Producing Electronic Transcripts
After you have set up the TS130 controls and mapped your internal values within the EDI Manager, you can create electronic transcript requests and process outbound files. This section discusses how to:
Enter electronic transcript request information.
Enter the recipient's address information.
Enter send options.
View electronic transcript request history for a student.
|
Page Name |
Definition Name |
Navigation |
Usage |
|---|---|---|---|
|
Transcript Request |
TSCRPT_REQUEST |
|
Enter general information about this transcript request. |
|
Address |
TSCRPT_ADDRESS |
|
Enter address information for the organization to which you are sending the electronic transcript. |
|
Send Options |
TSCRPT_EMAIL_SEND |
|
Specify the send method and the recipient's email information. |
|
Request History |
TSCRPT_HISTORY |
|
View the electronic transcript request history for this student. |
Access the Transcript Request page ().
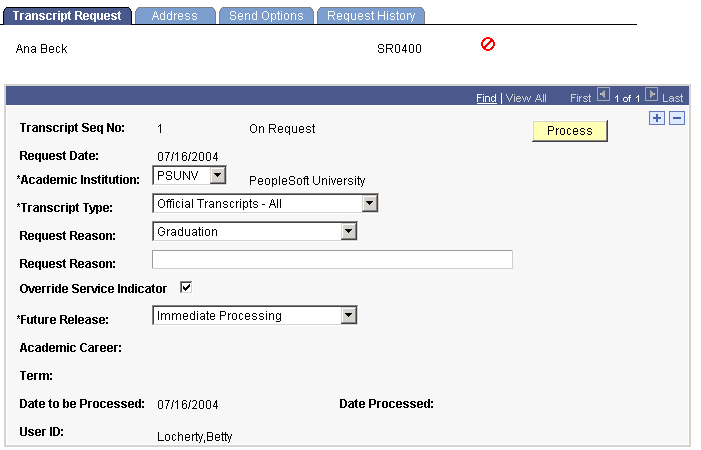
Image: Transcript Request page
This example illustrates the fields and controls on the Transcript Request page. You can find definitions for the fields and controls later on this page.
|
Field or Control |
Definition |
|---|---|
| Transcript Seq No (transcript sequence number) |
The system assigns a sequential number to each request that you enter for the student. |
| Request Date |
The system displays the date on which you enter the request. When you enter a new request, the system uses the current date by default. |
| Academic Institution |
Select the academic institution for which you want to print the request. By default, the system selects the academic institution defined in the User Defaults component. |
| Transcript Type |
Select a transcript type with the correct detail that you want to report electronically. Only transcript types for which you have user security and that have valid careers for this student are available. Transcript type values are defined on the Transcript Type - Basic Data page. |
| Request Reason |
Select the request reason. Request reason values are delivered with your system as translate values. You can modify these values. You can enter free-form text to further clarify the request reason in this field. |
| Override Service Indicator |
Select this check box to have the system process the transcript for this student, regardless of whether the student has a service indicator with service impacts that match those specified for this transcript type on the Basic Data page. Service impacts that are listed on the Basic Data page and are attached to the student prevent a student from receiving a transcript. If you do not select this check box, the system enforces the service indicator rules and does not generate transcripts for a student with service impacts that match those on the Basic Data page for this transcript type. |
| Future Release |
Select a future release to indicate that you want the system to generate the transcript at a later date. Future release values are delivered with your system as translate values. These translate values should not be modified in any way. Any modifications to these values require a substantial programming effort. Values are: Degree Confer Date: The Career and Term fields become available for entry. Grades Post: The Career and Term fields become available for entry. Hold: The system sets the Date to be Processed field to the current date and is available for entry. This option indicates that you are going to process the request at a later and undetermined time. The system saves this request until you change the future release value and enter a specific print date. Immediate Processing: The system sets the Date to be Processed field to the system date. Specific Date: The system sets the Date to be Processed field to the current date and it is available for entry. You can enter a specific date for the transcript request to be processed through the Generate Electronic Transcript page. Transfer Credit Post: The system sets the Date to be Processed field to the current date and it becomes available for entry. You can issue a transcript through the Generate Electronic Transcript page after the system articulates transfer credit to the student's academic record. Because this process is not automatic, you must still generate the electronic transcript on the Generate Electronic Transcript page. |
| Academic Career and Term |
If available for entry, select the appropriate academic career and term values. You can issue a transcript later through the Generate Electronic Transcript page on the fully graded date—future release value of Grades Post—or when the degree confer date arrives for the student—future release value of Degree Confer Date. The system populates the Date to the Processed field with either the fully graded date from the Term Control Dates page in the Term Activation component, or the degree confer date from the Degree page in the Student Degrees component. Term values are defined on the Term Table page. To create transcripts for future release, enter the request parameters and save the request without processing it. To process and send the future release request later, enter into the Generate Electronic Transcript page a range of dates based on the Dates to be Processed field. The system processes requests for all electronic transcripts that have not yet been generated within the range you specify. After you process a transcript request, the system marks the report request ID as Generated, and the system excludes it from further batch processing. |
| Entered By |
The system displays the user ID and name of the person who entered the request. |
| Process |
Click to process the request immediately and send the report as indicated on the Send Options page. The system takes you to the Request History page. The Process button calls an Application Engine program that processes the request and creates the flat file. PeopleSoft PeopleCode, using Workflow, will send the resulting file as an email attachment if so requested on the Send Options page. The process updates the request status to be generated. If you also send the file by email, the process updates the request status to complete. If the student has a service indicator with an attached service impact that is defined on the transcript type setup, the system displays the Service Indicator page and indicates that it prevented the transcript due to negative service indicators. |
Access the Address page ().
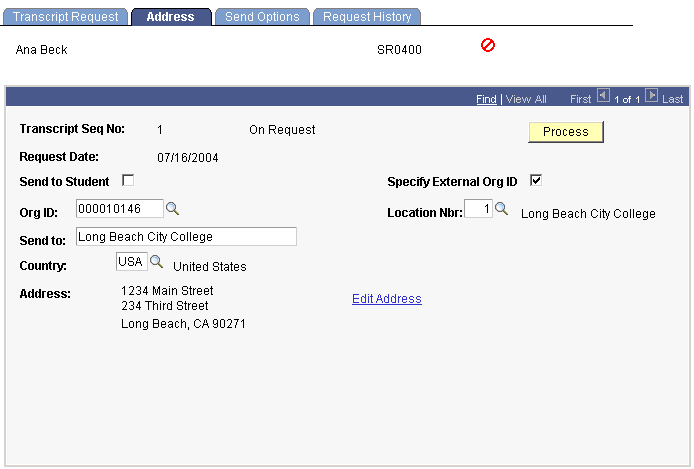
Image: Address page
This example illustrates the fields and controls on the Address page. You can find definitions for the fields and controls later on this page.
|
Field or Control |
Definition |
|---|---|
| Send to Student |
Select to automatically populate the Send to field with the student's name. The Address Type field becomes available. |
| Address Type |
Select the address type for the student to which you want to send this transcript. The system populates the address fields based on the address type you select. This field is available when you select the Send to Student check box. |
| Specify External Org ID (specify external organization ID) |
Select to choose an existing external organization. The system makes the Org ID and Location Nbr fields available. |
| Org ID (organization ID) |
This field becomes available when you select the Specify External Org ID check box. Select the organization to which you are sending the electronic transcript. Define external organizations on the Organization Table page. When you exit this field, the system automatically populates the Send to field with the organization's name. |
| Location Nbr (location number) |
This field becomes available when you select the Specify External Org ID check box. Select the location number of the organization to which you are sending the electronic transcript. Define location numbers for external organizations on the Organization Location page. When you exit this field, the system automatically populates the address fields with the location address. |
| Send to |
Enter the name of the recipient to whom you are sending the electronic transcript. If you select either the Send to Student check box or the Specify External Org ID check box, then this value populates automatically according to your selection. This value can be overwritten. |
| Country |
Select the country of the recipient's address. When you exit this field, the system displays the address format associated with that country. |
| Edit Address |
Click to enter a different address to which you want to send this transcript. |
Access the Send Options page ().
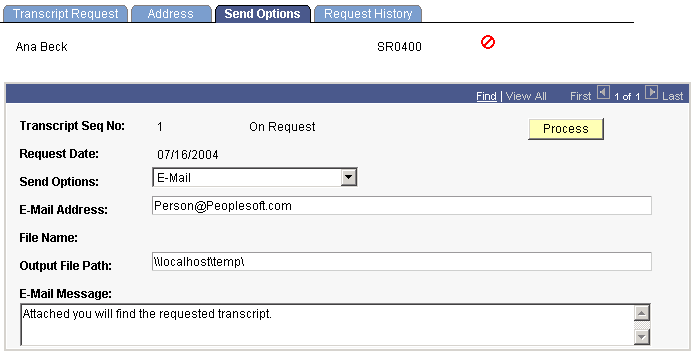
Image: Send Options page
This example illustrates the fields and controls on the Send Options page. You can find definitions for the fields and controls later on this page.
|
Field or Control |
Definition |
|---|---|
| Send Options |
Select the method that you want to use to send the TS130 file. Select E-Mail if you want to send the electronic transcript by email. The system sends the output file as soon as you run the Transcript Request process. Select Place File in Directory to enable you to transfer the file at a later time by using a file transfer protocol, such as the FTP. |
| E-Mail Address |
Enter a valid email address to which the system sends the transcript. |
| File Name |
The generated file name appears after processing. The naming convention is defined on the TS130 Setup page. The system inserts the control number before the file extension to identify unique files. |
| Output File Path |
Insert the file path to which the system writes the TS130 file at the time it is generated. The system displays this value by default from the TS130 Setup page (or the Organization TS130 Setup page if the send to address is an organization with information in the Org TS130 Setup page). Users must have write permission for this specified directory to prevent runtime errors. Note: Regardless of your send option, you need to specify a directory to store the TS130 file because the email process picks the file up as an attachment and sends it by email from this directory. For example, you could use c:\temp\. |
| E-Mail Message |
Enter free-form text that will appear in the body of the email. |
Note: You can set up defaults for the Send Options, E-Mail Address, and Output File Path fields on the Organization TS130 Setup page.
Access the Request History page ().
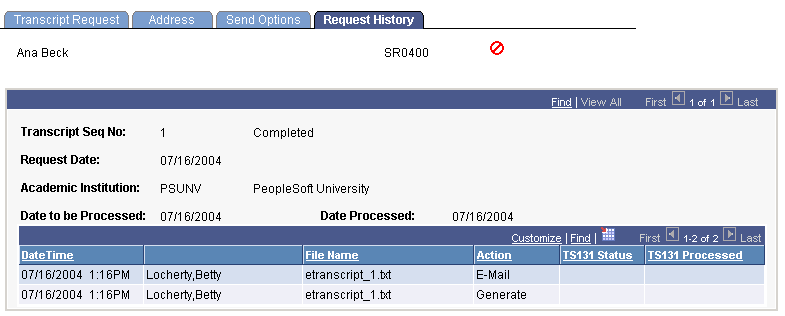
Image: Request History page
This example illustrates the fields and controls on the Request History page. You can find definitions for the fields and controls later on this page.
|
Field or Control |
Definition |
|---|---|
| DateTime |
Displays the date and time of the action performed on this request. |
| Name |
Displays the user name of the user performing the action. |
| File Name |
Displays the unique file name. |
| Action |
Displays the various actions performed on this request. Values include Generate, Batch Generate, E-Mail, and Batch E-Mail. |
| TS131 Status |
Displays the status of any incoming TS131 acknowledgements that have been processed for this request. Values include Confirm and Reissue. |
| TS131 Processed |
Displays the date on which the sender processed the TS131 inbound file. |