Setting Up Catalog and Schedule Options
When you first create or update the course catalog and schedule of classes, the system prompts you for various types of optional course and class data. This section discusses how to:
Define class notes.
Define global notes.
Define course attributes.
Define exam codes.
Define course material types.
Define course material type order.
|
Page Name |
Definition Name |
Navigation |
Usage |
|---|---|---|---|
|
Class Notes Table |
CLASS_NOTES_TBL |
|
Define class notes. |
|
Global Notes Table |
GLOBAL_NOTES_TBL |
|
Define global notes. |
|
Course Attributes |
CRSE_ATTR_TBL |
|
Define course attributes and attribute values. |
|
Exam Code Table |
EXAM_CODE |
|
Define exam time codes for different types of examinations. |
|
Course Material Type |
SSR_CRSE_MAT_TBL |
|
Define course material types. |
|
Course Material Type Order |
SSR_CRSE_MAT_ORD |
|
Organize course material to be displayed in a specific order. |
Access the Class Notes Table page ().
Note: Class notes differ from global notes in that class notes are attached to classes on the Notes page, whereas global notes are attached to entire academic subject areas or academic groups.
|
Field or Control |
Definition |
|---|---|
| Effective Date |
Enter an effective date for the class note. The effective date determines when the status that you select is valid. |
| Status |
Select a status for the class note. Select Active when adding a new class note. Select Inactive if your institution no longer uses this class note. |
| Description |
In the Description field, enter a short, informative description for the note. This is used for internal processes only. |
| Long Description |
In the Long Description field, enter a detailed description for the note. This text appears in the schedule of classes if you assign this note to a class on the Notes page. |
Access the Global Notes Table page ().
Note: You always associate global notes with an academic institution, academic group, and term. You can further associate global notes with a subject area. If you do not specify a subject area, the global note appears on the top of every corresponding schedule of classes page, before or after the academic group or subject area.
|
Field or Control |
Definition |
|---|---|
| Print Location |
Indicates whether the note text appears on the schedule of classes report before or after the subject area (if you specify a subject area), or whether the note text appears before or after the academic group for the term (if you do not specify a subject area). Available values are Print After and Print Before. You should not change these values because doing so requires a substantial programming effort. |
| Description |
Enter a short description for the global note. |
| Long Description |
Enter a detailed description for the global note. This text appears on the schedule of classes report in the location that you specify. |
Access the Course Attributes page ().
Image: Course Attributes page
This example illustrates the fields and controls on the Course Attributes page. You can find definitions for the fields and controls later on this page.
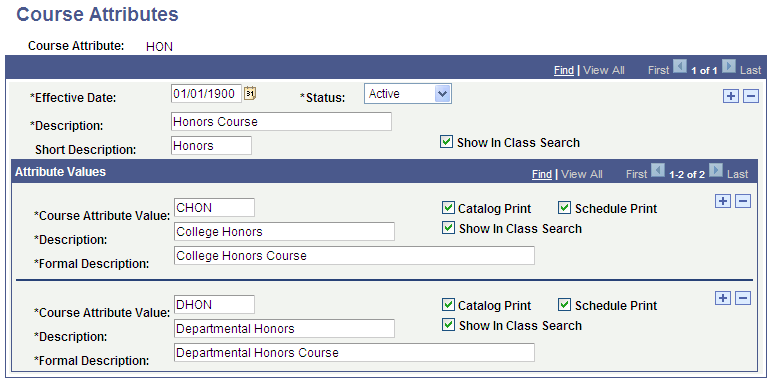
Note: Use course attributes for institutional research purposes and to print repetitive text in the schedule of classes or course catalog, such as Offered in Fall Only. Course attributes are attached to courses on the Catalog Data page and to classes on the Basic Data page. Unlike requirement designations, course attributes do not transfer to PeopleSoft Academic Advisement.
|
Field or Control |
Definition |
|---|---|
| Status |
Select a status for this course attribute. Select Active when adding a new course attribute. Select Inactive if your institution no longer uses this attribute and any of the corresponding attribute values. |
| Description |
The description that you enter here appears on the schedule of classes report or the course catalog report if you select the Schedule Print check box or the Catalog Print check box. |
| Course Attribute Value |
When you attach attributes to courses and classes, you can also specify attribute values. Therefore, you can define parent course attributes that have one or more attribute values. Insert rows to create multiple attribute values. |
| Catalog Print |
Select to display the course attribute formal description in the course catalog report. Note: The SSR_COURSE (Course Catalog) web service is one of a number of delivered Enrollment Web Services. The service operation SSR_GET_COURSES: Browse Course Catalog Summary obeys the Catalog Print setup that you select on the Course Attributes page and on the Requirement Designation Table page. For detailed information about Enrollment Web Services: See Enrollment Web Services Developers Guide and Enrollment Web Services Users Guide on My Oracle Support (Doc ID 1371391.1). |
| Schedule Print |
Select to display the course attribute formal description in the schedule of classes report. |
| Show in Class Search |
If this check box is selected for a Course Attribute and the Class Search Profile (for example, STDNT) includes a search criteria of Course Attribute, then a student can search by the Course Attribute in Self Service. If this check box is selected for a Course Attribute Value, the Class Search Profile (for example, STDNT) includes a search criteria of Course Attribute, and the Include Course Attribute Value check box is selected for the profile, then a student can search by the Course Attribute Value in Self Service. See Setting Up Class Search Profiles |
| Description |
Enter a description of the attribute values. |
| Formal Description |
Enter the text that you want to appear on the schedule of classes report or the course catalog report if you select the Schedule Print check box or the Catalog Print check box. |
Access the Exam Code Table page ().
Image: Exam Code Table page
This example illustrates the fields and controls on the Exam Code Table page. You can find definitions for the fields and controls later on this page.
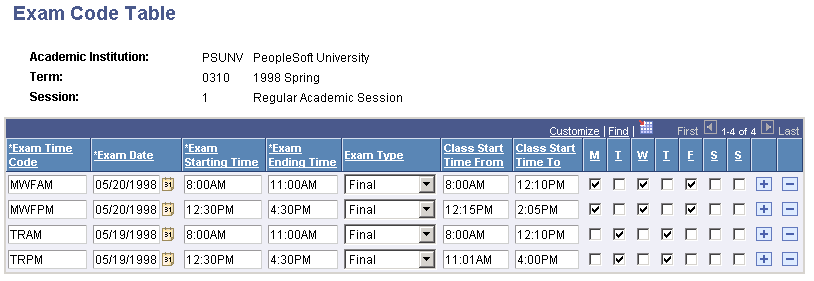
Note: Define exam time codes for each term and session. The system uses these codes when you run the exam scheduling process on the Exam Scheduling page. You can also manually post these codes to individual classes.
|
Field or Control |
Definition |
|---|---|
| Exam Time Code |
Enter an exam time code to define (in an abbreviated manner) the exam code. |
| Exam Date |
Enter the date for the exam. |
| Exam Starting Time |
Enter the start time of the exam. |
| Exam Ending Time |
Enter the end time of the exam. |
| Exam Type |
Select the exam type. Values for this field are delivered with your system as translate values. You can modify these translate values. |
| Class Start Time From |
Enter the minimum start time for classes with which you want to associate the exam time code. The system uses the value during the exam scheduling process. The system schedules exams for classes that fall within the two start times (and days) that you designate. |
| Class Start Time To |
Enter the maximum start time for classes with which you want to associate the exam code. The system uses the value during the exam scheduling process. The system schedules exams for classes that fall within the two start times (and days) that you designate. |
| M (Monday), T (Tuesday), W (Wednesday), T (Thursday), F (Friday), S (Saturday), and S (Sunday) |
Select the days of classes that you want to associate with the exam code. |
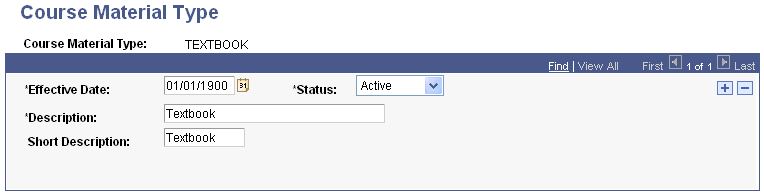
Access the Course Material Type page ().
Image: Course Material Type page
This example illustrates the fields and controls on the Course Material Type page. You can find definitions for the fields and controls later on this page.
|
Field or Control |
Definition |
|---|---|
| Status |
Select a status for this course material type. Select Active when you add a new course material type. Insert a new effective date and select Inactive if your institution no longer uses this course material type. |
| Description |
The description that you enter here appears in the Textbook Assignment group box on the (Schedule of Classes) Textbook page and is used on the Class Detail page and the Faculty and Student Center Textbook Summary page. |
See Defining Textbooks for Classes
Access the Course Material Type Order page ().
Image: Course Material Type Order page
This example illustrates the fields and controls on the Course Material Type Order page. You can find definitions for the fields and controls later on this page.
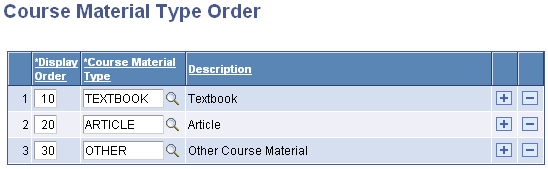
Note: The system uses the display order that you define here to determine the order in which course materials appear on the Class Detail page and on the self-service Faculty and Student Textbook Summary pages. If you do not define a course material display order, the course material appears at the end of the list.
|
Field or Control |
Definition |
|---|---|
| Display Order |
Define the order in which you want the course material type to appear on Class Detail page and on the faculty and student Textbook Summary pages. |
| Course Material Type |
Select a value based on the course material type values that you defined on the Course Material Type page. |
| Description |
The description appears by default from the Course Material Type page. |