Using the Self-Service Notifications Center
Generally, self-service users should access their notifications via their preferred email client, their phone for SMS messages and so on, but there may be situations where they need to check for notifications independently of their preferred methods, such as if they lose their phone. The Notifications Center is intended to meet that need and is located in the top level of the Self Service menu.
Note: Many Notifications Framework (NFK) consumer applications have extended the framework with extra fields and functionality that will not be presented in the Notifications Center. The consumer application should be the first point of call in normal circumstances.
The Notifications Center presents all notifications sent to a user so that they can:
Review notifications by status (unread/unactioned or otherwise).
Review by time periods.
Search by specific dates.
No setup is required.
|
Page Name |
Definition Name |
Navigation |
Usage |
|---|---|---|---|
|
Notification Center |
SS_CC_NTF_CENTER |
|
Self-service users view notifications. |
Access the Notifications Center page ().
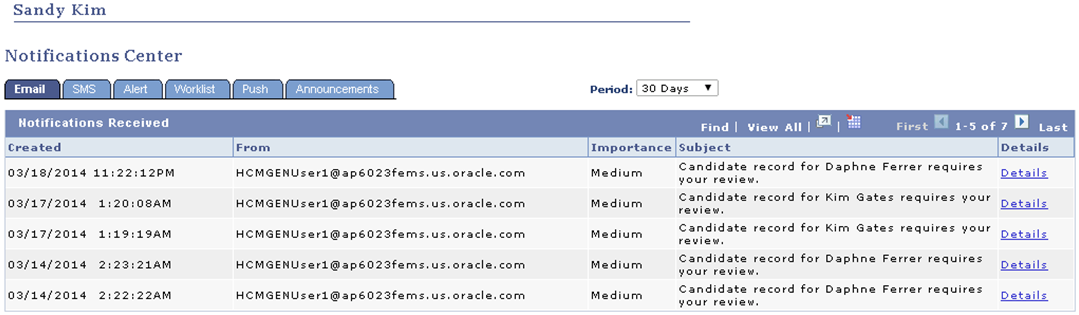
Image: Notifications Center page
This example illustrates the fields and controls on the Notifications Center page.
In the Notifications Center:
Each notification type has its own tab on which notifications of that type are shown.
The notifications are shown in descending date and time order, so that the newest one is at the top of the list unless the user resorts the list by another column heading.
The interface is the same for the Email and Alerts tabs except that the Email tab includes a From column and does not have a Status column.
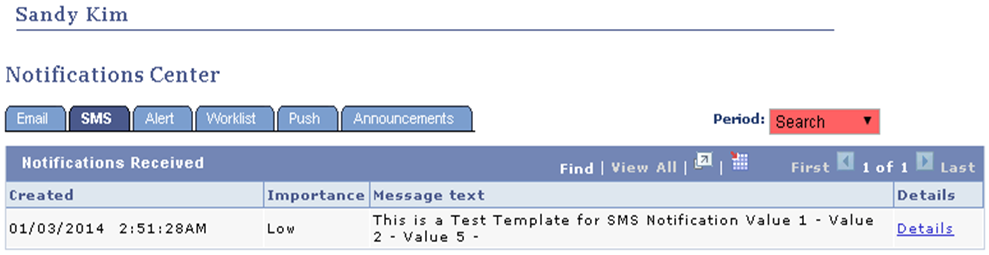
The SMS tab displays the SMS message text directly on the grid along with the date when the notification was received and importance of the notification.
Image: Notifications Center page: SMS tab
This example illustrates the fields and controls on the Notifications Center page: SMS tab.
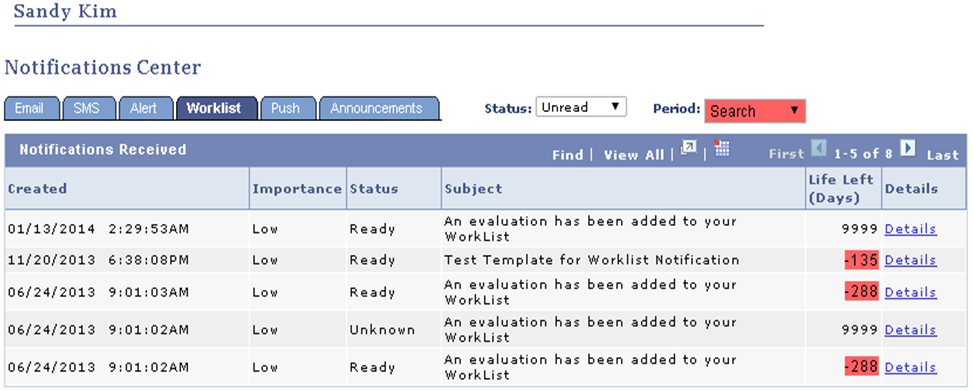
The Worklist tab has an extra field called Life Left (Days) which shows the user how many days remain until the deadline on the work list item expires. Similar to the SMS and Alerts tabs, the Worklist tab does not include a From column.
Image: Notifications Center page: Worklist tab
This example illustrates the fields and controls on the Notifications Center page: Worklist tab.
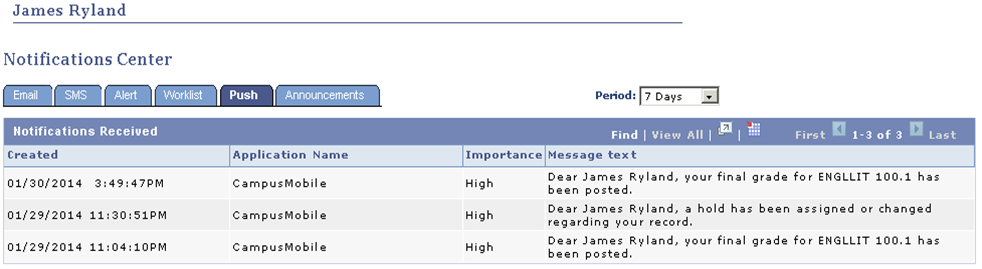
The Push tab displays the name of the application which sent the notification, the importance, and the message text.
Image: Notifications Center page: Push tab
This example illustrates the fields and controls on the Notifications Center page: Push tab.
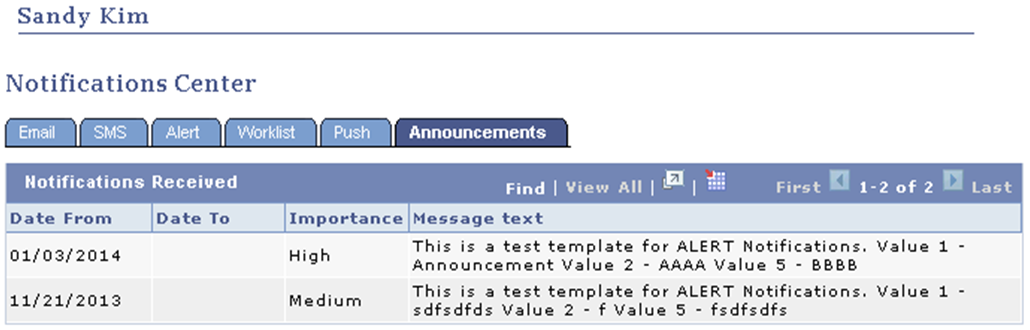
The Announcements tab displays all announcements that are still active as of the current date. They are displayed to all students. Unlike the other tabs, the Announcements tab cannot be filtered, and has additional From Date and To Date columns showing the duration of the announcement. Similar to the SMS tab, the announcement message is also directly displayed on the grid, so it has no Details link.
Image: Notifications Center page: Announcements tab
This example illustrates the fields and controls on the Notifications Center page: Announcements tab.
The Notification Center page includes a a Status field for the Worklist tab and a Period field for Email, SMS, Alert, Worklist and Push tabs which operate as follows:
Status: Select Unread or Read to filter the notifications. For worklist items these options equate to Unactioned and Actioned. The Notifications Framework has several statuses, and they are currently mapped to the options as follows:
A (Acknowledge) and W (Worked) equal Read/Actioned.
R (Ready), S (Selected), T (Timeout), and U (Unknown) equal Unread/Unactioned.
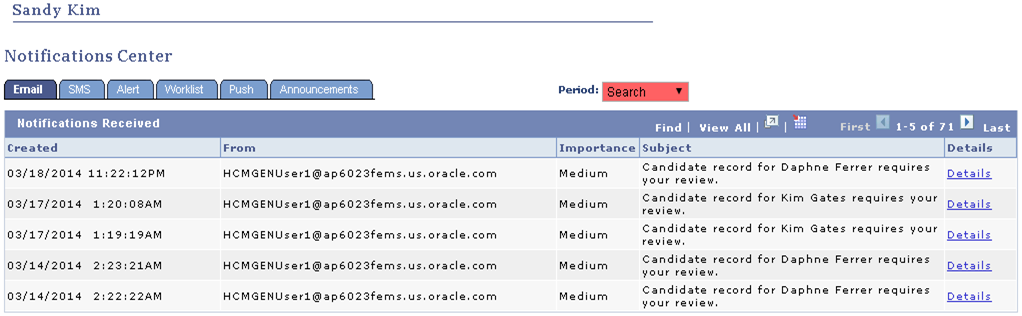
Period: Options are: 30 Days, (anything in the last 30 days), 7 Days, Today, and Search, which reveals a search subpage to allow the user to set specific date ranges.
When the search results are showing, the Period selector is highlighted in red to alert the user that the date range is filtered.
Image: Notifications Center page: Period Search example
This example illustrates the Period option of Search on the Notifications Center page.
The Details link takes the user to a detailed view of each notification.
Image: Notification Details page
This example illustrates the fields and controls on the Notification Detail page.
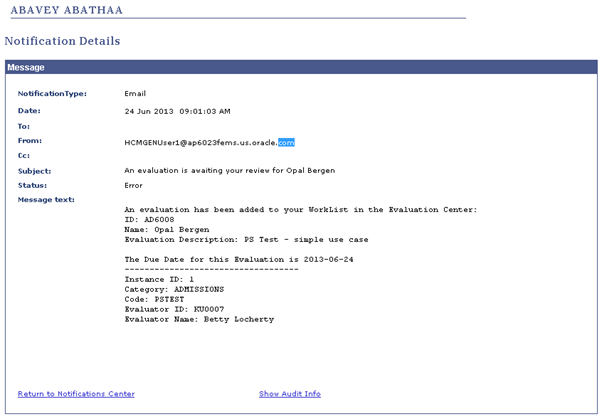
This page enables the user to view more detail about a particular notification. If the notification is a worklist, this page includes the Importance and Life Left (Days) fields.
The Show Audit Info link accesses the Audit Information page which is used for diagnostic purposes and would not be of use to a standard user.