Power supplies, which exist in pairs, provide DC to all of the Pilot components. If one power supply fails, the other supply carries the full load. This situation creates a risk of Pilot failure should the other power supply also fail.
- Prerequisites:
Ensure that you have a Phillips Number 2 screwdriver with at least a 4-inch shaft.
Before handling a component, touch a grounded surface to discharge any static electricity.
Attach an electrostatic discharge (ESD) wrist strap to your wrist, and stand on an ESD mat while replacing components.
Ensure that you have a similar replacement power supply available before you start the replacement procedure.
Initiate Guided Maintenance only when you are able to replace the power supplies immediately.
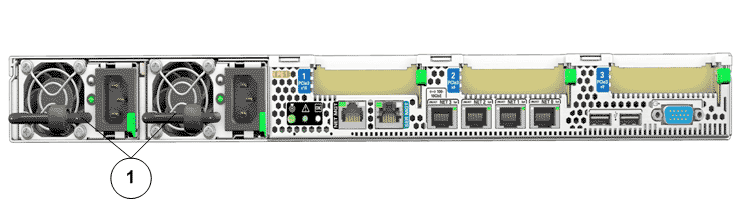
- Legend
1 Power supplies
- Locate the failed
component by checking the status of the component LEDs. You can also use Oracle FS System Manager (GUI) to view the status. From the GUI, navigate to and then select the chassis type of interest.
- From the GUI, prepare the system for component replacement.
- From the back of the Pilot, remove the velcro that holds the power cord from the failed power supply. Note: You might need to swing the cable management arm (CMA) out of the way to access the power supplies. If the CMA is still in the way, extend the Pilot approximately 20 cm (8 inches) out of the front of the rack.Note: The fans of a failed power supply may still be spinning when the system is powered on. You can remove a power supply while the fans are still spinning.
- Disconnect the power cord from the failed power supply.
- While holding the power supply handle with one hand, use the other hand to push the power supply latch to the left.Figure 2 Power supply removal
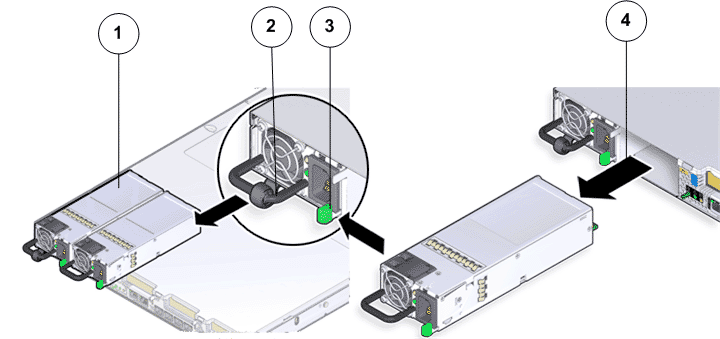
- Legend
1 Power supplies (PS0 and PS1) 2 Power supply handle 3 Power supply latch 4 Power supply compartment
- Pull the power supply out of the chassis and place the power supply on an antistatic mat.CautionWhenever you remove a power supply, you should replace it with another power supply; otherwise, the Pilot might overheat due to improper airflow.
- Unpack the
component from its shipping carton.Note: Place the component on an antistatic mat if it must be set aside for any reason.
- Align the replacement power supply with the empty power supply compartment.
- Slide the power supply into the bay until it is fully seated.Figure 3 Power supply insertion
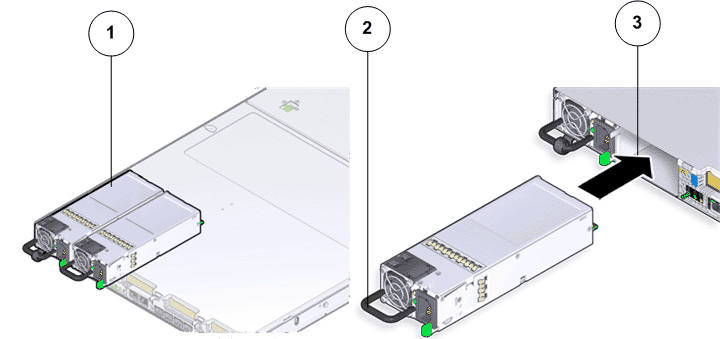
- Legend
1 Power supplies (PS0 and PS1) 2 Power supply handle 3 Power supply compartment
Note: Listen for an audible click or feel the power supply engage to confirm that the power supply is properly seated. - Re-connect the power cord into the replacement power supply.
- Attach the power cord velcro to the power supply.Note: If you pulled the Pilot out of the rack to make it easier to remove the power supply, push the Pilot into the rack until the slide-rail locks at the front of the Pilot engage the slide-rail assemblies.
- From Guided
Maintenance, verify that the status is Normal. You can also verify the status by navigating to and then selecting a chassis. The Overview page for the selected chassis lists the status of each component.Note: The Controller status will be visible several minutes after being powered on.
- Review the status of the LEDs to confirm a status of Normal.
Identify the Pilot chassis for replacement
Remove the failed Pilot power supply
Insert the replacement Pilot power supply
Verify the Pilot component status