I/O modules provide the input and output transfer of data. While a single I/O module failure does not impact data availability, two I/O module failures degrade data traffic and connectivity. Replace a failed I/O module as soon as possible.
- Prerequisites:
Before handling a component, touch a grounded surface to discharge any static electricity.
Attach an electrostatic discharge (ESD) wrist strap to your wrist, and stand on an ESD mat while replacing components.
Each Drive Enclosure has two I/O modules located at the back of the Drive Enclosure. I/O modules are customer replaceable units (CRUs). You can replace a failed I/O module without powering down the Drive Enclosure only if the other I/O module is operational with a status of Normal.
The following figure shows the I/O modules on the back of the DE2-24P and DE2-24C Drive Enclosure types.
Note: Notice that I/O module 0 in the DE2-24P Drive Enclosure is inverted.
Figure 1 I/O modules on DE2-24P and DE2-24C Drive Enclosure types 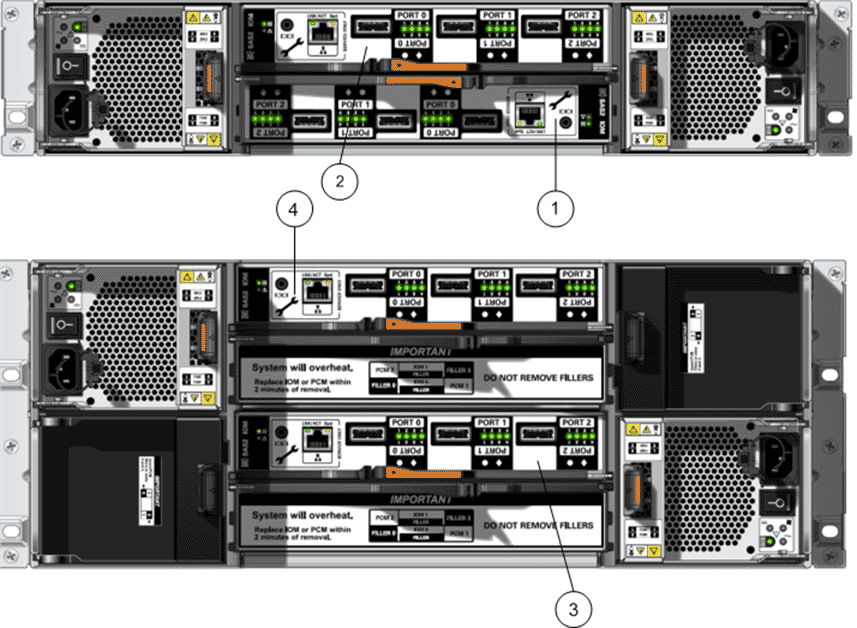
- Legend
-
1 I/O module 0 (DE2-24P Drive Enclosure) 3 I/O module 0 (DE2-24C Drive Enclosure) 2 I/O module 1 (DE2-24P Drive Enclosure) 4 I/O module 1 (DE2-24C Drive Enclosure)
Caution
Make sure you can replace the FRU or CRU within 10 minutes of removing the FRU or CRU. Do not remove a FRU or CRU if you cannot replace it within 10 minutes with a FRU or CRU or with a filler panel. If a FRU or CRU slot is left empty, the system can overheat due to improper airflow.Note: Prior to replacement, ensure that only one I/O module has failed and that the other I/O module shows a status of Normal.