5 Configure the WebSphere Application Server
This chapter contains these topics:
5.1 Configuring the WebSphere Application Server for World JAX-WS Web Services
Since Release A.9.3.1, the World Web Services were updated to use the Java API for XML Web Services (JAX_WS). In order to run these services on WebSphere Application Server, there are specific release levels and configuration steps that need to be used.
The functionality for the JAX-WS services requires PM70894, which ships in versions 7.0.0.27, 8.0.0.6, and 8.5.0.2 of WebSphere. If this functionality is required for a earlier release of WebSphere, you will need to contact your IBM representative to check on the availability of an ifix for your specific version.
Please refer to the certification information on myoraclesupport.com to determine the versions of WebSphere currently certified.
5.2 Create an Application Server
-
See Appendix B, "Create WebSphere Application Server" in this guide.
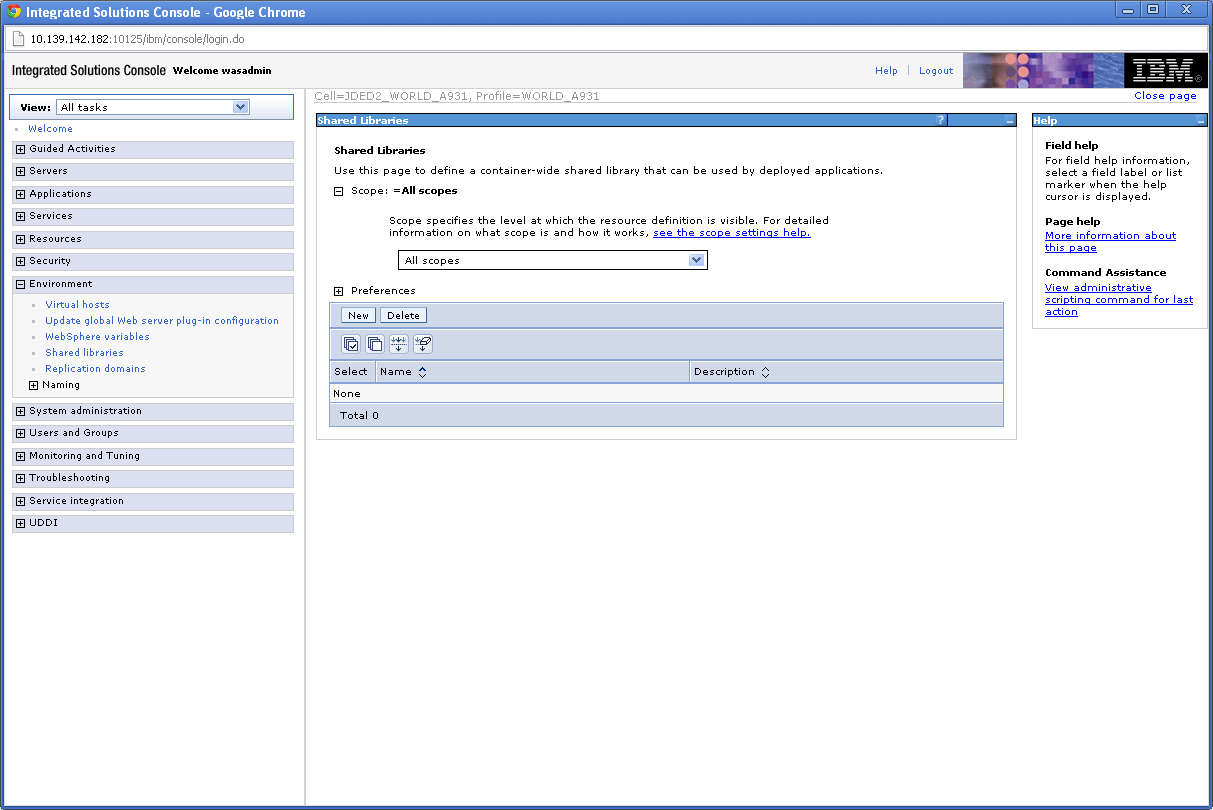
5.3 Set Up a Shared Library
The jt400.jar file needs to be set up in a shared library so that the web services process can authenticate a user. The jt400.jar can be downloaded and saved to an IFS folder.
-
Access the WebSphere Integrated Solutions Console and select Environment->Shared libraries.
-
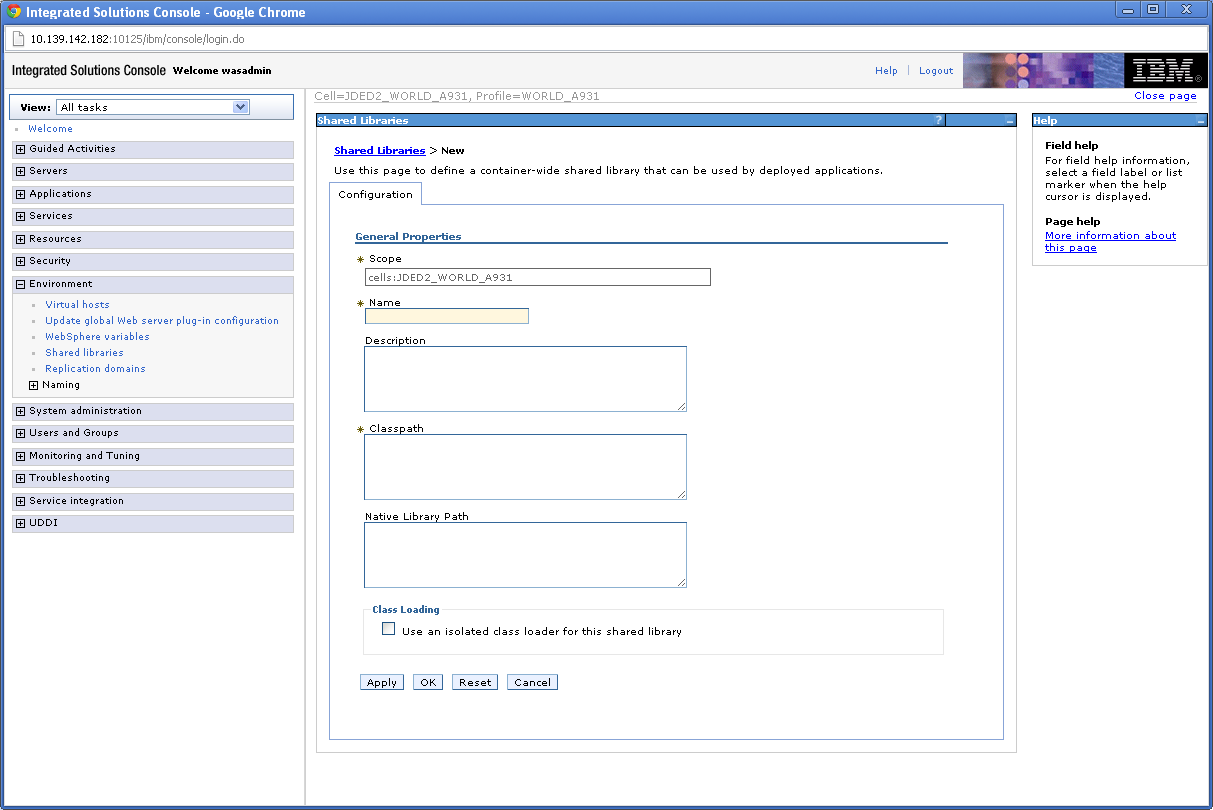
Select a scope from the drop-down and then click New.
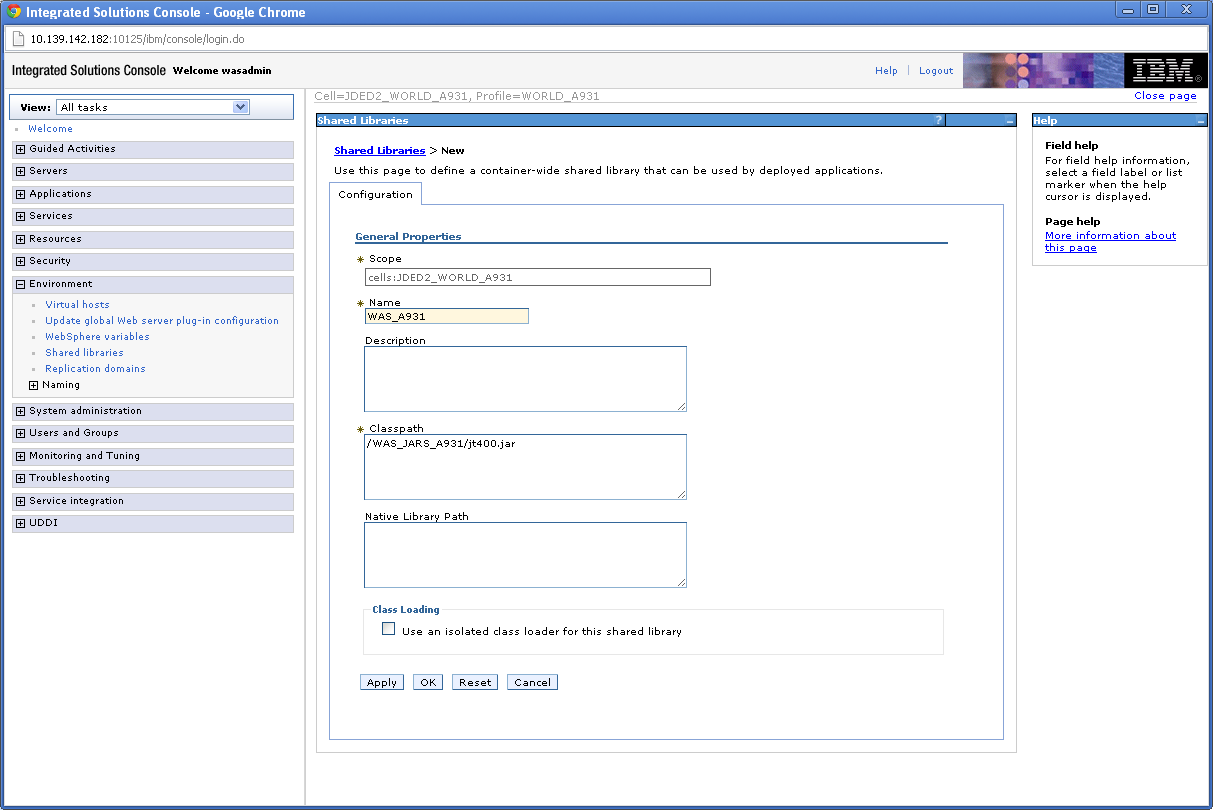
Enter "WAS_A931" in the Name field, and for the classpath, enter "/path," where jt400 is saved as "/jt400.jar."
Click OK.
Click Save.
5.4 Set Server Heap Size
-
From the WebSphere Integrated Solutions Console, select Servers_>Server Types_>WebSphere application servers.
Figure 5-4 WebSphere Application Servers screen
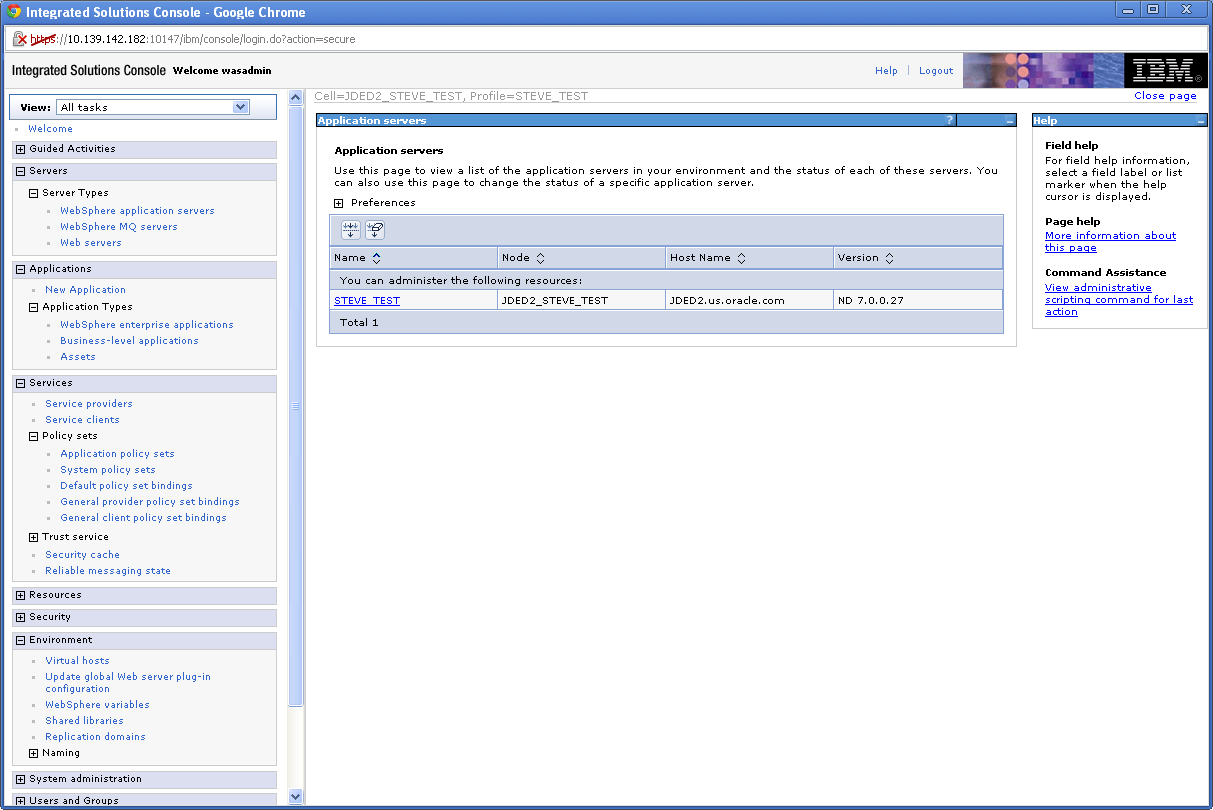
Description of ''Figure 5-4 WebSphere Application Servers screen''
-
Select your server.
Figure 5-5 WebSphere Application Servers screen
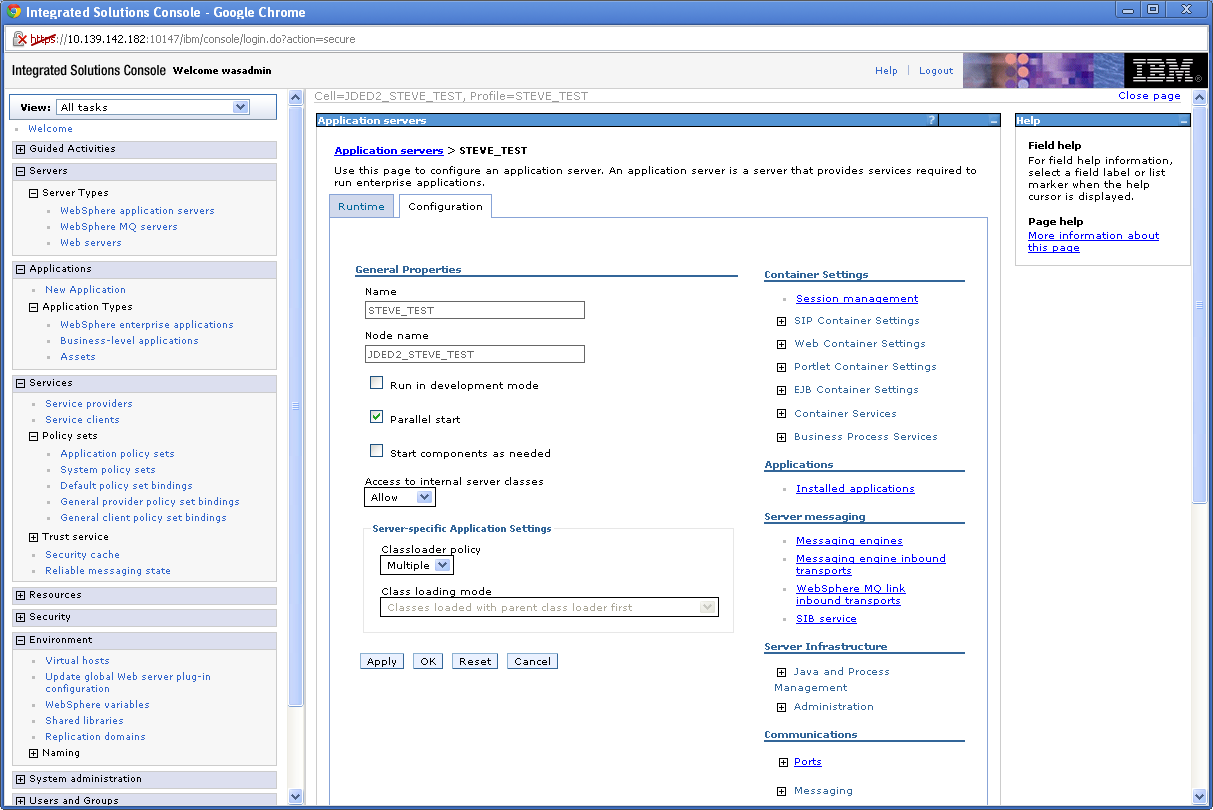
Description of ''Figure 5-5 WebSphere Application Servers screen''
-
Select Java and Process Management_>Process definition.
Figure 5-6 WebSphere Application Servers screen
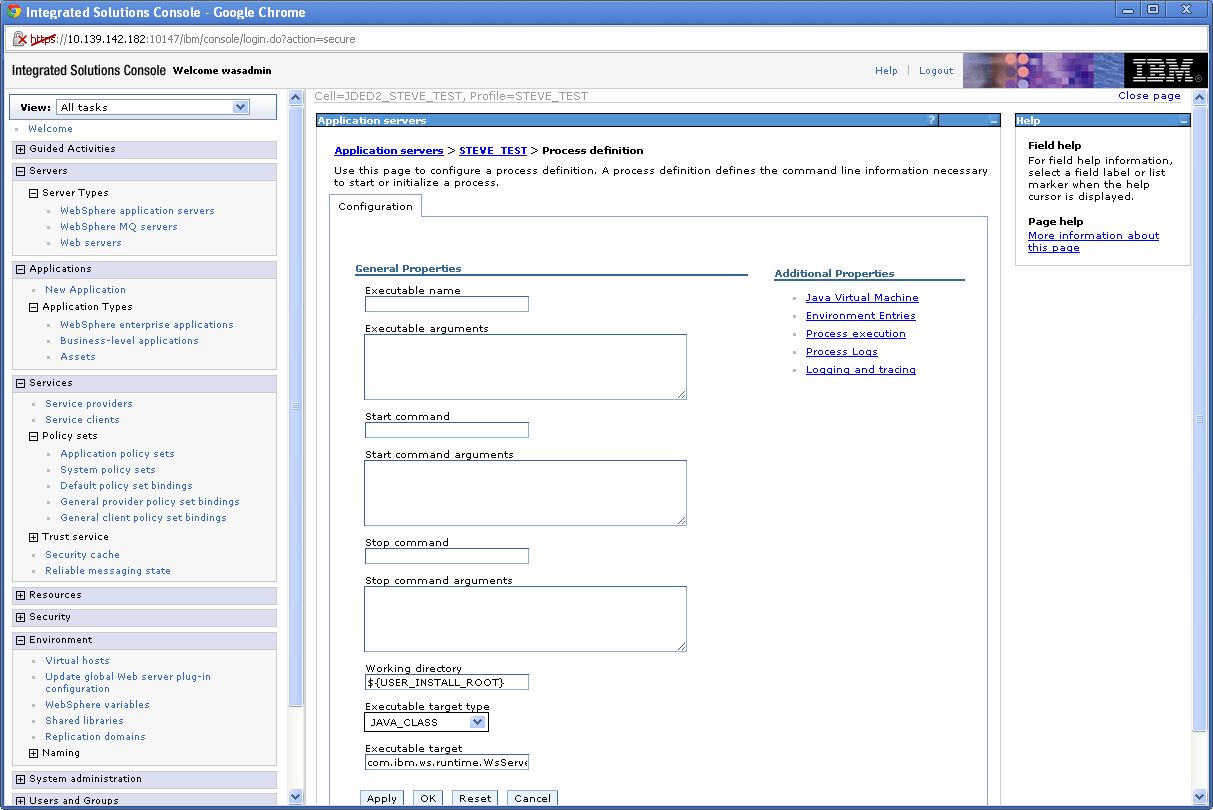
Description of ''Figure 5-6 WebSphere Application Servers screen''
-
Select Java Virtual Machine.
Figure 5-7 WebSphere Application Server screen
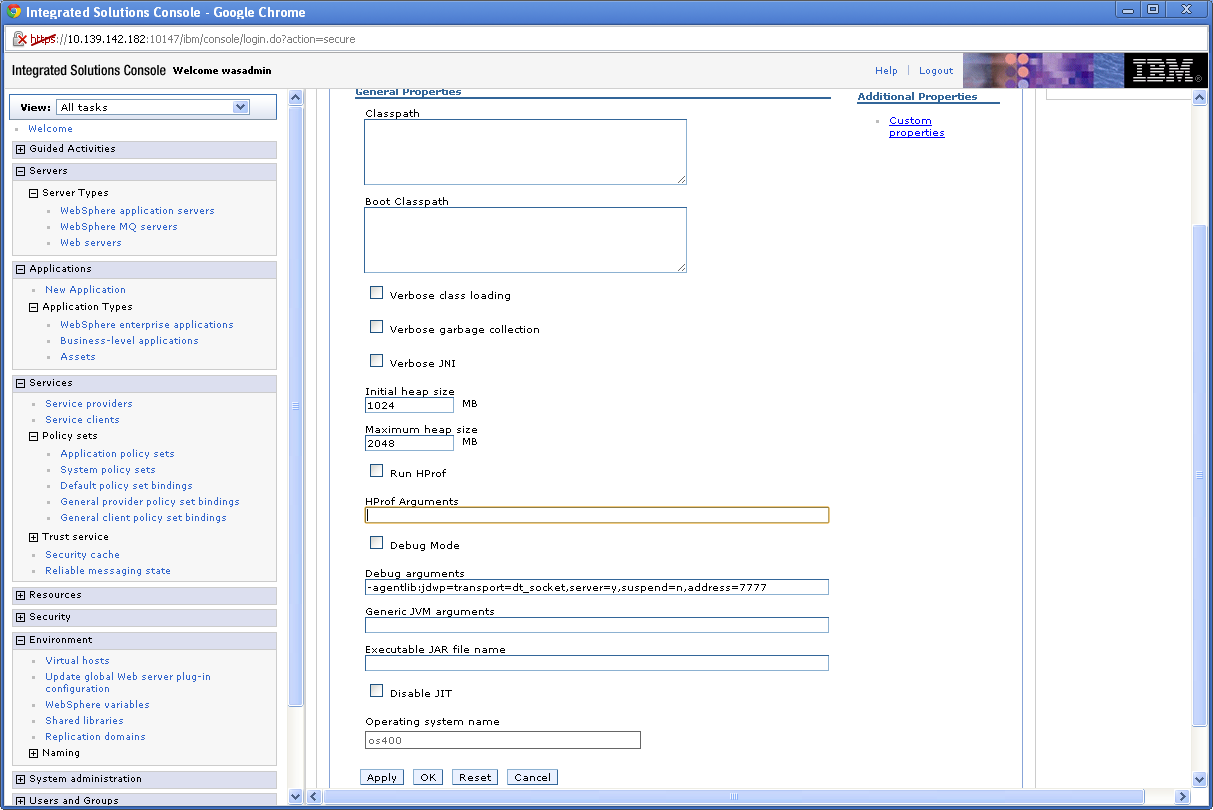
Description of ''Figure 5-7 WebSphere Application Server screen''
-
For the Initial heap size, enter 1024.
-
For the Maximum heap size, enter 2048.
-
Click OK.
-
Click Save.
-
Restart the server.
5.5 Configure Application Security
To configure application security
-
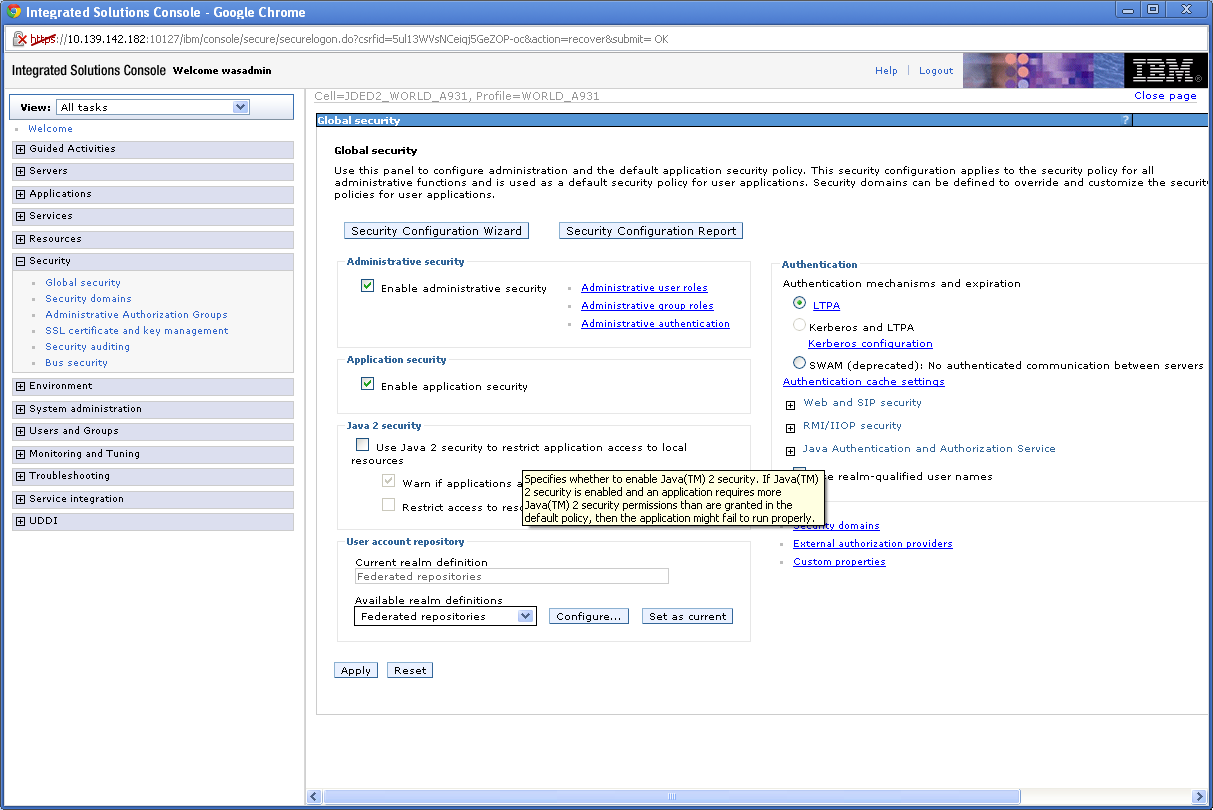
From the WebSphere Integrated Solutions Console, select the Security->Global Security option.
-
Check the Enable administrative security checkbox and uncheck Use Java 2 security to restrict application access to local resources.
-
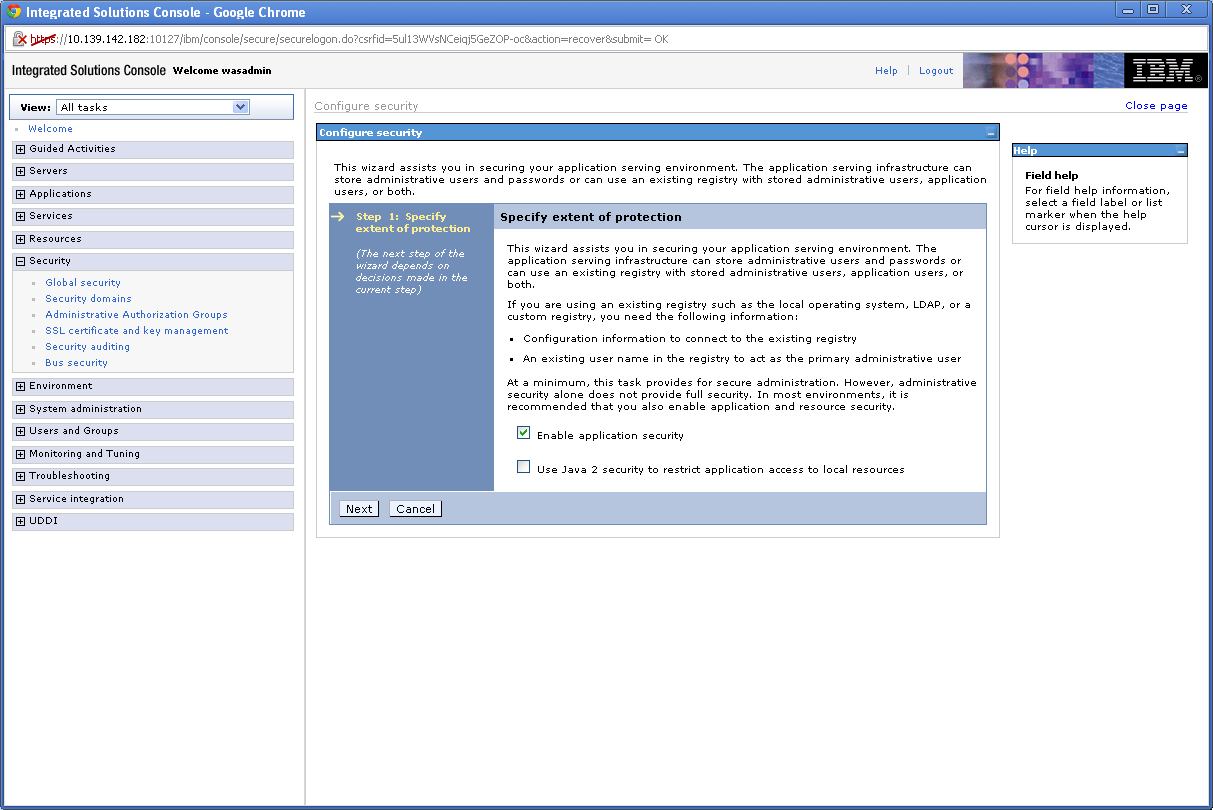
Select the Security Configuration Wizard button.
-
Click Next.
-
Select Federated repositories. Click Next.
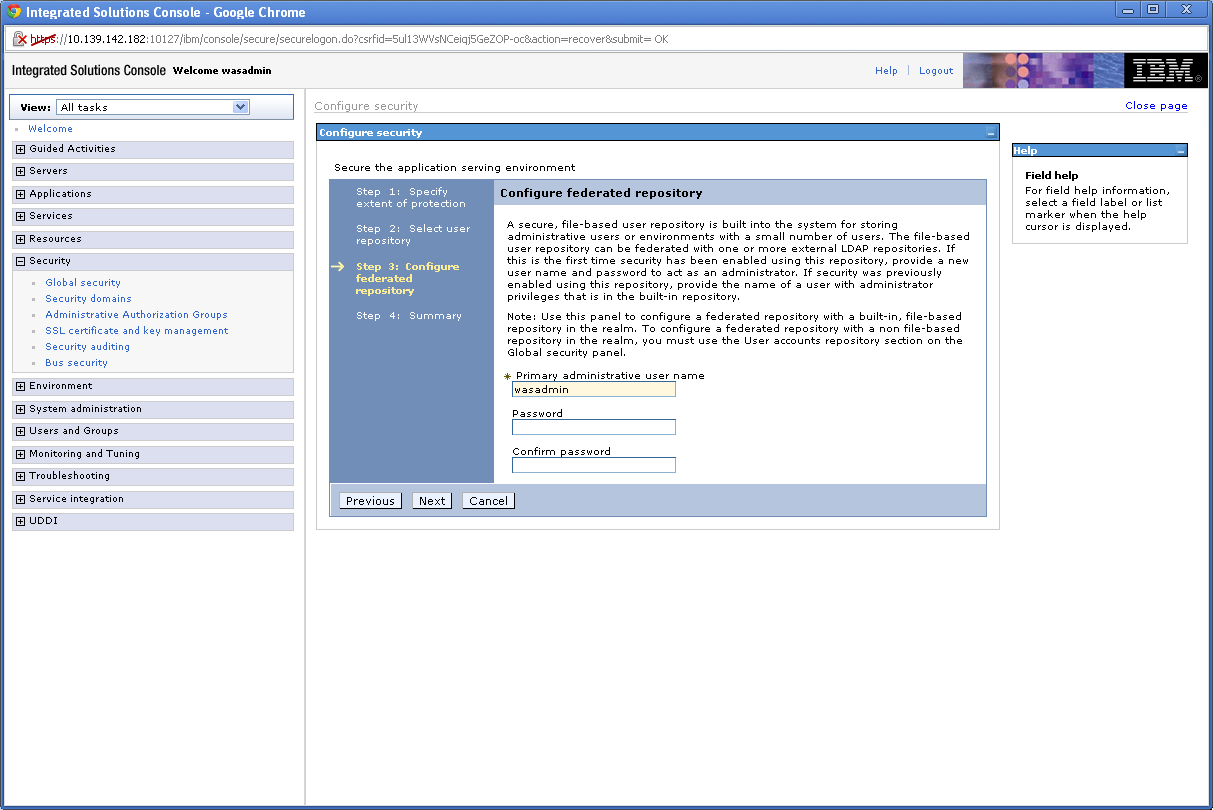
-
Enter a user name and password to be used to administer this server.
-
Click Next, and click Finish.
-
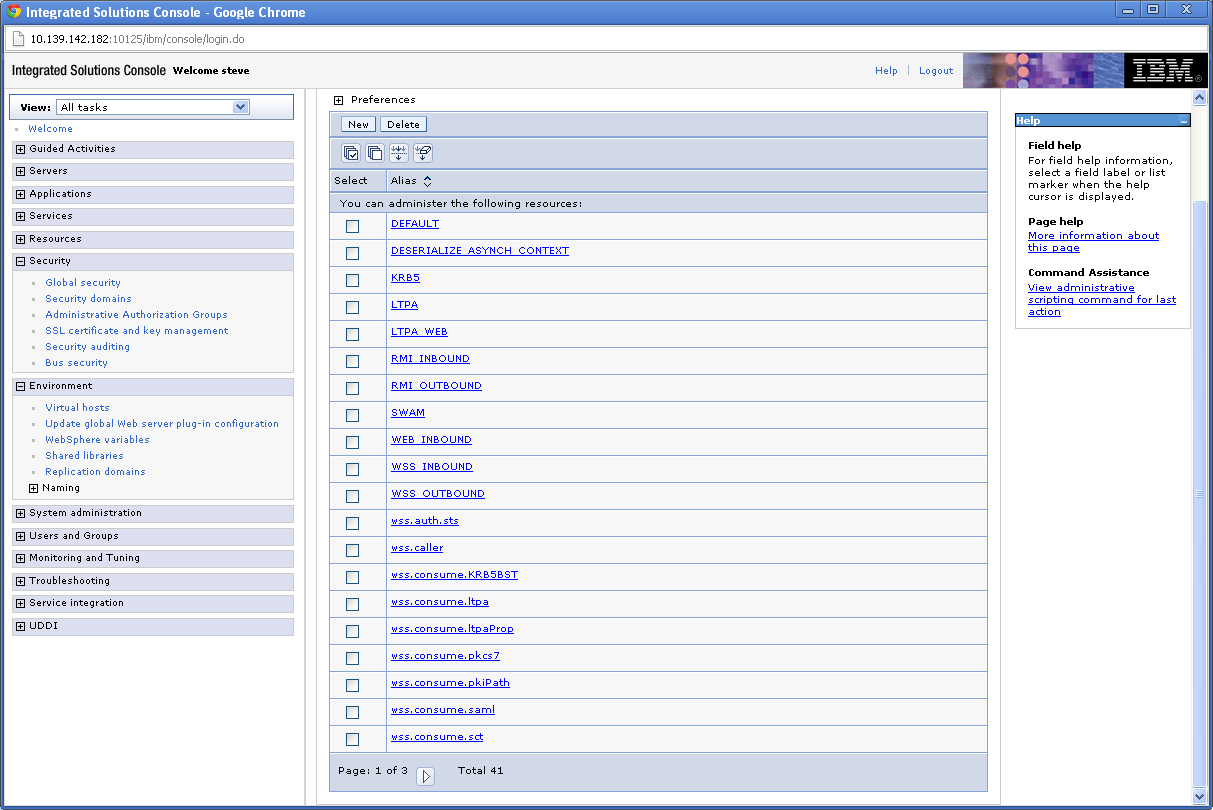
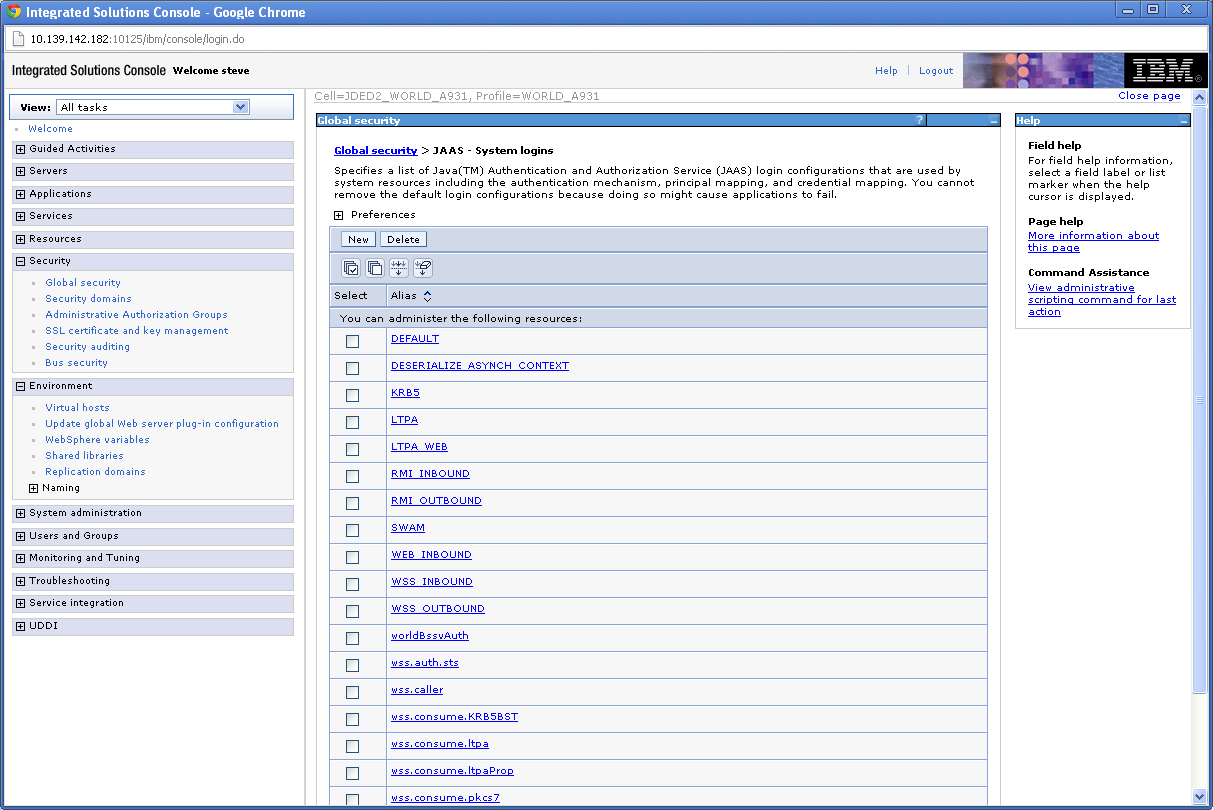
Expand the Java Authentication and Authorization Service, and select System logins.
-
Click New.
-
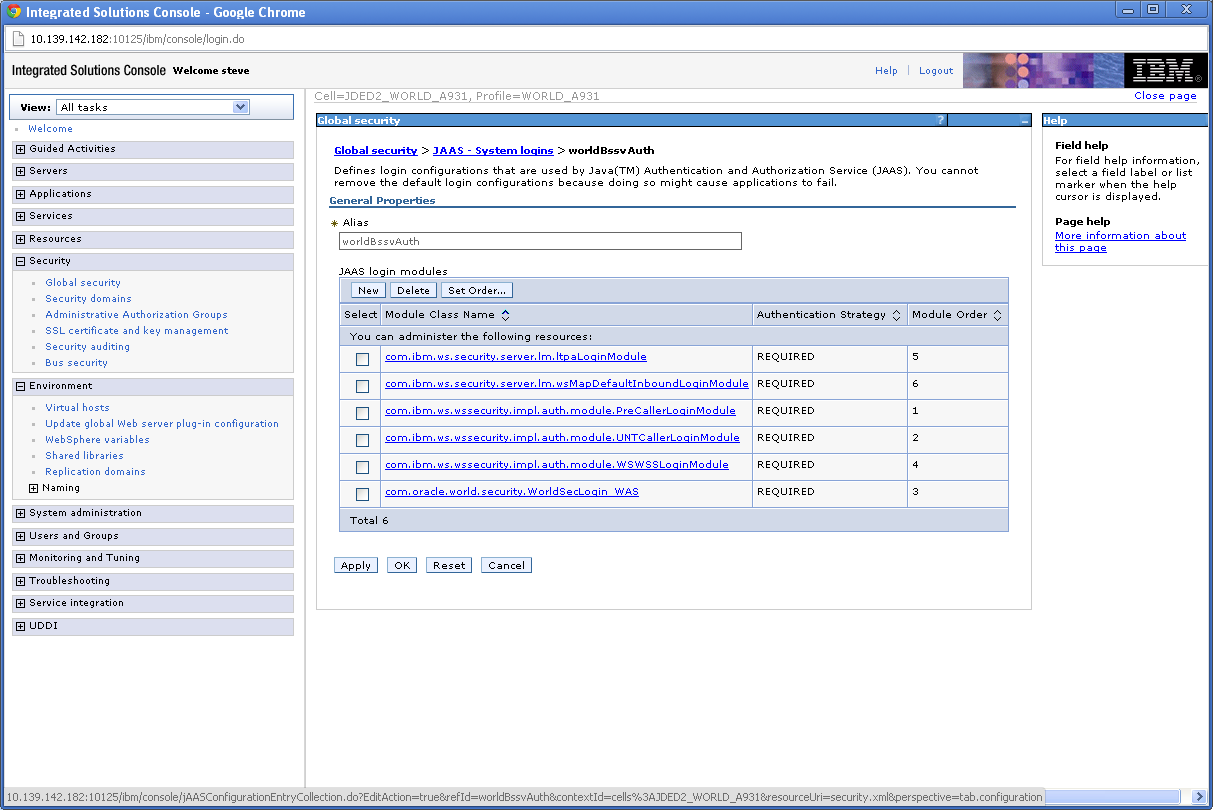
Enter "worldBssvAuth" for the Alias, and click New under JAAS login modules.
-
Enter "com.ibm.ws.wssecurity.impl.auth.module.PreCallerLoginModule" and click OK.
-
Click New under JAAS login modules to add the following modules:
-
com.ibm.ws.wssecurity.impl.auth.module.UNTCallerLoginModule
-
com.oracle.world.security.WorldSecLogin_WAS
(Check the Use login module proxy box when adding this class name)
-
com.ibm.ws.wssecurity.impl.auth.module.WSWSSLoginModule
-
com.ibm.ws.security.server.lm.ltpaLoginModule
-
com.ibm.ws.security.server.lm.wsMapDefaultInboundLoginModule
-
-
Click Save.
The worldBssvAuth system login should look like the screen shot below:
-
From the System logins screen click New.
-
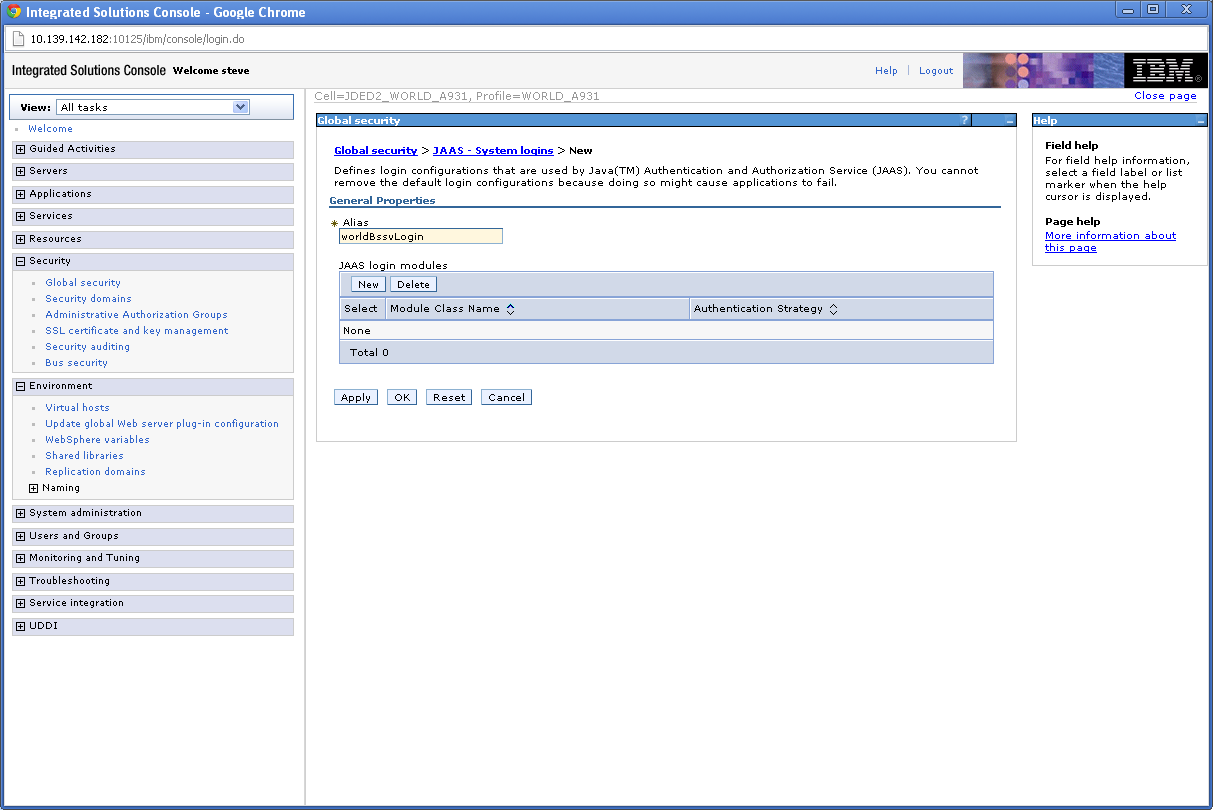
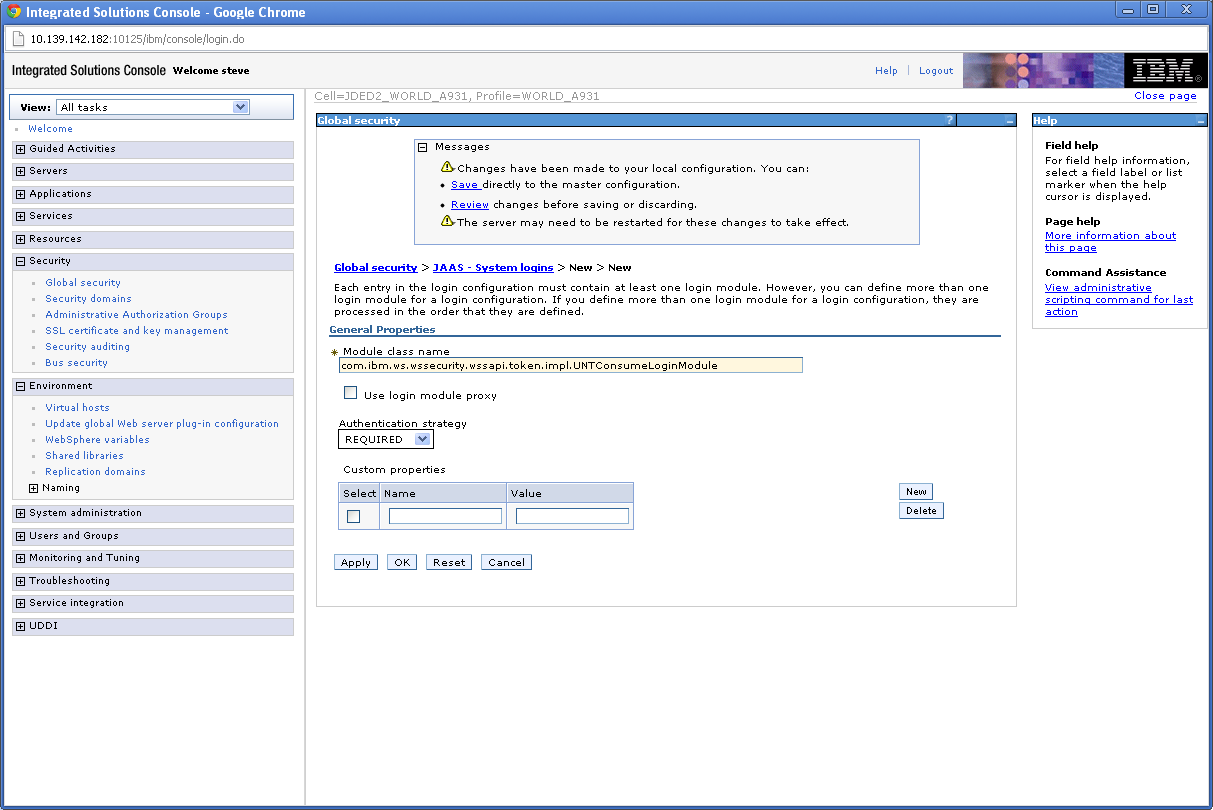
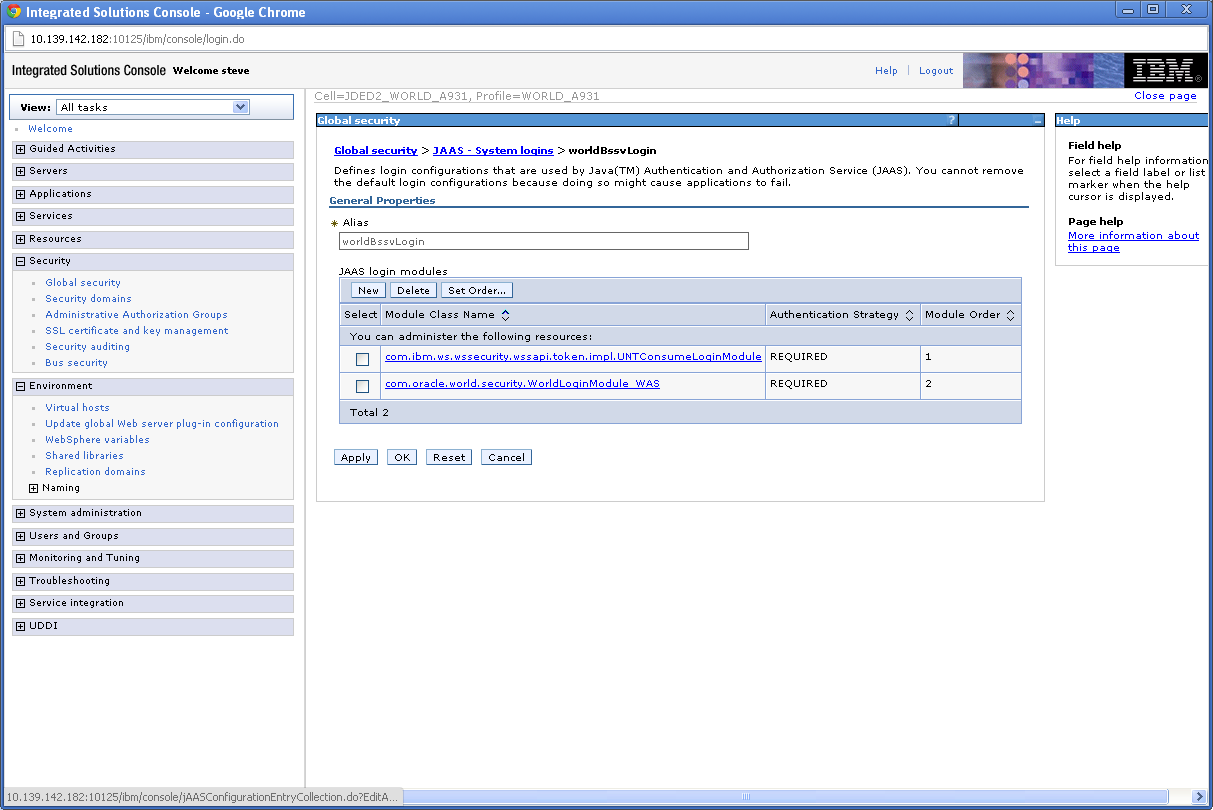
Enter "worldBssvLogin" for the Alias and click New under JAAS login modules.
-
Enter "com.ibm.ws.wssecurity.wssapi.token.impl.UNTConsumeLoginModule" for the Module class name, and click OK.
-
Click New and enter "com.oracle.world.security.WorldLoginModule_WAS" for the Module class name.
-
Click the Use login module proxy checkbox and click OK.
-
Click Save.
The worldBssvLogin system login should look like the screen shot below:

5.6 Set Up Policies and Bindings
To set up policies and bindings
-
From the Integrated Solutions Console, select Services->Policy sets->Application policy sets.
Figure 5-19 Application Policy Sets screen
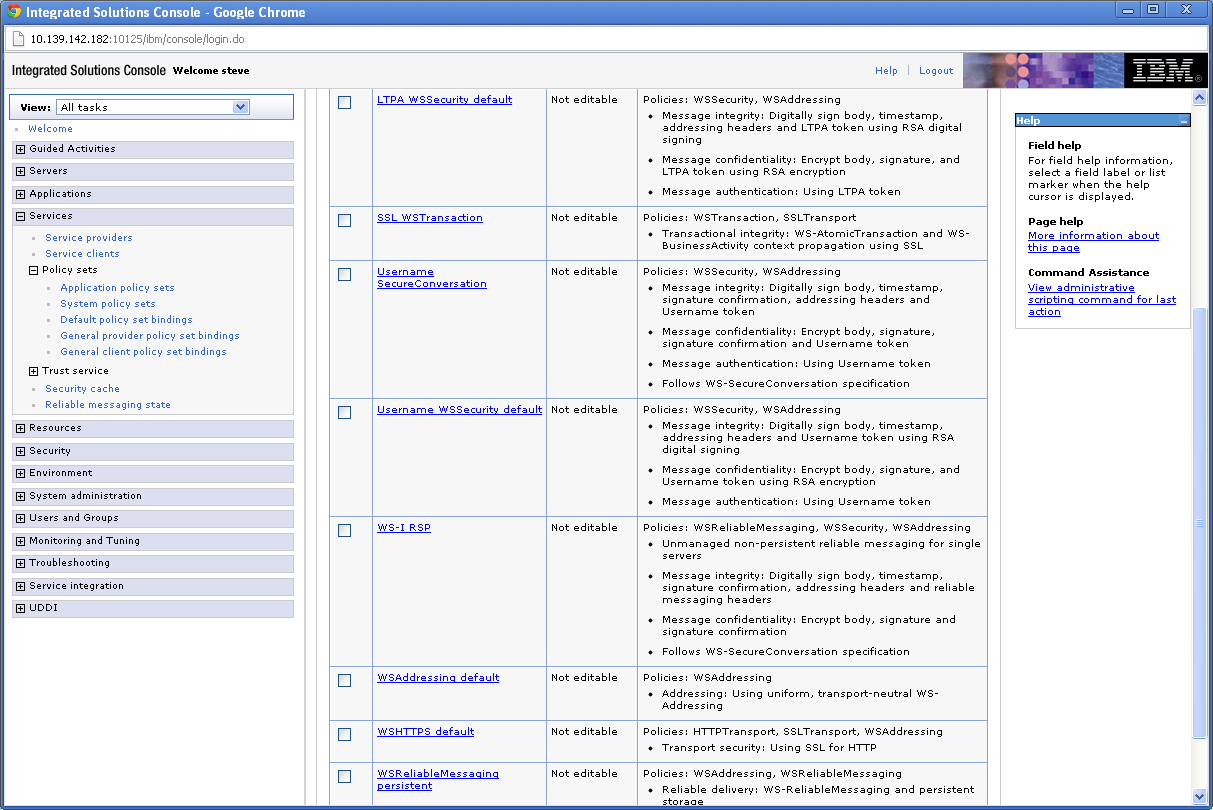
Description of ''Figure 5-19 Application Policy Sets screen''
-
Select the box next to Username WSSecurity default and click Copy.
Figure 5-20 Application Policy Sets screen
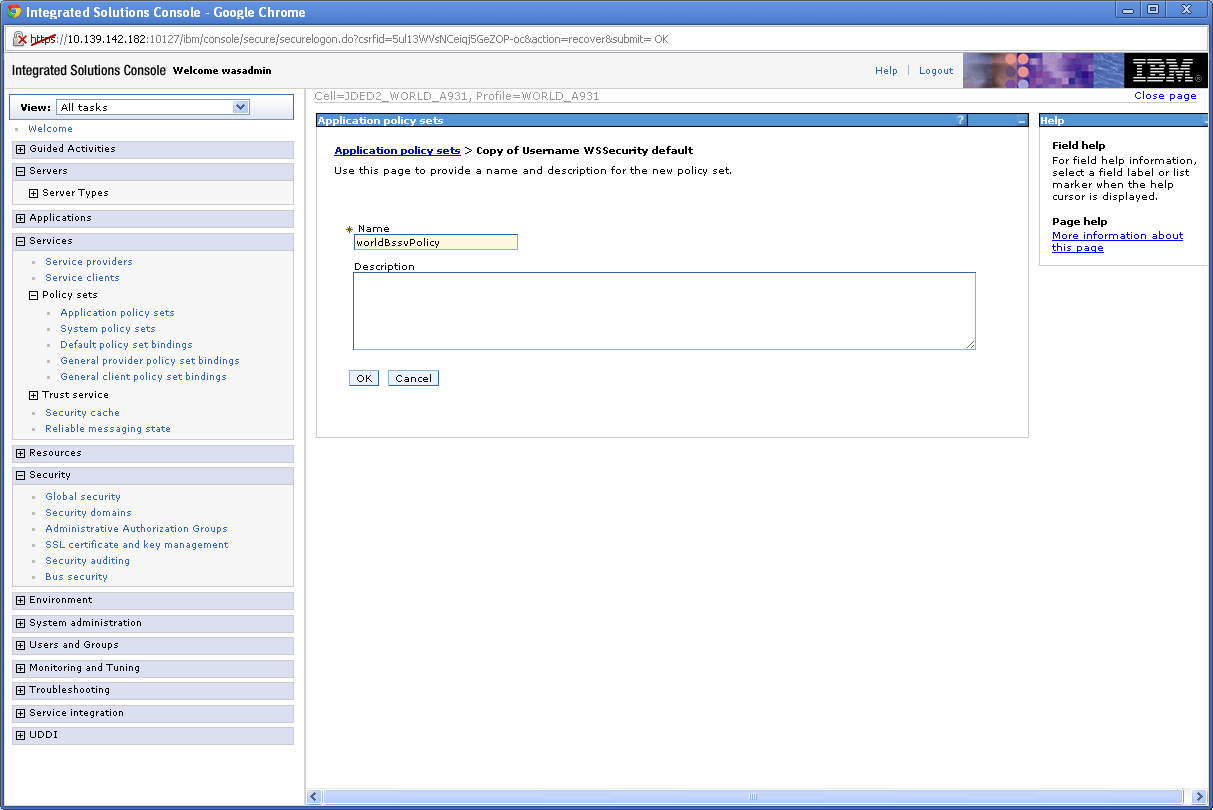
Description of ''Figure 5-20 Application Policy Sets screen''
-
Enter "worldBssvPolicy" for the Name and click OK.
Figure 5-21 Application Policy Sets screen
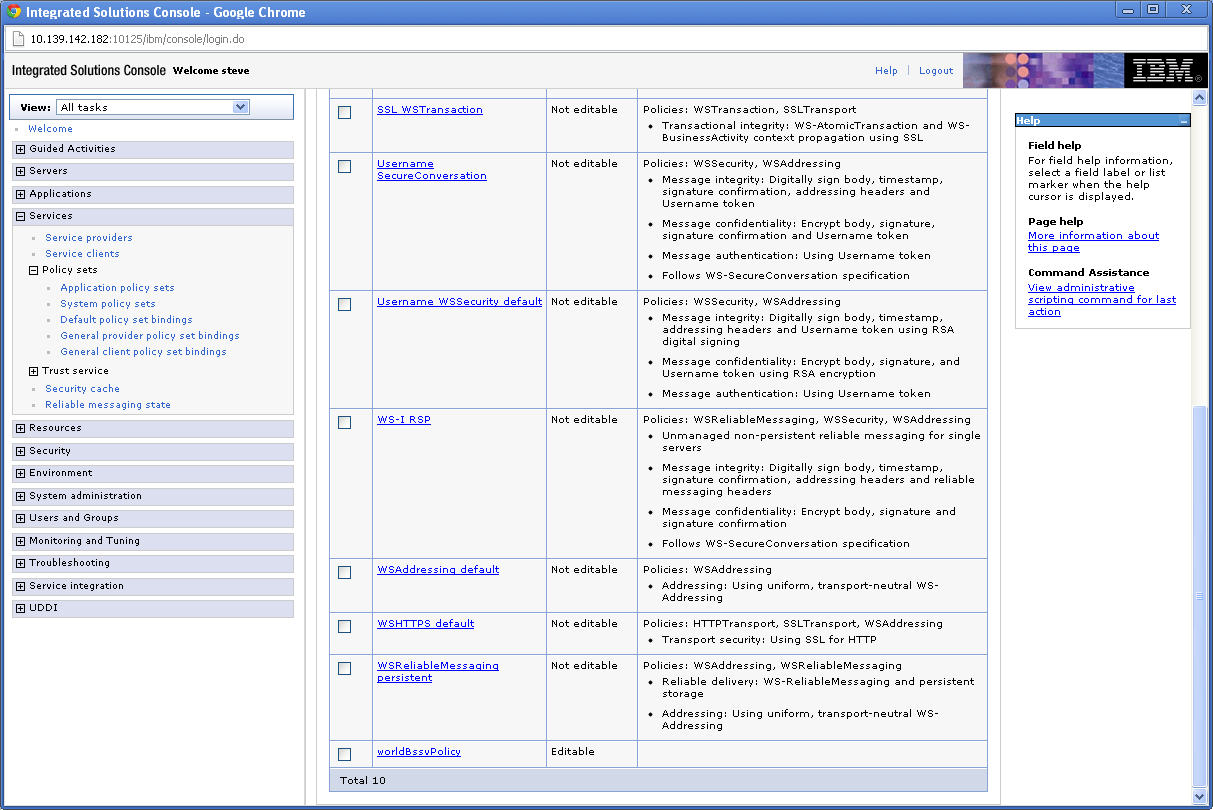
Description of ''Figure 5-21 Application Policy Sets screen''
-
Select worldBssvPolicy.
Figure 5-22 Application Policy Sets screen

Description of ''Figure 5-22 Application Policy Sets screen''
-
Check the box next to WS-Addressing and click Delete.
-
Click on WS-Security.
Figure 5-23 Application Policy Sets screen
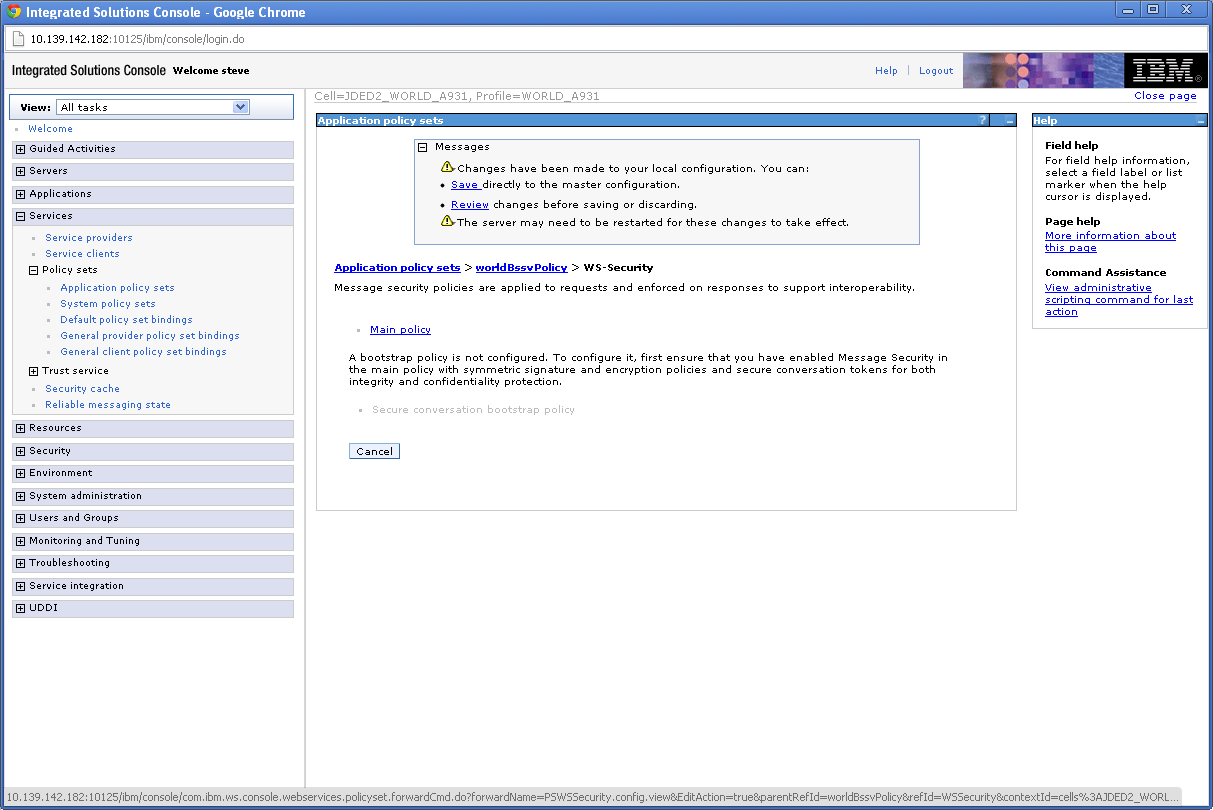
Description of ''Figure 5-23 Application Policy Sets screen''
-
Click on Main policy.
Figure 5-24 Application Policy Sets screen
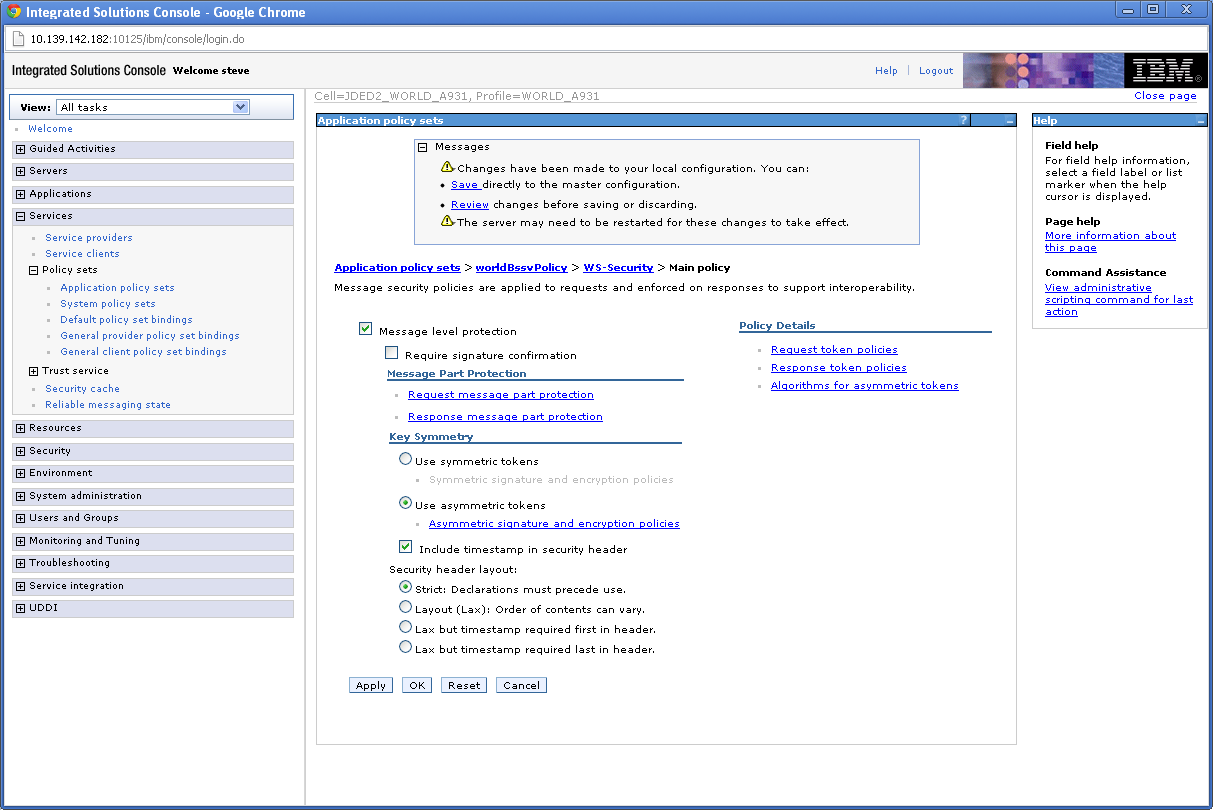
Description of ''Figure 5-24 Application Policy Sets screen''
-
Uncheck the box next to Message level protection.
-
Click OK.
-
Click Save.
-
On the left hand menu, select General provider policy set bindings.
Figure 5-25 General Provider Policy Set Bindings screen
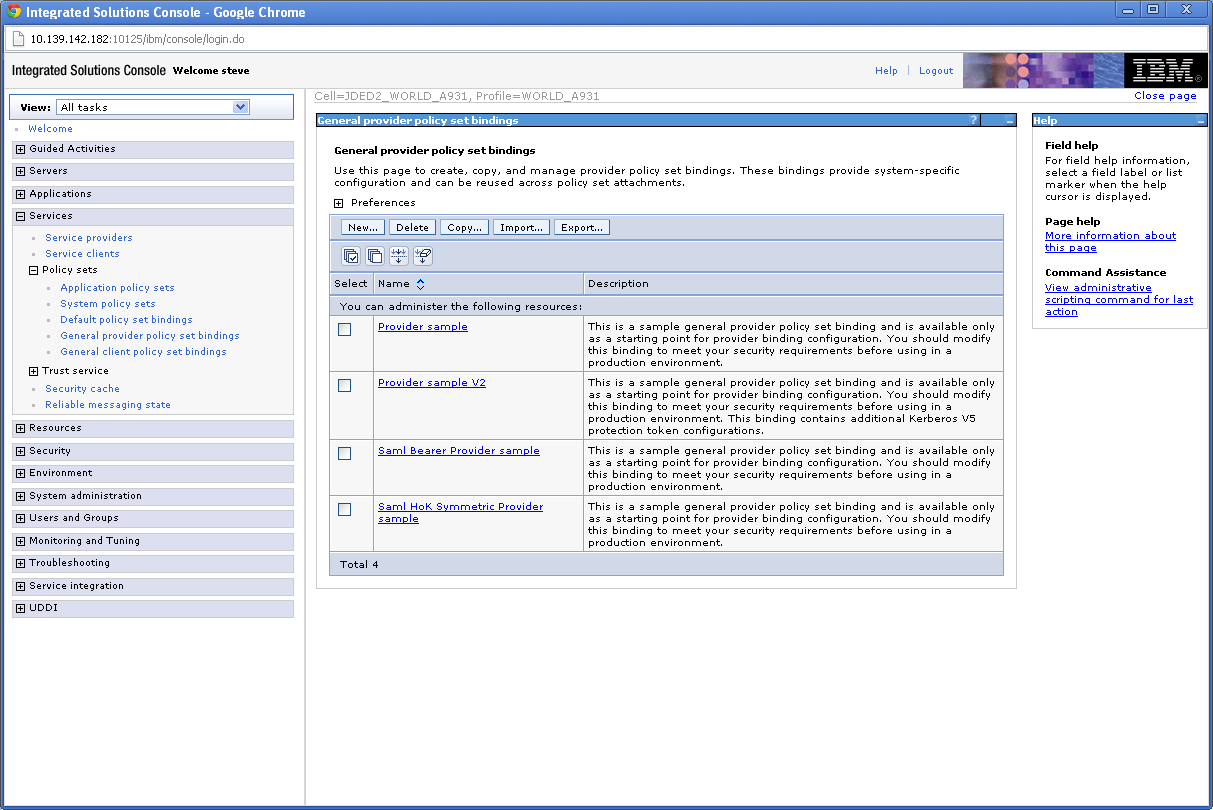
Description of ''Figure 5-25 General Provider Policy Set Bindings screen''
-
Check the box next to Provider sample and click Copy.
Figure 5-26 General Provider Policy Set Bindings screen
Description of ''Figure 5-26 General Provider Policy Set Bindings screen''
-
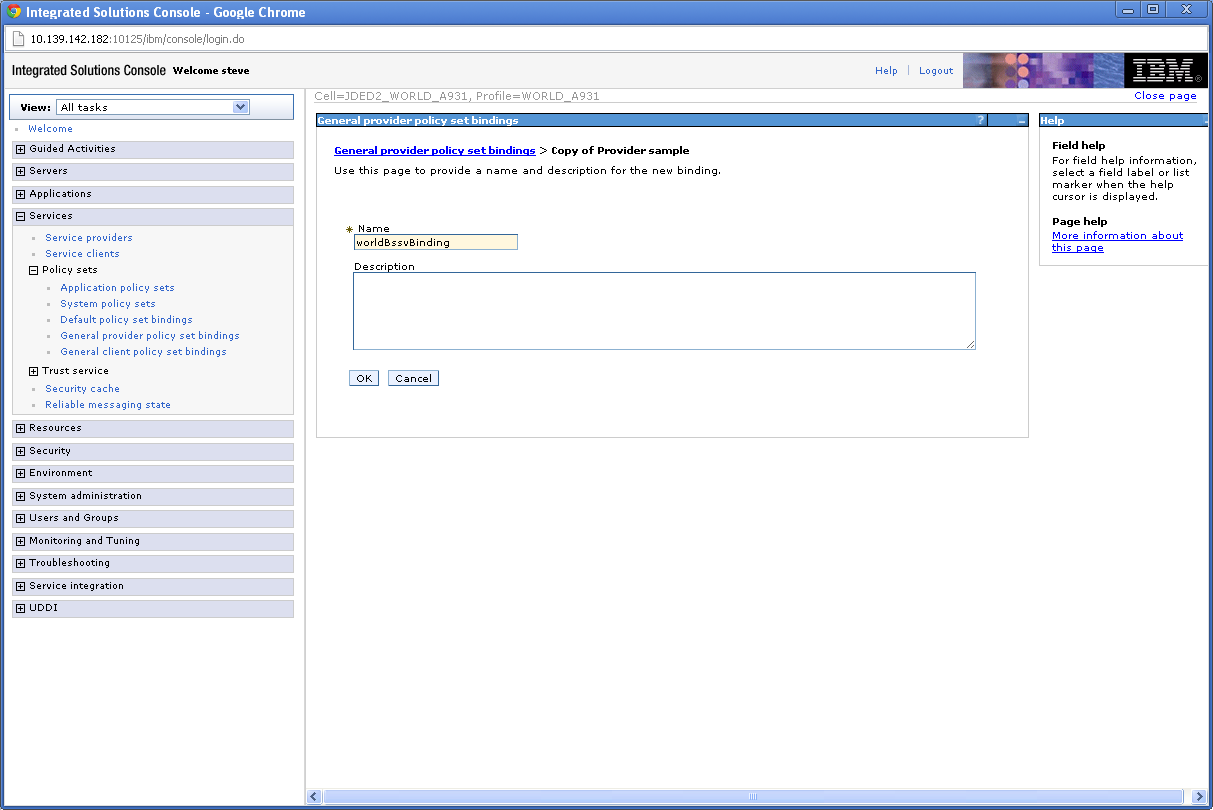
Enter "worldBssvBinding" in the Name field and click OK.
Figure 5-27 General Provider Policy Set Bindings screen
Description of ''Figure 5-27 General Provider Policy Set Bindings screen''
-
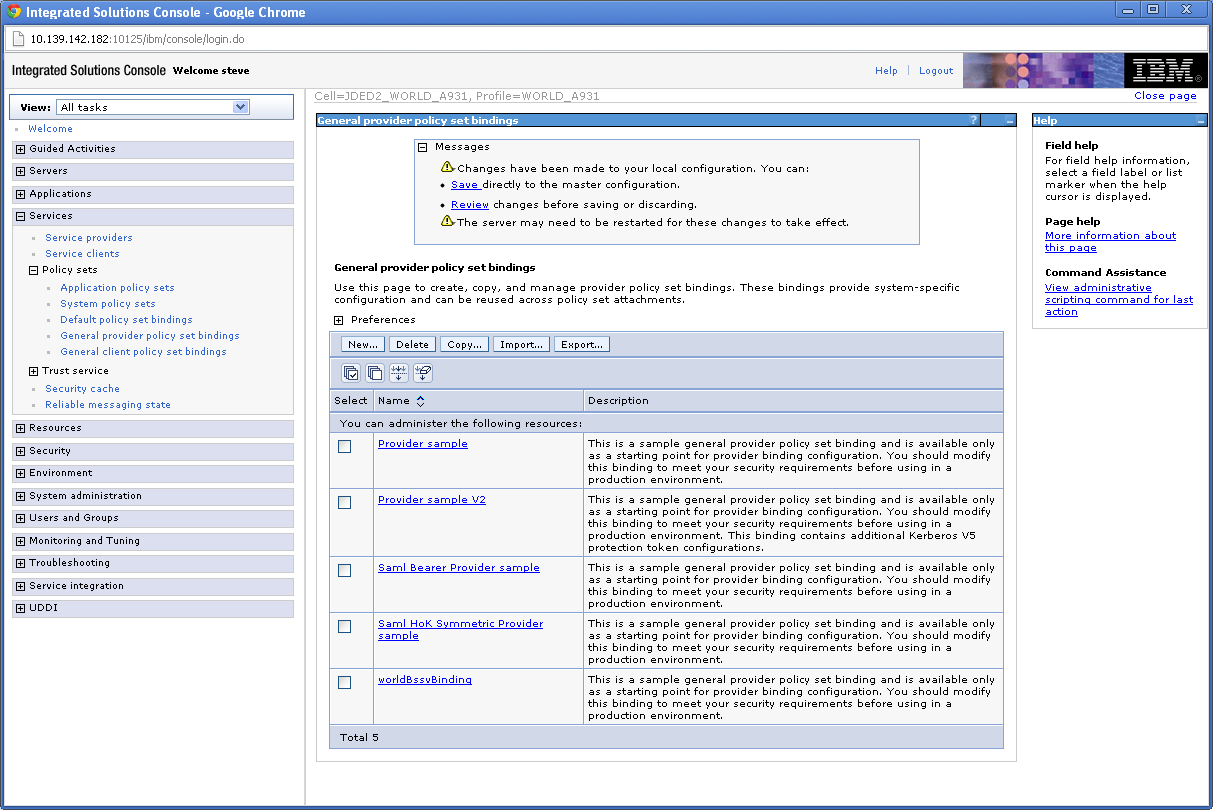
Select worldBssvBinding.
Figure 5-28 General Provider Policy Set Bindings screen
Description of ''Figure 5-28 General Provider Policy Set Bindings screen''
-
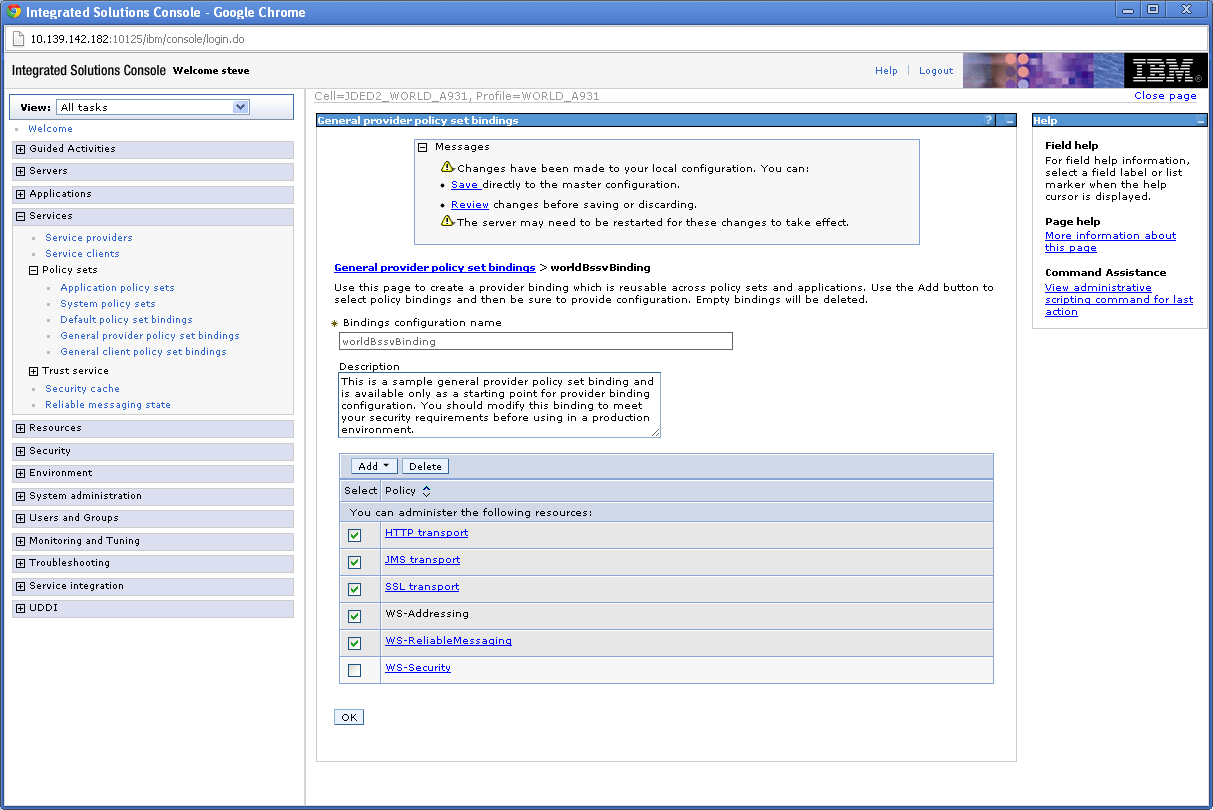
Check all the boxes EXCEPT WS-Security and click Delete.
-
Click OK.
-
Click Save.
-
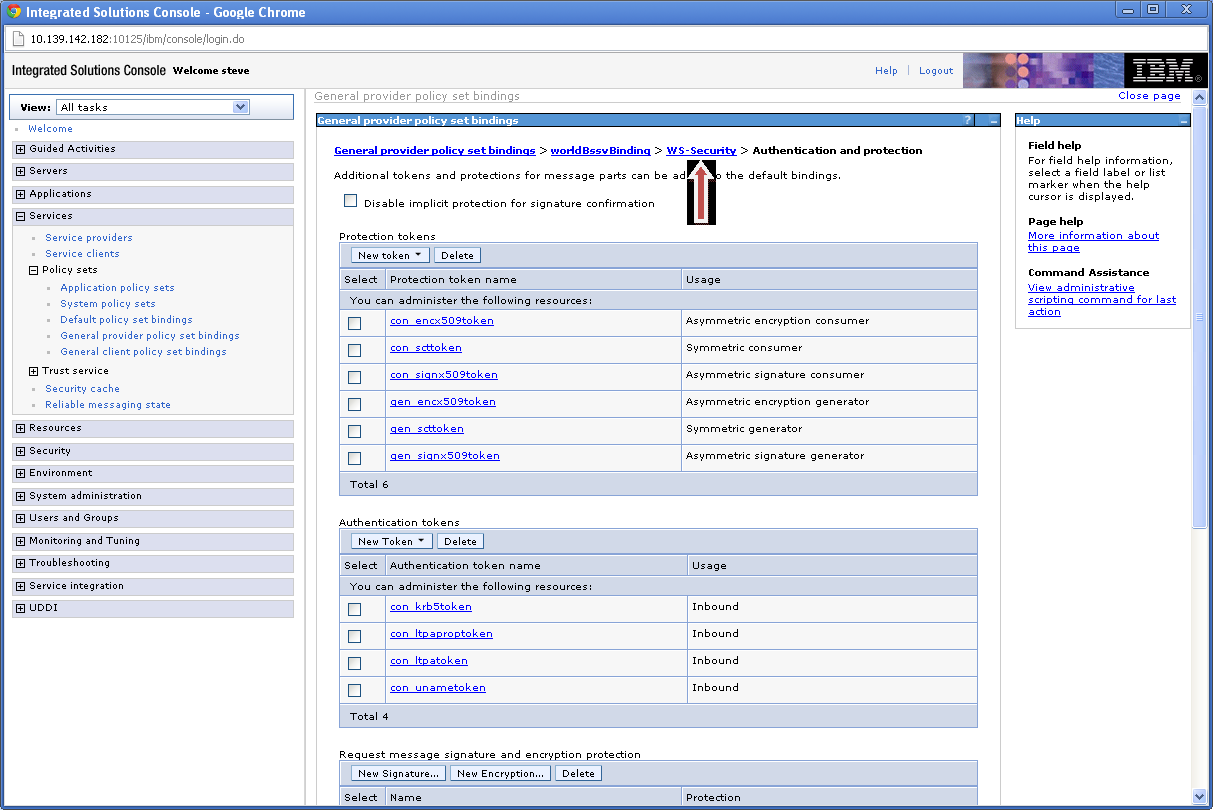
Select worldBssvBinding->WS-Security->Authentication and protection.
Figure 5-29 General Provider Policy Set Bindings screen
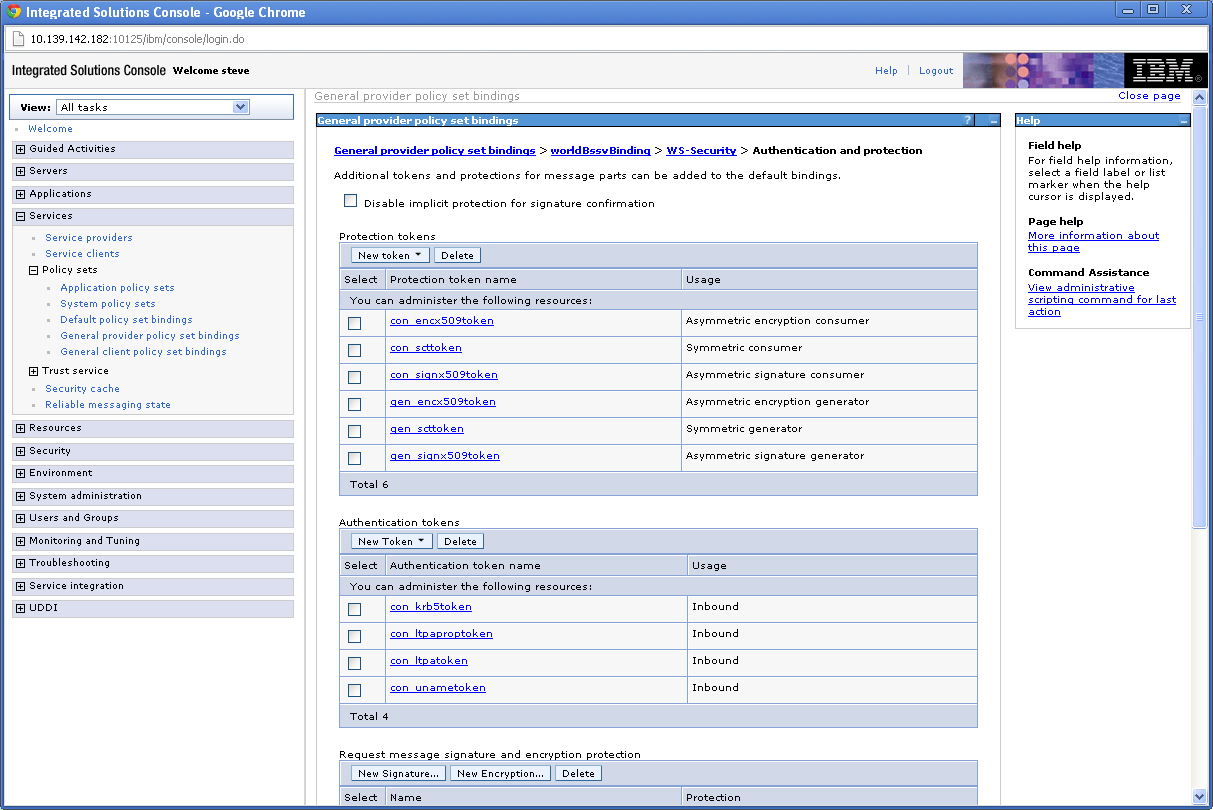
Description of ''Figure 5-29 General Provider Policy Set Bindings screen''
-
Under Authentication tokens select con_unametoken.
Figure 5-30 General Provider Policy Set Bindings screen
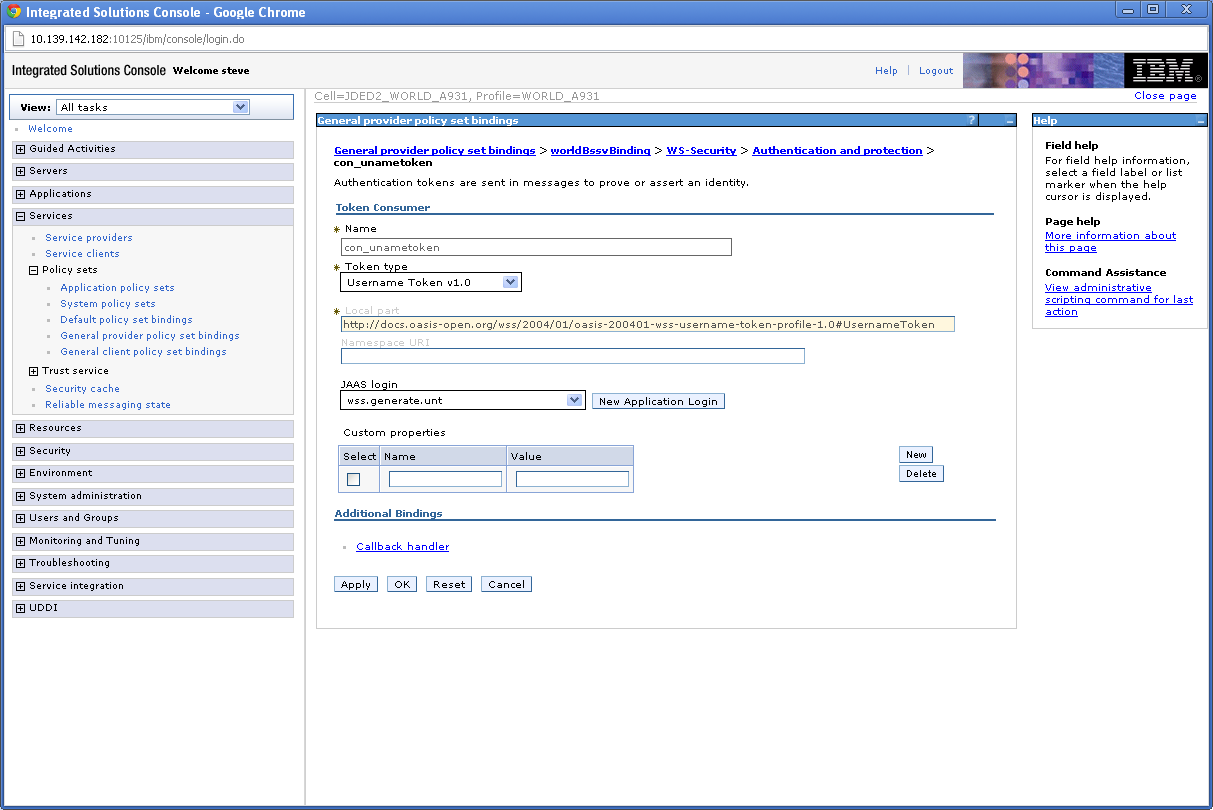
Description of ''Figure 5-30 General Provider Policy Set Bindings screen''
-
Select Callback handler.
Figure 5-31 General Provider Policy Set Bindings screen
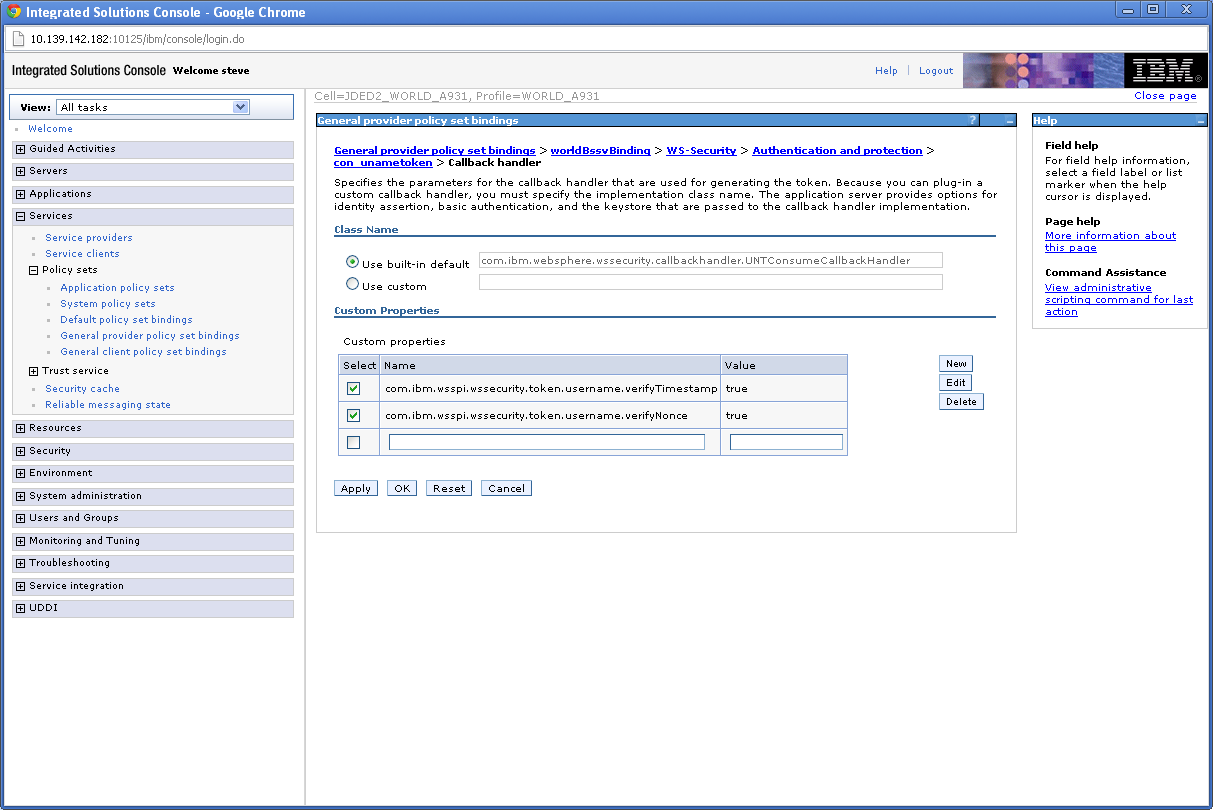
Description of ''Figure 5-31 General Provider Policy Set Bindings screen''
-
Check the boxes next to the two Custom properties and click Delete.
Figure 5-32 General Provider Policy Set Bindings screen
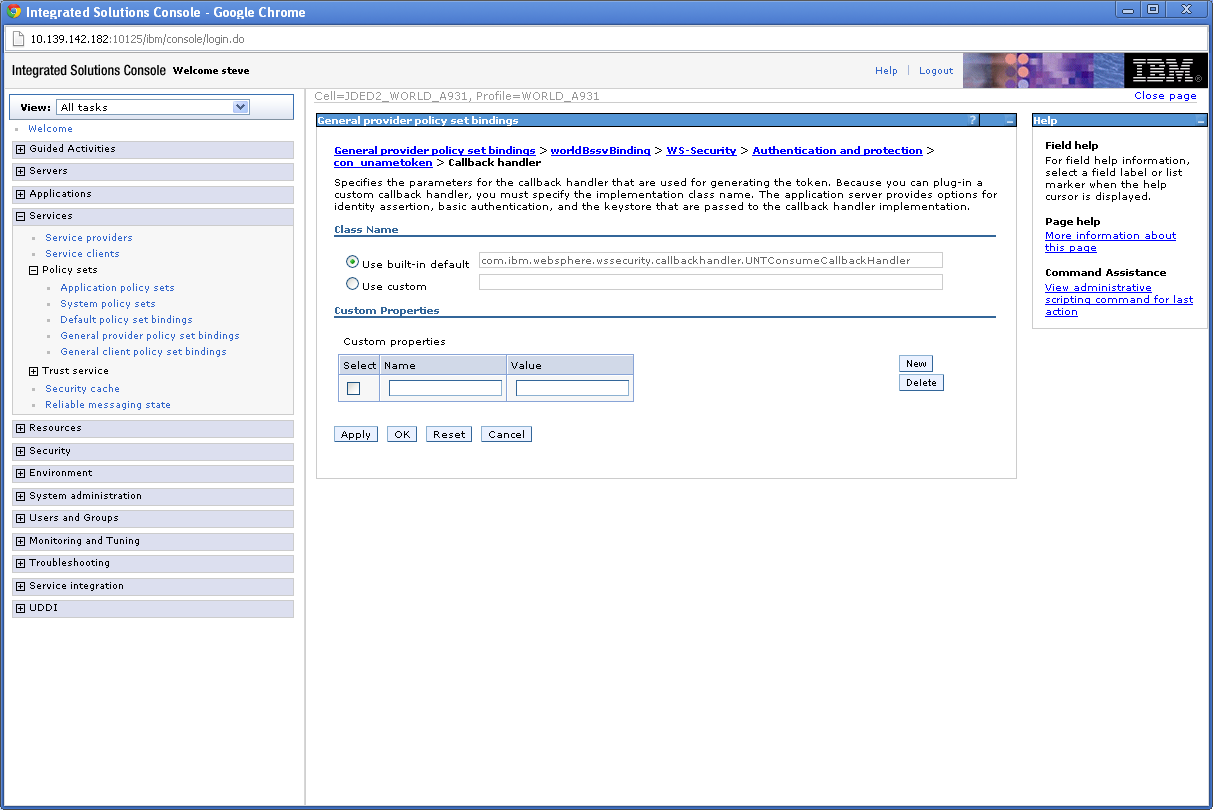
Description of ''Figure 5-32 General Provider Policy Set Bindings screen''
-
Under Custom properties, enter" com.ibm.wsspi.wssecurity.token.UsernameToken.authDeferred" in the Name field.
-
Enter "true" in the Value field.
-
Click OK.
Figure 5-33 General Provider Policy Set Bindings screen
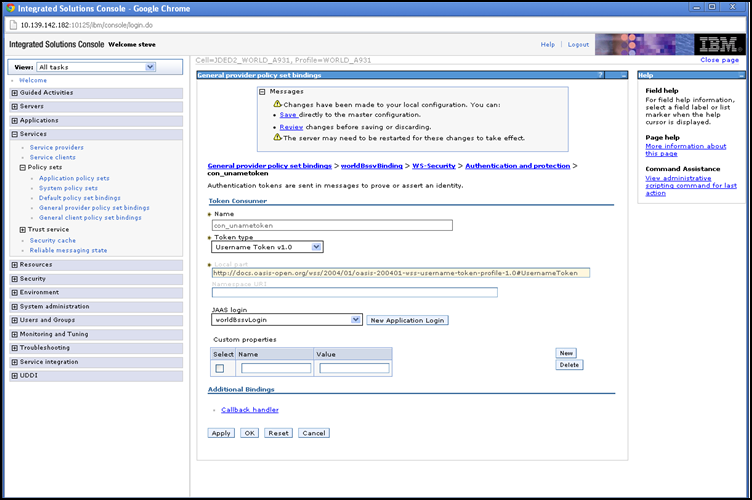
Description of ''Figure 5-33 General Provider Policy Set Bindings screen''
-
In the JAAS login dropdown box, select worldBssvLogin.
-
Click OK.
-
Click Save.
Figure 5-34 General Provider Policy Set Bindings screen
Description of ''Figure 5-34 General Provider Policy Set Bindings screen''
-
In the breadcrumb menu, select WS-Security.
Figure 5-35 General Provider Policy Set Bindings screen
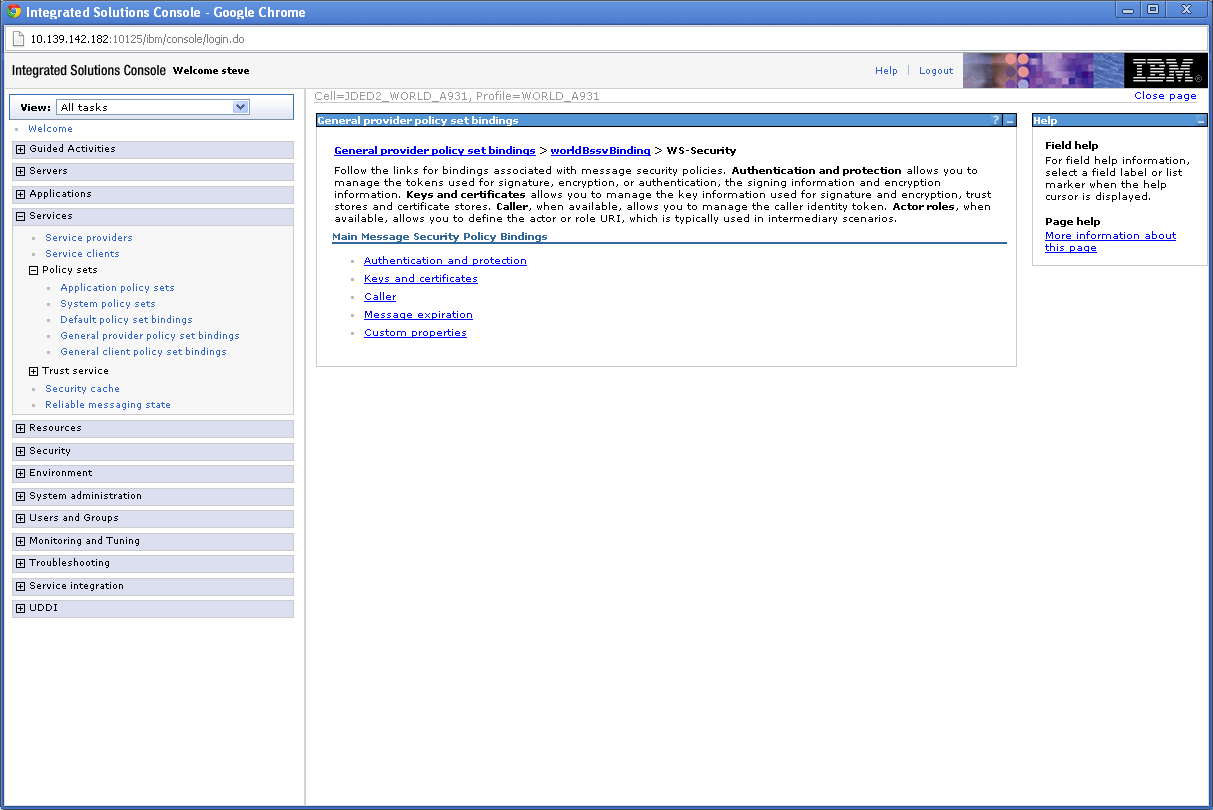
Description of ''Figure 5-35 General Provider Policy Set Bindings screen''
-
Select Caller.
Figure 5-36 General Provider Policy Set Bindings screen
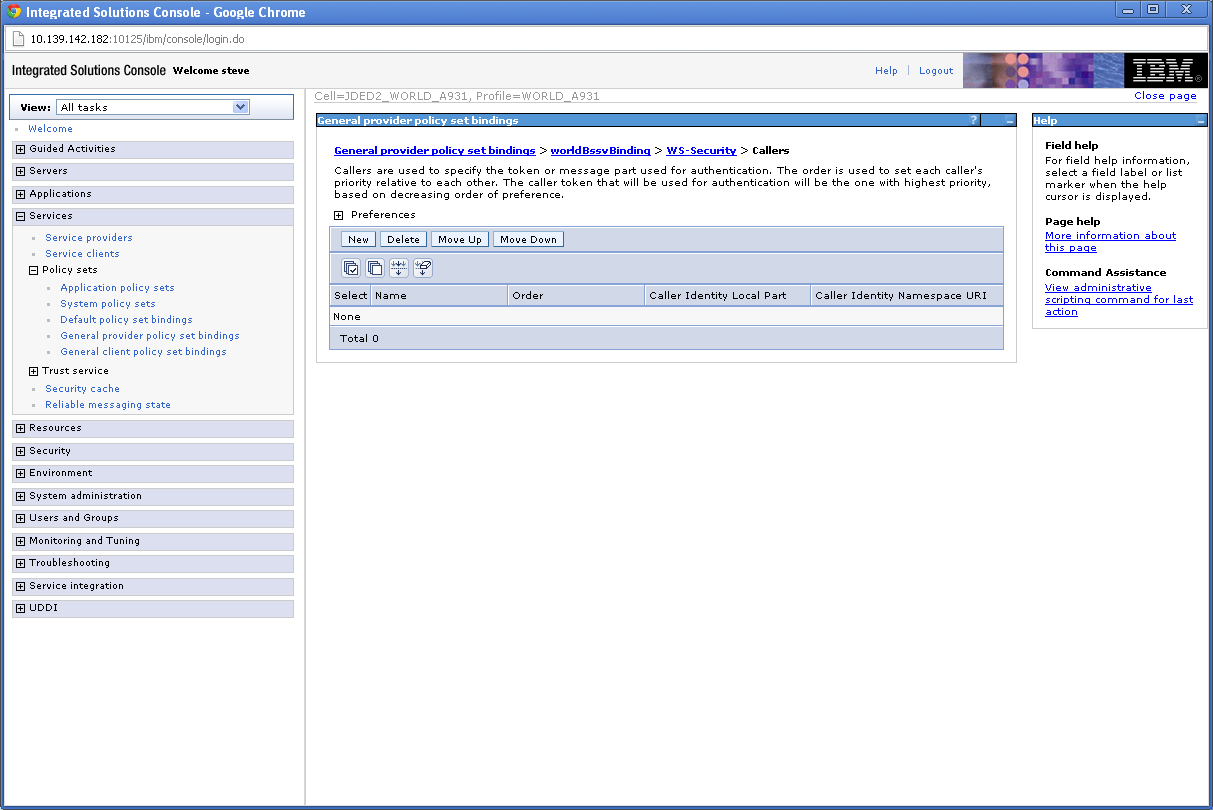
Description of ''Figure 5-36 General Provider Policy Set Bindings screen''
-
Click New.
Figure 5-37 General Provider Policy Set Bindings screen
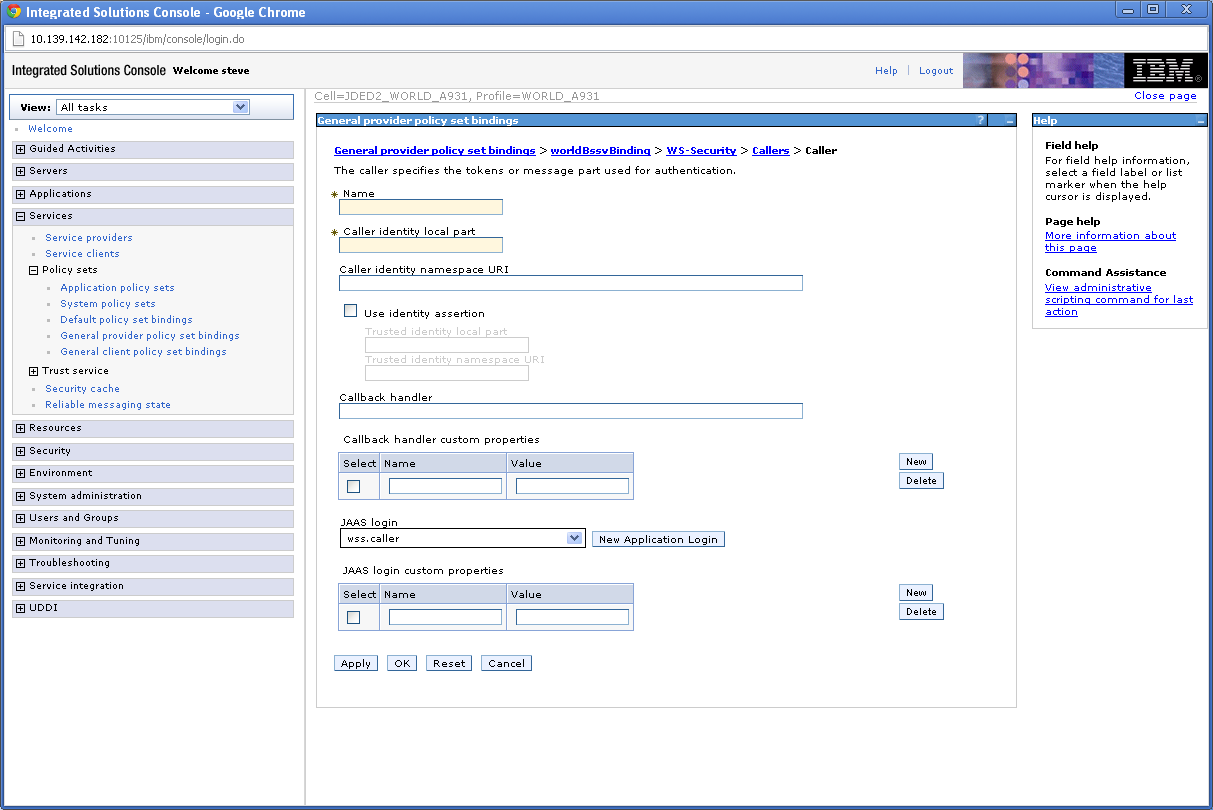
Description of ''Figure 5-37 General Provider Policy Set Bindings screen''
-
Enter "worldBssvCaller" in the Name field.
-
Enter "http://docs.oasis-open.org/wss/2004/01/oasis-200401-wss-username-token-profile-1.0#UsernameToken" in the Caller identity local part field.
-
In the JAAS login dropdown, select worldBssvAuth.
Figure 5-38 General Provider Policy Set Bindings screen
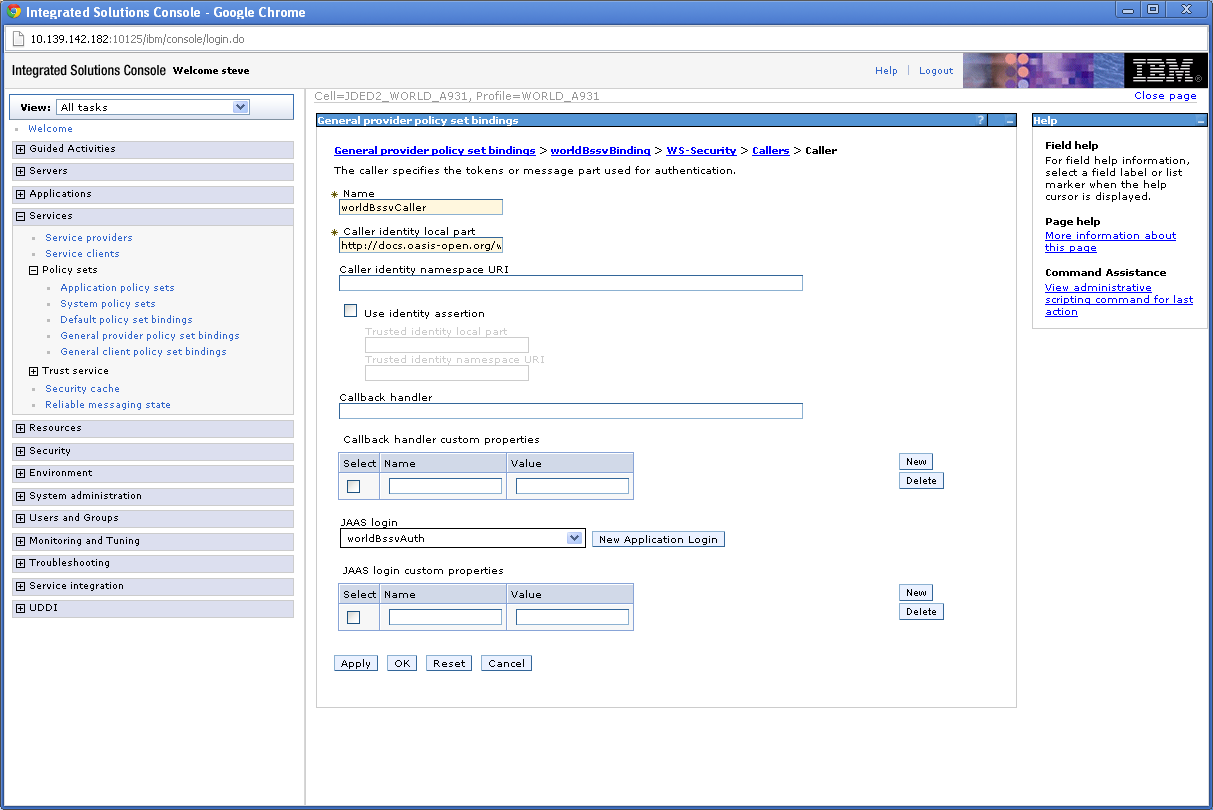
Description of ''Figure 5-38 General Provider Policy Set Bindings screen''
-
Click OK.
-
Click Save.
Figure 5-39 General Provider Policy Set Bindings screen

Description of ''Figure 5-39 General Provider Policy Set Bindings screen''
-
Restart the server.
5.7 Deploy Services
-
From the Integrated Solutions Console, select Applications->Application Types->WebSphere enterprise applications.
Figure 5-40 Enterprise Applications screen
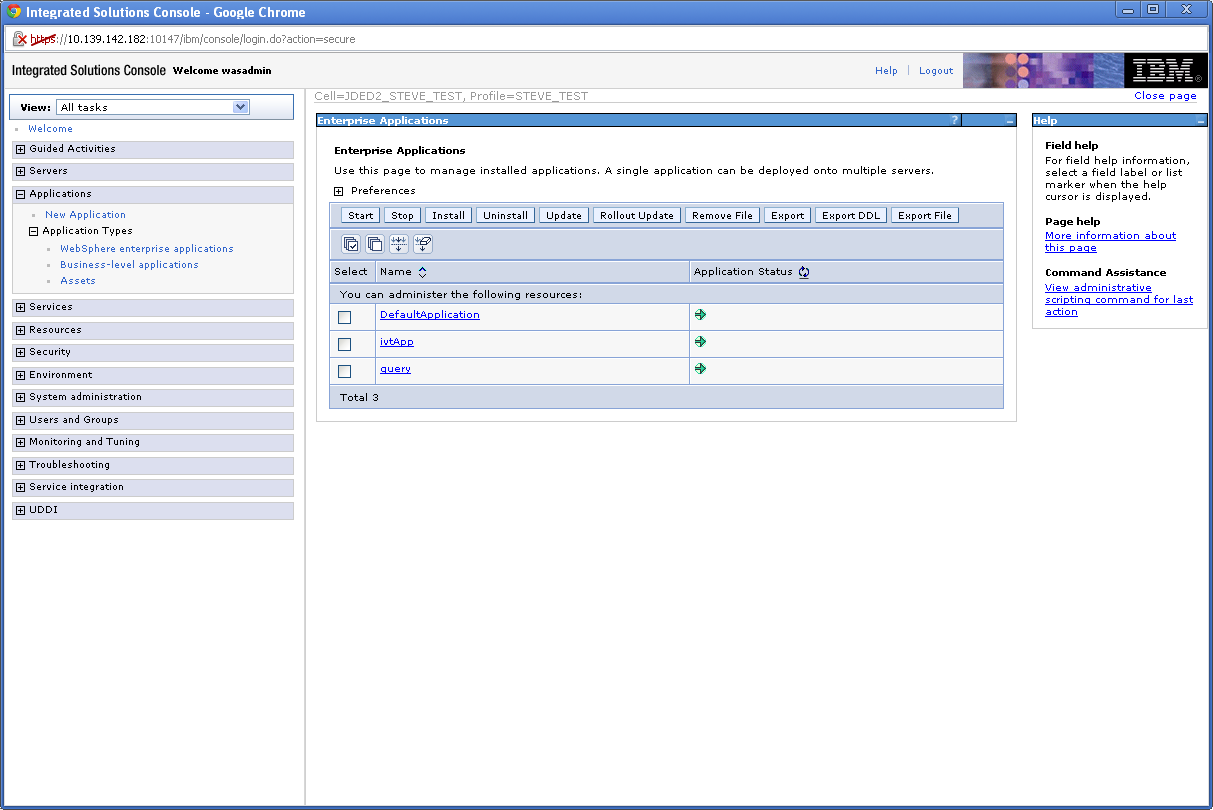
Description of ''Figure 5-40 Enterprise Applications screen''
-
Click Install.
Figure 5-41 Preparing for the Application Installation screen
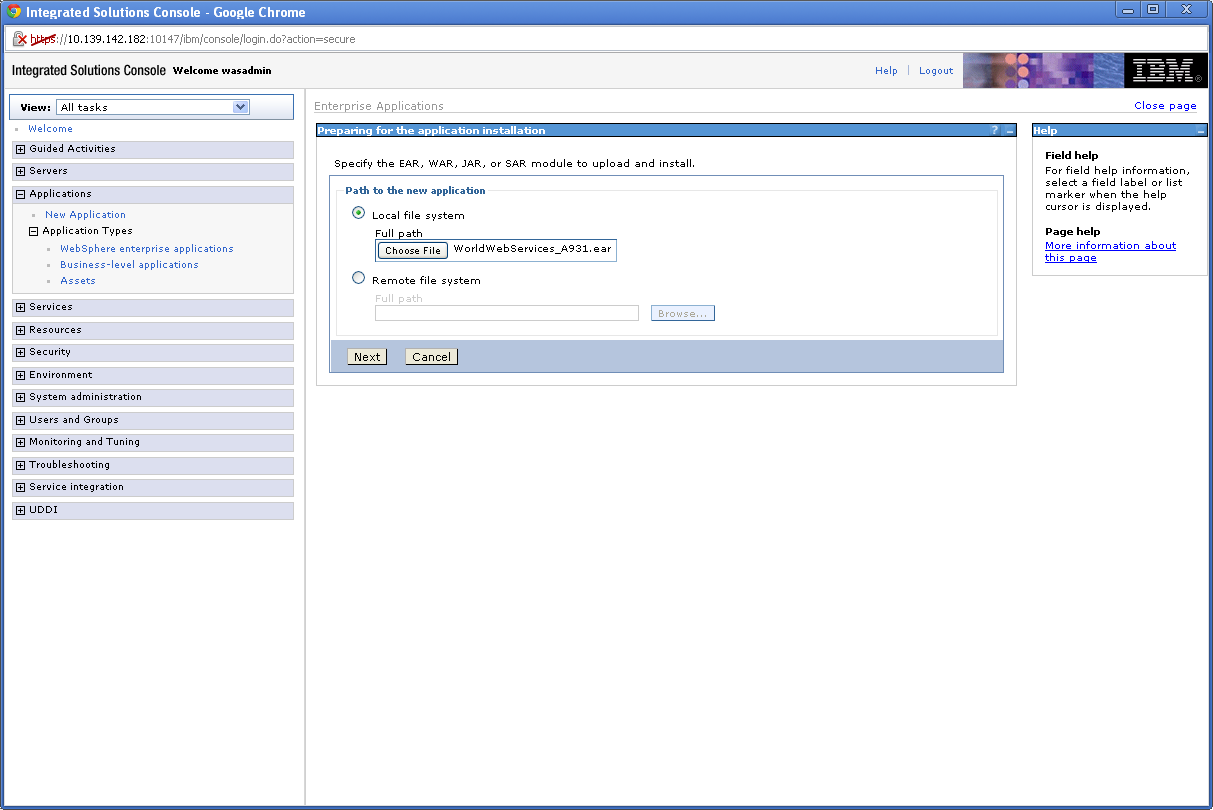
Description of ''Figure 5-41 Preparing for the Application Installation screen''
-
Click Choose File, navigate to folder where the .ear file was downloaded, and select the WorldWebServices_A931.ear file.
-
On the Preparing for the application installation screen, click Next.
-
On the Select installation options screen, click Next.
-
On the Map modules to servers screen, click Next.
-
On the Map virtual hosts for Web modules screen, click Next.
-
On the Summary screen, click Finish.
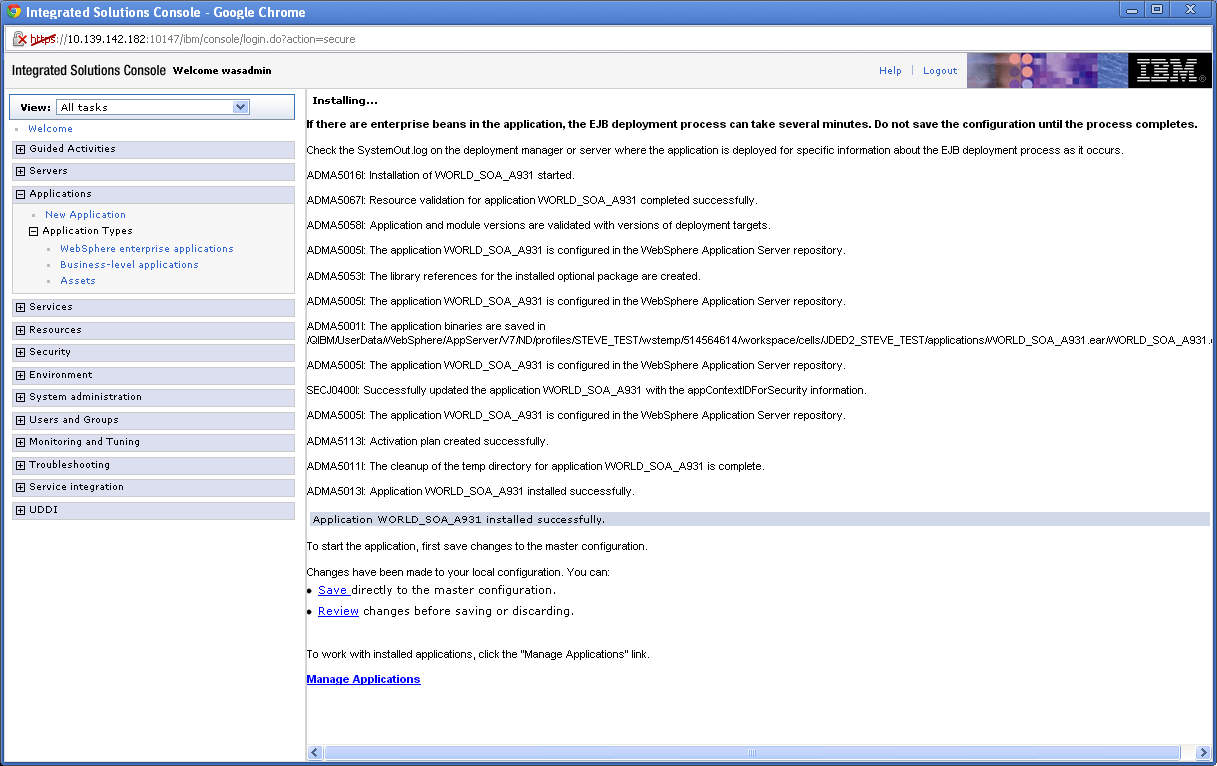
The following screen should be displayed:
Note:
This can take several minutes. -
Click Save.
Note:
This can take several minutes.Figure 5-43 Enterprise Applications screen
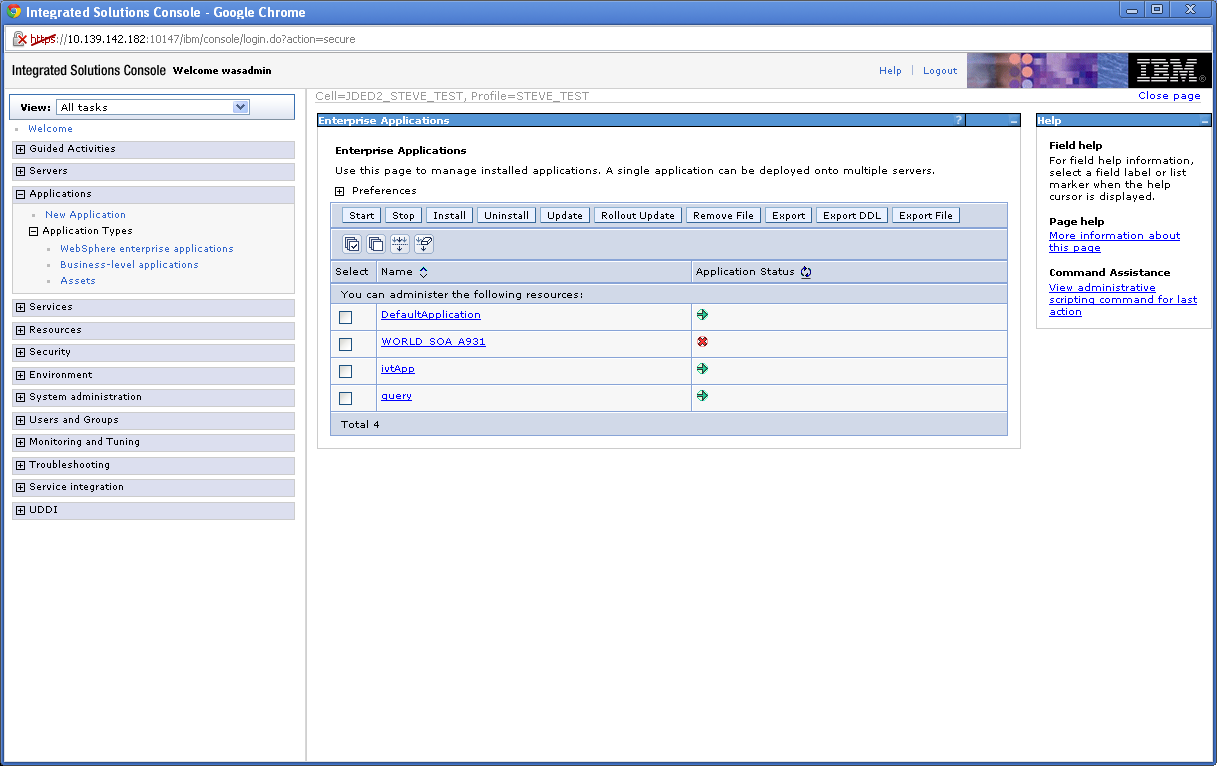
Description of ''Figure 5-43 Enterprise Applications screen''
-
Click WORLD_SOA_A931.
Figure 5-44 Enterprise Applications screen
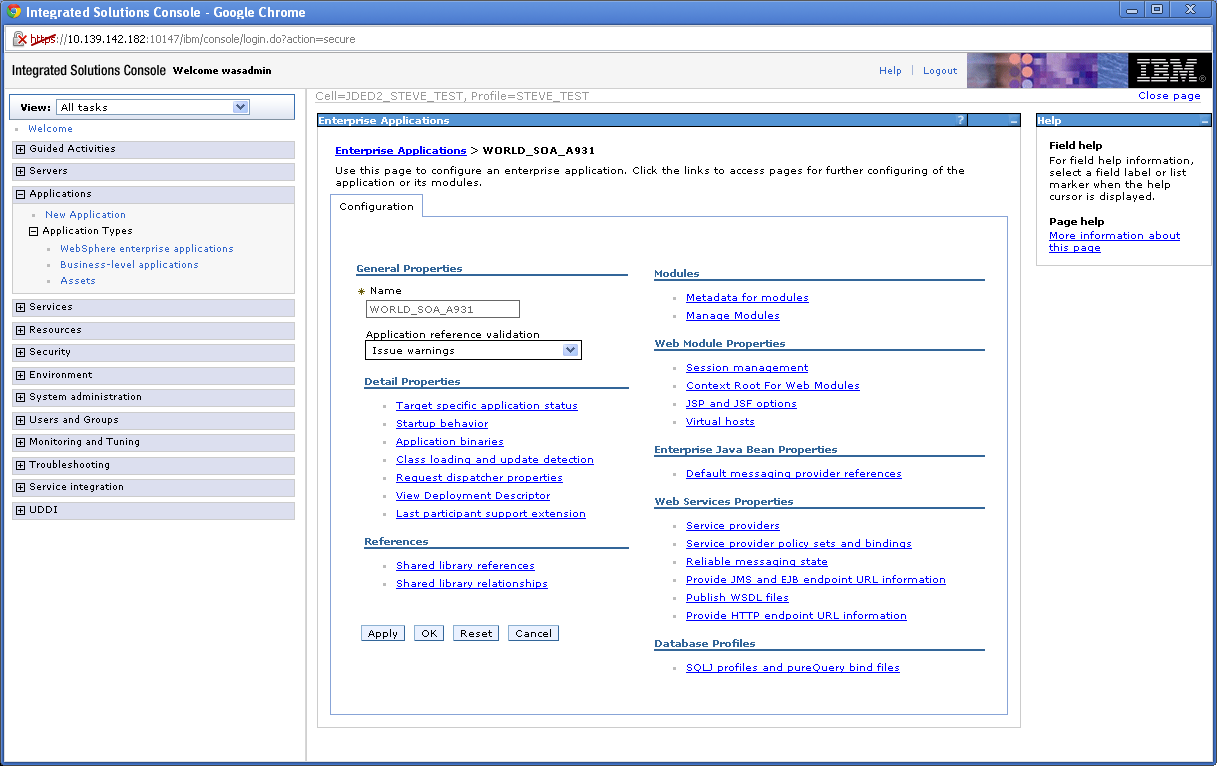
Description of ''Figure 5-44 Enterprise Applications screen''
-
Click Shared library references.
Figure 5-45 Enterprise Applications screen
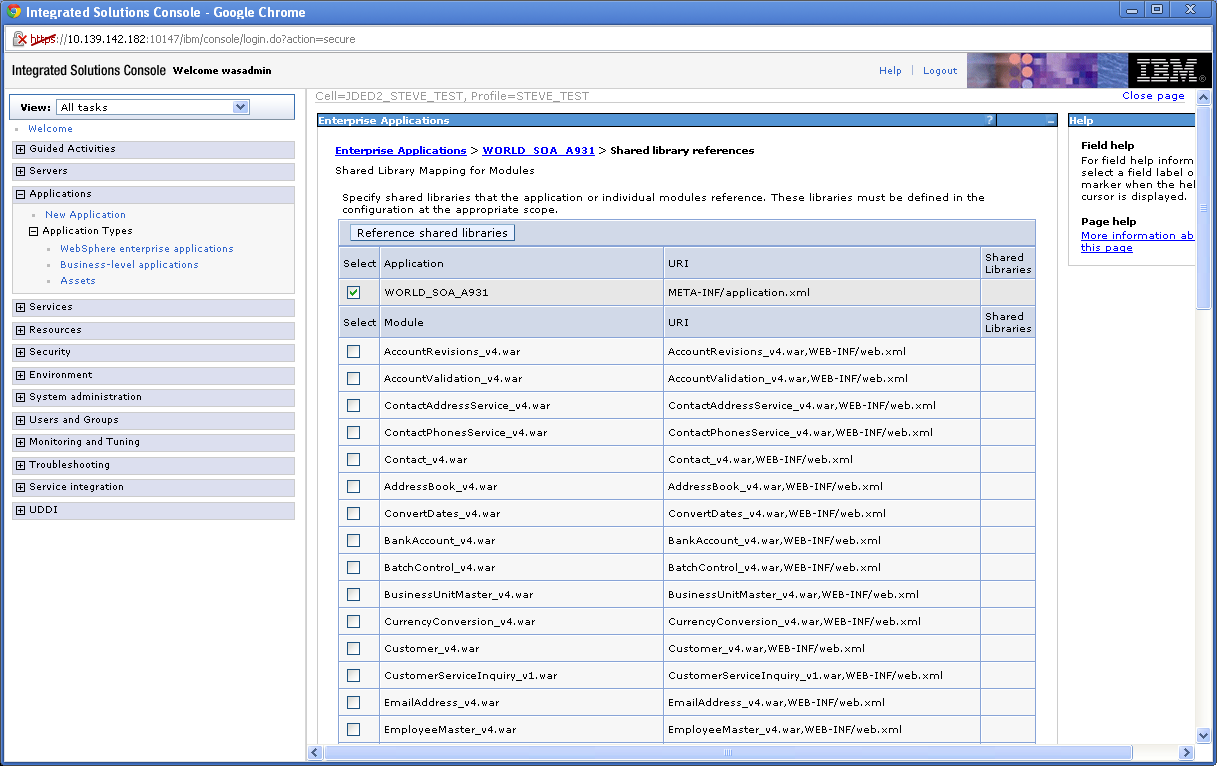
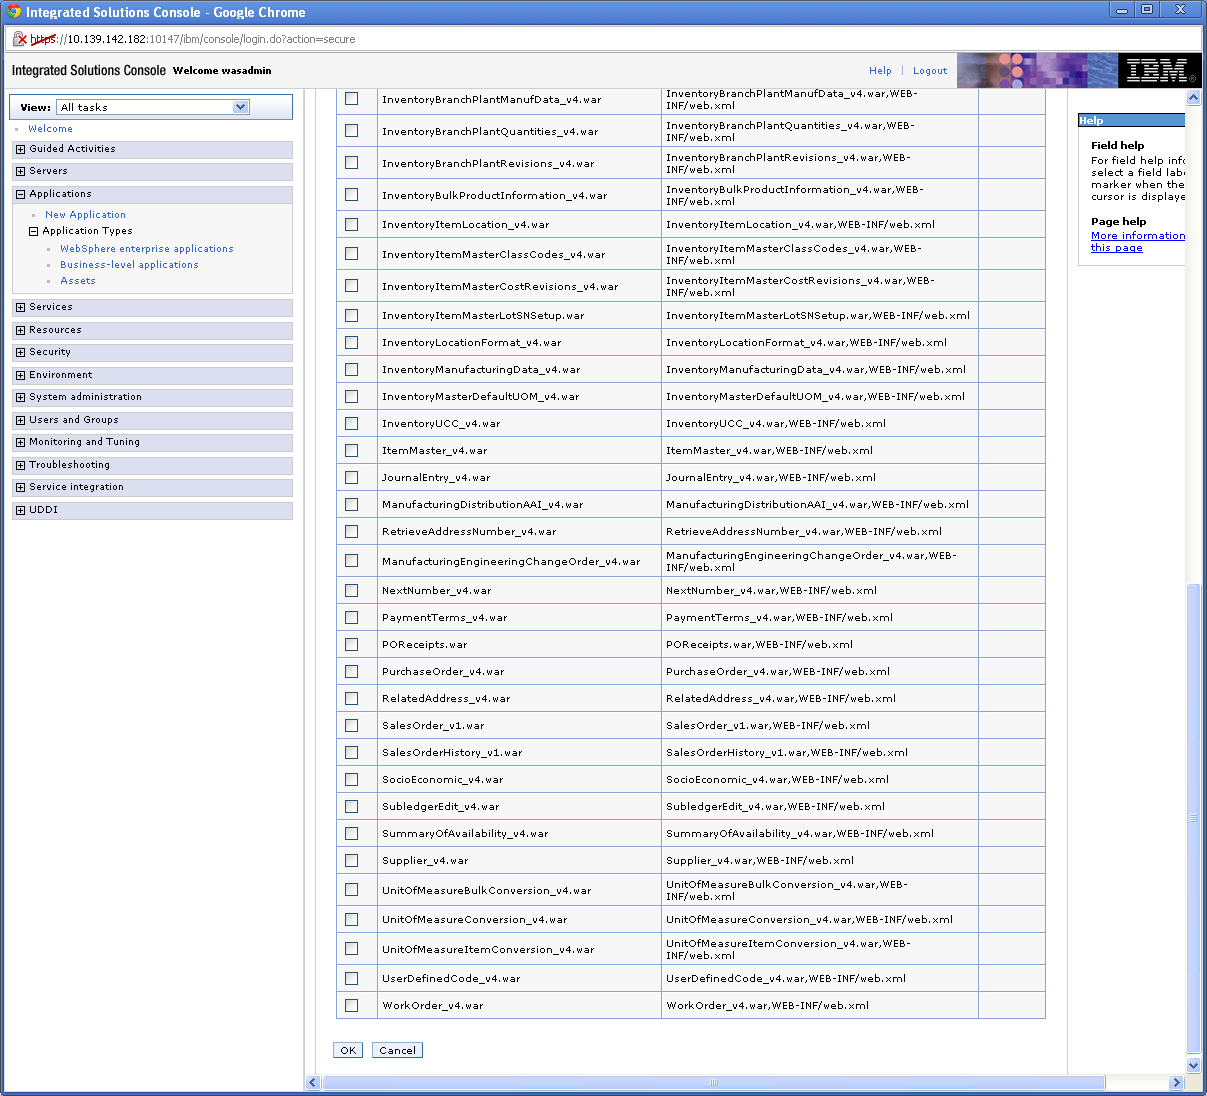
Description of ''Figure 5-45 Enterprise Applications screen''
-
Check WORLD_SOA_A931, and click Reference shared libraries.
Figure 5-46 Enterprise Applications screen
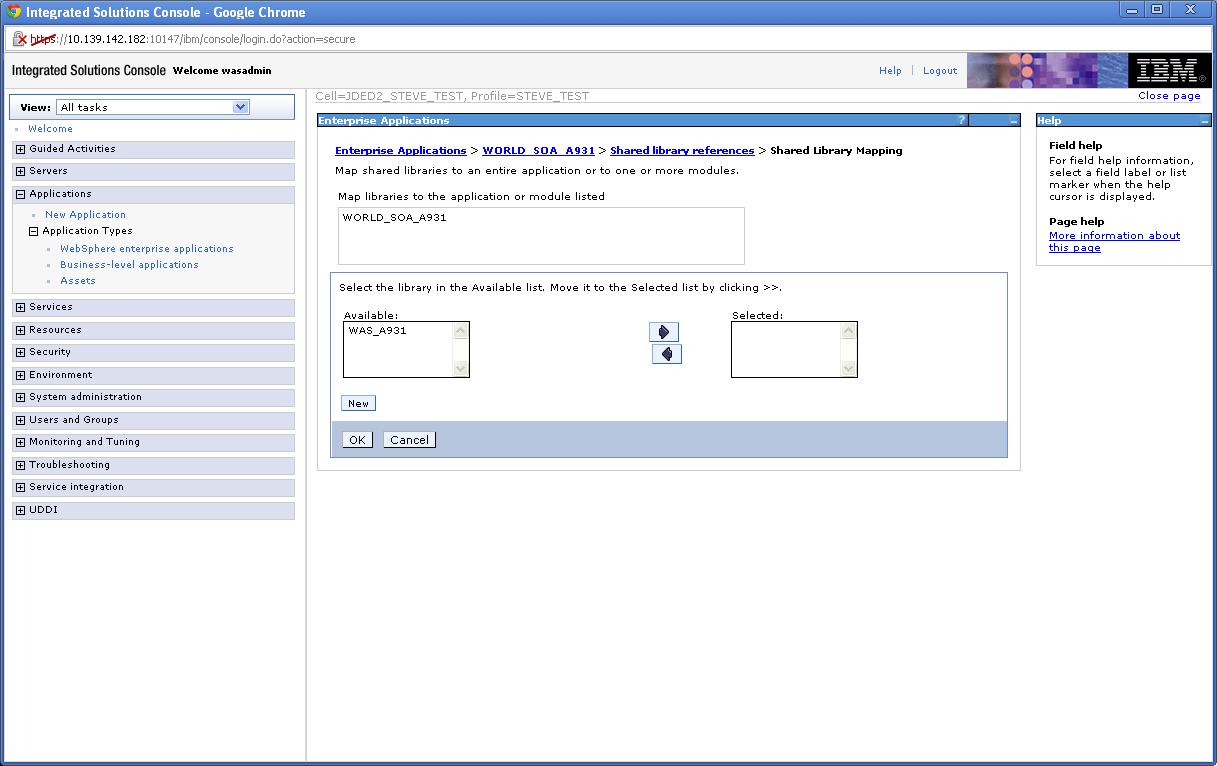
Description of ''Figure 5-46 Enterprise Applications screen''
-
In the Available box, select WAS_A931, and click the arrow key to move the library to the Selected box.
-
Click OK.
Figure 5-47 Enterprise Applications screen
Description of ''Figure 5-47 Enterprise Applications screen''
-
Click OK.
Figure 5-48 Enterprise Applications screen
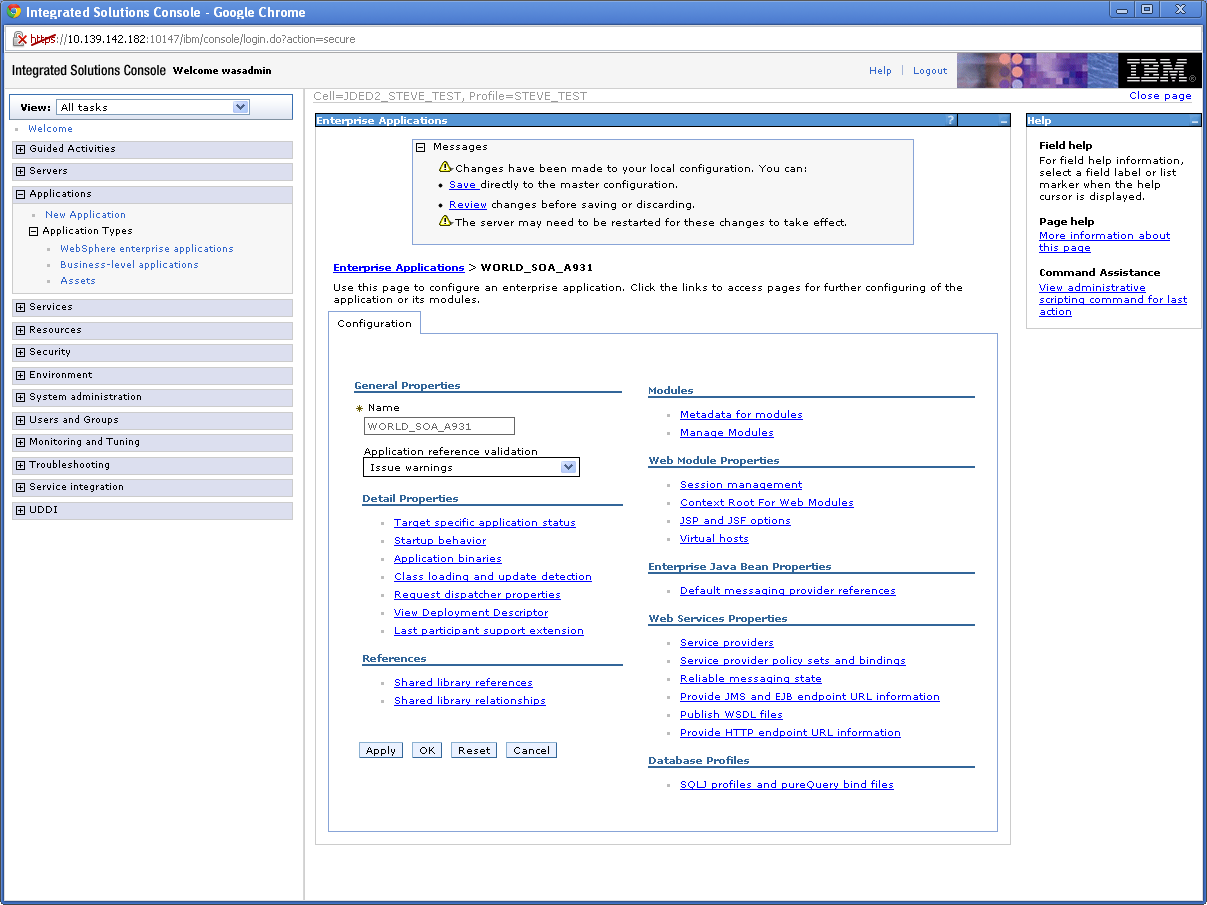
Description of ''Figure 5-48 Enterprise Applications screen''
-
Click Service provider policy sets and bindings.
Figure 5-49 Enterprise Applications screen
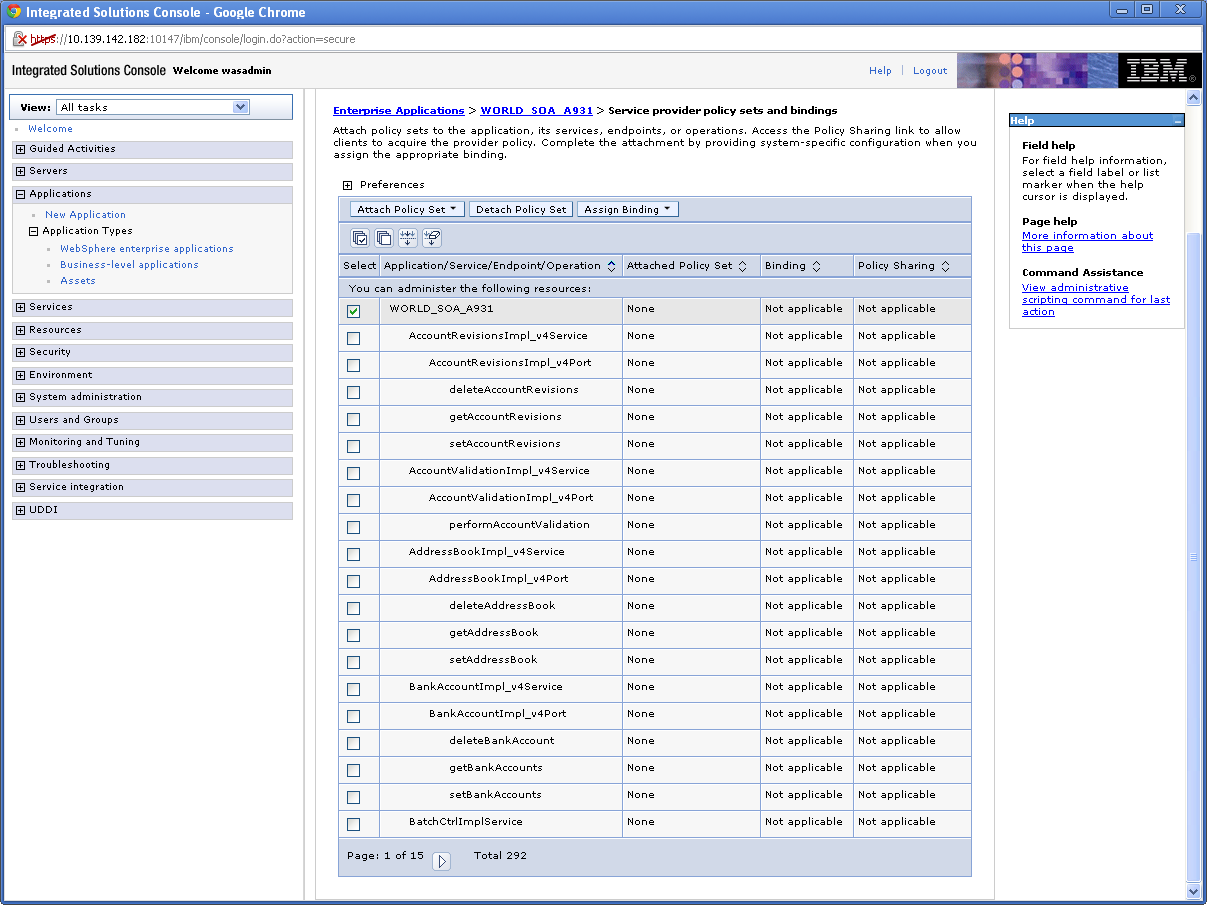
Description of ''Figure 5-49 Enterprise Applications screen''
-
Check the box next to WORLD_SOA_A931, and click Attach Policy Set->worldBssvPolicy.
Note:
This can take several minutes. -
Check the box next to WORLD_SOA_A931, and click Assign Binding->worldBssvBinding.
Figure 5-50 Enterprise Applications screen
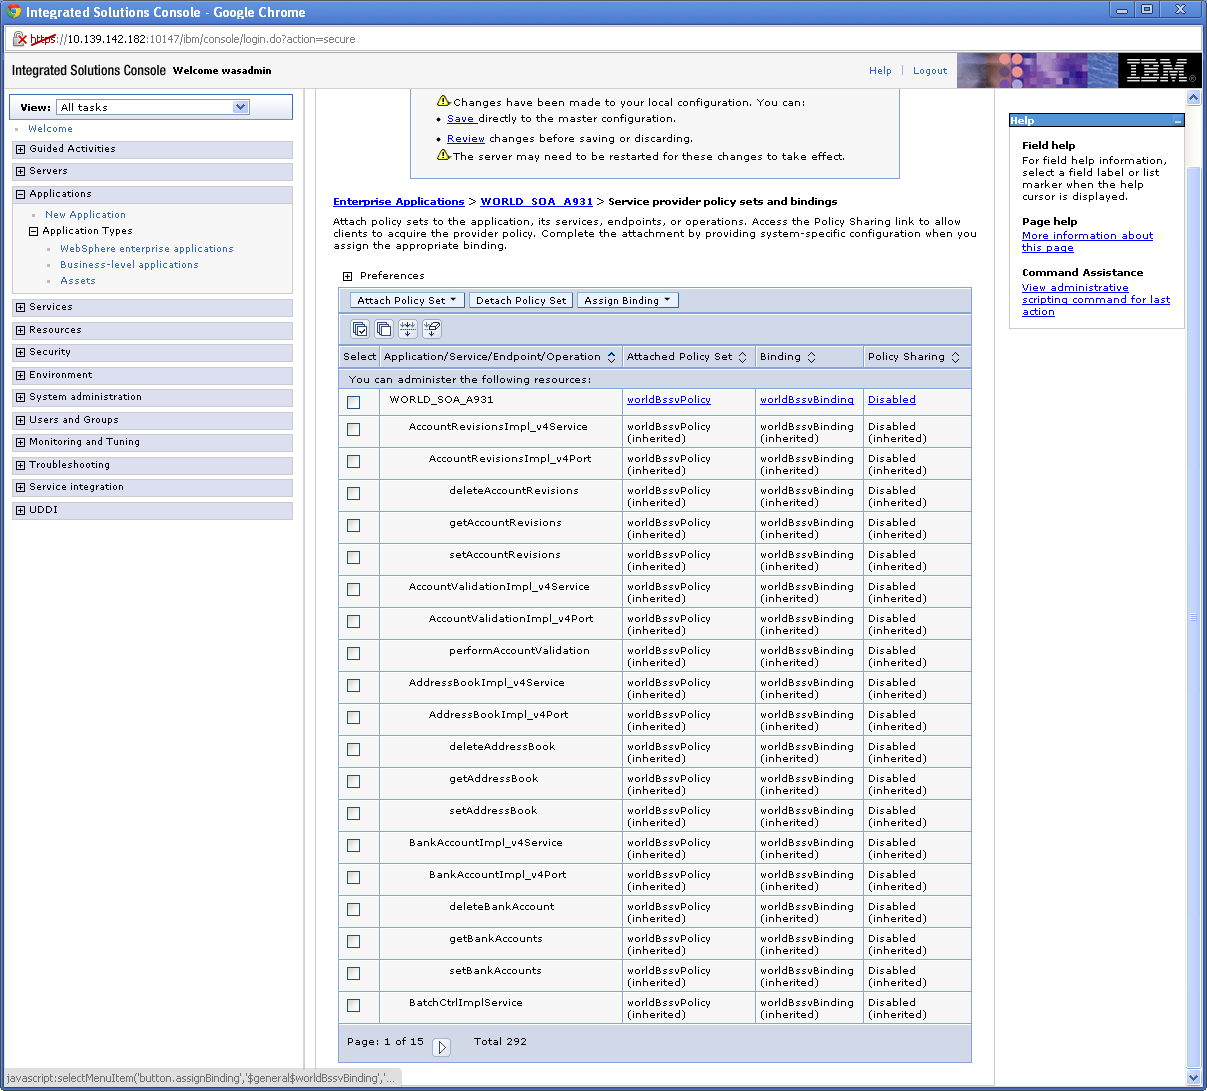
Description of ''Figure 5-50 Enterprise Applications screen''
-
Click Save.
-
On the left hand menu, select WebSphere enterprise applications.
Figure 5-51 Enterprise Applications screen
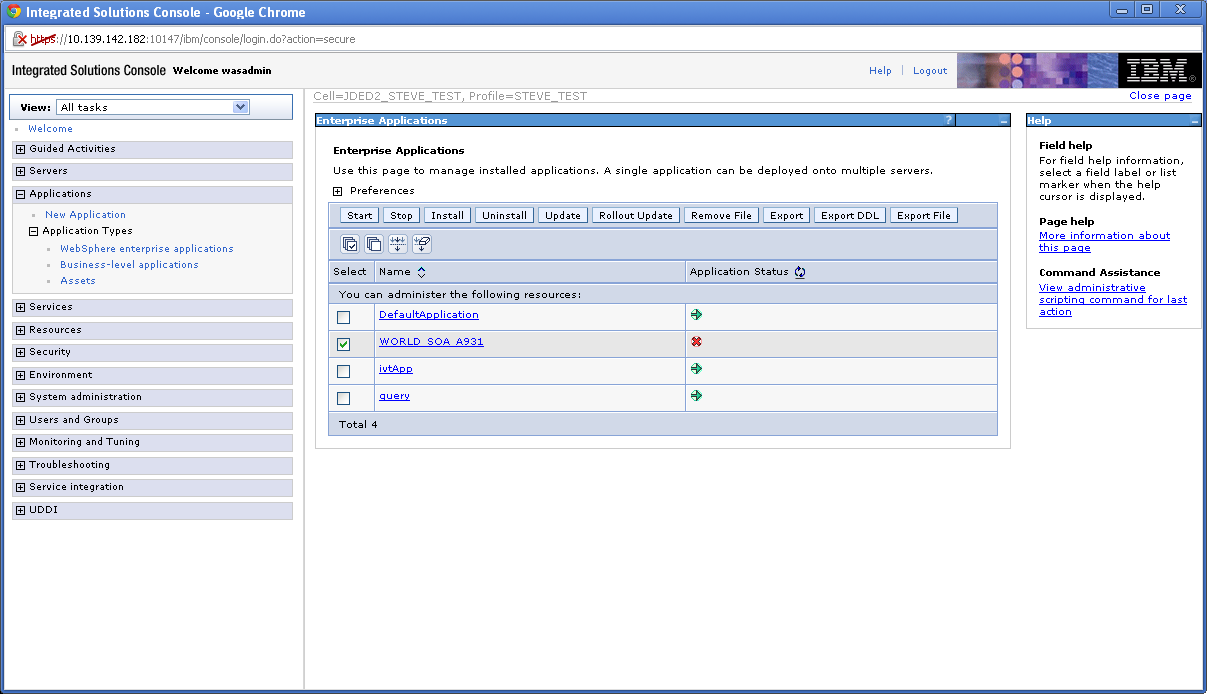
Description of ''Figure 5-51 Enterprise Applications screen''
-
Check the box next to WORLD_SOA_A931 and click Start.
Figure 5-52 Enterprise Applications screen
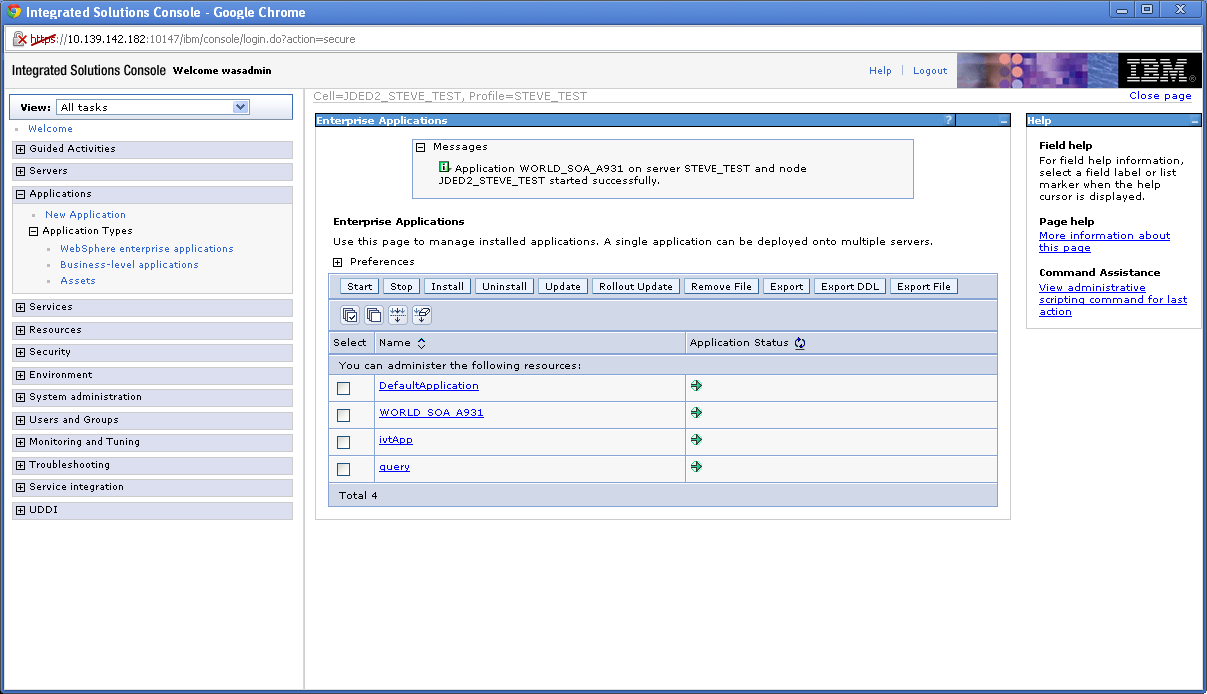
Description of ''Figure 5-52 Enterprise Applications screen''