26 Work with the Quick Start Application Tool
This chapter contains these topics:
-
Section 26.4, "Browsing or Updating the Screens or Reports (Optional),"
-
Section 26.7, "Submitting the Program to Compile (Optional),"
The Quick Start Application Tool allows you to quickly create initial versions of programs, screens, and reports. After you create a new version, you can access the Screen or Report Design Aid or the Program Generator and make adjustments to the version.
The tool provides an easy way for you to create a prototype. This program allows you to:
-
Create the program that you associate with the screen or report.
-
Select fields dynamically from the master and detail files, as well as other database files.
-
Compile your screen or report.
-
Create specifications for the Program Generator.
-
Create and compile your source code, optionally.
-
Create a Control Language (CL) program to launch your new screen or report program.
The Quick Start Application Tool recognizes whether the program is a subfile. Additionally, this tool:
-
Adds a hidden field to the screen for subfile maintenance.
-
Sets the Entry Optional field to N for subfile maintenance.
Quick Start cannot:
-
Define which VC0 fields to use as defaults in the version.
-
Add the CL program to a menu.
-
Add a Fold Area.
26.1 Quick Start Process
The Quick Start Application Tool is a set of steps that allow you to:
-
Define the Application
-
Define the type of program you want to create
-
Define the screen options
-
Define the report options
-
Define the files and libraries
-
Define the source file to use to create the application
-
-
Select Data Fields
-
Select the individual data fields to display on the screen or report using JD Edwards World Screen/Report Design Aid
-
Sequence the fields any way you choose.
-
-
Browse or update the screens or report you are creating (optional).
-
Compile screens or the report (optional).
-
Modify Specifications (optional).
-
Using the File Specifications, the Detailed Programming Facility, and the Help Instructions based on the program type you select.
-
Compile the program. Even if you compile the screen or report in a previous step, the system prompts you to do so again.
-
-
Compile the program (optional).
-
Update Data Dictionary and Glossary.
|
Note: As you create a version, you should continue through the steps and complete the entire process. The optional steps allow you to perform additional functions that relate to the process. If you exit the process and access the tool at a later time, the system enters all of the information on the Quick Start Application Tool screen from the previous version you created if you did not sign off the system. |
From Computer Assisted Programming (CAP) (G93), choose Quick Start Application Tool
26.2 Defining the Application
You create versions of programs, screens, and reports by defining the initial criteria.
The system enters all of the information on this screen from the previous version you created if you did not sign off the system.
On Quick Start Application Tool, complete the following fields:
-
Description
-
Program Name
-
Create Program(Y/N)?
-
Screen or Report Name
-
Select a Program Type(1-4)
-
Action Code
-
Selection Option
-
Report Detail Subheadings
-
Report Total Subheadings
-
Report Totals
-
Master File
-
Library Name
-
Detail File(optional)
-
Library Name
-
Source File Name
-
Source Library Name
-
Object Library Name
Figure 26-1 Quick Start Application Tool screen

Description of "Figure 26-1 Quick Start Application Tool screen"
| Field | Explanation |
|---|---|
| Description | Use this field to enter a short one-line description of the program you are creating. |
| Program Name | Type the name of the RPG program that the CL program will call. This is a required field. Do not leave it blank.
The name of the CL program generated will be the same as the RPG program name, but prefaced with a J instead of a P. |
| Create Program (Y/N)? | Indicate in this field whether you want to create the RPG program. |
| Screen or Report Name | Type the screen or report file name associated with the program. This field is only required for program type 2. |
| Select a Program Type (1-4) | Type one of the following in this field to indicate the type of program you are creating:
1 – Standard Interactive Program 2 – Standard Report Program with DREAM Writer 3 – File Processor 4 – File Processor with DREAM Writer |
| Action Code | Enter Y if you are creating a screen with an Action Code field.
Enter N if you are not creating a screen with an Action Code field. |
| Selection Option | Enter Y if you are creating a screen with a selection option. |
| Report Detail Subheadings | Enter Y if you are creating a report with detail subheadings. |
| Report Total Subheadings | Enter Y if you are creating a report with total subheadings. |
| Report Totals | Enter Y if you are creating a report with totals. |
| Master File | Type the name of the data file to use for the program you are creating. This field is required for program types 2, 3, and 4. |
| Library Name | Type in the name of the library your master file is in. |
| Detail File (optional) | Type in the name of an optional secondary file from which you want to select data. |
| Library Name | Type in the name of the library your secondary file is in. |
| Source File Name | The member ID of the file used by the program. |
| Source Library Name | File and library that contains the file source. |
| Object Library Name | Enter the name of the object library where the program you are creating will reside. This is defaulted from the CASE Profiles. |
26.3 Selecting Data Fields
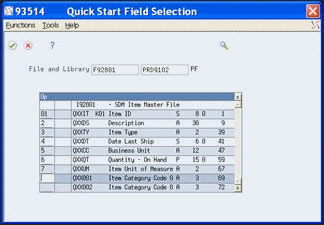
The system displays key fields from each data file. You can select, deselect or resequence the fields that you want to use in your program.
The fields from the primary data file display first in the list, followed by the fields from the secondary data file, if you entered one.
-
On Quick Start Field Selection, perform any of the following:
-
To select a field, enter 1 in the Option field to the left of the field name and click Enter.
-
To specify heading or subfile fields enter 1 or 2, respectively, in the column to the right of the selection and sequencing column.
This field only displays if the program you are creating is a transaction processor.
-
To sequence a field, enter the sequence number in the Option field to the left of the fields you want to use in your program and click Enter.
-
To add fields, enter the names of additional fields on the screen.
-
-
Press (F3) to continue.
-
The system prompts you perform one of the following:
-
Exit (F3) to exit the program.
-
Replace (F6) to continue to the next step in the process.
-
Figure 26-2 Quick Start Field Selection screen
Description of "Figure 26-2 Quick Start Field Selection screen"
26.4 Browsing or Updating the Screens or Reports (Optional)
At this point in the process, you can view or update the screens or reports you are create using the browse or update mode.
To browse or update screens or reports
On Quick Start Application Tool, enter 1 to browse or 2 to update.
To continue the steps to create a version, enter 8.
To exit the program, enter 9 and return to the Computer Assisted Programming (CAP) menu.
Figure 26-3 Quick Start Application Tool (Browse or Update) screen

Description of "Figure 26-3 Quick Start Application Tool (Browse or Update) screen"
26.5 Compiling the Screens or Report (Optional)
At this point in the process, you can compile the screens or report. Before you compile the program, you must complete this step.
To compile the screens or report
On Quick Start Application Tool, enter 3 to compile the screens or reports.
The system retrieves the object library for the compile from the CASE Profiles.
To continue the steps to create a version, enter 8.
Figure 26-4 Quick Start Application Tool (Compile) screen

Description of "Figure 26-4 Quick Start Application Tool (Compile) screen"
26.6 Modifying Specifications (Optional)
At this point in the process, you can access the Program Generator Specifications screen to modify specifications.
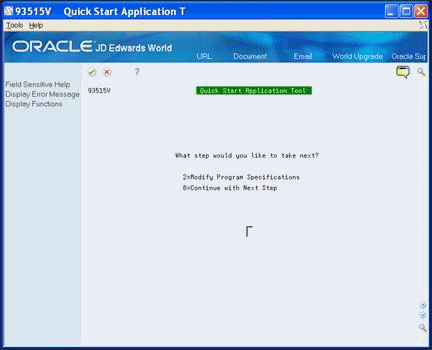
On Quick Start Application Tool, enter 2 to modify program specifications.
The Program Generator Specifications screen displays.
To continue the steps to create a version, enter 8.
Figure 26-5 Quick Start Application Tool (Modify) screen
Description of "Figure 26-5 Quick Start Application Tool (Modify) screen"
26.7 Submitting the Program to Compile (Optional)
Do not submit the program to compile until the screens or report successfully compile.
To submit the program to compile
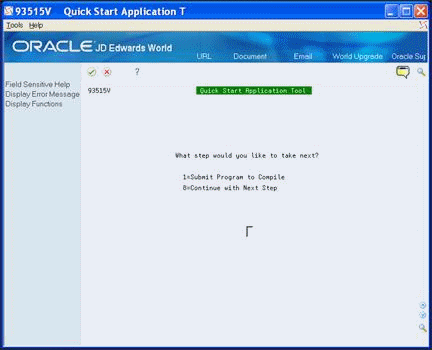
On Quick Start Application Tool, enter 1 to compile the screens or reports.
To continue the steps to create a version, enter 8.
Figure 26-6 Quick Start Application Tool (Submit to Compile) screen
Description of "Figure 26-6 Quick Start Application Tool (Submit to Compile) screen"
26.8 Updating the Data Dictionary and Glossary
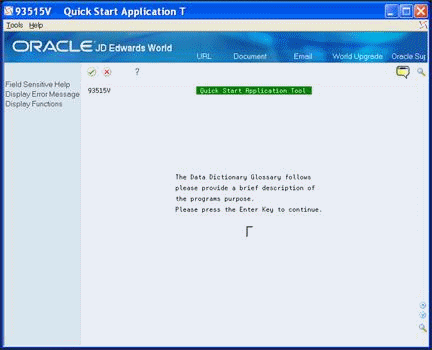
You must enter the purpose of the program on the Data Item Glossary Revisions screen.
To update the data dictionary and glossary
-
On Quick Start Application Tool, click Enter to continue.
Figure 26-7 Quick Start Application Tool (Update Data Dictionary) screen
Description of "Figure 26-7 Quick Start Application Tool (Update Data Dictionary) screen"
-
On Data Item Glossary Revisions, enter the description of the program's purpose that displays in the online help instructions.
Figure 26-8 Data Item Glossary Revisions screen
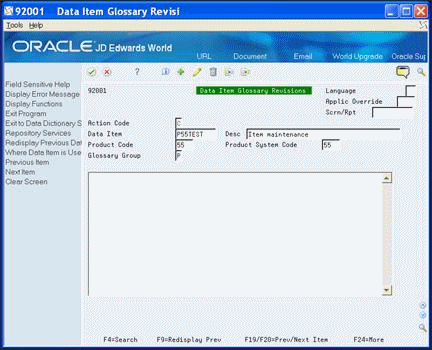
Description of "Figure 26-8 Data Item Glossary Revisions screen"
-
Click Add to add the program purpose statement.
-
Click Exit (F3).
-
On Quick Start Application Tool, perform one of the following:
-
Click Enter to exit the program and return to the menu.
-
Enter one of the following:
-
1 to Return to the Data Field Pick List
-
7 to Return to Quick Start Definition
-
-
Figure 26-9 Quick Start Application Tool (Exit) screen
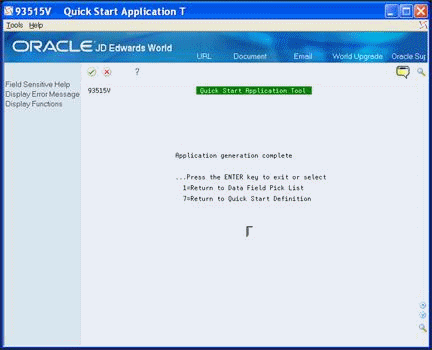
Description of "Figure 26-9 Quick Start Application Tool (Exit) screen"