18 Obtain and Upload FCI Numbers from SEFAZ
This chapter contains the following topics:
18.1 Overview
Federal Senate Resolution No. 13, dated April 25, 2012, changed to 4% the rate of the ICMS (Tax on circulation of Goods and Services) applicable to interstate transactions involving imported goods not submitted to industrial processing, as well as to imported goods submitted to industrialization resulting in imported content higher than 40%. It represents the goods that have been subjected to any transformation, processing, assembling, packaging, repackaging, renovation or refurbishment process, but its Import Content still accounts for more than 40% of its composition.
|
Note: The 4% tax rate and the 40% threshold on imported goods are the amounts determined by the resolution when the resolution was published. You should verify the current tax rates and thresholds before you process transactions subject to ICMS tax. |
You must include in some fiscal documents information about the imported content for certain transactions involving the interstate sales of goods with imported content. Because the ICMS tax rate differs depending on the import content, if an item includes imported content, you must enter and maintain the following information about each items's origin and import content:
-
Item origin code
-
Import content
-
Value of the portion from abroad
-
Total value of the interstate outbound item
You use the Item Master Additional Information Brazil (P4101ABR) and Item Branch Additional Information - Brazil (P76412B) programs to enter item information. When you enter import information, the system saves the data to the Item Master Tag File Res. 13 file (F76B431) for item records, and to the Item Location tag File Res. 13 (F76B432) for item/branch records.
See Chapter 17, "Enter Additional Item Master Information"
After you enter the item origin and import content information, you send the information in an electronic TXT file to the Brazilian Fiscal Authority (Receita Federal Do Brazil), known as SEFAZ. The electronic file is known as the Content Information Form (FCI). SEFAZ returns the file with an FCI number and other validation information for each item in the file. You then add the FCI numbers to your item and item/branch records so that the numbers can be included in documents and reports as required. You submit item information and request an FCI number for only those items that require it according to Resolution 13 of 2012.
18.1.1 Process to Obtain FCI Numbers from SEFAZ
To obtain FCI numbers from SEFAZ and update your item records with the FCI number, complete these steps:
-
Enter import content information in your item records.
-
Generate the FCI text file in test mode.
-
Review the report generated in test mode to identify errors that you must resolve.
-
After errors are resolved, generate the FCI text file in final mode.
See Section 18.3, "Generate the FCI TXT File in Final Mode to Submit to SEFAZ"
-
Submit the FCI text file to SEFAZ.
The JD Edwards World system does not support the transmission of the file. You must determine your own transmission process.
-
Upload the returned file to your system.
-
Use a manual or batch process to upload the returned FCI file to your system.
18.1.2 Before You Begin
Before you begin the tasks in this section:
-
Verify that a next numbering scheme is set up for this ICMS process on line 7 of system 76B.
The process uses the next numbering scheme to number the jobs.
-
Add the item origin to the ICMS tax rate information that you set up in the ICMS Tax Revision program.
-
Verify that the item origin and imported content information as required by Resolution 13 of 2012 exists in the Item Master Tag File Res. 13 (F76B431) if you generate the text file based on the item record, or in the Item Location tag File Res 13 (F76B432) if you generate the text file based on the item/branch record.
See Section 18.2.1, "Item Data Included in Report and TXT File"
18.2 Generate the FCI TXT File in Test Mode
From Localizations - Brazil (G76B), choose Inventory Management.
From Inventory Management (G76B41), choose ICMS Resolution 13.
From ICMS Resolution 13 (G76B4112), choose TXT Generation.
You run the FCI TXT Job Generation program (P76B4170) to generate the text file that you will submit to SEFAZ to request FCI numbers for your items with imported content. When you set processing options for the FCI TXT Job Generation program, you specify these factors:
-
Whether to run the program in test or final mode.
-
Whether to generate the files based on the item record in the F76B431 file or based on the item/branch record in the F76B432 file.
-
Whether to include in the text file all item or item/branch records or only those records that do not have an FCI number assigned.
-
Whether to generate a report.
-
Additional record selection criteria, such as the company.
When you run the FCI TXT Job Generation program, the program runs the P76B4172 – FCI TXT Generation Block 5 by Item (P76B4172) program if you set the processing option to generate the text file for items in the F76B431 table, or runs the FCI TXT Generation Block 5 by Item/Plant program (P76B4173) if you set the processing option to generate the text file for item/branch records in the F76B432 table.
You run the FCI TXT Job Generation program in test mode before you run it in final mode so that you can review and modify records if necessary. In test mode, Set the processing option to generate a report (R76B4170) that lists the items that will be included in the text file, and any errors that occur. If an error occurs, such as missing information for an item, you must correct the record in the F76B431 or F76B432 file.
After you generate the R76B4170 report and correct records with errors, run the FCI TXT Job Generation program in final mode to generate the text file that you will submit to SEFAZ and to populate database files.
See Section 18.3, "Generate the FCI TXT File in Final Mode to Submit to SEFAZ"
18.2.1 Item Data Included in Report and TXT File
If you request an FCI number for an item, the system includes the following information from the F76B431 or F76B432 file for each item:
-
Item Number
-
Item description
-
Fiscal classification
-
Stock unit of measure
-
Amount of the Portion From Abroad
-
Total Amount of the Interstate Outbound
-
CI - Import Content Percentage
If a value exists for the GTIN (Global Trade Item Number), then the program includes that value in the text file.
Except for the Global Trade Item Number, values are required for the information in the above list. If the required information does not exist in the item record, you can use the Item Master Additional Information - Brazil (P4101ABR) and Item Branch Additional Information - Brazil (P76412B) programs to enter data for each item record.
18.2.2 Processing Options
See Section 65.9, "Processing Options for FCI Txt File Generation (P76B4170)"
18.2.3 Reviewing the Test File Report
If you set a processing option to do so, the FCI Txt File Generation program (R76B4170) generates a report that you can use to identify errors in the item records. You must correct errors in the item records before generating the TXT file in final mode.
This image shows an example of the report:

18.3 Generate the FCI TXT File in Final Mode to Submit to SEFAZ
From Localizations - Brazil (G76B), choose Inventory Management.
From Inventory Management (G76B41), choose ICMS Resolution 13.
From ICMS Resolution 13 (G76B4112), choose TXT Generation.
After you have corrected errors, if any, in the item records, you can run the FCI TXT Job Generation program in final mode. In final mode, the system generates a text file and writes to these database files:
-
FCI Flat File (F76B4171)
This file contains the text file that you submit to SEFAZ. When you name the file in the Spooled File Export Parameters, you must name the file using the extension.txt.
-
FCI Header Information (F76B4174)
The F76B4174 file includes information for the header record (Block 0 of the text file), the issue date, the status of the file, and user information such as the user ID and workstation. When you generate the text file, the status is 0 (Sent to SEFAZ). The Update Files from Flat File program (P76B4176) updates the status and other fields when you process the file that SEFAZ returns to you.
-
FCI Status Update Detail (F76B4175)
This file includes information about the text file that you send, such as the job number and date; the items that appear in block 5 of the text file, such as the item number, import content percentage, fiscal code, status, and whether the item is processed; and information about the user who generated the text file.
|
Note: If you set a processing option to do so, the program also generates a report. |
After you generate the text file, you submit it to SEFAZ. The JD Edwards World software does not support the electronic submission of the text file to SEFAZ.
18.3.1 Data Included in the TXT File
When you run the FCI TXT Job Generation program in final mode, the program writes the text file generated to the F76B4171 file. The values in the file are separated using a pipe (|). If a value is missing, the program generates only the pipe as a placeholder for the field. For example, suppose that you have an item record that include the item description (concrete), the fiscal classification (300400500), and the item number (3338). These values would appear in the text file as:
concrete|300400500|3338
If the fiscal classification number was missing, then the values would appear as:
concrete||3338
This table describes the blocks and registers in the TXT file:
| Block | Description |
|---|---|
| Block 0: Opening File | Register 0000 is the Entity Identification section of block 0. It includes the information such as the CNPJ number and mailing name of the company. It also includes fields for information that SEFAZ will provide, such as the receipt code, receipt date, and validated date of the file.
Register 0001 is the Open Identification of Block section. It includes fixed values for the fields; no data for this register is obtained from JD Edwards World files. Register 0010 is the Entity/Contributor Identification section. It includes data such as tax IDs and address information. |
| Block 5: Item Information | The JD Edwards World software populates block 5 with data from the Item Master Tag File Res. 13 file (F76B431) for item records, or from the Item Location tag File Res. 13 (F76B432) for item/branch records. You set a processing option to specify whether to use item or item/branch records.
Register 5010 (Open Block of Items) includes a fixed value. Register 5020 is the Item Information section of block 5. It includes information such as the item number, fiscal classification, unit of measure, percentage of imported content, and other information. When you generate the text file of item/branch information, the program writes the item number as the concatenation of the internal item number, the branch plant, and the location. The text file also includes fields for the FCI number and the validation indicator. When you send the text file to SEFAZ, the FCI and validation indicator fields are blank. SEFAZ provides the data for these fields when it returns the file to you. Register 5990 is the End Block 5 register. It includes the total lines in block 5. |
| Block 9: Total of Registers | Register 9001 is the Open Block 9 section, which includes a fixed value. Register 9900 is the File Registers section, which includes information on the number of records in the file. Register 9990 is the End Block register, which includes the total count of lines in block 9. Register 9999 indicates the end of the digital file. |
18.3.2 FCI Statuses
When you generate the TXT file in final mode, the system assigns a value of 0 (Sent to the Fiscal Authority) to the records in the text file (F76B4171). When you process the returned file from SEFAZ using the Update Files from Flat File program (R76B4176), the system updates the status to 1 (approved) or 2 (error). You can also manually update the status in the F76B4171 file by using the Job Revision/Status Update program (P76B4175). In addition to codes 1 and 2, you can manually enter code 3 (cancelled).
You can have only one job in the F76B4174 table with a status of 0. You must change the status of an existing job to another status before you can generate a new job for a new batch of item files.
The system validates the values for the status against the values in the Process Status UDC (76B/SF) table.
18.4 Upload Returned FCI TXT File
After you submit a text file with item information to SEFAZ, SEFAZ sends you a return file that includes the FCI number and validation information for the items. You upload the returned file to into your system and into the F76B4171 file.
To upload the returned file:
-
Section 18.4.2, "Transfer the Fiscal Authority TXT File to Your iSeries Machine"
-
Section 18.4.3, "Review Your PC FCI File in Your iSeries Library"
-
Section 18.4.4, "Copy the Content of the PC FCI File to Your Workfile"
18.4.1 Create a Workfile on Your iSeries Machine
To create a workfile on your iSeries machine:
-
Make a copy of F76B4171 and save it to a work library.
Figure 18-2 Create Duplicate Object (CRTDUPOBJ) screen
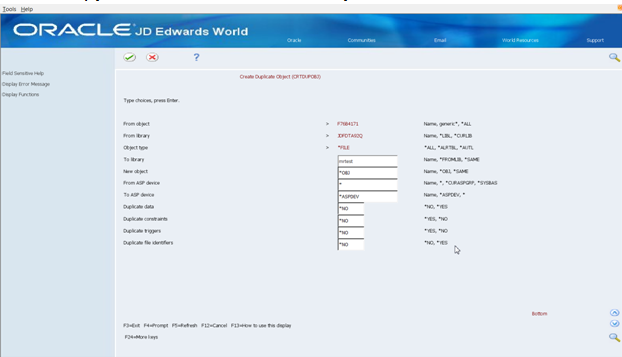
Description of ''Figure 18-2 Create Duplicate Object (CRTDUPOBJ) screen''
-
Execute command 40 so that you can verify that the Field Description matches the original file.
Figure 18-3 File Field Descriptions screen
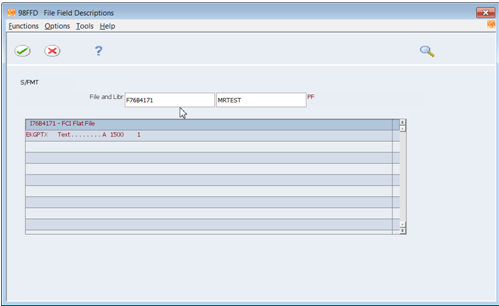
Description of ''Figure 18-3 File Field Descriptions screen''
18.4.2 Transfer the Fiscal Authority TXT File to Your iSeries Machine
To transfer the fiscal authority TXT file to your iSeries machine:
-
Go to the iSeries Navigator and select the Send File to Host from the Actions menu.
-
On the Data Transfer to System i screen, choose Create System i Database File from the Tools menu.
Figure 18-4 Data Transfer to System I screen
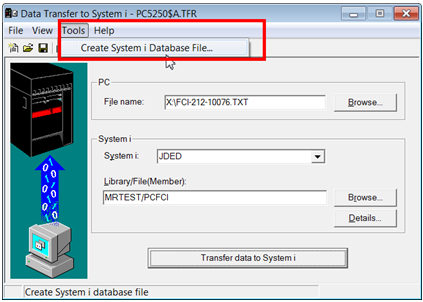
Description of ''Figure 18-4 Data Transfer to System I screen''
-
Follow the system prompts to create the PC FCI database file.
The prompts return you to the Data Transfer to System i screen.
-
Select the Send File to Host from the Actions menu.
-
On the Data Transfer to System i screen, complete these fields:
-
File Name
-
System
-
Library/File (Member)
Enter the Library to which you want to transfer the file. The file name must be different from the workfile name.
Figure 18-5 Data Transfer to System i screen
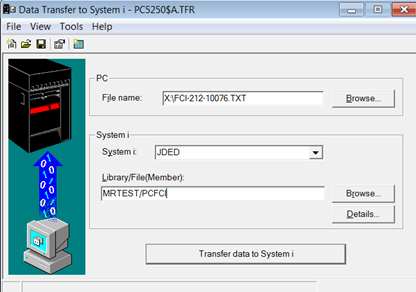
Description of ''Figure 18-5 Data Transfer to System i screen''
-
-
Press the Transfer data to System i button.
The system displays this screen if the transfer completes successfully:
Figure 18-6 Transfer to System I Complete screen
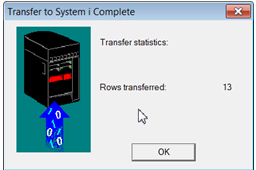
Description of ''Figure 18-6 Transfer to System I Complete screen''
18.4.3 Review Your PC FCI File in Your iSeries Library
To review your PC FCI file, open the file in your iSeries library.
18.4.4 Copy the Content of the PC FCI File to Your Workfile
Enter the following command to copy the content to your workfile:
CPYF FROMFILE(XXXXXX/YYYYY) TOFILE(ZZZZZZ/F76B4171) MBROP(*REPLACE) FMTOP(*NOCHK)
where XXXXX and ZZZZZ are the Library, and YYYYY is the PC FCI database file name that you set up on you iSeries machine.
|
Note: You might receive a warning message stating that the buffer length is longer than the record member in the database file. You can override the warning message and continue with the process. |
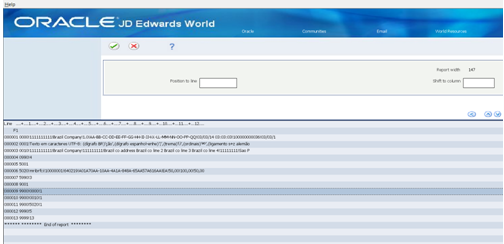
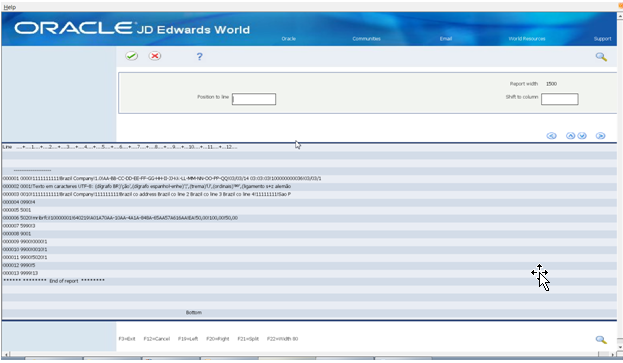
18.4.5 Review the Copied Workfile for Accuracy
This image provides an example of a copied workfile:
18.5 Update Database Files
From Localizations - Brazil (G76B), choose Inventory Management.
From Inventory Management (G76B41), choose ICMS Resolution 13.
From ICMS Resolution 13 (G76B4112), choose Update File from Flat File (batch program)
or
From ICMS Resolution 13 (G76B4112), choose Job Revision/Status Update (interactive program)
18.5.1 Batch Process
You can use the Update Files from Flat File batch program (P76B4176) to update the FCI files (F76B4174 and F76B4175) and item or item/branch files (F76B431 and F76B432). The processing options in the program enable you to specify the position of the data that SEFAZ provides, such as the receipt date, validation code, and the FCI number.
|
Caution: Carefully review the processing options for P76B4176 before executing the program. If you enter the wrong file name and library, you might update your Item Master Tag File Res. 13 (F76B431) and Item Location tag File Res 13 (F76B432) production files with incorrect data. |
The process writes the FCI number to the F76B431 file for all branch/plants for which the item exists if you set the processing option to process the text file by item. It writes the FCI number to the F76B432 file if you set the processing option to process the text file by item/branch. The process also writes the FCI number to the FCI detail file (F76B4175). The process writes the other data, such as the receipt date and validation code, to the FCI header file (F76B4174).
18.5.2 Manual Process
Use the Job Revision/Status Update program (P76B4175) to update header information for the TXT file that resides in the F76B4175 file, and use the FCI Status Update video (V76B4177) to modify the header record in the F76B4174 table. You can update the status, FCI number, and other information in the files.
The Job Revision/Status Update program displays a line for each item record in the file. You can enter a status code in the OP (Option) field to complete the processing of the text file. Valid status codes are stored in the FCI Status (76B/SF) UDC table. Valid values are:
-
0: Sent to the Fiscal Authority
-
1: Approved
-
2: Error
-
3: Cancelled
This image illustrates the Job Revision/Status Update screen:
Figure 18-9 Job Revision/Status Update screen

Description of ''Figure 18-9 Job Revision/Status Update screen''
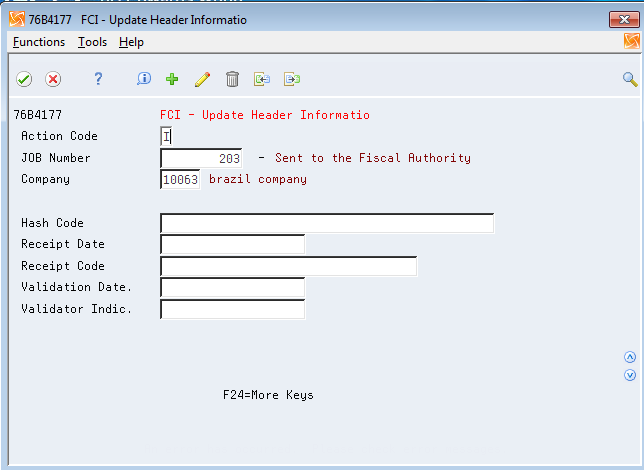
You access the FCI Status Update program (X76B4177) by pressing F5 on the Job Revision/Status Update screen. This image illustrate the FCI Update Header Information screen:
Figure 18-10 FCI Update Header Information screen
Description of ''Figure 18-10 FCI Update Header Information screen''
Complete the fields on the screen with the information that the fiscal authority sent to you.
18.5.3 Processing Options
See Section 65.10, "Processing Options for Update Files from Flat File (P76B4176)"