16.3 Creating Breadcrumbs
This section explains how to create and manage breadcrumbs. Breadcrumbs provide users with hierarchical navigation. A breadcrumb is a hierarchical list of links that display using templates. You can display a breadcrumb as a list of links or as a breadcrumb path.
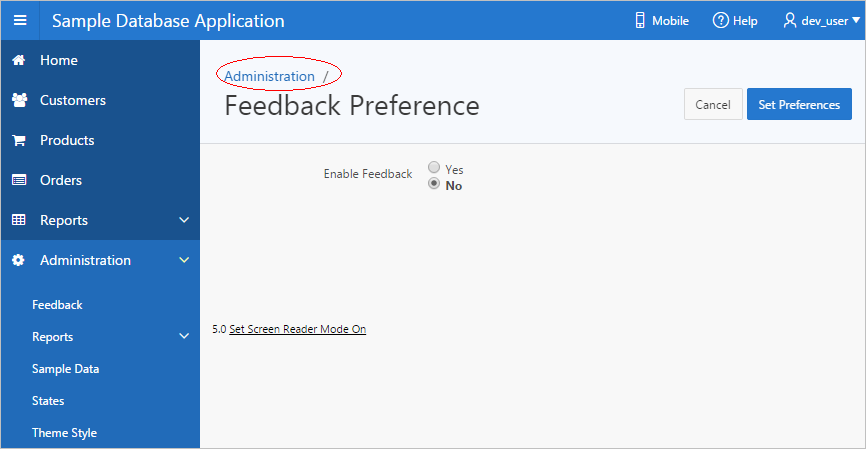
16.3.1 What Are Breadcrumbs?
A breadcrumb is a hierarchical list of links that indicates where the user is within the application from a hierarchical perspective. Users can click a specific breadcrumb link to instantly view the page. You use breadcrumbs as a second level of navigation at the top of each page, complementing other user interface elements such as tabs and lists.
Description of the illustration ''bc_menu.png''
16.3.2 Creating a Breadcrumb While Creating a Page
To create a breadcrumb while creating a page:
-
Run the Create Page Wizard to add a new page. See "Managing Pages in a Database Application."
During the wizard, a Breadcrumb option appears. The actual page on which this list displays depends upon the type of page you are creating.
-
From the Breadcrumb list, select Breadcrumb or select an existing breadcrumb (if applicable).
-
If you select Breadcrumb:
-
Parent Entry - Select a parent page (if applicable) or select No parent entry.
-
Entry Name - Enter a name for the breadcrumb.
-
-
Follow the on-screen instructions.
16.3.3 Creating a Breadcrumb Manually
This section describes how to create breadcrumbs manually.
16.3.3.1 About Creating a Breadcrumb Manually
To create breadcrumbs manually, you must add a breadcrumb to each page in your application as follows:
-
Step 1: Create the breadcrumb by running the Create/Edit Breadcrumb Wizard. You can access this wizard from the Shared Components page, Page Designer, or Component View. See "Creating Breadcrumbs."
-
Step 2: Add entries to the breadcrumb. See "Adding Breadcrumb Entries."
-
Step 3: Add the breadcrumb to a page by creating a region. See "Adding Breadcrumb Regions."
16.3.3.2 Creating Breadcrumbs
This section describes the various way to create breadcrumbs.
16.3.3.2.1 Creating Breadcrumbs as Shared Components
To create breadcrumbs from the Shared Components page:
-
On the Workspace home page, click the Application Builder icon.
-
Select an application.
-
On the Application home page, click Shared Components.
-
Under Navigation, click Breadcrumbs.
The Breadcrumbs page appears.
-
Click Create Breadcrumb.
-
Enter a name and click Create.
-
Add breadcrumb entries. See "Adding Breadcrumb Entries."
16.3.3.2.2 Creating a Breadcrumb from Page Designer
To create a breadcrumb from Page Designer:
-
View the page in Page Designer. See "Viewing a Page in Page Designer."
-
On the Page Designer Toolbar, click the Create menu and select Shared Components.
-
On Create Application Component, select Breadcrumb and click Next.
-
In Breadcrumb name, enter a name for this breadcrumb and click Create.
-
Once you create a named breadcrumb, you add breadcrumb entries. See "Adding Breadcrumb Entries."
16.3.3.2.3 Creating Breadcrumbs from Component View
To create breadcrumbs from a Component View:
-
View the page in Component View. See "Viewing a Page in Component View."
-
Click the Create menu and select Shared component.
-
On Create Application Component, select Breadcrumb and click Next.
-
In Breadcrumb name, enter a name for this breadcrumb and click Create.
-
Once you create a named breadcrumb, you add breadcrumb entries.. See "Adding Breadcrumb Entries."
16.3.3.3 Adding Breadcrumb Entries
To add a breadcrumb entry:
-
Navigate to the Breadcrumbs page:
-
Navigate to the Workspace home page.
-
Click the Application Builder icon.
-
Select an application.
-
Click Shared Components.
-
Under Navigation, click Breadcrumbs.
The Breadcrumbs page appears.
-
-
Select a breadcrumb to which to add entries.
-
Click Create Breadcrumb Entry.
-
Under Breadcrumb, select the page where this breadcrumb entry displays.
-
Under Entry:
-
Sequence - Indicate the order in which breadcrumb entries appear. The sequence determines the order of evaluation.
-
Parent Entry - Identify the parent of this entry. Any given breadcrumb should have only one root node, identified as an item with no parent ID.
-
Short Name - Identify the short name of this breadcrumb entry. Both the short and long names can be referenced from the breadcrumb template.
-
Long Name - Identify the long name of this breadcrumb entry. Both the short and long names can be referenced from the breadcrumb template.
-
-
Under Target, specify the target location:
-
Target is a - Select Page in this Application.
-
Page - Specify the target page number.
To reset pagination for that page, select reset pagination for this page.
-
Request - Enter text for which you would like to set the built-in application item called
REQUEST. This is also the item that is set with the name of a button that was clicked. -
Clear Cache - Enter the page numbers (separated by commas) for those pages for which you would like to clear the user's session state.
-
To set session state (that is, give a listed item a value):
-
Set these items - Enter the list of application item names (separated by commas) for which you would like to set the session state (give the listed item a value).
-
With these values - Enter a comma delimited list of values for the items specified in Set these items. You can specify static values or substitution syntax (for example,
&APP_ITEM_NAME.).You can specify static values or substitution syntax (for example,
&APP_ITEM_NAME.). Note that item values passed tof?p=in the URL cannot contain a colon. Additionally, item values cannot contain commas unless you enclose the entire value in backslashes (for example,\1234,56\).
-
-
-
For Conditions:
-
Condition Type - Select a condition type from the list. This condition must be met in order for this component to be rendered or processed.
-
Enter an expression in the fields provided.
-
-
For Authorization, optionally select an authorization scheme. This authorization scheme must evaluate to TRUE in order for this component to be rendered or otherwise processed.
-
For Configuration, select a build option for this component. Build options are predefined settings that determine whether or not components within an application are enabled.
-
Click Create Breadcrumb Entry.
Repeat these procedures for each breadcrumb entry you create.
16.3.3.4 Adding Breadcrumb Regions
A region is an area on a page that serves as a container for content. Once you create a breadcrumb and a breadcrumb template, the next step is to create a region. Once you create a breadcrumb region, you can add a breadcrumb to a page.
See Also:
"Creating a New Template" and "Breadcrumb Templates" for information about changing menu display16.3.3.4.1 Adding a Breadcrumb Region in Page Designer
To create a breadcrumb region in Page Designer:
-
Navigate to the appropriate page in Page Designer. "Viewing a Page in Page Designer."
Page Designer appears. Note the Gallery at the bottom of the page. Pass the cursor over a control or component to view a tooltip that describes it.
-
From the Gallery, Regions, select Breacrumb drag it to the appropriate location in Grid Layout.
Page Designer indicates what actions are required next.
The Messages tab displays a red or yellow badge indicating messages you need to address. The Message tab displays two types of messages
-
Errors - Error messages display in red. Selecting an error message displays the associated attribute in red in the Property Editor. You must address errors before a page can be saved.
-
Warnings - Warning messages display in yellow. Selecting a warning message displays the associated attribute in yellow in the Property Editor. You must address errors before a page can be saved. Note you can save a page without addressing warning messages.
-
-
View all attributes in the Property Editor. Select Show All from the Property Editor Menu.
Required attributes display a red triangle in the upper left corner next above attribute label.
-
Edit the appropriate attributes in the Property Editor.
Tip:
To learn more about an attribute, select the attribute in the Property Editor and click the Help tab in the center pane.-
Identification, Title - Enter a region title. The region title only displays when it is defined in the region template.
-
Layout, Sequence - Enter the display sequence for this item. The sequence and other grid layout settings determine where this item is displayed in relation to other items within the region.
-
Layout, Position - Select the template position used to display this region. The selections available are derived from the appropriate template positions defined within the current theme, for the page's user interface.
-
Appearance, Template - Select a region template.
-
Appearance, Item Display Position - Specify where page items display in relation to the main region content.
-
-
Click Save.
Repeat these procedures for each page where you would like to add breadcrumb navigation.
16.3.3.4.2 Adding a Breadcrumb Region in Component View
To create a breadcrumb region in Component View:
-
Navigate to the appropriate page. See "Viewing a Page in Component View."
-
Under Regions, click the Create icon.
-
For the region type, select Breadcrumb and click Next.
-
For Breadcrumb Container Region:
-
Region Title - Enter a title for this region.
-
Region Template - Select a region template.
-
Display Point - Select a Display Point.
Regions are organized by position (or Display Point). To determine the appropriate region position, click the flashlight icon. A graphical representation appears.
-
Sequence - Enter a number for the sequence. The sequence determines the order of evaluation.
-
Click Next.
-
-
For Breadcrumb:
-
Breadcrumb - Select the breadcrumb to be associated with this region.
-
Breadcrumb Template - Select a template.
-
Click Next.
-
-
Review the breadcrumb region information and click Next.
-
Click Finish.
Repeat these procedures for each page where you would like to add breadcrumb navigation.
16.3.3.5 About Creating Dynamic Breadcrumbs
To give users more exact context, you can include session state in breadcrumbs, making your breadcrumbs dynamic. For example, suppose a page in your application displays a list of orders for a particular company and you want to include the following breadcrumb:
Home > Orders > Orders for ACME Inc
In this example, ACME Inc not only indicates the page a user is on but also the navigation path. The Application Express engine stores the value of ACME Inc. in session state.
To create this type of dynamic menu, you must include a reference to a session state item in the breadcrumb's short name or long name. For example:
&COMPANY_NAME.
16.3.4 Editing Breadcrumbs
Once you create a breadcrumb, you can edit it on the Breadcrumbs page.
To edit a breadcrumb:
-
Navigate to the Breadcrumbs page:
-
Navigate to the Workspace home page.
-
Click the Application Builder icon.
-
Select an application.
-
On the Application home page, click Shared Components.
-
Under Navigation, select Breadcrumbs.
The Breadcrumbs page appears.
-
-
Select a breadcrumb.
-
Select a breadcrumb entry.
The Create/Edit page appears.
-
Edit the appropriate attributes.
To learn more about a specific item, see field-level Help. See "Viewing Field-Level Help."
-
(Optional) In the Breadcrumb Entry list on the right side of the page, you can select the Synchronize Breadcrumb With Page Name and Title option.
Selecting this option makes changing the name of a page and breadcrumb a one-step process. The information you provide for breadcrumb names is used to update the referenced page name and title.
-
Click Apply Changes.
See Also:
"Accessing Breadcrumb Reports"16.3.5 Reparenting Breadcrumb Entries
You can select a new parent for selected breadcrumb entries on the Reparent Entries page.
To reparent breadcrumb entries:
-
Navigate to the Breadcrumbs page:
-
Navigate to the Workspace home page.
-
Click the Application Builder icon.
-
Select an application.
-
On the Application home page, click Shared Components.
-
Under Navigation, select Breadcrumbs.
The Breadcrumbs page appears.
-
-
Select a breadcrumb.
The Entries page appears.
-
From the Tasks list, click Reparent Entries within this Breadcrumb.
The Reparent Entries page appears.
-
Use the navigation bar to edit or filter the view:
-
Breadcrumb - Identify the breadcrumb you want to edit and click Go.
-
Start With - Make a selection to restrict your view to a subset of the breadcrumb hierarchy and click Go.
-
-
From Reparent to, select the new parent.
-
Select the breadcrumbs entries you want to move and click Reparent Checked Entries.
16.3.6 Deleting Unused Breadcrumb Entries
To delete unused breadcrumb entries:
-
Navigate to the Breadcrumbs page:
-
Navigate to the Workspace home page.
-
Click the Application Builder icon.
-
Select an application.
-
On the Application home page, click Shared Components.
-
Under Navigation, select Breadcrumbs.
The Breadcrumbs page appears.
-
-
Select a breadcrumb.
The Breadcrumb Entries page appears.
-
From the Tasks list, click Delete Unused Breadcrumb Entries.
The Delete page appears.
-
Select the entries to remove and click Delete Checked.
16.3.7 Accessing Breadcrumb Reports
You can view the Breadcrumb Hierarchy, Grid Edit Breadcrumb, Breadcrumb Exceptions, Breadcrumb Utilization and Breadcrumb History reports by clicking the appropriate tab at the top of the Breadcrumbs page.
Note:
These reports only appear after you create a breadcrumb.To view Breadcrumb reports:
-
Navigate to the Breadcrumbs page:
-
Navigate to the Workspace home page.
-
Click the Application Builder icon.
-
Select an application.
-
On the Application home page, click Shared Components.
-
Under Navigation, select Breadcrumbs.
The Breadcrumbs page appears.
-
-
Click the appropriate tab:
-
Hierarchy - Click Hierarchy to view breadcrumbs by page and hierarchy. Click the page number to link to a page.
-
Grid Edit - Click Grid Edit to edit all breadcrumb names at once. Click the page number to link to a page.
-
Click Utilization to access the Breadcrumb Utilization report. This report lists breadcrumbs by page. Click the page number to go to a specific page.
-
History - Click History to view the Breadcrumb History report. This report lists recent changes to breadcrumbs.
-
You can change the appearance of the page by using the Search bar at the top of the page. See "Customizing Interactive Reports as an End User."