 button
from the User Maintenance tool bar. Add button
is disabled if you have selected any User ID in the grid. The New
User window is displayed.
button
from the User Maintenance tool bar. Add button
is disabled if you have selected any User ID in the grid. The New
User window is displayed.User Administration is one of the core functions of Security Management which involves administrators to create user definitions, user groups, maintain profiles, authorize users and user groups, and map users to groups, domains and roles.
User Administration refers to a process of controlling the user privileges in accessing the Infrastructure resources and is based on business requirements to provide access to view, create, edit, or delete confidential data. It also involves the administrator tasks to grant permissions based on user roles and requirements.
You (System Administrator) need to have SYSADM and METAAUTH function roles mapped to access User Administrator in LHS menu of Security Management. The options available under User Administrator are:
· User Group Folder Authorization
User Maintenance facilitates you to create user definitions, view, manage, modify, and delete user information. You can access User Maintenance by expanding User Administrator section within the tree structure of Navigation List to the left.
The User Maintenance window displays user details such as User ID, Name, Profile Name, Start, and End dates. You can also identify the user status if enabled to access the Infrastructure system. You can also search for a specific user or view list of existing users within the system.
To add a user definition in the User Maintenance window:
1. Select button
from the User Maintenance tool bar. Add button
is disabled if you have selected any User ID in the grid. The New
User window is displayed.
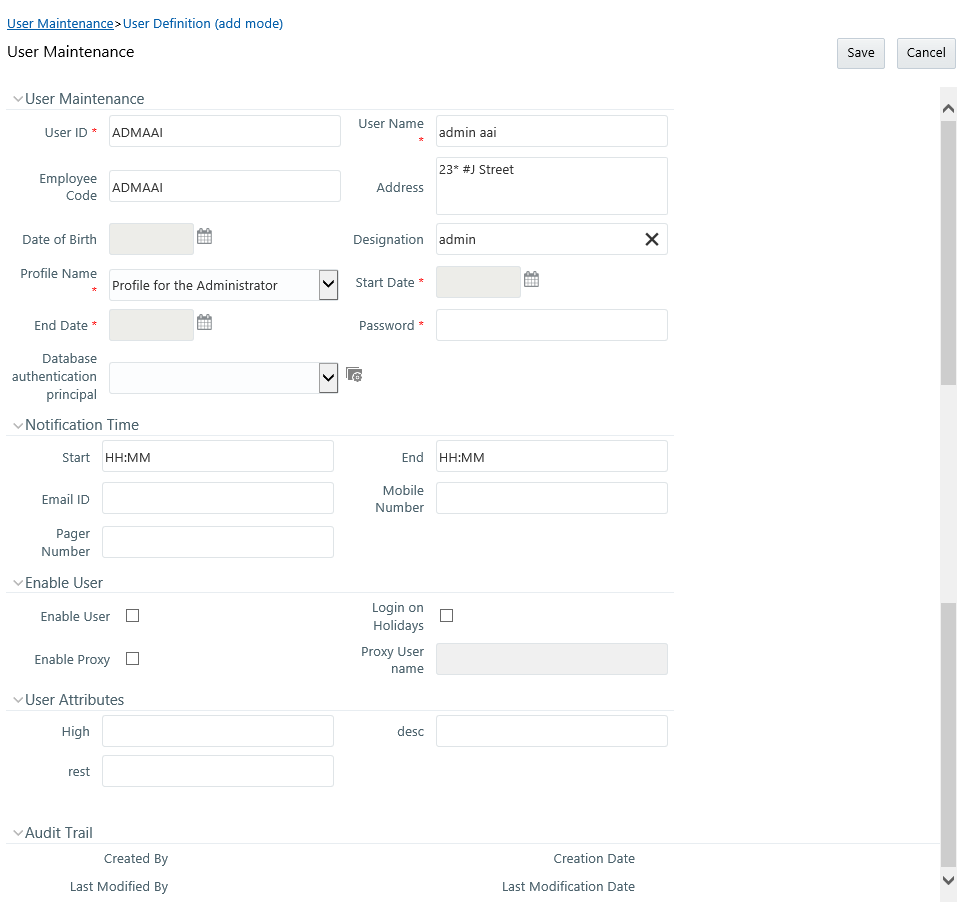
2. Enter the user details as tabulated.
Field |
Description |
Fields marked in red asterisk (*) are mandatory. |
|
User ID |
Enter a unique user id. Ensure that the User ID does not contain any special characters or spaces except “.”, “@”, “-”, and “_”. |
User Name |
Enter the user name. The user name specified here will be displayed on the Infrastructure splash window. Ensure that the User Name does not contain any special characters except “–”, “’” and “.”. |
Employee Code |
Enter the employee code. Ensure that the Employee Code does not contain any special characters or spaces except “.”, “@”, “-”, and “_”. If employee code is not provided, user ID will be taken as employee code. |
Address |
Enter the contact address of the user. It can be the physical location from where the user is accessing the system. Ensure that Contact Address does not contain any special characters except ".", "#", "-", ",". |
Date Of Birth |
Specify the date of birth. You can use the popup calendar to enter the date. |
Designation |
Enter the user designation. Ensure that Designation does not contain any special characters except “_, “:” and "-". |
Profile Name |
Select the profile name by clicking on the drop-down list. |
Start Date |
Specify the user start date based on the day slot the user is enabled to access the system. Ensure that User Start Date is greater than today’s date. You can use the popup calendar to enter the date. |
End Date |
Specify the user end date based on month and year when the user Id expires. Ensure that user End Date is greater than User Start Date. You can use the popup calendar to enter the date. |
Password |
Enter the default password for the user for the initial login. User needs to change the default password during the first login. A user is denied access in case the user has forgotten the password or enters the wrong password for the specified number of attempts (as defined in the Configuration window). To enable access, enter a new password here. |
Database Authentication Principal |
Select the Database Principal name from the drop-down list. The list displays the Principal names for HDFS Kerberos connection. Click |
Notification Time |
(Optional) Specify the notification start and end time within which the user can be notified with alerts. |
E-mail ID |
Enter the e-mail address of the user. |
Mobile No |
(Optional) Enter the mobile number of the user. |
Pager No |
(Optional) Enter the pager number of the user. |
Enable User |
Select the checkbox to allow user to access the system. A deselected checkbox denies access to the user. |
Login on Holidays |
Select the checkbox to allow users to access the system on holidays. A deselected checkbox denies access to the user on holidays. |
SMS Auth Only |
This field is displayed only if the LDAP Authentication & SMS Authorization or SSO Authentication & SMS Authorization is selected from the Configuration window. Select the checkbox to authenticate the user through SMS even though the LDAP Authentication or SSO Authentication is enabled. This feature can be used to bypass LDAP or SSO authentication for selected users. |
Enable Proxy |
Select the checkbox if you want to enable proxy user for database connection. |
Proxy User name |
Enter the Proxy user name for the OFSAAI user, which will be used for database connection. |
3. Click Save to upload the user details.
The new User details are populated in the User Authorization window which has to be authorized by System Authorizers. Once authorized, the User details are displayed in User Maintenance window and can then be mapped to the required user group in the User - User Group Map window.
You can view individual user details at any given point. To view the existing function details in the User Maintenance window:
4. Select the checkbox adjacent to the User ID.
5. Click  button
in the User Maintenance tool bar.
button
in the User Maintenance tool bar.
The View User Details window is displayed with the details such as User ID, User Name, Address, Date of Birth, Designation, Profile Description, Start, and End Date in which the user can access Infrastructure system. The View User Details window also displays the notifications details and status if enable to access the system on holidays.
To update the existing user details in the User Maintenance window:
1. Select the checkbox adjacent to the User ID whose details are to be updated.
2. Click  button
in the User Maintenance tool bar.
button
in the User Maintenance tool bar.
The Edit User Details window is displayed.
3. Update the required information. For more details, see Add User.
NOTE |
You cannot edit the User ID. You can view the modifications once the changes are authorized. Also a new password must be provided during the user details modification. |
4. Click Save to save the changes.
You can remove the user definition(s) which are created by you and which are no longer required in the system, by deleting from the User Maintenance window.
1. Select the checkbox adjacent to the user ID whose details are to be removed.
2. Click  button
in the User Maintenance tool bar.
button
in the User Maintenance tool bar.
3. Click OK in the information dialog to confirm deletion.
NOTE |
User can access the application until the delete request is authorized. |
This option allows you to input additional user attributes that are configured for a user. Ensure that the required user attributes are present in the CSSMS_ATTRIB_MAST table. For more information about how to add additional user attributes, see Setting up User Attribute Master section.
To add attributes to a user in the User Maintenance window:
1. Select the checkbox adjacent to the User ID for whom you wish to add additional attributes.
2. Click  button
in the User Maintenance tool bar. The User Attribute
window is displayed.
button
in the User Maintenance tool bar. The User Attribute
window is displayed.
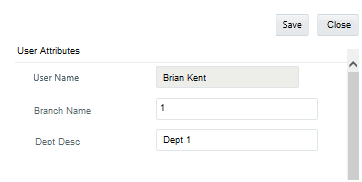
The user attributes present in the CSSMS_ATTRIB_MAST table are displayed in this window.
3. Enter appropriate information or select the required value from the drop-down list, for the displayed user attributes.
4. Click Save to upload the changes.
OFSAAI captures some of the common user attributes such as Address, Designation, Date of Birth, Employee Code and so on. Additionally if you want to capture user details such as Branch Code or Department Name, you can capture them by configuring User Attribute Master (CSSMS_ATTRIB_MAST) table.
You have to upload the CSSMS_ATTRIB_MAST table after entering the required information on the table. You should have Config Excel Advanced user role mapped to your user group. Note that this role is not available to SYSADMN user.
1. Download the CSSMS_ATTRIB_MAST table. For more information on how to download a table from Config Schema, see Config Schema Download section. You need to select CSSMS_ATTRIB_MAST from the Select the table drop-down list.
2. Open the downloaded file in MS Excel 2003/ 2007. The excel file will have columns ATTRIBUTE_ID, ATTRIBUTE_DESC, ALLOWED_VALUES, and TYPE.
3. Add data as shown in the following table:
ATTRIBUTE_ID |
ATTRIBUTE_DESC |
ALLOWED_VALUES |
TYPE |
BRANCH_CODE |
Branch Code |
|
0 |
BRANCH_NAME |
Branch Name |
New York, Dallas |
1 |
DEPT_CODE |
Department Code |
|
0 |
DEPT_NAME |
Department Name |
|
0 |
TYPE – Enter Type as 1 if you want to give a list of values from which the user has to select the attribute value. In the ALLOWED_VALUES column, give the required values for the attribute. Enter Type as 0 if the attribute value has to be entered in a text field.
4. Save the file.
5. Upload the modified CSSMS_ATTRIB_MAST table. For more information on how to upload a table to Config Schema, see Config Schema Upload section. Note that you need to select CSSMS_ATTRIB_MAST from the Select the table drop-down list and Upload Type as Complete.
An appropriate message based on the success or failure status is displayed.
User Group Maintenance facilitates you to create, view, edit, and delete user groups. You can maintain and modify the user group information within the User Group Maintenance window.
You can access User Group Maintenance by expanding User Administrator section within the tree structure of Navigation List to the left.
User Group Maintenance window displays details such as User Group ID, Group Name, Description, Precedence, and the number of Mapped Users.
You can search for a user group based on User Group ID, Group Name, and Description.
To add a User Group in the User Group Maintenance window:
1. Select from
the User Group tool bar. Add button is disabled
if you have selected any User Group ID in the grid. The User
Group Maintenance window is displayed.
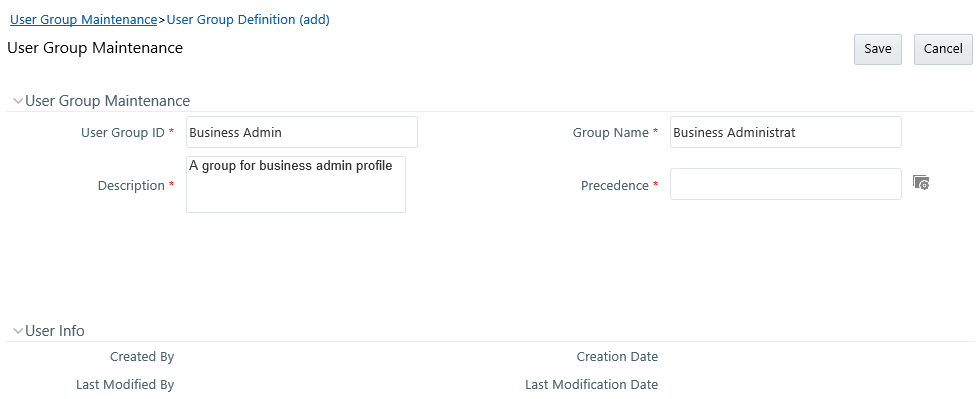
2. Enter the details as tabulated.
Field |
Description |
User Group ID |
Specify a unique id for the user group. Ensure that there are no special characters and extra spaces in the id entered. |
Group Name |
Enter a name for the user group. |
Description |
Enter a description for the user group. |
Precedence |
Enter the Precedence value.
You can click |
NOTE |
The lower the value in the precedence column, the higher is precedence. A user may be mapped to multiple user groups and hence the precedence value is required if Group Based Hierarchy Security setting is selected in the Configuration window. |
3. Click Save to upload the user group details. The new User Group details need to be authorized before associating users to the user group created. Before user group authorization, you need to map an information domain and role to the user group.
You can view individual user group details at any given point. To view the existing user group details in the User Group Maintenance window:
1. Select the checkbox adjacent to the User Group ID.
2. Click button
in the User Group tool bar.
The View User Group Details window is displayed with the details such as User Group ID, Group Name, Description, and Precedence value.
To update the existing user group details in the User Group Maintenance window:
1. Select the user group whose details are to be updated by clicking on the checkbox adjacent to the User Group ID.
2. Click button
in the User Group tool bar. Edit button is disabled if you have selected
multiple groups.
3. Edit the required User Group details except for User Group ID which is not editable. For more information see Add User Group.
4. Click Save to upload changes.
You can remove user group definition(s) which are created by you, which do not have any mapped users, and which are no longer required, by deleting from the User Group Maintenance window.
1. Select the checkbox adjacent to the user group ID(s) whose details are to be removed.
2. Click button
in the User Group tool bar.
3. Click OK in the information dialog to confirm deletion.
NOTE |
User Groups cannot be deleted if any requests (Domain map/unmap and Role map/unmap) are pending for authorization or any users are mapped to it. |
User - User Group Map facilitates you to map user(s) to specific user group which in turn is mapped to a specific Information Domain and role. Every User - User Group mapping
needs to be authorized by the System authorizer. If you have enabled auto authorization, then the user- user group mapping gets authorized automatically. To enable auto authorization, see the SMS Auto Authorization section.
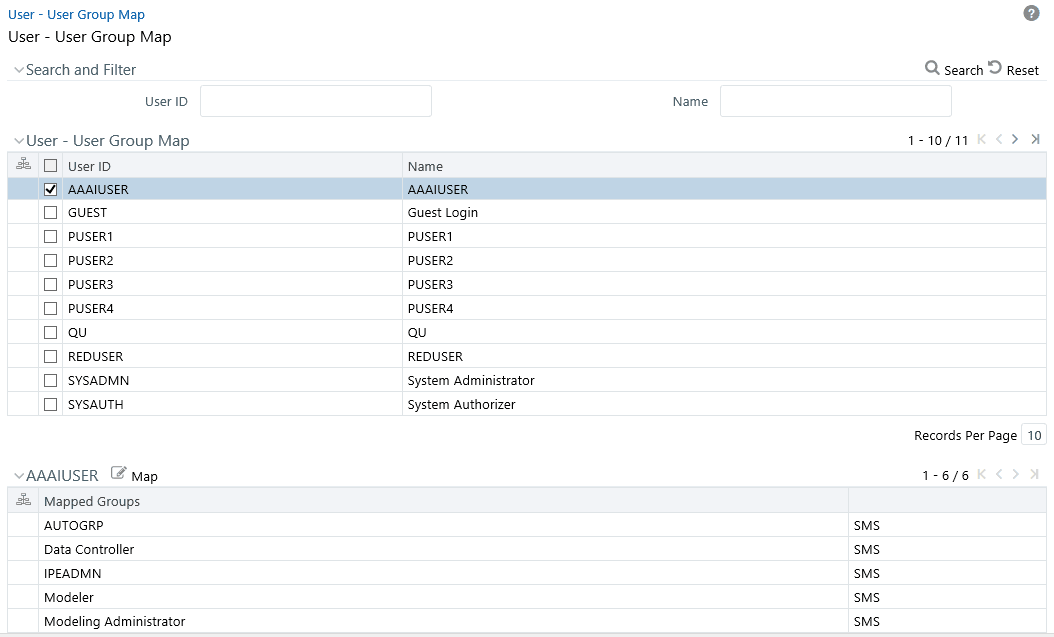
User - User Group Map window displays details such as User ID, Name, and the corresponding Mapped Groups. You can view and modify the existing mappings within the User - User Group Map window.
You can access User - User Group Map window by expanding User Administrator section within the tree structure of Navigation List to the left. You can also search for specific users based on User ID and Name.
This option allows you to view the user groups mapped to a user.
To view the mapped User Groups of a user
· From the User-User Group Map window, select the checkbox adjacent to the User ID. The list of user group(s) to which the selected user has been mapped is displayed under Mapped Groups grid.
This option facilitates you to map a user to specific user groups.
To map/unmap user in User-User Group Map window:
1. Select the checkbox adjacent to the User ID.
2. Click button
in the Mapped Groups grid. The User - User Group
Mapping window is displayed.
§ To map a user group, select the User Group and
click  . You can press Ctrl
key for multiple selections.
. You can press Ctrl
key for multiple selections.
§ To map all the User Groups to a user, click  .
.
§ To remove a User Group mapping for a user, select
the User Group from Select Members pane and click  .
.
§ To remove all the group mappings of a user, click
 .
.
In the User - User Group Mapping window, you can search for a User Group using the Search field.
3. Click OK to save the mappings and return to User-User Group Map window.
NOTE |
The newly created user- user group mapping
needs to be authorized by the system authorizer. Once it is authorized,
it will be visible in the User - User Group
Mapping window. If you have enabled auto authorization,
then the user- user group mapping gets authorized automatically. |
NOTE |
This feature will not be available if Authentication Type is selected as SSO Authentication and SMS Authorization from the Configuration window. |
Profile Maintenance facilitates you to create profiles, specify the time zones, specify the working days of the week and map holiday’s schedule. Profile Maintenance window displays the existing profiles with details such as the Profile Code, Profile Name, Time Zone, Workdays of Week, Holiday Time Zone, and mapped Holidays. In the Profile Maintenance window you can add, view, edit, and delete user profile definitions.
You can access Profile Maintenance by expanding User Administrator section within the tree structure of Navigation List to the left. You can also search for specific profile or view the list of existing profiles within the system.
To add a profile in the Profile Maintenance window:
1. Select from
the Profile Maintenance tool bar. Add button
is disabled if you have selected any Profile Code checkbox in the grid.
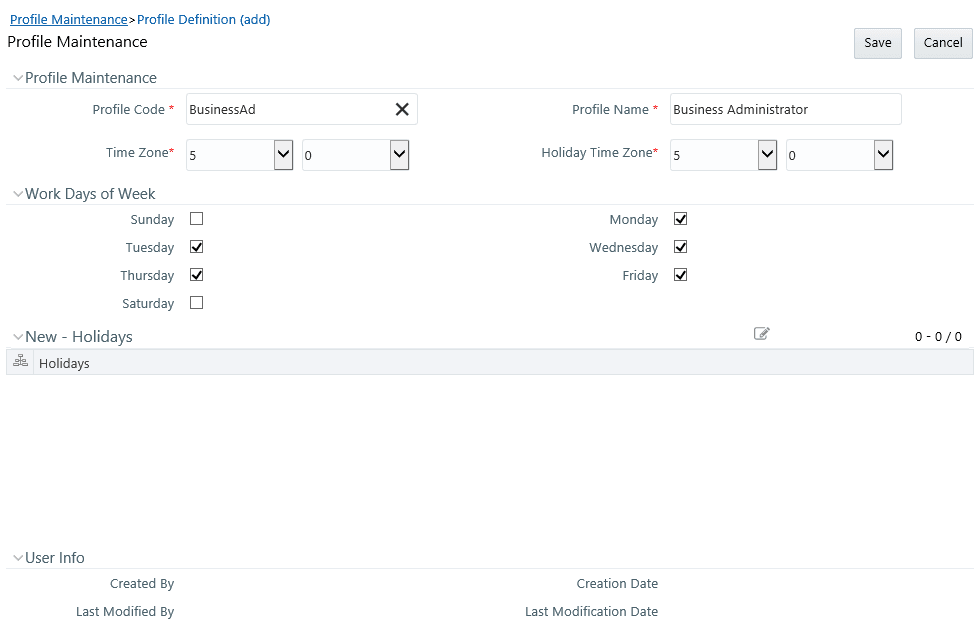
2. The New Profile window is displayed. Enter the details as tabulated.
Field |
Description |
Profile Code |
Enter a unique profile code based on the functions that the user executes. For example, specify AUTH if you are creating an authorizer profile. |
Profile Name |
Enter a unique profile name. Ensure that Profile Name does not contain any special characters except ".", "(",")", "_", "-". |
Time Zone |
Select the Start and End time zone from the drop-down list. Time zones are hourly based and indicate the time at which the user can access the system. |
Holiday Time Zone |
Select the Holiday Start and End time zone from the drop-down list. Time zones are hourly based and indicate the time at which the user can access the system on holidays. |
Work Days of Week |
Select the work days of a week by clicking on the checkbox adjacent to week days. The specified time zones will be applicable to the selected days. |
3. Click Save to save the profile.
To enable user to access the Infrastructure system during holidays, map the profile to the holiday’s schedule. For the user to access the system on holidays, the Login on Holidays checkbox in the User Maintenance window must be checked.
1. Click button
in the New Holidays grid. Holiday Mapping
window is displayed.
The Holiday Mapping window displays the holidays that are added through the Holiday Maintenance section.
2. To map a holiday, you can do the following:
§ To map holiday to the user profile, select from
the list and click .
§ To map all the listed holidays to the user profile,
click .
§ To remove holiday mapping to user profile, select
from the list and click .
§ To remove entire holiday mapping for the user
profile, click .
3. Click OK to save the mapping.
You can view the profile of a particular user at any given point. To view the existing user profile details in the Profile Maintenance window:
1. Select the checkbox adjacent to the Profile Code.
2. Click button
in the Profile Maintenance tool bar.
The Profile Maintenance window displays profile of the user with the holiday mapping details.
You can modify all the details except Profile Code and Profile Name of individual profiles at any given point of time.
To edit a user profile in the Profile Maintenance window:
1. Select the checkbox adjacent to the Profile Code.
2. Click button
in the Profile Maintenance tool bar.
3. Edit the user profile as required. For more information see Add Profile.
4. Click Save to upload changes.
You can remove user profile definition(s) which are created by you and which are no longer required in the system, by deleting from the Profile Maintenance window.
1. Select the checkbox adjacent to the Profile Code(s) whose details are to be removed.
2. Click button
in the Profile Maintenance tool bar.
3. Click OK in the information dialog to confirm deletion.
User Authorization function facilitates system authorizers to authorize and allow user(s) created or modified by system administrator to access the Infrastructure system. Whenever a new user is created or an authorized user details are updated, the user has to be authorized by the system authorizers to allow access to the Infrastructure system.
· As a system authorizer, you can:
§ View the available user ID’s which are to be authorized.
§ Authorize or reject users to access the system.
§ Authorize or reject modification request of Users.
§ View the current updated and previous user details for authorization.
§ Authorize based on the user ID’s created by Systems Administrator.
· As a user, you can login to the Infrastructure system only if authorized by the system Authorizer.
You can access User Authorization window by expanding User Administrator and selecting User Authorization within the tree structure of Navigation List to the left.
The User Authorization window displays a list of available users for Authorization. By default, the users will be displayed in alphabetical order of the User IDs with the other details such as User ID, Name, User Start Date, and User Expiration Date. You can also search for specific users.
In the User Authorization window, do the following:
1. Select User ID which has to be authorized. The window is refreshed and the user details are displayed below.
2. In the User Authorization tool bar,
§ Click  (authorize)
button to authorize a user(s).
(authorize)
button to authorize a user(s).
§ Click  (reject)
button to reject a user(s).
(reject)
button to reject a user(s).
3. Click OK in the information dialog to confirm authorization or rejection. On processing, a system message is displayed.
User Group Authorization function facilitates system authorizers to authorize or reject the user groups mapped to a user. This authorization is required if user groups are mapped to Public folders.
· As a system Authorizer, you can:
§ View the list of mapped/unmapped user(s) to be authorized
§ View the list of mapped/ unmapped roles to be authorized
§ View the list of mapped/ unmapped domains to be authorized
§ Authorize or reject mapping/unmapping of user group(s) to a role or a domain
You can access User Group Authorization window by expanding User Administrator section within the tree structure of Navigation List to the left and selecting User Group Authorization.
The User Group Authorization window displays a list of available user groups for authorization. When you select a user group, the details such as Mapped/Unmapped Users, Mapped/Unmapped Roles, and Mapped/Unmapped Domains are displayed. You can search for specific user group based on Group Code and Group Name.
NOTE |
After creating a user group, you need to map an information domain and role to the user group. Then only the user group will be visible for authorization in the User Group Authorization window. |
In the User Group Authorization window, do the following:
1. Select the required User Group ID for authorization.
The Mapped/Unmapped Users, Mapped/Unmapped Roles, and Mapped/Unmapped Domains corresponding to the selected User Group are displayed in the respective grids.
2. Select the checkbox adjacent to the mapped or unmapped group/user/role/domain and
§ Click (authorize)
button to authorize it.
§ Click (reject)
button to reject it.
3. Click OK in the information dialog to confirm authorization or rejection. On processing, a system message is displayed.
User Group Folder Mapping Authorization facilitates system authorizers to authorize or reject mapping and unmapping of roles to folders, done from the User Group Role Map window. This authorization is required for mapping of user groups to Shared folders.
As a system authorizer, you can view the list of mapped/unmapped user roles to be authorized for a selected user group. Once the mapping/unmapping is authorized, then the changes will be in effective.
You can access Authorization for User Group Folder Mapping window by expanding User Administrator section within the tree structure of Navigation List to the left and clicking Authorization for User Group Folder Mapping.
To authorize mapping of roles to folder
1. Click Authorization for User Group Folder Mapping under User Administrator in the Security Management menu. The Authorization for User Group Folder Mapping window is displayed.
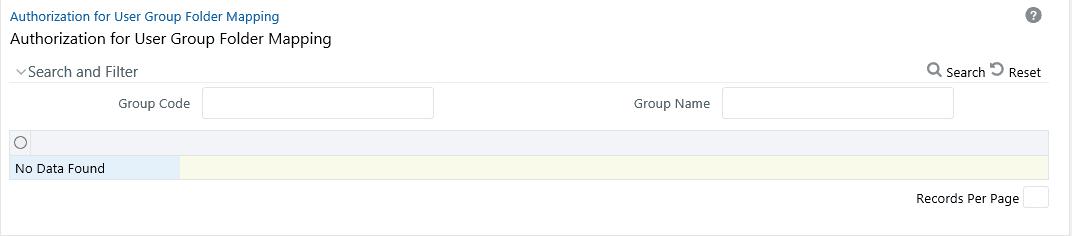
2. Select the user group and the folder. The Mapped/Unmapped Roles corresponding to the selected User Group which requires authorization are displayed in the respective grids.
3. Select the checkbox adjacent to the mapped or unmapped roles and
§ Click (authorize)
button to authorize it.
§ Click (reject)
button to reject it.
4. Click OK in the information dialog to confirm authorization or rejection. On processing, a system message is displayed.
User Group Domain Map facilitates System Administrators to view the available user groups and map the required Domain to User Group(s). System Administrators can also remove user group mapping for specific domain or map additional domains to a specific user group to ensure confidentiality of restricted Information Domains.
You can access User Group Domain Map window by expanding User Administrator section within the tree structure of Navigation List to the left.
The User Group Domain Map window displays a list of available user groups in alphabetical order with the User Group ID, Group Name, and Description. On selecting a user group, the list of available mapped domains are displayed.
NOTE |
It is mandatory to map at least one information domain to a user group. |
You can search for specific user group based on User Group ID, Group Name, and Description.
To map a user group to a domain, do the following:
1. Select the checkbox adjacent to the required User Group ID. The User Group Domain Map window is refreshed to display the existing mapped domains.
2. Click button
in the Mapped Domains section tool bar. The User
Group Domain Map window is displayed.
§ To map Domains to a User Group, select the Domain
from the Members list and click . You can press Ctrl key for multiple selections.
§ To map all the Domains to a User Group, click
.
§ To remove mapping for a user group, select the
Domain from Select Members list and click .
§ To remove all Domains mapped to User Group, click
.
In the User Group Domain Map window, you can search for a Domain using the Search field.
3. Click OK to save the mappings and return to User Group Domain Map window.
Mapping/unmapping of User Groups to Domain should be authorized by the System Authorizer. If you have enabled auto authorization, then the User Group-Domain mapping/unmapping gets authorized automatically. To enable auto authorization, see the SMS Auto Authorization section.
User Group Role Map facilitates System Administrators to map Role(s) to specific User Group(s). Each role has a defined function and any user(s) mapped to the role has to perform only those functions.
For example, the table below lists the user group mapped to a specific role.
GROUP CODE |
ROLE CODE |
ADMIN |
SYSADM |
AUTH |
SYSATH |
CWSADM |
CWSADMIN |
You can access User Group Role Map window by expanding User Administrator section within the tree structure of Navigation List to the left.
The User Group Role Map window displays a list of available user groups in alphabetical order with the User Group ID and Description. On selecting a user group, the list of available mapped roles are displayed.
You can also search for specific user group or view the list of existing user groups within the system.
To map a Role to User Group, do the following:
1. Select the checkbox adjacent to the required User Group ID. The User Group Role Map window is refreshed to display the existing mapped roles.
2. Click button
in the Mapped Roles section tool bar. The User Group
Role Map window is displayed.
3. In the User Group Role Map window, you can search for a Role using the Search field and edit the mapping.
§ To map Role to a User Group, select the Role from
the Members list and click .
You can press Ctrl key for multiple selections.
§ To map all the Roles to a specific User Group,
click .
§ To remove mapping for a user group, select the
Role from Select Members list and click .
§ To remove all Roles mapped to a User Group, click
 .
.
4. Click OK to save the mappings and return to User Group Role Map window.
Mapping/unmapping of User Roles to a User Group should be authorized by the System Authorizer. If you have enabled auto authorization, then the User Group-Role mapping/unmapping gets authorized automatically. To enable auto authorization, see the SMS Auto Authorization section.
User Group Folder Role Map facilitates System Administrators to map role(s) to specific user group(s), which are mapped to shared folders. This mapping is used to give access rights to a user on objects belonging to Shared folder/segment.
To map user group-folder-role
1. Click User Group Folder Role Map under User Administrator in the Security Management menu. The User Group Folder Role Map window is displayed.

2. Select the user group from the User Group Folder Role Map grid. All shared folders are displayed in the Infodom-Folder Map grid.
3. Select the shared folder to which you want to map
roles and click .
4. Select the required roles and click or click to map all the roles.
To remove mapping of a role, select the role and click .
To remove all mapped roles, click .
5. Click Ok.
User Group-Folder-Role mapping/unmapping should be authorized by the System Authorizer. If you have enabled auto authorization, then the mapping/unmapping gets authorized automatically. To enable auto authorization, see the SMS Auto Authorization section.
User Reinstate feature allows the System Administrators to reinstate deleted users. After reinstating, you should map the users to the required user groups.
To reinstate deleted users
1. Click Reinstate User under User Administrator in the Security Management menu. The User Reinstate window is displayed.
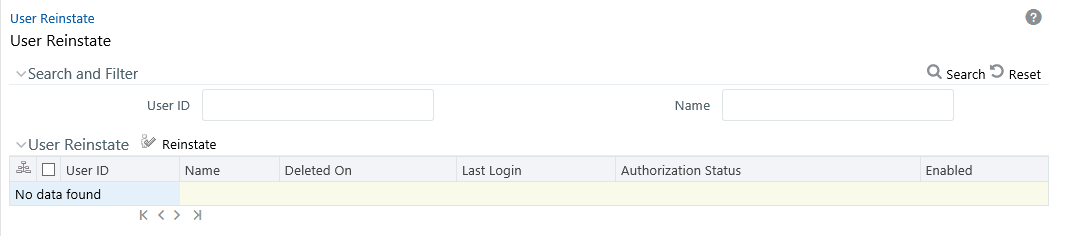
All deleted users are displayed in the User Reinstate grid.
2. Select the user you want to reinstate and click  . A confirmation message is displayed.
3. Click Ok.
The reinstated user(s) will have the same user id and the password will be reset as “password0”.