9 STA Usernames and Email
This chapter describes how to create and manage STA usernames and how to define available email recipients for STA alerts and Executive Reports.
This chapter includes the following sections:
STA Usernames
The primary STA administrator username was created during STA installation. You can use the STA screens at any time to create and maintain any number of additional STA usernames. Each STA username must be unique and must have a password and an assigned user role.
STA Username and Password Requirements
STA username requirements are as follows:
-
Must be 1–16 characters in length
-
All usernames must be unique
Password requirements are as follows:
-
Must be 8–31 characters in length
-
Must include at least one number and one capital letter
-
Must not include spaces
-
Must not include any of the following special characters:
& ' ( ) < > ? { } * \ ' "
STA User Roles
Each STA username must be assigned one of three predefined user roles. Each role comes with a set of privileges, which determine the screens and activities available to that STA username. Privileges are predefined and cannot be modified. The Viewer role provides the fewest privileges, while the Administrator role provides the most.
The user roles and privileges are summarized below; Table 9-1 provides complete detail.
- Viewer
-
Viewers have display privileges to screens on the Home, Tape System Hardware, and Tape System Activity tabs in the Navigation Bar.
Viewers can modify the appearance of screens for the current login session only, filter screens, and apply templates created by users with higher privileges. They can also download Executive Reports created by users with higher privileges.
Viewers have no access to the Setup & Administration tab in the Navigation Bar.
- Operator
-
In addition to all privileges available to Viewers, Operators can save and manage screen templates and run Executive Reports.
Operators have viewing access to all screens in the Setup & Administration tab in the Navigation Bar, allowing them to view STA policies and configuration settings defined by Administrator users; however, they cannot create policies or perform STA configuration tasks.
- Administrator
-
Administrators have full access and privileges to all STA screens. In addition to all privileges available to Operators, Administrators can create STA policies, define configuration settings, and create STA usernames.
Table 9-1 User Role Privileges, Organized by Screen
| Tab | Screen | Activity | Viewer | Oper | Admin |
|---|---|---|---|---|---|
|
– |
Preferences menu |
Configure preferences for your STA username. Change the password for your STA username. |
X |
X |
X |
|
– |
Templates toolbar |
Apply a template to the current screen. Set the current template as the screen default for your STA username. |
X |
X |
X |
|
– |
Templates toolbar |
Create a template. Modify the appearance of a custom template. Save a template to a new name. Change the public or private visibility settings of a custom template owned by your STA username. |
X |
X |
|
|
Home |
Dashboard |
Modify the screen display for this session only by adding and changing Dashboard portlets. |
X |
X |
X |
|
Home |
Quick Links |
Display a list of all templates available to your STA username. Navigate to a screen with the selected template applied. |
X |
X |
X |
|
Home |
Executive Reports |
Display a list of public report files run automatically or on demand. Export and view a report file. |
X |
X |
X |
|
Home |
Executive Reports |
Delete a public report file. |
X |
X |
|
|
Tape System Hardware |
All |
Modify the screen display for this session only by adding and changing graphs and table attributes. |
X |
X |
X |
|
Tape System Hardware |
Drives – Overview |
Display drives assigned to the media validation drive pools. |
X |
X |
X |
|
Tape System Hardware |
Drives – Overview |
Add selected drives to a manual logical group. View logical group assignments for selected drives. |
X |
X |
|
|
Tape System Hardware |
Media – Overview |
Add selected media to a manual logical group. View logical group assignments for selected media. Submit manual media validation requests. Resume interrupted validations of T10000T2 media. |
X |
X |
|
|
Tape System Activity |
All |
Modify the screen display for this session only by adding and changing graphs and table attributes. |
X |
X |
X |
|
Tape System Activity |
Alerts Overview |
Display a list of all generated alerts. Export the alerts list to a spreadsheet or document. View detail for an alert. Change the state of an alert. Show or hide dismissed alerts. |
X |
X |
X |
|
Tape System Activity |
Alerts Overview |
Annotate an alert. |
X |
X |
|
|
Tape System Activity |
Media Validation Overview |
Submit manual media validation requests one at a time. Reorder pending media validation requests. Cancel selected pending or in-progress media validation requests. Resume an interrupted validation of a T10000T2 media. |
X |
X |
X |
|
Tape System Activity |
All Messages – Overview |
Display a list of all SNMP traps received by STA. Export selected SNMP traps to a spreadsheet or document. View detail for a selected SNMP trap. |
X |
X |
X |
|
Setup & Administration |
Logical Groups |
Create a manual or dynamic logical group. List all drives and media assigned to a logical group. Add and remove drives and media from a manual logical group. Change the selection criteria for a dynamic logical group. Force a dynamic logical group update. Rename a logical group. Delete a logical group. |
X |
X |
|
|
Setup & Administration |
Alerts Policies |
Display a list of defined alert policies. |
X |
X |
|
|
Setup & Administration |
Alerts Policies |
Define, copy, rename, and delete an alert policy. Change the criteria for a selected policy. Change the list of email recipients for a policy. Enable or disable an alert policy. |
X |
||
|
Setup & Administration |
Executive Reports Policies |
Display a list of public Executive Report policies. Run a public report on demand. |
X |
X |
|
|
Setup & Administration |
Executive Reports Policies |
Create, modify, and delete a public report policy or a private policy created by your STA username. Display a list of public policies and private policies created by your STA username. Define a regular schedule for a report. Assign public or private ownership to a policy. Designate email addresses to receive report files. Change the Dashboard template on which a report is based. |
X |
||
|
Setup & Administration |
Templates Management |
Display a list of all templates available to your STA username. Change the default screen template for your STA username. Rename a custom template. Change the public or private visibility settings of a template owned by your STA username. Export a custom template. Import a template. Delete a template. Restore the STA predefined templates. |
X |
X |
|
|
Setup & Administration |
Media Validation |
Display media validation configuration settings. Display drives in the media validation drive pools. Display the list of media validation policies. |
X |
X |
|
|
Setup & Administration |
Media Validation |
Enable or disable media validation on STA. Enable or disable drive calibration. Define, copy, rename, and delete a media validation policy. Change the criteria for a media validation policy. Enable or disable a media validation policy. |
X |
||
|
Setup & Administration |
Service – Logs |
Display a list of all available service log bundles. Create a log bundle. Display run information for a log bundle. Download a log bundle to your local computer. Delete a log bundle. |
X |
X |
|
|
Setup & Administration |
Configuration – SNMP Connections |
Display SNMP client settings for STA. Display SNMP connection settings for all monitored libraries. Export SNMP connection settings for all monitored libraries to a text file. |
X |
X |
|
|
Setup & Administration |
Configuration – SNMP Connections |
Configure SNMP client settings for STA. Configure the SNMP connection to a library. Test a library SNMP connection. Perform a manual data collection for a monitored library. Remove a library connection from STA. |
X |
||
|
Setup & Administration |
Configuration – Users |
Display a list of all STA usernames and their roles. |
X |
X |
|
|
Setup & Administration |
Configuration – Users |
Create and modify an STA username. Change the password for an STA username. Delete an STA username. |
X |
||
|
Setup & Administration |
Configuration – Email |
Display configuration settings for the STA SMTP server. Display a list of all available email recipients and their location information. |
X |
X |
|
|
Setup & Administration |
Configuration – Email |
Configure the STA SMTP server. Configure an available email recipient. Send a test email to an available recipient. Delete an available email recipient. |
X |
STA User Management Tasks
These procedures allow you to manage STA usernames through the STA user interface.
If you need to configure Open LDAP or IBM RACF user authentication, see the instructions for configuring an access control service provider in the STA Installation and Configuration Guide.
Note:
All tasks in this section require Administrator privileges.Add an STA Username
Use this procedure to add a new STA username.
-
In the Navigation Bar, select Setup & Administration, then select Users.
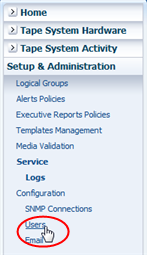
Description of the illustration if_navsetupusers.png
The Configuration – Users screen appears.
-
Click the Create New User icon.
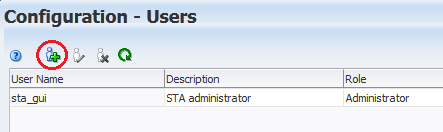
Description of the illustration user_new_user.png
The User Configuration dialog box appears.
-
Complete the dialog box as follows.
-
User Name—Enter the name of the user.
-
Description—Enter a description of the new user, if desired.
-
Role—In the menu, select Administrator, Operator, or Viewer.
-
Enter Password—Enter the login password for the new user. It must be at least eight characters long and contain a mix of letters and numbers.
-
Verify Password—Reenter the password.
-
-
Click Save.
The username is added, and the Configuration – Users table is updated.
Modify an STA Username
Use this procedure to modify properties of an existing STA username.
Note:
Any user can modify their own password by selecting Preferences and then General from the Main Toolbar. See "Change Your Password" for instructions.-
In the Navigation Bar, select Setup & Administration, then select Users.
The Configuration – Users screen appears.
-
In the table, select the STA username you want to modify, then click the Modify User icon.
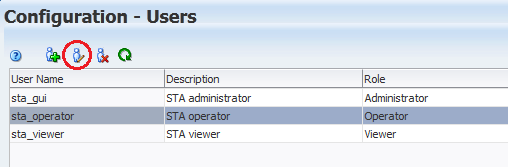
Description of the illustration user_user_modify.png
The User Configuration dialog box appears.
-
In the dialog box, modify the user Description, Role, or Password, and then click Save. See "STA Username and Password Requirements" for detailed password requirements.
The username is updated according to your modifications.
Delete an STA Username
Use this procedure to delete an STA username. You must designate whether logical groups and templates owned by the username should be deleted or retained and made public.
-
In the Navigation Bar, select Setup & Administration, then select Users.
The Configuration – Users screen appears.
-
In the table, select STA username you want to delete, then click the Delete User icon.
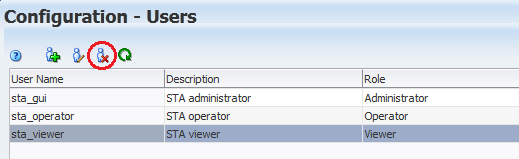
Description of the illustration user_user_delete.png
The Delete User dialog box appears.
-
In the dialog box, make one of the following selections, then click Delete.
-
Leave them in place, make them public—Retain all templates and logical groups owned by this username. The items will be made public and available to all users.
-
Delete them—Delete all templates and logical groups owned by this username.
Note:
Deleting a logical group may invalidate any filters, templates, and Executive Reports using that logical group.

Description of the illustration user_deleteconf.png
The STA username is deleted. Any templates and logical groups owned by the username are either updated or deleted, according to your selection.
-
Email Configuration Tasks
You can define STA alert and Executive Reports policies to automatically send emails to designated email addresses. Before doing this, you must use the following procedures to identify the STA email server and available recipient addresses. These procedures assume an email server has already been configured at your site.
See "Alert Emails" and "Emailing Executive Reports" for details about assigning available email recipients to the respective policies.
All tasks in this section require Operator or Administrator privileges.
Define the STA SMTP Server
Use this procedure to define the STA email server. You can define only one email server.
Note:
This task requires Administrator privileges.-
Contact your IT administrator to determine the host address and authentication requirements for the email server you want to use for sending STA emails.
-
In the Navigation Bar, select Setup & Administration, then select Email.
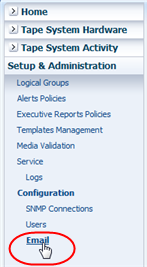
Description of the illustration if_navsetupemail.png
The Configuration – Email screen appears.
-
In the SMTP Server Settings table, select the StorageTek Tape Analytics Alerts record, then click the Edit Selected SMTP Server icon.
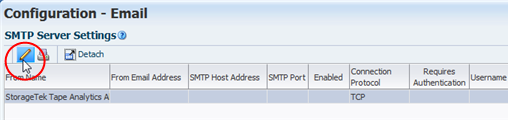
Description of the illustration email_smtpserver.png
The Define SMTP Server Details dialog box appears.
-
Complete the dialog box as follows:
-
SMTP Host Address—Enter the fully qualified name of the outgoing SMTP server to be used for STA emails. This must be a valid email server.
Note:
If the email server does not require authentication, you may need to specify localhost for the SMTP Host Address. -
SMTP Port—Enter the port number for outgoing mail transport.
Typically, this is port 25, but check with your IT administrator to verify this is the port used at your site.
-
From Name—Enter the name you want to appear in the From line of the emails. Oracle recommends you use text that identifies the STA server.
-
From Email Address—Enter the email address from which STA email is sent. This must be a valid address on the email server.
Since recipients cannot reply to this address, you may want to use an address that indicates this, such as DoNotReply@YourCompany.com.
-
Enabled?—Select the check box to enable the email server.
-
Use Secure Connection Protocol—To use a secure connection protocol, select the check box, and then select the protocol by clicking either TLS or SSL.
-
Requires Authentication—This check box is available only if you have selected the Use Secure Connection Protocol check box. If the SMTP server requires authentication, select the check box and then complete the remaining username and password fields.
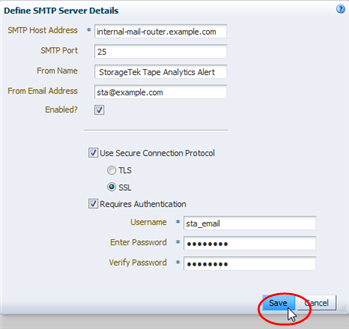
Description of the illustration email_smtpsave.png
-
-
Click Save.
The SMTP Server Settings table is updated with the information you have entered.
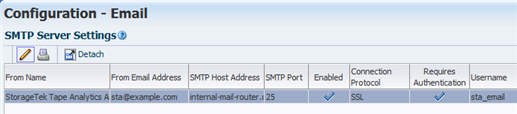
Description of the illustration email_smtpdone.png
Add an Available Email Recipient
Use this procedure to add an email address to the list of recipients available to receive STA emails. A user does not need an STA username to receive STA emails.
Note:
This task requires Administrator privileges.-
In the Navigation Bar, select Setup & Administration, then select Email.
The Configuration – Email screen appears.
-
In the Email Addresses table, click the Add Email icon.
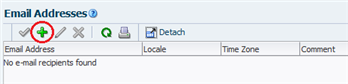
Description of the illustration email_addressadd.png
The Define Email Details dialog box appears.
-
Complete the dialog box as follows, and then click Save.
-
Address: Enter a valid email address (for example, yourname@yourcompany.com).
-
Language-Locale: Select the preferred language for emails sent to this address (English is currently the only selection).
-
Time Zone: Select the recipient's time zone.
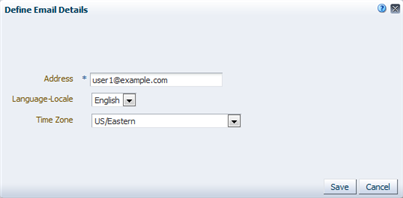
Description of the illustration email_defaddress.png
The address is added to the Email Addresses table. The Comment field is left blank for now.
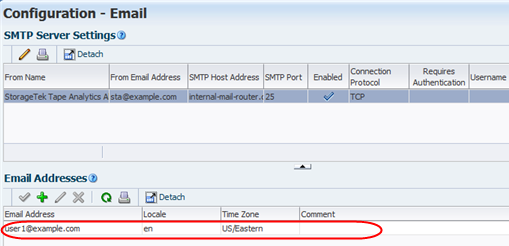
Description of the illustration email_addressdone.png
-
Display Email Configuration Information
Use this procedure to display details about the STA email server configuration and available email recipients.
Note:
This task requires Operator or Administrator privileges.-
In the Navigation Bar, select Setup & Administration, then select Email.
The Configuration – Email screen appears.

Description of the illustration email_allinfo.png
The SMTP Server Settings table shows all configuration information for the STA email server. The Email Addresses table shows all email addresses available to receive STA emails.
Note:
The Comment field in the Email Addresses table is reserved for system-generated comments about email activity directed to each email address. This field cannot be edited by the user.
Test the Email Server and Recipient Definitions
Use this procedure to verify the STA email server and recipient definitions by sending a test email to a selected recipient.You can test only one recipient at a time.
Note:
This task requires Administrator privileges.-
In the Navigation Bar, select Setup & Administration, then select Email.
The Configuration – Email screen appears.
-
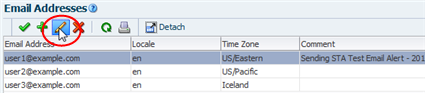
In the Email Addresses table, select the address you want to test, then click the Test SMTP and Email Address Setup icon.
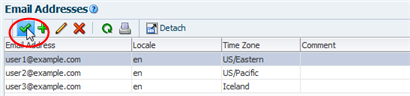
Description of the illustration email_test.png
The STA email server sends a test email to the selected address and updates the Comment field with details about the test. You may need to click the Refresh Table button to see the comment.

Description of the illustration email_testcomment.png
-
Check the recipient's email to confirm receipt. Example 9-1 is a sample of the test email contents.
-
If the email does not arrive within a few minutes, verify that the STA email server and recipient have been defined correctly. You can also check the following STA log for additional information. Contact your IT administrator for assistance, if necessary.
/Oracle_storage_home/Middleware/user_projects/domains/TBI/servers/staEngine/ logs/staEngine.log
Modify an Available Email Recipient
Use this procedure to modify an existing available email recipient. You can edit only one address at a time.
Note:
This task requires Administrator privileges.-
In the Navigation Bar, select Setup & Administration, then select Email.
The Configuration – Email screen appears.
-
In the Email Addresses table, select the address you want to change, then click the Edit Selected Email icon.
Description of the illustration email_addressedit.png
The Define Email Details dialog box appears.
-
In the dialog box, make any necessary changes. Click Save when done.
The email address is updated, and the changes are displayed in the Email Addresses table.
Delete an Available Email Recipient
Use this procedure to delete an email address from the list of available recipients. The address will no longer be able to receive emails from STA. If the address is used in any alert or Executive Report policies, it is also deleted from them. You can delete only one address at a time.
Caution:
There is no confirmation dialog box for this operation. The email address is deleted as soon as you click the Delete Selected Email(s) button.Note:
This task requires Administrator privileges.-
In the Navigation Bar, select Setup & Administration, then select Email.
The Configuration – Email screen appears.
-
In the Email Addresses table, select the email address you want to delete, then click the Delete Selected Email(s) icon.
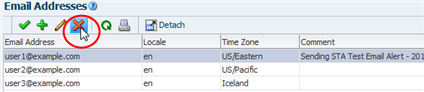
Description of the illustration email_addressdelete.png
The email address is deleted from the list of available recipients. It is also deleted from all alert and Executive Report policies in which was used.
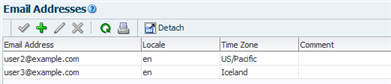
Description of the illustration email_addrdeletedone.png