2 User Preferences
STA provides various options for managing your login sessions and modifying the STA user interface display. Because these modifications are made on a username basis, different users can modify the settings to their own needs. Your settings remain in effect for future login sessions.
The following topics are discussed in this section:
Screen Session Options
You can modify both the screen refresh and automatic timeout intervals for your STA username.
Screen Refresh Interval
The STA screen display is refreshed automatically to display new data that may be available. The default refresh rate is every eight minutes. You can optionally change the refresh rate for your STA username to any period from one minute to twelve hours. See "Modify the Screen Refresh Interval" for instructions.
Automatic Timeout Interval
The default session timeout is 30 minutes. If your login session is idle for longer than this amount of time, your session is ended and you will need to log in again. You can optionally change the timeout period for your STA username to any period from 10 minutes to 24 hours. See "Modify the Login Session Timeout Period" for details.
Note:
Increasing the session timeout is likely to increase STA server memory utilization, with possible impact on STA performance. See the STA User's Guide for additional information.If your login session is idle for the defined amount of time, your session is ended automatically. Two minutes before the expiration time, the following dialog box appears. Click OK within the two-minute period to keep your session active.
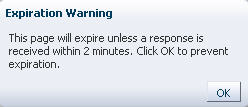
Description of the illustration if_pageexpirewarn.jpg
If you do not click OK within the two-minute period, your session is ended, and the following dialog box appears.
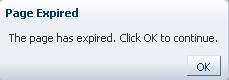
Description of the illustration if_pageexpire.jpg
When you click OK, you are re-directed to the Login screen so you can log in again.
Note:
The session timeout clock starts as soon as you start the Login screen in your browser. If you leave your browser idle and do not log in within the defined session timeout period, the Expiration Warning and Page Expired dialog boxes appear as described above.Time Zone Options
Dates and times of events shown in the STA user interface are automatically displayed in your local time zone. For example, an exchange with a start time of 02:43 on a library in San Francisco shows a start time of 06:43 for an STA user in Brasilia (four hours later), and 16:43 for a user in Jakarta (14 hours later).
By default, STA displays times adjusted to your computer's system clock. You can optionally set a specific time zone for your STA username to see data displayed according to a different location. For example, if you are reviewing data with a colleague in a different time zone, you may want to temporarily change your time zone to match his or hers. See "Change Your Time Zone Setting" for instructions.
Note:
These settings do not affect the Dashboard display. Dashboard data is always shown in UTC time, regardless of your time zone preference settings. See the STA User's Guide for details.The following figures show the same exchange data with two different time zone settings.
Figure 2-1 Exchanges With Time Zone Set to US/Eastern
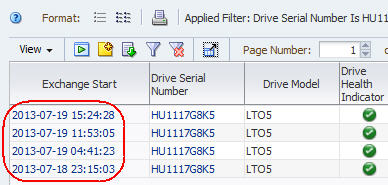
Description of "Figure 2-1 Exchanges With Time Zone Set to US/Eastern"
Figure 2-2 Exchanges With Time Zone Set to US/Mountain (Two Hours Earlier)
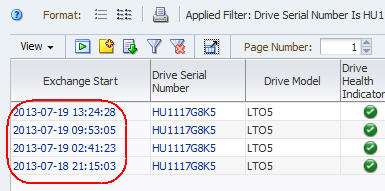
Description of "Figure 2-2 Exchanges With Time Zone Set to US/Mountain (Two Hours Earlier)"
Filtering is also done according to the time zone setting for your STA username. When you enter filter criteria based on time and date, use times in your local time zone.
Removed Drives and Media Display Options
By default, removed drives and media are not included on their respective Overview and Analysis screens. However, you can selectively turn on the display of either removed drives, removed media, or both. Your selections take effect immediately, so depending on your needs, you can selectively show or hide removed drives and media throughout your login session. See "Modify Removed Drives and Media Display Settings" for instructions on how to change the settings.
Table 2-1 summarizes the effects of selecting or deselecting each option. See the STA User's Guide for details about removed drives and media.
Table 2-1 Removed Drives and Media Display Settings
| Option | Selected | Deselected |
|---|---|---|
|
Show Removed Drives |
Removed drives are listed on the Drives – Overview screen. Aggregated data for removed drives are included on the Drives – Analysis screen. On all screens, drive serial numbers of removed drives are active links to the Drives – Overview, Detail View screen. |
Removed drives are not listed on the Drives – Overview screen. Aggregated data for removed drives are not included on the Drives – Analysis screen. On all screens, drive serial numbers of removed drives are dimmed and are not active links. |
|
Show Removed Media |
Removed media are listed on the Media – Overview screen. Aggregated data for removed media are included on the Media – Analysis screen. On all other screens, volume serial numbers (VSNs or volsers) of removed media are active links to the Media – Overview, Detail View screen. |
Removed media are not listed on the Media – Overview screen. Aggregated data for removed media are not included on the Media – Analysis screen. On all other screens, volsers of removed media are dimmed and are not active links. |
Accessibility Options
The STA user interface provides accessibility options for users with low vision, blindness, color blindness, or other visual impairments. See "Modify Accessibility Preferences" for instructions on enabling the options. The following options are available:
-
Screen reader mode – Enables screen reader mode for users with low vision, blindness, color blindness, or other visual impairments. This mode causes the screen display to be optimized for use with screen readers such as JAWS. It also allows you to perform all screen actions with the keyboard instead of a mouse, and alternate text is provided for all screen icons, buttons, and graphic images
-
High contrast mode – Causes STA screens to be compatible with high-contrast features provided by your browser. For best results, you may also want to enable large fonts mode, described below.
This mode is designed to be used with your browser's high-contrast capabilities (see your browser's documentation for details). You should disable this mode if you are not using these capabilities in your browser.
-
Large fonts mode – Causes STA screens to be compatible with larger font sizes and zoom capabilities provided by your browser. For best results, you may also want to enable high-contrast mode, described above.
This mode is designed to be used with larger fonts or zoom capabilities in your browser (see your browser's documentation for details). You should disable this mode if you are not using these capabilities in your browser.
In addition, tooltips provide text detail for all graphs and text items. See "Tooltips" and "Types of Graphs" for details.
Confirmation Dialog Box Options
By default, confirmation dialog boxes are displayed for the following activities:
-
Synchronizing the date range for all graphs on a screen; see "Synchronize a Date Range Across All Graphs".
-
Overwriting a custom or predefined template; see the STA User's Guide.
-
Changing the default template for the current screen; see the STA User's Guide.
-
Deleting a custom or predefined template; see the STA User's Guide.
You can selectively turn off the display of any of these dialog boxes. Your selections take effect immediately. See "Modify Confirmation Dialog Box Preferences" for instructions.
User Preference Tasks
Modify the Screen Refresh Interval
Use this procedure to set the screen display refresh rate for your STA username in this and future login sessions. STA screens will be updated to display new data at the frequency you specify. The default is 480 seconds. See "Screen Refresh Interval" for details.
-
In the Main Toolbar, select Preferences, then select General.
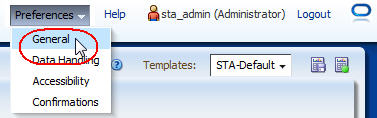
Description of the illustration if_prefgen.jpg
The General dialog box appears.

Description of the illustration if_prefgeneral.jpg
-
In the Refresh interval in seconds field, enter the new refresh rate want to assign, and then click OK.
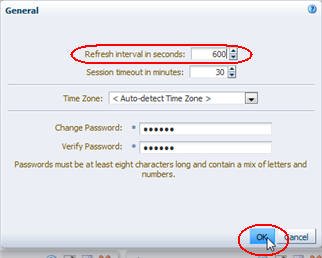
Description of the illustration if_prefgenrefreshok.png
The settings take effect immediately. They remain in effect for this and future login sessions, until you change them again using this procedure.
Modify the Login Session Timeout Period
Use this procedure to set the timeout period for your STA username in this and future login sessions. If your login session is idle for longer than this amount of time, your session will be ended. The default is 30 minutes. See "Automatic Timeout Interval" for details.
-
In the Main Toolbar, select Preferences, then select General.
Description of the illustration if_prefgen.jpg
The General dialog box appears.
Description of the illustration if_prefgeneral.jpg
-
In the Session timeout in minutes field, enter the timeout period you want to assign, and then click OK.
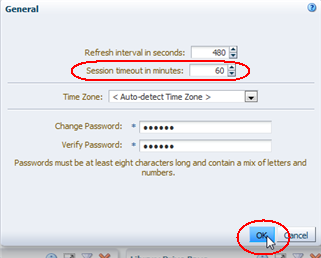
Description of the illustration if_prefgensessionok.png
The settings take effect immediately. They remain in effect for future login sessions, until you change them again using this procedure.
Change Your Time Zone Setting
Use this procedure to change the time zone setting for your STA username. All dates and times are displayed in the time zone you specify. See "Time Zone Options" for additional information.
-
In the Main Toolbar, select Preferences, then select General.
Description of the illustration if_prefgen.jpg
The General dialog box appears.
Description of the illustration if_prefgeneral.jpg
-
In the Time Zone menu, select the time zone you want to use, and then click OK.
To have STA automatically detect your local time zone based on your computer's system clock, select <Auto-detect Time Zone>.
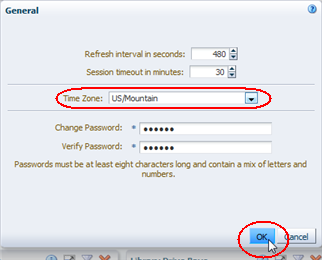
Description of the illustration if_prefgentimezoneok.png
Data in all STA screens is immediately displayed in the new time zone. The time zone setting remains in effect for future login sessions, until you change it again using this procedure.
Modify Removed Drives and Media Display Settings
Use this procedure to customize the removed drives and media display settings for your STA username in this and future login sessions. These settings control how removed drives and media are displayed by the STA user interface. See "Removed Drives and Media Display Options" for details.
-
In the Main Toolbar, select Preferences, then select Data Handling.
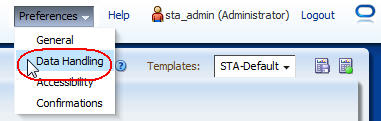
Description of the illustration if_prefdatahand.jpg
The Data Handling dialog box appears.

Description of the illustration if_datahandling.jpg
-
Select the appropriate check boxes to enable the display of removed drives, media, or both.
-
Verify your selections and then click OK.
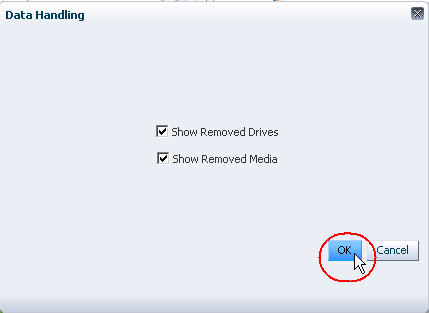
Description of the illustration if_datahandlingok.jpg
The settings take effect immediately. They remain in effect for this and future login sessions, until you change them again using this procedure.
Modify Accessibility Preferences
Use this procedure to customize the accessibility settings for your STA username in this and future login sessions. See "Accessibility Options" for details.
-
In the Main Toolbar, select Preferences, then select Accessibility.
Note:
If the "Do not show these options again" check box is not selected, then this screen appears automatically whenever you log in to STA.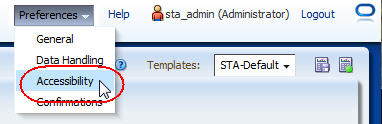
Description of the illustration if_prefaccess.jpg
The Accessibility Settings dialog box appears.

Description of the illustration if_accessset.jpg
-
Select the appropriate check boxes to enable the accessibility modes you want to use. Options are:
-
Screen Reader – Causes the screen display to be optimized for use with screen readers such as JAWS. It also allows you to perform all screen actions with the keyboard instead of a mouse.
-
High Contrast – Causes STA screens to be compatible with high-contrast features provided by your browser. For best results, you may also want to enable large fonts mode, described below.
-
Large fonts – Causes STA screens to be compatible with larger font sizes and zoom capabilities provided by your browser. For best results, you may also want to enable high-contrast mode, described above.
-
Do not show these options again – Indicates that you do not want this dialog box to be displayed automatically when you log in. If you apply this option, this dialog box will be skipped for all future times that you log in to STA. You can use this procedure to reset this option at any time.
-
-
Verify your selections and then click OK.
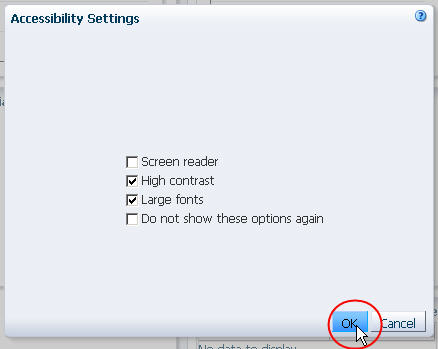
Description of the illustration if_accessok.jpg
The STA screen display is immediately modified according to your selections. These settings remain in effect for future login sessions, until you change them again using this procedure.
Modify Confirmation Dialog Box Preferences
Use this procedure to customize the display of selected confirmation dialog boxes for your STA username in this and future login sessions. See "Confirmation Dialog Box Options" for details.
-
In the Main Toolbar, select Preferences, then select Confirmations.
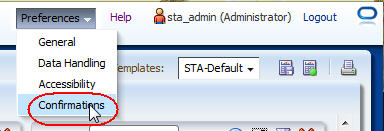
Description of the illustration if_prefconfirm.jpg
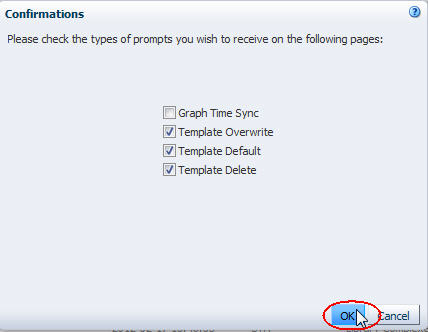
The Confirmations dialog box appears.

Description of the illustration if_confirmset.jpg
-
For each option listed, select the check box to display the dialog box or deselect the check box to suppress the dialog box. Options are:
-
Graph Time Sync – Selecting this check box indicates you want a confirmation dialog box to appear before you synchronize all graphs on a screen to the same date range.
Deselecting this check box indicates you want to suppress the confirmation dialog box. Graphs will be synchronized as soon as you click Synchronize Date Range in the Graph Pane Toolbar.
-
Template Overwrite – Selecting this check box indicates you want a confirmation dialog box to appear before you save changes to an existing template.
Clearing this box indicates you want to suppress the confirmation dialog box. Existing templates will be overwritten as soon as you click Save in the Save Template dialog box.
-
Template Default – Selecting this check box indicates you want a confirmation dialog box to appear when you change the default template for a screen.
Clearing this box indicates you want to suppress the confirmation dialog box. The new default template will be set as soon as you click Default Template in the Templates toolbar.
-
Template Delete – Selecting this check box indicates you want a confirmation dialog box to appear before you delete an existing template.
Clearing this box indicates you want to suppress the confirmation dialog box. Templates will be deleted as soon as you click Delete in the Delete Template dialog box.
-
-
Verify your selections and then click OK.
Description of the illustration if_confirmok.jpg
The settings take effect immediately. They remain in effect for future login sessions, until you change them again using this procedure.