| Oracle® Retail Xstore Point of Service Manager's Guide Release 18.0 F12255-02 |
|

 Previous |
 Next |
| Oracle® Retail Xstore Point of Service Manager's Guide Release 18.0 F12255-02 |
|
Previous |
Next |
Payroll Maintenance refers to the system functions that allow you to view, analyze, edit, and post weekly payroll information to the home office. Payroll information includes the daily hours-by work assignment-for each employee for a given week, including overtime hours. This payroll information for each week is derived from the timecard shift data.
Timecard Maintenance refers to system functions that allow you to view and edit timecard entries created through the clock-in/clock-out process. You may also create new timecard entries and void existing ones, whether they were created automatically or manually. For example, use Timecard Maintenance to modify an employee's timecard when the employee fails to clock-in or clock-out properly. Timecard entries also directly translate into payroll data, assuming the payroll data is not modified later.
|
Note: Refer to Employee Scheduling for information about scheduling and maintaining employee time-off events such as vacations and other times when employees may not be available for work, creating and maintaining employee work shifts and assigning employees to defined work shifts. |
The following topics are covered:
Associates with the proper security permissions may access Payroll Maintenance and Timecard Maintenance from the Back Office Employee Maintenance and Payroll Menu. Use these functions to maintain the timecard entries that were created through the clock-in/clock-out process and the payroll entries that were derived from the timecard entries.
In addition to the employee payroll and timecard maintenance functions, a Posted Timecard Report and a Payroll Report are also available.
Select the Back Office option.
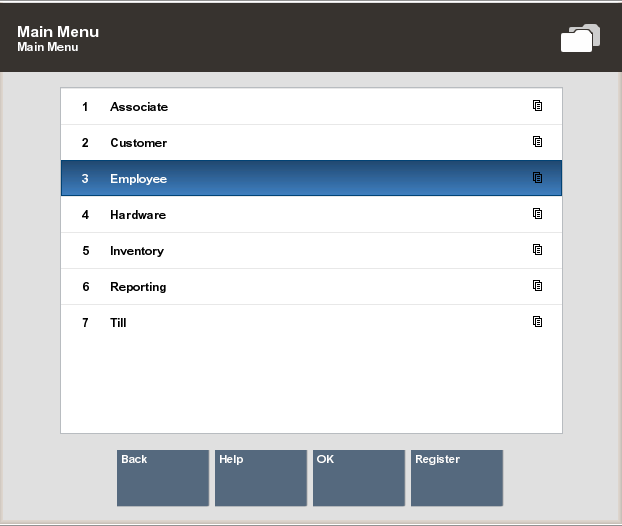
After logging in to the Back Office (see Accessing the Back Office), select the Employee option from the Main Menu.
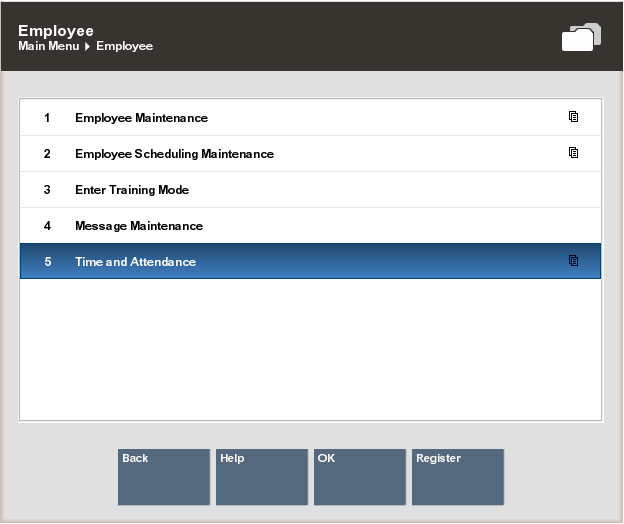
Select the Time and Attendance option from the Employee Maintenance and Payroll menu.
|
Note: Because each Oracle Retail Xstore Point-of-Service menu is configurable, the button functions and the menu options on your system may appear in a different order or have different text than the examples shown in this manual. |
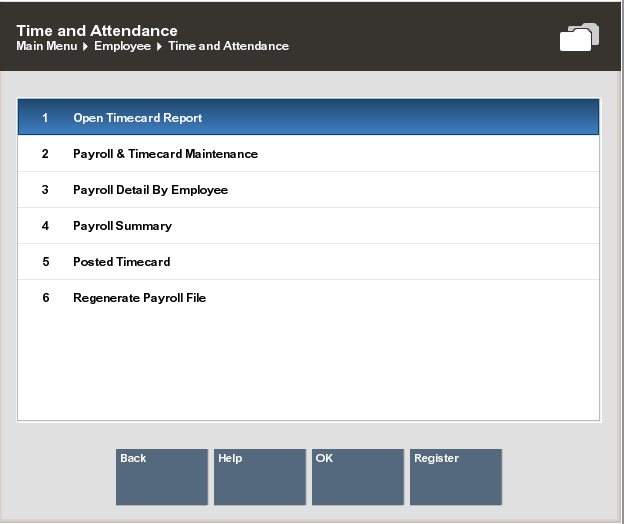
Select one of the options from the Time and Attendance Menu.
The following options are available:
Payroll & Timecard Maintenance - Select this option to maintain employee payroll records. Refer to Payroll and Timecard Maintenance.
Payroll Summary - Select this option to run the Payroll Report. Refer to Payroll Summary Report.
Payroll Detail By Employee - Select this option to run the Payroll Detail By Employee Report. Refer to Payroll Detail By Employee Report.
Posted Timecard - Select this option to run the Posted Timecard Report. Refer to Posted Timecard Report.
Open Timecard Report - Select this option to run the Open Timecard Report. Refer to Open Timecard Report.
Regenerate Payroll File - Select this option to recreate the payroll file.
Use the Payroll and Timecard Maintenance menu option to maintain Payroll and Timecard information.
|
Note: The payroll categories are configurable, so the categories available on your system may differ from the examples shown here. The starting work day of the week display is also configurable. Your first day of the week may be different from the day shown in the example. |
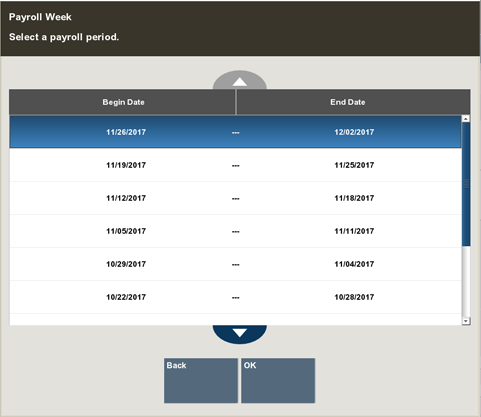
At the Time and Attendance Menu, select the Payroll and Timecard Maintenance option. Oracle Retail Xstore Point of Service prompts for the payroll week you want to manage. Select a payroll date from the list and select OK to continue.
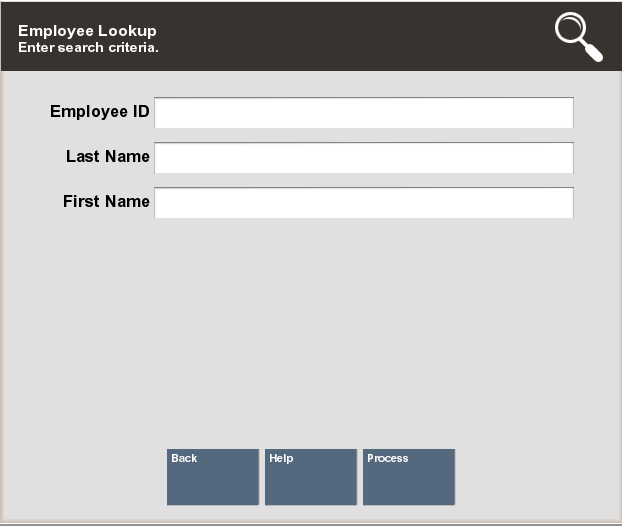
Oracle Retail Xstore Point of Service displays the Employee Lookup form, prompting for employee information. Enter the criteria you want to use for finding the employee payroll record you want to review and select Process.
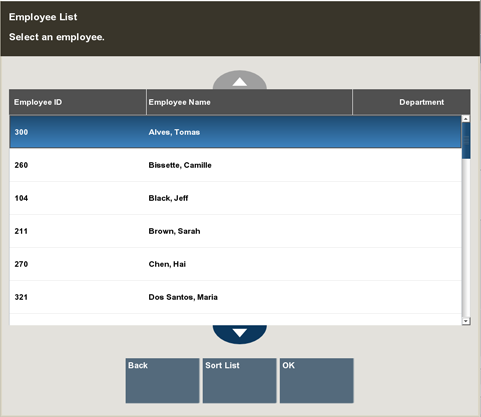
If you enter an employee ID and Oracle Retail Xstore Point of Service finds it, the name is displayed in a list. Press Enter to continue.
If your search criteria produces more than one record, you must select the record you want from the list and press Enter.
When you have located and selected the employee, Oracle Retail Xstore Point of Service displays the Payroll Maintenance record for the employee. The record includes the following tabs:
Use the Payroll Maintenance tab to verify and enter payroll hours for a selected payroll period. All payroll records should be reviewed manually and saved before the payroll finish date. This includes hours automatically fed to payroll from the timecard clock in/ clock out records. Posted payroll information is uploaded to the home office at closing.
You must find and display an employee payroll record for a specific payroll week so that you may view it or change it.
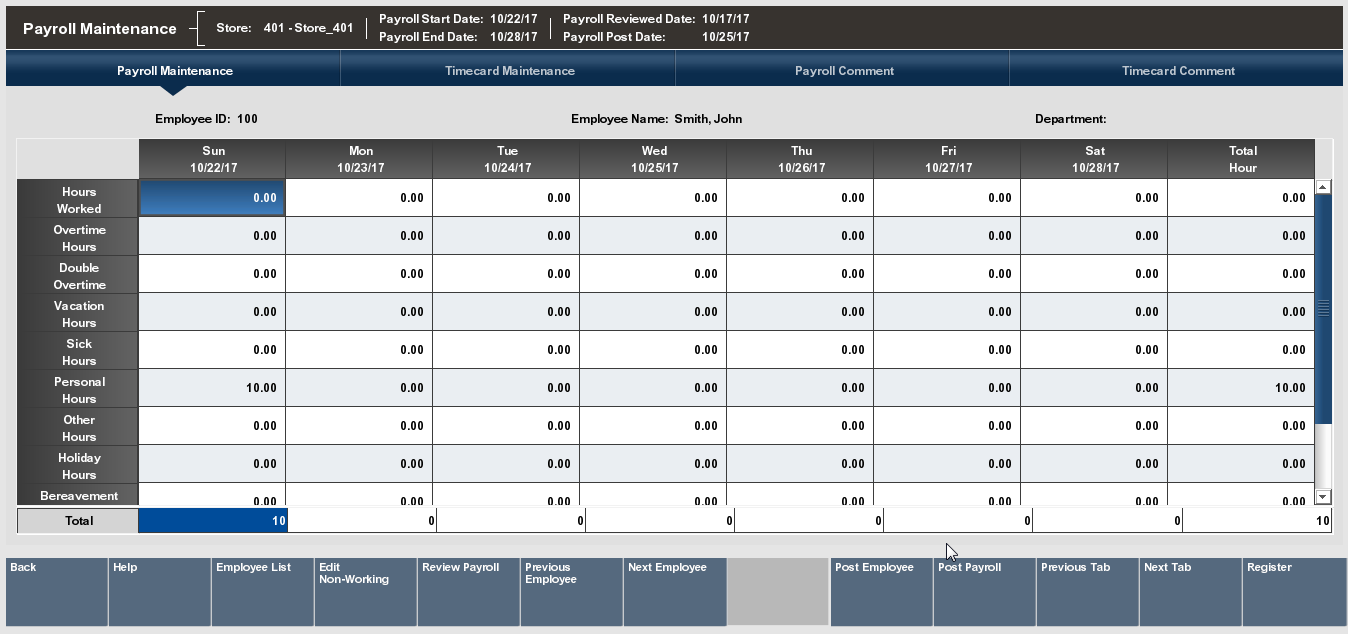
The Payroll Maintenance tab shows the following information:
Employee information: Employee ID, name, and department.
The days of the week and the date for each day; for example, Sunday through Saturday.
Regular Hours Worked - These hours are determined from the timecard records and cannot be changed here. Refer to Editing a Timecard Record for more information on changing timecard records.
Overtime Hours - These hours are calculated automatically by the system, based on the overtime rules established by the home office. These hours cannot be changed here. Refer to Editing a Timecard Record for more information on changing timecard records.
Double Overtime Hours - These hours are calculated automatically by the system based on the overtime rules established by the home office. These hours cannot be changed here. Refer to Editing a Timecard Record for more information on changing timecard records.
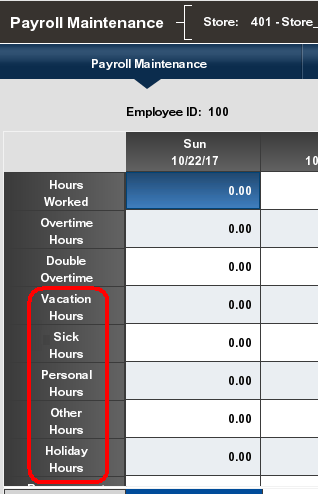
Non-Working Hours Categories - These types of payroll hours can be edited in Payroll Maintenance using the Edit Non-Working Hours option. Examples of non-working hours include:
Vacation Hours
Sick Hours
Personal Hours
Other Hours
Holiday Hours
Bereavement Hours
Jury Hours
Funeral Hours
Total Hours - The total working hours for each category by day and by week.
Totals - The total hours by day and by week.
The following options are available from the Payroll Maintenance screen:
Select Employee List to see a list of active employees for the payroll week you are viewing.
Select Edit Non-Working to edit the hours for the non-working categories. Non- working categories include Vacation Hours, Sick Hours, Personal Hours, and Other Hours as determined by your store policy. Hours that are calculated from the timecard records cannot be edited through Payroll Maintenance. See Editing a Payroll Record.
Select Review Payroll after you have reviewed the employee's payroll record. This function adds a timestamp to the record along with your ID and the payroll record is now ready for posting to the home office.
Select Post Employee to post the employee's record to the home office.
Select Post Payroll to post all employees' records to the home office.
Select Previous Employee to move backward or Next Employee to move forward and view additional employee payroll records for the payroll week.
Use the Previous Tab and Next Tab options to navigate between the tabs on this screen:
Use the Timecard Maintenance tab to review or edit the timecard records that correspond to this payroll record. Refer to Timecard Maintenance Tab for more information about editing timecard records.
Use the Payroll Comment tab to view and/or add a comment.
Select Register to go to the register screens.
The following section covers these topics:
|
Note: Only non-working hours such as sick time, vacation time, personal time, and so on can be edited from Payroll Maintenance. To edit working hours (derived from the timecard records), use Timecard Maintenance. |
To make a change to a non-working-hour payroll record select the Edit Non? Working option from the Payroll Maintenance screen (Figure 7-7).
Select a non-working hour payroll record and make the change by typing the number of hours in the selected field:
You can use up to 2 decimal places when entering hours; for example, 2.75 for 2 hours and 45 minutes.
You cannot enter more than 24 hours or less than 15 minutes (.25 hours) in a day.
Depending upon your store policy, you may have additional time restrictions.
Select the Save option to save the edited payroll record. Oracle Retail Xstore Point of Service updates the hours for the payroll record.
After you have verified the information for an employee's payroll record, you can mark this record as reviewed.
At the Payroll Maintenance screen, select the Review Payroll option to add a timestamp to the currently displayed employee record.
Press Enter to close the prompt: the payroll has been reviewed. The Payroll Maintenance screen displays.
Oracle Retail Xstore Point of Service marks the record as reviewed. This information is displayed in the information panel at the top of the Payroll Maintenance screen as shown below.
Continue reviewing additional employee records as needed by selecting the Previous Employee and Next Employee options. When all records have been reviewed, the payroll records are ready for posting to the home office.
After you have verified the information for an employee's payroll record and marked the record as reviewed, you can post the record to the home office.
|
Note: You also have the option to post all employee payroll records at once. Refer to Posting all Employee Payroll Records at One Time for procedural information. |
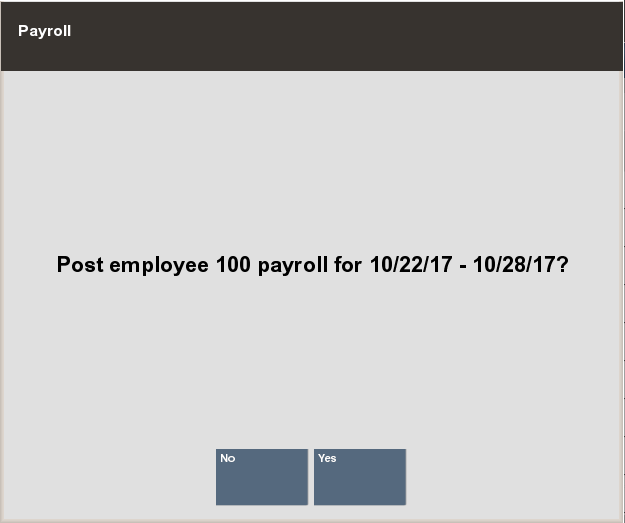
To post the employee's payroll record to the home office, select the Post Employee option.
Oracle Retail Xstore Point of Service prompts to confirm the selection. Select Yes to post the employee's payroll record and Oracle Retail Xstore Point of Service displays a message notifying you that the employee's payroll record has been posted.
|
Note: If you have not marked this employee payroll record as reviewed before choosing to post the record, Oracle Retail Xstore Point of Service displays a message asking if you want to post the record anyway.Select Yes to post the record or select No to return to the Payroll Maintenance screen where you can review the payroll record. |
Press Enter to close the prompt: payroll has been posted. The Payroll Maintenance screen displays.
Oracle Retail Xstore Point of Service marks the employee's payroll record as posted. This information is displayed in the information panel at the top of the Payroll Maintenance screen as shown below.
Continue reviewing and posting additional employee records as needed by selecting the Previous Employee and Next Employee options.
If the system identifies a payroll exception error (as determined by your store's policy) when you post an employee's payroll record, you are notified that a payroll exception exists.
If any payroll errors are found, select an employee from the list and press Enter to return to the employee's payroll record where you can review the record and make changes as required.
|
Note: To edit an employee's regular hours, you must use the Timecard Maintenance tab. |
You can also post all employee payroll records at the same time rather than individually.
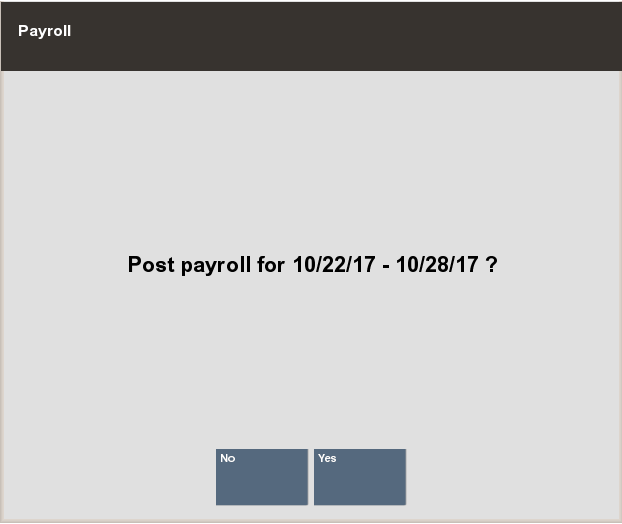
To post the entire payroll to the home office, select the Post Payroll option.
|
Note: If the system identifies a payroll exception error (as determined by your store policy) when you post payroll records, you are notified that a payroll exception exists. See Figure 7-12 |
Oracle Retail Xstore Point of Service prompts to confirm the selection.
Select Yes to post the payroll to the home office.
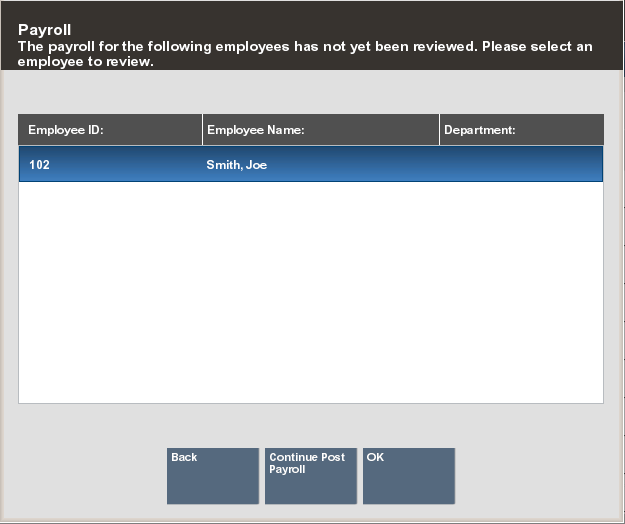
If any records have not been marked as reviewed, Oracle Retail Xstore Point of Service displays a list of employee payroll records that require review.
To review a record, select the name on the list and then select OK to display the Payroll Maintenance screen where you can review the record.
<OR>
To post payroll to the home office without reviewing the records, select the Continue Post Payroll option.
When payroll has been posted, Oracle Retail Xstore Point of Service displays a message indicating that the records have been posted and marks all records with a timestamp for the posted date.
Once payroll records have been posted, you can view the information at the Payroll Maintenance screen and edit information if you have the proper security permissions.
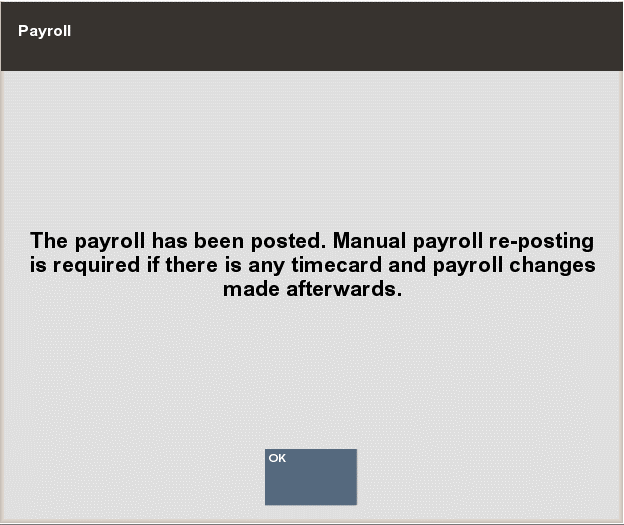
When you select an option to edit timecard and/or payroll information for a posted payroll record, Oracle Retail Xstore Point of Service displays a message informing you that payroll has been posted. Any changes you make to a posted record must be re-posted to the home office manually.
Select OK to acknowledge this message and make your edits as required.
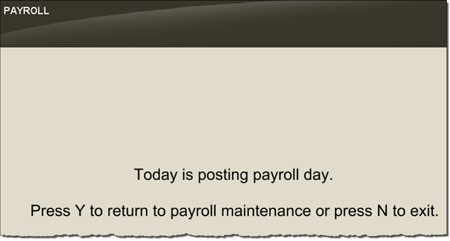
On the day payroll must be posted to the home office, Oracle Retail Xstore Point of Service may display a message indicating that payroll records are due. This message displays when you exit the Payroll Maintenance function without posting the payroll records. Select Yes to continue maintaining the payroll records or No to exit Payroll Maintenance.
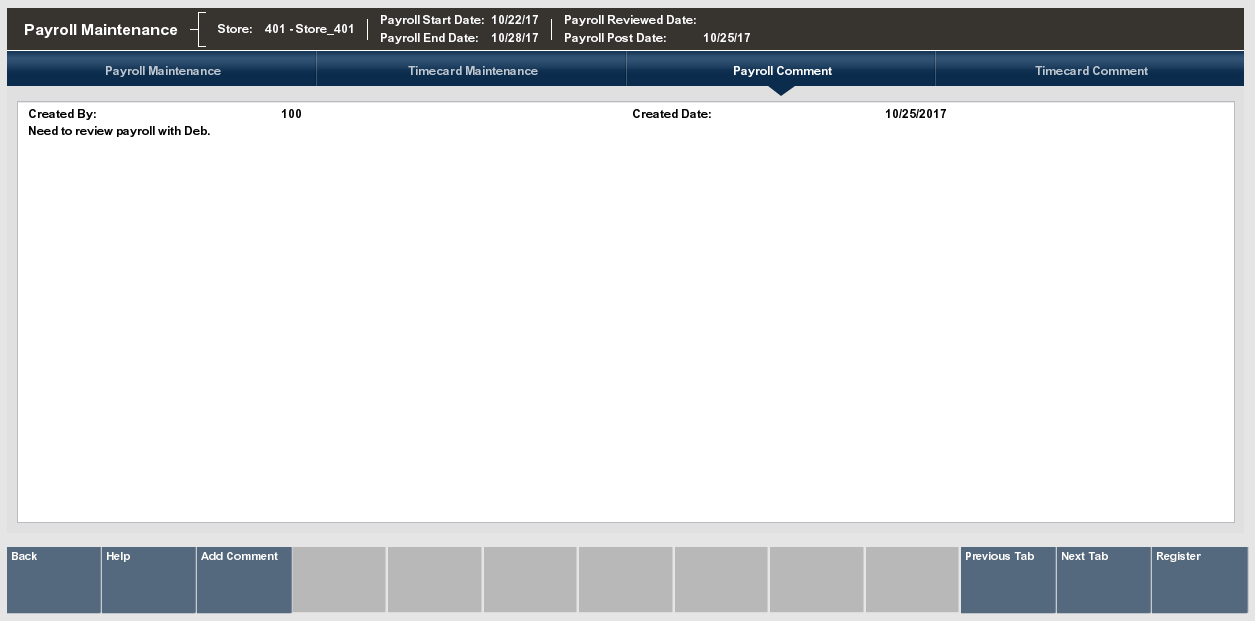
To view payroll record comments, use the Previous Tab and Next Tab options to navigate between the tabs on this screen and select the Payroll Comment tab.
Oracle Retail Xstore Point of Service displays any comments associated with this payroll record. In addition to the text, the date the comment was added and the ID of the person who created the comment are also included.
An option to add a new comment to this payroll record is also available. You can add additional comments to a record, or add comments to a record that has no current comments associated with it.
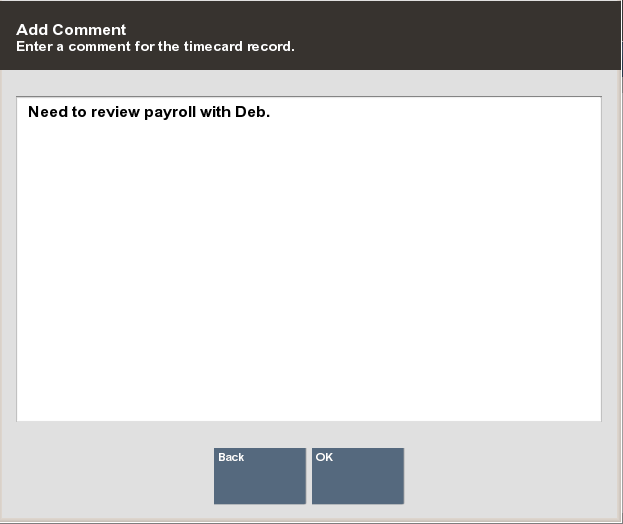
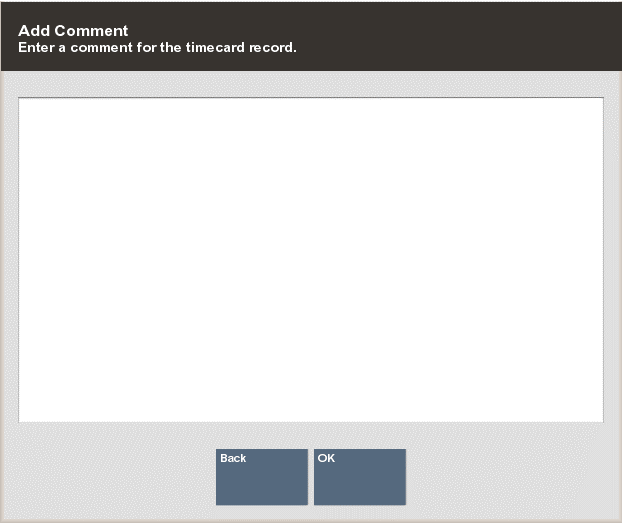
To add a comment to the payroll record, select the Add Comment option (Figure 7-18 above). Oracle Retail Xstore Point of Service displays the Add Comment form.
Type a comment and select OK to add the comment to the employee's payroll record.
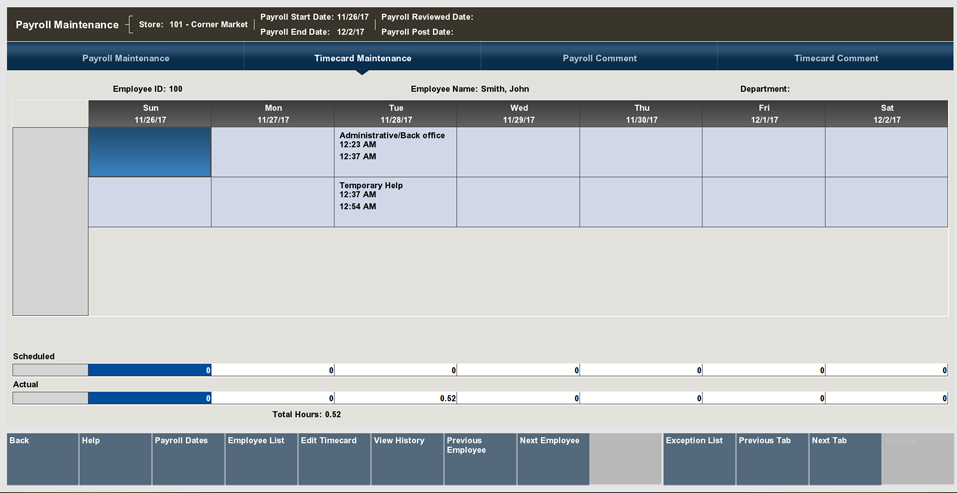
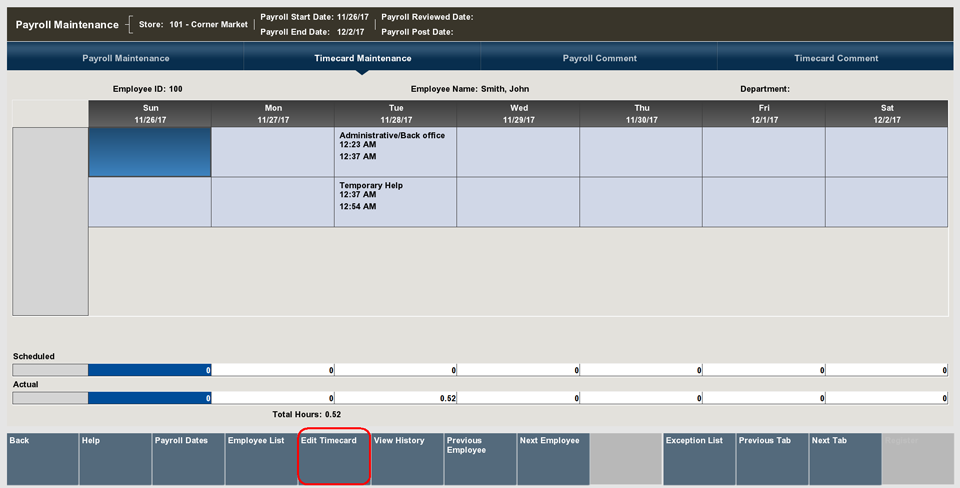
The Timecard Maintenance tab shows the following information:
The days of the week and the date for each day; for example, Sunday through Saturday.
|
Note: The week day order is configurable, so your beginning day of the week may differ from the first day shown here. |
The work code and the times the employee clocked in and out for each work code.
If the employee uses multiple work codes while clocking in during the day, multiple entries display. For example, in Figure 7-20, on Monday, the employee worked on the selling floor (Cashier) and then worked in the Back Office (Admin).
An icon  associated with a timeclock record indicates that it has been entered or modified through Timecard Maintenance and it is not the original clock-in or clock- out record, or that the record has an exception to a timecard rule. Select the record and the View History option for details about this modified record.
The hours scheduled for each day. Available if the scheduling option is used.
The actual hours worked each day.
The total number of hours worked for the week.
The following menu options are available from the Timecard Maintenance screen:
Payroll Dates - Select this option to view the list of payroll dates. Select a new date from the list to view the selected employee's timecard record for the new payroll week.
Employee List - Select this option to view a list of active employees for the payroll week you are viewing.
Edit Timecard - Select this option to edit the timecard record.
View History - Select this option to view the details about a specific timeclock record.
Previous Employee/Next Employee - Select these options to move backward/ forward to view additional employee timecard records for the payroll week.
Exception List - Select this option to view a list of employee records that have exceptions for this payroll week. Exception rules are set up by the home office.
Use the Previous Tab and the Next Tab menu options to navigate between the Timecard Maint tab and the Timecard Comment tab.
Timecard Comment Tab- Select this tab to view and/or add a comment.
This section covers the following topics:
To change a timecard record, select the record that you want to change on the Timecard Maintenance screen and select the Edit Timecard option.
The following editing options are available:
Add Timecard record - Use this option to add a timecard record for the selected day. Refer to Adding a Timecard Record.
Change Timecard record - Use this option to change a timecard record for the selected day. Refer to Changing a Timecard Record.
Delete Timecard record - Use this option to remove a timecard record for the selected day. Refer to Deleting a Timecard Record.
Select Edit Timecard.
Select the day to be edited and select Add Timecard.
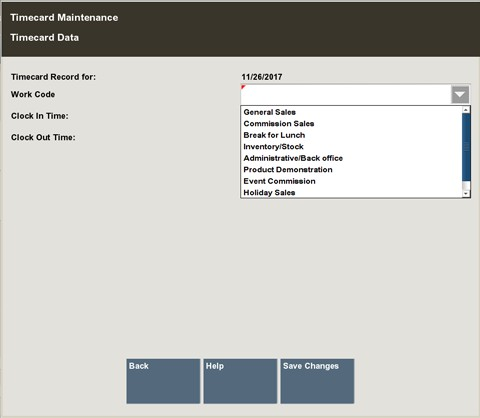
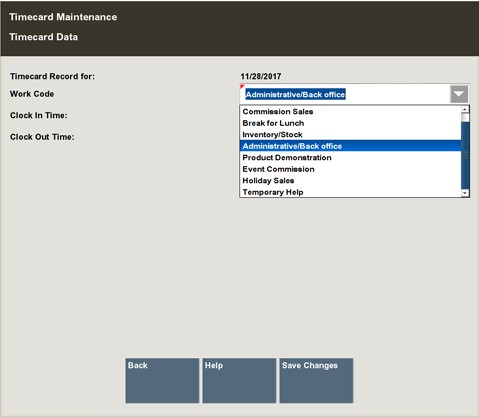
Oracle Retail Xstore Point of Service displays the Timecard Maintenance form. You must select a work code and enter the start time and end time for the timecard record.
Select the Save Changes option to create the new timecard record.
Depending upon your store policy, you may be prompted to enter a comment about the change to the timecard record. Type a comment and press Enter to continue.
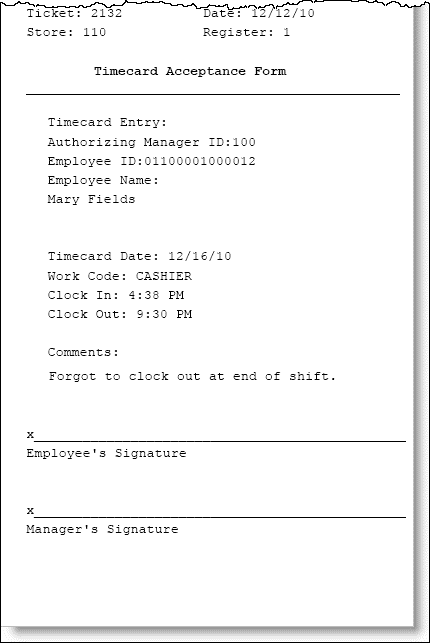
The system prints receipts for your records and the record is added to the selected day.
On the Timecard Maintenance screen, this record is preceded by an icon indicating that it has been modified and is not an original clock in/clock out record.
The system recalculates the actual hours worked for the day, the total hours worked for the week, and updates the timecard record accordingly.
Select Edit Timecard.
Select the day to be edited and select Change Timecard.
|
Note: If no timecard exists for the day you are editing, select Add Timecard. |
Oracle Retail Xstore Point of Service displays the Timecard Maintenance form where you can change the work code and start time and end times for the timecard record. The data on the form defaults to the current record information for the selected day.
Make the changes as needed and then select the Save Changes option to replace the current timecard record with the edited timecard record.
Depending upon your store policy, you may be prompted to enter a comment about the change to the timecard record. Type a comment and press Enter to continue.
The system prints receipts for your records and the edited record is updated for the selected day.
This record is preceded by an icon indicating that it has been modified and is not an original clock in/clock out record. The system recalculates the actual hours worked for the day and the total hours worked for the week, and updates the timecard record accordingly.
Select Edit Timecard.
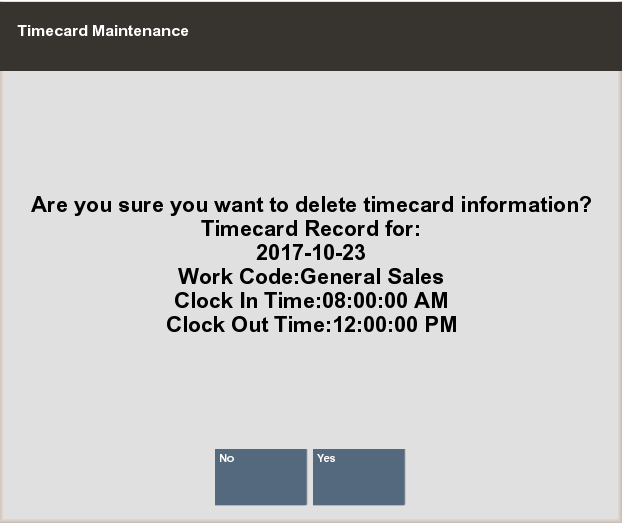
Select the day to be edited and select Delete Timecard.
Oracle Retail Xstore Point of Service prompts to confirm that you want to delete the selected record. Select Yes to delete the record.
Depending upon your store policy, you may be prompted to enter a comment for this change to the timecard record. If prompted, type a comment and select OK to continue.
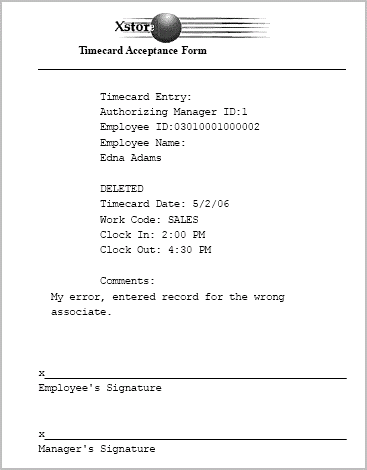
The system prints receipts for your records.
The record for the selected date is deleted as indicated on the Timecard Maintenance screen.
This record shows DELETED indicating that it has been removed. The system recalculates the actual hours worked for the day and the total hours worked for the week, and updates the timecard record accordingly.
Exception criteria are set up by the home office. For example, an exception may include employees who worked more than 14 hours per day or employees who worked less than 1 hour per day. Other exceptions include mismatched clock in/clock out records.
At the Timecard Maintenance Screen, select the Exception List option.
Oracle Retail Xstore Point of Service displays a list of employees with exceptions for the current payroll date. Select a name from the list and select OK to view the timecard record with the exception.
Oracle Retail Xstore Point of Service displays the Timecard Maintenance tab for the selected employee:
To view the details about the exception, select the record and then select the View History option. Refer to Posted Timecard Report for more information.
To edit the exception record, select the record and then select the Edit Timecard option. Refer to Editing a Timecard Record for more information.
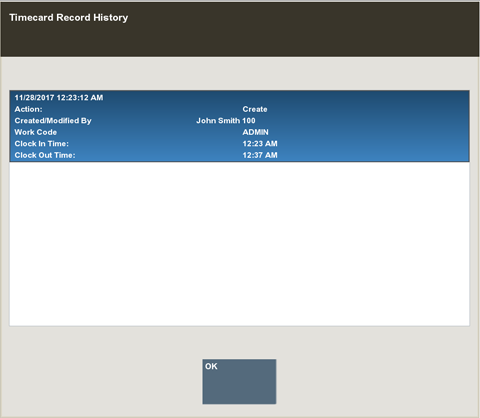
The timecard record history shows a list of all the activities for a specific record. This information includes the clock in and clock out times, the work codes, and any edits that pertain to the record.
To view the timecard record history, select the timecard record and then select the View History option at the Timecard Maintenance screen.
Oracle Retail Xstore Point of Service displays the history for the selected timecard record.
Press Esc to return to the Timecard Maintenance screen.
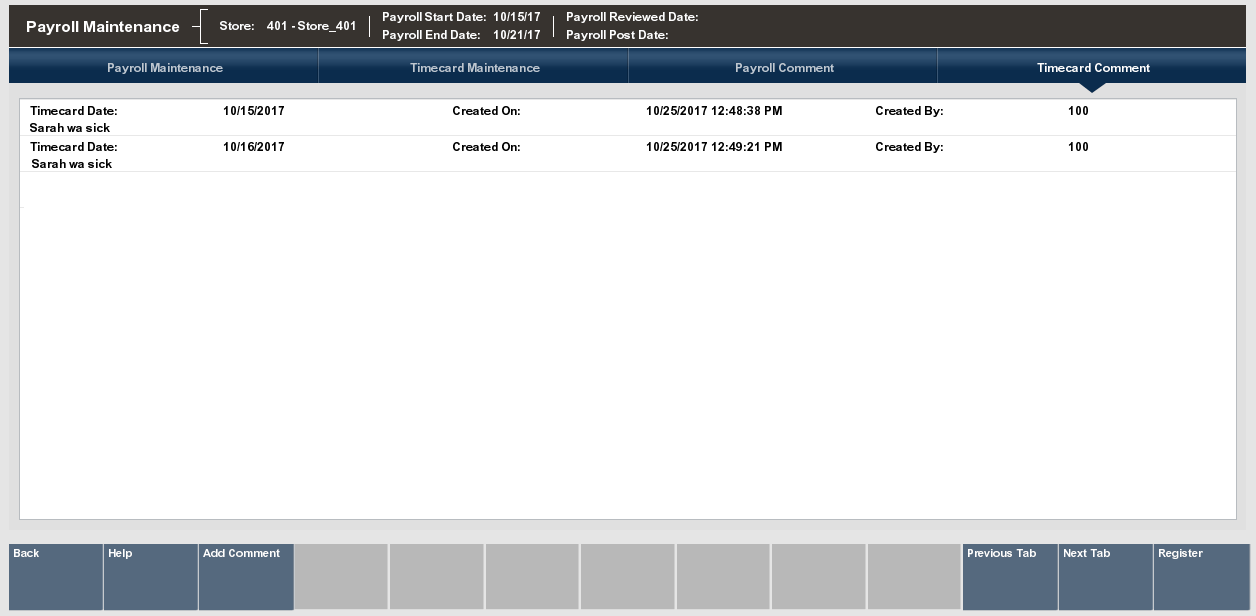
To view timecard record comments, use the Previous Tab and Next Tab options to navigate to the Timecard Comment tab at the Timecard Maintenance screen.
Oracle Retail Xstore Point of Service displays the comments associated with the current timecard record. In addition to the text of the comment, the comment's date and time of entry, and the ID of the person who created the comment are also shown.
An option to add a new comment to this timecard record is also available at the Timecard Comment tab. You can add additional comments to a record, or add comments to a record that has no current comments associated with it.
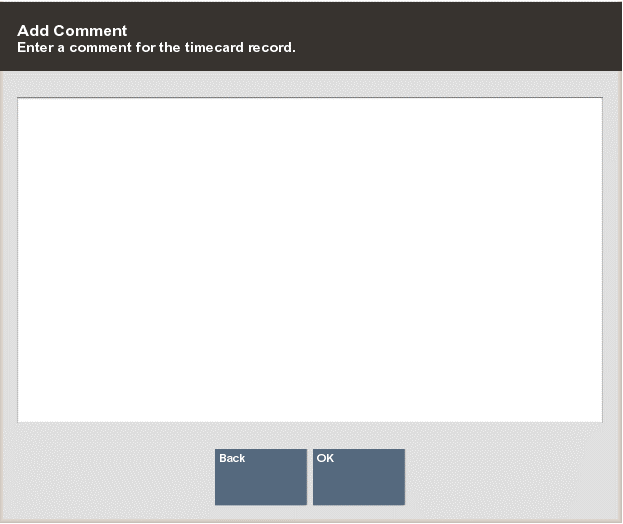
To add a comment to the timecard record, use the Previous Tab and Next Tab options to navigate to the Timcard Comment tab.
Select the Add Comment option (Figure 7-32 above).
Oracle Retail Xstore Point of Service displays the Add Comment form. Type a comment and press Enter to add the comment to the timecard record.
The following Payroll and Timecard reports are available:
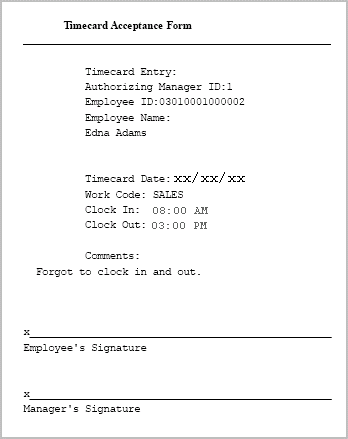
This report shows a day-by-day breakdown of employee time-card records when payroll is posted. For each employee, the report includes the total hours for each day and for the week. If this report is printed, it includes signature lines for the employee and manager.
This report includes the following information:
Date
Time In
Time Out
Category
Hours
Day Total
Week Total
Refer to the Oracle Retail Xstore Point of Service Reports Guide for details about this report.
The Open TimeCard Report provides a listing of employees who have time cards with Clock-In times but who have not yet clocked out from work. The report lists the employee name and ID, the clock-in time and the work code selected at clock-in time. This report includes the following information:
Employee ID
Name
Clock-In Time
Register
Work Code
Refer to the Oracle Retail Xstore Point of Service Reports Guide for details about this report.
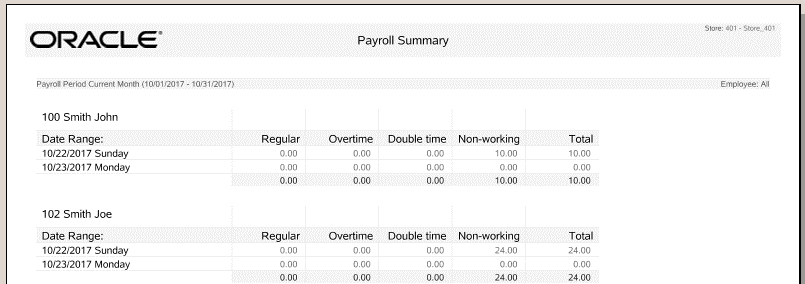
The Payroll Summary Report shows all of the hours displayed on the Payroll Maintenance screen for all active employees for a pay period.
This report includes the following information:
Employee Name/ID
Date/Weekday
Reg Hours - The regular hours worked, excluding overtime hours.
Over Time Hours - The overtime hours worked.
Double Time Hours - Overtime hours worked at a double pay rate.
Non-Working Hours - Non-working categories include Vacation Hours, Sick Hours, Personal Hours, and Other Hours as determined by your store policy.
Total Hours - The total hours worked for each employee and category.
Report Total Hours - The sum of all hours for all employees on the report.
|
Note: Refer to the Oracle Retail Xstore Point of Service Reports Guide for details about this report. |
The Payroll Detail By Employee Report shows a detailed breakdown for each employee's payroll record by day and payroll category. This report includes the following information:
Payroll Period
Regular Hours
Overtime Hours
Double-time Hours
Vacation Hours
Personal Hours
Sick Hours
Funeral Hours
Other Hours
Total Hours
The report also includes lines where employees may sign and date the printed report to indicate they reviewed the payroll information.
|
Note: Refer to the Oracle Retail Xstore Point of Service Reports Guide for details about this report. |