| Oracle® Retail Xstore Point-of-Service Mobile User Guide Release 18.0 F12257-04 |
|

 Previous |
 Next |
| Oracle® Retail Xstore Point-of-Service Mobile User Guide Release 18.0 F12257-04 |
|
Previous |
Next |
A Hold Account transaction is typically performed when customers plan to purchase merchandise, but would like the store to hold the item(s) for a short period of time so they can return to the store later to complete the purchase and pick up the reserved items. You must associate a customer with the transaction to ensure they receive the reserved items once they return.
The following topics are described in this section:
From the Sale screen Context Menu, select Extended Transaction.
At the Extended Transaction menu, select the Hold option.
The next steps depend on whether or not a customer is associated with the current transaction:
If you have assigned a customer, see If a customer is associated with the transaction.
If you have not assigned a customer, see If a customer has not been associated with the transaction.
When a customer has been associated with the current transaction, the system automatically searches the database to locate any open Hold accounts for this customer.
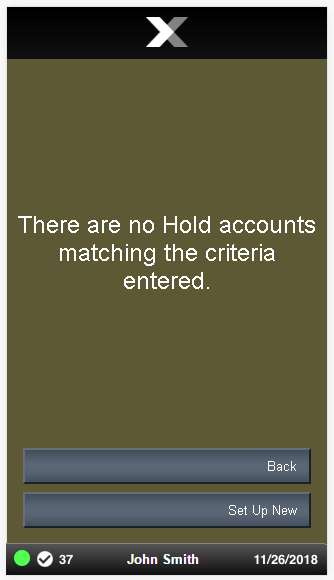
If no Hold accounts are found, you have the following options:
Select Set Up New to create a Hold account for this customer. Continue with Creating a New Hold Account.
Select Back to enter new search criteria.
If a Hold account is found, you have the following options:
Select Set Up New to create a new Hold account. Continue with Creating a New Hold Account.
Press Enter to view the selected Hold account.
When there is no customer associated with the current transaction, the Hold Search form displays. You have the following options:
Select Set Up New to create a new Hold account. After associating a customer with the transaction, continue with Creating a New Hold Account.
To search for a Hold account, enter search criteria and select Process. See Searching for a Hold Account.
Select Back to return to the Sale screen.
...continued from step 3
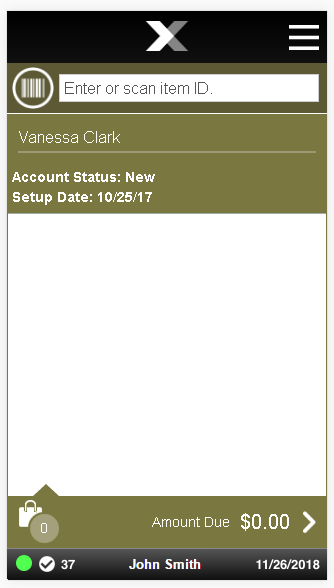
After a customer is associated with the transaction, scan or enter the Hold item ID.
You have the following options at the Hold screen before tendering:
Figure 17-5 Hold Account Screen - Item Added
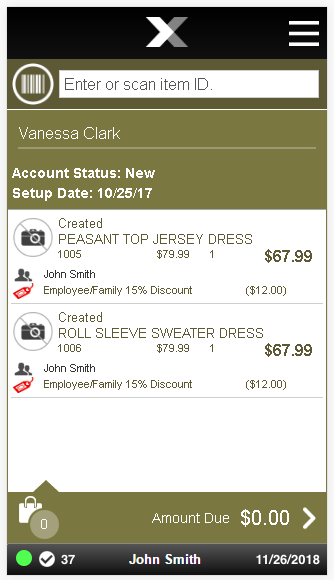
You can scan another Hold item.
You can change an item by:
Adding a discount (See Adding a Discount to an Item or Transaction).
Changing the item price (Changing the Item Price).
Voiding a line item (Voiding an Item).
Voiding a discount (this is only available for items with a discount applied, and uses the same process as voiding an item).
After adding items to the Hold account, select Exit Hold to exit Hold mode and return to sale mode before completing the Hold account setup.
|
Note: Hold items may only be modified in the Hold screen.You cannot change the Hold item quantity. |
...continued from step 3
To search for a Hold account, enter search criteria in the Hold Search form.
Account ID: The Hold account identifier.
Last Name: The Hold account owner's last name.
First Name: The Hold account owner's first name.
Customer ID: The Hold account owner's customer ID.
Phone #: The Hold account owner's phone number.
Select Process.
If there are no Hold accounts matching your search criteria, a message displays indicating no accounts were found. See Figure 17-1.
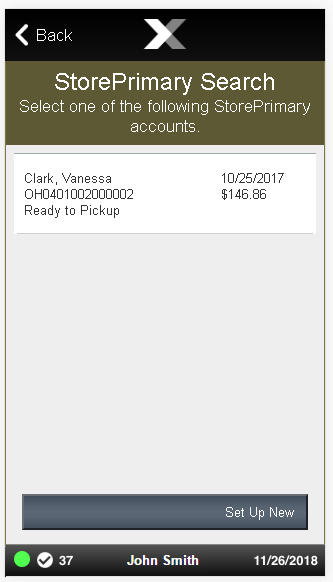
If at least one Hold account matches your search criteria, the account or accounts are listed in the Hold Account Search Results Form. See Figure 17-7.
From the Sale screen Context Menu, select Extended Transaction.
At the Extended Transaction menu, select the Hold option.
Find the Hold Account:
If prompted, enter search criteria to find the Hold Account.
If a customer has been associated with the transaction, Xstore Mobile returns a list of Hold accounts for the customer.
Select a Hold account from the list.
Figure 17-7 Hold Account Search Form List
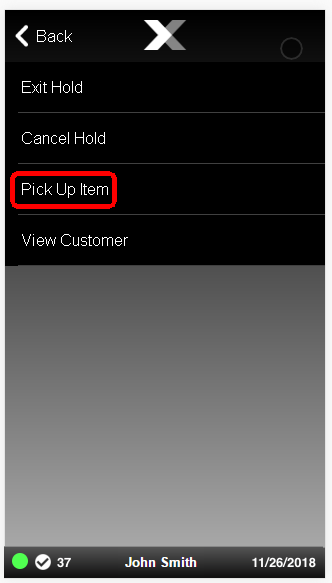
At the Hold Account screen context menu, select Pick Up Item.
Figure 17-8 Hold Account Screen Context Menu Options
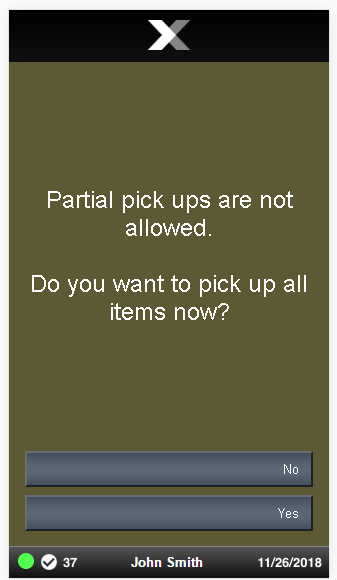
If prompted, select Yes to pick up all the Hold items. Selecting No returns to the Hold Account screen.
|
Note: This prompt only displays when there are multiple Hold items on the account. |
Figure 17-9 Pick Up Items Confirmation Prompt
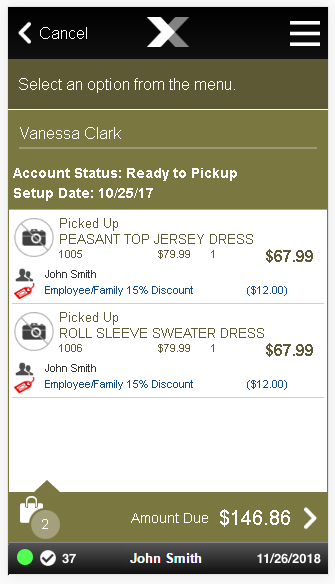
The system returns to the Hold Account screen and all items are marked as Picked Up.
Figure 17-10 Hold Account Screen - Items Picked Up
Complete the transaction:
Select Amount Due to complete the transaction. See Email Receipt Optionsfor more information about receipts.
<OR>
Select Exit Hold to return to the Sale screen before completing the transaction.
From the Sale screen Context Menu, select Extended Transaction.
At the Extended Transaction menu, select the Hold option.
Find the Hold Account:
If prompted, enter search criteria to find the Hold Account.
If a customer has been associated with the transaction, Xstore Mobile returns a list of Hold accounts for the customer.
Select a Hold account from the list.
Figure 17-11 Hold Account Search Form List
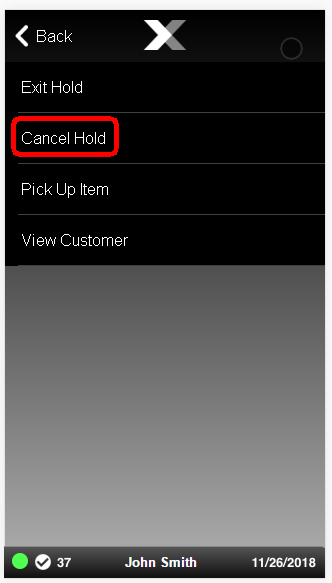
At the Hold Account screen context menu, select Cancel Hold.
Figure 17-12 Hold Account Screen Context Menu Options
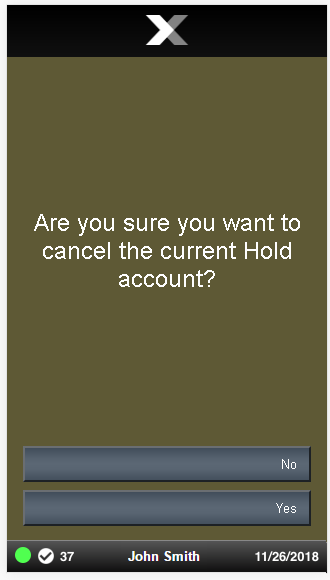
When prompted, select Yes to confirm you want to cancel this Hold account. Selecting No returns to the Hold Account screen.
Figure 17-13 Cancel Hold Account Confirmation Prompt
The system returns to Sale mode where you can complete the cancel process.