| Oracle® Retail Xstore Point of Service User Guide Release 18.0 F12254-01 |
|

 Previous |
 Next |
A warranty (also known as a service plan) is a promise made by a manufacturer or seller to support a product after its purchase. Typically, this involves the purchase of a contract that covers the costs of parts and service on an item beyond the manufacturer's original warranty period.
Additional benefits may be offered during the manufacturer's warranty and throughout the entire coverage period. A warranty may be offered to a customer during a sales transaction. It may also be used to bring the customer back to the store when the plan includes an option for periodic merchandise inspections.
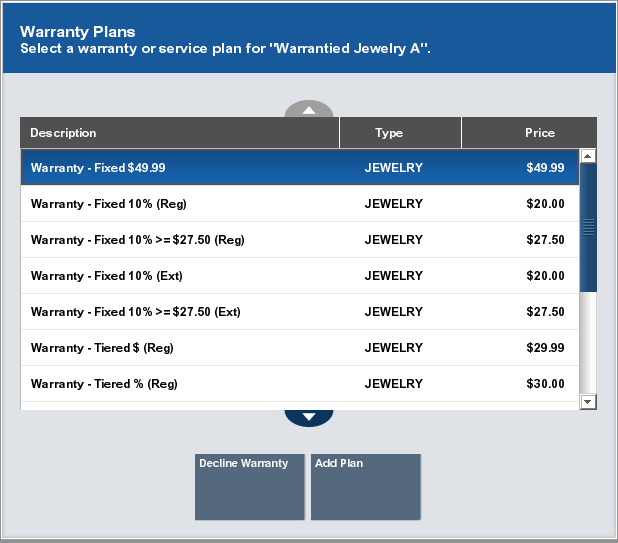
When you sell an item that is eligible for a warranty or service plan, the system automatically displays a list, in the Message Window, of plans that are available for the specific item.
|
Note: Items that are eligible for warranty plans but have not been associated with any plan show a No Warranty Purchase icon next to them in the View Port. |
When are prompted to select a warranty:
Select whether to add a warranty:
Select Decline Warranty to continue the transaction without adding a warranty.
Select the warranty to add:
Click the warranty.
Use the up and down arrows to highlight the warranty.
Click Add Plan.
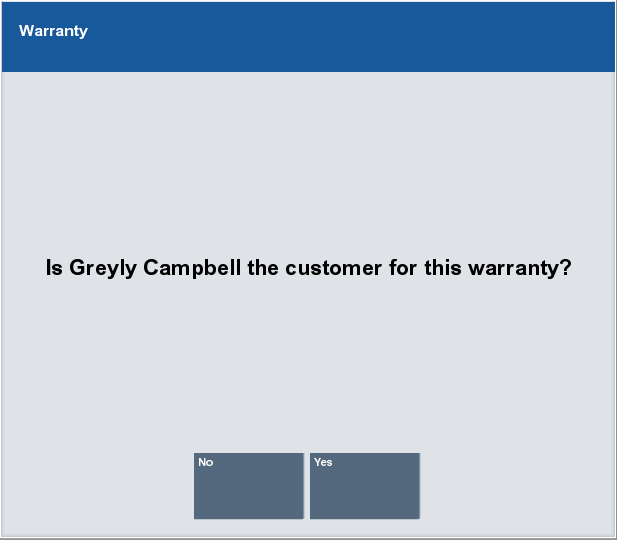
The warranty is added to the transaction and Xstore Point of Service prompts for the customer to assign to the warranty.
If a customer is associated with the transaction, Xstore Point of Service prompts whether to assign the current customer to the warranty. Continue with Step 3.
If no customer is associated with the transaction, Xstore Point of Service prompts for customer information for the warranty. Continue with Step 4.
|
Note: Because a warranty must have an owner, you must associate a customer name with the warranty plan. The plan owner may be a different person than the customer who purchases the item and the warranty. For example, the customer may purchase an item as a gift and also wants to assign the warranty to the person receiving the gift. |
Indicate whether to assign the warranty to the current customer:
Click Yes to assign the warranty to the current customer.
Continue the transaction.
Click No to assign the warranty to a different customer.
Xstore Point of Service prompts for the warranty owner.
Enter the warranty owner information.
Click Yes.
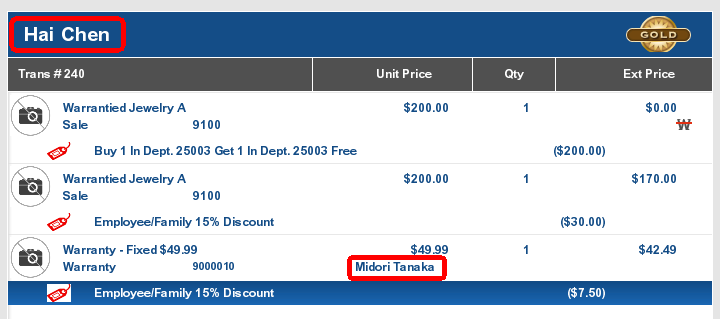
The person's name is added to the warranty.
A customer may decide to purchase a warranty after purchasing an item. For example, the item may have been purchased as a gift and the recipient would like to purchase a warranty for the item. Perhaps the customer has reconsidered the warranty option and returns to the store later to purchase the warranty. You can also add a warranty plan in the current transaction if the customer declines the warranty at first and reconsiders the decision before the transaction is tendered.
To add a warranty after a purchase:
Click Extended Transaction in the Register Sale screen.
Click Warranty.
Click Add Warranty.
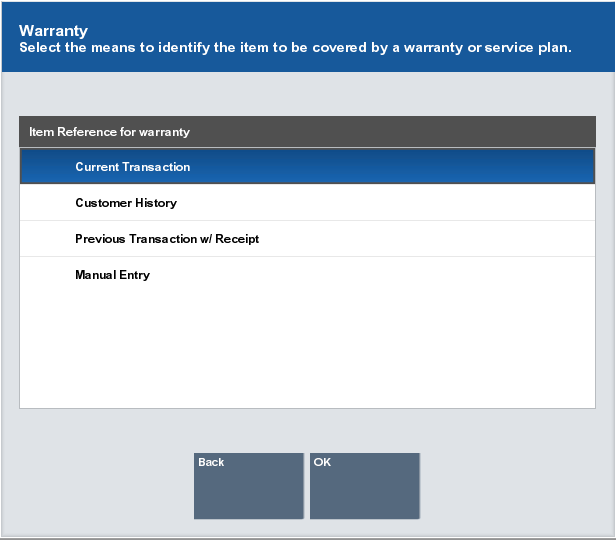
Click the method to use to find the item on which the warranty will be applied, then click OK:
Current Transaction - The item is in the current sale transaction. This option is only available if there is at least one item in the current sale transaction.
Xstore Point of Service displays a lists of items in the current transaction that are eligible for a warranty. Continue with Current Transaction.
Previous Transaction w/ Receipt - The item is identified on the receipt from a previous transaction.
Xstore Point of Service prompts you to enter information from the original transaction receipt. Continue with Previous Transaction with Receipt.
Customer History - Find the item by searching the customer's previous purchase transaction history.
Xstore Point of Service displays a list of items previously purchased by the customer that are eligible for a warranty. Continue with Customer History.
Manual Entry - The item has no receipt available and it is not in the customer's purchase history.
Xstore Point of Service prompts for an item ID. Continue with Manual Entry.
After selecting Current Transaction in Step 4, do the following:
Select the items in the Message Window.
Click the item.
Use the up and down arrows to highlight the correct item and press the Spacebar.
Click OK.
Xstore Point of Service displays a list of warranties that can be added to the item. Figure 13-1.
Select the warranty:
Click the warranty.
Use the up and down arrows to highlight the correct warranty and press the Spacebar.
Click OK.
The warranty is added to the transaction and Xstore Point of Service prompts for the customer to assign to the warranty.
If a customer is associated with the transaction, Xstore Point of Service prompts whether to assign the current customer to the warranty. Continue with Step 5.
If no customer is associated with the transaction, Xstore Point of Service prompts for customer information for the warranty. Continue with Step 6.
Indicate whether to assign the warranty to the current customer:
Click Yes to assign the warranty to the current customer.
Continue the transaction.
Click No to assign the warranty to a different customer.
Xstore Point of Service prompts for the warranty owner.
Enter the warranty owner information.
Click Yes.
The person's name is added to the warranty. Continue the transaction.
After selecting Previous Transaction w/ Receipt in Step 4, do the following:
Enter information about the original transaction:
Gift Receipt - Indicates whether the receipt is a gift receipt.
Trans Barcode - Barcode for the transaction.
Orig Ticket ID - ID of the original ticket.
Orig Trans Date - Date of the transaction.
Orig Store ID - ID of the store where the transaction was performed.
Orig Register ID - ID of the register that performed the original transaction.
Credit Card # - Number of the credit card used in the original transaction.
Serial Number - Serial number of the item.
Click Process.
Xstore Point of Service displays a list of items from the original transaction that are eligible for a warranty.
Select the item for which to add a warranty:
Click the item.
Use the up and down arrows to highlight the correct item and press the Spacebar.
Click OK.
The warranty is added to the transaction and Xstore Point of Service prompts for the customer to assign to the warranty.
If a customer is associated with the transaction, Xstore Point of Service prompts whether to assign the current customer to the warranty. Continue with Step 5.
If no customer is associated with the transaction, Xstore Point of Service prompts for customer information for the warranty. Continue with Step 6.
Indicate whether to assign the warranty to the current customer:
Click Yes to assign the warranty to the current customer.
Continue the transaction.
Click No to assign the warranty to a different customer.
Xstore Point of Service prompts for the warranty owner.
Enter the warranty owner information.
Click Yes.
The person's name is added to the warranty. Continue the transaction.
After selecting Customer History in Step 4, do the following:
Select the items for which to add a warranty:
Click the item.
Use the up and down arrows to highlight the correct item and press the Spacebar.
Click OK.
The warranty is added to the transaction and Xstore Point of Service prompts for the customer to assign to the warranty.
If a customer is associated with the transaction, Xstore Point of Service prompts whether to assign the current customer to the warranty. Continue with Step 3.
If no customer is associated with the transaction, Xstore Point of Service prompts for customer information for the warranty. Continue with Step 4.
Indicate whether to assign the warranty to the current customer:
Click Yes to assign the warranty to the current customer.
Continue the transaction.
Click No to assign the warranty to a different customer.
Xstore Point of Service prompts for the warranty owner.
Enter the warranty owner information.
Click Yes.
The person's name is added to the warranty. Continue the transaction.
After selecting Manual Entry in Step 4, do the following:
Enter the item:
Scan the item.
Enter the ID of the item and press Enter.
If necessary, enter the price of the item and press Enter.
The warranty is added to the transaction and Xstore Point of Service prompts for the customer to assign to the warranty.
If a customer is associated with the transaction, Xstore Point of Service prompts whether to assign the current customer to the warranty. Continue with Step 3.
If no customer is associated with the transaction, Xstore Point of Service prompts for customer information for the warranty. Continue with Step 4.
Indicate whether to assign the warranty to the current customer:
Click Yes to assign the warranty to the current customer.
Continue the transaction.
Click No to assign the warranty to a different customer.
Xstore Point of Service prompts for the warranty owner.
Enter the warranty owner information.
Click Yes.
The person's name is added to the warranty. Continue the transaction.
To change the customer assigned to a warranty:
Click Extended Transaction in the Register Sale screen.
Click Warranty.
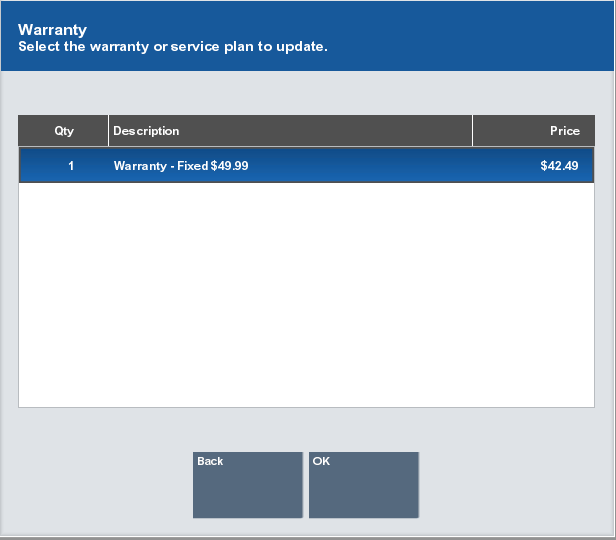
Click Change Customer. Figure 13-5.
Xstore Point of Service displays a list of warranties in the current transaction.
Select the warranty:
Click the warranty.
Use the up and down arrows to highlight the correct warranty and press the Spacebar.
Click OK.
Xstore Point of Service prompts for customer information.
Enter the new warranty owner information.
Click Yes.
The customer assigned to the warranty is changed. Continue the transaction.