| Oracle® Retail Xstore Point of Service Reports Guide Release 19.0 F21535-03 |
|

 Previous |
 Next |
Oracle Retail Xstore Point of Service provides a wide variety of reports to help you monitor and analyze your store's operations and sales. All reports are available in the Back Office module and are grouped by function. The information in this guide will help you understand what reports are available, how to access the reports you need, how to select the correct report criteria, and what output and save options you can use.
The reports available on the Back Office menu are based on your business needs. The order in which the reports are displayed may also be customized. Because each Oracle Retail Xstore Point of Service menu is configurable, the menu options and locations shown on your system may be different than the options shown throughout this guide.
Controlling access to company information on reports is a significant issue and Oracle Retail Xstore Point of Service addresses that requirement through system security privileges. Access to reports can be controlled at an individual employee level or at a group level.
You must have security privileges in Xstore Point of Service that allow you to log in to the Back Office module in order to run reports.
At the register screen, select the Back Office option.
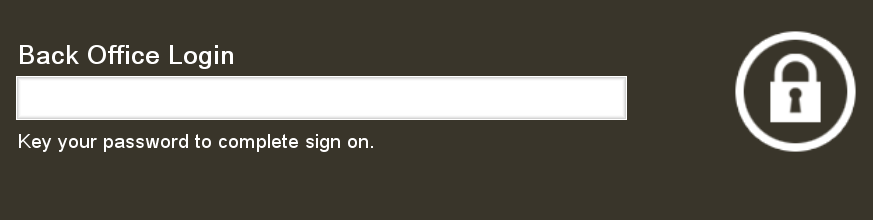
Enter your ID at the Login ID prompt and press [Enter].
Enter your password at the Login Password prompt and press [Enter].
|
Note: If your system is set up to use a Biometric Fingerprint device, this Employee ID Login prompt displays. Use the device to scan your fingerprint rather than entering your user ID and password (typing your user ID and password is also supported at this prompt). |
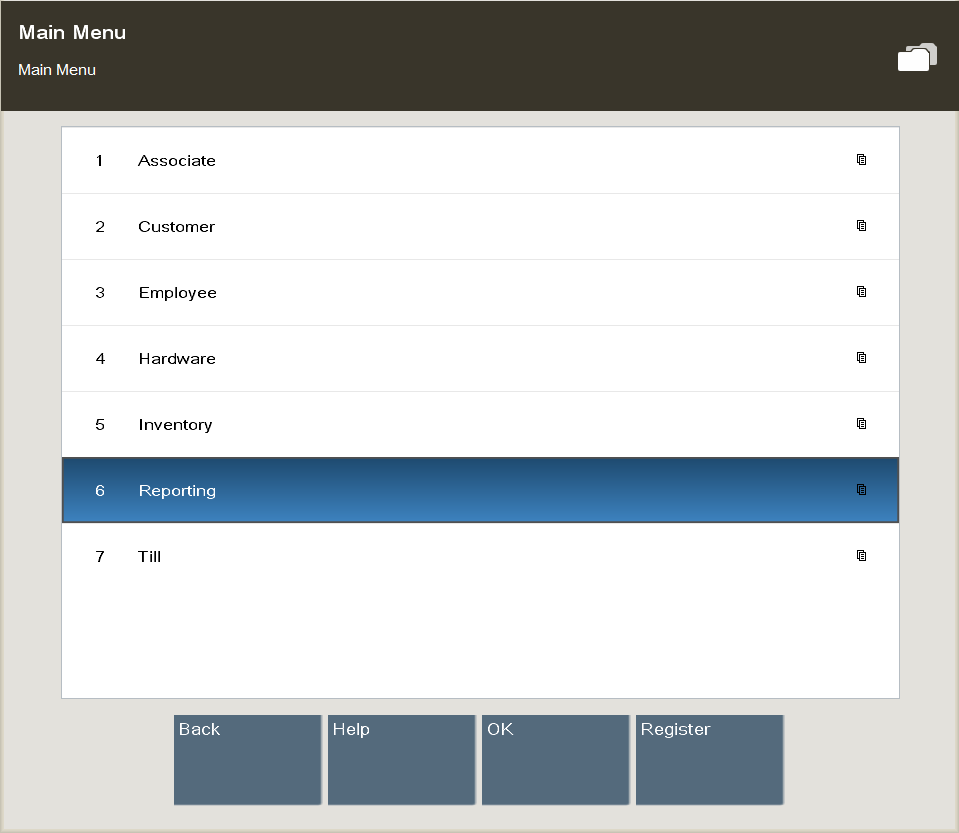
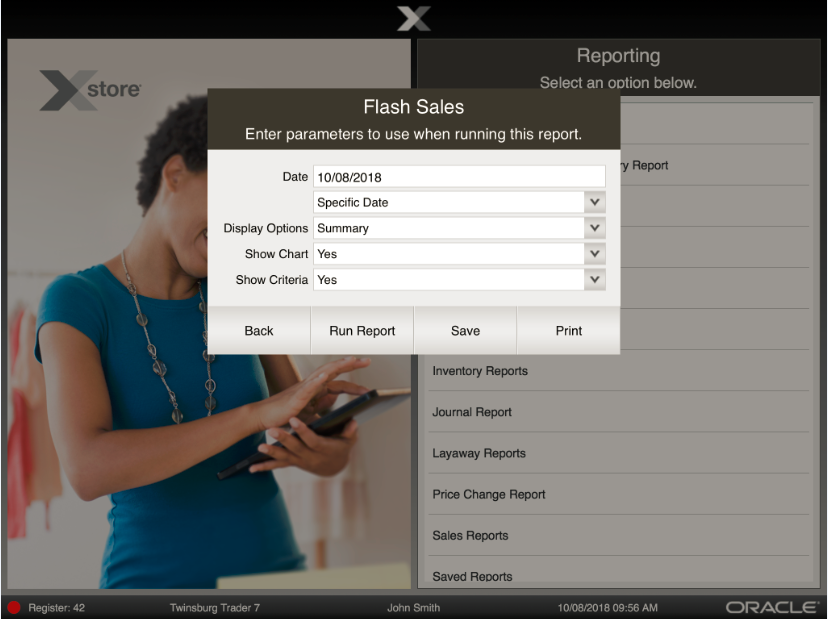
On the back office Main Menu, use the up and down arrows to highlight the menu option you want to use and click Ok.
The system may display a list of reports for the function you selected (Sales, Inventory, Manager Reports, and so on), or if only one report is available, you will see the criteria selections for defining your output.
Refer to the chapter in this guide that explains how to run the report you selected.
|
Note: All Oracle Retail Xstore Point of Service desktop reports are also available on the Xstore Mobile Tablet. |
To access Xstore reports on the Xstore Mobile Tablet, follow the steps below.
At the Login screen, enter your credentials to log on to Xstore Mobile.
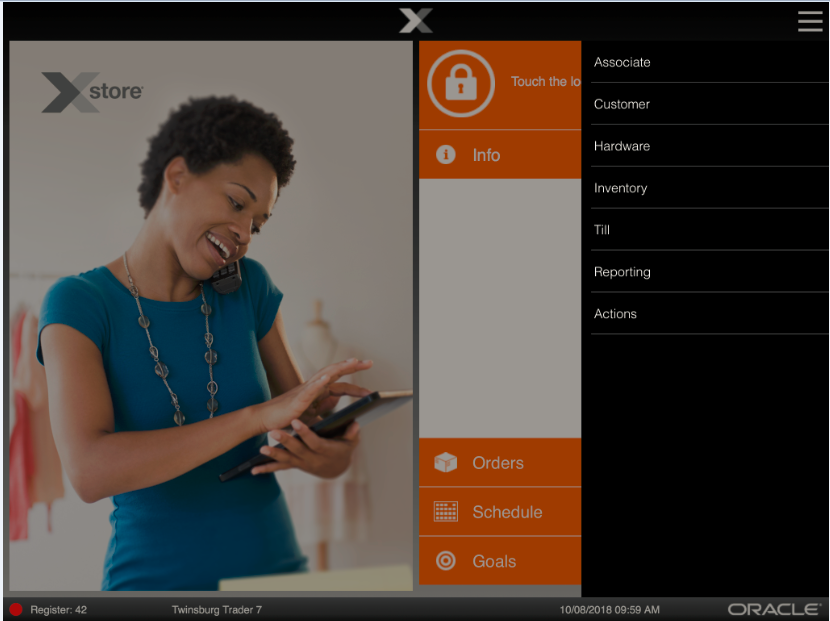
At the main menu, select the Context Menu button in the upper-right hand corner of the screen.
At the Context Menu, select Actions and then Reporting.
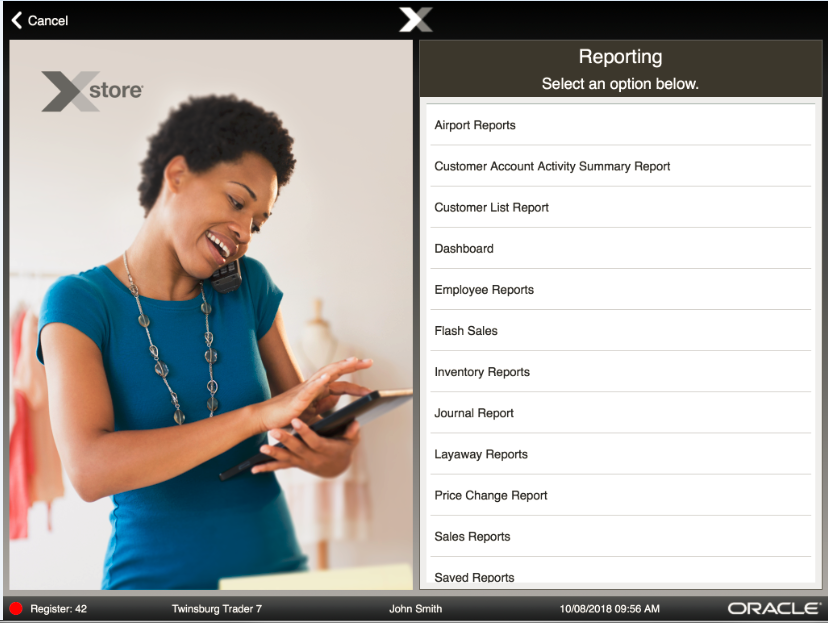
Depending on you system's configuration, the Report Categories are displayed.
Select Cancel to return to the Login screen.
Select a Report Category. Xstore Mobile displays a list of available reports.
Select Cancel to return to Reporting.
Select a report from the list. The system displays the Report Search screen. Enter the search criteria.
Select Run Report. The report is displayed in the PDF viewer of your device.
Select Xstore in the top left corner to exit the report.
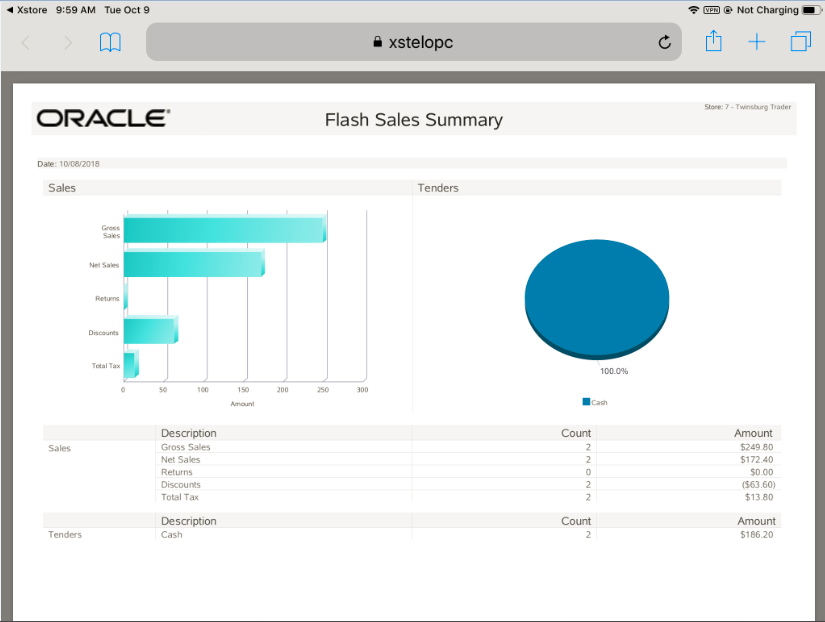
In reports, net sales are calculated as follows:
Count for net sales is the number of items sold, minus the number of items returned.
Amount calculation is Gross Sales minus Tax, and minus Returns. Any Markdowns (discounts) are also excluded.
There are several SystemConfiguration.xml parameters that determine how Net Sales are calculated:
<ExcludeVatFromNetSales dtype="Boolean">true</ExcludeVatFromNetSales>
When true, VAT is excluded from Net Sales.
<BookAsSaleOnSetup dtype="Boolean">false</BookAsSaleOnSetup>
There are two flags, one for Layaway and one for Special Order. This is used to determine if a sale of this type is booked as a Sale during Setup or Pickup. When false, the sale is booked at pickup.
The following database flag is checked for net sale calculations:
itm_item_options.exclude_from_net_sales_flag
When true, Non-Merchandise items are excluded from Net Sales calculations.
There are other SystemConfiguration.xml parameters that affect Gross Sale calculations:
<IncludeSalesTaxInGrossSales dtype="Boolean">true</IncludeSalesTaxInGrossSales>
When true, the sales tax amount is included as part of the total Gross Sales amount.
<GrossSalesOptions dtype="Default">
1) <EnforceExcludeFromNetSalesFlag dtype="Boolean">false</
EnforceExcludeFromNetSalesFlag>
2) <ExcludeReturns dtype="Boolean">false</ExcludeReturns>
</GrossSalesOptions>
1) If the itm_non_phys_item.exclude_from_net_sales_flag value is set to true for certain non-physical items, this configuration value determines whether or not the system enforces the exclusion of the sales amount of this item from the total gross sale amount as well.
2) When true, return amounts are not included in the total gross sale amount.