2 Installing the Connector
The Oracle Enterprise Manager Connector Framework requires a web service interface for forwarding event information to IBM Tivoli Netcool/OMNIbus (Netcool/OMNIbus). Since Netcool/OMNIbus does not provide a web services interface, you must install a third-party web service for Netcool/OMNIbus front-end, which is included in the Oracle Enterprise Manager Netcool/OMNIbus installation package.
You can install the web service on a Windows or Unix system that has connectivity to the Netcool/OMNIbus server. In addition to the web service for Netcool/OMNIbus front-end, you must also install a back-end Oracle Agent for Netcool/OMNIbus on the same physical system as the Netcool/OMNIbus server. The Oracle Agent for Netcool/OMNIbus is preconfigured and is also included in the Oracle Enterprise Manager IBM Tivoli Netcool/OMNIbus installation package.
Figure 2-1 shows the communication between the various components of the Netcool/OMNIbus Connector.
The following sections in this chapter discuss these topics:
2.1 Installation Platforms
You can install the web service for IBM Tivoli Netcool/OMNIbus on the following platforms that support Java Development Kit (JDK) 1.6:
-
Microsoft Windows
-
Oracle Solaris
-
HP-UX
-
Linux
You can install the Oracle Agent for IBM Tivoli Netcool/OMNIbus on the following platforms:
-
Microsoft Windows (2000, 2003, 2008, XP)
-
IBM AIX (RS/6000 OS version 5.2+, 5.3, 6.x, and 7.x)
-
Linux RHEL (64-bit) 5.3, 5.4, 5.6
-
Oracle Solaris (8, 9, and 10)
2.2 Prerequisites
Ensure that the following prerequisites have been met before proceeding to the next section.
-
For Enterprise Manager Cloud Control 13c: The latest version of the Netcool/OMNIbus connector comes pre-installed and does not need to be downloaded through Self Update. If the connector you wish to install is not pre-installed, the My Oracle Support (MOS) Preferred Credentials must be set to enable the download of connectors through self update. To determine whether the connector needs to be downloaded from self update, perform the following steps:
-
From the Setup menu, select Extensibility, then select Self Update.
-
On the Self Update page, click Management Connector to display a list of available connectors.
-
If the Netcool/OMNIbus connector that you need is not listed here, then you will need to set up My Oracle Support Preferred Credentials (see below).
-
-
For Enterprise Manager Cloud Control 12c: The Netcool/OMNIbus connector must be downloaded from the Self Update page of Enterprise Manager Cloud Control 12c. The My Oracle Support (MOS) Preferred Credentials must be set (see below) to enable you to download it.
-
To set the MOS Preferred Credentials:
-
From the Setup menu, select My Oracle Support, then select Set Credentials.
-
Enter the user name and password information, then click Apply.
-
From Setup menu, select Extensibilty, then Self Update.
-
From the Self Update page, click Check Updates to schedule a job to collect the metadata for the connector.
See Also:
"Using Self Update to Download Oracle Products" section of the Enterprise Manager Cloud Administration Guide for more details. -
-
An IBM Tivoli Netcool/OMNIbus user account must be set up that the web service for Netcool/OMNIbus can use to access the Object Server database. The account must have read permission to the
alerts.status,alerts.details, andalerts.journaldatabase tables. -
An unzip utility must be available on the system where the Oracle Agent for Netcool/OMNIbus is to be installed.
-
A Netcool/OMNIbus Process Agent must be installed on the system where the Oracle Agent for Netcool/OMNIbus is to be installed. Oracle recommends installing the Oracle Agent for Netcool/OMNIbus on the Object Server system.
-
The Netcool/OMNIbus connector requires a Netcool/OMNIbus TEC EIF Probe to insert events into IBM Tivoli Netcool/OMNIbus. This probe can be a single standalone master or a master/slave pair. At a minimum, a master Netcool/OMNIbus TEC EIF Probe must be installed on a system that has connectivity to the Object Server system.
2.3 Installing the Connector in Enterprise Manager
All connectors in the store are available for download via the Self Update page of Enterprise Manager Cloud Control.
Notes:
-
There are no special privileges needed to download a connector. However, you need the Super Administrator privilege to apply a connector.
-
If Enterprise Manager is not connected to My Oracle Support, then refer to Installing the Connector if Enterprise Manager is in "Offline" Mode.
-
For Enterprise Manager Cloud Control 13c: The Netcool/OMNIbus connector is preloaded; so, in most cases you will only need to apply the connector. If you need to install an older version of the connector or the connector is inadvertently deleted, then the connector will need to be downloaded from self update.
-
For Enterprise Manager Cloud Control 12c: The Netcool/OMNIbus connector is not included out-of-box, so you need to download it from the Oracle Enterprise Manager store. All connectors in the store are available for download via the Self Update page of Enterprise Manager Cloud Control.
To determine whether you need to download the connector, perform the following steps:
-
From the Setup menu, select Extensibility, then select Self Update.
-
On the Self Update page, select Management Connector to display a list of available connectors.
-
Look for the Netcool/OMNIbus connector that you intend to use.
If it is not listed, you will need to set up My Oracle Support (MOS) Preferred Credentials as specified in Prerequisites. Once the update task has completed, the connector should show up with a status of Available.
If the status of the connector is Available, perform the following steps to download the connector:
-
From the Setup menu, select Extensibility, then select Self Update.
-
Click the Management Connector link in the Type column.
The IBM Tivoli Netcool/OMNIbus connector appears in the list with a status of Available.
-
Click on IBM Tivoli Netcool/OMNIbus connector to select it, then click Download.
The Schedule Download window appears, where you can determine when the download should be performed.
-
Click Select to download immediately.
If you want to schedule the download for a later time, specify the date and time when the download should occur, and click Select. You will need to return and finish the remainder of this procedure after the scheduled download date and time.
-
If necessary, refresh the screen until the status of the connector changes to Downloaded.
If the status of the connector is Downloaded, perform the following steps to apply the connector.
-
From the Setup menu, select Extensibility then select Self Update.
-
On the Self Update page, select Management Connector to display a list of available connectors.
-
Click on the IBM Tivoli Netcool/OMNIbus connector to select it, and then click Apply.
After you respond to the prompt to confirm the operation, a page appears that indicates the request has been submitted.
-
Refresh the screen until the status of the connector changes from Apply Scheduled to Applied.
See Also:
"Using Self Update to Download Oracle Products" section of the Enterprise Manager Cloud Administration Guide for detailed information and diagnostic procedures.2.3.1 Installing the Connector if Enterprise Manager is in "Offline" Mode
Under certain circumstances, such as in high security environments, an active Internet connection between Enterprise Manager and the Enterprise Manager Update Store may not be available. In such situations, Enterprise Manager can be set to install the connector in an "offline" mode.
The installation process still requires that a computer exist at your site that has Internet access, as a connection to the Enterprise Manager Update Store is still required to obtain the necessary files. The files that you download to this computer can then be transferred to a computer behind your firewall.
Note for Enterprise Manager 13c only:
The latest Netcool/OMNIbus connector comes pre-installed so you can ignore this section if the connector that you need has been pre-installed. To determine if it is pre-installed, perform the following steps:-
From the Setup menu, select Extensibility then select Self Update.
-
On the Self Update page, select Management Connector to display a list of available connectors.
-
Look for the Netcool/OMNIbus connector that you intend to use. If it appears and has a status of Downloaded, then you can skip this section.
To install the connector if Enterprise Manager is in "offline" mode:
-
From the system that you will ultimately deploy the connector, set Enterprise Manager Cloud Control to Offline Mode:
-
From the Setup menu, select Provisioning and Patching, then select Offline Patching.
-
In the Online and Offline Settings page, select Offline.
-
-
From the Setup menu, select Extensibility, then select Self Update.
-
On the Self Update page, click Check Updates. A message appears with the following URL to an Oracle site from where the updates catalog file can be downloaded:
https://updates.oracle.com/Orion/Download/download_patch/p9348486_112000_Generic.zip
-
From an Internet-enabled computer, download the catalog file using the aforementioned URL.
-
Copy the downloaded catalog file to the OMS host or the Management Agent host where you plan to import the connector.
-
Import the catalog file to Enterprise Manager:
-
If the catalog file is on the OMS host:
emcli import_update_catalog -file="file" -omslocal
Where:
-
-file: is the direct path to the connector archive (*.zip). -
-omslocal: indicates that the path mentioned in the-fileoption is directly accessible to the Enterprise Manager server
-
-
If the catalog file is on a different host:
emcli import_update_catalog -file="file" -host="hostname" [-credential_set_name="setname"] | -credential_name="name" -credential_owner="owner"
Sample for Importing Catalog Archive shows a sample for importing the catalog archive.
-
-
On the Self Update page, in the table, click Management Connectors.
-
On the Connector Updates page, select the imported update that is available for download. Click Download.
A message appears with a URL to an Oracle site from where the update can be downloaded.
-
From a computer that is connected to the internet, download the update using the aforementioned URL.
-
Copy the downloaded file to the OMS host or the Management Agent host where you plan to deploy the connector.
-
To import the downloaded connector archive into Enterprise Manager, run the following command:
emcli import_update -file=”<path to *.zip file>” -omslocal
Where:
-
-file: is the direct path to the connector archive (*.zip). -
-omslocal: indicates that the path mentioned in the-fileoption is directly accessible to the Enterprise Manager server
-
2.3.1.1 Sample for Importing Catalog Archive
emcli import_update_catalog -file="/u01/common/p9348486_112000_Generic.zip"  -omslocal

Imports the master catalog file p9348486_112000_Generic.zip. The file must exist
on the OMS host. In a multiple OMS setup, the request can be processed by any
OMS, so the file should be accessible from the OMS processing the request. This
means that the file must be kept on a shared location that is accessible from all
the OMS instances.

emcli import_update_catalog -file="/u01/common/p9348486_112000_Generic.zip" -host="host1.example.com" -credential_set_name="HostCredsNormal"

Imports the master catalog file p9348486_112000_Generic.zip that is present on
the host host1.example.com. The host must be a managed host target in Enterprise
Manager, and the Management Agent on this host must be up and running. The
preferred unprivileged credentials for host host1.example.com are used to retrieve
the remote file.
2.4 Exporting the Installation Files
The agent and web service installation files are included in the Self Update archive that was installed in Installing the Connector in Enterprise Manager.
2.4.1 Exporting Installation Files for Enterprise Manager 13c
To export the installation files, first determine where you want to export the installation files. You can export it to a managed host machine or to your workstation:
-
To export the installation files to a managed host, see Exporting to a Managed Host.
-
To export the installation files to your workstation, see Exporting to Your Workstation.
-
To extract the installation files, follow the instructions in Extracting the Installation Files.
2.4.1.1 Exporting to a Managed Host
To export the installation files to a managed host machine, perform the following steps:
-
From the Setup menu, select Extensibility then select Self Update.
-
On the Self Update page, click Management Connector to display a list of available connectors.
-
From the list of available Management Connectors, click the appropriate Netcool/OMNIbus connector name, then select Export to->Managed Host from the Actions list.
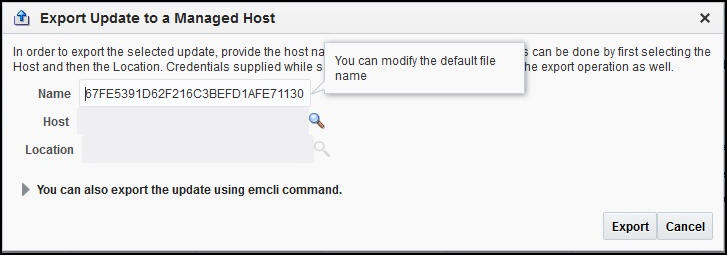
A pop-up window similar to Figure 2-2 will be displayed:
-
Enter the name of the export file or accept the default name.
-
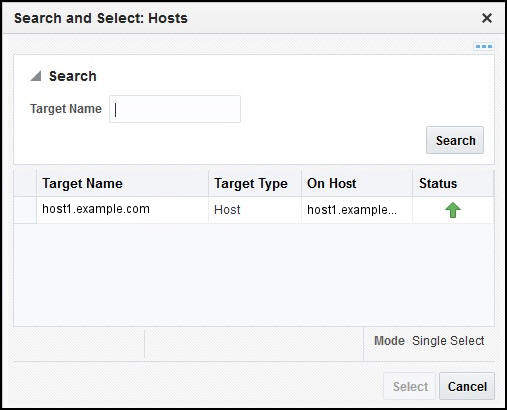
Click on the search icon for the Host field. A pop-up window similar to Figure 2-3 is displayed:
-
Select a host and click Select. You might need to enter a search string to narrow the results.
-
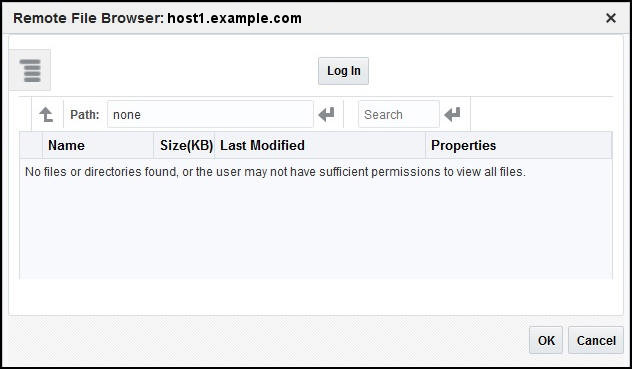
From the Export Update to a Managed Host pop-up window, click the search icon for the Location field. A popup similar to Figure 2-4 is displayed:
-
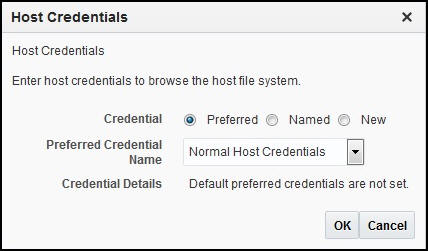
Click Log In. A popup similar to Figure 2-5 is displayed:
-
Select existing Preferred or Named credentials or enter a New set of named credentials and click OK.
-
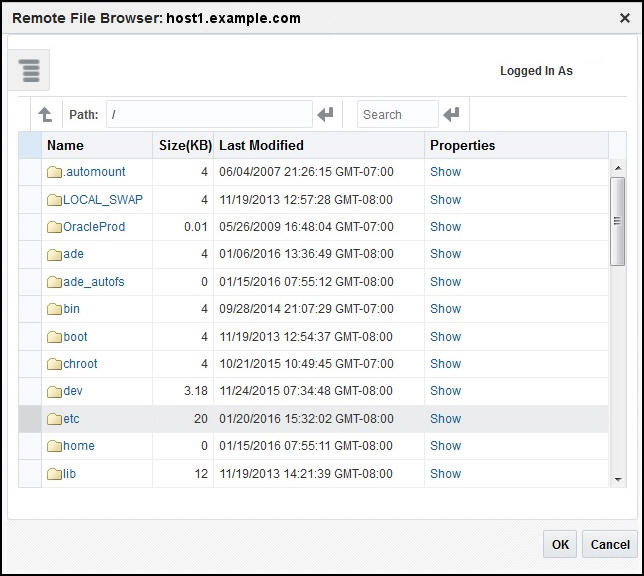
A pop-up window similar to Figure 2-6 is displayed:
-
Select the path where you want to place the export file and click OK.
-
The Export Update to a Managed Host pop-up window will refresh with the selections listed. Click Export.
2.4.1.2 Exporting to Your Workstation
To export the installation files to your workstation, perform the following steps:
-
From the Setup menu, select Extensibility then select Self Update.
-
On the Self Update page, click Management Connector to display a list of available connectors.
-
From the list of available Management Connectors, click the appropriate Netcool/OMNIbus connector name, then select Export to->Your Workstation from the Actions list.
-
A pop-up window will be displayed that prompts whether to Open or Save the file. Select Save File and click OK.
-
A pop-up window may then be displayed that allows you to select the location where the file will be saved. Select a location and click Save.
2.4.2 Exporting Installation Files for Enterprise Manager 12c
To export the installation files for an Enterprise Manager Cloud Control 12c instance:
-
Determine the command required to export the adapter installation file. To do this, perform the following steps:
-
From the Setup menu, select Extensibility, then Self Update.
-
Click the Management Connector link in the Type column.
-
Click the IBM Tivoli Netcool/OMNIbus connector to select it, then select Export from the Actions list.
A pop-up window similar to the example shown in Figure 2-7 appears with the command required to export the file.
-
-
Open a command window on the host where the export file was copied and navigate to the directory where the file was copied.
-
Log into EM CLI using the following command:
emcli login -username=<Enterprise Manager Super Administrator log in>
You will be asked to provide the password information.
You must execute EM CLI from the OMS server system. See the Oracle Enterprise Manager Command Line Interface for information about setting up EM CLI:
http://docs.oracle.com/cd/E24628_01/em.121/e17786/toc.htm
-
Run the EM CLI
export_updatecommand from your system, changing<dirname>to the full path of the temporary directory.This action creates a zip file with a name of
p18729201_112000_Generic.zip. -
Continue with Extracting the Installation Files.
2.4.3 Extracting the Installation Files
Once the zip file has been exported, perform the following steps to extract the agent installation files.
-
Open a command window on the host where the export file was copied and navigate to the directory where the file was copied.
-
Extract the installation files from the zip file using the following command:
unzip *.zip archives/*
2.5 Installing the Web Service for Netcool/OMNIbus Front-End
The web service for Netcool/OMNIbus acts as a front-end for all data flowing into and out of Netcool/OMNIbus. Oracle Enterprise Manager posts calls to the web service whenever it needs to create or update an alert or get new or updated alerts from Netcool/OMNIbus.
You can install the web service for Netcool/OMNIbus on any Unix or Windows system that runs the Oracle JDK 1.6 and has connectivity to the Netcool/OMNIbus server and the Oracle Enterprise Manager OMS (Oracle Management Service).
2.6 Web Service for Netcool/OMNIbus on Unix
The following sections explain how to install and then subsequently run the Web Service on a Unix platform:
2.6.1 Prerequisites
The following prerequisites must be met before proceeding to the next section:
2.6.2 Installing the Web Service on Unix
To install the web service on a Unix platform, perform the following steps:
-
Create a directory where you want to install the web service.
-
Copy the
OMNIbus_webservices_adapter.jarfile from the Management Server host system to the web service installation directory. The file is located in the archives directory that was extracted in Exporting the Installation Files. -
Open a command prompt window and change the working directory to the web service installation directory.
-
Enter the following command to extract the web services components from the web services .jar file:
jar xvf OMNIbus_webservices_adapter.jar
Note:
If the system where the web service for Netcool/OMNIbus is being installed does not have the JDK installed, you cannot extract the jar file contents. You need to copy the .jar file to a system that has the installed JDK and transfer the files after they have been extracted.This creates the adapters directory that contains the installation files.
-
Enter the following command to change the working directory:
cd adapters/endpoints/omnibus
-
Enter the following command to run the installation script:
sh ./install.sh
-
When the script prompts whether you want to use HTTPS:
-
If you specify Y, then the web service is set up to use HTTPS port number 8443.
-
If you specify N, then the web service is set up to use HTTP port number 8080.
-
-
When the script prompts for the user name of the web service, enter a user name that must be provided to access the web service for Netcool/OMNIbus.
The user name can be any value and is not associated with any specific OS or Netcool/OMNIbus account. Make a note of this value and supply it when configuring the Netcool/OMNIbus connector in Enterprise Manager.
-
When the script prompts for the password of the web service, enter the password that must be provided to access the web service for Netcool/OMNIbus.
The password can be any value and is not associated with any specific OS or Netcool/OMNIbus account. Note this value and supply it when configuring the Netcool/OMNIbus connector in Enterprise Manager.
-
When the script prompts for the username to access the Object Server database, enter the username of an account that has read access to the
alerts.status,alerts.details, andalerts.journalsdatabase tables. -
When the script prompts for the password to access the Object Server database, enter the password for the account specified in the previous step.
-
When the script prompts for the host name of the Object Server system, enter the host name or IP address of the system where the Object Server is installed. You will not be allowed to specify a host name of localhost, because the web service will fail when attempting to connect to the Object Server database.
-
When the script prompts for the Object Server database port number, enter the port number to use when connecting to the Object Server database. The default port number is 4100. To determine the port number used by your system, start the Netcool/OMNIbus Administrator and open the Object Servers window. The port number for the Object Server is listed on this window.
-
The web service can be configured to attempt to connect to a backup Object Server database if there are problems connecting to the primary Object Server database. You are prompted to specify whether you want to configure the web service to connect to a backup Object Server instance. If you answer N to the prompt, skip to step 17.
-
When the script prompts for the host name of the backup Object Server system, enter the host name or IP address of the system where the backup Object Server is installed. You are not allowed to specify a host name of localhost, because the web service will fail when attempting to connect to the Object Server database.
-
When the script prompts for the backup Object Server database port number, enter the port number to use when connecting to the backup Object Server database. The default port number is 4100. To determine the port number used by your system, start the Netcool/OMNIbus Administrator and open the Object Servers window. The port number for the Object Server is listed on this window.
-
When the script prompts for the master EIF probe host name, enter the host name or IP address of the system where the master TEC EIF probe is installed.
-
When the script prompts for the master EIF probe port number, enter the port number to use when connecting to the master TEC EIF probe. The port number is defined in the
PortNumberproperty in thetivoli_eif.propsfile. The file is located in the EIF probe installation directory. -
The web service can be configured to also send events to a slave EIF probe when sending events to the master EIF probe. You will be prompted to specify whether you want to configure the web service to send events to a slave EIF probe. If you answer N to the prompt, skip to step 22.
-
When the script prompts for the slave EIF probe host name, enter the host name or IP address of the system where the slave TEC EIF probe is installed.
-
When the script prompts for the slave EIF probe port number, enter the port number to use when connecting to the slave TEC EIF probe. The port number is defined in the
PortNumberproperty in thetivoli_eif.propsfile. The file is located in the EIF probe installation directory. -
After the script displays the message "Netcool/OMNIbus Adapter Install Complete," press Enter to complete the installation.
-
Copy additional required jar files as specified in Copying the Required .jar Files
-
If the web service was configured to run using the HTTPS protocol, you must set up SSL as specified in Section 6.1, "Configure Oracle Enterprise Manager to Use SSL."
-
Delete the
OMNIbus_webservices_adapter.jarfile from the installation directory.
The web service framework is now installed and ready to start.
2.6.3 Running the Web Service on Unix
To run the web service for Netcool/OMNIbus framework commands listed with the following tasks, first change the working directory to ...
adapters/bin
... in the installation directory.
-
Start:
./service.sh start -
Shut Down:
./service.sh stop -
Restart:
./service.sh restart -
Check Status:
./service.sh status
2.6.4 Testing the Web Service on Unix
Perform the following steps to verify that the web service for Netcool/OMNIbus is functional.
-
Open a terminal and change the working directory to the
adapters/bindirectory in the installation directory. -
Run the test script:
./testAdapter.sh
-
When the utility prompts for the web service password, enter the password you specified for the web service for Netcool/OMNIbus in step 9 of Installing the Web Service on Unix.
If the test completes successfully, the last line the utility displays is "Test completed successfully."
2.6.5 Copying the Required .jar Files
The web service for Netcool/OMNIbus requires you to copy the following .jar files in the Web Services installation directory to the lib/adapters directory:
-
log.jar— Used by the EIF probe -
evd.jar— Used by the EIF probe -
jconn3.jar— Sybase JDBC driver file
To copy the appropriate .jar files, complete the following steps:
-
From the Object Server system, access the following directory:
$OMNIHOME/java/jars -
Copy the
log.jar,jconn3.jarandevd.jarfiles to thelib/adaptersdirectory in the web service installation directory.
Note:
Periodically, new versions of the JDBC file are released. When a major release occurs, the name of thejconn.jar file changes.
Whenever the jar file name changes, a configuration change must be made to the OMNIbus web service. Listed below are the steps required to make the configuration change to the web service:
-
Navigate to the
confdirectory of the Web Service installation directory. -
Open the
framework.propertiesfile in a text editor. -
Change the
omnibus.sql.driverproperty to the path of the SybDriver class in thejconnjar file that was downloaded. For example:If the jar file is named
jconn5.jar, then the path should be:com.sybase.jdbc5.jdbc.SybDriver
If the jar file is named
jconn6.jar, then the path should be:com.sybase.jdbc6.jdbc.SybDriver.
If there are any problems using those paths, you can use the jar utility to determine the correct path to the SybDriver class as shown below
jar tvf /path/to/jconnx.jar | grep SybDriver
-
Save the update to the
framework.propertiesfile. -
Restart the OMNIbus web service.
2.6.6 Uninstalling the Web Service on Unix
To uninstall the web service on Unix:
-
Run the
service.sh statuscommand to determine whether the web service is running. -
If the web service is running, run the
service.sh stopcommand to stop the web service and verify it completes successfully. -
Delete all files in the installation directory.
2.7 Web Service for Netcool/OMNIbus on Windows
The following sections explain how to install and then subsequently run the web service for Netcool/OMNIbus on a Windows platform:
2.7.1 Prerequisites
The following prerequisites must be met before proceeding to the next section.
-
Oracle Java Development Kit (JDK) version 6 Update 11 or higher is installed.
-
JAVA_HOMEenvironment variable is set to the JDK installation directory. -
Zip utility, such as WinZip, is installed for unzipping a zip file.
2.7.2 Installing the Web Service on Windows
To install the web service on a Windows platform, perform the following steps:
-
Create a directory where you want to install the web service.
-
Copy the
OMNIbus_webservices_adapter.jarfile from the Management Server host system to the web service installation directory. The file is located in the archives directory that was extracted in Exporting the Installation Files -
Open a command prompt window and change the working directory to the web service installation directory.
-
Enter the following command to extract the web services components from the web
services .jarfile:jar xvf OMNIbus_webservices_adapter.jar
Note:
If the system where the web service for Netcool/OMNIbus is being installed does not have the JDK installed, you cannot extract the jar file contents. You need to copy the jar file to a system that has the installed JDK and transfer the files after they have been extracted.This creates the adapters directory that contains the installation files.
-
Enter the following command to change the working directory as follows:
cd adapters\endpoints\omnibus
-
Enter the following command to run the installation script:
install.bat
-
When the script prompts whether you want to use HTTPS:
-
If you specify Y, then the web service is set up to use HTTPS port number 8443.
-
If you specify N, then the web service is set up to use HTTP port number 8080.
-
-
When the script prompts for the user name of the web service, enter a user name that must be provided to access the web service for Netcool/OMNIbus.
The user name can be any value and is not associated with any specific OS or Netcool/OMNIbus account. Note this value and supply it when configuring the Netcool/OMNIbus connector in Enterprise Manager.
-
When the script prompts for the password of the web service, enter the password that must be provided to access the web service for Netcool/OMNIbus.
The password can be any value and is not associated with any specific OS or Netcool/OMNIbus account. Note this value and supply it when configuring the Netcool/OMNIbus connector in Enterprise Manager.
-
When the script prompts for the username to access the Object Server database, enter the username of an account that has read access to the
alerts.status,alerts.details, andalerts.journalsdatabase tables. -
When the script prompts for the password to access the Object Server database, enter the password for the account specified in the previous step.
-
When the script prompts for the host name of the Object Server system, enter the host name or IP address of the system where the Object Server is installed. You will not be allowed to specify a host name of localhost, because the web service will fail when attempting to connect to the Object Server database.
-
When the script prompts for the Object Server database port number, enter the port number to use when connecting to the Object Server database. The default port number is 4100. To determine the port number used by your system, start the Netcool/OMNIbus Administrator and open the Object Servers window. The port number for the Object Server is listed on this window.
-
The web service can be configured to attempt to connect to a backup Object Server database if there are problems connecting to the primary Object Server database. You will be prompted to specify whether you want to configure the web service to connect to a backup Object Server instance. If you answer N to the prompt, skip to step 17.
-
When the script prompts for the host name of the backup Object Server system, enter the host name or IP address of the system where the backup Object Server is installed. You will not be allowed to specify a hostname of localhost, because the web service will fail when attempting to connect to the Object Server database.
-
When the script prompts for the backup Object Server database port number, enter the port number to use when connecting to the backup Object Server database. The default port number is 4100. To determine the port number used by your system, start the Netcool/OMNIbus Administrator and open the Object Servers window. The port number for the Object Server is listed on this window.
-
When the script prompts for the master EIF probe hostname, enter the host name or IP address of the system where the master TEC EIF probe is installed.
-
When the script prompts for the master EIF probe port number, enter the port number to use when connecting to the master TEC EIF probe. The port number is defined in the
PortNumberproperty in thetivoli_eif.propsfile. The file is located in the EIF probe installation directory. -
You can also configure the web service to also send events to a slave EIF probe when sending events to the master EIF probe. You will be prompted to specify whether you want to configure the web service to send events to a slave EIF probe. If you answer N to the prompt, skip to step 22.
-
When the script prompts for the slave EIF probe hostname, enter the host name or IP address of the system where the slave TEC EIF probe is installed.
-
When the script prompts for the slave EIF probe port number, enter the port number to use when connecting to the slave TEC EIF probe. The port number is defined in the
PortNumberproperty in thetivoli_eif.propsfile. The file is located in the EIF probe installation directory. -
After the script displays the message "Netcool/OMNIbus Adapter Install Complete," click Enter to complete the installation.
-
Copy additional required jar files as specified in Copying the Required .jar Files
-
If the web service was configured to run using the HTTPS protocol, you must set up SSL as specified in Section 6.1, "Configure Oracle Enterprise Manager to Use SSL."
-
Delete the
OMNIbus_webservices_adapter.jarfile from the installation directory.
The web service framework is now installed and ready to start.
2.7.2.1 Running the Web Service as a Windows Service (Optional)
Optionally, if you want the web service to run as a Windows service, perform the following steps:
-
Change the working directory to the
adapters\bindirectory in the installation directory. -
Enter the following command to install the web service as a Windows service:
service.bat install
2.7.3 Running the Web Service on Windows
You can run the web service either as a standalone service or Windows service.
Running as a Standalone Service
To start the web service for Netcool/OMNIbus framework when set up as a standalone application (not set up to run as a Windows service):
-
Change the working directory to the
adapters\bindirectory in the installation directory. -
Run the following command:
startAdapters.bat
To shut down the web service Netcool/OMNIbus framework, close the window where you started the web service.
To start the web service for Netcool/OMNIbus framework when set up to run as a Windows service, enter the following command:
net start iWaveAdapters
To shut down the web service Netcool/OMNIbus framework, enter the following command:
net stop iWaveAdapters
2.7.4 Testing the Web Service on Windows
Perform the following steps to verify that the web service for Netcool/OMNIbus is functional.
-
Open a terminal and change the working directory to the
adapters\bindirectory in the installation directory. -
Enter the following command to run the test script:
.\testAdapter.bat
-
When the utility prompts for the web service password, enter the password you specified for the web service for Netcool/OMNIbus in step 9 of Installing the Web Service on Windows.
If the test completes successfully, the last line the utility displays is "Test completed successfully."
2.7.5 Copying the Required .jar Files
The web service for Netcool/OMNIbus requires you to copy the following .jar files in the Web Services installation directory to the lib/adapters directory:
-
log.jar— Used by the EIF probe -
evd.jar— Used by the EIF probe -
jconn3.jar— Sybase JDBC driver file
To copy the appropriate .jar files, complete the following steps:
-
From the Object Server system, access the following directory:
%OMNIHOME%\java\jars -
Copy the
log.jar,jconn3.jarandevd.jarfiles to thelib\adaptersdirectory in the web service installation directory.
Note:
Periodically, new versions of the JDBC file are released. When a major release occurs, the name of thejconn.jar file changes.
Whenever the jar file name changes, a configuration change must be made to the OMNIbus web service. Listed below are the steps required to make the configuration change to the web service:
-
Navigate to the
confdirectory of the web service installation directory. -
Open the
framework.propertiesfile in a text editor. -
Change the
omnibus.sql.driverproperty to the path of the SybDriver class in thejconnjar file that was downloaded. For example:If the jar file is named
jconn3.jar, then the path should be:com.sybase.jdbc3.jdbc.SybDriver
If the jar file is named
jconn4.jar, then the path should be:com.sybase.jdbc4.jdbc.SybDriver
-
Save the update to the
framework.propertiesfile. -
Restart the OMNIbus web service.
2.7.6 Uninstalling the Web Service on Windows
To uninstall the web service on Windows:
-
Determine if the web service is installed as a Windows service:
-
If the web service is installed as a Windows service, perform the following steps:
-
Determine if the web service is running.
-
If the web service is running, run the
service.batstop command to stop the web service and verify it completes successfully. -
Run the
service.batuninstall command to remove it as a Windows service and verify it completes successfully.
-
-
If the web service is not installed as a Windows service, perform the following steps:
-
Determine if the web service is running.
-
If the web service is running, stop the web service by closing the Java window.
-
-
-
Delete all files in the installation directory.
2.8 Installing the Oracle Agent for Netcool/OMNIbus
The Oracle Agent for Netcool/OMNIbus is invoked by an Object Server external procedure to send event information to the web service for Netcool/OMNIbus.
Note:
The IBM Tivoli Netcool/OMNIbus Process Control/Process Agent must first be installed on the system where the Agent is to be installed. Oracle recommends installing the Oracle Agent for Netcool/OMNIbus on the Object Server system.To install the Oracle Agent for Netcool/OMNIbus, perform the following steps:
-
Create a directory where you want to install the Oracle Agent for Netcool/OMNIbus.
-
Determine the name of the installation file based on the OS platform where the agent is being installed.
The platforms and associated installation files are as follows:
-
Windows —
OMNIbusAgentWindows.zip -
AIX —
OMNIbusAgentAIX.tar.gz -
Linux —
OMNIbusAgentLinux.tar.gz -
Oracle Solaris —
OMNIbusAgentSolaris.tar.gz
-
-
Transfer the appropriate installation file from the Management Server host system to the Agent installation directory. The file is located in the archives directory that was extracted in Exporting the Installation Files.
-
Extract the files from the zip archive. This creates the agent directory that contains the installation files.
-
Change the working directory to the agent directory.
-
Run the setup script to configure the agent.
The file name depends on the platform. If the platform is Windows, the setup script is named
Setup.cmd. For all other platforms, the setup script is namedsetup.shand should be called using the following command:sh ./setup.sh
-
When the script prompts for the web service host name, enter the host name or IP address where the web service for Netcool/OMNIbus is installed.
-
When the script prompts for the web service port, enter the port number the web service for Netcool/OMNIbus uses to receive transactions from the Agent.
The default port number of 8080 will be used most of the time and will even be used if the Netcool/OMNIbus web service is configured to use HTTPS. The only time the default port number will not be used is when the default port is changed as specified in the Changing the Web Service Port (8080) section in Appendix A. If you are unsure of what port number to use, perform the following steps to determine the port number to use:
-
At the system where the web service is installed, navigate to the
adapters/confdirectory. -
Open the
framework.propertiesfile in a text editor and search for thenotification.urlproperty. -
Whatever port number is specified in the
notification.urlproperty is the port number you should specify.
-
-
When the script prompts for the user ID to specify when creating event journal entries in Netcool/OMNIbus, enter the user ID of a user that has permission to add journal entries. If no value is specified, the user ID will default to 0 (
root). The value specified must be an integer value and will not work properly if a different value is entered.The script generates the necessary configuration files and places them in the Agent directory. The Agent is now installed, but you need to make some modifications in Netcool/OMNIbus for everything to function properly.
-
Perform the steps in Modifying Netcool/OMNIbus to complete the setup.
2.8.1 Uninstalling the Oracle Agent for Netcool/OMNIbus
To uninstall the Oracle Agent for Netcool/OMNIbus:
-
If the agent is being permanently deleted, the OMNIbus server modifications must be backed out as specified in Uninstalling Modifications to Netcool/OMNIbus.
-
Delete all files in the installation directory.
Note:
If the Oracle Agent for Netcool/OMNIbus is being replaced, the database external procedures that call the agent will fail until the replacement agent has been installed in the same location.2.9 Modifying Netcool/OMNIbus
The procedures in the following sections enable you to configure Netcool/OMNIbus to work with the installed Oracle Agent and web service components:
-
Configuring the Object Server Database to create a custom database table and the triggers/procedures the Oracle Agent and web service require.
-
Configuring the TEC EIF Probe to change the configuration of the TEC EIF probe to populate the custom database table when creating/updating events in Netcool/OMNIbus.
-
Change Deduplication Trigger Priority to change the configuration of the TEC EIF probe to populate the custom database table when creating/updating events in Netcool/OMNIbus.
2.9.1 Configuring the Object Server Database
Perform the following steps to run the configuration script that sets up the Netcool/OMNIbus Object Server database to work with the installed Oracle Agent and web service components.
-
If the Oracle Agent for Netcool/OMNIbus was NOT installed on the primary Object Server system, copy the
configure_oracle_webservice.sqlfile from the system where the Oracle Agent for Netcool/OMNIbus was installed to the system where the primary Object Server is installed. -
Run the SQL script using the appropriate command listed below based on the applicable platform:
Unix:
$OMNIBUSHOME/bin/nco_sql -S <objserver> -U <username> -P <password>
< <script_directory>/configure_oracle_webservice.sql
Windows:
"%OMNIBUSHOME%\bin\isql" -S <objserver> -U <username> -P <password>
-i <script_directory>\configure_oracle_webservice.sql
When entering the commands, provide the following information:
-
objserver— Object Server name -
username— User name that will be used when connecting to the database. The account must have permission to create tables, triggers, and procedures in the Object Server database. -
password— Password associated with the user name -
script_directory— Directory where theconfigure_oracle_webservice.sqlfile is located. If the Oracle Agent for Netcool/OMNIbus was installed on the primary Object Server system, this will be the Oracle Agent for Netcool/OMNIbus installation directory. Otherwise, it will be the directory where the file was copied.
-
2.9.2 Configuring the TEC EIF Probe
You need to manually change the set up of the TEC EIF probe configuration to accept alerts from the web service for Netcool/OMNIbus. You must modify the existing EIF probe rules file to include an Oracle-supplied rules file.
Note:
If the probes are configured to operate in a master/slave pair, these changes are required for each probe.To install the new rules file, perform the following steps:
-
Shut down the EIF probe.
-
Access the EIF probe installation directory.
-
Make a back-up copy of the existing
tivoli_eif.rulesfile. -
Copy the
oracle_eif.rulesfile from the system where the Oracle Agent for Netcool/OMNIbus was installed to the EIF probe install directory. -
Modify the
tivoli_eif.rulesfile as follows:-
Insert the following statements before any other executable statements:
defaultAlerts = registertarget("<PRIMARY>", "<BACKUP>", "alerts.status") OracleAlerts = registertarget("<PRIMARY>", "<BACKUP>", "custom.oracle_status") -
Replace
<PRIMARY>with the name of the primary object server. -
Replace
<BACKUP>with the name of the back-up server. If a back-up is not configured, replace it with an empty string so that the back-up server is "". -
In the location where the
tivoli_eif_tpc.rulesandtivoli_eif_tsm.rulesfiles are included, add an include statement for theoracle_eif.rulesfile. -
Save the
tivoli_eif.rulesfile.
-
-
Make sure the Inactivity parameter for the
tivoli_eif.propsfile is set to 0. -
Restart the EIF probe.
Note:
After installing the EIF Probe, at a minimum, you need to edit thetivoli_eif.props file and set the correct Netcool/OMNIbus server name. The file can be found in the following locations:
For UNIX:
%OMNIHOME%/probes/<platform>/tivoli_eif.prop
For Windows:
%OMNIHOME%\probes\<platform>\tivoli_eif.prop
Where:
<platform> is the actual platform name (such as win32).
Refer to the IBM Netcool/OMNIbus Installation and Deployment Guide for more information on configuring the EIF Probe:
http://publib.boulder.ibm.com/infocenter/tivihelp/v8r1/index.jsp?topic=%2Fcom.ibm.tivoli.namomnibus.doc%2Fwelcome_ob.htm
2.9.3 Change Deduplication Trigger Priority
The oracle_alert_reinserted trigger in the primary_only group must run first in order to function properly. To ensure the trigger runs first, the priority of the deduplication trigger in the default_triggers group must be changed from 1 to 2.The trigger priority can modified using the Netcool/OMNIbus Administrator application.
Note:
On some older versions of Netcool/OMNIbus, this trigger does not exist. If the trigger does not exist in your system, then no changes are required in this section.2.9.4 Uninstalling Modifications to Netcool/OMNIbus
To uninstall modification made to Netcool/OMNIbus:
Revert Deduplication Trigger Priority
Change the priority of the deduplication trigger in the default_triggers group back to 1. The trigger priority can modified using the Netcool/OMNIbus Administrator application.
Revert TEC EIF Probe Configuration
Perform the following to revert the TEC EIF probe configuration back to its original settings:
-
Shut down the EIF probe.
-
Access the EIF probe installation directory.
-
Replace the
tivoli_eif.rulesfile with the backup copy of the file that was created during installation. -
Delete the
oracle_eif.rulesfile from the EIF probe install directory. -
Restart the EIF probe.
Revert the Object Server Database Configuration
Perform the following steps to uninstall the customizations made to the Netcool/OMNIbus Object Server database during installation:
-
If the Oracle Agent for Netcool/OMNIbus was NOT installed on the primary Object Server system, copy the
uninstall_oracle_webservice.sqlfile from the system where the Oracle Agent for Netcool/OMNIbus was installed to the system where the primary Object Server is installed. -
Run the SQL script using the appropriate command listed below based on the applicable platform:
-
Unix:
$OMNIBUSHOME/bin/nco_sql -S <objserver> -U <username> -P <password> <script_directory>/uninstall_oracle_webservice.sql
-
Windows:
"%OMNIBUSHOME%\bin\isql" -S <objserver> -U <username> -P <password> -i <script_directory>\uninstall_oracle_webservice.sql
When entering the commands, provide the following information:
-
objserver— Object Server name -
username— User name that will be used when connecting to the database. The account must have permission to delete tables, triggers, and procedures from the Object Server database. -
password— Password associated with the user name -
script_directory— Directory where theuninstall_oracle_webservice.sqlfile is located. If the Oracle Agent for Netcool/OMNIbus was installed on the primary Object Server system, this will be the Oracle Agent for Netcool/OMNIbus installation directory. Otherwise it will be the directory where the file was copied.
-
2.10 Uninstalling the Connector
To uninstall the connector, you must first delete all defined instances of the connector, then you must delete the connector from the Self Update page.
-
From the Setup menu, select Extensibility, then Management Connectors.
-
Select an instance of the connector you want to delete, then click Delete.
-
On the Confirmation page, click Yes.
-
Repeat steps 2 and 3 until all instances of the connector have been deleted.
-
From the Setup menu, select Extensibility, then Self Update.
-
Click on the Management Connector link in the Type column. A list of updates appears for Management Connectors.
-
Click on the connector you want to delete, select Actions, then select Delete. The Delete Update window appears.
-
Click Delete to delete the connector. A pop-up confirmation window appears.
-
Click OK to confirm and delete the connector.