2 Manage Health Checks Tools
This chapter explains how to provision and stop the ORAchk plug-in to monitor your Engineered/non-Engineered Systems assets.
WARNING:
You should not attempt to associate ORAchk compliance standards to targets directly, but rather follow the below process. Failing to do so will result in incorrect or no results.
The following sections are provided:
2.1 Provisioning ORAchk
Once the plug-in is deployed, follow the steps below to provision ORAchk/Exachk to monitor your Engineered System/Cluster or Hosts running single instance databases assets:
-
All member targets of Engineered and non-Engineered System targets should be discovered and promoted before provisioning ORAchk.
-
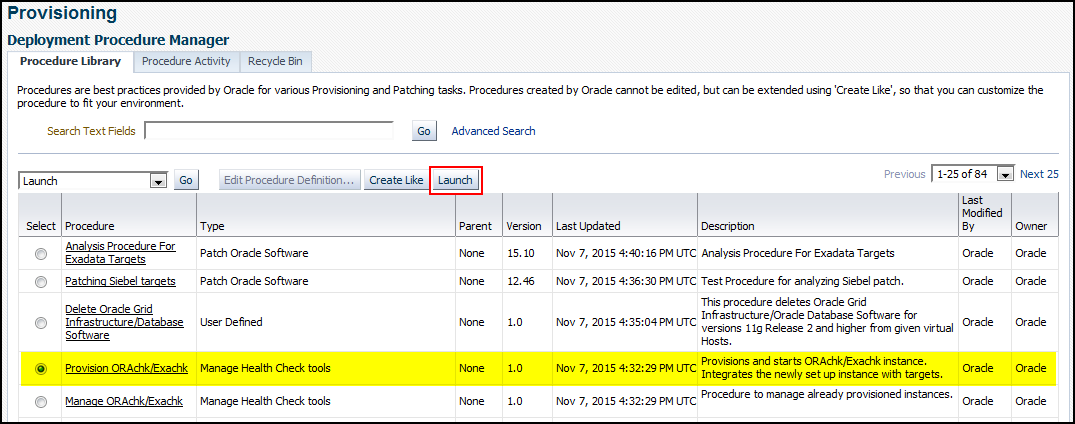
From the Enterprise menu, select Provisioning and Patching, then Procedure Library.
The Provisioning page displays the Deployment Procedure Manager.
Tip:
The Procedure Library contains tools or procedures that enable you to enact best practices for effective monitoring and management of your Oracle products. -
On the Provisioning page, select the Provision ORAchk/Exachk procedure and click Launch, as shown in Figure 2-1:
-
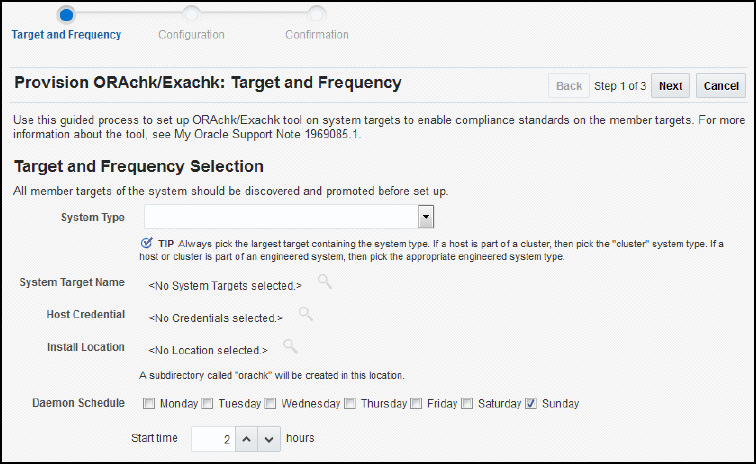
After you click Launch, the Provision ORAchk/Exachk wizard begins with the Target and Frequency, as shown in Figure 2-2. On this page, you must set up ORAchk/Exachk for the selected target.
Enter the following information:
-
Select a System Type. The target type list is presented for the systems supported by ORAchk/Exachk.
Click the drop-down menu and make a selection of an appropriate system, as shown in Figure 2-3:
Based on target type selection, more inputs may be needed. For example, if you select Oracle Exadata Database Machine, then you may have to select Cluster because one instance of Exachk is required per cluster.
Tip:
Always pick the highest available system type in the topology. If the host is part of cluster, then pick cluster system type. If the host or cluster is part of an engineered system, then pick the appropriate engineered system type. -
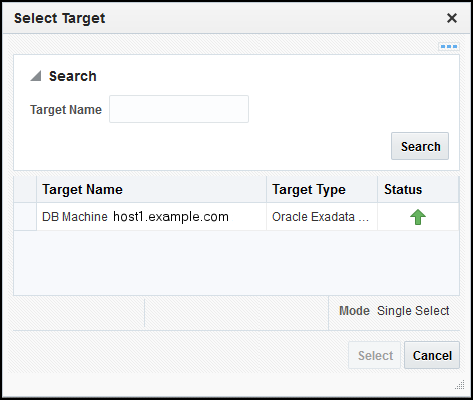
After you select the system type, select the System Target Name. Click the search icon and select a target name from the list. In the example shown in Figure 2-4, if you select an Exadata Databse Machine target type, then all available targets are shown in the list:
Note:
Only targets that have already been discovered by Enterprise Manager will appear in this list. -
If the system type you select has a cluster, then choose the cluster on which you want to configure Exachk. One instance of Exachk is needed for each cluster. Select a cluster name from the Cluster drop-down menu.
-
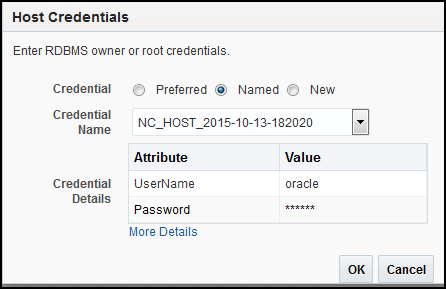
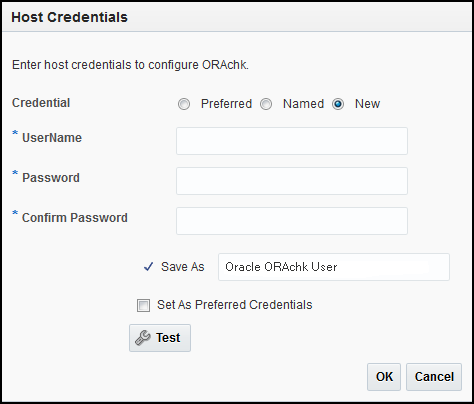
Set the Host Credential. Click the search icon and select either Preferred or Named in the pop-up window, as shown in Figure 2-5:
If the credentials are not set for the target, then click New and enter the information as shown in Figure 2-6:
-
The Install Location should then be populated (by default) with the location for where the
orachksubdirectory will be created. Click the search icon to change the location. -
Set the Daemon Schedule. Select the day and the time you want to begin. By default, the schedule is set for 2 am Sunday morning.
Click Next to begin the configuration. Provisioning processing takes about 5 minutes.
-
-
On the Configuration page (Figure 2-7), enter the following configuration information:
-
General Configuration: Verify the CRS home directory. The ORAchk/Exachk wizard will pre-populate this field with the necessary information.
-
Cell Cluster Configuration: Select an option to evaluate the best practices on the storage cells of a cluster or to skip the checks for the storage cells.
For evaluating best practices on the storage cells of a cluster, root level privileges are required on the cells. You can select an option to use the same root password on all storage cells. Otherwise, enter the password for each storage cell.
-
InfiniBand Configuration: Select an option to evaluate the best practices on the InfiniBand switch of the cluster or to skip the checks on the InfiniBand switch.
For evaluating best practices on the InfiniBand switch of a cluster, root level privileges are required. You can select an option to use the same root password on all InfiniBand switches. Otherwise, enter the password for each InfiniBand switch.
-
-
Click Submit.
-
On the Confirmation page, the Exachk setup begins. Click Show Status to view the setup details as the process continues.
-
Click Finish.


Note:
Repeat these steps for each Engineered Systems target to set up ORAchk.The steps described above can vary from engineered system to system. The questions/details asked for will vary.
2.2 Update the ORAchk Version
ORAchk versions will be made available through the Self Update feature of Enterprise Manager. To update the ORAchk plug-in:
2.2.1 Stop the ORAchk Daemon
Once ORAchk has been set up as the daemon, you can stop it, as needed:
-
From the Enterprise menu, select Provisioning and Patching, then Procedure Library.
The Provisioning page displays showing the Deployment Procedure Manager.
-
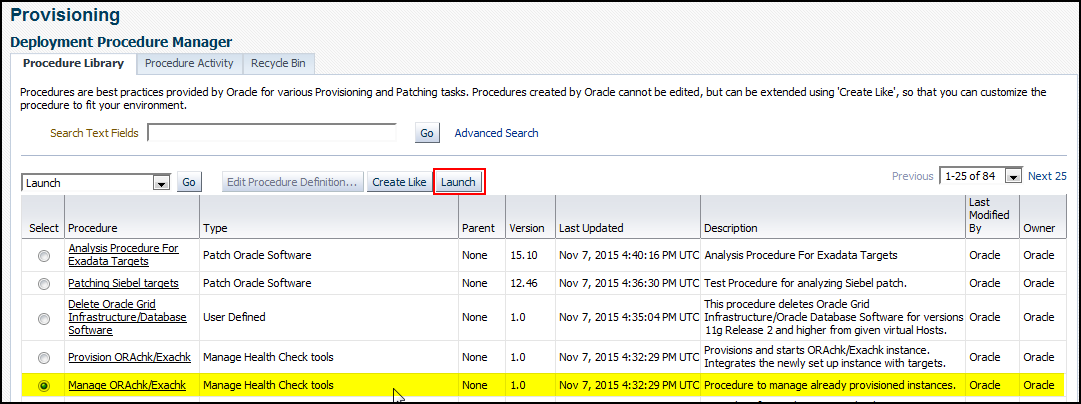
On the Provisioning page, select the Manage ORAchk/Exachk Services procedure and click Launch as shown in Figure 2-8:
-
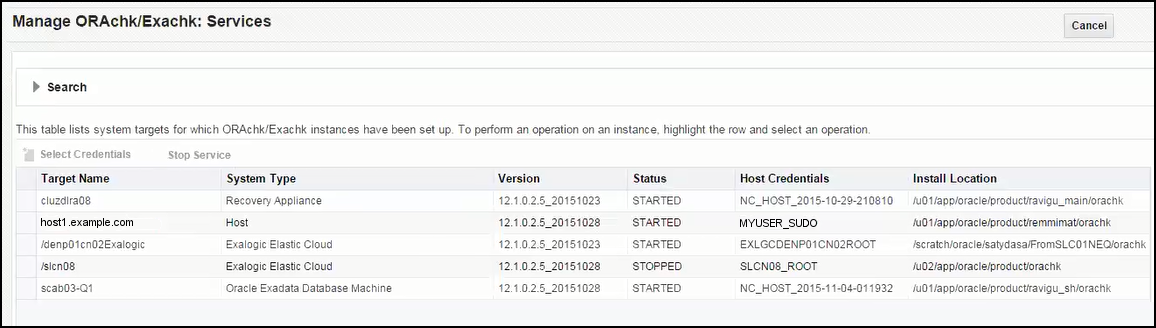
On the Manage ORAchk Services page, a list of all targets monitored by the ORAchk plug-in is displayed, as shown in Figure 2-9:
The table contains the following information:
-
Target Name: The target name as recognized by Enterprise Manager.
-
System Type: The type of the system you set during the provisioning (see Provisioning ORAchk).
-
Version: The release version of the ORAchk plug-in running for a particular target.
-
Status: The current monitoring status of the plug-in. The status field is provided to help users track progress of setup activities and are described below:
Provisioned – Tool bits have been staged on mentioned location. However, configuration data has not been provided to start the daemon process.
Processing – Daemon setup is in progress.
Collection Enabled – OMS has been configured to collect Orachk/Exachk results for the system target (or cluster target wherever applicable). Configuration Extensions feature of the platform is used to collect Orachk/Exachk results.
Started – The setup process is complete.
Stopped – The Orachk services has been stopped successfully.
Terminal states are Provisioned, Started, and Stopped. If a procedure activity has failed and the status in not amongst these terminal states, refer to Troubleshooting the ORAchk Plug-in to recover.
-
Host Credentials: The host credentials of the target that were last used during the provisioning. This user must have the privileges to stop the ORAchk plug-in.
-
Location: The directory location of the ORAchk plug-in.
-
-
Select the target you want to exclude from ORAchk monitoring and click Stop Service. A stop job will be submitted to Enterprise Manager.
-
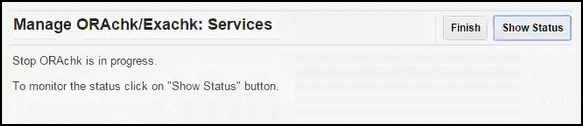
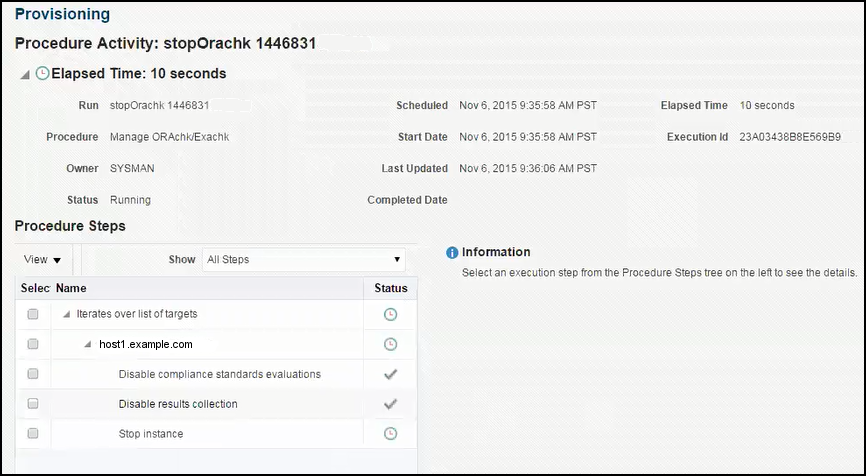
Click Show Status to see the progression, as shown in Figure 2-11. The Procedure Steps show each part of the stop process. A check mark indicates that the step is complete.
2.2.2 Update Entities
Three entities must be updated to use the latest version of ORAchk:
-
Diagnostic Tools Updates
This entity is used for updating ORAchk binaries:
-
Download the available update for Support Tool entity. Figure 2-12 show and example of what the ORAchk entries will look like:
-
Download the available update of other two entities. This is to ensure that all updates related to ORAchk versions are applied together.
-
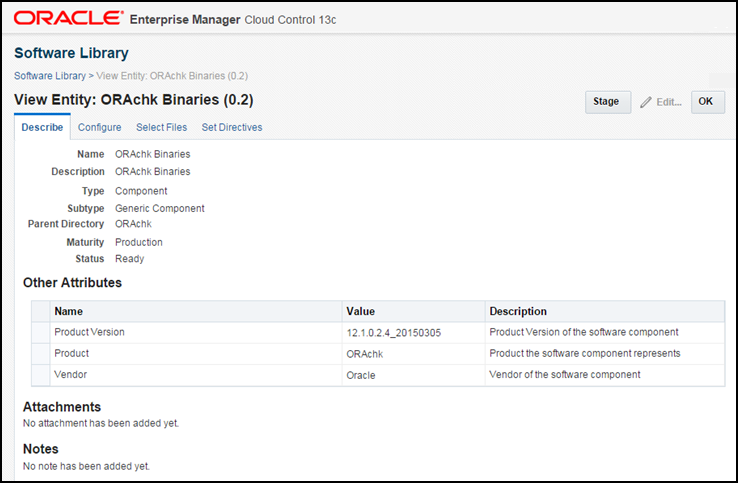
Apply the update and verify in software library if correct version has been updated (Figure 2-13).
-
-
Compliance Content
All new/modified ORAchk compliance standards and rules will be shipped using this entity:
-
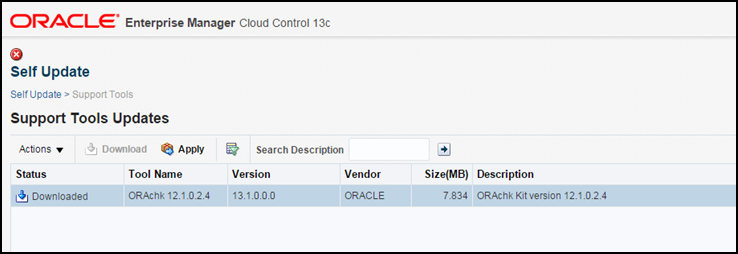
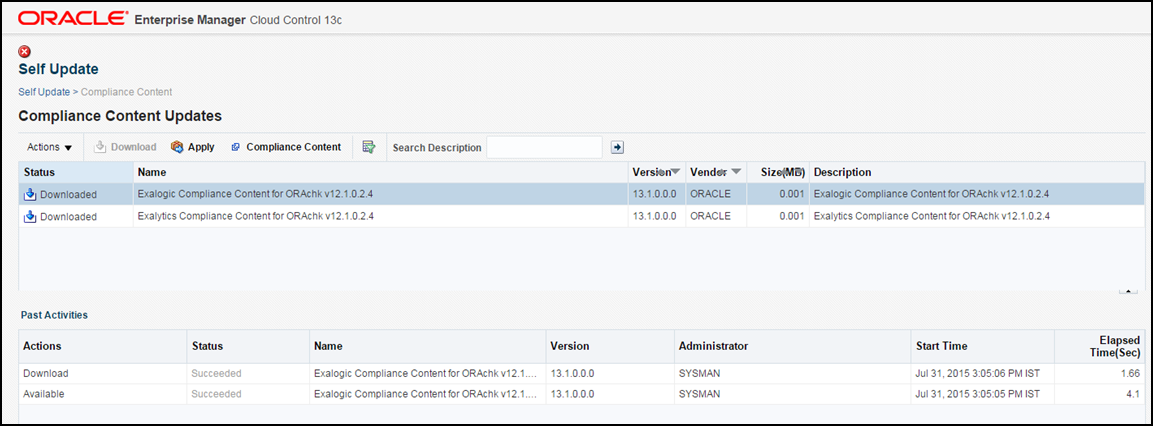
Download the available update for Support Tool entity. Figure 2-14 shows how the ORAchk entries will look:
-
Apply these updates.
-
-
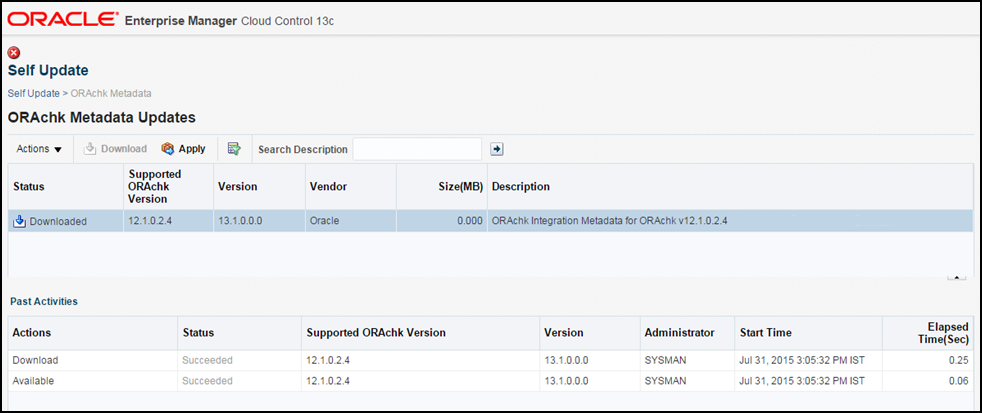
ORAchk Metadata
This entity is used to keep mapping of ORAchk checks an Enterprise Manager targets:
-
Download the available update. Figure 2-15 shows a sample entry:
-
Apply these update
-
After applying these entities, every subsequent setup will use the new ORAchk. Older instances will continue to use older version of ORAchk.
2.3 Roll Back the ORAchk Version
<content to be added>