21/49
Exporting Content from the 11.1.1.9.2 ODI Repository
Use these instructions to export content from the 11.1.1.9.2 ODI repository.
To export content from the 11.1.1.9.2 ODI repository:
- Launch the ODI Studio client and connect to the ODI repository for BI Applications 11.1.1.9.2. (do not connect to the backup of the ODI repository).
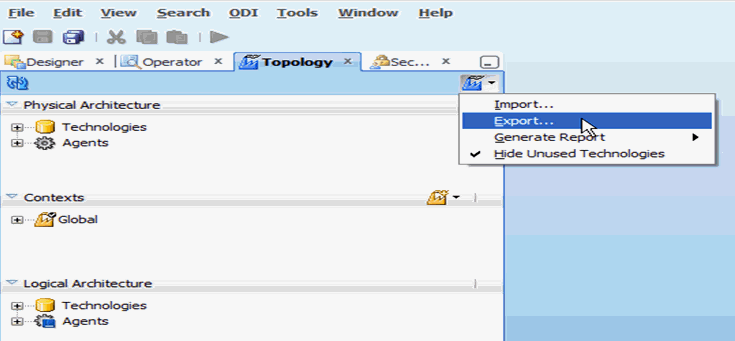
- Navigate to the Topology tab. From the Connect Navigator (Topology icon drop-down on the top right side of the navigator pane), select Export.
As part of the procedures described here, you will export files to a local directory.
- To export connections, complete the following steps:
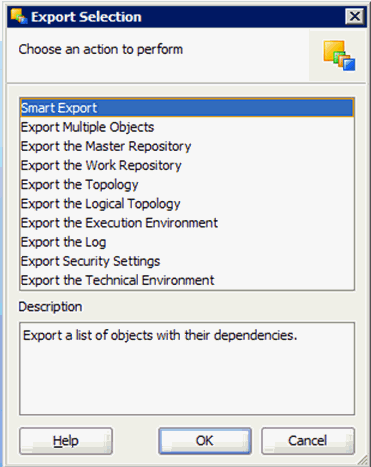
- Launch the Smart Export wizard from the Export selection dialog.
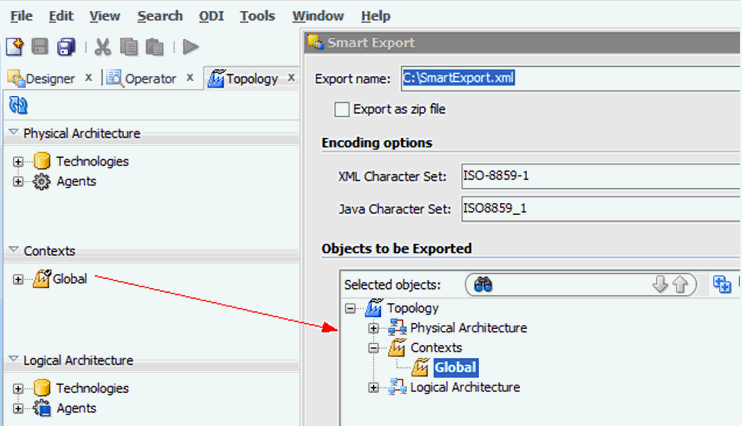
- Drag the Global context into the Objects to be Exported window. Provide a meaningful name for the export file and click Export.
This will export the logical and physical topology including assigned Datasource Num ID values and database connect details.
- To export security, complete the following steps:
- Connect to the 11.1.1.9.2 ODI Repository schema using Oracle data base client tools such as SQL Plus, SQL Developer and execute the following script:
/* Script Begins */

UPDATE SNP_FLEX_FIELD SET I_FF=26040 WHERE
FF_CODE='OBI_DATASTORE_DYNAMIC_FILTER1' AND I_OBJECTS=2400 AND
FF_TECHNO='ORACLE_BI';

UPDATE SNP_FLEX_FIELD SET I_FF=31040 WHERE
FF_CODE='OBI_DATASTORE_DYNAMIC_FILTER2' AND I_OBJECTS=2400 AND
FF_TECHNO='ORACLE_BI';

COMMIT;

/* Script Ends */
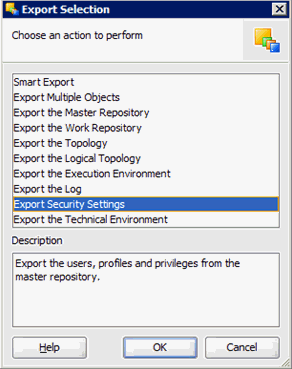
- Navigate to Topology > Export and select the Export Security Settings action.
- Choose to export to a local file (directory).
This action exports your user configurations.
- Connect to the 11.1.1.9.2 ODI Repository schema using Oracle data base client tools such as SQL Plus, SQL Developer and execute the following script:
- To export any customizations in your ODI repository, complete the following steps:
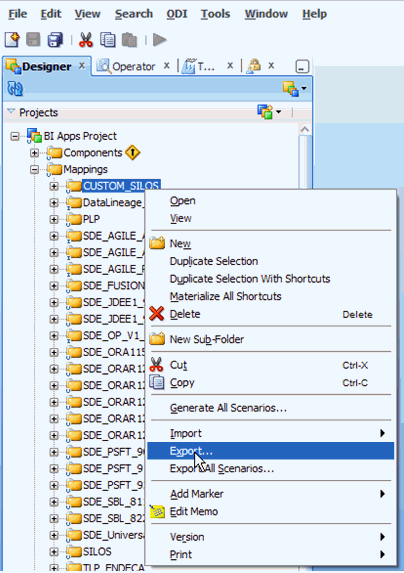
- Export the Custom folder by right clicking it and selecting the Export option.
Per the customization methodology, all custom and customized ETL tasks should be in a separate CUSTOM folder.
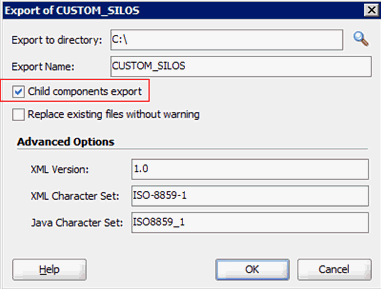
- In the next window, ensure that the Child Components Export check box is selected.
- Export the Custom folder by right clicking it and selecting the Export option.
- To export customized data stores, complete the following:
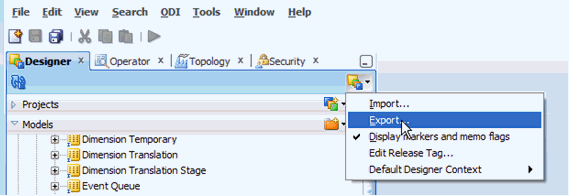
- Click the Export… option from the navigator window.
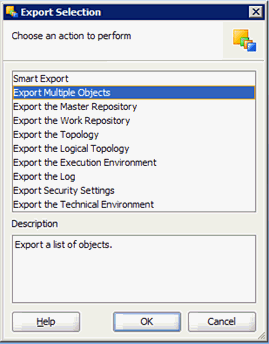
- Select the option to export multiple objects.
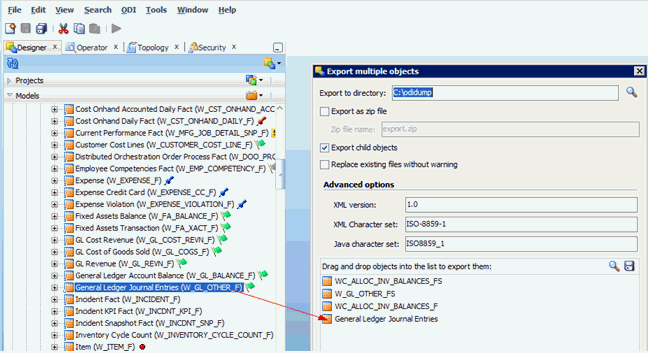
- Drag and drop your purely custom and customized datastores. Ensure that the Export child objects option is selected.
In the example below, WC_ALLOC_INV_BALANCES_F/FS are purely custom tables while W_GL_OTHER_F/FS are out of the box tables that have been customized.
