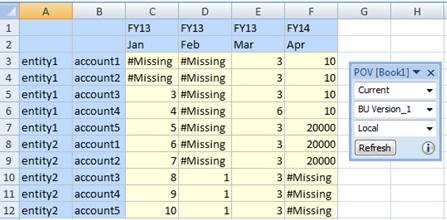
Smart Forms start with an ad hoc grid, created either by opening an Oracle Planning and Budgeting Cloud Service form for ad hoc analysis or by starting ad hoc analysis at the Plan type level, as shown in Figure 47, Form Opened for Ad Hoc Analysis.
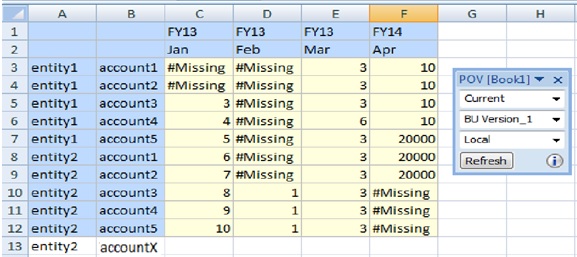
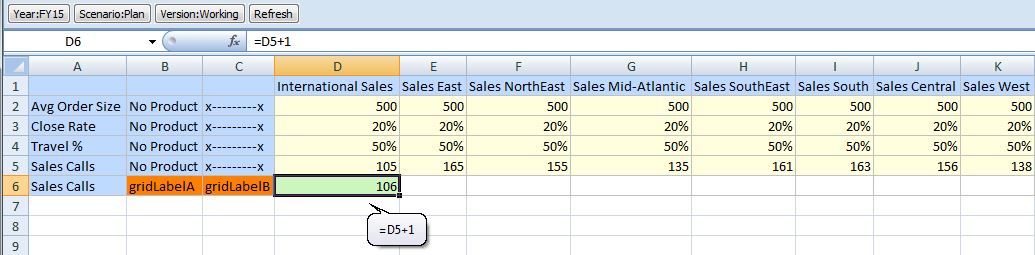
Add a row by typing “entity2” for the Entity dimension, and the label “accountX” for the Account dimension on row 13, cells A13 and B13, creating on the row two grid labels. Cells C13:F13 will be calculated cells. In order to be used as grid labels, the member names “entity2” and “accountX” should not exist in any dimension and there should not be any alias with the same name in any alias table. However, note that in the basic ad hoc above, entity2 is a member name, so entity2 will be treated as a member.
Add business calculations, in the form of Excel formulas, for cells C13:F13, created by the intersection of real column dimension members with the grid label’s row 13. Figure 49, Business Calculations Added to Cells C13 and D13, through to Cell F13 shows that the calculation was entered and executed in cell C13, and the same calculation is copied to cell D13.
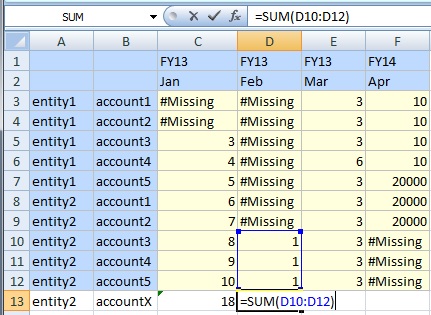
Figure 50, Business Calculation in the Excel Formula Bar shows the business calculation in the Excel formula bar.
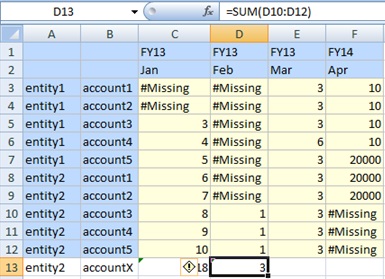
Upon refresh, entity2 in cell A13 will take on the properties of a member, accountX in cell B13 will take on the properties of a grid label, and cells C13 and D13 will take on the properties of business calculation cells.
You must enter grid labels in order to save an ad hoc grid with business calculations in the form of Excel formulas and functions.
If an empty space is entered instead of a grid label, the grid behavior is determined by generic ad hoc rules, such as replacing empty member cell with the same member from this dimension or displaying an error in case the grid becomes malformed.
You can enter grid labels at any dimension location for an axis: innermost, outermost, or any location in the middle.
You can enter business calculations only on rows and columns created by grid labels.
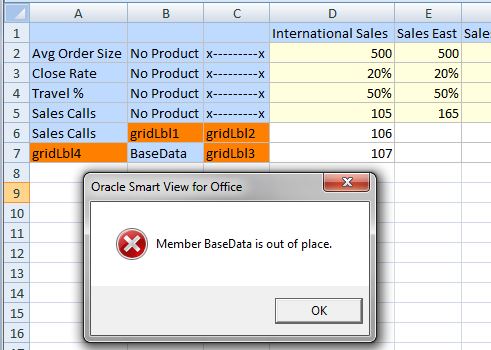
You may type a member name in a grid label row, but it must be placed within the correct dimension. If the member name is entered out of place, and is already in use by Oracle Planning and Budgeting Cloud Service in another dimension, a message is returned upon Refresh, prompting you to change the label name.
Now you can save the ad hoc grid as a Smart Form, as described in step 4 in Creating Smart Forms. By doing this, our grid labels and business calculations are also saved to Planning.
Planning will identify “accountX” as a grid label on refresh by displaying it as an ad hoc “comment” row or column (blank cells background). The “entity2” label will take on the same properties as the other entity2 members in the grid, as this member name already exists in the Planning database.
Using the Vision sample application, here is an example of a Smart Form, saved from an ad hoc grid, then later opened as a form in Smart View.
In Figure 51, Originally an Ad Hoc Grid, Saved as a Smart Form, then Opened as a Form in Smart View, the business calculation was constructed to show the average gross quarterly profit and average gross total profit for two years, FY13 and FY14. It also shows cell styles applied to the grid label and business calculations cells.
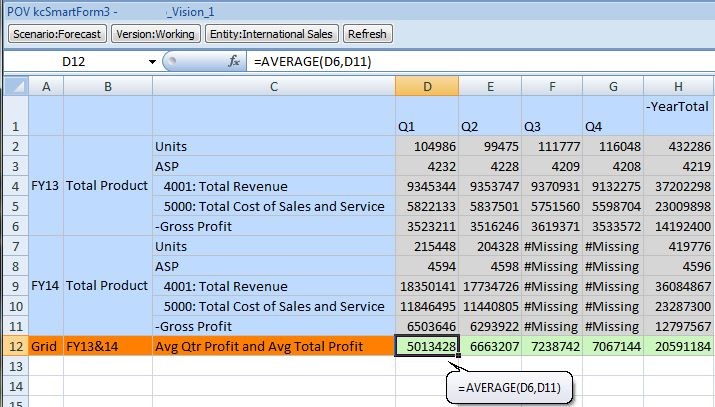
Figure 52, Smart Form Opened as an Ad Hoc Grid in Smart View shows a Smart Form opened as an ad hoc grid. The grid labels and business calculations were added in the middle of the grid, and cell styles were applied.
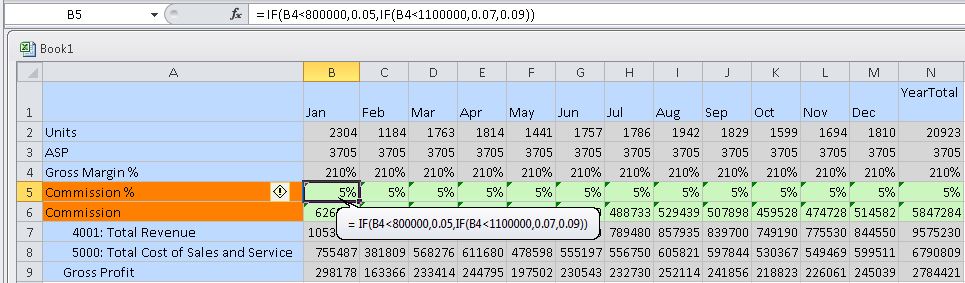
Figure 53, Smart Form Opened as a Form in Smart View is the same ad hoc grid, that was saved as a Smart Form and opened as a form:
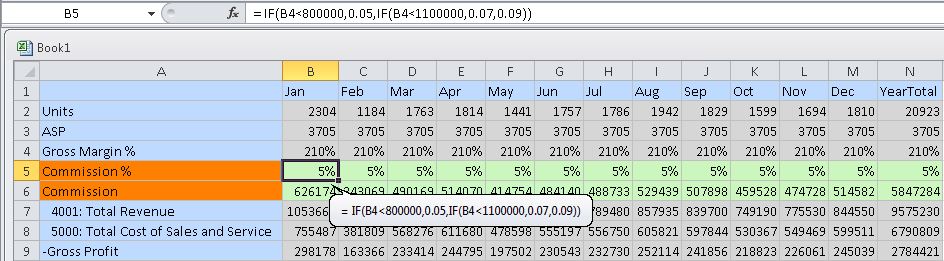
Figure 54, Smart Form with Member Name Typed on Grid Label Row shows two grid labels and a business calculation cell formula, along with a member name typed into the grid label row. In the form, the hand-typed member name displays a member.
In Figure 55, Grid Label Between Members, a new column contains grid labels in cells F1 and F2. Column G contains a repeated, hand-typed member name in cell G1, and a grid label in cell G2 between the member and business calculation in cell G3.
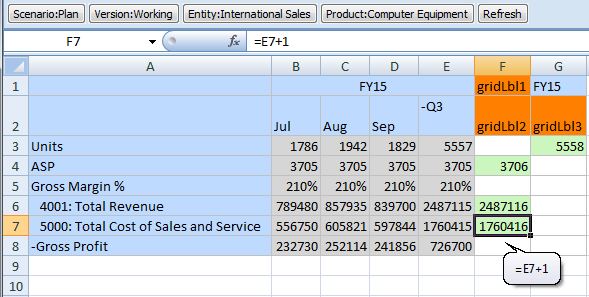
Figure 56, Member Between and Below Grid Labels shows how grid labels can surround a valid member.
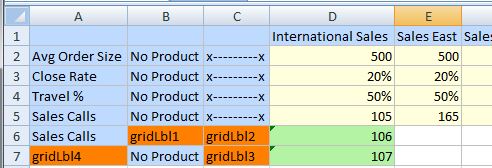
Figure 57, Out of Place Member in Grid Label Row shows how a member cannot be out of place between, or surrounded by, grid labels. A message notifies you that the member is out of place.