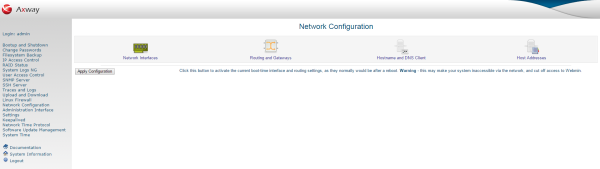
The Network Configuration page enables you to configure the following:
| Note | You can also configure the network settings using the . For more information, see Configure your appliance network settings. |
Click the Network Interfaces icon on the Network Configuration page to view the network interfaces that are currently active on the appliance. The active interfaces are listed in two tables. The first shows the interfaces that are currently active and have an IP address assigned, while the second table shows the interfaces that were activated at system boot time.
There are four network interfaces altogether on the appliance. The interface called eth0
obtains its IP address from DHCP, while the eth1
interface has a fixed IP address by default. There are two more interfaces on the appliance, eth2
and eth3, which are typically used for handling API Gateway traffic. The eth0
and eth1interfaces are usually employed for administration and management purposes.
You must configure the third and fourth interfaces using the Web Administration Interface after one of the two management network interfaces has been configured. However, it is up to the administrator to decide which interfaces are used for administration purposes and which interfaces are used to handle API Gateway traffic. All four interfaces are completely interchangeable in terms of the roles they serve.
The four Ethernet ports can be seen in the center of the back panel with the interface ports and are labeled Gb1
through Gb4, corresponding to the four network interface names, eth0
through eth3.
To change the default configuration of a network interface,edit the interface from the Interfaces Activated at Boot Time table on the Network Configuration page. Click the name of the interface in the Interfaces Activated at Boot Time table, and complete the following fields:
| Note | If you change the IP addresses of any network interfaces, ensure that you also update any host address entries associated with them. For details, see Host addresses. You might also need to update records in your DNS server. |
To remove a boot-time interface that it is activated at startup, click the Delete button on its form. You can use the Delete and Apply button to delete the interface immediately.
| Caution | Removing a boot-time interface might cause the appliance to stop functioning correctly. This should only be done under extreme circumstances and under strict advice from Oracle Support. |
For a complete example of editing the default network interfaces activated at boot time, see Modify the default network configuration.
To add an interface that starts up at boot time, click the Add a New Interface button above or below the Interfaces Activated at Boot Time table on the Network Interfaces page. Complete the fields as described in the previous section.
To edit a currently activated network interface, click its name in the Interfaces Active Now table and complete the following fields:
Down. You can then re-enable it by setting this option back to Up.You can add and activate an interface immediately by clicking the Add a New Interface button above or below the Interfaces Active Now table. Complete the fields as described in the previous section.
You can add virtual interfaces to an existing interface to further organize and compartmentalize your network. For example, to have the SNMP service available on a particular network only. In this case, you can add a virtual network interface and configure the SNMP service to only listen on this interface.
To add a virtual interface, add an additional IP address to an existing real interface. Virtual interface names typically include the name of the real network interface and also the number of the virtual interface, because you can have several virtual interfaces configured for a single real network interface. For example, eth1:1
where eth1
is the name of the real network interface, and 1
identifies the virtual interface.
To add a virtual interface, see Add a virtual IP address.
For the appliance to communicate with other networks, it must be configured with the IP address of an API Gateway machine. The API Gateway machine is responsible for forwarding packets from one network to another.
To change the default API Gateway used by the appliance, click the Routing and Gateways icon on the Network Configuration page, and complete the following steps:
eth0) in the Interface
column. Enter the name of the remote network in the Network
column. Specify the netmask of this network in the Netmask
column. Finally, in the API Gateway
column, specify the IP address of a router that is capable of forwarding packets to this network.| Note | The changes do not take effect until the appliance is rebooted. |
The currently active routes are listed in the Active Routes table.
To delete an active route, select the route to delete, and click the Delete Selected Routes button.
To create a new route, complete the Route destination, Netmask for destination, and Route via fields and click the Create button.
To enable the appliance to look up and resolve the host names and IP addresses of destination servers, you must configure a DNS server. To update the appliance's DNS settings, click the Hostname and DNS Client icon on the Network Configuration page, and complete the following steps:
You can use host addresses to provide mappings between host names and IP addresses that can be used by the appliance in cases where the configured DNS servers are not available, or where no DNS server has been configured at all.
Click the Host Addresses icon on the Network Configuration page to view the addresses configured on the appliance. If you have changed the host name or IP address of the appliance, the new name might not be reflected in the list (unless you have changed it already). To change a host address, complete the following steps: