If a failed energy storage module (ESM) is not replaced, you run the risk of losing the data that is temporarily stored in the flash memory. If the ESM capacity has degraded, but the ESM still has the capability to process a worst case save action, guided maintenance (GM) displays a warning but the Controller does not fail immediately. However, if the ESM has faulted, the Controller is failed over immediately. A failed ESM must be replaced as soon as possible to avoid the risk of data loss.
- Prerequisites:
Before handling a component, touch a grounded surface to discharge any static electricity.
Attach an electrostatic discharge (ESD) wrist strap to your wrist, and stand on an ESD mat while replacing components.
Ensure that a replacement ESM or a filler panel available to replace the ESM that you will be removing.
Figure 1: ESM
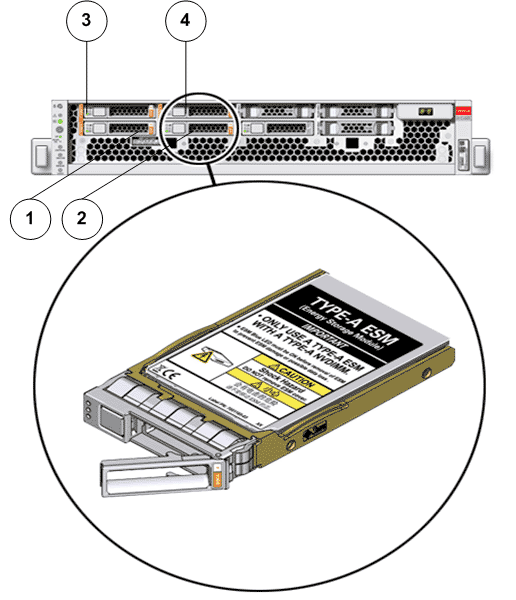
- Legend
-
1 ESM 0 2 ESM1 3 ESM 2 4 ESM 3