

To complete this tutorial, you will create a new MCS mobile backend, create an API definition to connect and access appliance incident data, including images, and then view the components from a MAF MCS Tester Application.
You must also download a zip file containing images and code that you will need while working on the tutorials. Unzip the file to a directory that works for you. In this tutorial, the file has been unzipped in the root of the "D:\" drive.
| Required Files | Download Files
|
|---|---|
This archive contains code and images you will need during the tutorial. |
 |
In this section, you connect to your MCS instance and create, then examine, a mobile backend.
Like with all development efforts, save often, and save a lot.
-
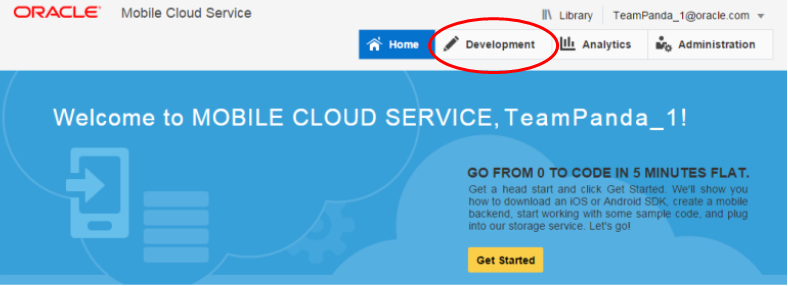
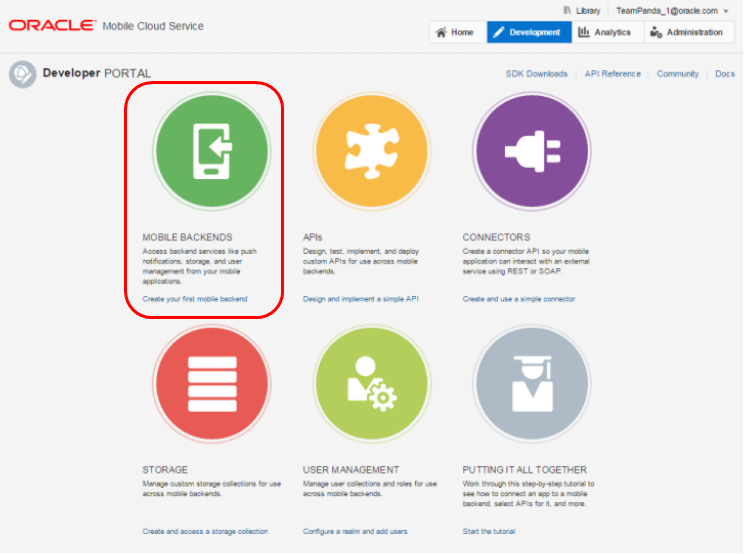
Log in to your Mobile Cloud Service Home page and then click the Development button to access the tools available in the Developer Portal.
-
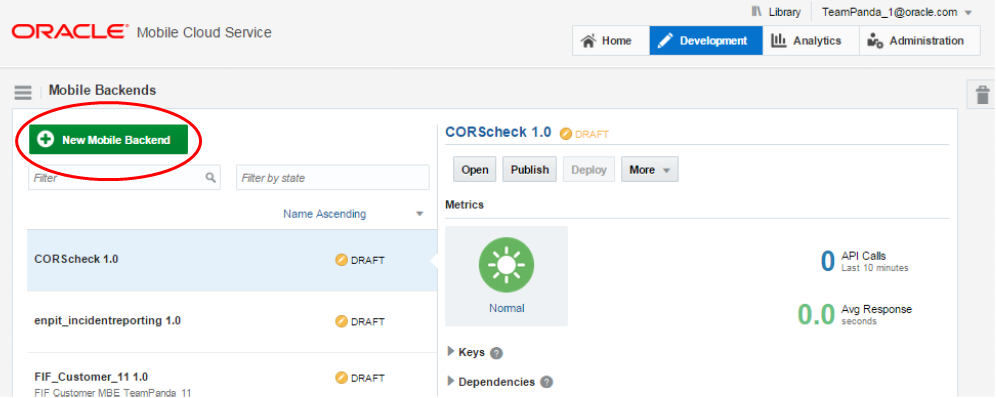
In the Developer Portal, click the Mobile Backends icon.

-
In the Mobile Backends page, you can create, search, and view any mobile backend. On the left, you see any previously created mobile backend definitions. On the right, you see some high-level details for the selected mobile backend.
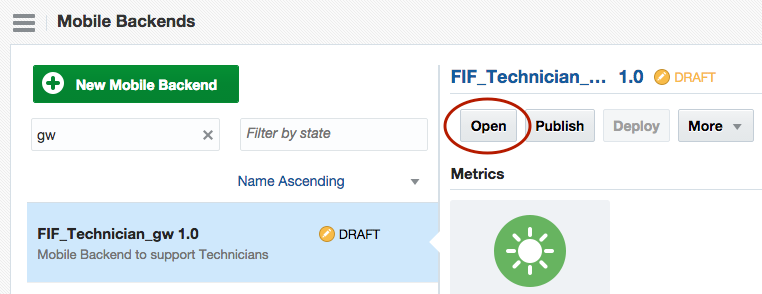
On the upper left, click the New Mobile Backend button.
-
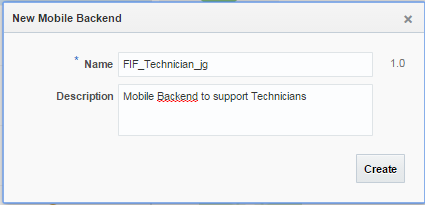
In the pop-up window, set the Name to FIF_Technician_xx (where xx is a unique value in the MCS instance, such as your initials). You will be using this naming convention throughout this tutorial.
Then, enter a description and click Create.
-
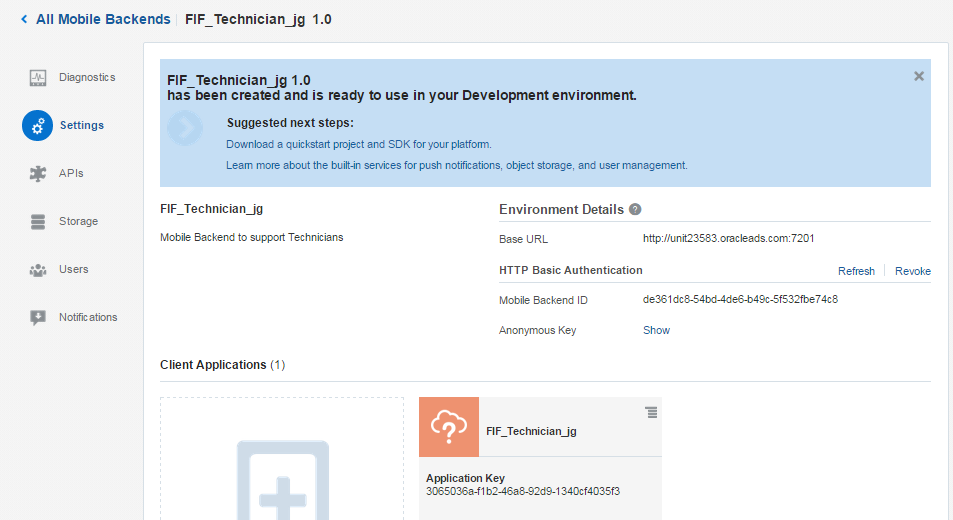
By default, the Settings page appears, where you can access the authentication and connection details required by your mobile applications.
The identifiers you see here are used to authenticate your mobile application, connect your mobile application to its mobile backend, and access platform and custom APIs. These settings are also used by the mobile client SDK to construct REST headers for calls made to platform APIs. The Notifications API uses the application key to pair your mobile application with an individual user's mobile device, so that you can precisely target the sending of notifications from MCS.
To get a better understanding of what a mobile backend may contain, let's examine one. All of the elements that we will look at here are covered in successive tutorials.
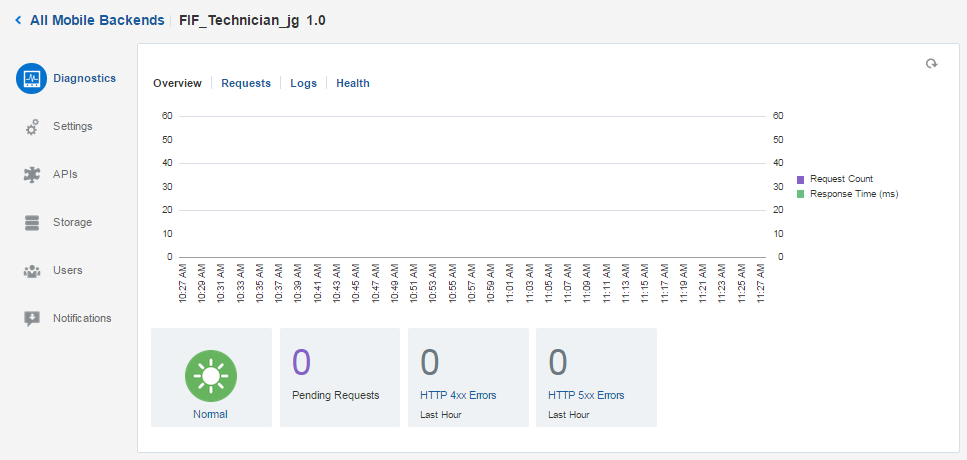
Examine the page, and when you are ready to move on, click the Diagnostics icon on the left.
-
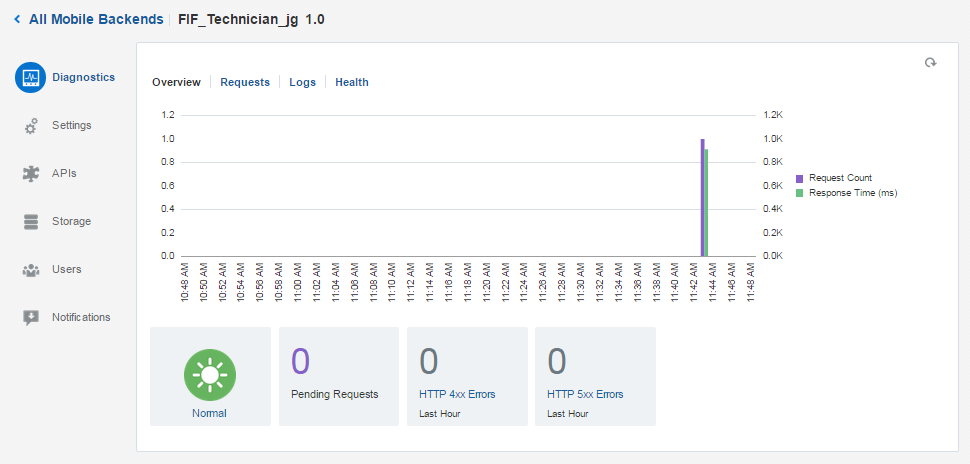
Diagnostics enables you to easily find out what's going on with your connected mobile application by providing you with increasingly detailed levels of logging messages. Diagnostics presents request and error data in the Diagnostics page that is specific to a single mobile backend.
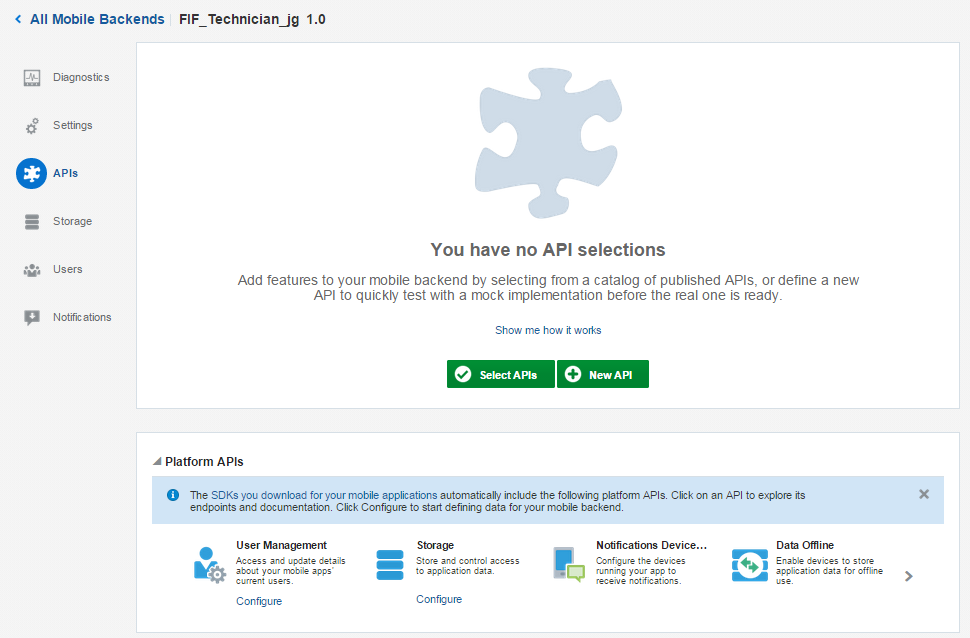
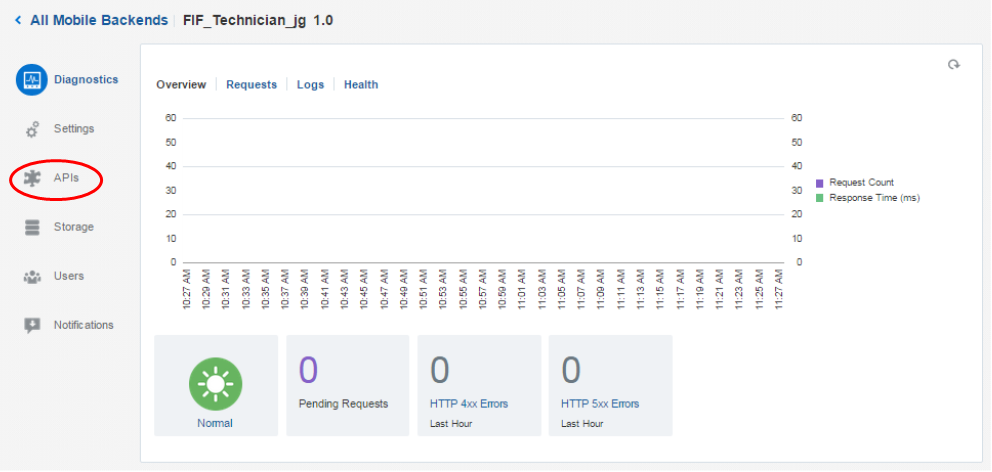
Examine the page, and when you are ready, click the APIs icon on the left.
-
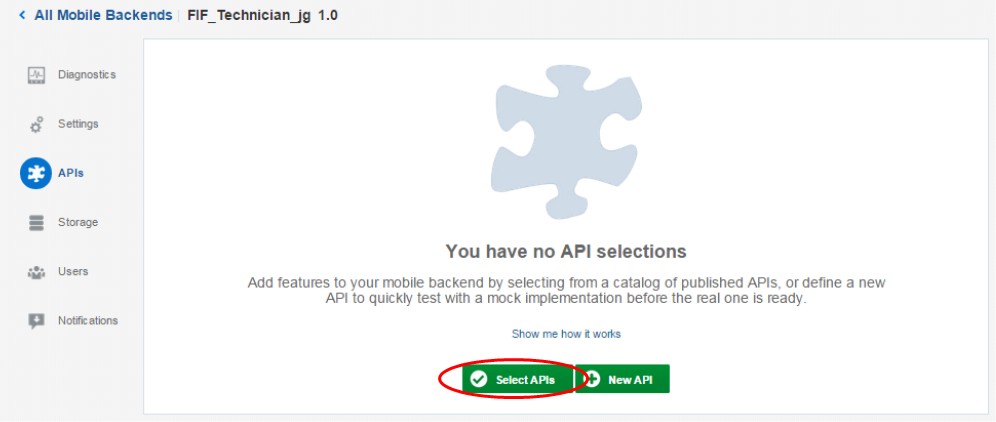
After you have a mobile backend defined, you can access the API Catalog and select any custom APIs for your mobile backend to use.
Or as the mobile developer, you might want to start creating your own set of REST APIs to provide building blocks for your applications.
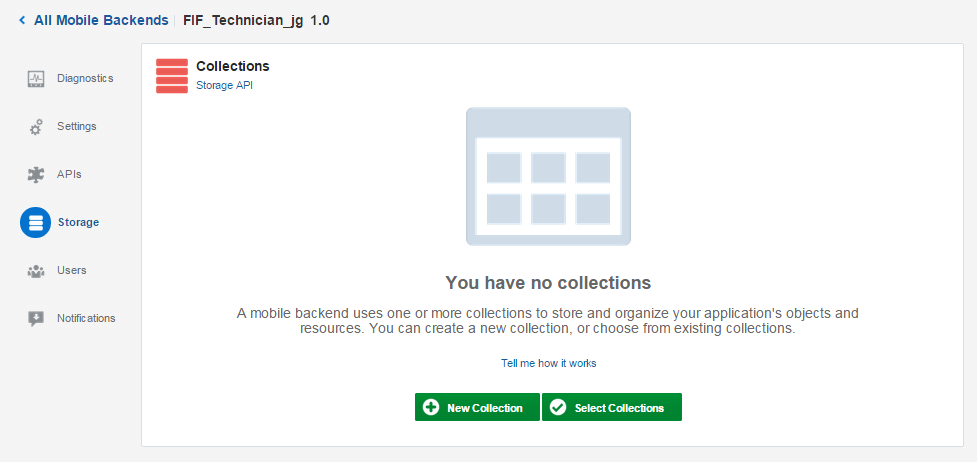
When you are ready, click the Storage icon.
-
Within a mobile backend, collections store the data that is manipulated by the mobile application's read or write requests. Similar to a table, a collection manages a group of various data objects, such as JSON payloads, text files, or images.
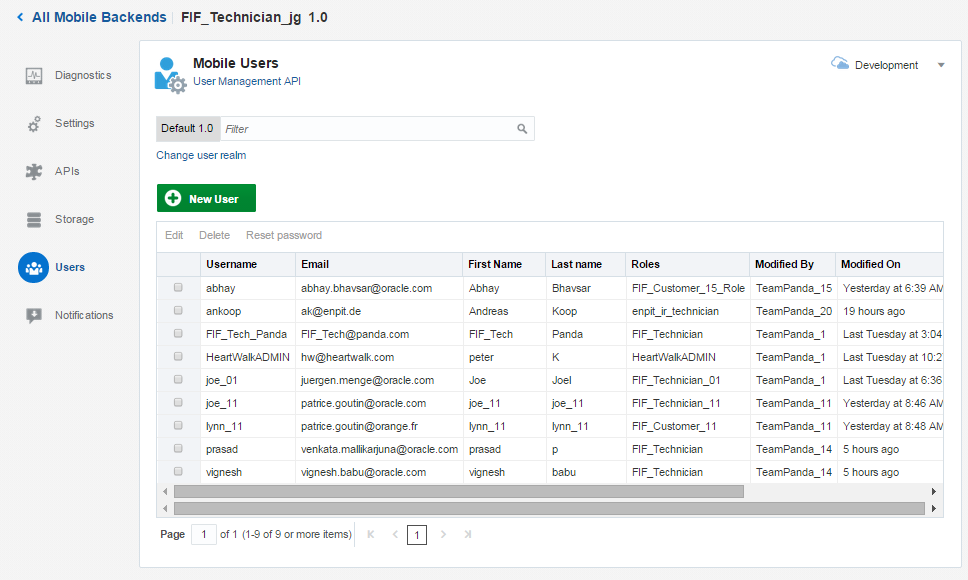
Click Users.
-
Here is where you specify a user realm where you create and manage the mobile app users that are allowed to access the applications associated with the mobile backend. You can create new users from scratch or import them from a JSON file.
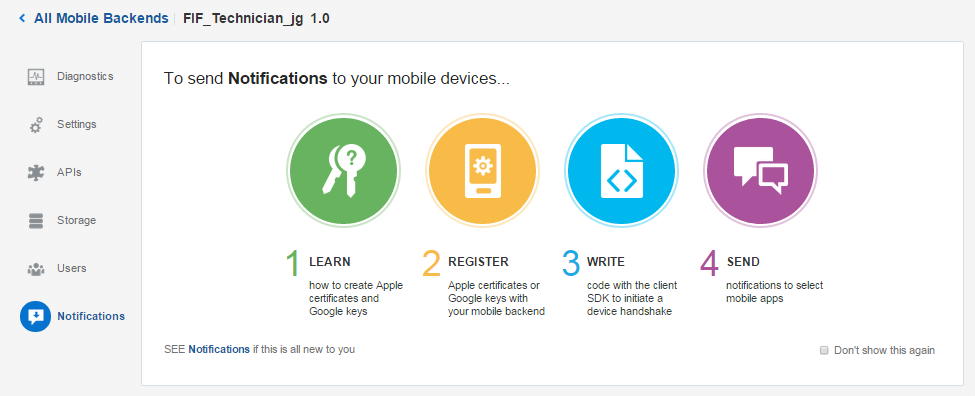
Click Notifications.
-
Here you configure notifications for both iOS applications (via Apple Push Notifications Service (APNS)) and Android applications (via Google Cloud Messaging (GCM)). If you set up notification configurations for both, you can initiate a single notification and have it delivered to both types of applications.
In the next section, you add an API and test the backend.
In this section, you add an API that allows your customers to report problems. This time, you create the API from an existing RAML document and consume it in your mobile backend. A later tutorial covers creating an API from the ground up.
Save often, save a lot.
-
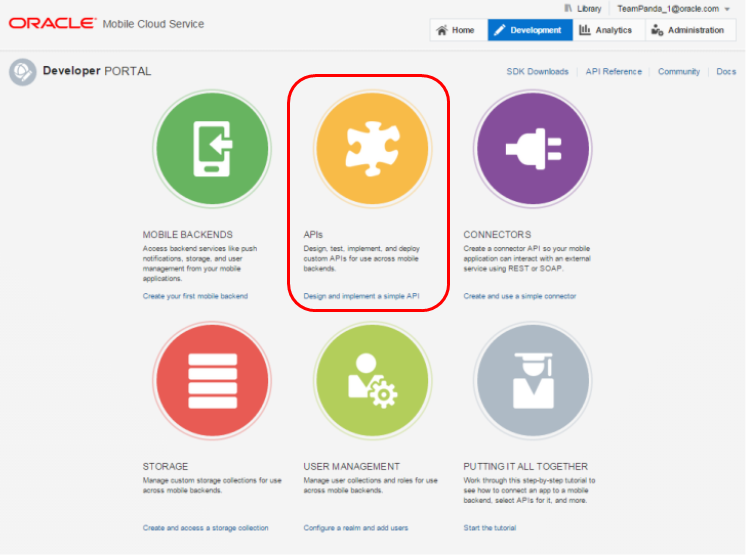
Click the Development button to return to the Developer Portal. Then, click the APIs icon.
-
In the APIs page, click the New API button.

-
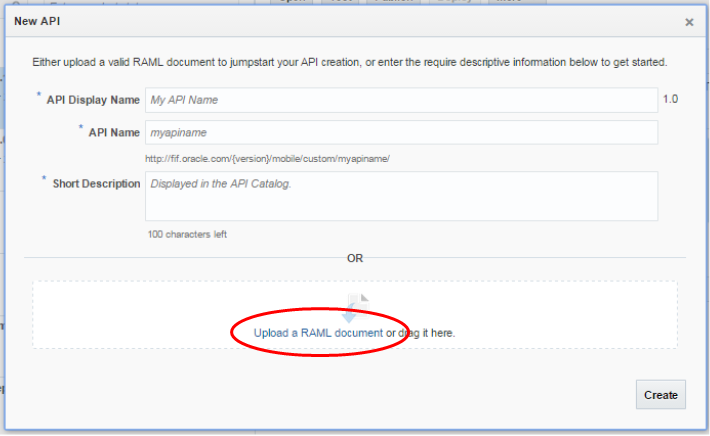
In the New API pop-up window, click the Upload a RAML document link.
-
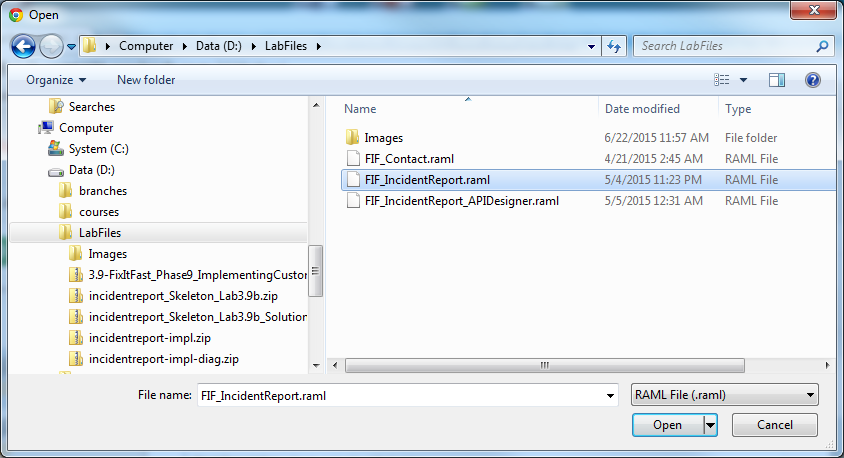
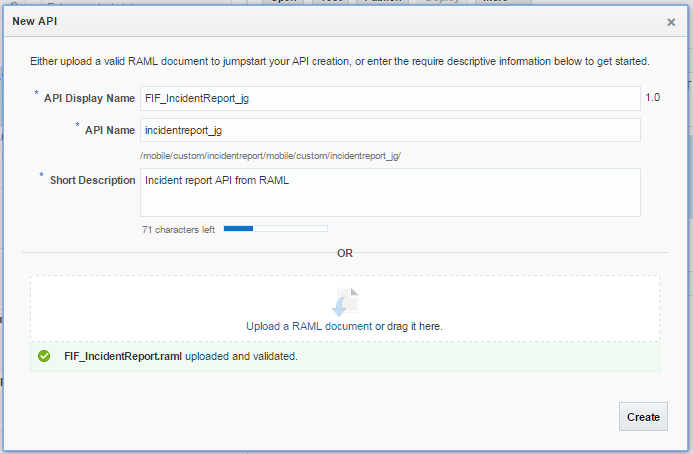
In the Open window, navigate to the location where you unzipped the LabFiles and select the FIF_IncidentReport.raml file.
Then click Open.
-
In the New API pop-up window, the document loads and all the appropriate properties are populated. To ensure uniqueness, append "_xx" (where xx is your initials or another unique value) to the API Display Name and API Name properties.
Add a short description and then click Create.
-
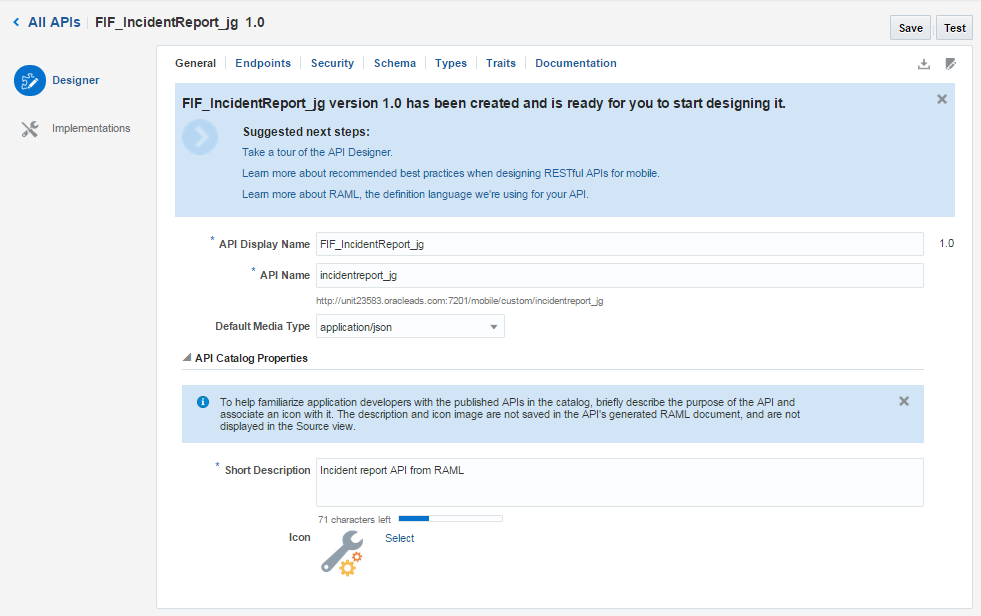
A confirmation message that the API has been created is displayed.
-
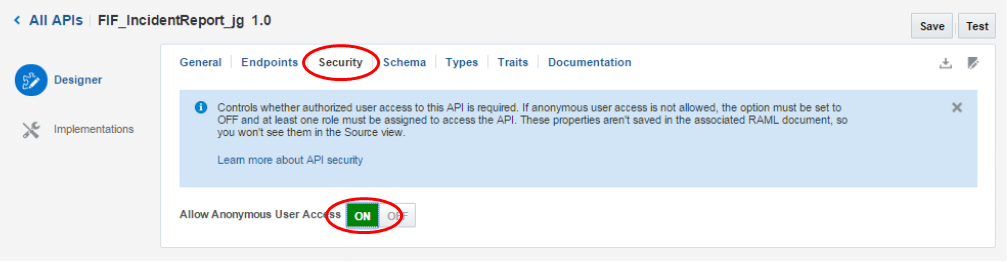
To make it easy to run the API, allow for anonymous access.
Click the Security tab, and set the Allow Anonymous User Access slider to the On position.
Then click Save.
-
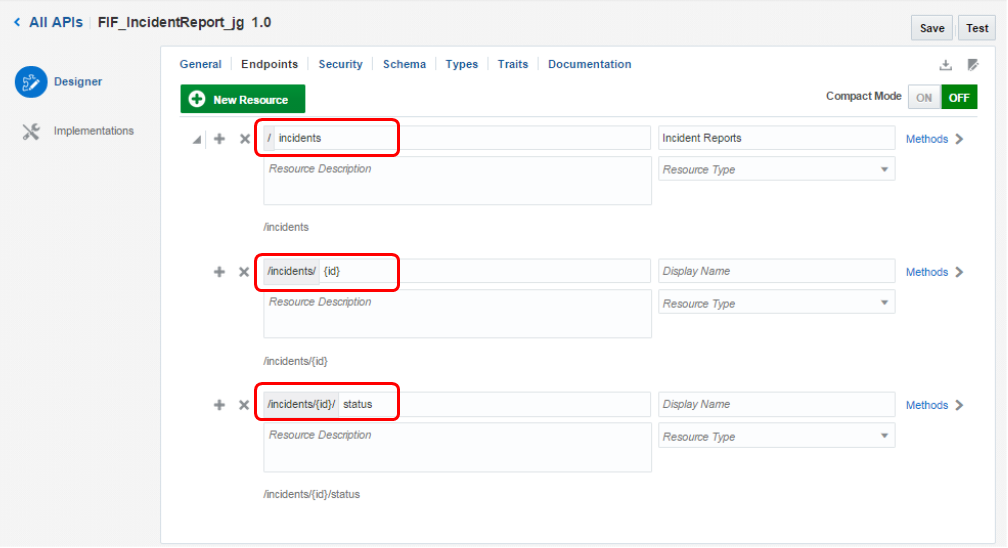
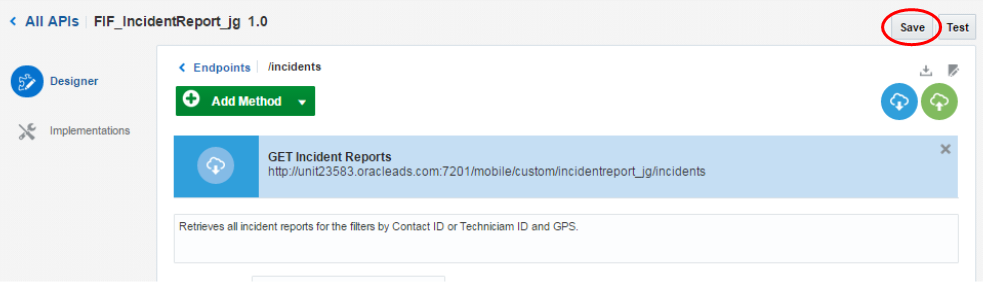
Let's take a quick look at what is created in MCS from the RAML document.
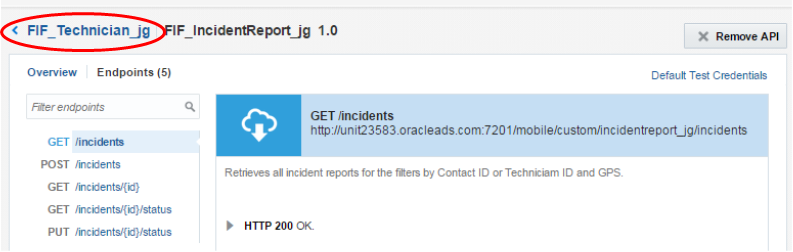
Click the Endpoints tab and notice the three resources this API makes available.
-
Examine the methods in the /incidents resource.
Click the Method link to the far right of the /incidents resource and you'll see two methods: GET and POST (if you scroll down).

-
Click the Save button.
-
In the GET method, expand the Parameters node.
Here are the three parameters, including name, type, and example values, which can be set when running the API. If more are required, then you can add them here.

-
Click the Save button.
-
Next, navigate to the mobile backend you created earlier and add the incident report API.
From the Developer Portal, click the Mobile Backends icon.
-
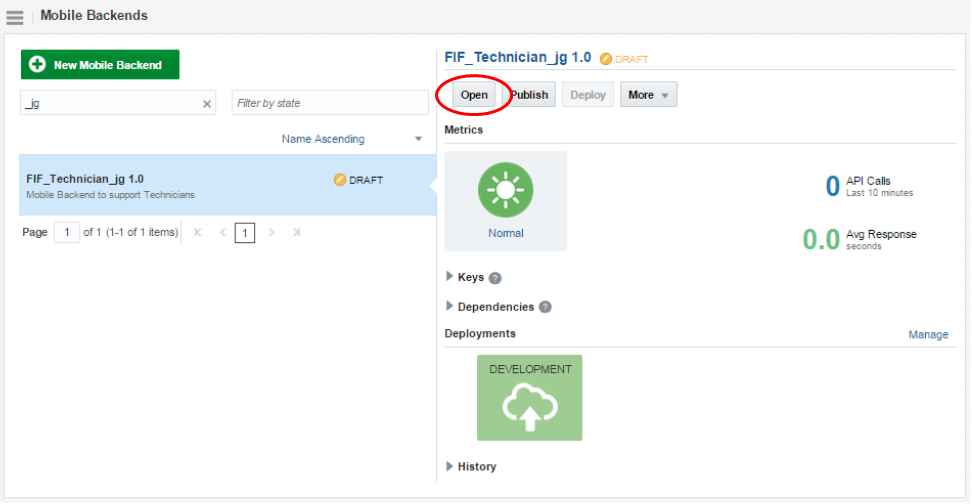
In the Mobile Backends page, put the cursor in the Filter/Search box and type the unique characters (_xx) that you appended to your mobile backend when it was created.
Then select the mobile backend and click the Open button.
-
Then, click the APIs icon on the left.
-
Click the Select APIs button.
-
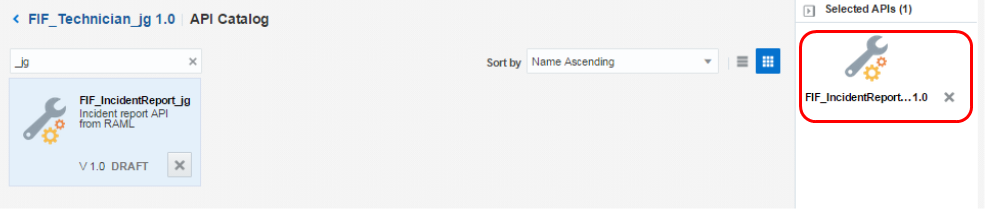
Just like earlier, in the Filter/Search area, enter the two unique characters that you appended to the API name when it was created. Your API should be the only one in the list.
Click the gray plus sign...

...to add the API to your mobile backend.
-
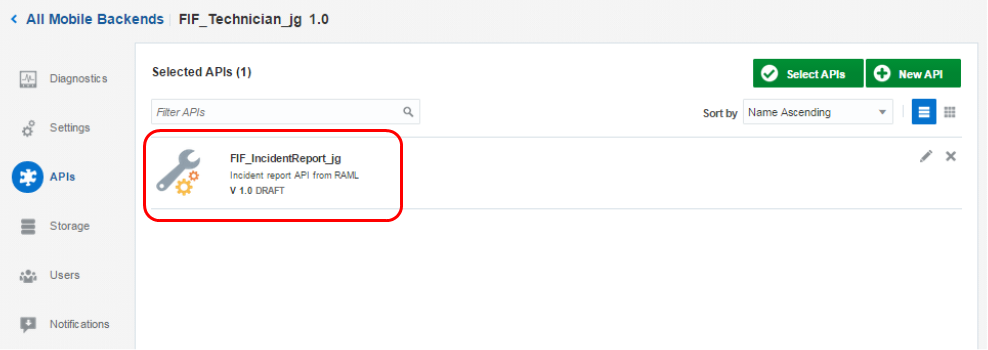
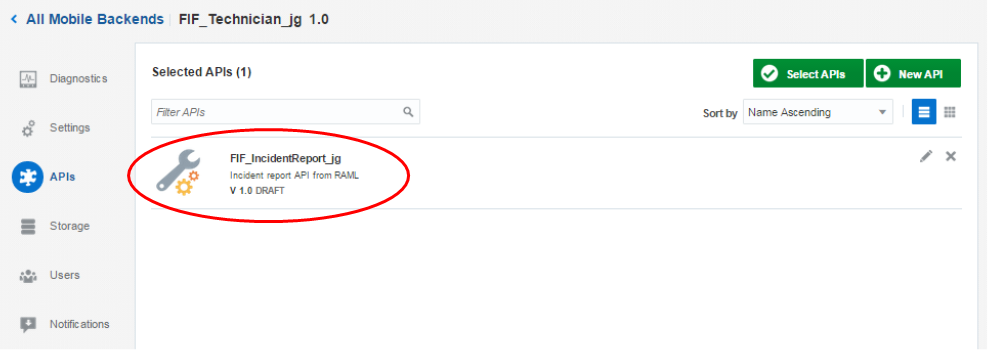
Navigate back to the APIs page by clicking the FIF_Technician_xx 1.0 link in the upper-left corner of the page.
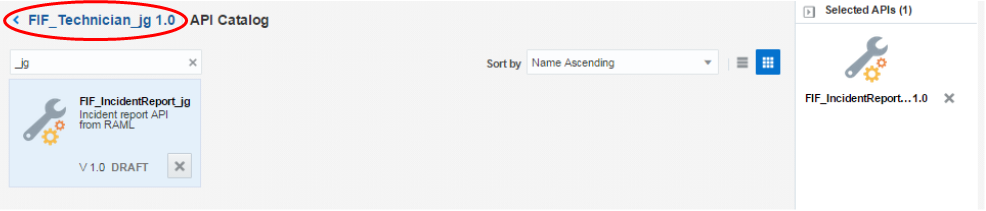
The FIF Incident Report API is now part of your mobile backend.
In this section, you test the endpoints and examine some diagnostics on the API. When you first created your mobile backend, the diagnostics page had no data. By testing the endpoints, you aren't able to find out if the endpoints can return requests from the mobile applications, but you can see how MCS tracks requests, enabling you to quickly troubleshoot problems.
-
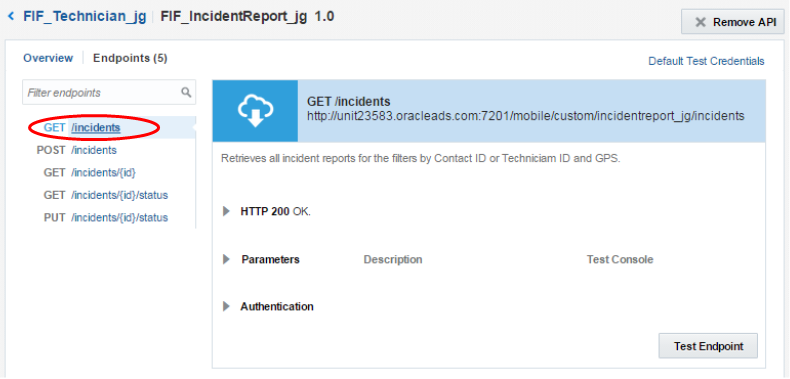
Inside the API node of your mobile backend, select the FIF_IncidentReport_xx API to see all the endpoints.
-
Here you see all the available resources that this API has to offer.
On the left, click the GET /incidents endpoint.
-
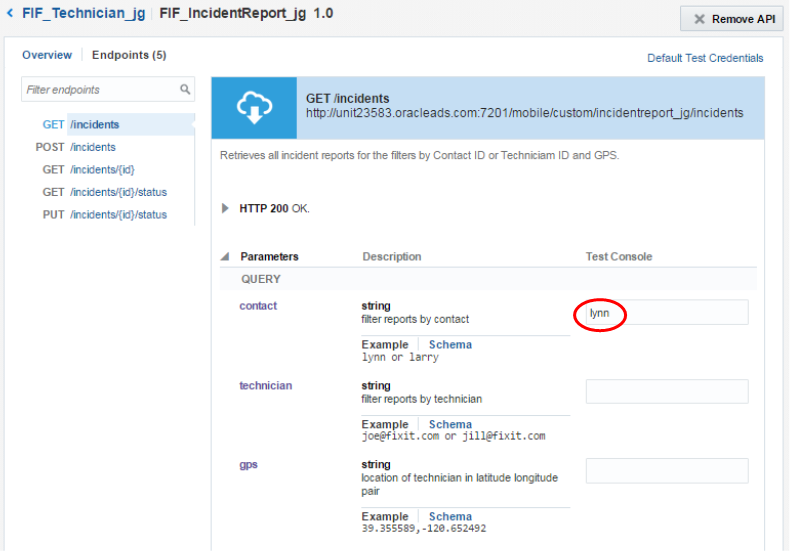
On the right, expand the Parameters node and for the contact parameter, enter lynn in the Test Console column.
-
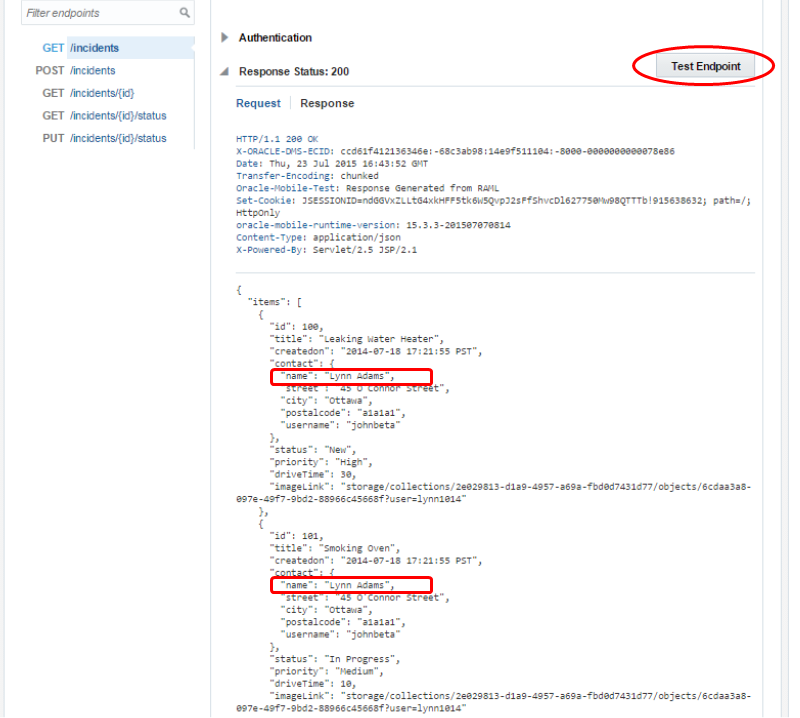
Click the Test Endpoint button and examine the response. The response is displayed in a JSON format, and you can see two records for the customer named "Lynn".
-
Navigate back to the mobile backend page by clicking the FIF_Technician_xx link in the upper-left corner.
-
Click the Diagnostics icon to see the overview.
-
Next, examine the requests and results for the API.
Click the Requests tab and then the 2xx box to see any calls that returned HTTP 200, which represents a successful response. You should see one response for each time you tested the API.

-
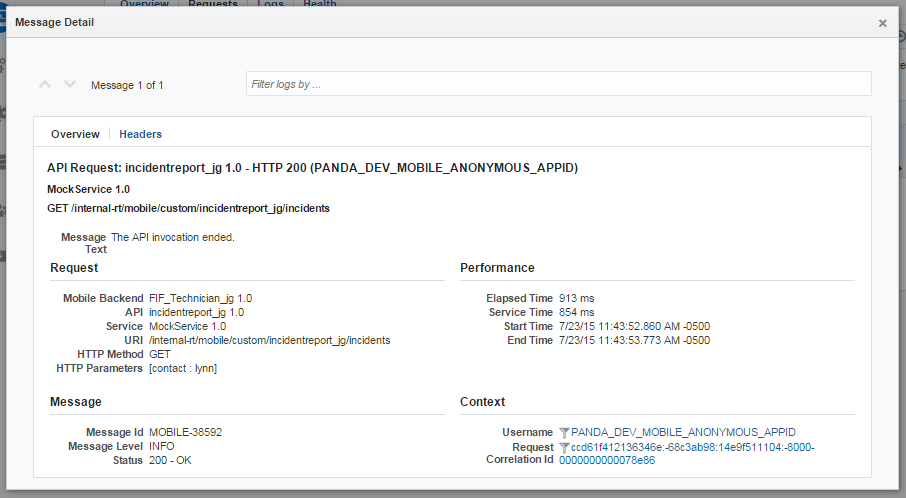
Click the timestamp to examine the message details. Notice the message includes the mobile backend name and API that was used.
Click the X in the upper-right corner to close the pop-up window.
You have now created a mobile backend and API, then added the API to your backend and tested it. Next, you run a Mobile Application Framework application and configure it to test your mobile backend.
In this section, you install the MAF MCS Tester Application.
-
Navigate to the place where you unzipped the labfiles.zip and expand the /labfiles/ directory. Unzip the maf-mcs-utility-2.1.3.1.4.zip file to a directory of it's own.
-
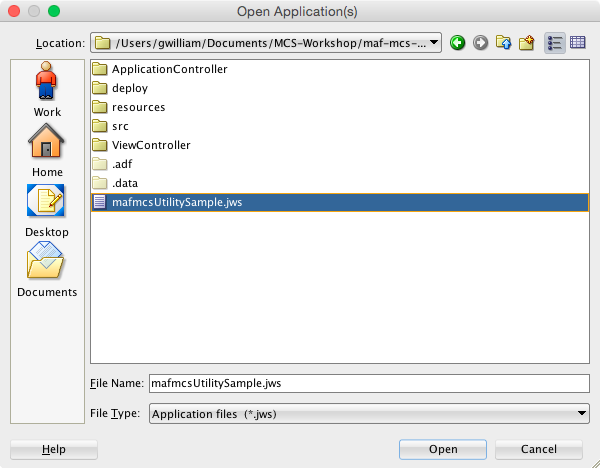
Then, open JDeveloper and click Open Application and navigate to the folder where you downloaded and expanded the MAF MCS Tester Application. Select public-samples/mafmcsUtilitySample.jws and click Open.
-
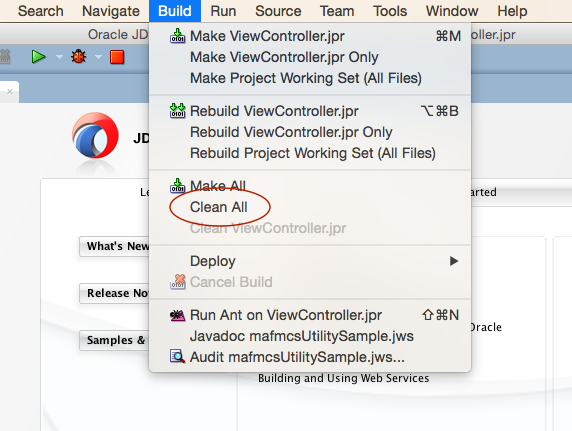
From the JDeveloper menu select Build -> Clean All.
-
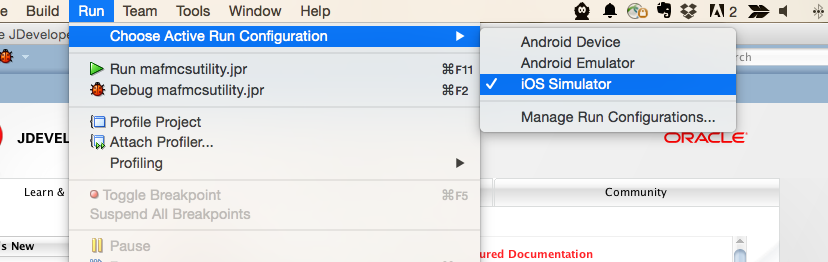
Again in the JDeveloper menu, select Run -> Choose Active Run Configuration -> iOS Simulator if you are on an iOS machine, or Android Emulator if you are on Windows.
-
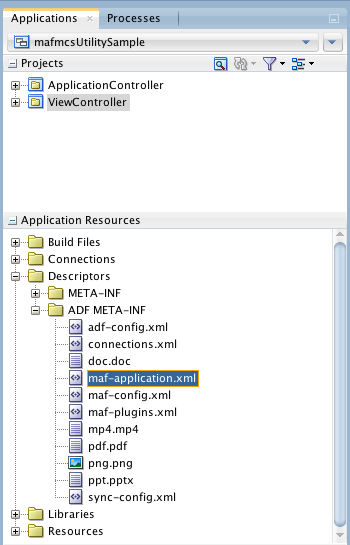
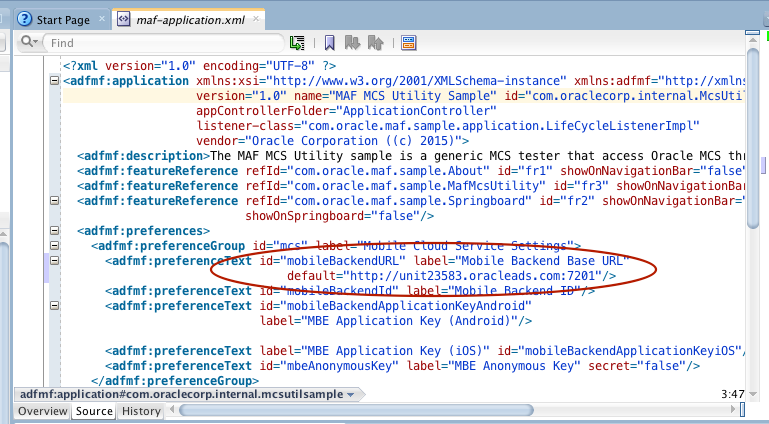
In the Application Resources pane, expand Descriptors -> ADF META-INF and open maf-application.xml.
-
In the editor window, click the Source tab.
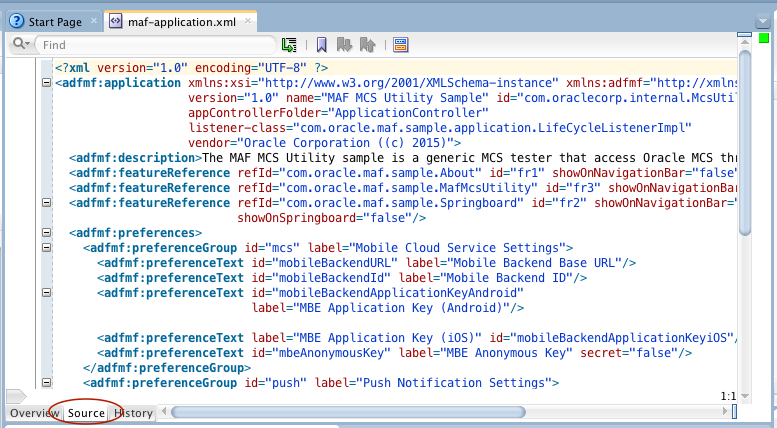
The utility uses maf-application.xml for default preference values. You can set preferences in the application, but it is easier to set them in the file.
You will set several preferences in this file with values that you get from MCS.
-
In MCS, navigate to your mobile backend main page and click Open. (The screenshots have changed to a different set of initials, but you will search for the same mobile backend you created earlier).
-
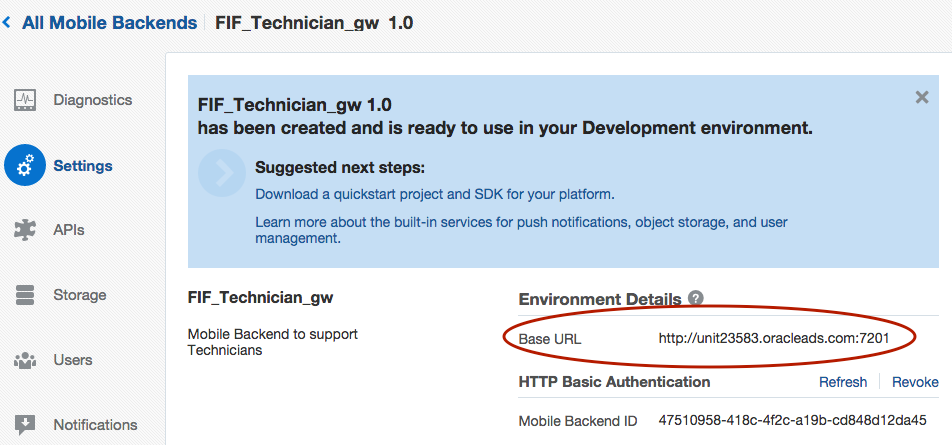
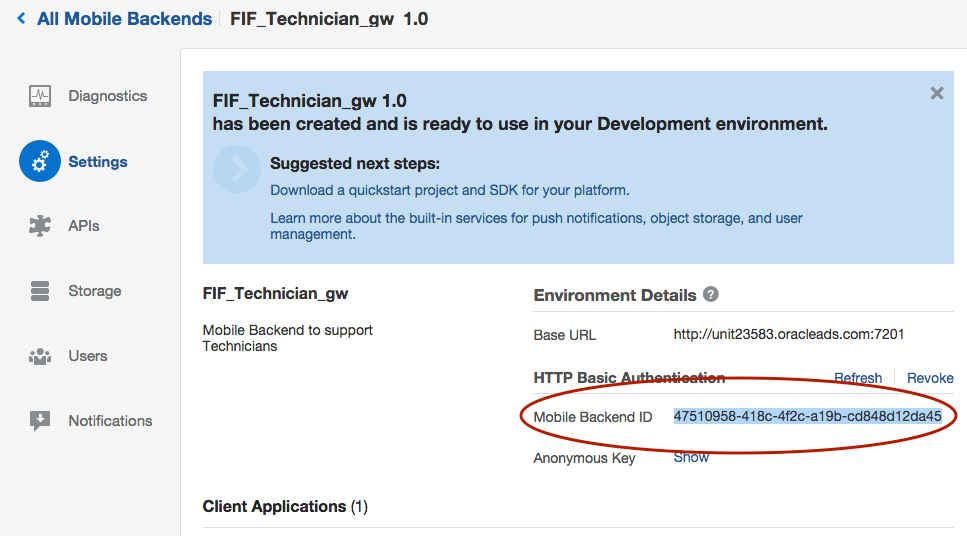
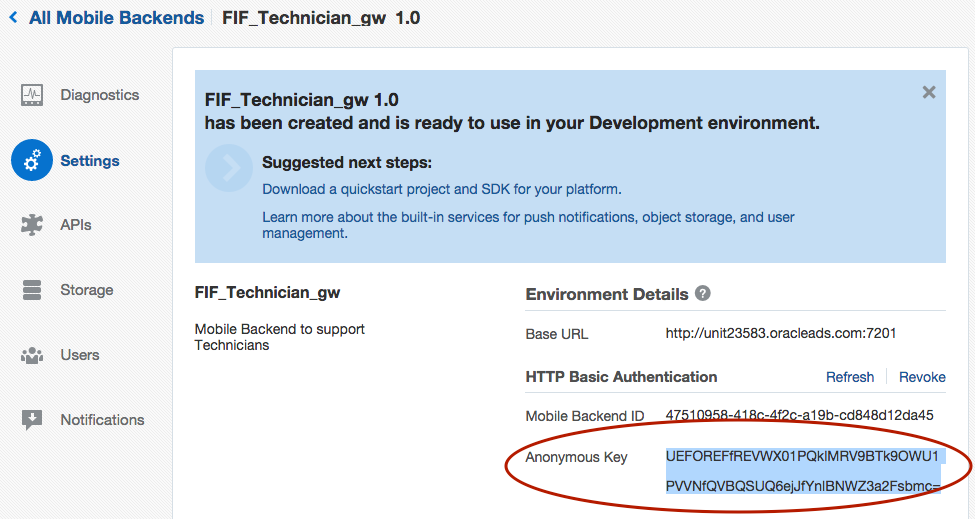
Click Settings and copy the Base URL from the Environment Details section.
-
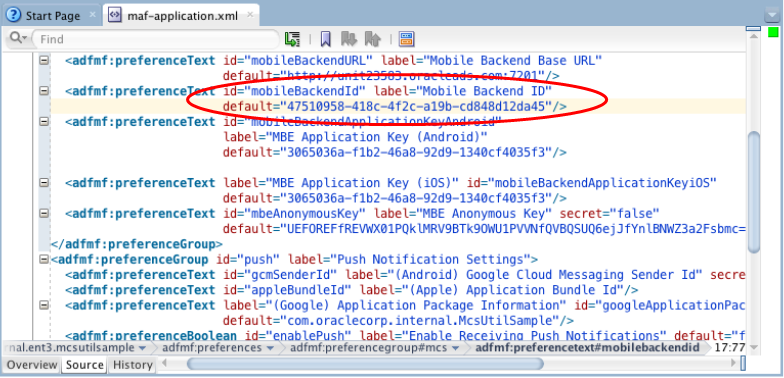
Back in JDeveloper, add a default to the mobileBackEndURL preference and paste in the value of Base URL that you copied in the previous step. You can type default= and paste the value in between double quotes, or you can paste the value into the default property of the Properties window. Use the following screen shot as a guide.
-
Back in MCS, copy the Mobile Backend ID. In JDeveloper, paste it into the default property for mobileBackendId.
-
Back in MCS, next to Anonymous Key, click Show and copy the Anonymous Key. In JDeveloper, paste it into the default property for mbeAnonymousKey.

-
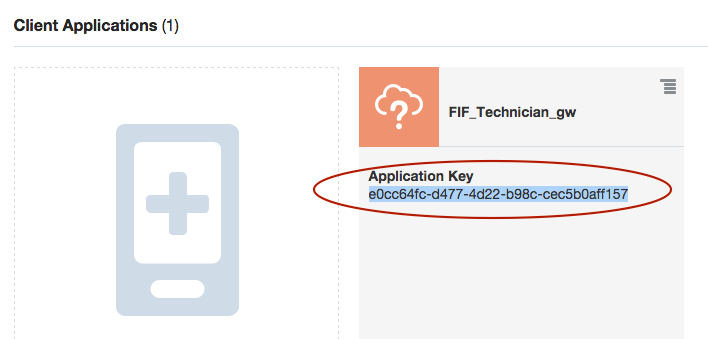
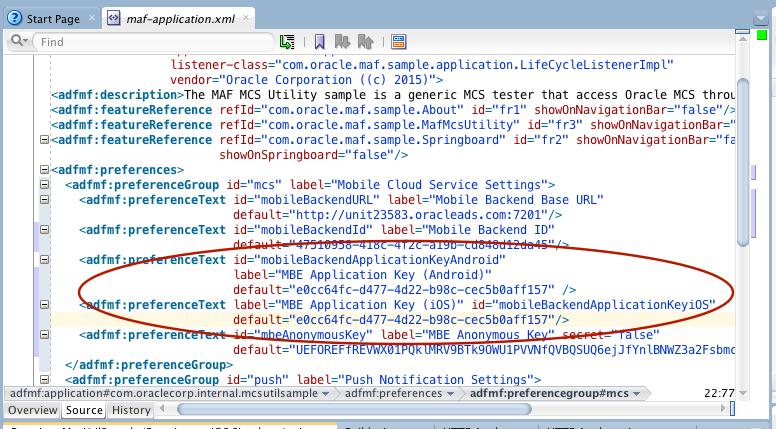
Back in MCS, copy the Application Key and paste it into the default property for both the mobileBackendApplicationKeyAndroid and mobileBackendApplicationKeyiOS preferences.
-
Save your work.
-
Right-click the View Controller project and select Run from the context menu.
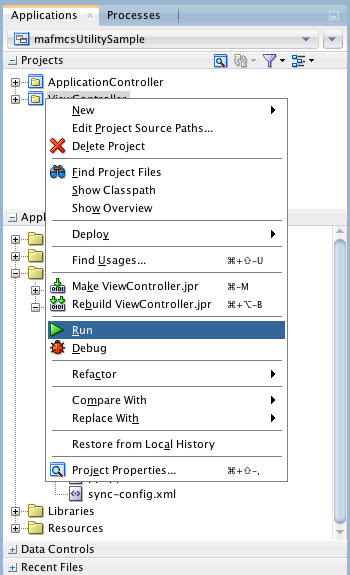
This launches the MAF MCS Tester Application in the simulator you selected earlier.
-
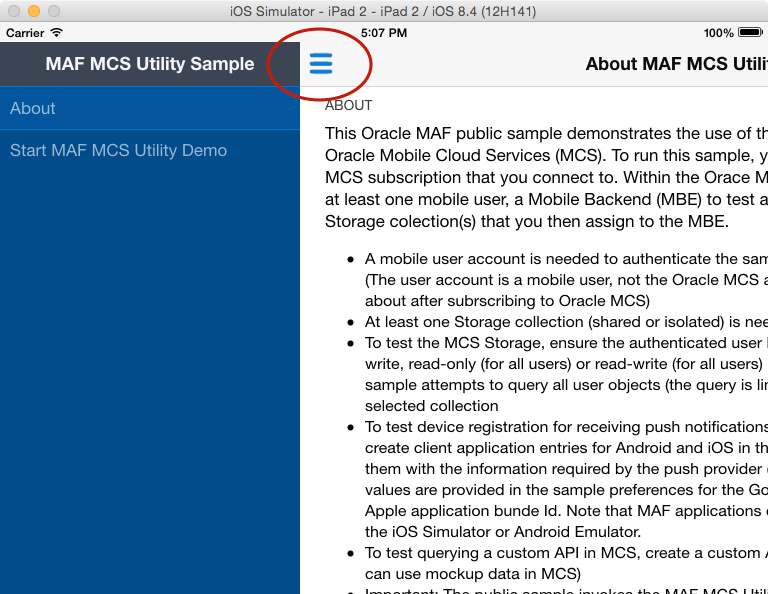
In the MAF MCS Tester Application, click the Options icon (referred to as the hamburger icon) to see the options on the left. Click Start MAF MCS Utility Demo.
-
Log in to the MAF MCS Tester Application anonymously by selecting the Anonymous switch.
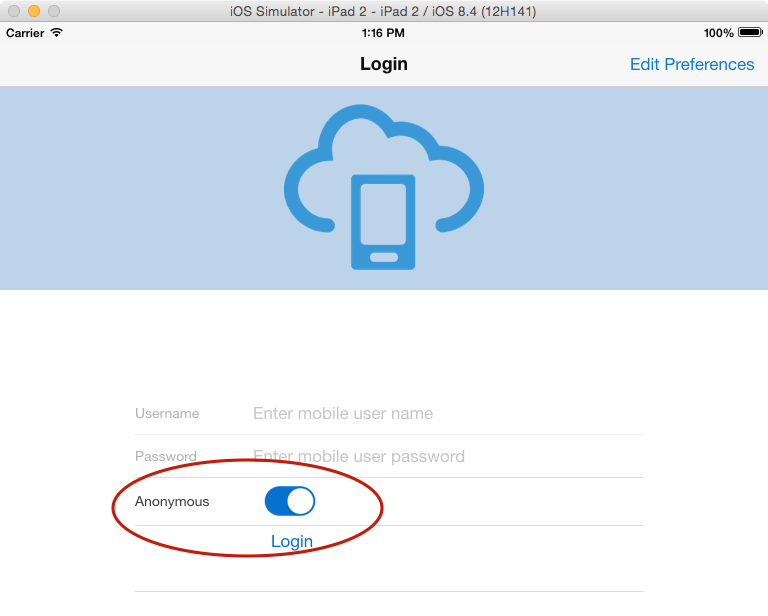
You will see the following page when the anonymous login is successful.

You are now ready to use the MAF MCS Tester Application to test your mobile
backend. You will also use the tester to verify your work in later tutorials.
In this part of the tutorial, you test the IncidentReport API by using the MAF MCS Tester Application. You've already logged in as an anonymous user. Now you run the API to see some example data returned.
-
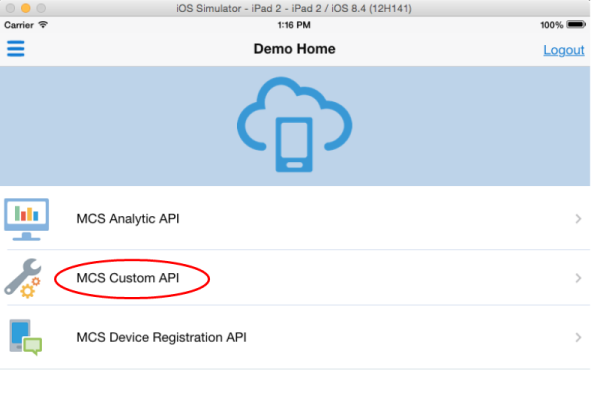
Go back to the MAF MCS Tester Application and navigate to the Home page as shown in the following image.
Then, click the MCS Custom API option.
-
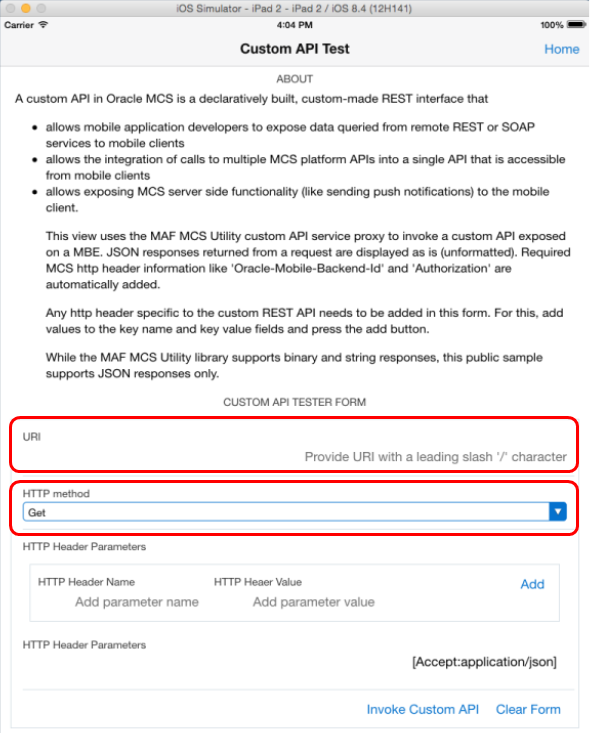
From this page, you can access API endpoints.
You must set two properties to run the API: URI and HTTP Method.
-
First set the URI. You can find the value for this field in MCS.
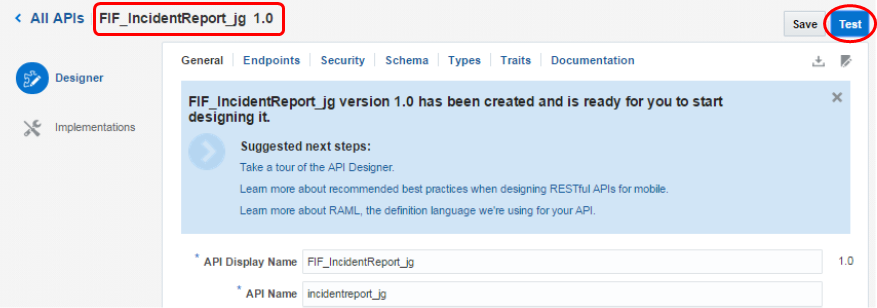
Back in MCS, open the FIF_IncidentReport_xx API in the API Designer.
Then click the Test button.
-
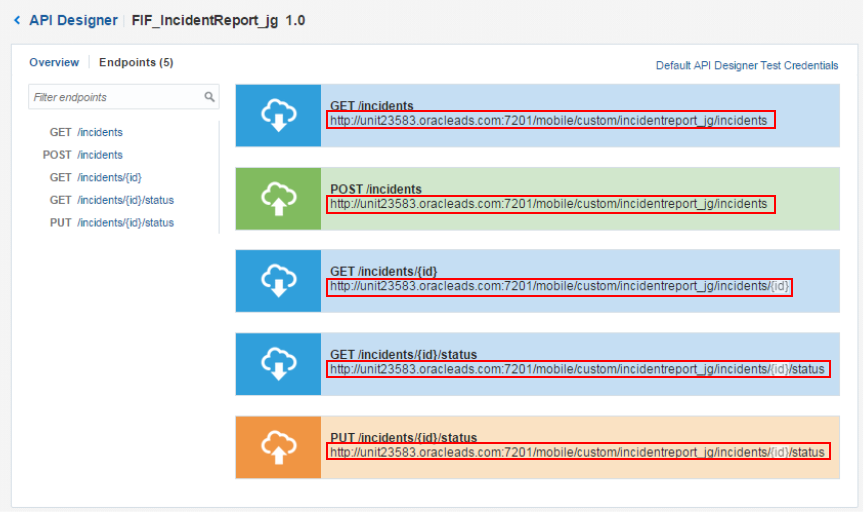
Here you see all the methods that you can use. Each method has a unique URL that you can use when you test the API.
-
First, you test the GET/incidents method to see the example data from the API.
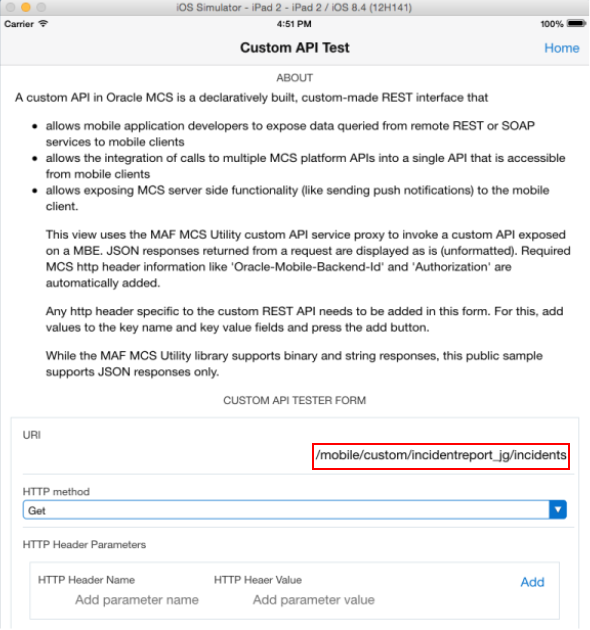
Look at the GET/incidents endpoint. The URI that you need to use in the tester consists of everything that follows the port number.
In the example, the URI is:
/mobile/custom/incidentreport_jg/incidents

-
Go back to the MAF MCS Tester Application, and in the CUSTOM API TESTER FORM section, enter that value in the URI property.
-
By default, the HTTP Method is set to the first method in the list, GET. You test the GET method first.
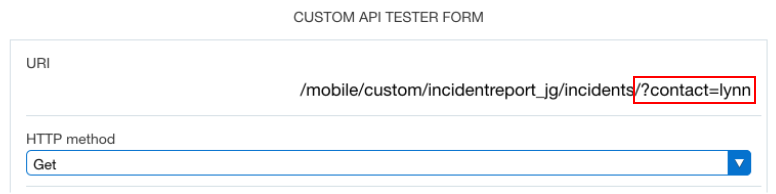
Instead of returning all incidents, you can include a query parameter in the URL to restrict the records that are returned. Query parameters are constructed by including a "?", followed by the parameter name and then the parameter value.
To return only incidents where the contact is lynn, append the following query parameter to the URI:
/?contact=lynn
-
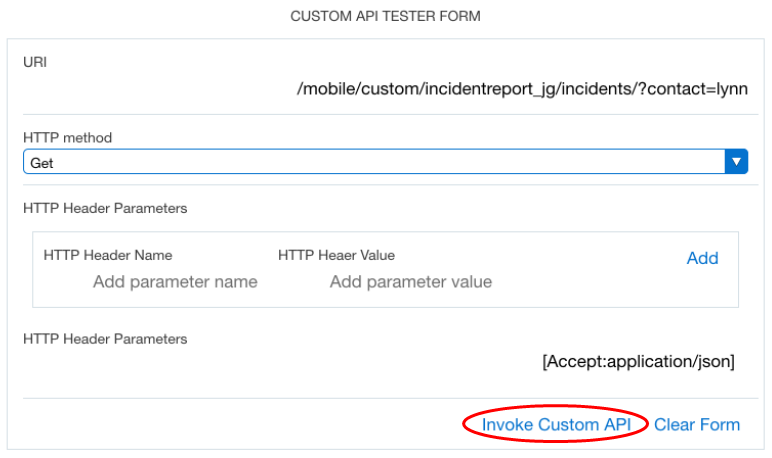
At the bottom of the form, click Invoke Custom API to run the API and test the endpoint using the URI that you specified.
-
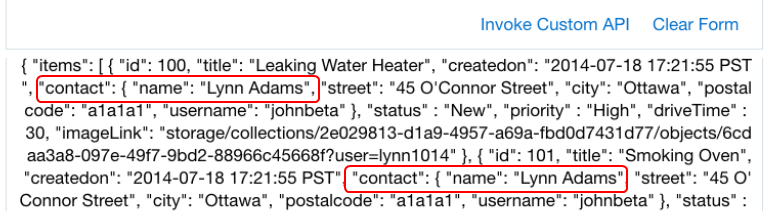
The API is accessed, and you should see records returned in the response at the bottom of the page. They include any records with "lynn" as part of the contact name.
These records come from the API's example data, just like they did in the API tester page within the MCS UI.
You've now completed this tutorial. Congratulations.