Data source types: Essbase
When performing ad hoc analysis, you can quickly insert Essbase attribute dimensions on the worksheet.
 To insert Essbase attribute dimensions on a worksheet:
Connect to an Essbase database and either perform an ad hoc analysis or type members in free-form format on the worksheet.
In the Essbase ribbon, click the Insert Attributes button,
 .
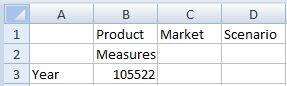
.For example, using Sample Basic, from the Action Panel, select Ad hoc analysis to place dimensions, including page dimensions, on the worksheet, as shown in Figure 37, Initial Ad Hoc Grid.
Now click Insert Attributes,
.In Figure 37, Initial Ad Hoc Grid, you can see that the attributes Caffeinated, Ounces, Pkg Type, Population, and Intro Date have been added to the worksheet as page dimensions.

You can now work with the attribute dimensions in the same way you would if you had used the Member Selection dialog box or free-form to place the attributes on the sheet. Along with the other page dimensions, you can pivot the attribute dimensions between rows and columns on the grid, and pivot them between the POV and the grid.
Notes about inserting attributes:
If an attribute is already present on the grid, then it will not be duplicated when you click Insert Attributes.
The grid must be in refreshed state. If the grid is in free-form state prior to refresh, then Smart View prompts you to manually refresh.
Once attributes are inserted on the grid, the grid is auto-refreshed.
If there is no POV or title row present in the sheet, then a row will be added at the top of the sheet for inserting the attribute dimensions.
Only the default member of the attribute will be inserted; you cannot insert specific members from an attribute dimension, although after insertion, you can use Member Selection to select them.
The Insert Attributes operation is not supported for Query Designer or Smart Slice design sheets.
Insert Attributes is supported only for Essbase; it is not supported for non-Essbase providers.
Insert Attributes is not supported for multiple grid sheets.