Site Configuration
Note:
Ingest must be disabled before you add or change any value in the site configuration.Site configuration is where you define and manage site-specific information that is required by the VSM GUI. Site configuration is performed as a part of the initial installation process but can be run again at any time after installation to modify any of the configuration details.
Site configuration is performed using a multi-page wizard, the Site Configuration Wizard, which steps you through the configuration process.
Before you start, disable the Ingest service on your virtual machine.
Select Administration and Site Configuration on the navigation tree.
The Introduction page is displayed.
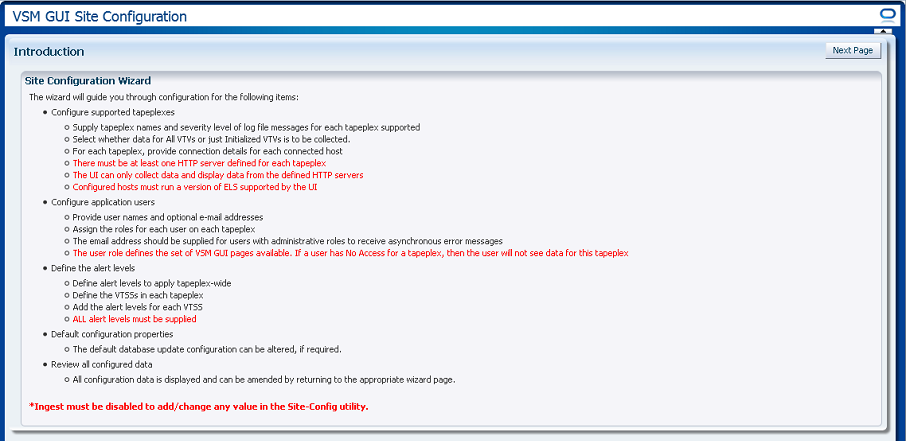
The Introduction page summarizes the site configuration tasks:
"Configure Supported Tapeplexes"
-
Supply tapeplex names and severity level of log file messages for each tapeplex supported
-
Select whether data for all VTVs or just initialized VTVs is to be collected
-
For each tapeplex, provide connection details for each connected host
-
There must be at least one HTTP server defined for each tapeplex
-
The UI can only collect data and display data from the defined HTTP servers
-
Configured hosts must run a version of ELS supported by the UI
-
Provide user names and optional Email addresses
-
Assign the roles for each user on each tapeplex
-
The Email address is optional
-
The user role defines the set of VSM GUI pages available. If a user has no access for a tapeplex, then the user will not see data for that tapeplex.
-
Define alert levels to apply tapeplex-wide
-
Define the VTSSs in each tapeplex
-
Add the alert levels for each VTSS
-
All alert levels must be supplied
-
The default database update configuration can be altered, if required
"Edit Default Configuration Properties"
-
Several site configuration properties are editable to fine-tune host cycle times and batch record sizes for your site.
"Review Site Configuration Summary"
-
All configuration data is displayed and can be amended by returning to the appropriate page.
Click Next Page to display the Configure Supported Tapeplexes page and begin the site configuration process.
Configure Supported Tapeplexes
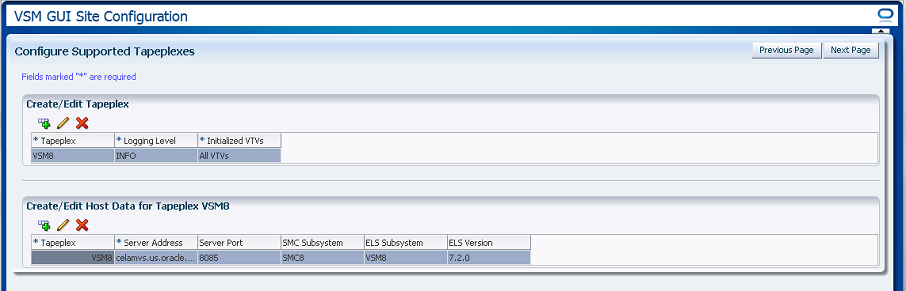
Configure Supported Tapeplexes has two elements:
-
"Create/Edit Tapeplex" is where you define and manage site configuration information about your supported tapeplexes
-
"Create/Edit Host Data for Tapeplex" is where you define and manage site configuration information about the host systems associated with the tapeplexes
Create/Edit Tapeplex
Create/Edit Tapeplex is where you identify and manage site configuration information about supported tapeplexes.

Data columns and descriptions include:
| Column | Description |
|---|---|
| Tapeplex | The name of the supported tapeplex |
| Logging Level | Defines the level at which logging entries will be created by the database refresh code. Enabling logging at a given level also enables logging at all higher levels.
Logging levels (in ascending order from lowest to highest) include: ALL: All messages should be logged FINEST: Highly detailed tracing messages should be logged FINER: Fairly detailed tracing messages should be logged FINE: Basic tracing messages should be logged CONFIG: Static configuration messages should be logged INFO: Informational messages should be logged WARNING: Warning messages indicating a potential problem should be logged SEVERE: Severe messages indicating a serious failure should be logged OFF: No messages should be logged |
| Initialized VTVs | Determines whether data for all VTVs or just initialized VTVs is to be collected |
Click the icons to perform the following operations:
| Icon | Name | Description |
|---|---|---|
| Add | Add a new tapeplex to the configuration | |
| Edit | Edit the selected tapeplex and associated host entries in the configuration | |
| Delete | Delete the selected tapeplex and associated host entries from the configuration |
Add a New Tapeplex
Click the Add icon. A dialog is displayed.
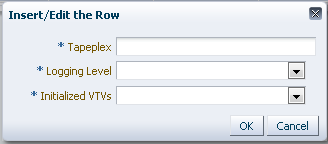
Enter the name of the tapeplex.
Select the Logging Level and Initialized VTVs settings for this tapeplex.
Click OK to enter the data, or click Cancel to end the dialog. Your entries are recorded in the configuration when you click OK.
Repeat these steps to add another tapeplex.
When finished adding tapeplexes, go to "Create/Edit Host Data for Tapeplex" to define and manage information about the host systems associated with the tapeplexes.
When finished with Configure Supported Tapeplexes, click Next Page to display the next configuration page, or click Previous Page to go back one page.
Edit a Tapeplex
Select the tapeplex to edit.
Click the Edit icon. A dialog is displayed.
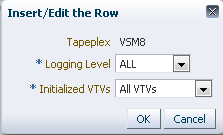
Change the settings you want to edit.
Click OK to enter the revised data, or click Cancel to end the dialog. Your changes are entered in the configuration when you click OK.
When finished with Configure Supported Tapeplexes, click Next Page to display the next configuration page, or click Previous Page to go back one page.
Delete a Tapeplex
Select the tapeplex to delete.
Click the Delete icon. A dialog is displayed.
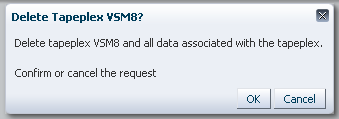
Click OK to delete the tapeplex and all data associated with the tapeplex, or click Cancel to end the dialog. The tapeplex will be deleted when you click OK.
When finished with Configure Supported Tapeplexes, click Next Page to display the next configuration page, or click Previous Page to go back one page.
Create/Edit Host Data for Tapeplex
Create/Edit Host Data for Tapeplex is where you define and manage site configuration information about the host systems associated with a selected tapeplex.

Data columns and descriptions include:
| Column | Description |
|---|---|
| Tapeplex | The name of the tapeplex the host is associated with |
| Server Address | Either the IP address for the host or the fully qualified domain name for the host |
| Server Port | The port number for the SMC HTTP server that is expected to be running on the host. If this is not running, then the database refresh process will not collect data from this host. |
| SMC Subsystem | The SMC subsystem name on the host |
| ELS Subsystem | The ELS subsystem name on the host |
| ELS Version | The ELS version on the host must be ELS 7.1 or higher. Data will not be collected from a host with an unsupported ELS version. |
Click the icons to perform the following operations:
| Icon | Name | Description |
|---|---|---|
| Add | Add a new host entry to the selected tapeplex | |
| Edit | Edit the selected host entry | |
| Delete | Delete the selected host entry |
Add a New Host
Select the tapeplex the host is associated with in the Create/Edit Tapeplex table.
Click the Add icon for the Create/Edit Host Data for Tapeplex table. A dialog is displayed.
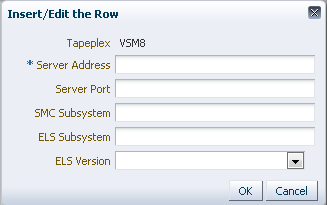
Enter the host's HTTP server address and optionally the host's HTTP server port, SMC subsystem, ELS subsystem, and ELS version.
Click OK to enter the data, or click Cancel to end the dialog. Your entries are recorded in the configuration when you click OK.
Repeat these steps to add additional hosts to the tapeplex or to add hosts to a different tapeplex.
When finished with Configure Supported Tapeplexes, click Next Page to display the next configuration page, or click Previous Page to go back one page.
Edit a Host
Select the host to edit.
Click the Edit icon. A dialog is displayed.
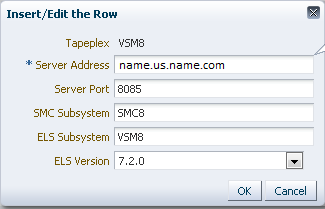
Change the settings you want to edit.
Click OK to enter the revised data, or click Cancel to end the dialog. Your changes are entered in the configuration when you click OK.
When finished with Configure Supported Tapeplexes, click Next Page to display the next configuration page, or click Previous Page to go back one page
Delete a Host
Select the host to delete.
Click the Delete icon. A dialog is displayed.
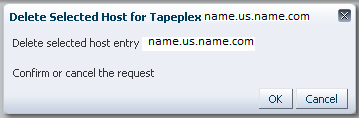
Click OK to delete the host, or click Cancel to end the dialog. The host will be deleted when you click OK.
When finished with Configure Supported Tapeplexes, click Next Page to display the next configuration page, or click Previous Page to go back one page.
Configure Application Users
User Information is where you identify and manage information about the users who will access VSM GUI. Each user must be in your site's LDAP directory. and must be assigned at least one user role on at least one tapeplex.
User Information has two elements:
-
"Create/Edit User Information" is where you identify the users who will be authorized for VSM GUI login
-
"Create/Edit User Roles for User" is where you define and manage user roles and tapeplex access for specific users
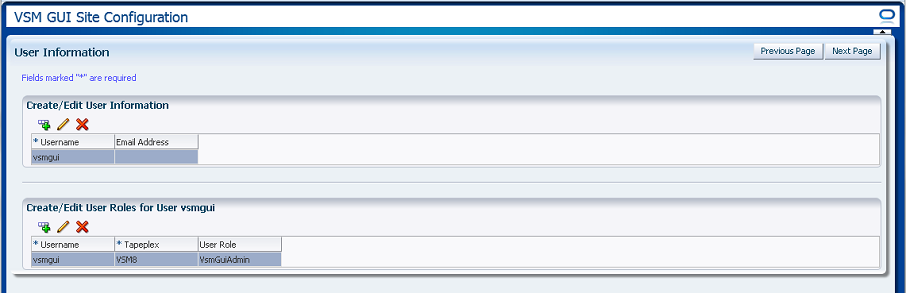
Create/Edit User Information
Create/Edit User Information is where you identify the users who will be authorized for VSM GUI login.
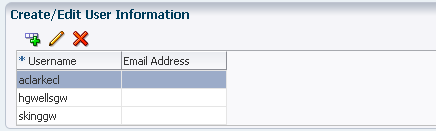
Table columns and descriptions include:
| Column | Description |
|---|---|
| Username | The name of a user that is allowed to run the application. The user name must be the name of a user defined on the site's LDAP directory services |
| Email Address | The user's Email address (optional). The email address is used to send information messages to a user that has the VsmGuiAdm role. |
Click the icons above the graph to perform the following operations:
| Icon | Name | Description |
|---|---|---|
| Add | Add or modify user authorization information in the configuration | |
| Edit | Edit the selected user and all assigned roles for that user in the configuration | |
| Delete | Delete the selected user and all assigned rolls for that user in the configuration |
Create a User
Click the Add icon. A dialog is displayed.
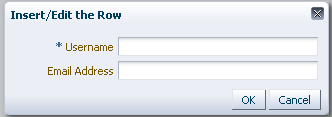
Enter the username of the user.
Optionally, enter the user's Email address.
Click OK to enter the data, or click Cancel to end the dialog. Your entries are recorded in the configuration when you click OK.
Repeat these steps to add another user.
When finished, go to "Create/Edit User Roles for User" to define and manage user roles and tapeplex access for the user's you create.
When finished with User Information, click Next Page to display the next configuration page, or click Previous Page to go back one page.
Edit a User
Select the username to edit.
Click the Edit icon. A dialog is displayed.
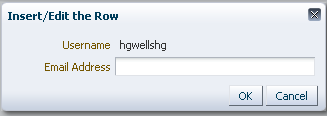
Change the settings you want to edit.
Click OK to enter the revised data, or click Cancel to end the dialog. Your changes are entered in the configuration when you click OK.
When finished with User Information, click Next Page to display the next configuration page, or click Previous Page to go back one page
Delete a User
Select the username to delete.
Click the Delete icon. A dialog is displayed.
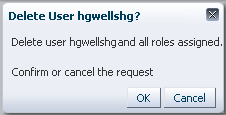
Click OK to delete the user, or click Cancel to end the dialog. The user will be deleted when you click OK.
When finished with User Information, click Next Page to display the next configuration page, or click Previous Page to go back one page.
Create/Edit User Roles for User
Create/Edit User Roles for User is where you define and manage user roles and tapeplex access for specific users. Each user must be assigned at least one user role on at least one tapeplex

Table columns and descriptions include:
| Column | Description |
|---|---|
| User Name | The name of the user to create or edit user roles for |
| Tapeplex | The name of the tapeplex to which the user role field will apply |
| User Role | The user's access role for this tapeplex:
There are three user roles:
|
Click the icons above the graph to perform the following operations:
| Icon | Name | Description |
|---|---|---|
| Add | Add a new user role entry in the configuration | |
| Edit | Edit the selected user role entry in the configuration | |
| Delete | Delete the selected user role entry from the configuration |
Create a User Role Entry
Select the username whose role entry you want to create.
Click the Add icon. A dialog is displayed.
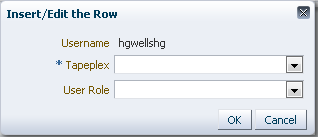
Select the tapeplex the user role is for.
Select the user role.
Click OK to enter the data, or click Cancel to end the dialog. Your entries are recorded in the configuration when you click OK.
Repeat these steps to create another user role entry.
When finished with User Information, click Next Page to display the next configuration page, or click Previous Page to go back one page.
Edit a User Role Entry
Select the username whose role entry you want to edit.
Click the Edit icon. A dialog is displayed.
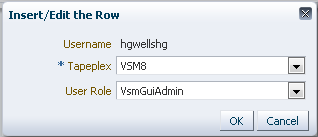
Change the settings you want to edit.
Click OK to enter the revised data, or click Cancel to end the dialog. Your changes are entered in the configuration when you click OK.
When finished with User Information, click Next Page to display the next configuration page, or click Previous Page to go back one page.
Delete a User Role Entry
Select the username whose role entry you want to delete.
Click the Delete icon. A dialog is displayed.
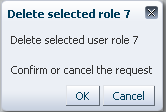
Click OK to delete the selected user role entry, or click Cancel to end the dialog. The user role entry will be deleted when you click OK.
When finished with User Information, click Next Page to display the next configuration page, or click Previous Page to go back one page.
Configure Alert Levels
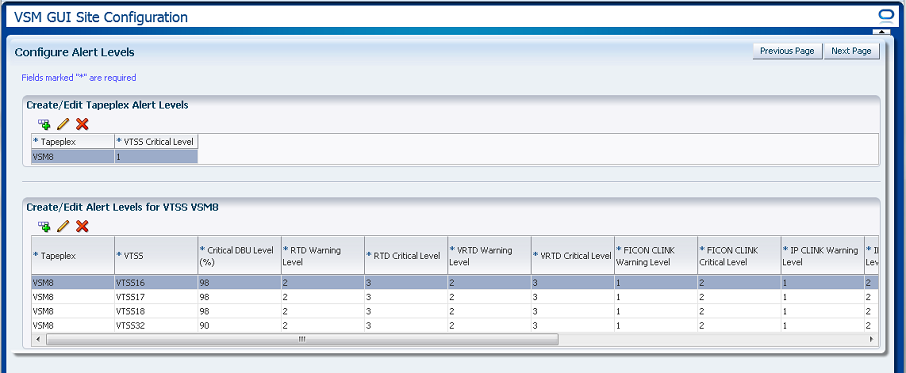
Configure Alert Levels has two elements:
-
"Create/Edit Tapeplex Alert Levels" is where you define the critical alert level threshold for the number of offline VTSSs in a tapeplex that will raise a critical alert
-
"Create/Edit Alert Levels for VTSS" is where you define and manage alert level thresholds for VTSSs within a tapeplex
When finished with Configure Alert Levels, click Next Page to display the next configuration page, or click Previous Page to go back one page.
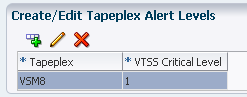
Create/Edit Tapeplex Alert Levels
Create/Edit Tapeplex Alert Levels is where you define the critical alert level for the number of offline VTSSs in a tapeplex that will raise a critical alert.
Data columns and descriptions include:
| Column | Description |
|---|---|
| Tapeplex | The name of the tapeplex to define or edit alert values for |
| VTSS Critical Level | The number of offline VTSSs within the tapeplex that will raise a critical alert |
Click the icons above the graph to perform the following operations:
| Icon | Name | Description |
|---|---|---|
| Add | Add a new tapeplex alert in the configuration | |
| Edit | Edit the selected alert for the tapeplex and associated VTSS alerts in the configuration | |
| Delete | Delete the selected alert for the tapeplex and associated VTSS alerts in the configuration |
Add a New Tapeplex VTSS Critical Level Alert
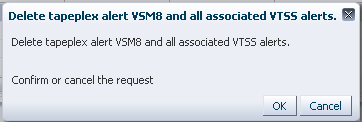
Click the Add New Alert icon. A dialog is displayed.
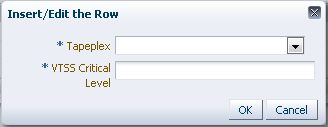
Select the tapeplex the VTSS Critical Level alert is associated with.
Enter the VTSS Critical Level for the selected tapeplex.
Click OK to enter the data, or click Cancel to end the dialog. Your entries are entered in the configuration when you click OK.
Edit VTSS Critical Level Alert for a Tapeplex
Select the tapeplex where you want to edit the VTSS Critical Level alert.
Click the Edit Alert icon. A dialog is displayed.
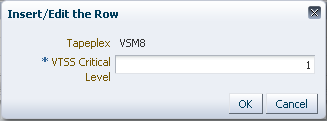
Change the setting for the VTSS Critical Level alert.
Click OK to enter the revised data, or click Cancel to end the dialog. Your entries are entered in the configuration when you click OK.
Create/Edit Alert Levels for VTSS
Create/Edit Alert Levels for VTSS is where you define and manage alert level thresholds for VTSSs within a tapeplex.

Table columns and descriptions include:
| Column | Description |
|---|---|
| Tapeplex | The name of the tapeplex to add or edit alerts for |
| VTSS | The name of the VTSS in the tapeplex to add or edit alerts for |
| Critical DBU Level (%) | The disk buffer usage (as a percentage) at which a critical alert is raised for the specified VTSS |
| RTD Warning Level | The number of offline RTDs attached to a VTSS that will raise a warning alert |
| RTD Critical Level | The number of offline RTDs attached to a VTSS that will raise a critical alert |
| VRTD Warning Level | The number of offline vRTDs attached to a VTSS that will raise a warning alert |
| VRTD Critical Level | The number of offline vRTDs attached to a VTSS that will raise a critical alert |
| FICON CLINK Warning Level | The number of offline FICON CLINKS that will raise a warning alert |
| FICON CLINK Critical Level | The number of offline FICON CLINKS that will raise a critical alert |
| IP CLINK Warning Level | The number of offline IP CLINKS that will raise a warning alert |
| IP CLINK Critical Level | The number of offline IP CLINKS that will raise a critical alert |
| Queued Migrates Warning Level | The number of queued migrates that will raise a warning alert |
| Queued Migrates Critical Level | The number of queued migrates that will raise a critical alert |
| Queued Replications Warning Level | The number of queued replications that will raise a warning alert |
| Queued Replications Critical Level | The number of queued replications that will raise a critical alert |
Click the icons above the graph to perform the following operations:
| Icon | Name | Description |
|---|---|---|
| Add | Create alert levels for a VTSS in the configuration | |
| Edit | Edit the selected alert in the configuration | |
| Delete | Delete the selected alert from the configuration |
Add New VTSS Alerts for a Tapeplex
Select the tapeplex where you want to add VTSS alerts.
Click the Add icon. A dialog is displayed.
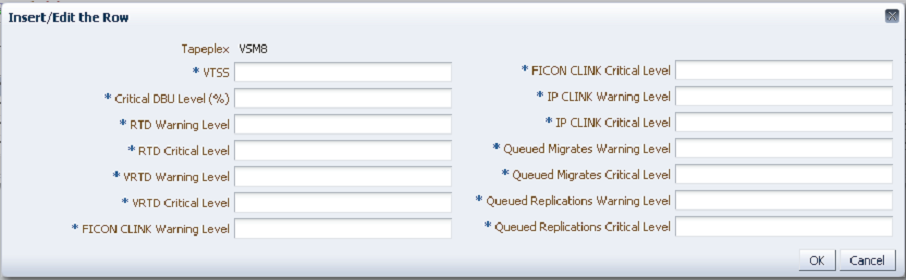
Enter the VTSS name and the then enter alert levels in each field.
Click OK to enter the data, or click Cancel to end the dialog. Your entries are entered in the configuration when you click OK
Repeat these steps to add additional VTSS alert levels.
When finished with Configure Alert Levels, click Next Page to display the next configuration page, or click Previous Page to go back one page.
Edit a VTSS Alert
Select the VTSS in the tapeplex where you want to edit the VTSS alerts.
Click the Edit icon. A dialog is displayed.
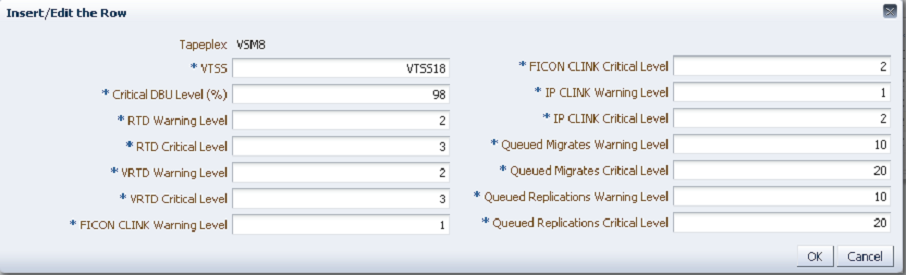
Change the settings you want to edit.
Click OK to enter the revised data, or click Cancel to end the dialog. Your entries are entered in the configuration when you click OK.
Edit Default Configuration Properties
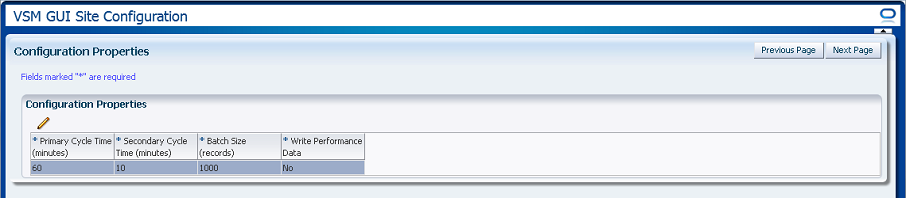
Several site configuration properties are editable to fine-tune host cycle times and batch record sizes for your site.
Table columns and descriptions include:
| Column | Description |
|---|---|
| Primary Cycle Time (minutes) | Primary cycle times are for the data ingest process. The primary ingest gets updates from VTCS on VTV and MVC data, which causes VTCS to scan the CDS and requires MVS resources To avoid impacting other production activity, this process should be done less frequently. The recommended frequency is 60 minutes, which is the default. |
| Secondary Cycle Time (minutes) | Secondary cycle times are for the data ingest process. Secondary ingest gets data for all tables not updated by primary ingest. This is less work for VTCS, so the secondary cycle can be run more frequently with little impact on other production activity. The recommended value is 10 minutes, which is the default. |
| Batch Size (records) | The number of records added to a database table in a single action during an ingest process. A larger number will result in a faster data load, but any error in a batch results in any remaining rows not being updated. The recommended value is 1000, which is the default. |
Click the icon above the graph to perform the following operation:
| Icon | Name | Description |
|---|---|---|
| Edit | Edit configuration properties |
Edit Configuration Properties
Click the Edit icon above the graph. A dialog is displayed:
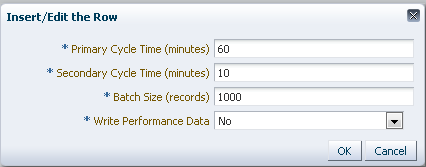
Change the settings you want to edit.
Click OK to enter the revised data, or click Cancel to end the dialog. Your entries are entered in the configuration when you click OK.
When Configure Properties is complete, click Next Page to display the Summary page, or click Previous Page to go back one page in the Site Configuration wizard.
Review Site Configuration Summary
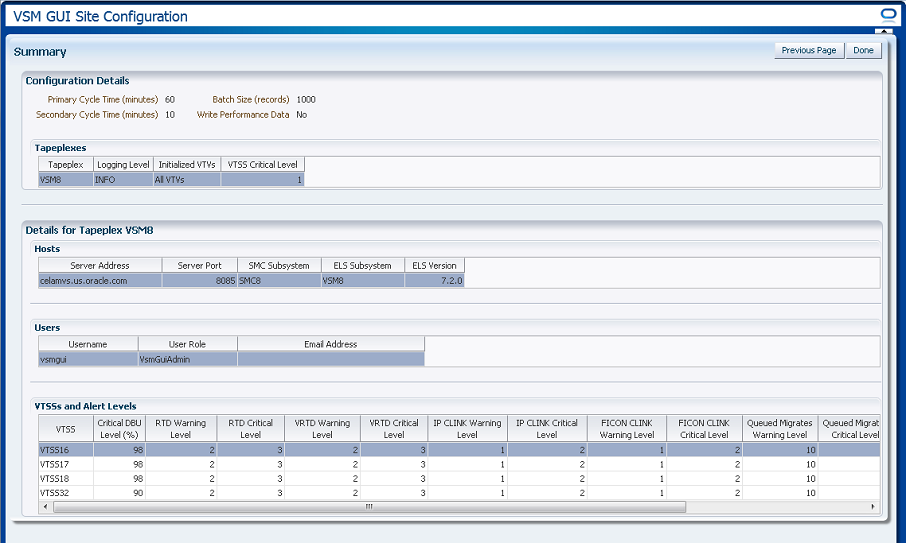
The Summary page lists your current site configuration settings.
Review the settings to ensure they are complete and accurate.
If you need to make changes, use Previous Page to go back to the page where you want to make changes.
When you are finished, click Done to close the Site Configuration Wizard. A dialog is displayed:

Click OK to exit the Site Configuration Wizard.
Any changes made are now committed to the database.
Enable the Ingest service on your virtual machine to activate these changes.