1 Getting Started
This chapter includes the following topics:
STA Overview
Oracle's StorageTek Tape Analytics (STA) is an intelligent monitoring application available exclusively for Oracle's StorageTek Modular Tape Libraries. It simplifies tape storage management and allows you to make informed decisions about future tape storage investments based on the current health of your environment.
STA allows you to monitor globally dispersed libraries from a single, browser-based user interface. You can manage open systems and mainframe mixed-media, and mixed-drive environments across multiple library platforms.
STA's detailed performance trending analyses allow you to increase the utilization and performance of your tape investments. These analyses are based on a continually updated database of library operations. STA captures and retains data from your tape library environment and uses this data to calculate the health status of your library resources (drives and media). STA aggregates data according to a variety of criteria and displays it in tabular and graphical formats, allowing you to quickly assess environment activity, health, and capacity.
Supported Devices
This section identifies the devices supported by STA. See the STA Requirements Guide for complete details about minimum firmware levels and other requirements.
In general, the newer the drive model and the more up-to-date the drive and library firmware, the richer the data that STA receives and the more in-depth the analysis it can perform. For best results, it is recommended that you update your drive and library firmware to the most current versions.
Drive and Media Types
-
StorageTek T10000A, T10000B, T10000C, and T10000D drives
-
StorageTek T10000T1 and T10000T2 media
-
StorageTek 9840C and 9840D
-
HP LTO-3, LTO-4, LTO-5, and LTO-6, full Automation Drive Interface (ADI) support
-
IBM LTO-3 and LTO-4, full ADI support
-
IBM LTO-5 and LTO-6, basic support—Library Drive Interface (LDI) mode—only
Note:
For LTO drives, the ADI protocol must be enabled on both the drives and the library for STA to receive rich data about these drives. LTO 2 and SDLT drives do not support ADI, and therefore STA receives only minimal data about them.STA Login Sessions
Your STA administrator will provide you with an STA username and password for logging into STA. Once you are logged in, you have access to all STA screens and features. See "Log In to STA" for instructions.
Username and Password Requirements
Username requirements are as follows:
-
Must be 1–16 characters in length
-
All usernames must be unique
Password requirements are as follows:
-
Must be 8–32 characters in length
-
Must include at least one uppercase letter and one number
-
Must not include spaces or tabs
-
Must not include any of the following special characters:
% & ' ( ) < > ? { } * \ ' " ; , + = #
You can change your password at any time. See "Change Your Password" for details.
User Account Lockout
After five unsuccessful login attempts within a five-minute period, you will be locked out of your user account for 30 minutes. For security reasons, your account cannot be reset during the lockout period, even by the STA administrator, so you must wait the full 30-minutes before attempting to log in again.
User Roles
Each STA username is assigned a user role, which determines the screens and activities the user can access. Your user role is displayed in the Main Toolbar, next to your STA username.
Description of the illustration ''if_usernamerole.jpg''
The user roles are as follows:
-
Viewer – Can access all screens from the Home, Tape System Hardware, and Tape System Activity menus.
-
Operator – Has all privileges of the Viewer role. Also has editing privileges for some Setup & Administration screens and view-only privileges on Configuration screens.
-
Administrator – Has all privileges of the Operator role, plus has full editing privileges for all Setup & Administration screens.
For a complete description of the screens and activities available to each role, see "STA User Roles".
The STA documentation identifies the user role required to access screens and perform activities. If no role is identified, then the activity can be performed by all users.
Best Practices for Login Sessions
This section provides tips for your STA login sessions. See the STA Screen Basics Guide for related screen display tips.
- Using the STA Navigation Bar
-
The Navigation Bar provides perspectives focused on hardware components (for example, Libraries, Drives, and Robots) and activities involving those components (for example, Exchanges, Drive Cleanings, and Alerts). Choose the perspective and views that achieve your goals most easily.
- Navigating forward and backward
-
Do not use your browser's Forward and Back (or Next and Previous) buttons for navigating through the STA screens. Using these buttons could have unpredictable results, as the data you see may be stale or out of sync with the data on the STA server. To navigate, you should always use the methods provided by STA: the Navigation Bar and text links.
- Always log out to end a session
-
When you are ready to finish a login session, always explicitly log, rather than simply closing the browser window. Logging out releases the session memory on the STA server for other processes. If you simply close the browser window, the session memory is not freed until the defined session timeout period is exceeded, possibly impacting STA performance, especially if your session timeout period is long.
See "Log Out of STA".
- Number of STA login sessions
-
For each browser you can have only one login session at a time open to a particular STA instance. If you have multiple sessions open to the same STA instance in the same browser, you may notice navigation and display issues, such as the locked Navigation Bar shown in the example below—the tabs on the Navigation Bar cannot be selected or expanded. You may also notice the Logout link or the Setup & Administration link in the Navigation Bar disappear from the screen display.
If you notice any of these conditions, you should close or log out of all but one session to an STA instance in the browser.

Description of the illustration ''if_navbarnonselect.png''
- Loss of VPN connection
-
If you are connected to STA through a virtual private network (VPN) and the VPN connection goes down, you may see an error message similar to the following:
null windowId
ADF_FACES-60097: For more information, please see the server's error log for an entry beginning with: ADF_FACES-60096:Server Exception during PPR, #1
After reconnecting to VPN, you should initiate a new STA login session, either by forcing a reload of the current STA browser page or by closing the current STA page and then opening a new one.
If you simply reconnect to VPN without initiating a new login session, you will appear to be logged in, but the Logout link in the Main Toolbar at the top of the page will be missing.
Login Tasks
Log In to STA
Use this procedure to start an STA session. Before using this procedure, you must verify that your computer and browser are configured correctly. See the STA Requirements Guide for minimum requirements.
In addition, you must get the following information from your STA administrator:
-
URL of the STA application
-
Your STA username and password
-
Start a supported Web browser on your computer.
-
In the Location Bar or Address field, enter the URL of the STA application. The URL uses one of the following formats:
http://local_host_name:port_number/STA
https://local_host_name:port_number/STA
where local_host_name and port_number are the name and port number of the STA server given to you by your STA administrator. Typically, STA runs on port 7021.
The Login screen appears.
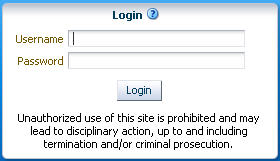
Description of the illustration ''if_login.jpg''
-
Enter the STA username and password you have been assigned, and then click Login.
Depending on the preference settings for your STA username, the Accessibility Settings dialog box may appear.
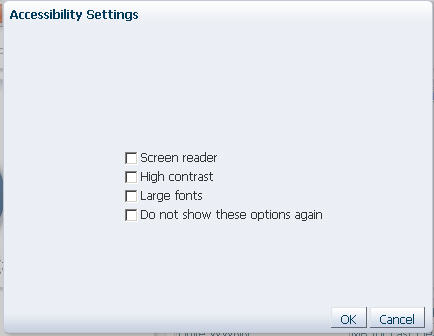
Description of the illustration ''if_accessset.jpg''
-
Complete the Accessibility Settings dialog box, if applicable, and then click OK. See the STA Screen Basics Guide for details on completing this dialog box.
The Dashboard appears.
Enable HTTPS in Your Browser (optional)
Use this procedure to explicitly enable the HTTPS protocol in your browser so you can use a secure connection to log in to STA.
Note:
Use this procedure only if STA is accessed at your site with the HTTPS protocol (that is, the STA URL starts with https:// rather than http://). You can skip this procedure if the STA URL starts with http://Background: When accessed through HTTPS, the STA user interface requires the TLS 1.0 protocol. Recent browser versions have enabled TLS 1.2 or TLS 1.3 and disabled TLS 1.0 by default. If TLS 1.0 is disabled in your browser, the HTTPS connection to STA fails with a warning, such as "Secure Connection Failed".
Use the procedure for the browser you use to access STA. After you complete the procedure, the TLS 1.0 protocol remains enabled in the browser for future sessions on the computer you are using.
Note:
These procedures provide sample instructions for selected recent-version browsers, and the steps may vary slightly if you are running a different version browser or operating system than the ones listed here. See the STA Requirements Guide for supported browser versions.Firefox 38 on Windows 7
-
Open a new tab in the browser.
-
In the address bar, enter about:config.
-
If the "This might void your warranty" screen is displayed, click I'll be careful, I promise!
-
In the Search bar, enter security.tls.version.fallback-limit.
-
If the displayed value is not 1, double-click the entry to change it.
-
Enter 1 and click OK.
-
Restart the browser.
-
The first time you use HTTPS to log in to STA after using this procedure, you may see a message that the connection is untrusted. Perform the following steps to permanently add the security exception to your browser:
-
On the This Connection is Untrusted screen, select I Understand the Risks and click Add Exception.
-
In the Add Security Exception dialog box, select the Permanently store this exception check box and click Confirm Security Exception.
The browser continues to the STA login screen.
-
Internet Explorer 10 on Windows 7
Note:
You cannot access STA in Internet Explorer 11; you must use a different version of Internet Explorer.-
In the Tools menu, select Internet Options.
-
Select the Advanced tab.
-
Scroll to the Security heading and select the Use TLS 1.0 check box. Click OK.
-
The first time you use HTTPS to log in to STA after using this procedure, you may see a message indicating a problem with the website's security certificate. To permanently add the security exception to your browser, select the Continue to this website (not recommended) link.
The browser continues to the STA login screen.
Chrome 46 on Windows 7
-
Open a new tab in the browser.
-
In the address bar, type chrome://settings.
-
Select the Show advanced settings link at the bottom of the page.
-
In the Network heading, click Change proxy settings.
-
In the Internet Properties dialog, select the Advanced tab.
Note:
Chrome shares the Windows Internet Properties dialog box with Internet Explorer, so you may see "Internet Explorer" referenced in the dialog box. -
Scroll to the Security heading and select the Use TLS 1.0 check box. Click OK.
-
Restart your computer.
Note:
You must restart your computer, not just the browser. -
Right-click the Google Chrome shortcut on your desktop, and select Properties.
-
Select the Shortcut tab in the Google Chrome Properties dialog box.
-
In the Target field, add a space and the following parameter to the end of the text that is already there (after the closing quote mark). This parameter enforces the use of TLS1 as the minimum fallback protocol.
--ssl-version-fallback-min=tls1
The contents of the Target field should now be similar to the following:
"C:\Program Files (x86)\Google\Chrome\Application\chrome.exe" --ssl-version-fallback-min=tls1
-
Click OK.
-
The first time you use HTTPS to log in to STA after using this procedure, you may see a message that the connection is not private. Perform the following steps to permanently add the security exception to your browser:
-
On the Your connection is not private screen, select the Advanced link.
-
Select the Proceed to server_name (unsafe) link.
The browser continues to the STA login screen.
-
Safari 8 on OS X
On OS X, Apple Security Update 2014-005 is all that is needed to allow HTTPS access to STA. Use the following procedure to verify this update has been installed on your computer. See the following website for details about the update.
https://support.apple.com/en-us/HT203107
-
In the Apple menu, click the Option button and select System Information.
-
Scroll to the Software heading and select Installations.
-
Verify that Security Update 2014-005 is included in the displayed list (by default, software updates are listed in alphabetical order).
Log Out of STA
Use this procedure to terminate your STA session. You can terminate your session at any time.
Note:
It is recommended that you log out of STA rather than simply closing the browser window. Logging out releases the session memory on the STA server for other processes. It is especially important to log out if your defined login session timeout period is long. See the STA Screen Basics Guide for related information.-
From any STA screen, click Logout in the Main Toolbar.

Description of the illustration ''if_logoutclick.jpg''
Your login session is terminated and the Logged Out dialog box appears.
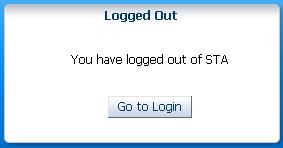
Description of the illustration ''if_loggedout.jpg''
-
Click Go to Login.
Description of the illustration ''if_gotologin.jpg''
The Login screen appears. See "Log In to STA" for instructions on logging in.
Description of the illustration ''if_login.jpg''
Display STA Software Version Information
Use this procedure to display version information about the STA application and supporting software. This information is useful whenever you contact your Oracle support representative.
-
Click About in the Status Line.

Description of the illustration ''if_aboutclick.jpg''
The version information dialog box is displayed.
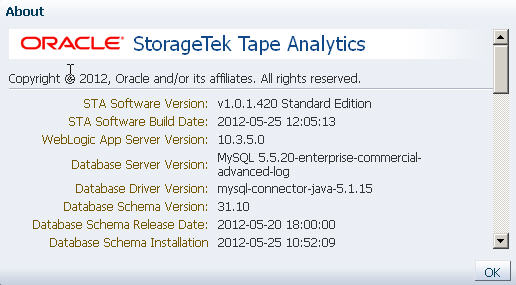
Description of the illustration ''if_version.jpg''
-
Click OK to dismiss the dialog box.
Change Your Password
Use this procedure to change the password for your STA username. See "Username and Password Requirements" for details on valid password assignments.
-
In the Main Toolbar, select Preferences, then select General.
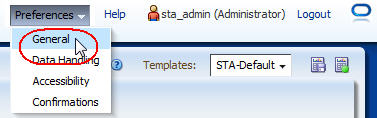
Description of the illustration ''if_prefgen.jpg''
The General dialog box appears.
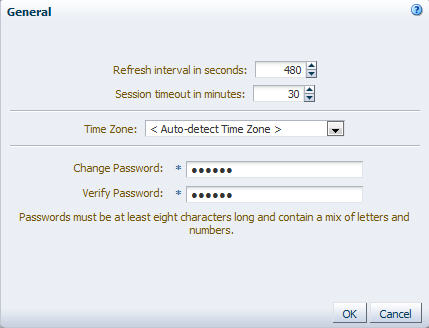
Description of the illustration ''if_prefgeneral.jpg''
-
In the Change Password field, enter the new password you want to assign.
The entry is masked as you type.
-
Enter the password again in the Verify Password field.
-
Click OK.
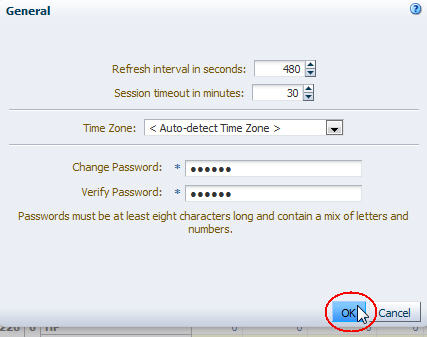
Description of the illustration ''if_prefgeneralok.jpg''
Your password is updated, and the next time you log in, you must use the new one.
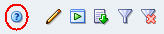
Help
STA provides context-sensitive Help for all screens. Help buttons are located on the following toolbars:
-
Main Toolbar

Description of the illustration ''if_mastmenuh.jpg''
-
Template Toolbar

Description of the illustration ''if_toolbartemplatesh.jpg''
-
Graphics Area Toolbar

Description of the illustration ''if_toolbargrmainovwh.jpg''
-
List View Table Toolbar (Overview screens only)
Description of the illustration ''if_tabletoolbardh.jpg''
-
Pivot Table Toolbar (Analysis screens only)
Description of the illustration ''if_tabletoolbarph.jpg''
-
Dialog boxes

Description of the illustration ''if_dialogh.jpg''
Help Window Layout
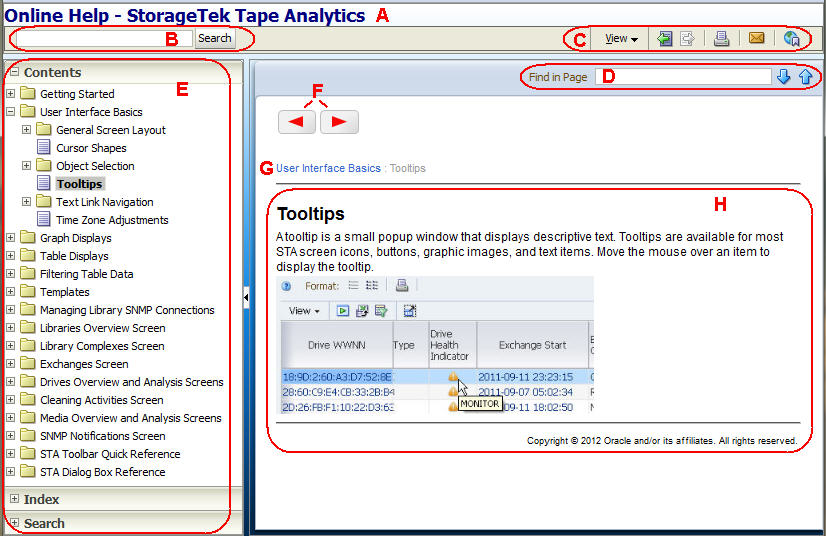
Description of the illustration ''if_helpwindow.jpg''
| Item | Name | Description |
|---|---|---|
| A | Title | Displays the title of the help system. |
| B | Helpset Quick Search | Allows you to perform a quick search throughout the helpset. |
| C | Help Toolbar | Provides direct access to commands for interacting with the helpset. See "Help Toolbar" for details. |
| D | Topic Quick Search | Allows you to perform a quick search within the currently displayed topic. |
| E | Help Navigation Bar | Provides three navigation tabs: Contents, Index, and Search. See the following topics for details: |
| F | Browse Buttons | Allows you to browse sequentially through the help topics, forward and backward. |
| G | Topic Breadcrumbs | Shows the current topic within the topic hierarchy. Click a parent heading to display that topic. |
| H | Topic Area | Displays the contents of the help topic. |
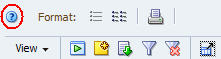
Help Toolbar
The Help Toolbar provides direct access to frequently used commands for displaying and using the help system.
Description of the illustration ''if_helptoolbar.jpg''
| Icon | Name | Description |
|---|---|---|
| View menu | Provides the following selections:
|
|
| Go back/forward one page | Allows you to retrace your steps backward and forward through previously displayed topics. | |
| Print this topic page | Opens your computer's print dialog box so you can print the current topic. | |
| Email this topic page | Opens your computer's default email application so you can email the link to the current topic. | |
| Link to this topic page | Allows you to save the link to the current topic in your browser bookmarks. |
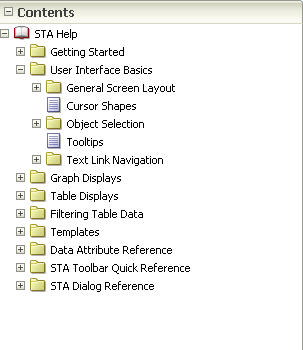
Help Contents Tab
The Contents tab displays the table of contents for the helpset. Topics are listed in a hierarchical tree, with higher-level headings shown as folders. You can expand or collapse folders to list or hide the headings within. Click a heading to display the topic in the Topic Area.
Description of the illustration ''if_helpcontentstab.jpg''
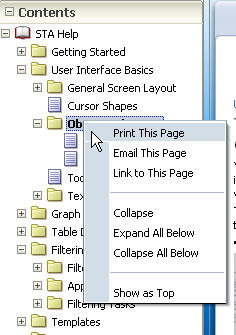
Context Menu
Right-click within the Contents Tab to bring up the Context menu.
Description of the illustration ''if_helpcontextmenu.jpg''
| Menu Selection | Action |
|---|---|
| Print This Page | Opens your computer's print dialog box so you can print the current topic. Also available through the Help Toolbar. |
| Email This Page | Opens your computer's default email application so you can email the link to this topic. Also available through the Help Toolbar. |
| Link to This Page | Allows you save a link to the current topic in your browser bookmarks. Also available through the Help Toolbar. |
| Expand | Expands the selected heading. |
| Collapse | Collapses the table of contents to hide the headings within the selected heading. |
| Expand All Below | Expands the selected heading and all sub-headings within it. |
| Collapse All Below | Collapses the selected heading and all sub-headings within it. |
| Show As Top | Displays the current heading at the top of the Contents tab. |
Help Index Tab
The Index tab displays a sorted index of keywords in a two-level hierarchy. A keyword can be associated with multiple topics.
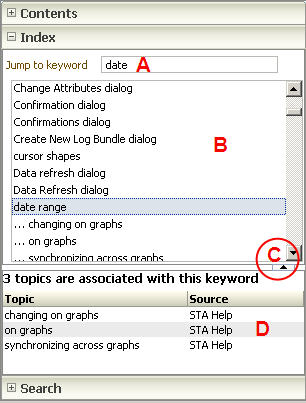
Description of the illustration ''if_helpindextab.jpg''
| Item | Name | Description |
|---|---|---|
| A | Jump to keyword | Enter one or more words in the text field. As you type, the first keyword in the list that matches the typed letters is selected. As more letters are typed, a more accurate selection is made. |
| B | Keyword list | Two-level list of keywords, sorted alphabetically. Select a keyword to display the associated topic in the Topic list. |
| C | Expand/Collapse Pane | Click to expand or collapse the Topic list. |
| D | Topic list | List of keywords. Click a keyword link to display the associated topic in the Topic Area. Click a column heading (Topic or Source) to sort by that column. |
Help Search Tab
The Search tab allows you to construct a full-text query that searches throughout the helpset.

Description of the illustration ''if_helpsearchtab.jpg''
| Item | Name | Description |
|---|---|---|
| A | Search text | Enter one or more words in the text field. As you type, the first keyword in the list that matches the typed letters is selected. As more letters are typed, a more accurate selection is made. |
| B | Selection criteria | Allows you to specify selection criteria for the search. |
| C | Expand/Collapse Pane | Click to expand or collapse the Topic list. |
| D | Topic list | List of search results. Includes the topic title, score, and source of each. Click a topic link to display it in the Topic Area.
The Score column indicates the ranking of the topics according to how well they match the search criteria. By default, all topics are sorted by Score. Click a column heading (Topic Title, Score, or Source) to sort by that column. |