To add additional memory (SO-DIMM RAM) to the Workstation 6 Series, perform the following steps.
-
Before installing memory modules, turn off the workstation and unplug it.
-
Observe precautions for handling electrostatic-sensitive devices. Use an anti-static wrist strap and a grounding mat.
-
When handling memory, hold each module by the edges. Do not bend or drop the memory.
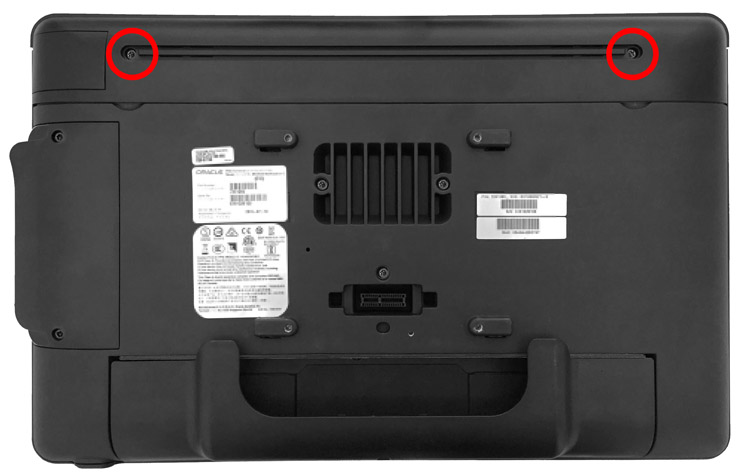
- Use the hex key included with your workstation to loosen the screws that secure the top cover of the workstation.
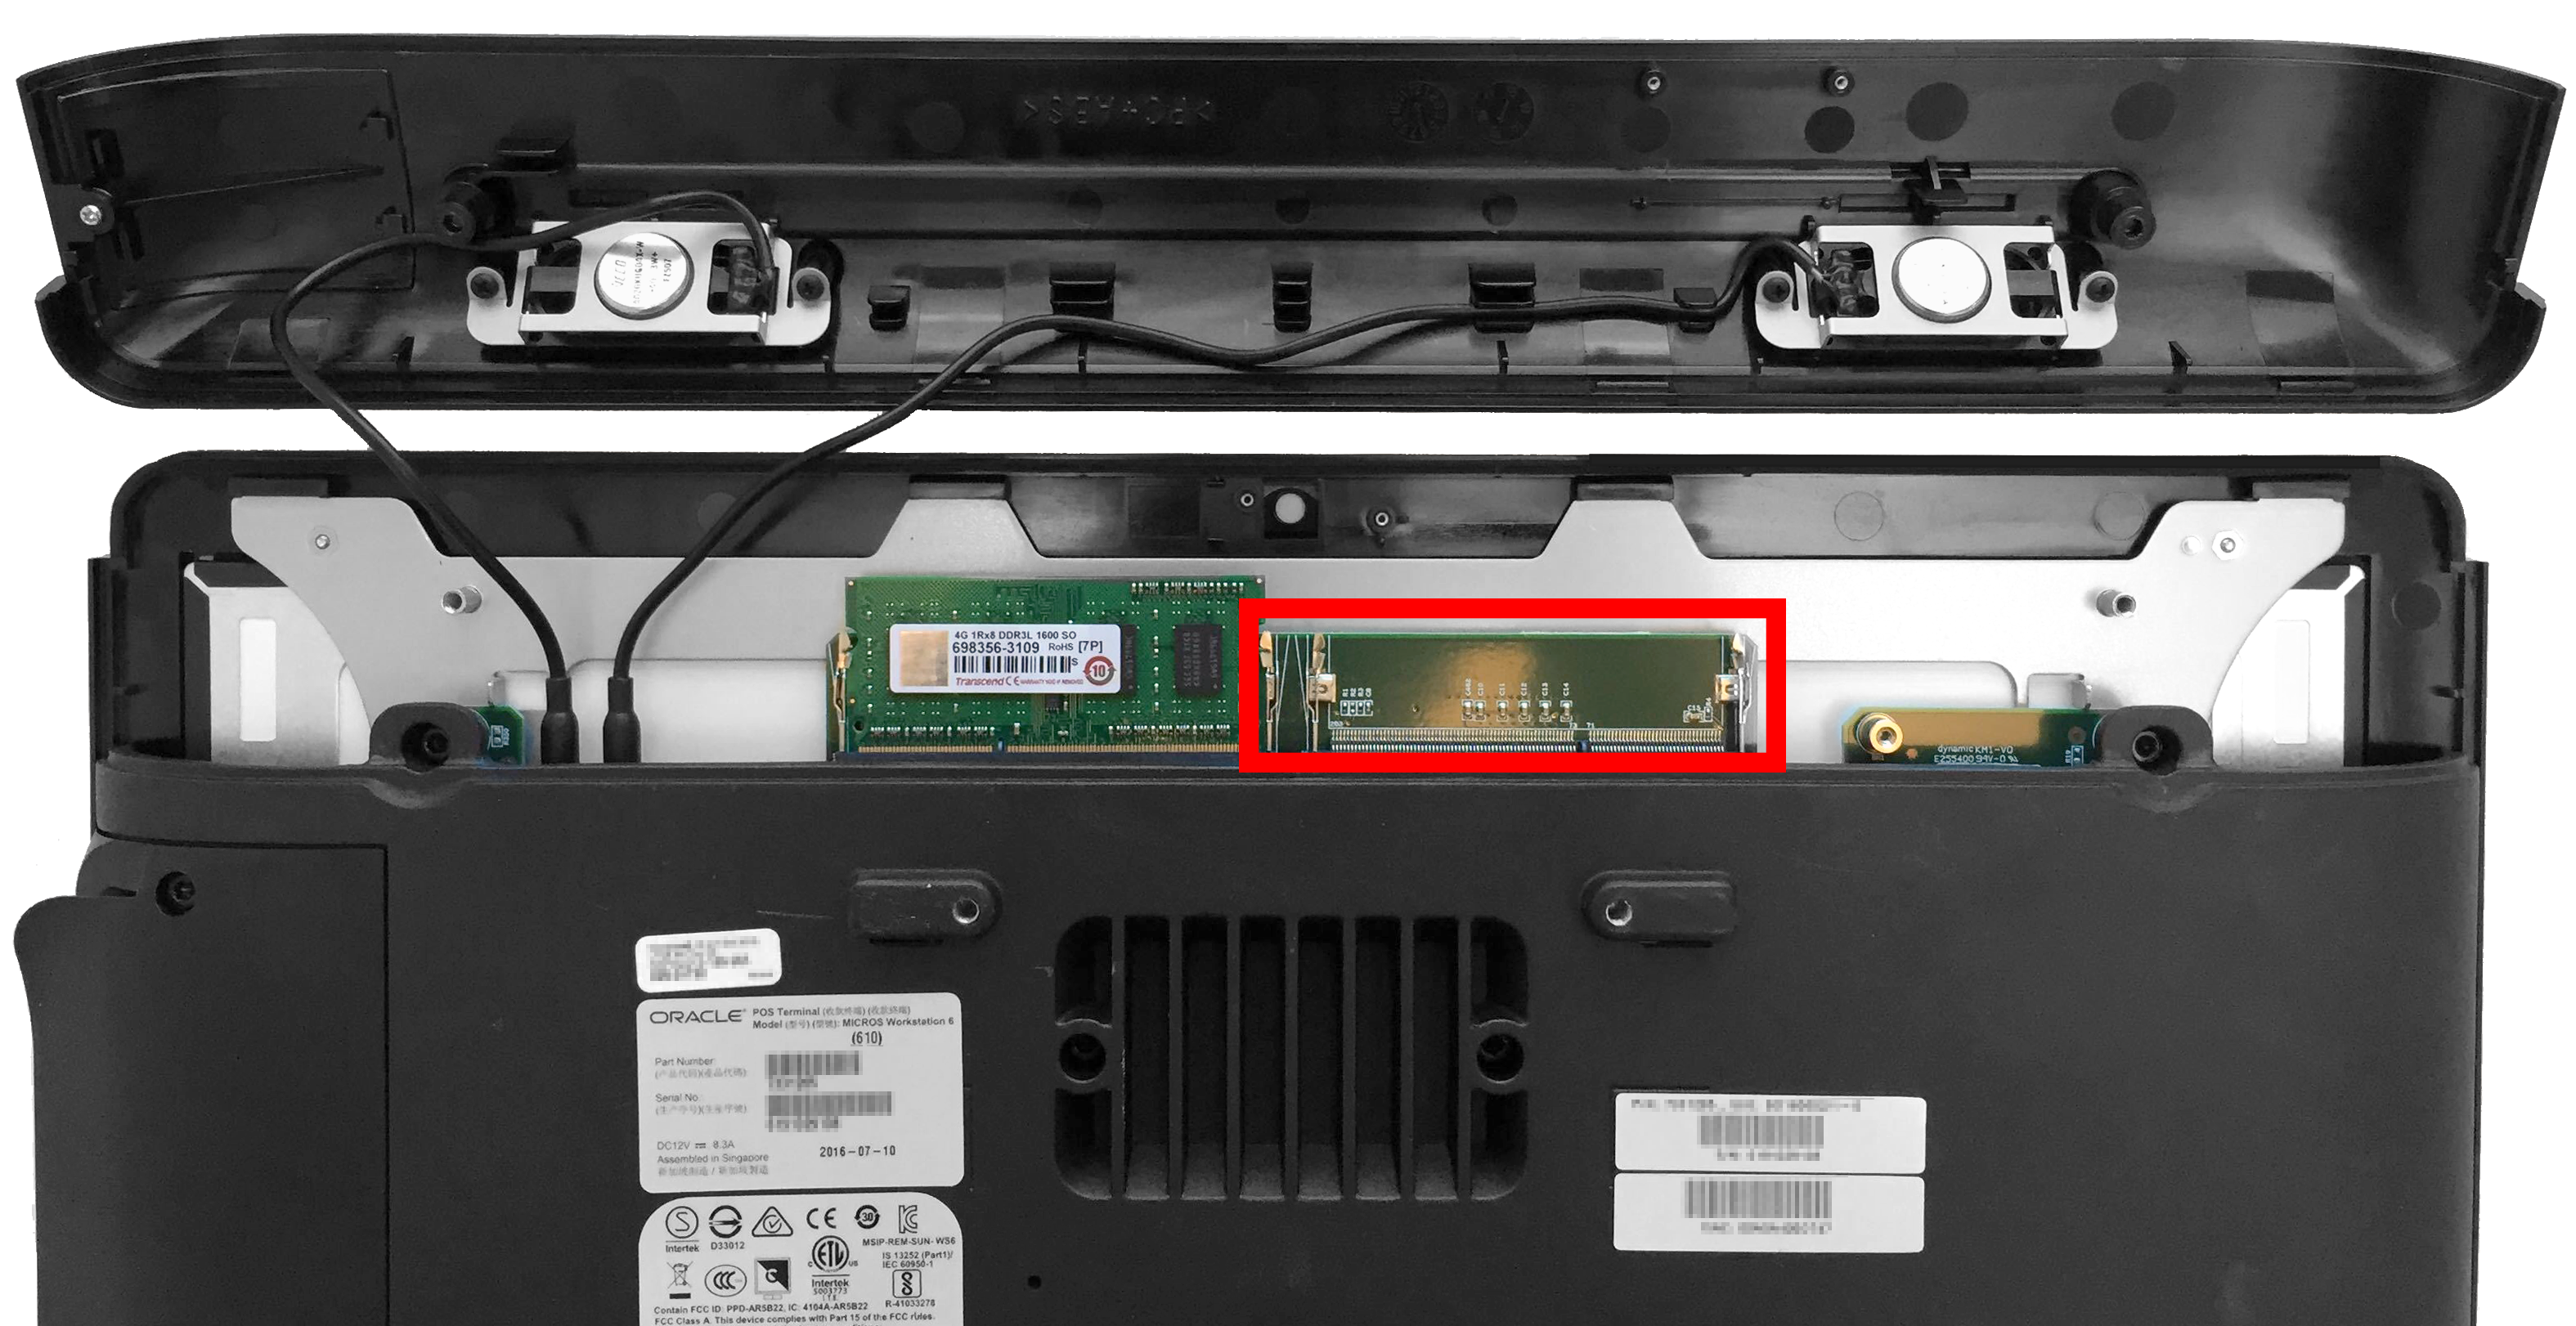
- Remove the top cover. Pull the cover away carefully to avoid damaging the internal speaker wires. Locate an available memory expansion slot.
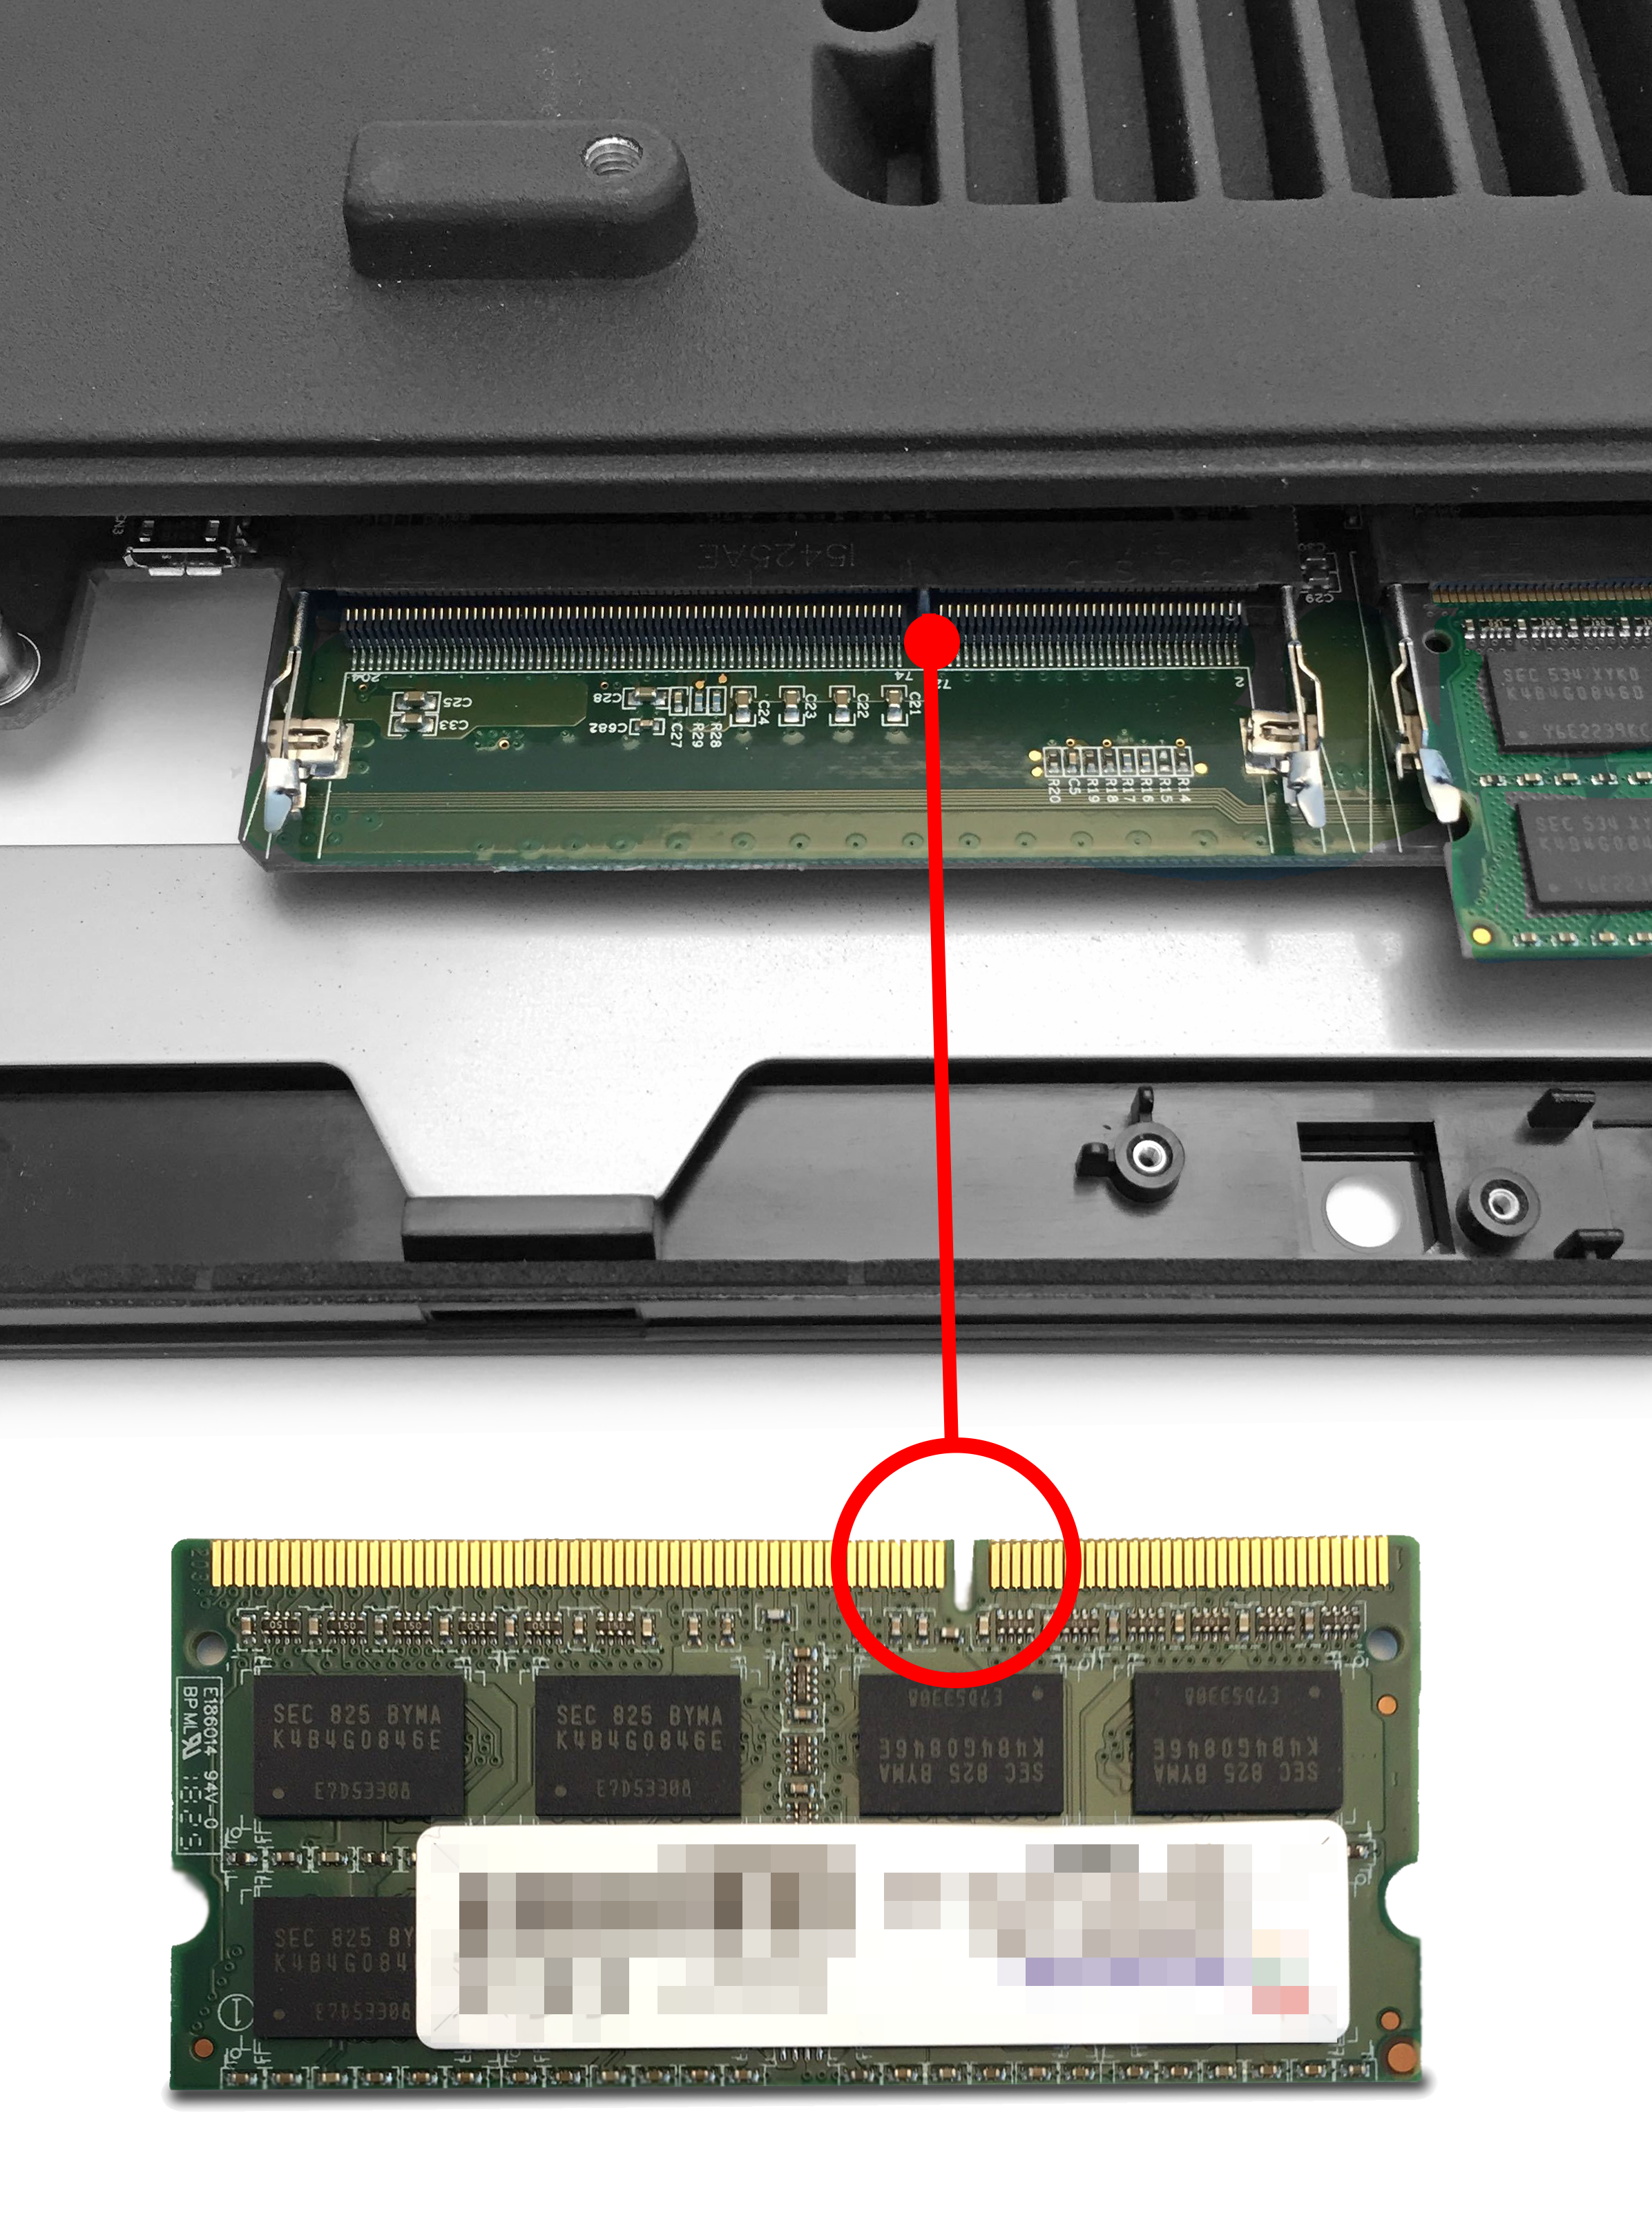
- Align the notch in the memory module with the groove in the memory expansion slot, and then push the module into the slot until secure.
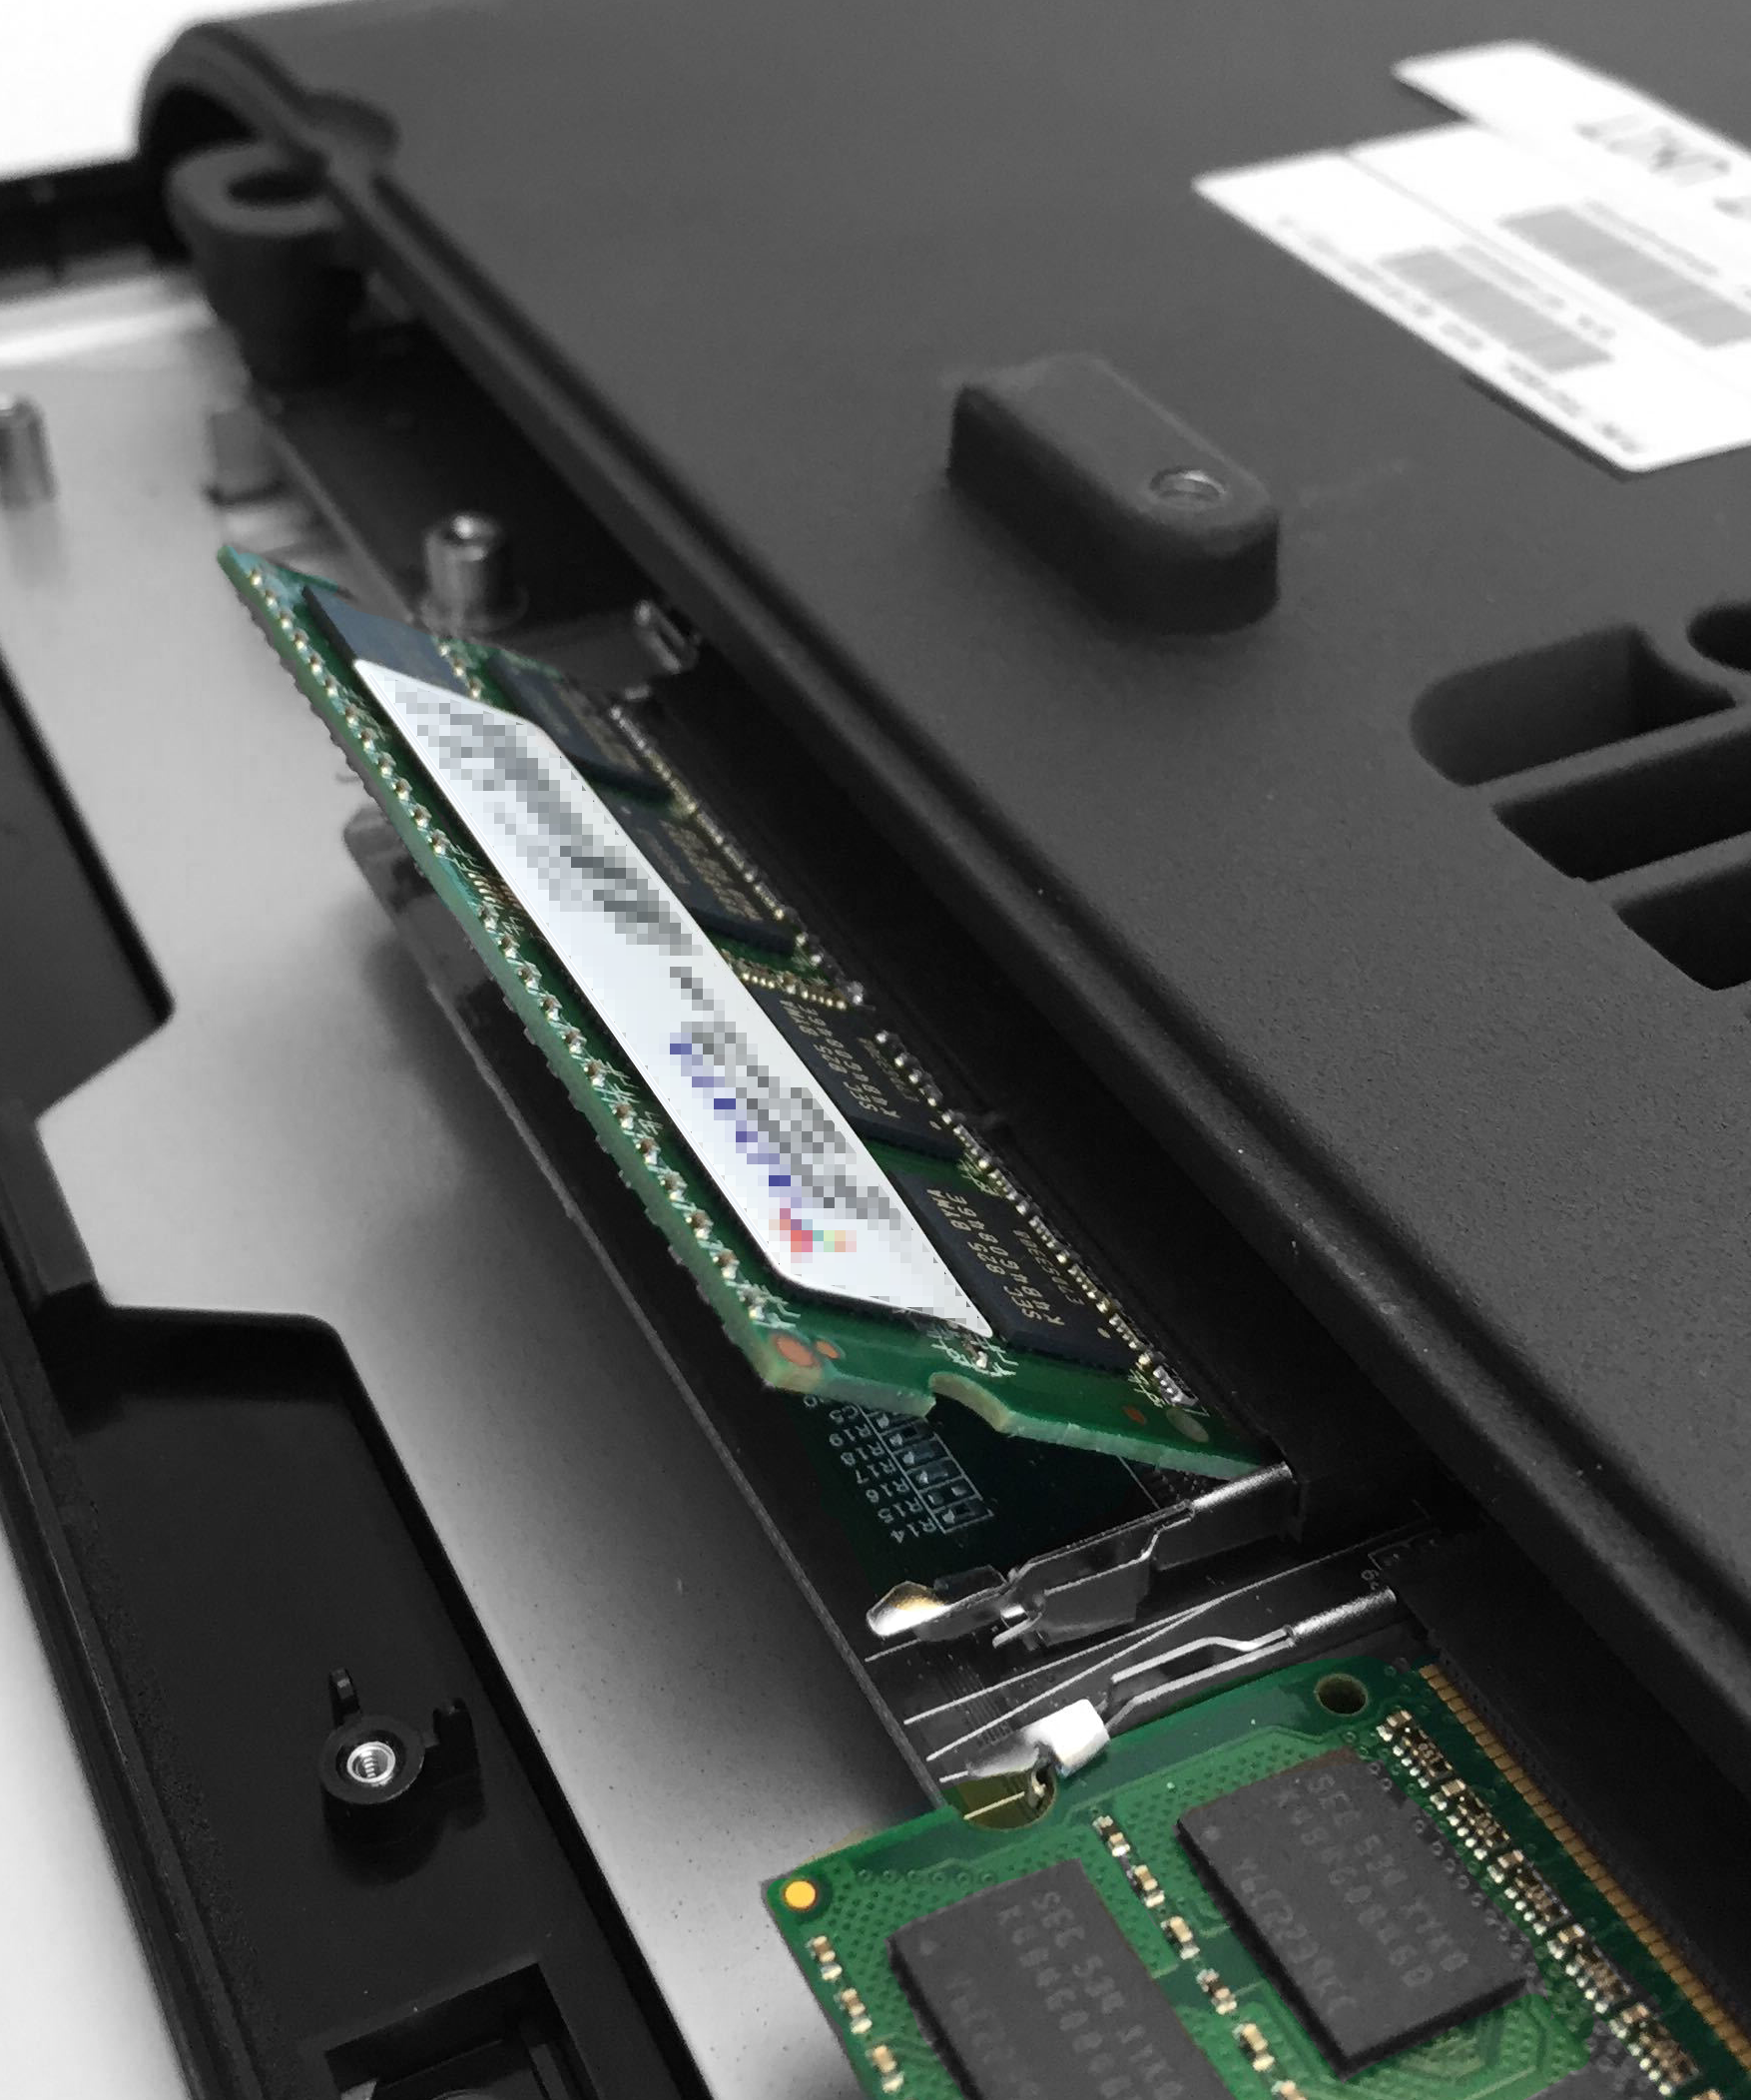
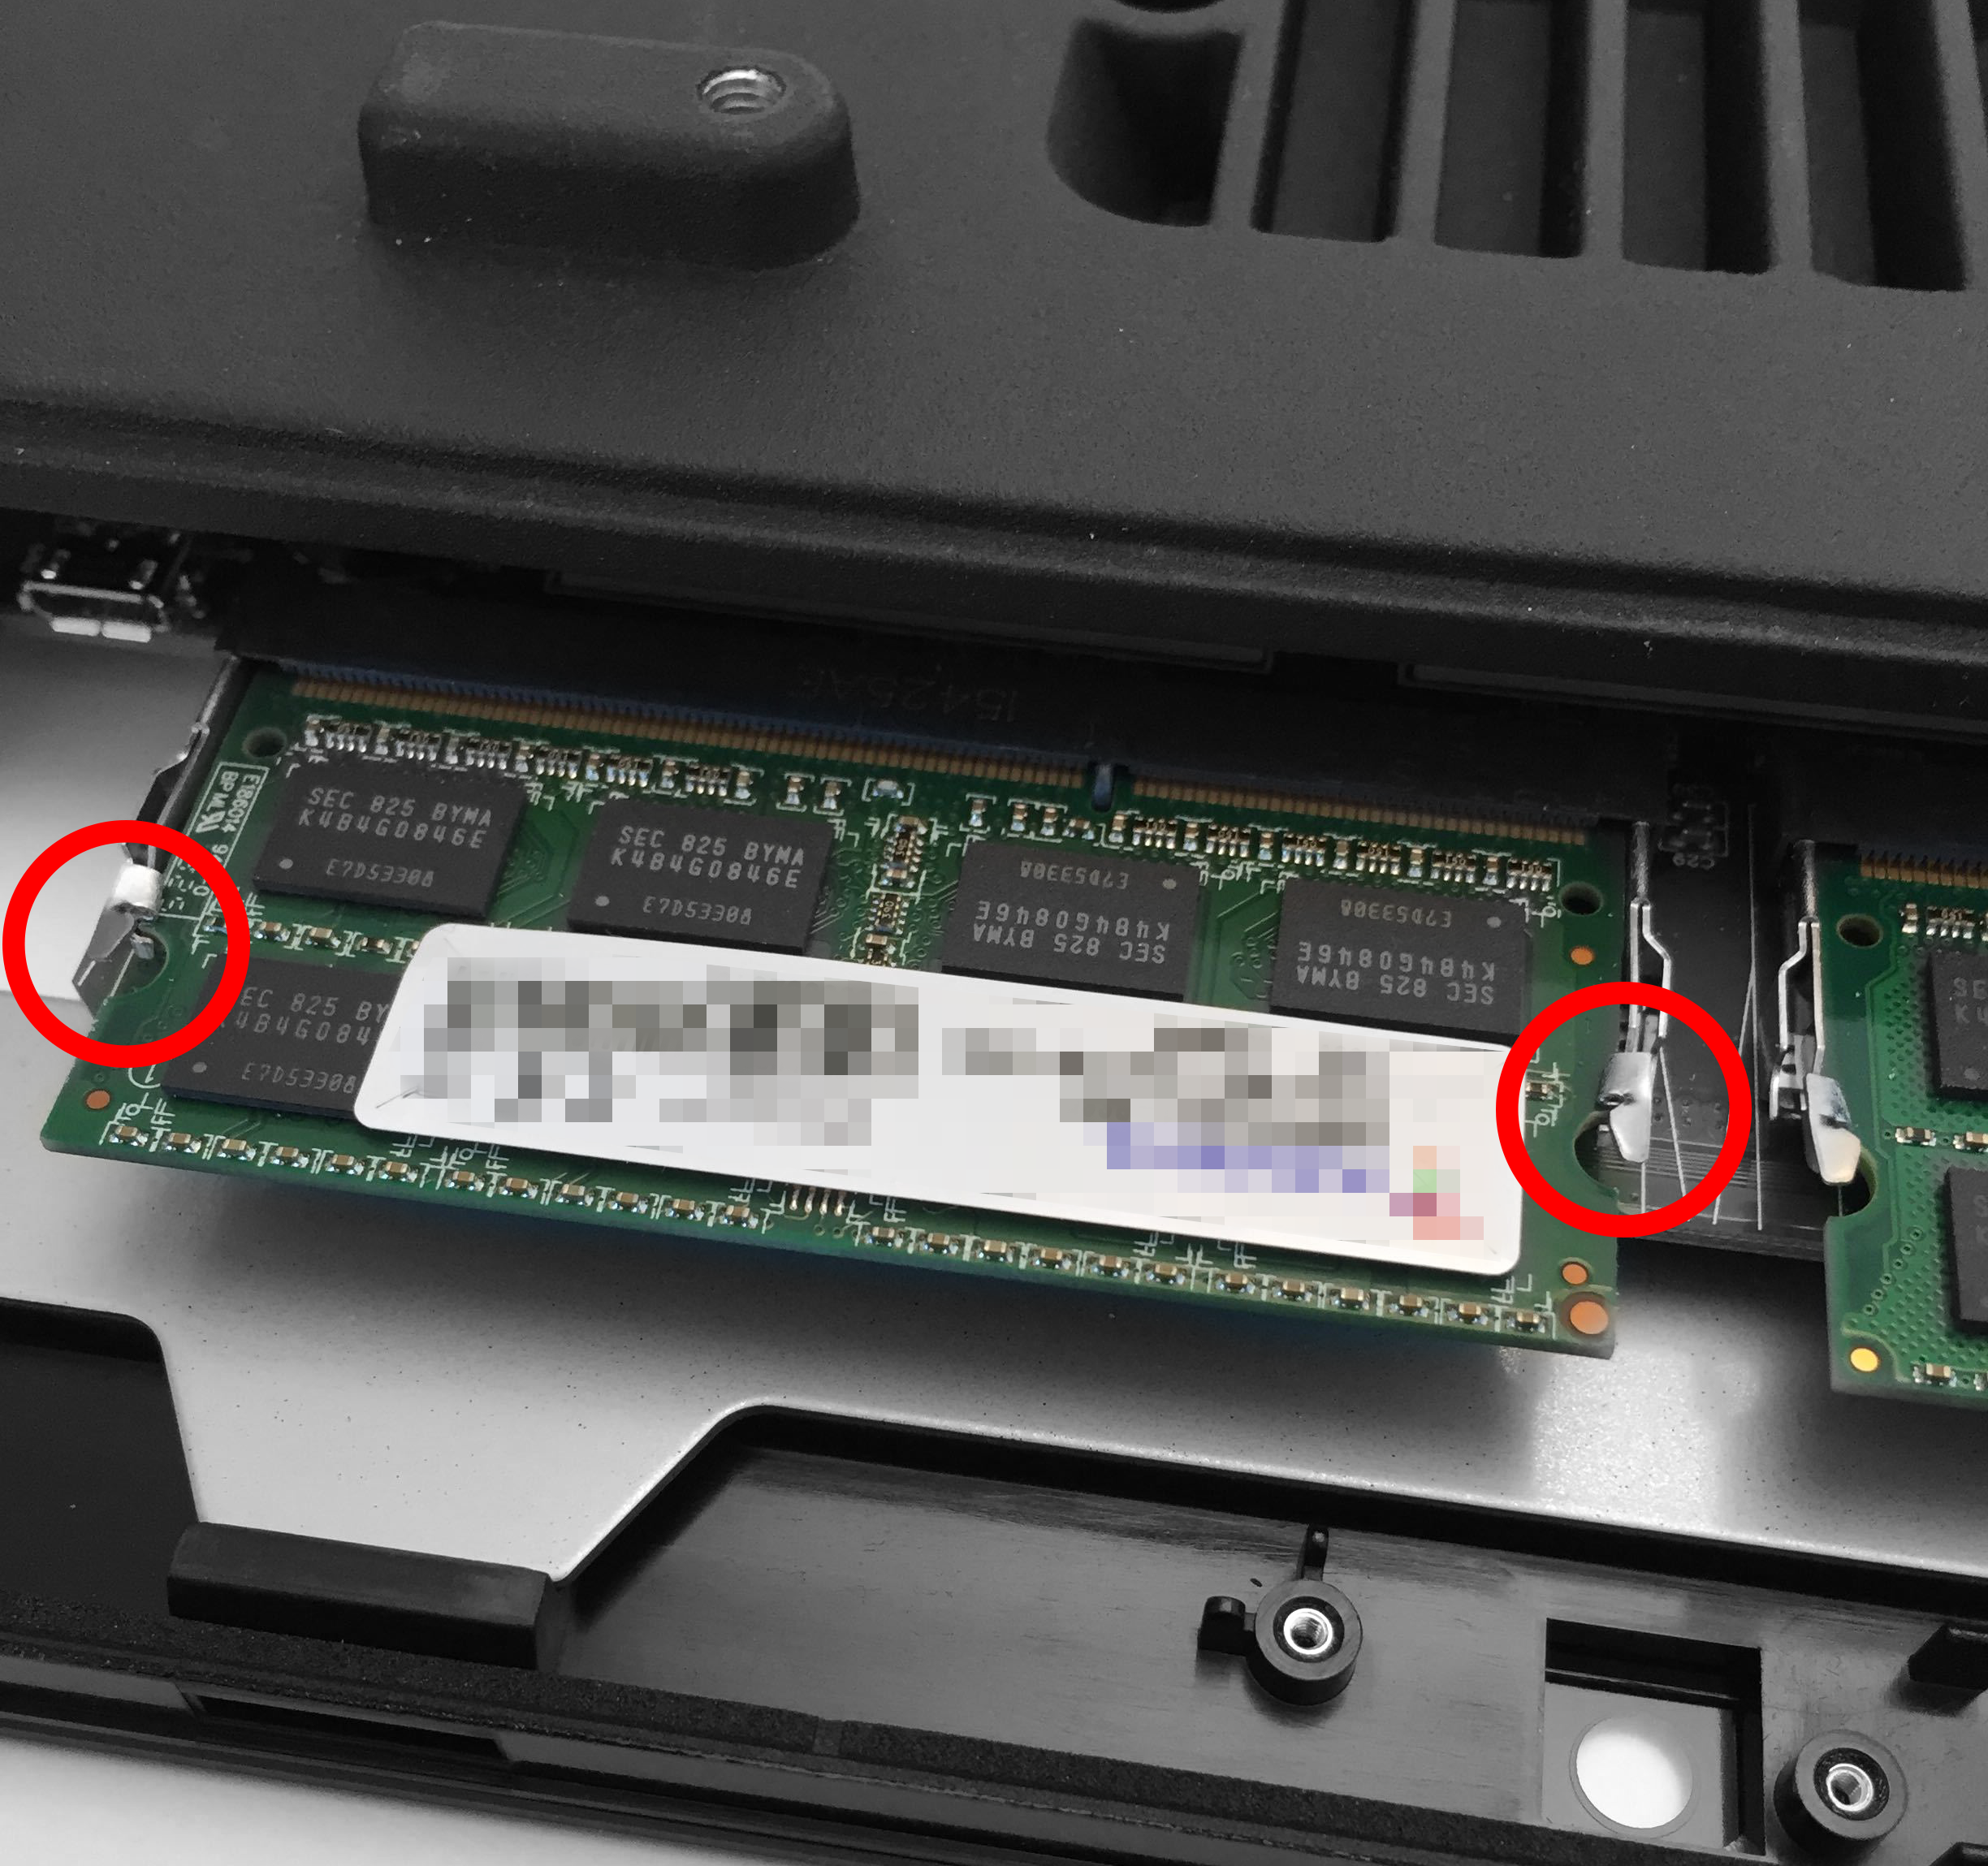
- Push the memory module down until the retaining clips snap into position.
- To remove a memory module, simultaneously pull both retaining clips away from the module to release it, and then pull the module from the expansion slot. The following image shows the location of the retaining clips.
- Reinstall the top cover.
