Disassembling the Workstation

This figure shows a yellow triangle containing a zigzag downward arrow (high voltage symbol).

Caution: The workstation’s Power Supply Unit (PSU) contains a permanently-connected fuse in the neutral line. After a fuse operation, parts of the PSU remain energized and present a shock hazard as long as the AC power cord is connected. Always disconnect the AC power cord before opening the unit for service or configuration.


To disassemble the unit to access the system board and peripheral components:
  1. Remove the IO panel cover, and then remove all cables from the I/O panel, including the DC power cable.
  2. Place a towel or soft cloth over your work surface to protect the touchscreen, and then place the workstation face-down on the surface.
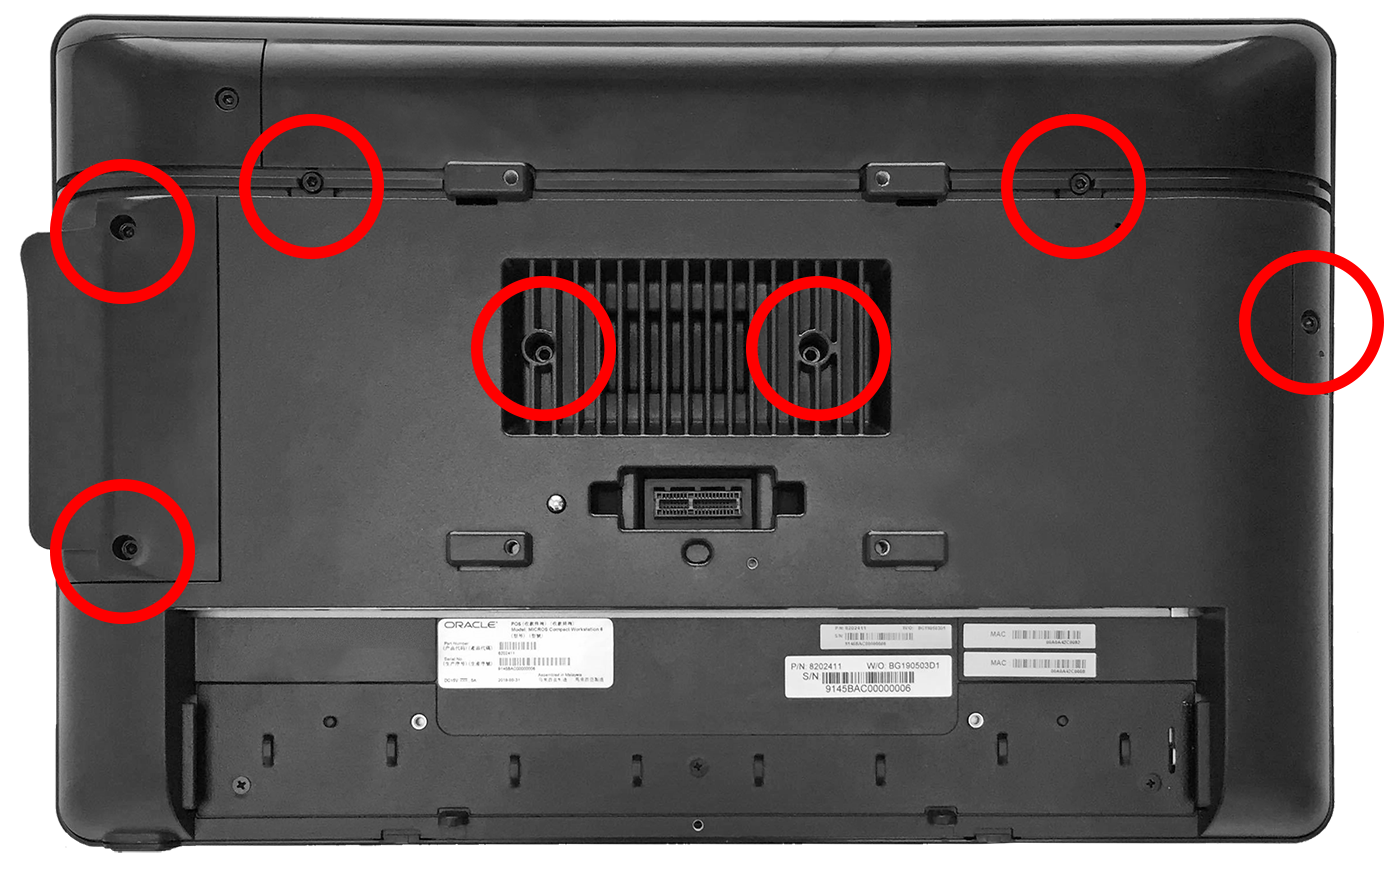
  3. Loosen the captive security screws using a hex key.


    This figure shows the location of the screws on the back of the Workstation 625.

  4. Lift the top cover off of the workstation, and then remove the expansion slot cover and the magnetic stripe reader.
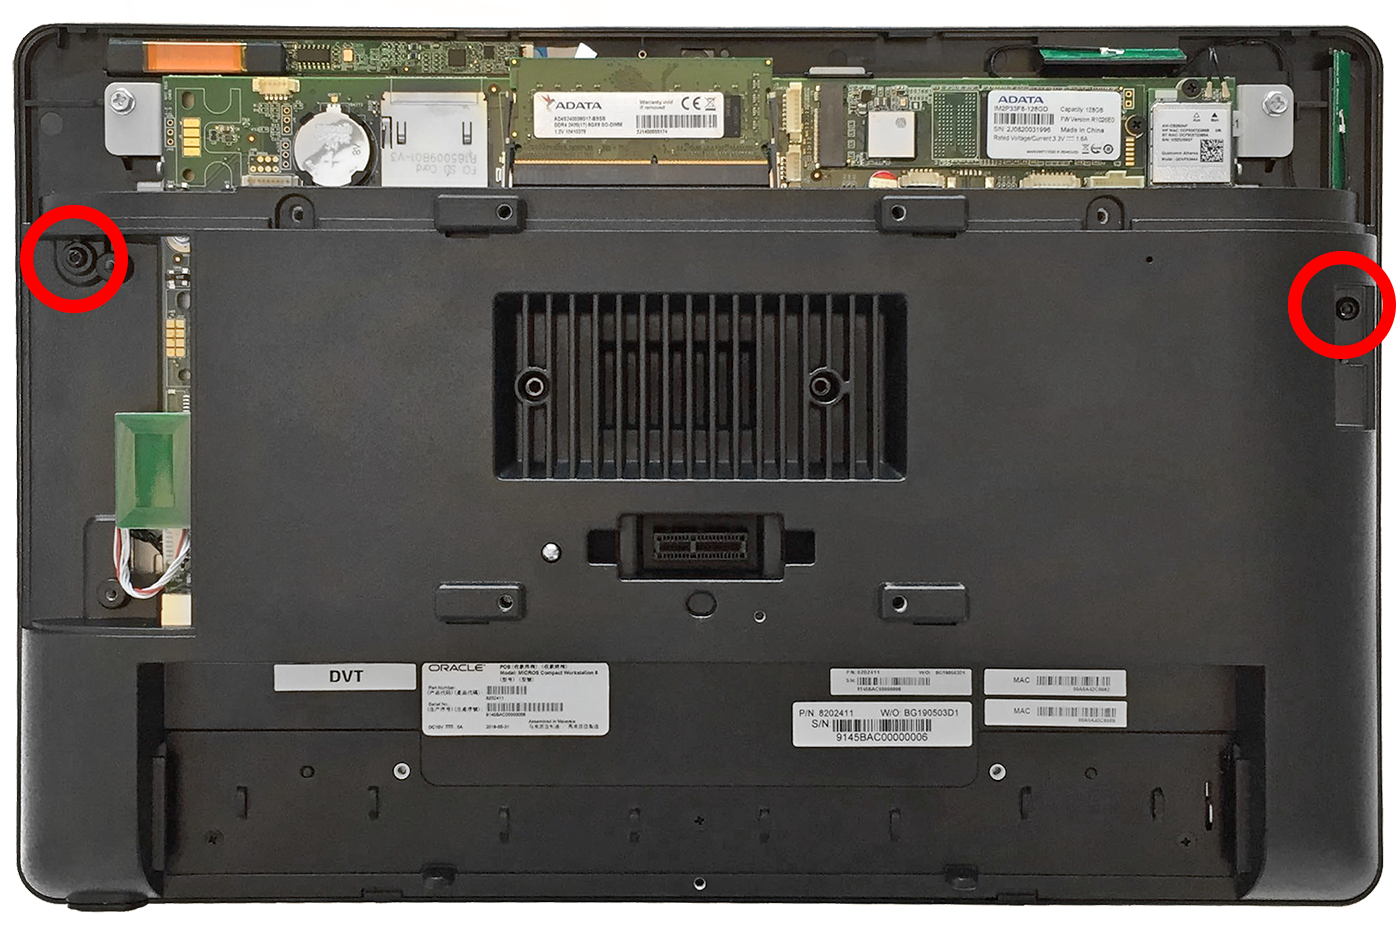
  5. Remove the screw in the magnetic stripe reader compartment, and then remove the screw in the expansion slot.


    This figures shows the location of the screws in the magnetic stripe reader compartment and the expansion slot.

  6. Carefully lift the rear housing away from the body of the workstation to avoid damaging the RFID tag cable.
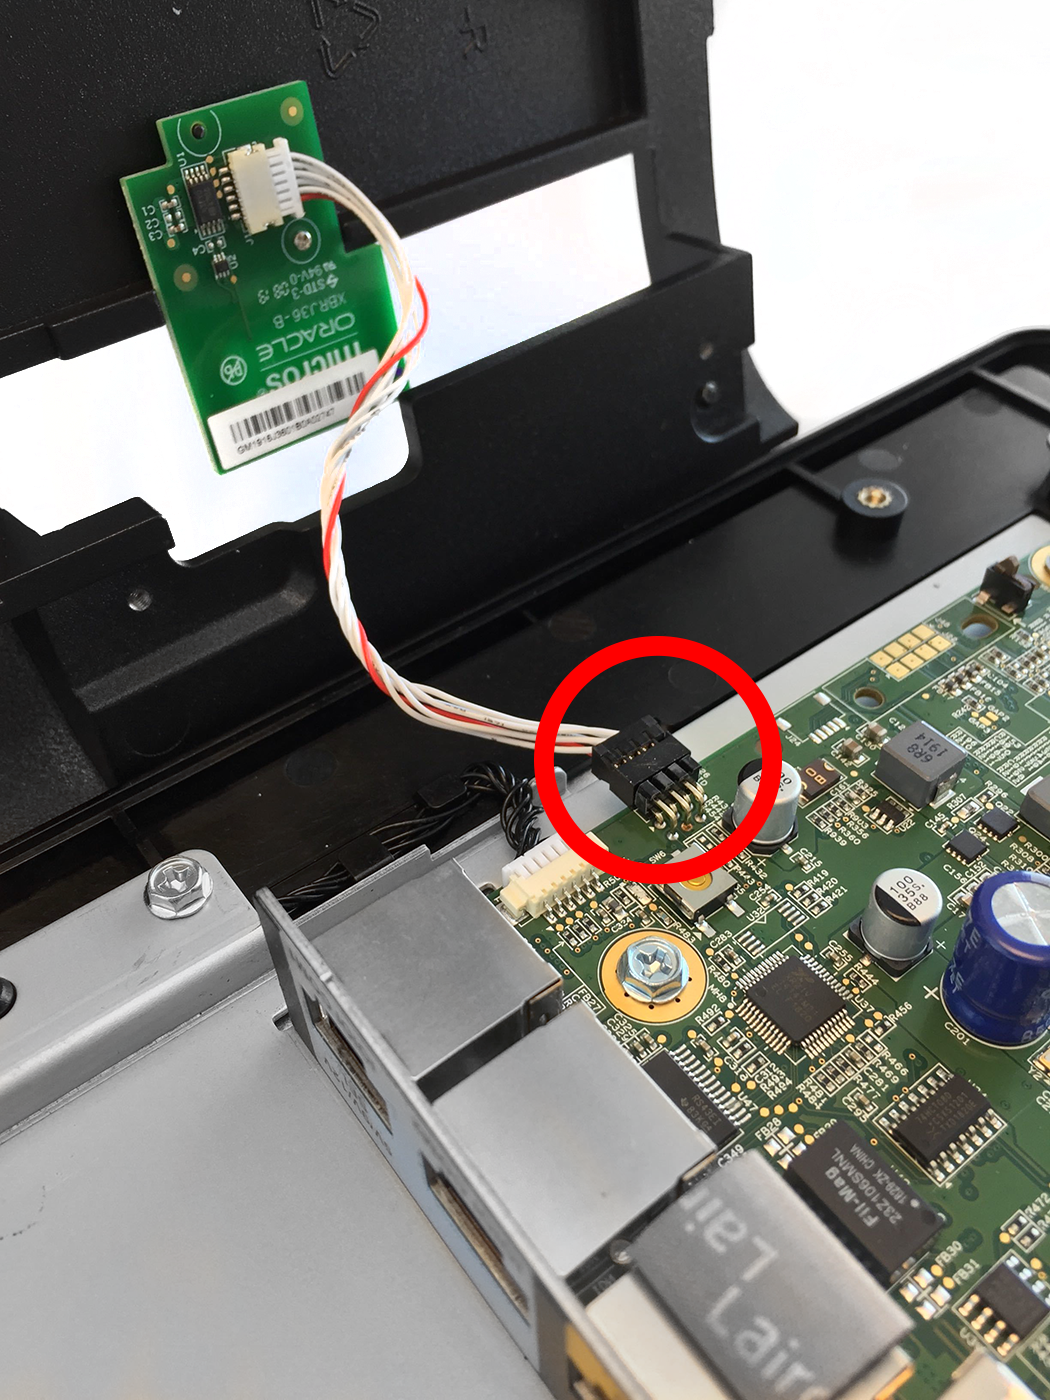
  7. Disconnect the RFID tag 8-pin modular cable. The RFID tag is factory-programmed with information specific to the workstation in which it is installed. The RFID tag is bonded to the workstation casework; do not attempt to remove it.


    This figures shows the location of the RFID tag 8-pin modular cable and connector.

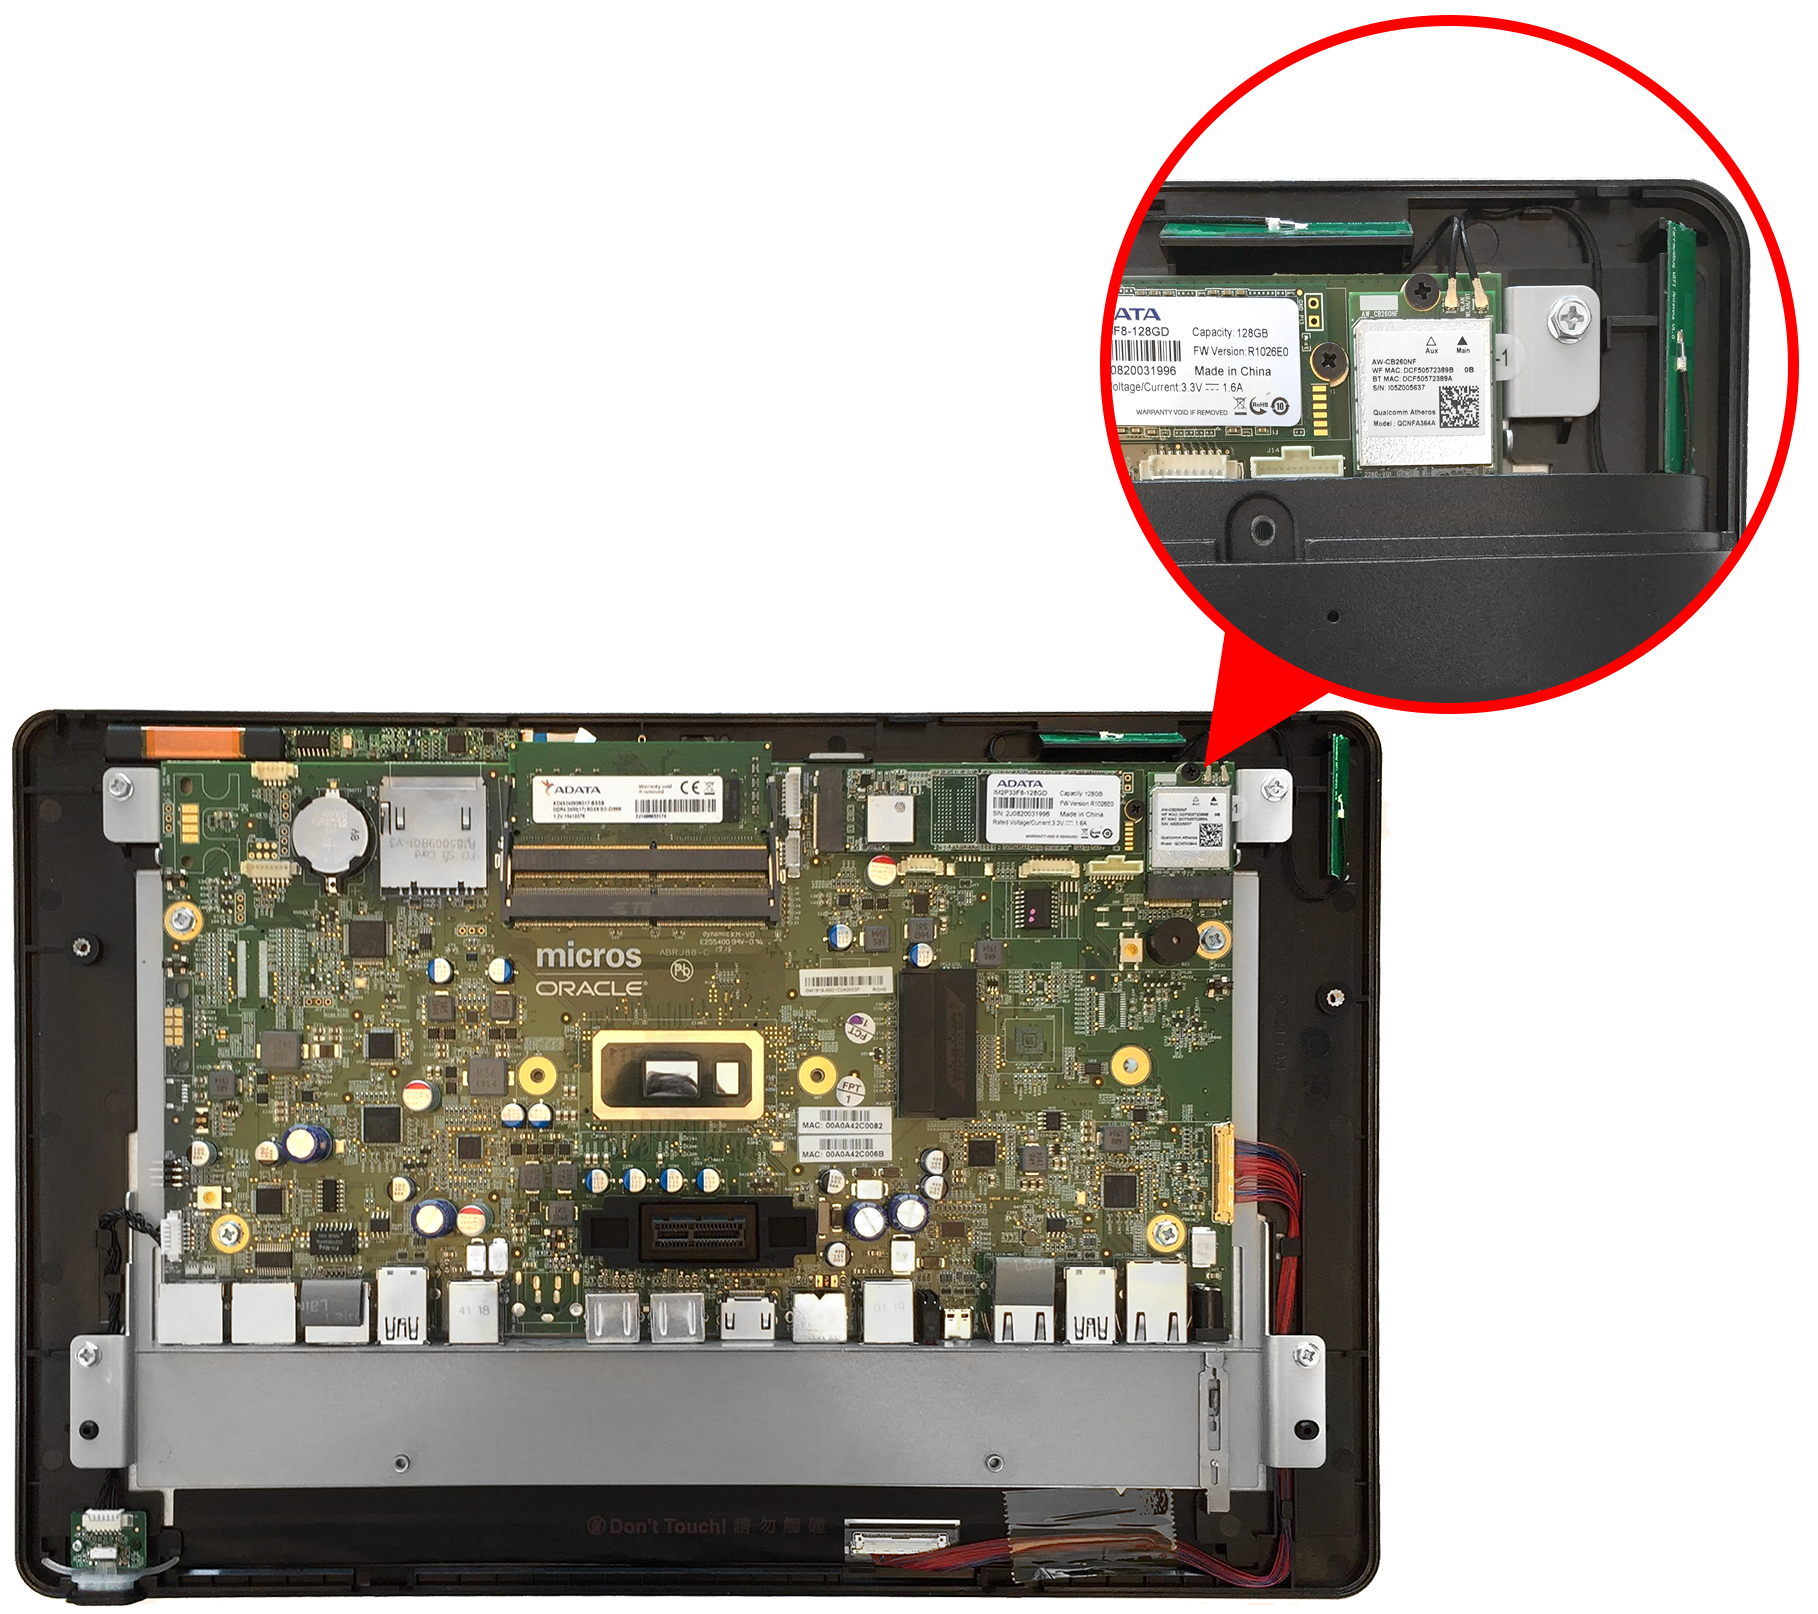
  8. The workstation system board is now accessible. Note the location of the installed Wi-Fi card and antennas.


    This figure shows the back of the workstation with the system board exposed and the location of the Wi-Fi card and antennas.