8.1 Adding a Custom Field to CASD
This section provides instructions to add a custom field to the CASD database schema to contain the Enterprise Manager connector identifier information. The identifier must be stored with the incident, because it is a required value that must be supplied when status updates are sent to Enterprise Manager.
To add the custom field:
-
Start the Web Screen Painter and log in using an account that has permission to update database schemas.
-
Select Tools from the menu, then Schema Designer.
The Schema Designer window appears.
-
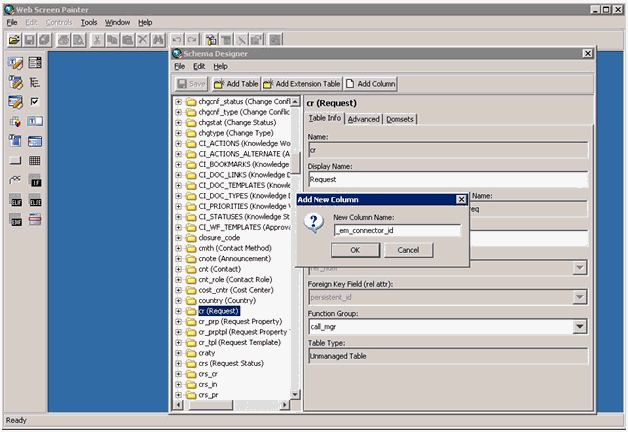
Scroll down through the list of tables, right-click on cr (Request), and select Add Column.
The Add New Column pop-up appears, as shown in Figure 8-1.
Figure 8-1 Add New Column Window

-
Enter a column name of _em_connector_id and click OK.
A form appears that contains the new column information.
-
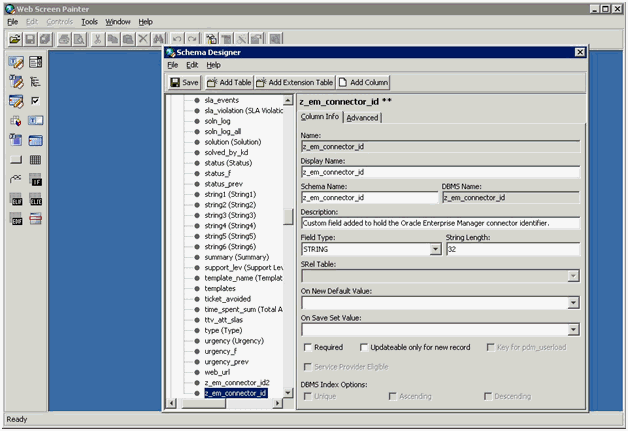
Set the Field Type to STRING and the String Length to 32. You can also optionally add a description.
-
Click Save after you have entered the information.
Figure 8-2 shows an example of a completed form.
Figure 8-2 Example of New Column Input

-
From the File menu, click Save and Publish.
-
Click Yes on the confirmation window when it appears.
-
Click OK on the informational window when it appears.
-
Stop the CA Server.
-
Run the pdm_publish utility to publish the changes to the CA Server.
-
Start the CA Server.