| Oracle® Retail Predictive Application Server Cloud Edition User Guide Release 19.0 F24877-28 |
|

 Previous |
 Next |
| Oracle® Retail Predictive Application Server Cloud Edition User Guide Release 19.0 F24877-28 |
|
Previous |
Next |
A segment is a selection of products, locations, and times that defines a workspace. These selections have a name, and they last until they are deleted.
A segment is not a workspace. A segment is the positions that define a workspace and a key to opening the associated workspace.
Segments can be created, edited, duplicated, renamed, and deleted, and are used to build the associated workspace.
In an RPASCE application, segments are usually referred to by the name of the result of the application. For example, in Merchandise Financial Planning, a segment would be referred to as a plan.
You can use the Segment window to manage all segments for a workspace type. From here, you can:
Filter for an existing segment
Create a new segment
Build the workspace associated with a segment
Edit an existing segment
Open an existing workspace, both in the current browser tab or in another one
Determine whether a given segment is associated with a workspace
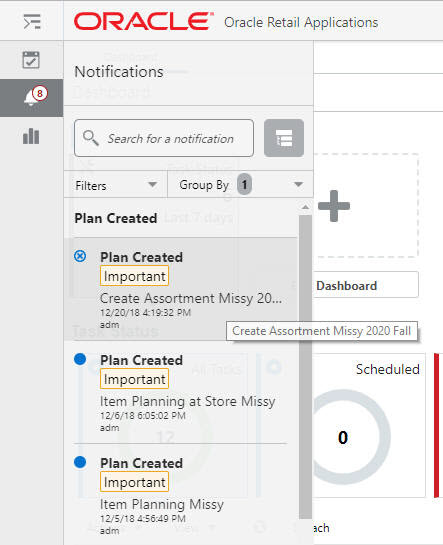
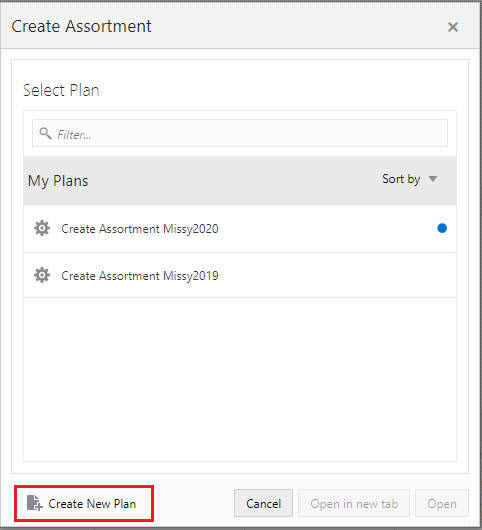
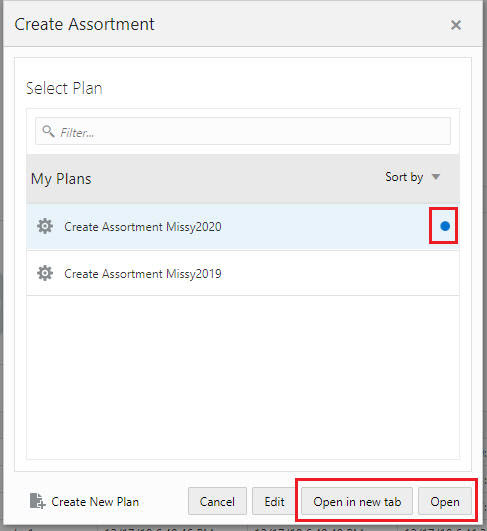
Figure 5-1 shows the segments that are already defined. You can create a new segment at any time by selecting the link in the lower left hand corner.
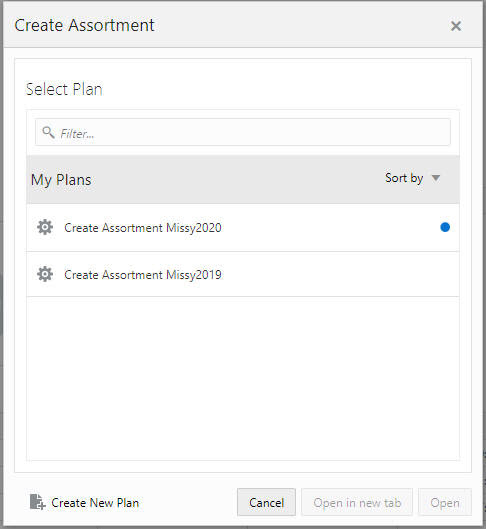
The blue dot next to a segment means that the segment is active, that is, a workspace has already been built for that segment. This means that the workspace can be opened, either in this browser tab or another one.
Figure 5-2 Create Assortment Active Segment
Conversely, an inactive segment, that is, one without a blue dot, must have its associated workspace built before that workspace can be opened.
Figure 5-3 Create Assortment Inactive Segment

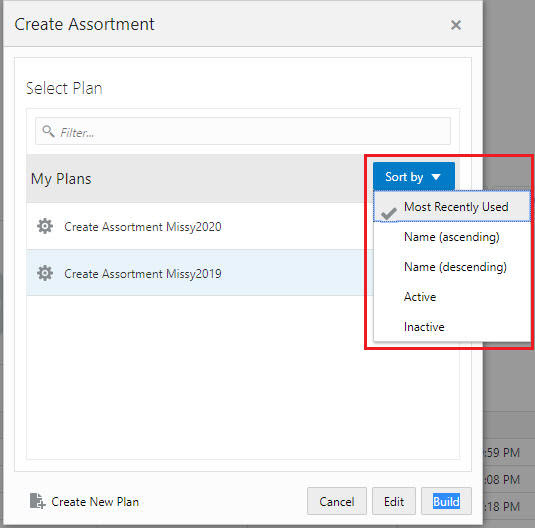
In order to find a particular segment, you can sort and filter the segment entries.
To sort the entries, select an option in the Sort by list.
The Sort by options are:
Most Recently Used: The segments are displayed in the same order as they appear in the Most Recently Used section of the dashboard.
Name (ascending): The segments are sorted in alphabetical order.
Name (descending): The segments are sorted in reverse alphabetical order.
Active: The active segments are sorted alphabetically.
Inactive: The inactive segments are sorted alphabetically.
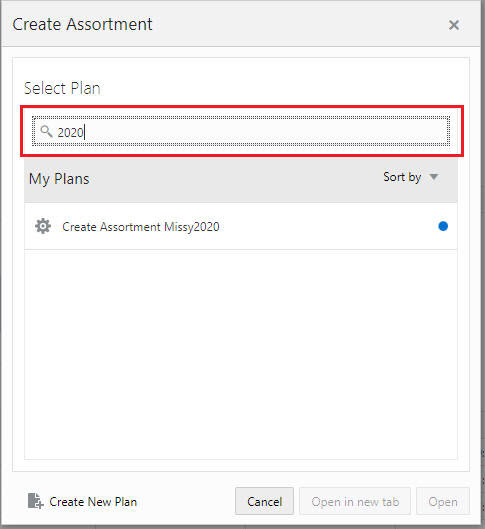
To search for a particular segment, type text into the search box. As shown in Figure 5-5, the value 2020 has been entered into the Select Plan search box. The list of segments displayed include only those with the value 2020 in the label.
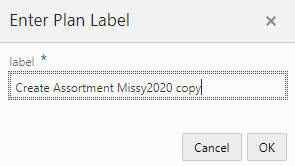
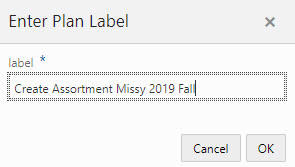
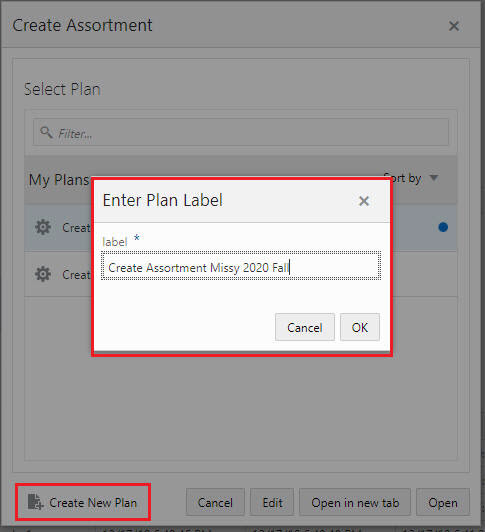
If no segments exist, the Enter Plan Label window is opened using the Segment window. Enter the plan label and click OK. You see the Segment Wizard.
A new segment can be created either with the Create New link in the lower left corner. You are prompted for a label for that segment, and then taken to the Segment Wizard (see Wizards). If you select any of the segments, then the buttons, Edit, Open in new tab, and Open are displayed.
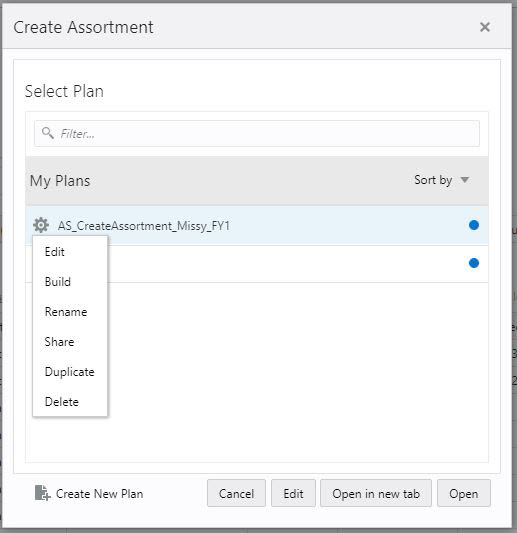
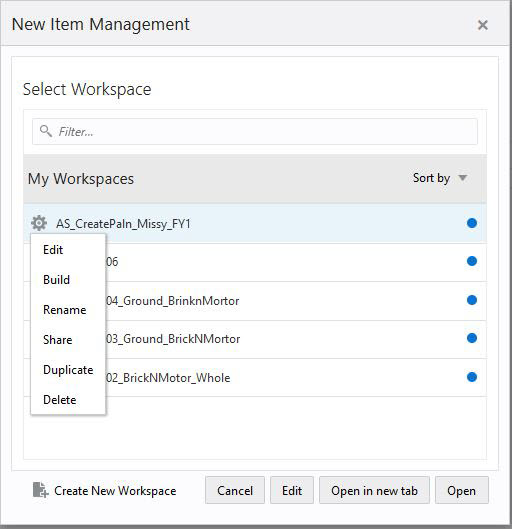
In order to take action on a segment, click the Action Menu icon next to the segment. A context menu appears, with four options: Edit, Build, Rename, Duplicate, Delete and Share.
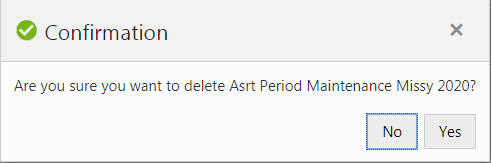
In order to delete a segment, select Delete from the Action menu. At the confirmation window, click Yes to delete the segment. The workspace must be closed before it can be deleted.
|
Note: Deleting a segment also deletes the workspace it is associated with. Make sure that you have finished working with the workspace before deleting the segment |
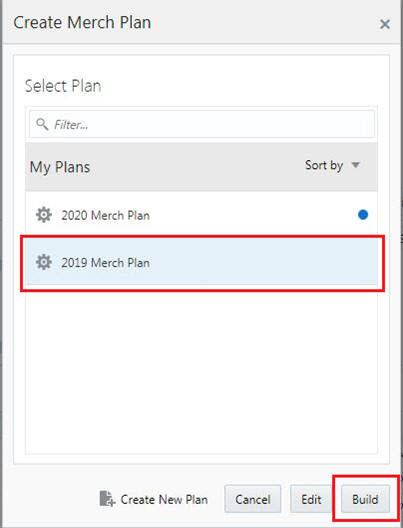
In order to build a workspace for segment, select Build from the Action menu/segment window. The workspace begins building in the background (see Asynchronous Build).
Note that once the segment is submitted for building, the segment is locked until the operation is completed. If any of the operations on the segment, such as open, edit, delete, build, or rename, are performed, then all of them will fail and an error similar to the following message appears, 'Create Assortment Missy2019' is being re-created and cannot be edited during this time. Try again in a few minutes, or check notifications to see when it can be edited again. If the problem persists, contact your administrator.
Users are generally notified about the segment build status in the notification. If the status has a value of Failed, contact the application administrator who can view the online administration task log files to determine the cause of the failure. Usually, the segment build process completes within a specified time with the arrival of the notification. If the user does not receive the notification within 24 hours, then the segments will be unlocked automatically.
In order to duplicate a segment, select Duplicate from the context menu. The window prompts you for a new name and then copies the segment and displays it in the segment list. Any segment can be duplicated at any time.
|
Note: Duplicating a segment copies the selections that define the workspace, but does not make a copy of the workspace. The associated workspace must be created (built) before it can be used.Editing a duplicated segment has no effect on the original segment or workspace. |
When you select the Edit option from the context menu, the wizard opens. The wizard comes prepopulated with the saved selections from the segment. This option is useful when a new workspace must be created with the same products and locations, but for a different time period, such as the next week or quarter.
You cannot edit a segment when the workspace associated with the segment is open or being built or rebuilt. This ensures that you do not break the segment or its workspace.
|
Note: Editing a segment and selecting Finish on the wizard deletes the existing workspace associated with the segment and recreates the workspace with the revised selections. Make sure you are finished with the workspace before editing the segment. |
When you select the Rename option from the context menu, you are prompted for a new segment label. After you change the label, the new label appears in the segment dialog and in the dashboard's most recently used list.
You cannot rename a segment when the workspace associated with the segment is open or being built or rebuilt. This ensures that you do not break the segment or its workspace. The non-calendar positions are sorted alphabetically by default, based on the Label attribute. The Calendar positions are sorted chronologically.
The Sharing feature allows you to share a existing segment with another user who has similar rights for the templates and positions. Sharing of Segments makes the team collaboration easier. These scenarios in the following list are examples that could enhance the team productivity when you this feature.
You are an assistant buyer who started a plan and you want to collaborate/finish with another Buyer.
You are an assistant buyer who created versions of what-if scenarios and wants to share with the Buyer.
You are a new associate that requires review or guidance from the manager in order to complete your plan.
You are going on vacation and a colleague will be monitoring your plans.
You are leaving the company and have work-in-progress that are not ready to commit (including what-if scenarios).
The following steps describe how you can share your existing segment with other users.
Next to the existing segment that you want to share, click the Gear icon and then click share.
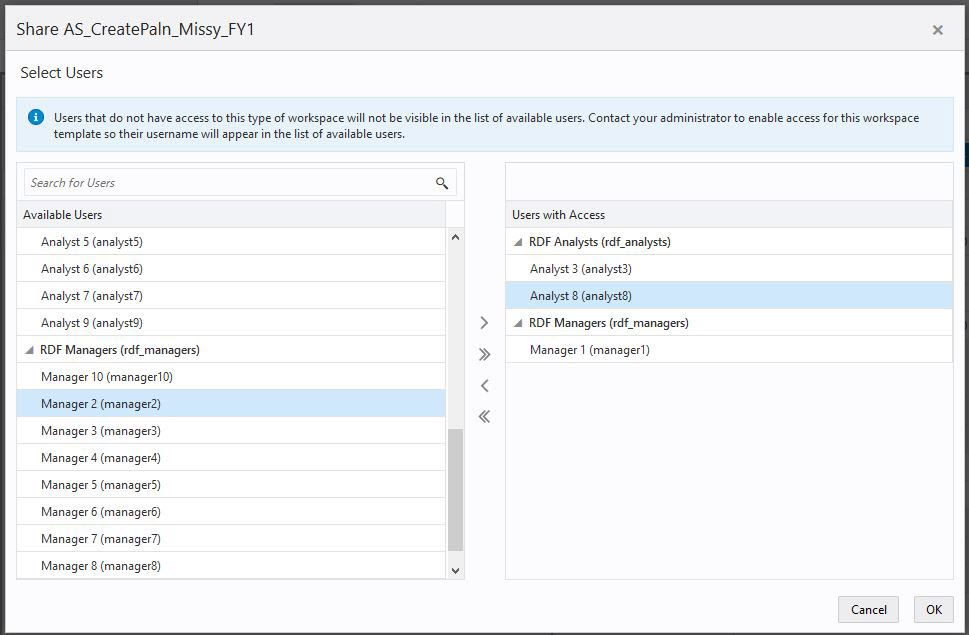
RPASCE displays the Select Users Window where you can select the user to share the segment with.
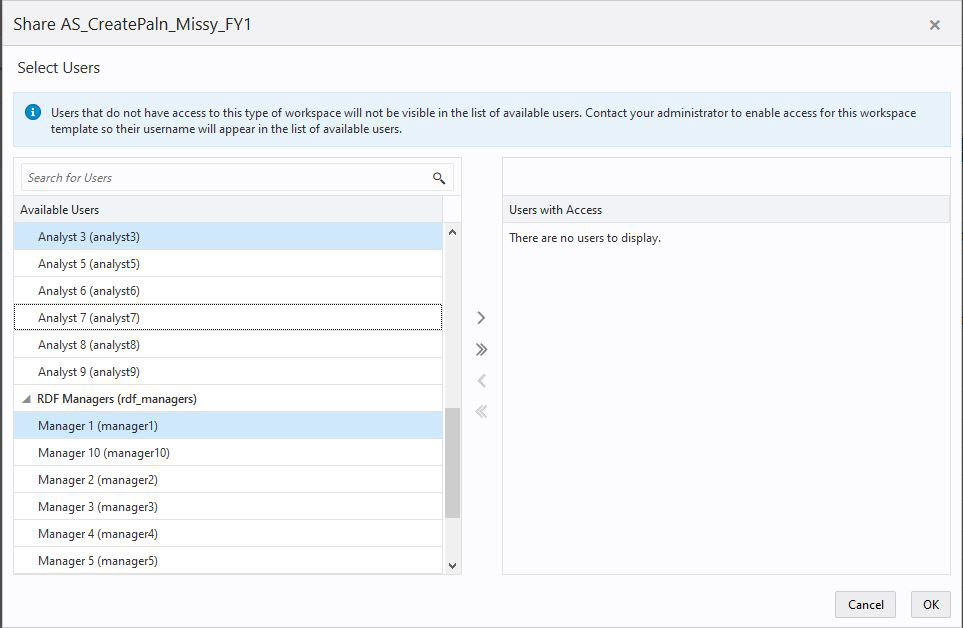
You can select one or more users to share the segment with. Locate users by using the Search for Users box. Move available users by selecting the user and then using the > arrow to move them to the Users with Access pane.
Remove access for users by selecting then and then use the < arrow to move them to the Available Users pane. Use the double arrows (either << or >>) to move all users between the panes.
The shared segment is available to the other users with access while creating the same segment under the same taskflow. Figure 5-15 shows the segment AS_CreatePlan_Missy_FY1 that is available for the Analyst3 under the same taskflow.
Figure 5-15 Select User to Share a Segment
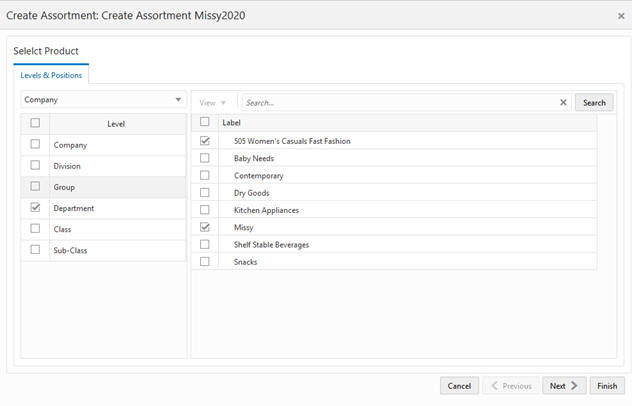
When you select Create New or Edit in the Segments window, a wizard opens. The wizard take you through a set of screens to select the positions for each dimension in the workspace.
When you select Create New options, no level in the wizard is pre-selected and no position is shown in the position area. Only when you select a level, the positions for the respective level appear in the wizard.
If any level has a higher number of positions then an alert icon appears next to the level and the position area displays a message, Levels displaying the alert icon have high number of positions and may take long time to load.
When you hover over the alert icon next to a level, it displays a message which states: The level contains high number of positions and displaying this position may take longer time to load. The default position count threshold is set at 50,000 positions. Positions with more than 50,000, are considered higher and the alert icon appears next to the level. The position count is configurable by an administrator as per the requirement.
Figure 5-17 Wizard with a High Number of Positions
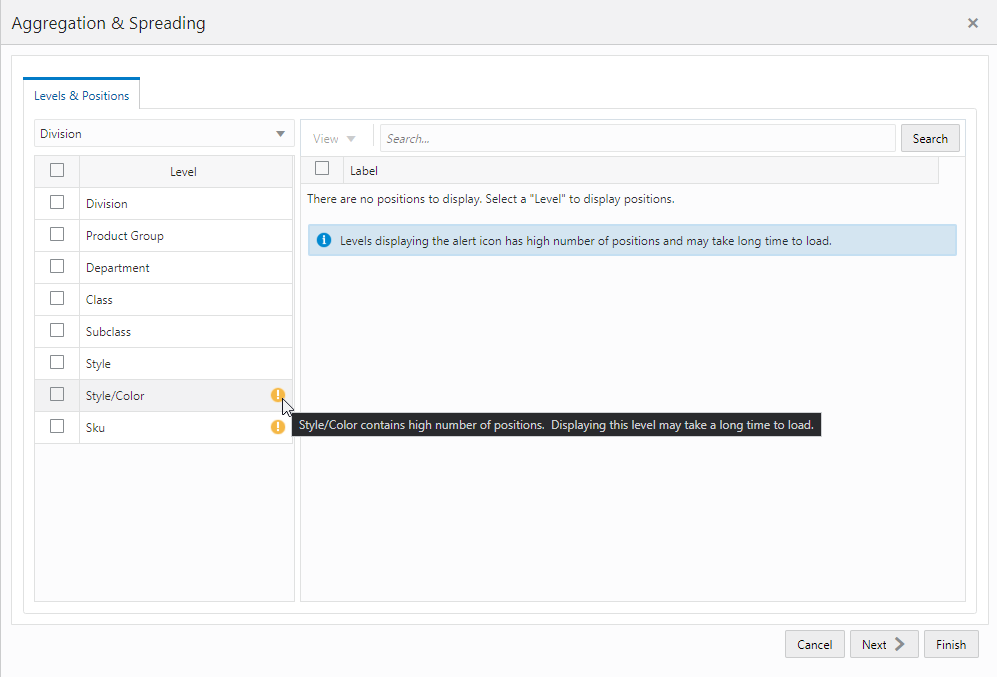
To load positions faster into the wizard, choose a higher level in the wizard, such as department which has a fewer number of positions. You can still select the level with alert icon if you need to select or clear positions at that level, but it may take time for wizard to load those positions.
When you create a new segment again, the wizard step defaults to the last selections. If the prior selections made in wizard are at the child level with a high position count, then it will impact the loading time of wizard. To improve the wizard loading time, choose to work with higher levels with less position count. This improves the position loading time when you open the wizard the next time.
When the positions display in the wizard, the non-calendar positions are sorted alphabetically by default based on the Label attribute. The Calendar positions are sorted chronologically.
When you select the Edit option, the wizard is pre-populated with the saved selections from the segment. This option is useful when a new workspace must be created with the same products and locations, but for a different time period, such as next week or quarter.
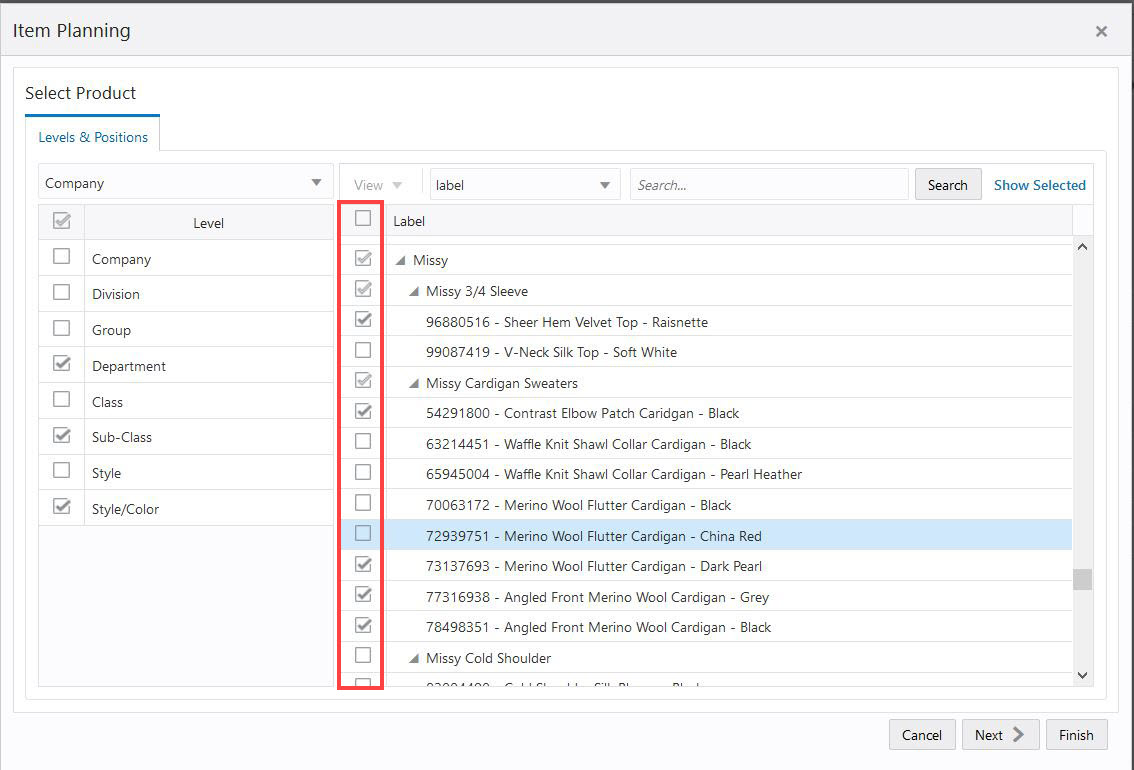
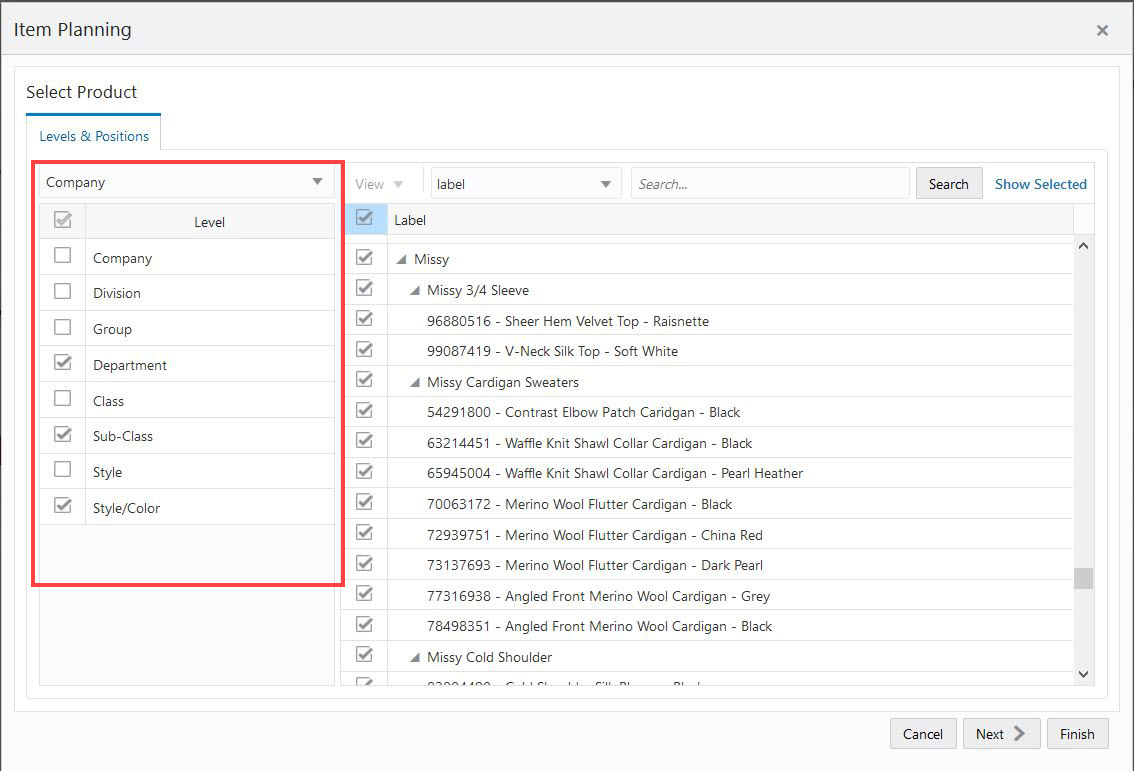
To select a level or position, complete the following steps.
Once in the wizard, select the positions for each dimension by selecting the check box next to the position.
You can view alternate branches of the hierarchy or dimension by using the Branch Selector list. When you select a different branch in the list, you will notice that different dimensions are displayed in the Levels and Dimensions area.
Note that if you select a large number of positions, it may impact the time required for the workspace to open. Select only the positions required for the current task.
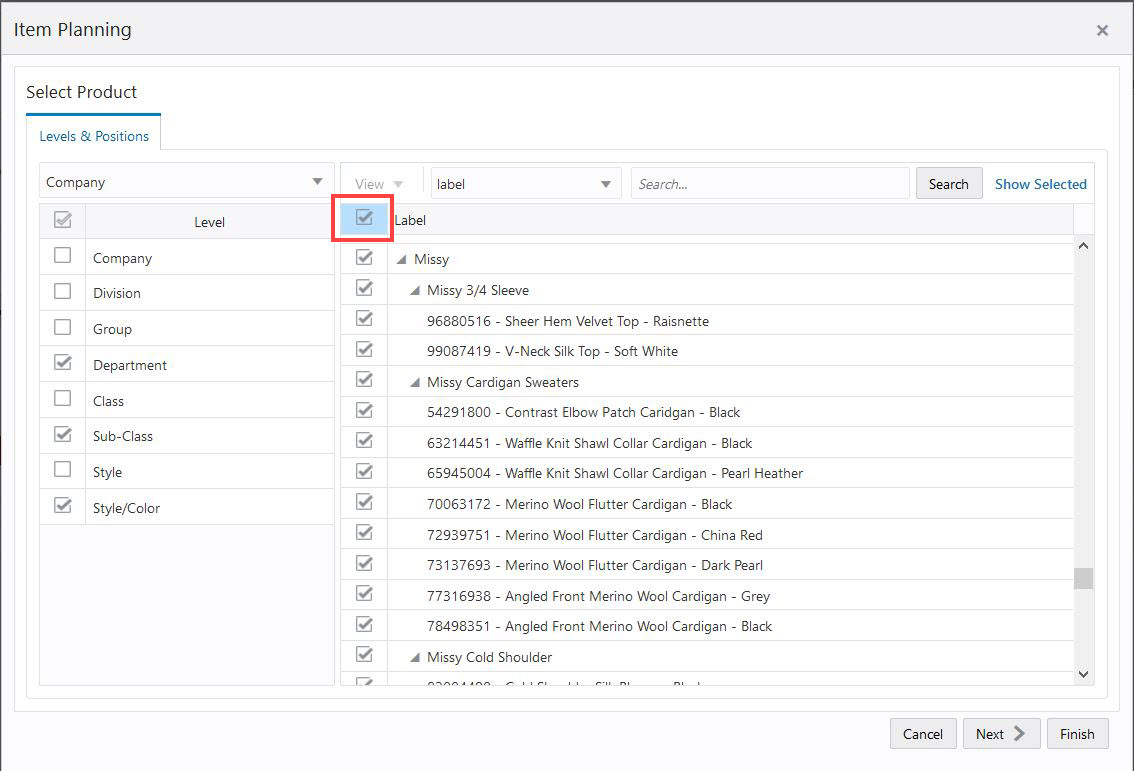
To select all positions, click the top of the column next to all the positions.
To change the level of the positions to select from, place a check mark next to the desired level in the top left of the screen.
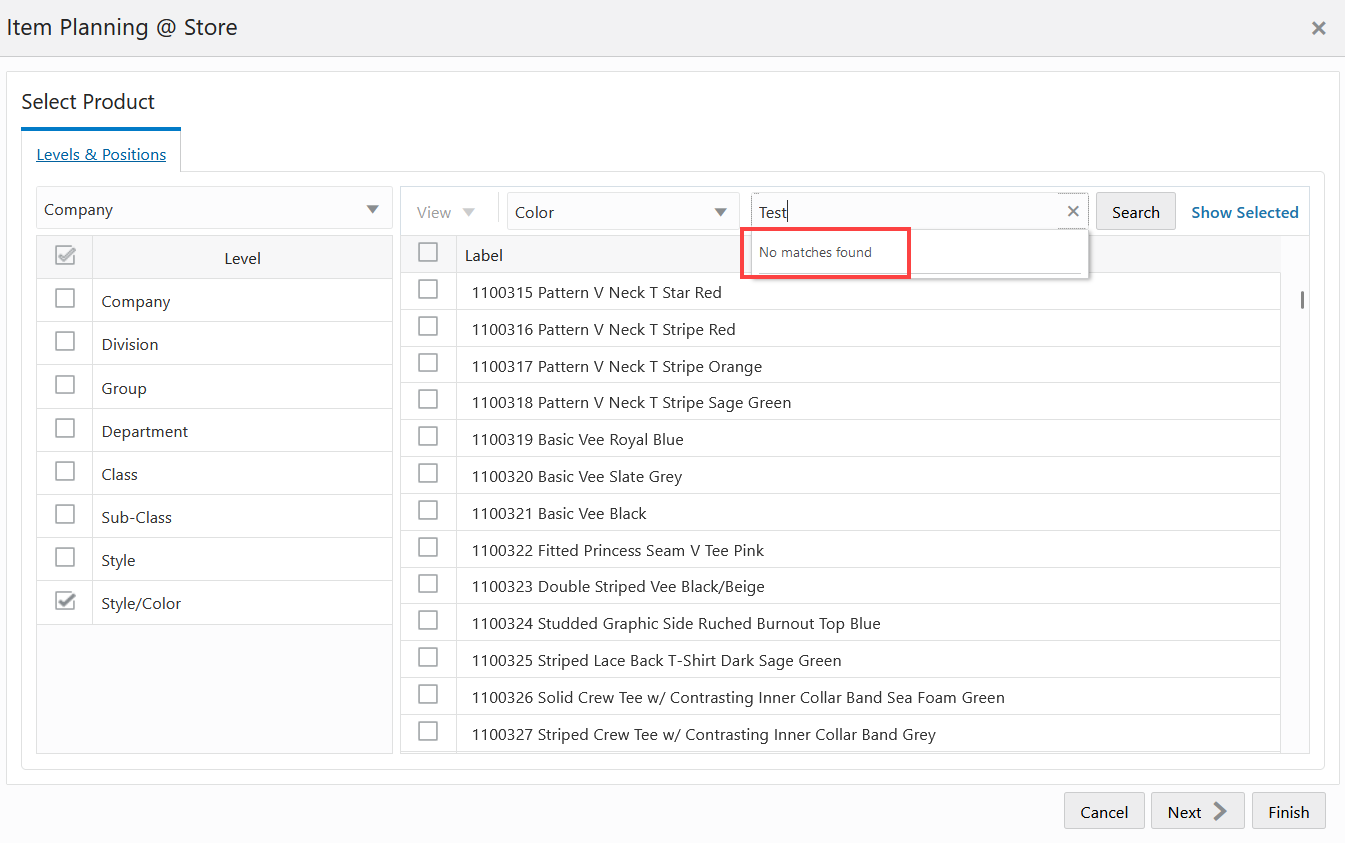
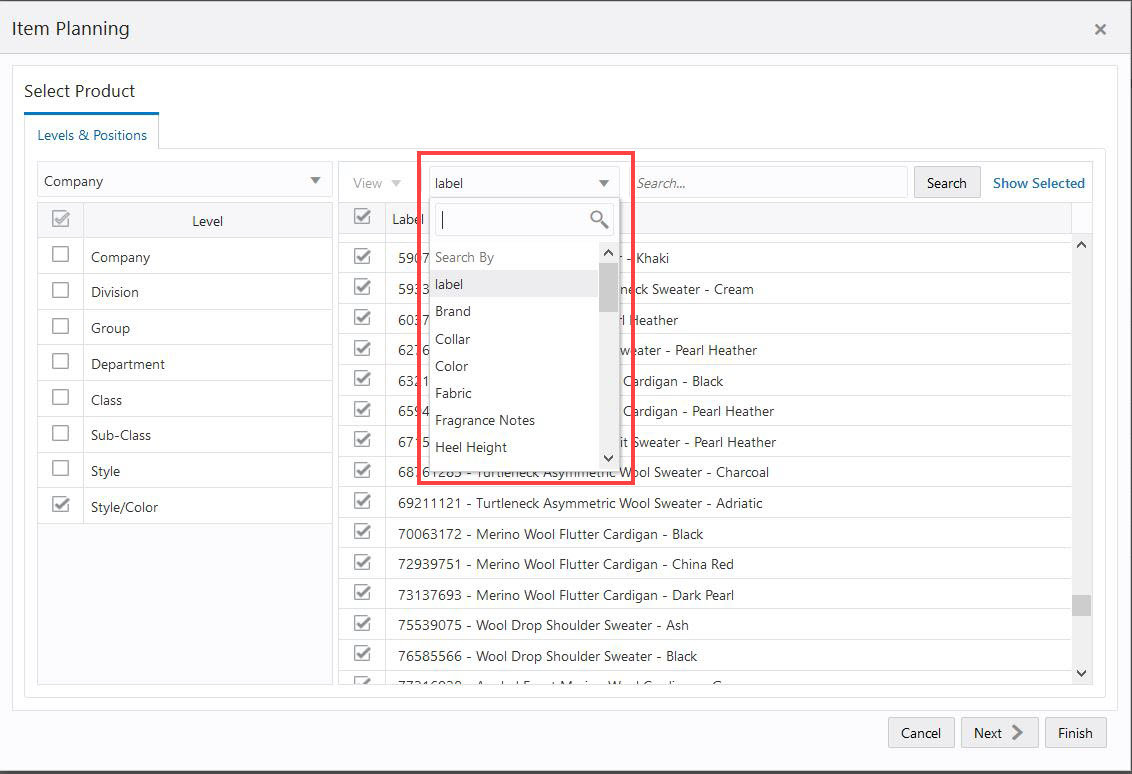
You can filter the positions by attributes when you create your plan. This allows you to examine the different options that you care about and make decisions. The attribute filter is visible only when attributes are associated with at least one of the selected levels. The filter picklist is by default set to the label attribute.
Once you have selected the desired attribute from drop-down list, you can see the list of attribute values associated with the attribute that is displayed as the list in the filter area (refer fig – Attribute values displayed). You can then select the attribute value and click Add Filter. For example, if you select Style/Color as the filter and then you can see the list of all the attribute values associated with attribute Color. From the list select Black and all the positions that have Black as the color attribute value are listed. When the search value does not matches the label or attribute value, a No matches found message displays in the drop-down list.
Figure 5-21 Attribute Values Drop-down List
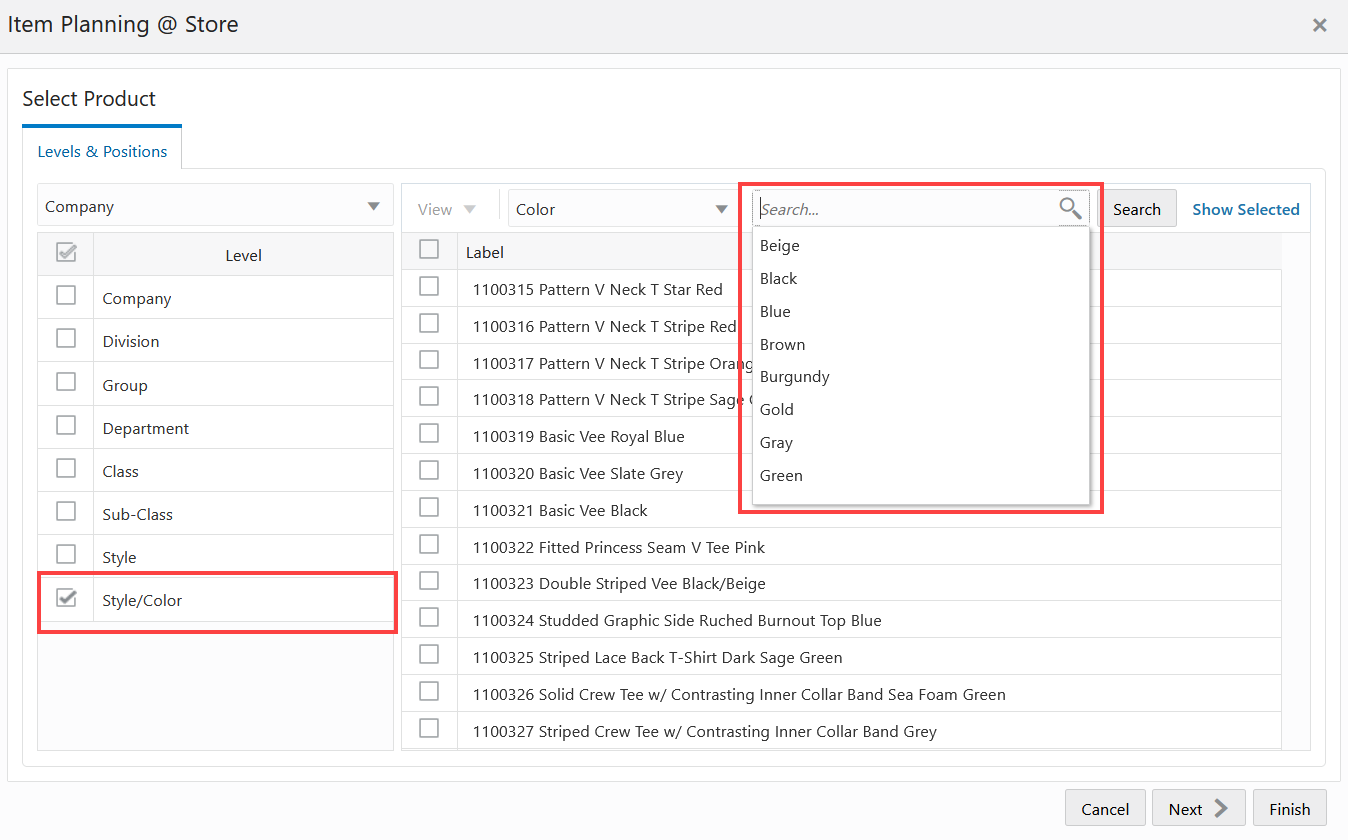
Figure 5-22 Filter Position (Segment Wizard)
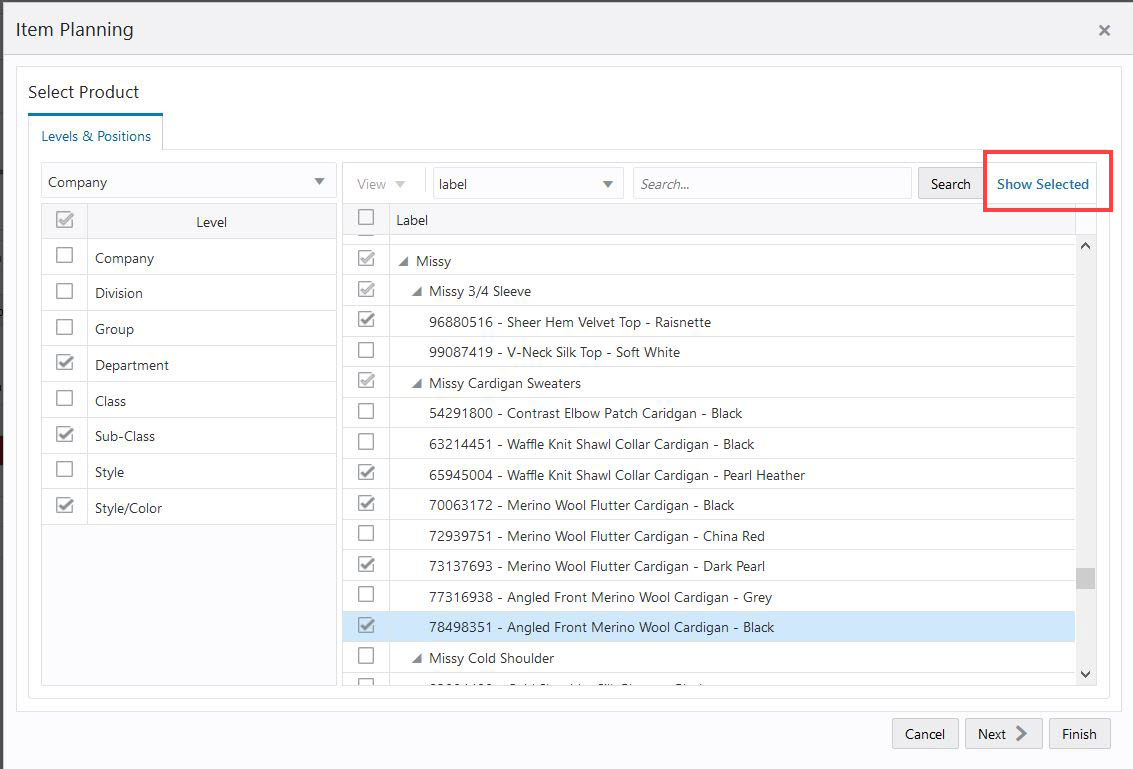
You can see the positions selected in wizard with the Show Selected link within the wizard. This can help you in understand what needs to be included in your plan and allows you to display only selected positions in wizard. Click the Show Selected link to see the list of positions selected along with their parents roll up. When there is no position selected, the Show Selected link displays a message that there is no data to display.
Click the Show All link to bring back all the positions of the wizard
If an attribute filter is applied, then the Show Selected link displays only the position matching the filter criteria which is already selected.
Once you have made your position selections for a dimension, click Next or Previous to move to the next or previous dimension selection screen. If all positions for all dimensions have been selected, click Finish to complete the workspace build and close the wizard.
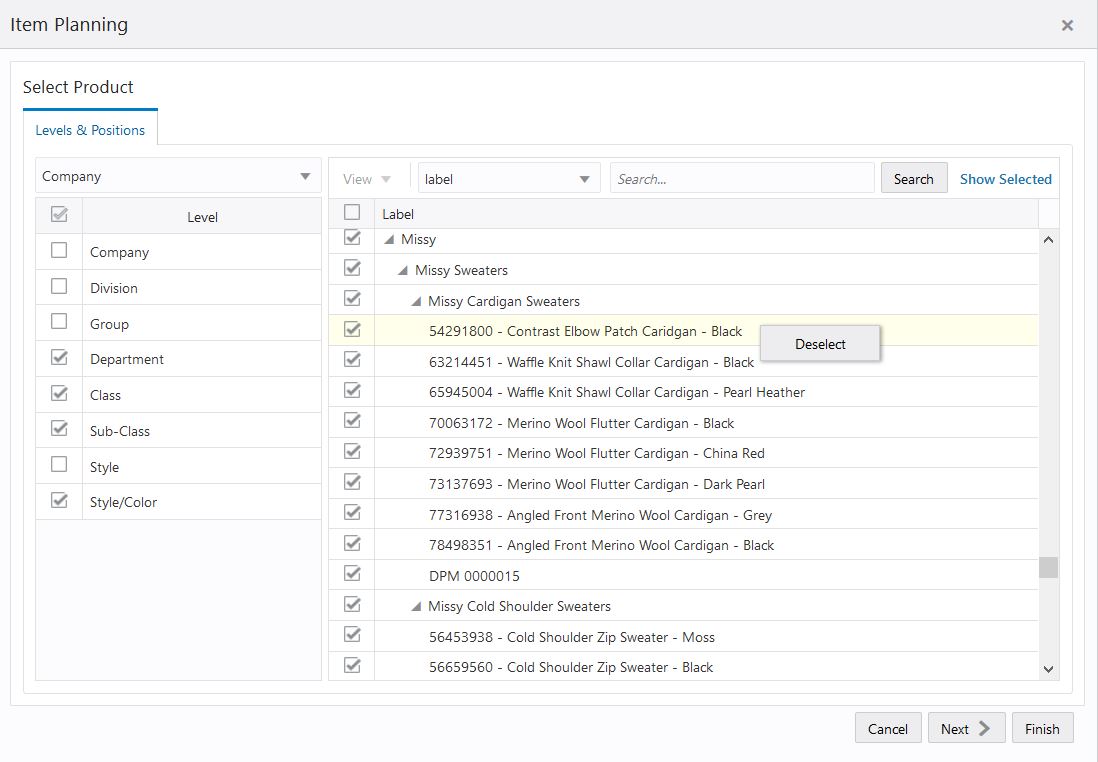
You can also select and deselect positions using the context menu (right-click) option. This option is an alternative to select or deselect positions in wizard. You can use context menu option to select or deselect multiple positions simultaneously.
To select a position, right-click on the position and choose Select. Similarly, to deselect a position, right-click on a selected position and choose Deselect.
When you want to select or deselect multiple positions, select multiple positions by Using a mouse drag with a Shift or Ctrl key and right-click to opt for Select or Deselect positions.
Figure 5-27 Wizard Context Menu Select Position
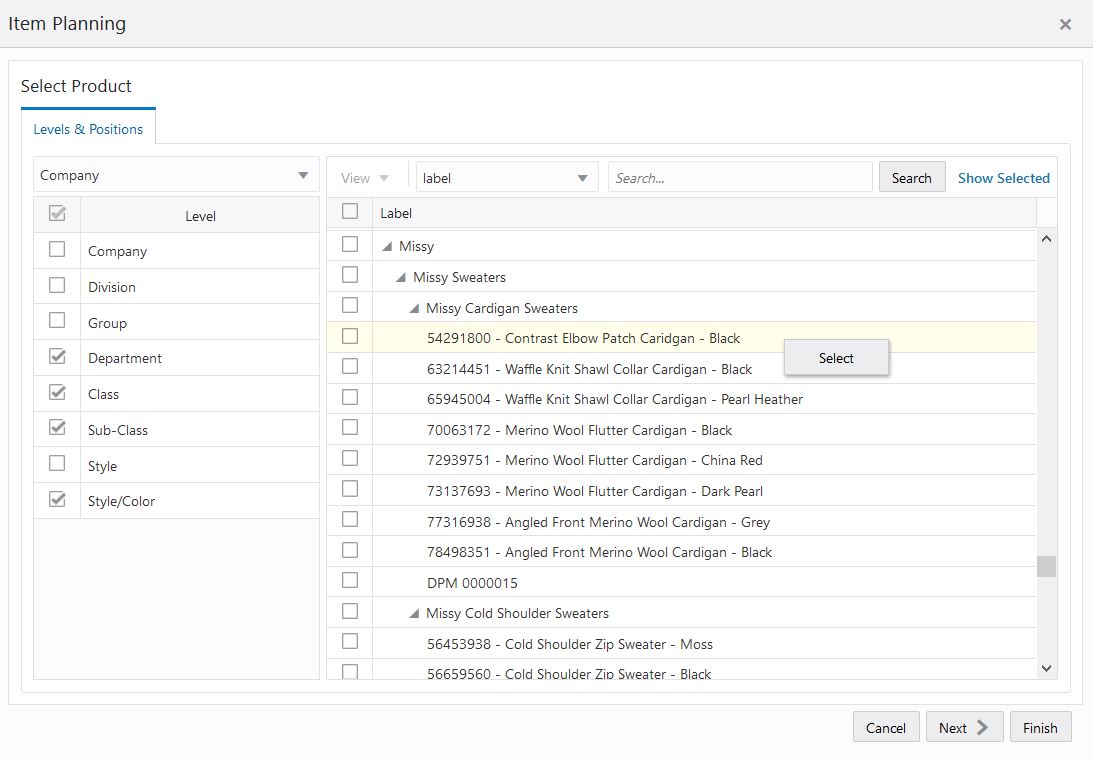
Figure 5-28 Wizard Context Menu Deselect Position
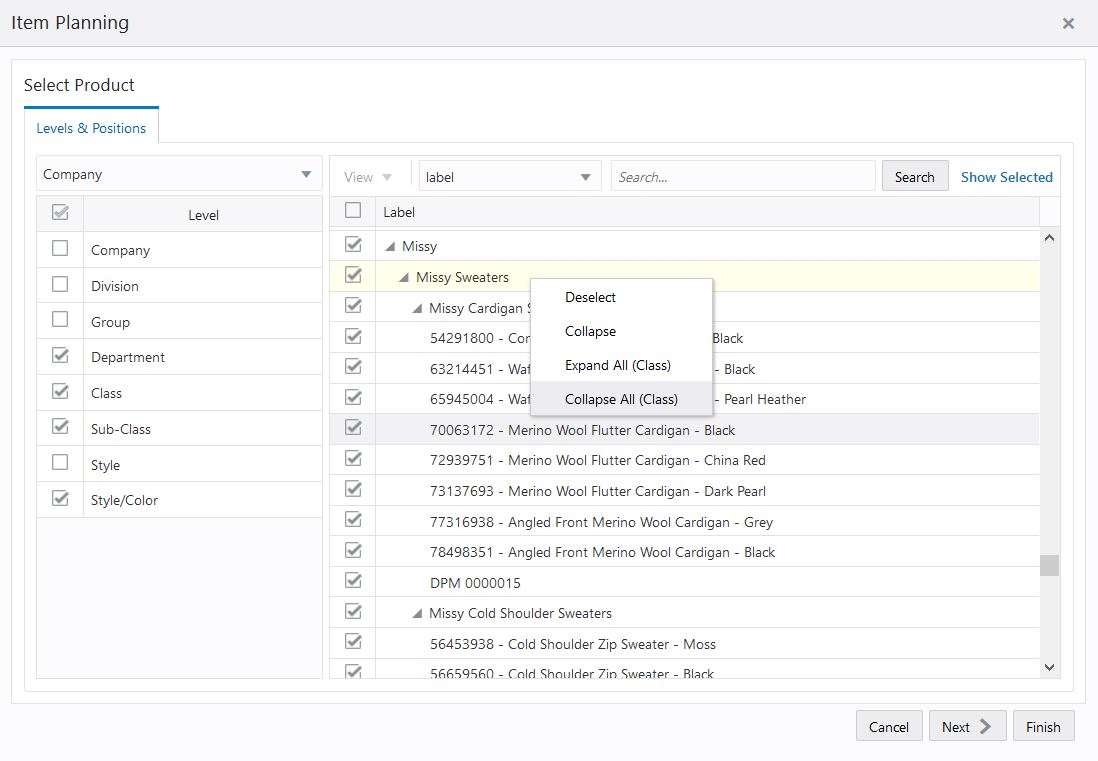
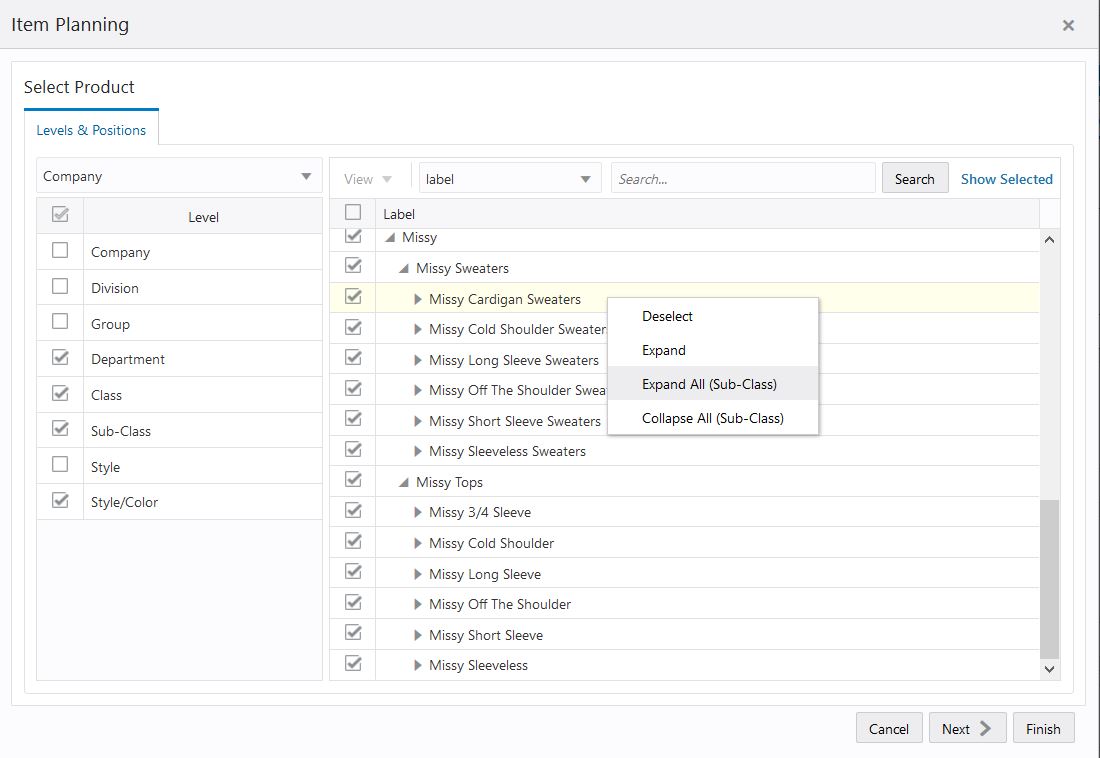
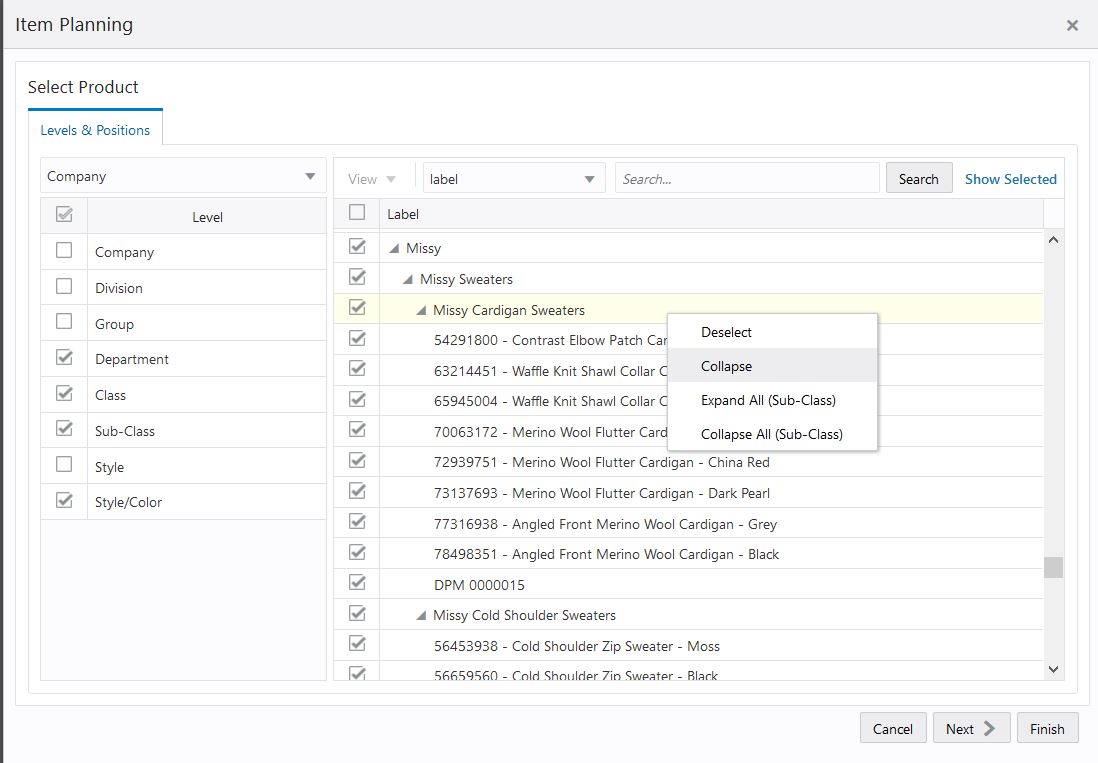
Collapse functionality allows a planner to group the child level positions to parent level. Expand functionality allows a planner to drill-down parent level to view all the child level positions. Collapse and expand function helps you to see all the positions in edit view that is meaningful to you.
To collapse or expand the dimension position you can use context menu (right-click) option. You can right-click on a parent level position, you can select expand function to see all the child positions. Similarly, to group the child level position, you can right-click on the parent position and select Collapse.
Figure 5-29 Wizard Expand Position Level
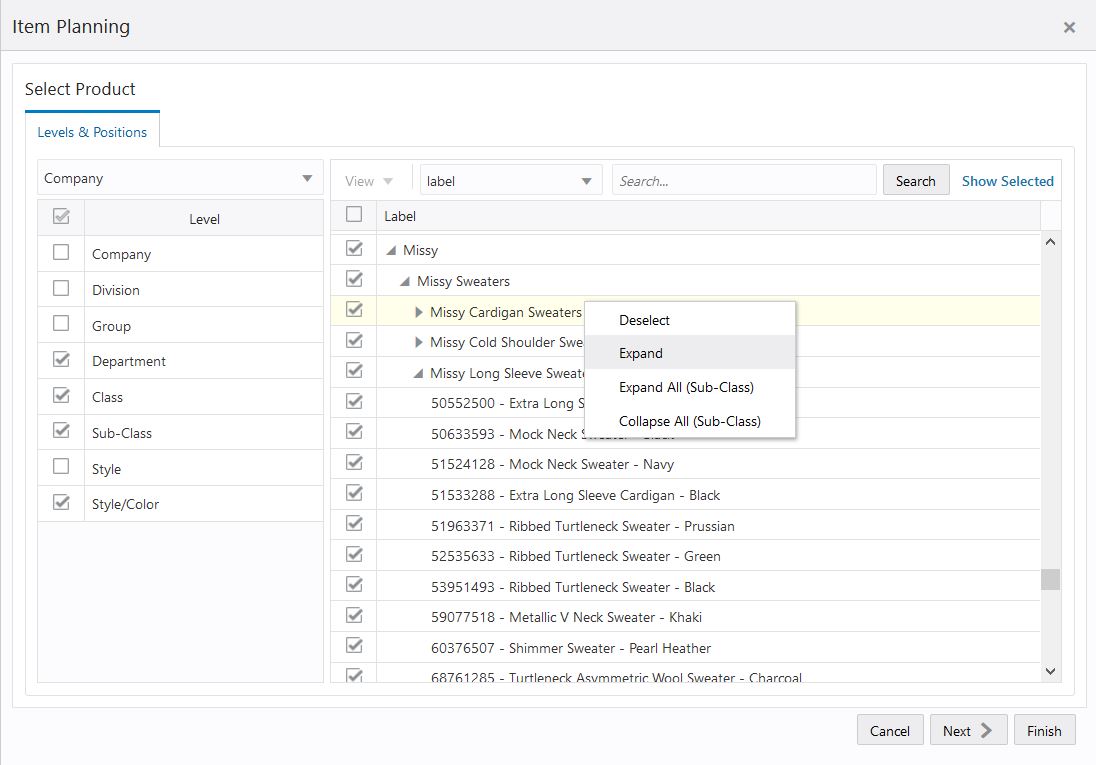
Figure 5-30 Wizard Collapse Position Level
The same functionality of collapse has been extended to Collapse All which collapses all the child level positions for the selected dimension level in wizard. And Expand all function expands all the child level position for the selected dimension level in wizard. The selected dimension level is specified next to Collapse All or Expand All in the context menu. With this function, you can quickly collapse or expand view the list of positions as desired.
When selecting Calendar dimension, you have the option to use a rolling calendar rather than the predefined time periods that are available from the wizard. This enables you to use a range of time periods that are relative to the current date. As time passes, the calendar favorite updates the range of time to be in relation to the new date.
To use the rolling Calendar, feature you must enable the rolling calendar feature from the Configuration Tool.
The length of the time periods is determined by the lowest level of the Calendar dimension presented in the wizard. For instance, if the lowest level in the wizard is Week, then when you select the time range in the rolling calendar option, you choose the number of weeks to include.
To use the rolling calendar feature, complete the following:
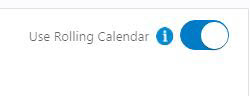
In the calendar step of the workbook wizard, select the Use Rolling Calendar option
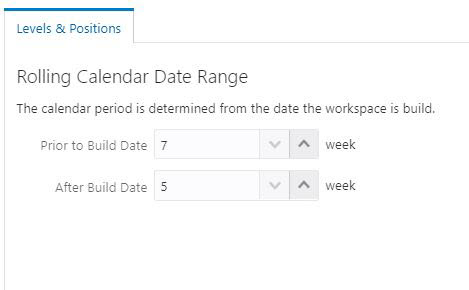
Set the Rolling Calendar Date Range.
In the Prior to Build Date field, either use the arrows or enter the desired number to select the number of time periods in relation to today's date for the start period. For instance, if the workbook's lowest calendar level is week and you want the time period to begin seven weeks in the past from today's date, you would enter 7.
In the After Build Date field, either use the arrows or enter the number of weeks in relation to today's date that you want the time period to end.
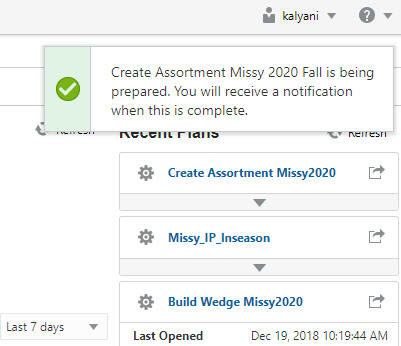
Click Finish and the workspace begins building in the background. You can work on other tasks and workspaces while this is occurring. When the workspace build is complete, you will receive a Toast notification. You can also see the status at the bottom of the Administration Dashboard.
When you select a workspace from the Tasks module, the Segment window is displayed.
Figure 5-36 Asynchronous Build Notification