| Oracle® Retail Predictive Application Server Cloud Edition Administration Guide Release 22.2.401.0 F72005-01 |
|

 Previous |
 Next |
| Oracle® Retail Predictive Application Server Cloud Edition Administration Guide Release 22.2.401.0 F72005-01 |
|
Previous |
Next |
This chapter describes the administration tasks for the Planning Data Schema (PDS).
The Planning Data Schema (PDS) consists of multiple database schemas residing on an Oracle Database server: a main schema (internally called a data mart schema) and multiple access schemas. The data mart schema contains all the dimension and fact tables that store all application data. The data mart schema also contains metadata tables, PL/SQL packages, procedures and functions, as well as other database objects. Access schemas are user schemas that are granted necessary privileges to access database objects in the data mart schema.
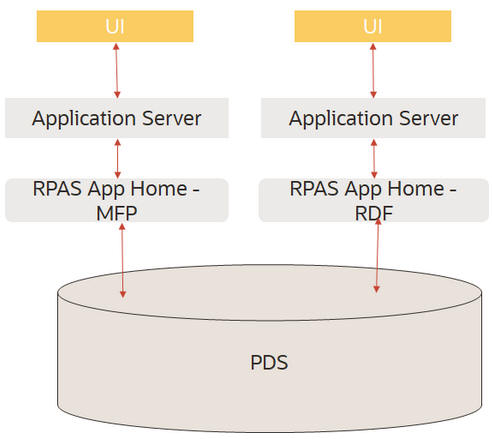
From RPASCE Version 19 to Version 21, the Planning Data Schema (PDS) has evolved from an optional data integration component into a powerful integration/calculation engine that can support multiple applications such as MFP, RDF, and ASCS. Figure 3-1 provides a high level graphical description of the system architecture.
The diagram shows two RPASCE applications, MFP and RDF, accessing a shared data mart schema. All RPASCE internal processes (except workbook calculations) communicate with PDS to perform their operations. For example, workbooks are built from and committed to PDS, batch calculations run inside PDS, and so on.
The data of retail business is multi-dimensional by nature, with typical dimensions including Product, Location, Calendar, Supplier, and so on. In the data mart schema, we use the data model called a de-normalized snowflake schema, which is built from the applications' configuration. Figure 3-2 shows a sample Entity Relationship Diagram (ERD) of the data model.
Figure 3-2 PDS Entity Relationship Diagram
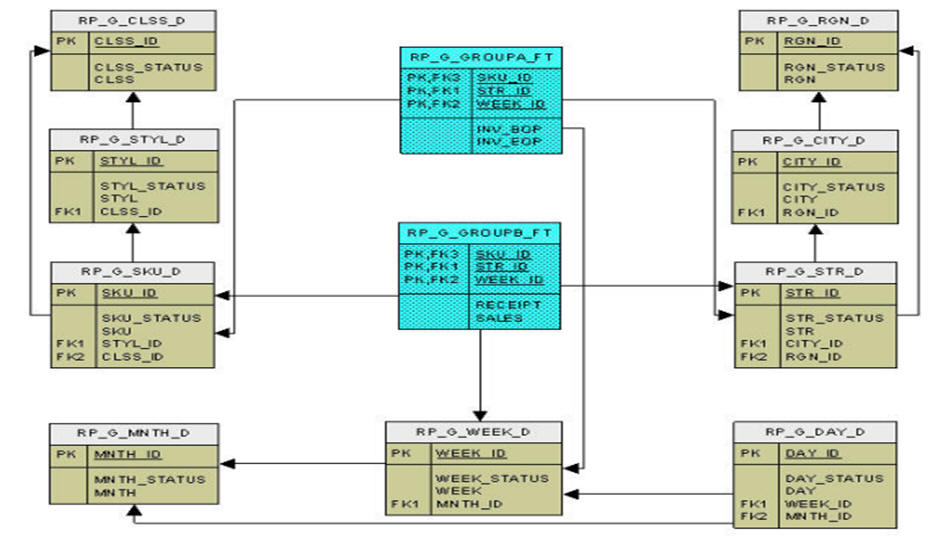
The ERD shows two fact tables and their parent dimension tables (including all the roll-up dimension tables). The data model is a snowflake (as opposed to star) because there is a dimension table for each dimension level. It is de-normalized because each dimension table contains all the higher levels (not just the immediate parent). The data mart schema may contain hundreds of such snowflakes.
Because of the highly configurable nature of RPASCE applications (dimensions, measures, rules, workbook templates, and so on, are configured), the data mart schema is dynamically created, that is, dimension tables and fact tables are dynamically created from the application configuration. The data mart schema also contains a fixed set of metadata tables whose content is dynamically populated with application metadata. Batch calculation rules are dynamically translated into PL/SQL blocks and stored in PDS for IN-DB calculations.
In RPASCE Version 21, PDS is built from application configurations. Unlike V19, there is no separate PDS configuration. The users only need to work on application configurations. For details, see Oracle Retail Predictive Application Server Cloud Edition Configuration Tools User Guide. The deployment process internally generates the PDS schema configuration from the application configurations that specify all application dimensions, facts (and mapping between the application measures and facts), and all the necessary metadata required to create all tables, and populates the metadata tables with the application configuration information.
Once an application is deployed, the PDS contains complete information about the application. Unlike V19, the traditional RPASCE application is not required and is no longer built.
When there are changes to the configuration after the application is deployed, the application can be patched. (See details in "Patch PDS".)
In the Planning Data Schema (PDS), fact tables are partitioned. Proper partitioning is crucial for optimal performance. The concept of partitioning PDS is inherited from the previous versions of RPASCE, but in Version 22, it is easier for the administrators. Now, the level DEPT of dimension PROD is the partitioning level. All fact tables with PROD dimension level at or below DEPT are automatically partitioned, with one DEPT in each database partition. With the automatic partitioning, the administrators are not involved in partitioning configuration at all.
A sample partitioninfo.xml is as follows:
<?xml version="1.0" encoding="utf-8"?>
<rpas>
<partitiondim>pgrp</partitiondim>
<rdm-partitions>
<partition id="1">9,10</partition>
<partition id="2">11</partition>
<partition id="3">12</partition>
<partition id="4">13</partition>
<partition id="5">14</partition>
<partition id="6">15</partition>
<partition id="6">16</partition>
</rdm-partitions>
</rpas>
All tags are required. The tag <partitiondim> defines the partitioning level; <partition> defines each partition, with the required id attribute that identifies the partition and a comma-separated list of positions in each partition. The above sample file defines six partitions. New partitions are automatically added when new positions that are not in partitioninfo.xml are loaded, with one partition per new position.
General guidelines for partitioning configuration are as follows:
Choose the partitioning dimension level to minimize (or eliminate) aggregation across the partitioning level for batch calculations. This is a limit on how low the partitioning level can be. For example, level CLSS may not be a good choice for MFP because the batch calculations aggregate from below to above CLSS).
Try to make the size of partitions as even as possible. The configurator is expected to have some knowledge about the application data volume.
To build PDS for an application, users must have the application configuration and partitioninfo.xml uploaded to the Object Storage. In addition, the input files for dimensions and facts should optionally be loaded. For details, see Oracle Retail Predictive Application Server Cloud Service Implementation Guide.
PDS can be built from the UI by completing the following steps:
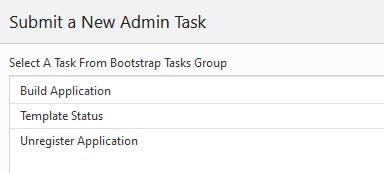
From Online Admin Tools > Submit a New Admin Task, select Bootstrap Tasks, as shown in Figure 3-3.
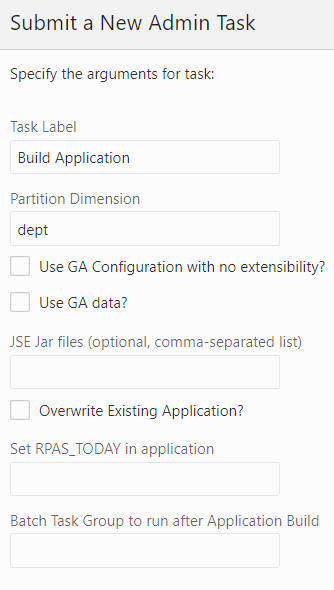
Select Build Application, as shown in Figure 3-4, and click Next.
Provide the parameter values, as shown in Figure 3-5, and click Next to schedule or run the task.
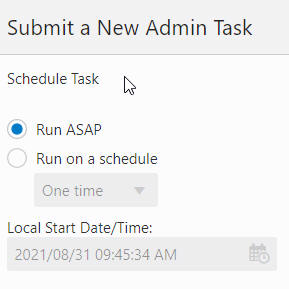
Select Run ASAP or Run on Schedule and enter the appropriate parameters, as shown in Figure 3-6.
Figure 3-6 Build Application Schedule Parameters
When changes occur in the application configuration, the already-deployed application can be patched. The Patch Application task is designed for this purpose.
To run the Patch Application task, first upload the application configuration <appName>_config.zip to the config folder in the Object Storage.
Then, complete the following steps.
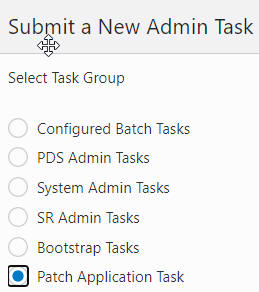
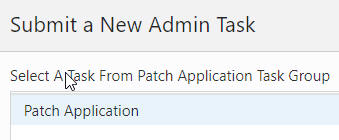
From Online Admin Tools > Submit a New Task, select Patch Application Task, as shown in Figure 3-7, and click Next.
Select Patch Application, as shown in Figure 3-8, and click Next.
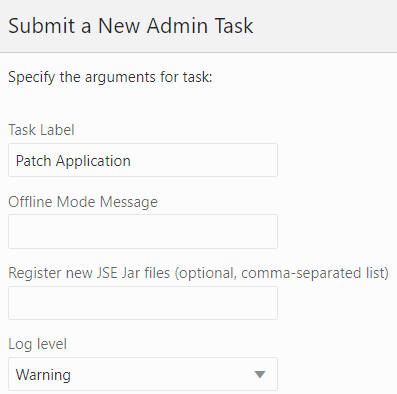
Complete the Patch Application parameters, as shown in Figure 3-9, and click Next to schedule or run the task.
This section describes the following tasks:
Check PDS
List PDS Status
Create Reporting Views in PDS
Load Dimension Data
Load Fact Data
PDS Manager
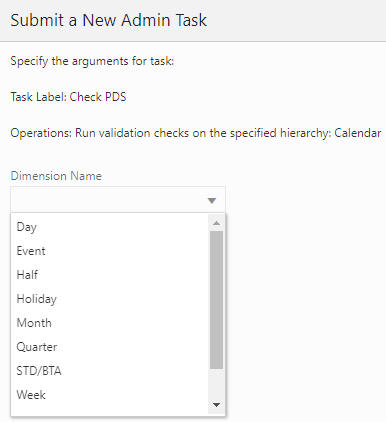
Use the Check PDS task to obtain diagnostic information from PDS. The user can select one of the following operations to perform.
Run validation checks on a specified hierarchy
The user must provide the hierarchy for the validation to be conducted. As shown in Figure 3-10 and Figure 3-11, the user can provide the dimension level to further limit the validation. If the value is left blank, the operation will perform the validation on all dimensions of the hierarchy.
Figure 3-10 Validation Checks on Specified Hierarchy
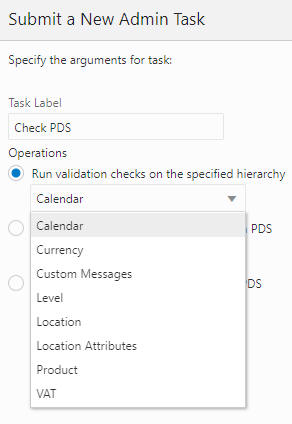
Figure 3-11 Calendar Arguments for Specified Hierarchy
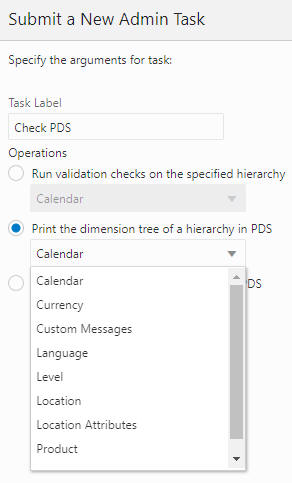
Print the dimension tree of a hierarchy in PDS
This operation prints the dimension tree using the PDS hierarchy information.The user is required to select the hierarchy to be printed, as shown in Figure 3-12.
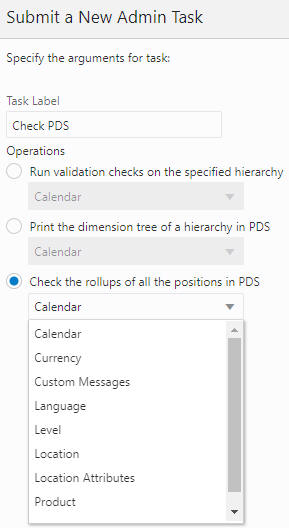
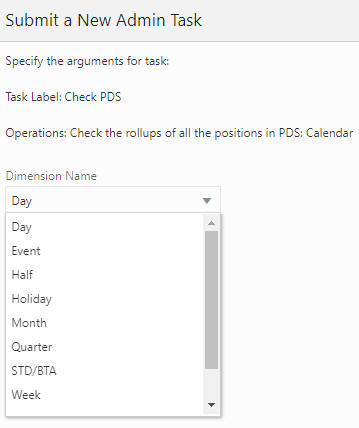
Check the rollups of all the positions in PDS
This operation is used to detect rollup corruption at dimension/level. As shown in Figure 3-13 and Figure 3-14, the user must first provide the hierarchy name and select the dimension for the validation. If the Check All option is enabled, the operation will perform the same rollup validation for all the dimensions that are rollups from the selected dimension. For example, if Day is selected and Check All is enabled, then, in addition to the Day dimension, Month, Quarter, Half, and so on, will also be validated.
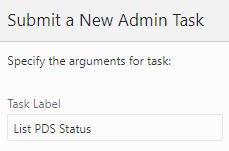
The List PDS Status task, shown in Figure 3-15, does not have any additional parameters. It provides the current state of PDS regarding operation and application consistency.
It has following status codes:
1001 - Hierarchy load in one of the applications is in progress.
1002 - PDS dimension loading is in progress.
1004 - PDS re-partition is in progress.
1005 - PDS fact data loading is in progress.
1006 - Data is being transfer from one of the applications to PDS. (Obsolete)
1007 - Translation loading is in progress.
1008 - One of the application registrations is in progress.
1009 - One of the application un-registrations is in progress.
2001 - There are mismatch positions between one of the applications and the PDS.
2002 - PDS repartition is required.
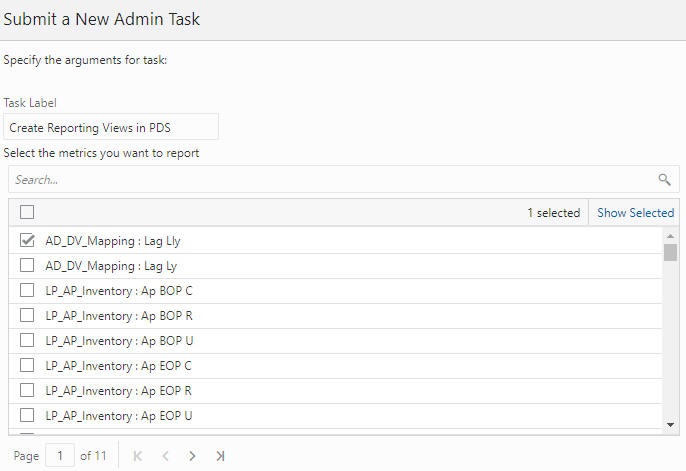
This operation is used to create views for different metrics that can be selected. The metrics are shown in Figure 3-16. Navigation through various metrics is controlled using the Page numbering or Page Navigation options that are available in the left bottom corner of the screen.
After the PDS is built, the user must load the dimension data and/or fact data to make PDS fully operational. Dimension data can be loaded from flat files.
Prepare the flat files and place them in the Object Storage under "<SubNamespace>/planning/incoming/input. See Oracle Retail Predictive Application Server Cloud Service Implementation Guide for details regarding uploading and downloading batch files to the Object Storage.
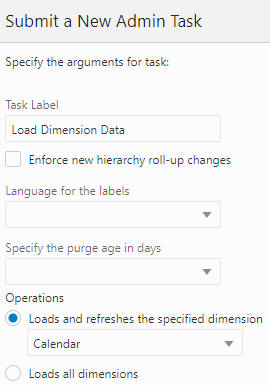
Load Dimension Data, shown in Figure 3-17, is used to load hierarchy information into the PDS from one or more flat files.
Options
Language for the labels. Sets the language for the labels provided in the flat file. The default is English.
Enforce new hierarchy roll-up changes. When an incoming flat file contains only partial hierarchy data, it is possible that the data has different rollup positions than the records in PDS. Use this option to enforce the rollup from the flat file and apply it to all instances in PDS. If this option is not checked, the task will fail if it detects different rollups in the incoming file and in the records in PDS.
Specify the purge age in days. Use to auto purge records that have not been seen from the load file by the number of days specified in this field. If a value is not specified, the purge age defined by the configuration will be used.
Operations. Choose between loading a particular dimension (the dimension file must exist) and loading all dimensions. This allows the system to load the dimensions if the corresponded data files have been uploaded.
|
Note: When the Load Dimension Data Task is called in dimension/hierarchy load mode, it will look for unarchived data files with the following names in the following order: <dim>.csv.dat.*, <dim>.hdr.csv.dat.*. But if the ALL dimensions option is selected, it will look for an archive with name planning/incoming/input/dimdata.zip from the Object Storage. If it exists, it will be extracted and all files that match the mentioned pattern will be loaded to the designated dimension. |
|
Note: Virtual dimension/hierarchy cannot be explicitly loaded using the Load Dimension Data task. |
Use this task, shown in Figure 3-18, to load measure data into the PDS from flat files. Once present in the PDS, this data is available to any application that shares that measure throughout PDS. Prepare the flat files and place them in the Object Storage under "<SubNamespace>/planning/incoming/input. See Oracle Retail Predictive Application Server Cloud Service Implementation Guide for details regarding uploading and downloading batch files to the Object Storage.
The format of the data file must be CSV with a header line.
Administrators must pay close attention to the extension of the input file. RPASCE supports the following types of loads (identified by file name extension):
.ovr (Overlay): Existing values in the measure are overlaid with the values in the input file. Any values not included in the input file are not changed.
|
Note: For string type measures, an empty cell in the .ovr file is treated as a valid string; as a result, the Load Fact Data task overwrites the previously loaded string with an empty string. For other measure types, an empty cell in the .ovr file is treated as invalid data. It is discarded and the previously loaded value is retained.
|
The Load Fact Data task allows multiple facts to be loaded from a single file. The multiple facts must have the same base intersection. If the data file contains multiple facts and the option Specify the files to load, all facts (specified in the header line) within the selected data file will be loaded. If a fact is in the header line but does not exist in the application, the corresponding column will be ignored and other facts will be loaded.
If this task skips records for any reason, a warning will be printed out to the log file that can be obtained from the OAT dashboard. The maximum number of skipped records that can be output to the log is 1000. After that, any further reject records will be skipped silently.
Options
Run in Trickle Feed mode. When this mode is enabled, loadFactData will use a transactional type of query for inserting and committing. Data will either be all loaded to the PDS or not loaded at all; a partial load is not permitted. This is intended for small data feeds only.
Do not clean input files used after the load. By default, data files are removed from the source location. Enable this option to have the file(s) remain at the original location after the load.
Operations
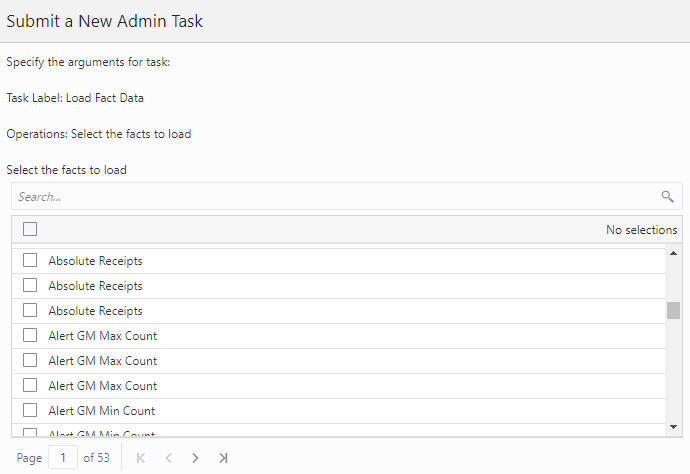
Select the facts. Select the list of facts to load.
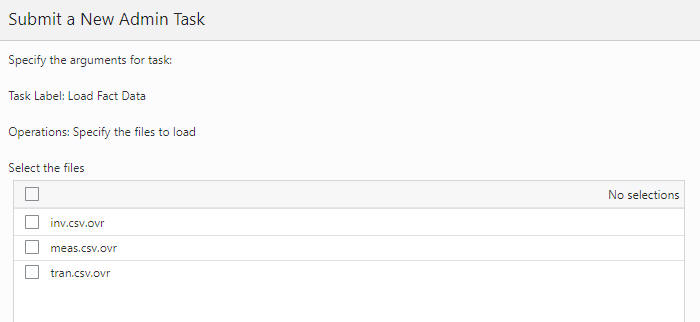
Specify the files to load. Select which file to load.
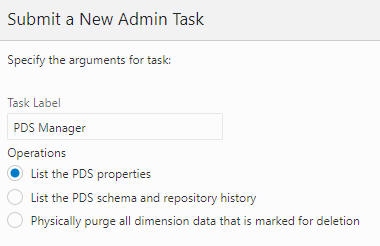
Use PDS Manager, shown in Figure 3-21 to perform various PDS operations.
List the PDS properties. Print the list of properties for PDS.
List the PDS schema and repository history. Print the history and the schema.
Physically purge all dimension data. Purge all deleted dimension data and associated fact data from the PDS.
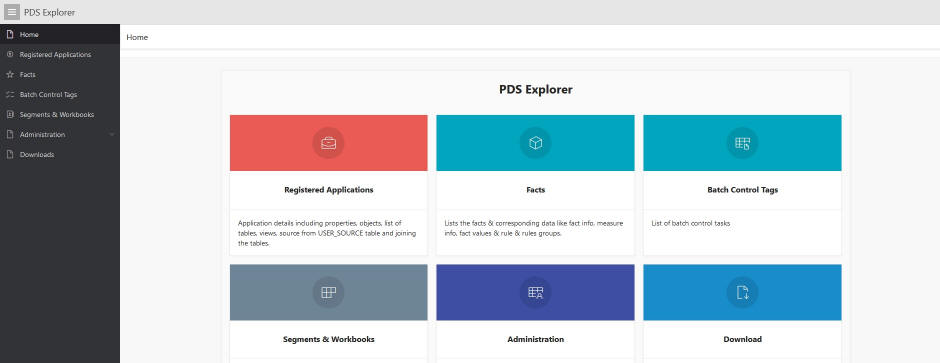
This section describes the RPASCE Planning Data Schema Diagnostic Tool called PDS Explorer. The PDS Explorer is a set of administrative web-based tools that an application administrator or system integrator can use to identify and review many RPASCE data schema issues. In this way, the system administrator or system integrator has access to the information necessary to take action to diagnose the issue related to configuration, hierarchies, and measure data. The PDS explorer tool is accessed by an ords-enabled web service shared during the provisioning by the cloud team on a new environment onboarding. Using the information provided in the PDS Explorer Tool, the administration user has a clearer understanding of where the issue is, which can help the user address the issue.
Once you log into the web application, you are presented with the following tabs that you can use to explore the existing planning data schema for a given application.
This tab provides access to Applications and Users and Groups.
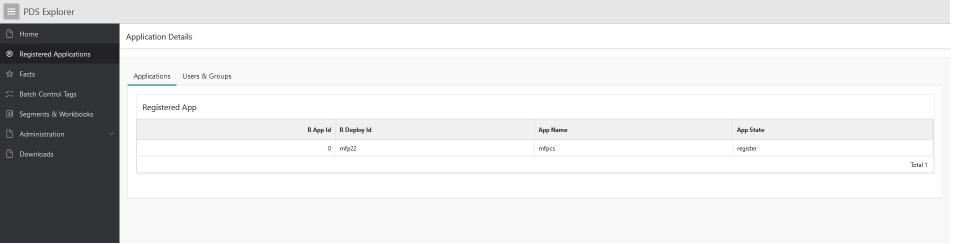
Application
This tab provides details regarding the one or more applications that were built using the bootstrap process by uploading the configuration. The Application R Deploy ID and R App ID uniquely identify an application that was built in the environment.
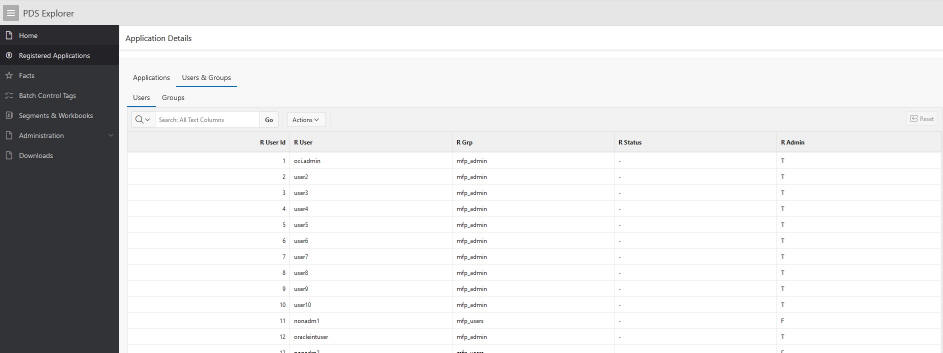
Users and Groups
This tab provides details regarding the list of users registered to the planning data schema. It is possible to look up the groups the users are associated with. Users and groups can be filtered based on the R APP ID.
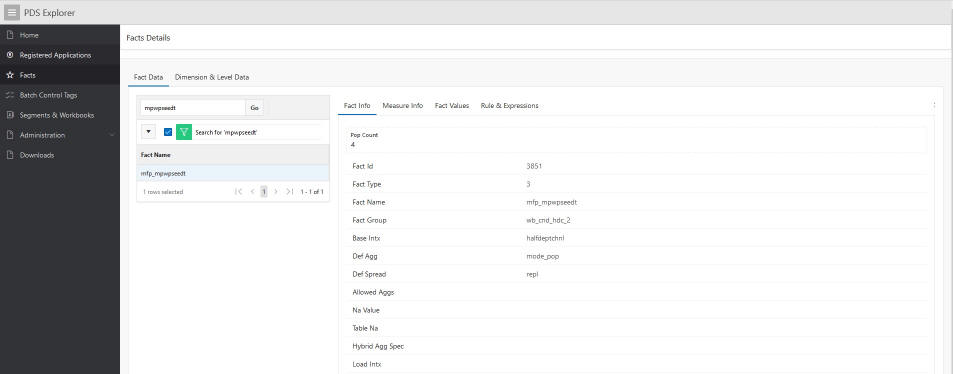
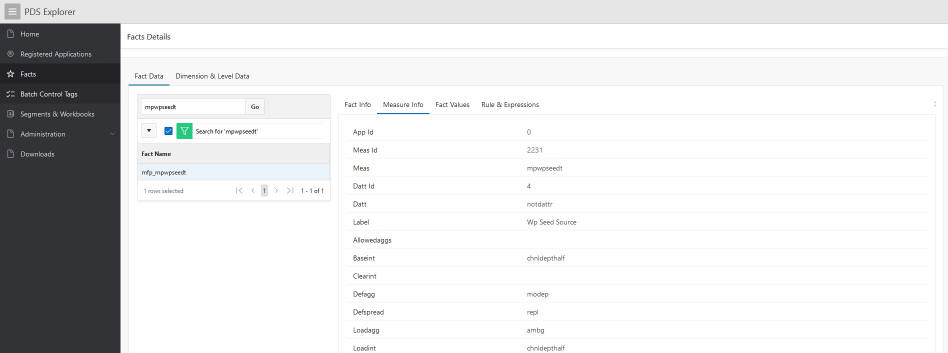
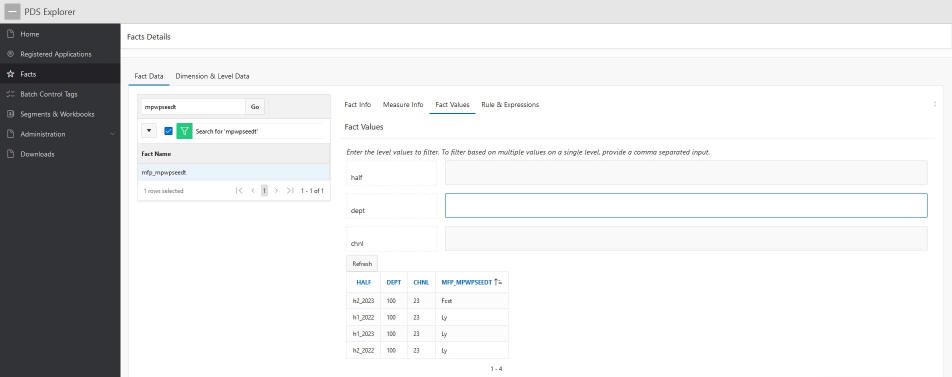
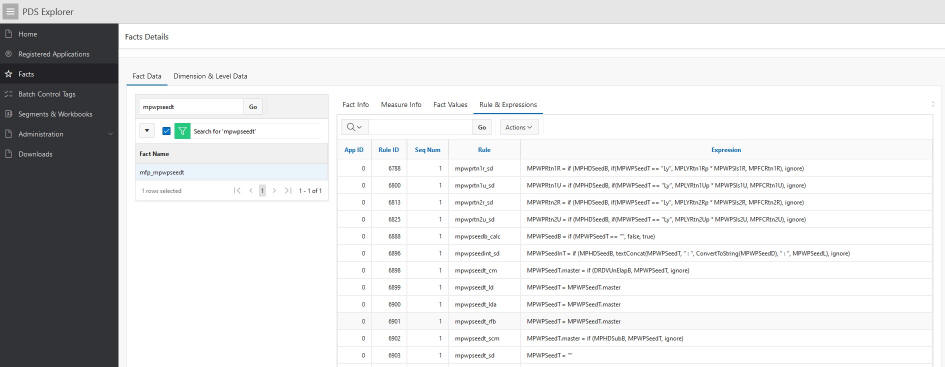
This provides access to Fact Info, Measure Info, Fact Values, and Rules and Expressions.
Fact Data
This tab can be used to search for facts and their corresponding measures, registered to the given application and its metadata, even the value down to the cell value. In addition, it can be used to find all the rules and expression the measure is part of. The following figures illustrate an example of a fact search for a measure named mpwpseedt-.
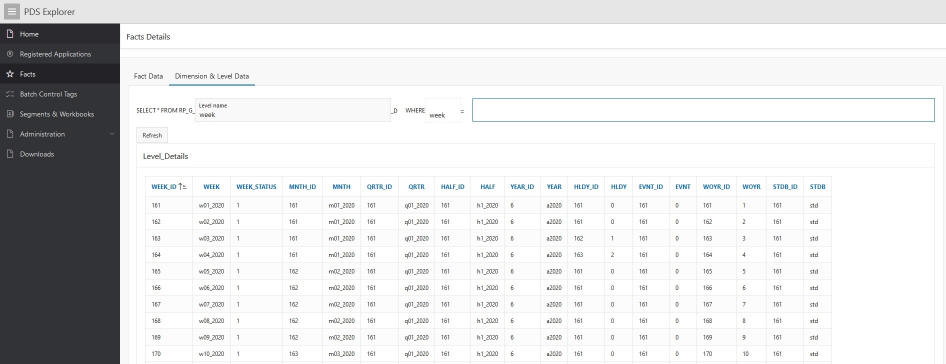
Dimension and Level Data
This tab can be used to inspect all the hier data inside the PDS. All the data loaded for the respective hier can also be viewed. The following figure provides an example of all the weeks loaded to the PDS.
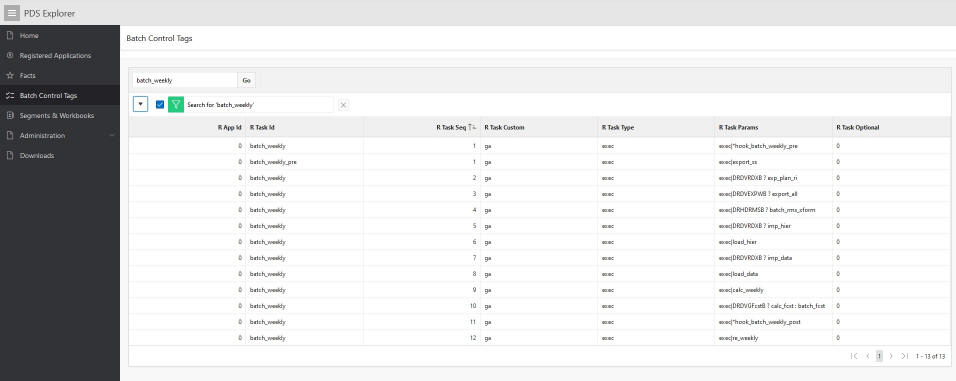
This tab can be used to review the batch control files that were loaded to the given application using the online administration tools. The raw txt files are transformed into a table for tracking in PDS.
R App Id signifies the application against which it was loaded.
R TaskId is the internal ID that was created using the app name as prefix.
R Task Seq is an internal sequence used to track the group of R Task Id execution.
R Task Column determines whether the loaded batch control files are from ga or customer loaded/overridden.
R Task type are diff types of execution with batch control.
R Task params are the actual execution parameters
R Task Optional conditional values before executing the tag.
The following figure provides an example of reviewing a batch control for batch_weekly and all the underlying tasks it executes in sequence.
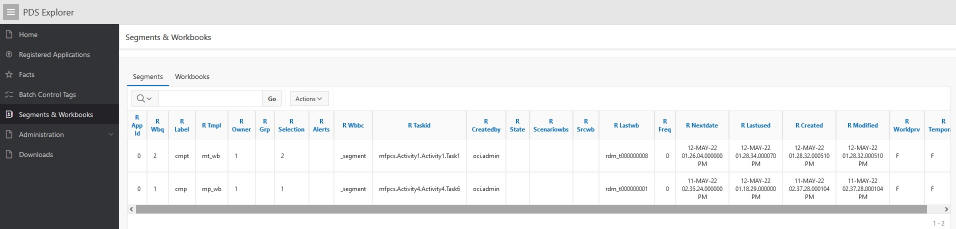
This tab mostly provides end customers the meta information about the segments users are building per application.
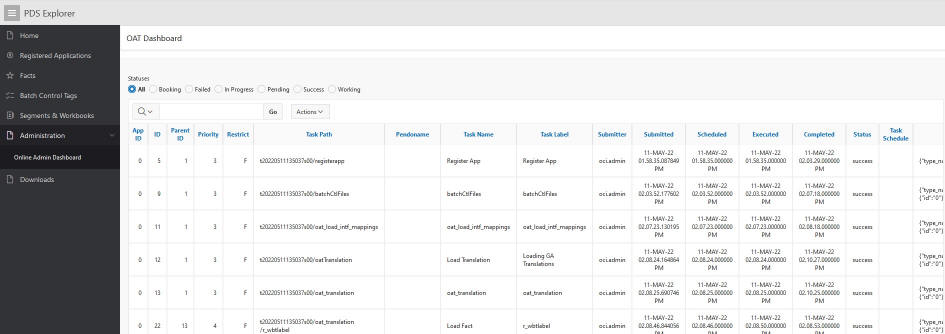
This tab provides details about the online administration tasks meta information about all the tasks visible in the online administration dashboard. It is best to use the online administration tools dashboard in the UI to view this information as it enables the parent-child relationship.
PDS is a common database platform shared by multiple applications. PDS is built with pre-created web services for measure metadata and measure data. The default web services are automatically available after PDS is built. Web services map to the PDS read-only schema in the database and uses Oracle Restful Services.
The types of users in Apex are:
Workspace Admin - Responsible for creating workspaces and additional users. This access is only provided to the Oracle/AMS team.
RPAS_READ_ONLY_WORKSPACE - Provides viewer access to the workspaces. This user cannot create additional users. These users can access the default web services. If the customer requires a user to be a rest API developer who can log into and build restful services on the PDS read-only schema, the customer must send email to the Oracle/AMS team.
The Oracle/AMS team shares the base url for the web service during provisioning to the customer. This can be accessed by a user in the OCI IAM with the following group association: RPAS_ORDS_GROUP (for example, https://---wts.oracleindustry.com:443/ords).
Any users who are not part of the above group will not be able to access the web service. For more fine-grained control, it is possible to create multiple groups and map groups to specific rest urls.
|
Note: In order to control access to the restful services to specific groups in OCI IAM, contact your Oracle/AMS Workspace Admin. |
The default web services includes the following data:
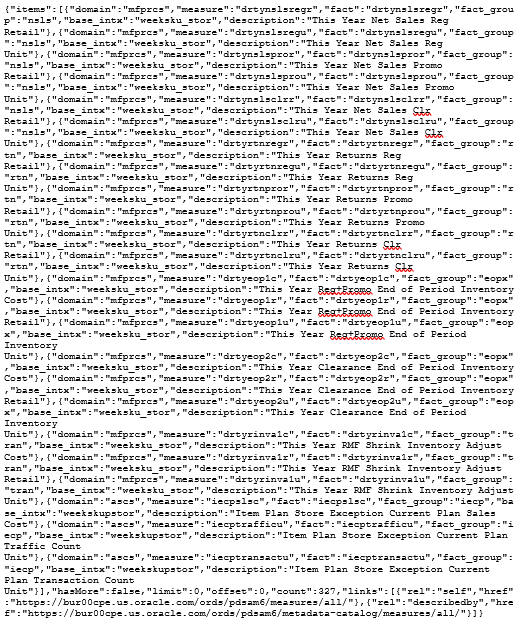
The metadata web service exposes the following metadata for all measures in PDS: application, measure, (mapped) fact, base intersection, and description.
The web services for fact data provide one web service for each fact in PDS. The fact data is retrieved at the fact's base intersection with position names.
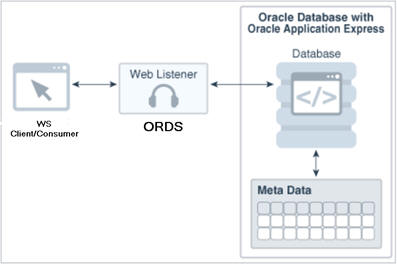
Figure 3-34 shows a high level architectural diagram of PDS (Oracle Database) with ORDS. Web services are accessible from any web service client (a web browser is an example of web client) through an ORDS Listener, which is deployed on a Tomcat server. Within the database, an ORDS enabled read-only schema provides access to the necessary database objects.
All web services are available under the base path: <ords_path>/<schema_alias>, where <ords_path> is determined by the ORDS installation/configuration. In production, this value is https://<cust>-<env>-<app>-wts.oracleindustry.com:443/ords and <schema_alias> is pds.
Table 3-1 describes the Web Services URL.
Table 3-1 Web Services URL
| Sl Number | Web Service | Example URL | Description |
|---|---|---|---|
|
1 |
Metadata |
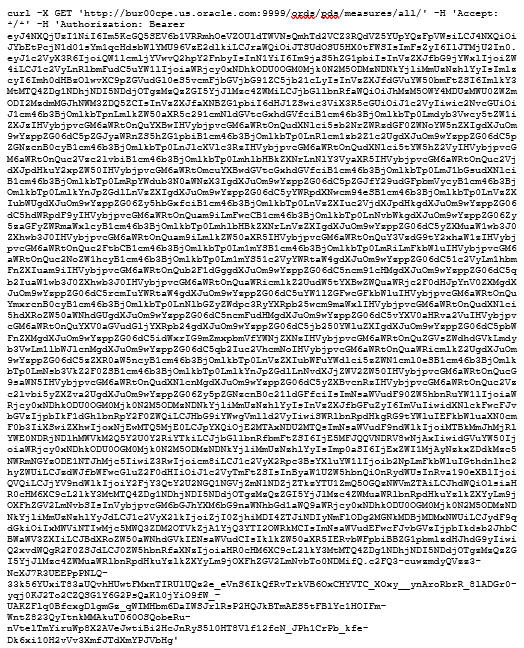
https://<cust>-<env>-<app>-wts.oracleindustry.com:443/ords/pds/measures/all/ |
Web service exposes the following metadata for all measures in PDS: application, measure, (mapped) fact, base intersection, and description. |
|
2 |
Measure |
https://<cust>-<env>-<app>-wts.oracleindustry.com:443/ords/pds/measuredata/<fact_ name>/ |
One web service for each measure in PDS. Measure data is retrieved at the measure's base intersection with position names. |
Example Output:
URL for metadata:
https://cust1-prod3-rpasee-wts.oracleindustry.com:443/ords/pds/measures/all
URL for fact data:
https://cust1-prod3-rpasee-wts.oracleindustry.com:443/ords/pds/measuredata/drtynslsregr/
Filtering
Filtering in the web services is supported through ORDS. To add a filter to a web service, append the parameter q=FilterObject, where FilterObject is a JSON object that represents the custom selection and sorting.
For the FilterObject syntax in ORDS version 19.1, see:
Table 3-2 provides examples of the FilterObject.
Table 3-2 Example URLs
| Description | Web Service URL |
|---|---|
|
To select measure metadata for mfp or rdf deployment only. |
https://<cust>-<env>-<app>-wts.oracleindustry.com:443/ords/pds/measures/all/?q={"deploy_id":{"$or": [{"$eq":"ascs"},{"$eq":"rdf"}]}} |
|
To select metadata for deploymnet ID in ("rdf", "mfprcs") and measure name in ("drtyeop1r", "rsal" |
https://<cust>-<env>-<app>-wts.oracleindustry.com:443/ords/pds/measures/all/?q={ "deploy_id": {"$or": [{"$eq": "rdf"},{"$eq": "mfprcs"}]}, "measure": {"$or": [{"$eq":"drtyeop1r"}, {"$eq":"rsal"}]} } |
|
To retrieve measure data for a given week and sku. |
https://<cust>-<env>-<app>-wts.oracleindustry.com:443/ords/pds/measuredata/drtyeop1r/?q={"week":"w01_2017","sku":"1000466"} |
Pagination
Data is returned in pages, with a page size of 100. This means that each web service call returns 100 rows. To retrieve additional data, append ? offset parameter.
For example, the url for the first page (first 100 rows) of rsal data is
https://cust1-prod3-rpasee-wts.oracleindustry.com:443/ords/pds/measuredata/rsal
and the url for the second page is
https://cust1-prod3-rpasee-wts.oracleindustry.com:443/ords/pds/measuredata/rsal/?offset=100
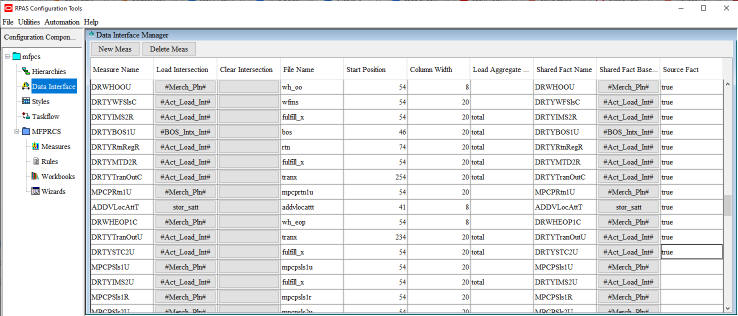
RPASCE also offers the PUT (write) web service that allows customers to write/update source facts in PDS. Source facts are the facts that are usually loaded (not calculated) whose mapping measures are flagged in the application configuration.
See the last column on the right in Figure 3-35 for source facts.
Example URL for PUT service below.
https://<cust>-<env>-<app>-wts.oracleindustry.com:443/ords/pds/putfact/data/
The payload of the web service will be in a JSON format that can support input data for a fact at any intersection.
Here is a sample JSON file.
{
"fact_names": ["DRTYEOP1C"]
"intersection": ["week","stor","sku"]
"data_rows": [
                      ["w01_2017","900002","1005",1],
                      ["w01_2017","900002","1008",1]
                  ]
}
This section provides details about using the REST API call to Oracle Identity Cloud Service to interact with APEX/ORDS to access planning data schema web services. The example shows how the REST API calls are typically executed in Oracle Identity Cloud Service.
The REST APIs provide a way to integrate Oracle Identity Cloud Service with custom applications and clients that support REST, such as Java, C#, Go, Python, or Ruby apps.
This tutorial uses Oracle Linux 7.2. It can be executed on other operating systems with a bash terminal (such as Red Hat, Ubuntu, or OSX), or in Windows (using a bash emulator such as git bash). The commands may have small variations on different operating systems. It is recommended that you are familiar with the REST architecture style.
Access to Oracle Identity Cloud Service with authorization to manage Applications (Identity Domain Administrator, Security Administrator, or Application Administrator).
A Linux machine with cURL utility available.
Credentials - Contact an Oracle cloud administrators if you do not have access to the following credentials.
IDCS-client-id
IDCS-client-secret
IDCS-tenant-id
IDCS_URL
Userid
Password
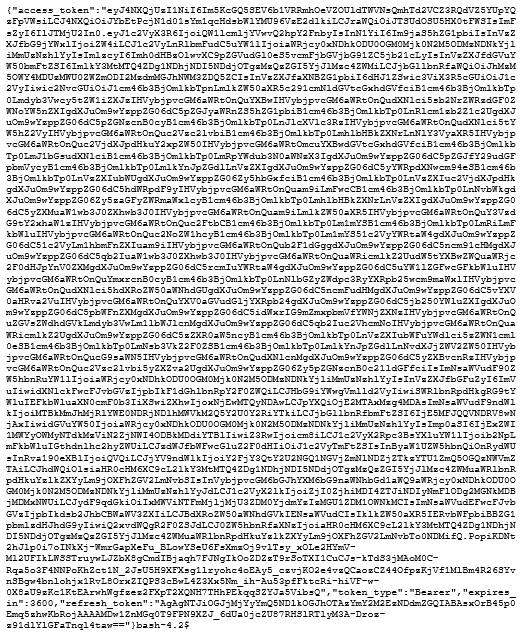
The access_token (Bearer) identifies your client access in Oracle Identity Cloud Service and will be used for subsequent REST API calls. This token is encoded following the JSON Web Token (JWT) standard. Replace the following credentials with the correct values for your environment.
curl -i -u "<IDCS-client-id>":"<IDCS-client-secret>" \
https://<idcs-tenant-id>.<IDCS_URL> \
-H 'Content-Type: application/x-www-form-urlencoded' \
-H 'Host: <idcs-tenant-id>.<IDCS_URL>' \
-d 'grant_type=client_credentials' -d 'scope=urn:opc:idm:__myscopes__'
Example Bearer Token Rest Call
curl -i -u "a3399f80531e4eff82637f0ba5c7d49d":"d3e376c2-d5fb-4d3b-b2d0-3bd52df6f5eb" \
https://idcs-148d8548c42947c983343db9b2e378ec.identity.c9dev2.oc9qadev.com/oauth2/v1/token \
-H 'Accept: application/json' \
-H 'Accept-Language: en' \
-H 'Accept-Version: 1.3.0' \
-H 'Content-Type: application/x-www-form-urlencoded' \
-H 'Host: idcs-148d8548c42947c983343db9b2e378ec.identity.c9dev2.oc9qadev.com' \
-d 'username=oci.admin&password=OracleRetail1&grant_type=password&scope=urn%3Aopc%3Aidm%3A__myscopes__%20offline_access' --tlsv1.2
You will see output that contains the following:
The Access Token request output in JSON format. The return contains the attributes access_token, token_type, and expires_in.
The access_token(Bearer) identifies your client access in Oracle Identity Cloud Service and will be used for subsequent REST API calls. This token is encoded following the JSON Web Token (JWT) standard.
To check the JWT token, you can copy the access_token and verify its value using: https://jwt.io/#debugger-io
The token_type identifies the Access Token as a Bearer token type. In future requests, you will use this token type to identify your token in the Authorization header of your request.
The expires_in identifies the validity period of the Access Token.
|
Caution: These bearer tokens may expire and may have to be regenerated in case a 401 Authorization Required error occurs. |
Token
HTTP/1.1 200 OK
Cache-Control: no-store
Content-Length: 4667
Content-Type: application/json;charset=UTF-8
Date: Fri, 08 Jan 2021 20:46:40 GMT
Pragma: no-cache
Server: Oracle Identity Cloud Service
Strict-Transport-Security: max-age=315360000; includeSubDomains
Vary: Accept-Encoding
Via: 1.1 net-idcs-config
X-Content-Type-Options: nosniff
X-Frame-Options: deny
X-Oracle-Dms-Ecid: Roj^J0TA200000000
X-Oracle-Dms-Rid: 0:1
X-Xss-Protection: 1; mode=block
In this task, you perform your REST API call to Oracle Identity Cloud Service. The objective is to show you how the REST API calls are typically executed in Oracle Identity Cloud Service.To learn more about the application API, refer to the Oracle Identity Cloud Service REST API documentation.
In this example, it is assumed that a publicly accessible ORDS url has been provided to the customer.
Example: http://<hostname>:<port>/ords
RestAPI example url: http://<hostname>:<port>/ords/pds
Replace the bearer token with the value received from "Get Bearer Token."Note that these bearer tokens may expire and may have to be regenerated if a "401 Authorization Required" error occurs.
Output
All measures.
Here is a sample payload.json file with the configuration values.
{"fact_names":["drtyeop1c"],"intersection":["week","stor","sku"],"data_rows":[["w01_2023","1001","900001",55],["w01_2023","1012","900002",4]]}
Invoke the Web Service
Replace the bearer token with the value received in"Get Bearer Token."
Note that these bearer tokens may expire and may have to be regenerated if a "401 Authorization Required" error occurs.
Write PDS Web Service
Replace the bearer token with the value received in "Get Bearer Token."
Note that these bearer tokens may expire and may have to be regenerated if a "401 Authorization Required" error occurs.
Sample Output