| Oracle® Retail Predictive Application Server Cloud Edition Administration Guide Release 22.2.401.0 F72005-01 |
|

 Previous |
 Next |
| Oracle® Retail Predictive Application Server Cloud Edition Administration Guide Release 22.2.401.0 F72005-01 |
|
Previous |
Next |
This chapter describes the following system administration workbooks and wizards:
These workbooks and wizards are found in the Administration task in the taskflow.
RPASCE can be used to set up and maintain user-named and user-defined dimensions within hierarchies. Hierarchy Maintenance is the means by which custom-created dimensions within a hierarchy can be established and maintained through the application interface in order to meet individual business needs.
The configurator can define the dimensions and hierarchical structures specific to the customer's organization. For example, the system can be built to recognize that SKUs roll up into styles, styles roll up into product classes, and so on, within the product hierarchy. Occasionally, you might want to group products according to some ad hoc personal design to suit a particular business need. You can group arbitrary items in a hierarchy to use in functions such as forecasting, replenishment, and measure analysis. These user-defined groupings act as normal dimensional levels. In other words, they allow the user to roll data up from lower levels of aggregation along the hierarchical paths that the user defines.
For example, suppose experience has shown that the accuracy of forecasts for your top 50 products (A products) reflects the relative accuracy of all forecasts. Therefore, you would like to group elements within a user-defined dimension as the top 50 products by designating them "A Products." Then, when you select products in a wizard or look at data in a view, you can change the rollup to your user-defined dimension to see your top 50 products grouped together.
|
Note: Your collection of 50 products may comprise elements from a wide range of product classes or departments, and your grouping scheme may have little to do with the normal dimensional relationships of these items in the product hierarchy.The group of items you designate as "A Products" may change over time as consumer preferences change. From this example, you can see that user-defined dimensions can be used to create any ad hoc groupings to provide additional support in analyzing, selecting, or summarizing data in demand forecasting. The Hierarchy Maintenance interface allows you to change the nature of the groupings as required.The number and names of user-definable dimensions are set by your company when an RPASCE-based solution is initially installed. The positions within each dimension and their associated labels can be altered and maintained through the hierarchy maintenance process.User-definable dimensions can be only defined as leaf dimensions in the hierarchy. Stacking of user-definable dimensions or adding one in-between normal dimensions is not supported. |
Remember that any hierarchy in RPASCE can have user-defined dimensions within it as long as they are set up by your company at the time of installation. The examples in this section refer to the product hierarchy, but other hierarchies can be maintained in the same way.
Suppose you want to designate subclasses in your product hierarchy as either A, B, or C products so that you can group these subclasses together when you view information such as forecasting, replenishment, or measure analysis reports.
To do this, you must maintain a user-defined dimension that allows you to map the subclasses to the various positions of your classification scheme (A, B, or C). The user-defined dimension used in the following example is named "Consignment" To maintain this user-defined dimension, use the Hierarchy Maintenance Wizard.
To access the Hierarchy Maintenance Wizard:
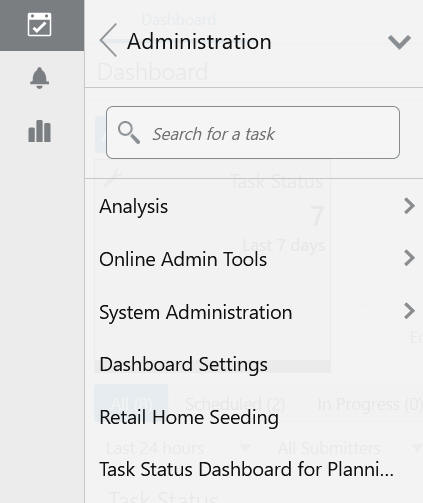
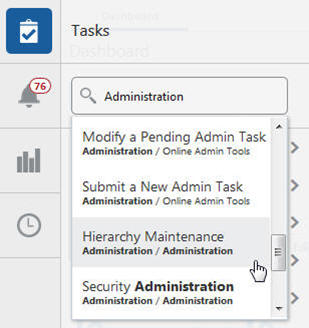
On the main page, click Tasks, then select Administration. The Administration group appears.
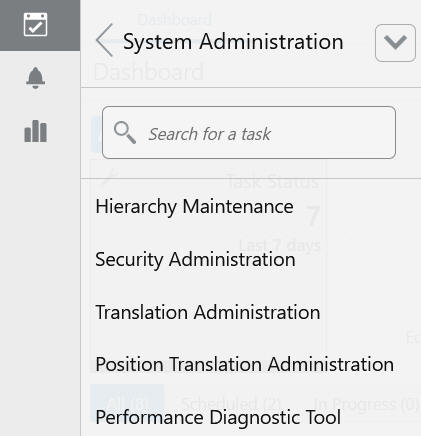
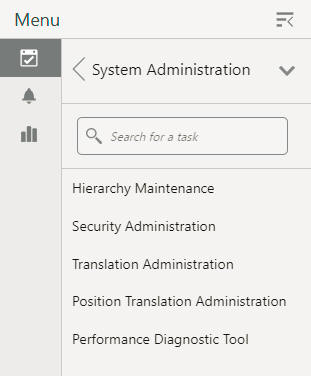
In the Administration group, select System Administration.
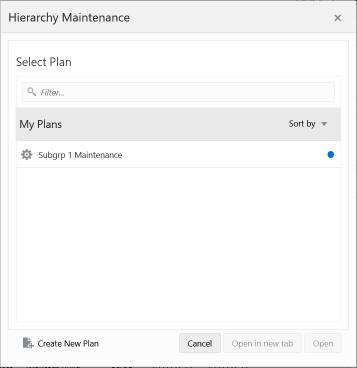
In the System Administration group, select Hierarchy Maintenance. A plan dialog box appears.
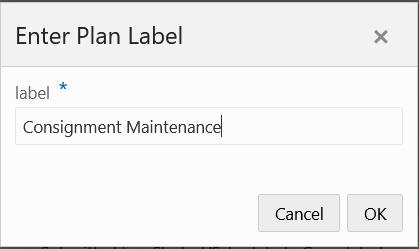
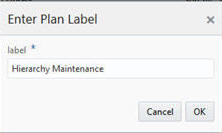
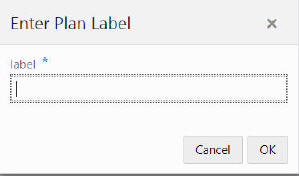
Click Create New Plan to create a new segment. If it is the first segment, the dialog box for entering the label will appear. Otherwise, click Create New Plan, as shown in Figure 4-4, to enter the label for the new segment.
Provide a label for the segment.
A wizard page appears to select the custom dimension to maintain. Select a custom dimension and click Next.
Select the positions to be included into the segment and click Finish.
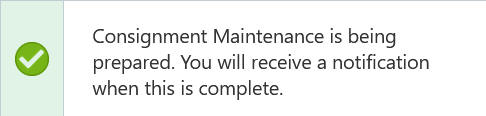
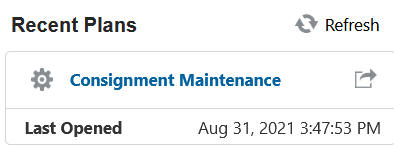
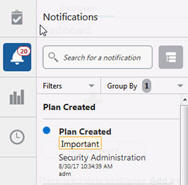
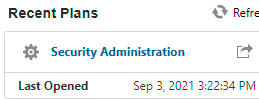
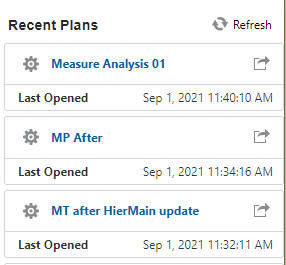
The RPASCE server processes the request. Upon completion, a notification will be sent to the user interface, as shown in Figure 4-6 and a link to open the segment will be available in the Recent Plans box, shown in Figure 4-7.
Click the link to open the segment.
In the position assignment field for the custom dimension, assign a value to each product or location position in the workbook. Enter any text string in a cell. Each unique string is treated as a separate user-defined position within the custom dimension.
After you make your selection, for the changes to take effect, click Calculate and then Commit.
To close the segment, click the X icon next to the segment label on the top of the page. The segment is saved automatically.
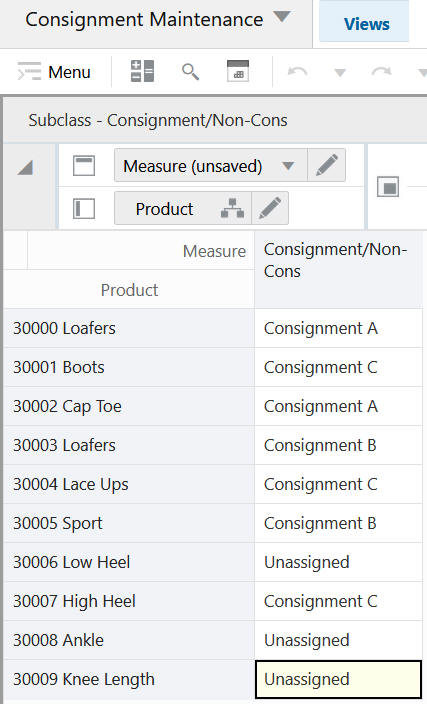
The Hierarchy Maintenance view displays the position assignment fields for the selected custom dimension. Edit the cells associated with the custom dimension as required.
Returning to the example dimension Consignment: You want to classify each selected subclass in your segment as either a Consignment A, a Consignment B, or a Consignment C. This example provides only three positions, or values, in the Consignment dimension; however, you can enter any character string in an individual subclass's Consignment cell. This new string is treated as a separate user-defined grouping. If this is the first time a particular subclass has been mapped to the Consignment dimension, the label assigned to that subclass will not yet be defined. The Consignment field is automatically filled with "Unassigned."
Assign labels to each product with regard to the Consignment dimension. In the following example, products that were previously Unassigned are now designated as Consignment A, B, or C.
|
Note: The RPASCE system is case sensitive when a new position label is entered in the Hierarchy Maintenance segment. After the segment is committed, the typing of the group name is not case sensitive. For example, Consignment B can later be entered as consignment b after the Consignment B group label has been committed. |
After making the Consignment A, Consignment B, or Consignment C designations for the selected subclasses, you must calculate and commit the segment for any changes to take effect.
For this example, labels have now been assigned to the various positions within the Consignment/Non-Cons dimension, and selected products in the product hierarchy have been classified with regard to the custom dimension.
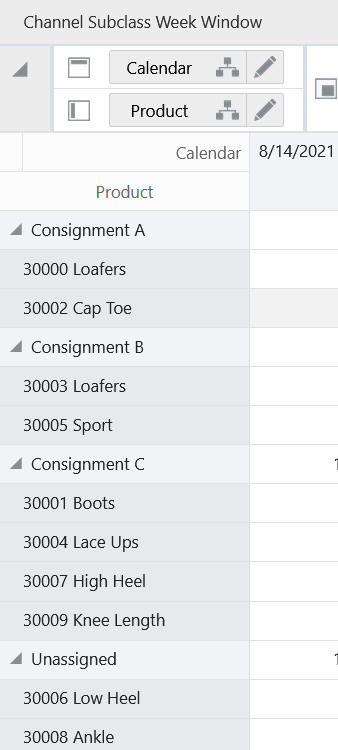
Figure 4-9 displays the results when you access a quick menu in a wizard and change the rollup to the Consignment/Non-Cons dimension. The products shown here are classified according to the position values (Consignment A, Consignment B, or Consignment C) that were assigned while maintaining the Consignment/Non-Cons dimension.
Figure 4-9 Consignment/Non-Cons Dimension Results
Use this procedure to assign product or location items to custom-defined positions within a specialized dimension. Custom-created dimensions are distinct from those in the standard hierarchical roll-ups configured in the system implementation. You can use these dimensions in the same way that you use normal Demand Forecasting levels, aggregating data along these new hierarchical paths.
In the taskflow, select Administration. The Administration activity appears with all the subtasks.
Click Hierarchy Maintenance.
The segment dialog box opens. Select Create New Plan and enter the label of the segment. A Hierarchy Maintenance Wizard window appears.
Select the hierarchy to specify a user-defined dimension (for example, Product or Location). Only the hierarchies that have been set up to contain user-defined dimensions appear here. Click Next.
Select the user-defined dimension to be updated. The number and names of available custom dimensions are set at installation. Click Next.
From the Available Items in the selection wizard, select the items to be mapped to positions within the custom dimension.
Use the Add, Add All, Remove, and Remove All buttons or the drag and drop action to move your selection to the Selected Items section.
After you have selected all the items to appear in your workbook, click Finish. The Hierarchy Maintenance segment is created with the given label and submitted for building the workbook. After the notification is provided, open the workbook.
In the position assignment field for the custom dimension, assign a value to each product or location position in the workbook. Enter any text string in a cell. Each unique string is treated as a separate user-defined position within the custom dimension.
After you make your selection, for the changes to take effect, click Commit (F8) in the bottom right corner. Commit notification will be sent once the commit is successful.
To close the workbook, click X on the top-right corner of the tab.
The Hierarchy Maintenance workbook is displayed. In the position assignment field for the custom dimension, assign a value to each product or location position in the workbook. Enter any text string in a cell. Each unique string is treated as a separate user-defined position within the custom dimension.
The security model in RPASCE includes workbook templates, workbooks, measures, and positions. The levels of security are defined as measure level, position level, and workbook level.
This section provides the basic information on the security model in RPASCE.
During a RPASCE Client deployment, one or more user groups are specified via a deployment property. These groups must be created in OCI IAM. The Cloud Engineering team responsible for setting up the customer's application will have already created the application-specific groups.
Users created as members of these groups gain access to the Client UI.
It may be necessary to add and remove users. This can be done by adding and removing them from the OCI IAM directory.
Position level security allows access control for dimensions on a position-by-position basis. This capability is completely optional. If position level security is not explicitly defined and configured, all users in an application have access to all positions in all hierarchies. After the position level security is defined, access to a position can be granted or denied for individual users, users in a group, or for all users.
Position level security is used when a user selects positions in the wizard before building a workbook. Only positions to which the user has access are available for selection in the wizard, which are then included in the build of the workbook.
Position level security can be defined for any hierarchy (except the calendar) at any level (for example, the class level in the product hierarchy). As positions are added at a level lower in the hierarchy than where the position level security is maintained, access to those positions is automatically granted if a user has access to the parent position. For example, if security is maintained at the subclass level, users are automatically granted access to all the SKUs in a given subclass if they have access to that subclass. This also includes new positions that were added after security was established.
Exactly one dimension in each hierarchy can be defined as the security dimension for the hierarchy. If a security dimension is defined for the hierarchy, all dimensions in the hierarchy have position level security enabled, but position security is set at or above the designated dimension. For example, if the class dimension is designated as the security dimension, an administrator can maintain access to positions in the class dimension or at any level above class.
To specify the security dimension for a hierarchy, the application designer must update the configuration and either rebuild or patch the application.
After a security dimension is defined for a hierarchy, all users in the application default to having access to all positions in any dimension in the hierarchy. Additionally, users automatically have access to any newly added positions. Views in the Security Administration workbook are used to control position access for individual users, user groups, or all users (referred to as world or default access). Three views are provided in this workbook for each hierarchy with a defined security dimension. The default view controls access to positions for all users (for instance, Prod Security Default); one view controls access to positions by user group (for instance, Prod Security Group); and the last view controls access to positions by individual users (for instance, Prod Security User).
Access must be granted at all levels for a user to have access to a position. This means that a position must have a value of true at the levels default/world, group, and user. Table 4-1 demonstrates how access is granted or denied based on all combinations of settings.
In the table, the resulting access in case of different combinations of user, group, and world access is displayed. Based on the settings for User, User Group, and World, the user is either granted or denied access, as shown in the Resulting Access column.
Table 4-1 Grant or Denial of Access by a Combination of Settings
| User | User Group | World | Resulting Access |
|---|---|---|---|
|
Denied |
Denied |
Denied |
Denied |
|
Denied |
Denied |
Granted |
Denied |
|
Denied |
Granted |
Denied |
Denied |
|
Granted |
Denied |
Denied |
Denied |
|
Denied |
Granted |
Granted |
Denied |
|
Granted |
Denied |
Granted |
Denied |
|
Granted |
Granted |
Denied |
Denied |
|
Granted |
Granted |
Granted |
Granted |
|
Note: If a position filter measure is set for a hierarchy in the configuration, it overrides which positions are available for the hierarchy at the application level. Only those positions that are visible to the application can be used with the position level security for the application. For more information, refer to position filter measure section in the Oracle Retail Predictive Application Server Cloud Edition Configuration Tools User Guide. |
Workbook access is either granted or denied. If users have been granted access to a workbook, they can open, modify, and commit the workbook. No distinction is made between read-write-commit, read-write, and read-only access.
Workbook access is automatically granted to the user who built it.
|
Note: A user must have access to the workbook template in order to access the workbook, even if the workbook has world or group access rights. |
Users with administration status automatically have access to all workbook templates.
Another aspect of workbook security is the ability to set limits for the number of workbooks that a user can have saved at any given time. Scenario copies created within a single workspace are also counted in the number of workbooks saved by a user. Limits can be set for a user per template, for a user group per template, or for a template for all users. The limits are evaluated in the above order, which means that a limit defined at user-template overrides any values defined at group-template or template. If the above limits are not defined, the default value is one billion.
The limits are checked when the workbook build process is initiated. When the limit is reached, an error message is displayed informing the user that the workbook build process cannot complete because the limit has been reached. The message also lets the user know what the limit is.
Administration users have full access to all workbook templates, regardless of the access rights that other administration users may assign to them in the Security Administration workbook. The administration user can build the Security Administration workbook to change the access right, so the assignment in the Security Administration workbook does not matter for administration users.
Non-administration users do not have access to the Security administration template, even if the administrator inadvertently assigns them access rights. Table 4-2 provides a full list of such templates that cannot be accessed by non-administration users even if they have been provided the access rights by an administration user.
Table 4-2 Templates Unavailable to Non-Administration Users
| Template Group | Template Name |
|---|---|
|
Online Admin Tools |
Copy from an Existing Admin Task |
|
Delete a Scheduled Admin Task |
|
|
Modify a Scheduled Admin Task |
|
|
Submit a New Admin Task |
|
|
System Administration |
Hierarchy Maintenance |
|
Security Administration |
|
|
Translation Administration |
|
|
Position Translation Administration |
|
|
Performance Diagnostic Tool |
|
|
Task Status Dashboard |
Task Status Dashboard |
|
Dashboard Settings |
Dashboard Settings |
The Security Administration workbook is used for controlling the RPASCE-related security aspects of an RPASCE application. The Security Administration workbook is only accessible to administration users. To make sure the Security Administration workbook is current and in sync with the users and groups in the application, you must rebuild it before making any changes in case it is not freshly built. In a multi-application environment, the values set in the Security Administration workbook are application specific.
|
Note: The Security Administration workbook needs to be committed for any changes made in the Security Administration workbook to take effect. |
Workbook Template Rights view
Dimension Modification Rights view
Position Level Security views
Workbook Template Limits views
Max Domain Session Limit view
Max User Session Limit view
Group Workbook Template Default Rights view
The Workbook Template Rights view is used for setting and maintaining the access permissions of each user to specific workbook templates.
The view contains a drop-down list for each available workbook template and user combination. To grant a user access rights to a workbook template, select one of the following options from the drop-down list for that workbook template:
Denied
Read-Only
Full Access
The Read-Only permission on a template applies only to actual workbooks created by the template. For templates that do not generate a workbook, but only run through a wizard process for other purposes, the Read-Only permission for a user on that template does not prevent the user from running through the wizard.
The Dimension Modification Rights view allows the administrator to determine which dimensions, if any, a user can modify. Its purpose is to provide a filtered list of user-defined dimensions to be shown on the dimension selection wizard page of the Hierarchy Maintenance template. The view contains a check box for each available user and dimension combination. A check mark in the cell indicates that the user is permitted to modify the specified dimension.
|
Note: The dimension modification rights only apply to the Hierarchy Maintenance template, which is only available to administration users. Changing these rights for normal users has no effect. This view does not have any impact on the ability of the user to add, modify, or delete dimension positions using the Dynamic Position Maintenance feature. |
The Position Level Security views are used to grant or deny access to positions for individual users, user groups, or all users.
For each hierarchy that has position-level security enabled, three views are available, at the user level, the group level, and the world/all users level. For example, for the product hierarchy, the views are named prod/user position security, prod/group position security, and prod/all position security.
The Workbook Template Limit views are used to limit the number of workbooks that the user can have. The template limits can be set at the user level, the group level, or the all users level. The three views are named workbook limit per user/template, workbook limit per group/template and workbook limit per template. The limits set in the user view override the group view, which overrides the template view.
The limits are checked when the user begins the segment build process. If the limit has been reached, an error message appears that informs the user that the workbook build process cannot complete because the limit has been reached.
|
Note: Scenario workbooks within the workspace are also included in the workbook count. |
The Max Domain Session Limit view is used to limit the number of user sessions that can be created in an application by all users of that application. This limit is set at the application level.
The limit is checked during user login and when the limit has been reached, an error message is displayed to the user indicating that the login has failed because this limit has been reached.
The Max User Session Limit view is used to limit the number of concurrent user sessions that each user can create in an application. The administration user can control the maximum number of concurrent sessions that are allowed for any individual user using this view.
This limit is checked during user login and when the limit has been reached, an error message is displayed to the user indicating that the login has failed because this limit has been reached.
The Group Workbook Template Default Rights view is used for setting and maintaining default access permissions for each user group for specific workbook templates. The worksheet contains a drop-down list of available rights for each available workbook template and user group combination.
To grant a user group access rights to a workbook template, select one of the following options from the drop-down list for that workbook template: Denied, Read Only, or Full Access.
|
Note: These tasks are performed through the Security Administration workbook. This workbook is only available to system administrators. |
In the taskflow, select Administration. The Administration activity appears with all the subtasks.
Click System Administration. Then click Security Administration.
Figure 4-12 Security Administration Task
A new segment is created and a notification is issued. If the segment already exists, the existing workbook associated with the segment is re-opened.
You can also open the segment from recent plans.
The Workbook Template Rights view enables you to set one of the following access privileges to each workbook template for a user:
Denied
Read-Only
Full Access
To set or modify a user's access to workbook templates:
In the taskflow, select Administration.
Click System Administration.
Click Security Administration.
A new segment is created, and a notification is issued. If the segment already exists, the existing workbook associated to the segment is re-opened. You can also open the segment from recent plans.
On the Workbook Template Rights view, for each workbook template, select one of the access privileges for the users you want.
After you make your selection, for the changes to take effect, click Commit (F8), located under the bottom right corner. A notification is issued once the commit is done.
The data modified is autosaved.
To close the workbook, click X on the top-right corner of the tab.
In the taskflow, select Administration.
Click System Administration.
Click Security Administration.
A new segment is created, and a notification is issued. If the segment already exists, the existing workbook associated to the segment is re-opened. You can also open the segment from recent plans.
On the Dimension Modification Rights view, select each dimension for which the user needs modification rights. For dimensions that the user must not be able to modify, make sure there is no check mark.
After you make your selection, for the changes to take effect, click Commit (F8), located under the bottom right corner. A notification is issued once the commit is completed.
The data modified is autosaved.
To close the workbook, click X on the top-right corner of the tab.
In the taskflow, select Administration.
Click System Administration.
Click Security Administration.
A new segment is created, and a notification is issued. If the segment already exists, the existing workbook associated to the segment is re-opened. You can also open the segment from recent plans.
On the Position Level Security view, select the view for which security must be set or modified: User, User Group, or World.
By default, the dimension (level) at which position level security is enabled appears. To manage security at a level above the designated level (only levels above are possible), right-click and select Rollup to view the available dimensions.
To grant access to a position, select the check box in the relevant cell.
|
Note: A user must have access at the User, User Group, and World levels to have access to a position. |
After you make your selection, for the changes to take effect, click Commit (F8), located under the bottom right corner. A notification is issued once the commit is completed.
The data modified is autosaved.
To close the workbook, click X on the top-right corner of the tab.
In the taskflow, select Administration.
Click System Administration.
Click Security Administration.
A new segment is created, and a notification is issued. If the segment already exists, the existing workbook associated to the segment is re-opened. You can also open the segment from recent plans.
On the Workbook Limit Per User/Template view, for a workbook template, set an appropriate value as the limit for a user.
After you make your selection, for the changes to take effect, click Commit (F8), located under the bottom right corner. A notification is issued once the commit is completed.
The data modified is autosaved.
To close the workbook, click X on the top-right corner of the tab.
In the taskflow, search for Administration activity.
Click System Administration.
Click Security Administration.
A new segment is created and a notification is issued. If the segment already exists the existing workbook associated to the segment is re-opened. You can also open the segment from recent plans.
On the Workbook Limit Per Template view, for a workbook template, set an appropriate value as the limit.
After you make your selection, for the changes to take effect, click the Commit (F8), located under the bottom right corner. A notification is issued once the commit is completed.
The data modified is autosaved.
To close the workbook, click X on the top-right corner of the tab.
In the taskflow, select Administration.
Click System Administration.
Click Security Administration.
A new segment is created, and a notification is issued. If the segment already exists, the existing workbook associated to the segment is re-opened. You can also open the segment from recent plans.
On the Workbook Limit Per Group/Template view, for a workbook template, set an appropriate value as the limit for the user group.
After you make your selection, for the changes to take effect, click Commit (F8), located under the bottom right corner. A notification is issued once the commit is completed.
The data modified is autosaved.
To close the workbook, click X on the top-right corner of the tab.
RPASCE uses a two-state authorization model. Users of the system are either administration or non-administration users. A number of interactions with the system are privileged and may only be performed by administration users. This section describes how the system reacts when the administrative privileges of administration users are removed but the users themselves are not removed from the system.
Such a case can occur as a result of a change of role in the customer organization or because a user is given temporary privileges in order to perform some operation that requires privileges. (Examples include working in an administrative template such as translation administration or measure analysis or in saving template-level formatting.)
This section describes the withdrawal scenario for the Security Administration Workbook.
When a non-administration user's workbook template access is modified by the administrator, the server does the following:
The user is prompted with the following message when the user performs operations that are not permitted.
"Administrator has modified access to this template. You can either ask administrator to remove the restriction or you can delete the segment."
When a user's access right to a workbook template has been withdrawn, the user will be denied access to all segments and workbooks from that template.
When a user's access right to a workbook template has been changed to read-only, the user will not be allowed to perform any operation that may affect data in the application, including calc, commit, custom menu, and saving the format for group or template.
Commit Subsystem
Commit Subsystem will fail, pending commits from the template to which access rights have been withdrawn or changed to read-only for the submitter of the commit.
The Measure Analysis view allows the user to view specific measure data for the positions selected from the measure's associated hierarchies. Each Measure Analysis view is displayed at a different intersection, depending on the measure selections made in the wizard. This intersection is shown in the view title bar.
Although a common use of the Measure Analysis workbook is to view actual sales data, the workbook is not restricted to presenting sales data alone. The user can view any data loaded into the RPASCE master database, such as selling prices, shipments, and orders. The Measure Analysis Wizard provides a list of all stored measures that have an insertable measure property set to true. The user simply chooses the measures to be displayed in the new workbook.
The Measure Analysis view allows the user to view the chosen measure data for the positions selected from the measure's associated hierarchies. Each Measure Analysis view is displayed at a different dimensional intersection, depending on the measure selections made in the wizard. This dimensional intersection is shown in the view title bar.
Figure 4-15 Measure Analysis View Example
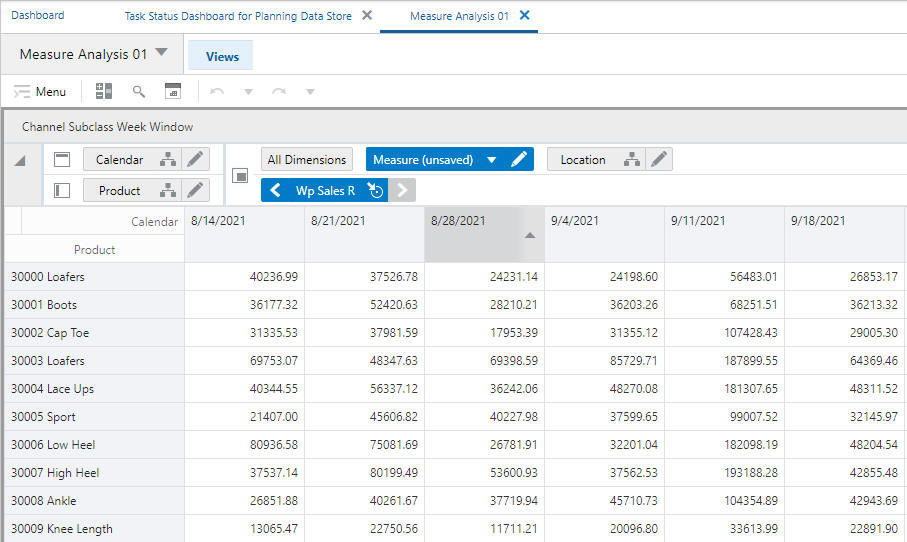
Figure 4-15 shows a Measure Analysis view that displays Sales data for several items in a particular store. The location/product/calendar dimensional intersection of this view, as shown in the title bar, is SubClass, Channel, WEEK. The Sales measure, because it is registered as a read/write measure, can be edited in this view. However, only an administration user can commit overwrites to writable measures in this workbook.
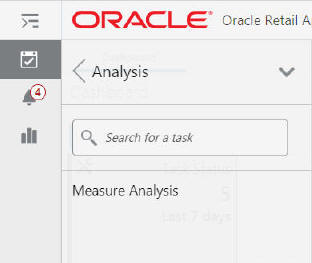
In the taskflow, select Administration. The Administration activity appears with all the subtasks.
Click Measure Analysis.
The segment dialog box opens. Select Create New Plan and enter the label of the segment.
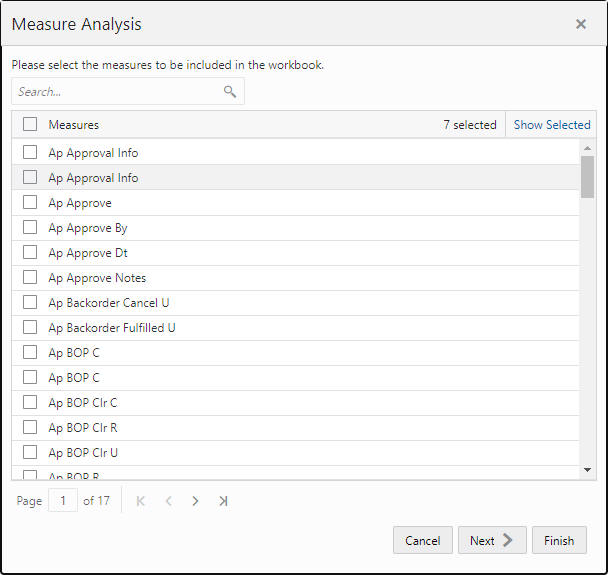
A Measure Analysis Wizard window appears. Only measures that are accessible to current users and have the insertable property set to true are displayed. Select the measures to be included in the workbook.
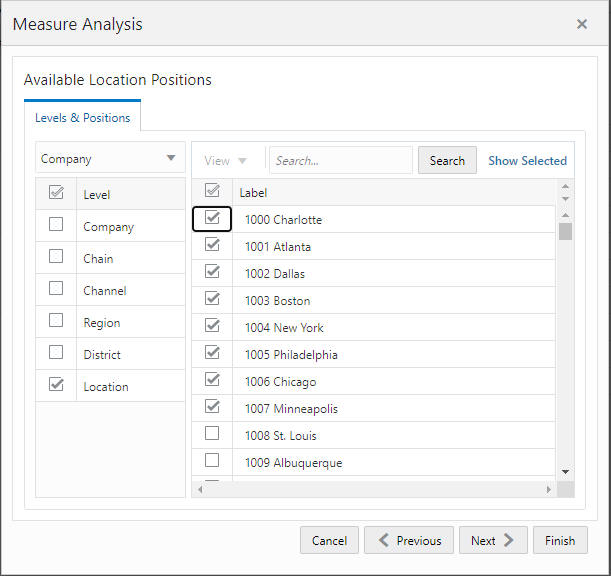
Based on the common base intersection of all the measures selected., a sequence of Hierarchy Selection wizards is displayed. Use these wizards to select the positions to be included in the workbook. The Location Selection wizard (as an example) is shown in Figure 4-19.
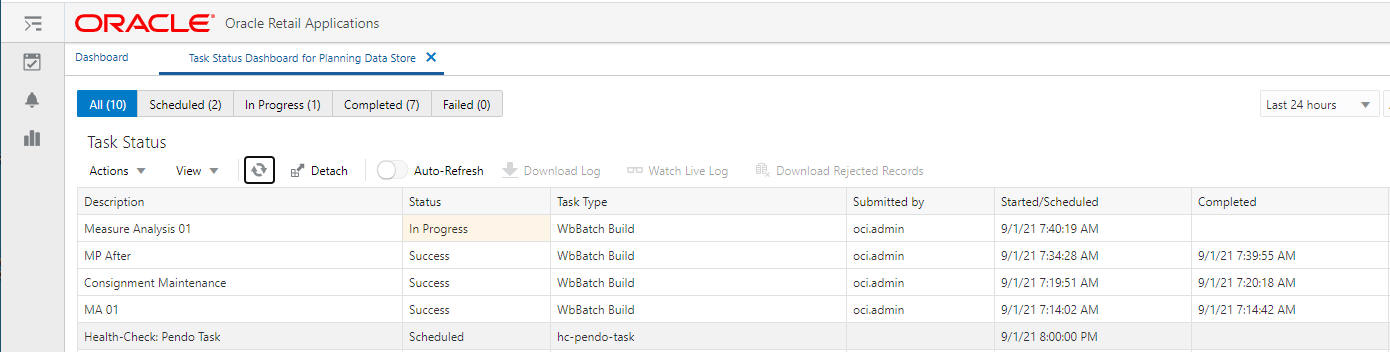
Use the wizards to make the appropriate selections and click Finish. A segment is created, as shown in Figure 4-20.
You will receive a notification once the segment is built. You can open it from Recent Plans, as shown in Figure 4-21.
Click the segment name to open the newly created Measure Analysis segment. The segment has one window per intersection, named with the level names. All measures that have the same base intersection will be added into the same window.
You cane edit the measure at the base level if the measure's base state is Write and at the aggregated level if the measure's agg state is Write, provided a valid defSpread method has been configured.
In the taskflow, select Administration. The Administration activity appears with all the subtasks.
Click Measure Analysis.
The segment dialog box opens. Select Create New Plan, and enter the label of the segment. A Measure Analysis Wizard window appears.
|
Note: To open an existing Measure Analysis workbook, users can open the segment dialog box from step 3, and then go to step 8. |
In the Workbook Wizard window, select the measures you want to include in the new workbook. You can use the Search field to filter the list of items if it is available. Use the check boxes to select items or use the All options to select or deselect items in the multi-select list.
Click Next. Based on each hierarchy specified in the base intersection of the selected measures, a hierarchy wizard appears.
In the hierarchy wizard, select the relevant positions and then click Next. Repeat this step for each hierarchy wizard.
Click Finish. A segment is created, and you will receive a notification once the segment is built and can open it from recent plans.
On the Measure Analysis View(s), view the stored data associated with the measures and hierarchy positions selected in the wizard. Make any changes as required. As an administrator, you can commit the changes.
The XML schema contains information for all groups and users that are imported into the application. Since this file can be edited, it does not contain any password information. Each group and user contains an XML attribute with the group or user name as well as the inner tags listed in Table 4-3.
|
Note: All XML tags must be in all caps. |
Table 4-3 XML Schema Tags
| Outer Tag | Inner Tag | Description |
|---|---|---|
|
GROUP |
LABEL |
The group's label. |
|
USER |
LABEL |
The user's label. |
|
USER |
DFLT_GRP |
The user's default group. |
|
USER |
OTHER_GRPS |
A comma-separated list that contains all the other groups that the user is associated with. |
|
USER |
ADMIN |
If this value contains T, the user is an admin. |
|
USER |
LOCKED |
If the value contains T, the user is locked when the file is imported. |
|
USER |
INHERITRIGHTS |
If this value contains T, the user will inherit the default rights defined for all the groups the user belongs to. |
Here is a sample users.xml file.
<?xml version="1.0" ?>
<VERSION>1.0</VERSION>
<USER_LIST version="2.0">
    <GROUPS>
        <GROUP NAME="grp1">
            <LABEL>Administrators</LABEL>
        </GROUP>
        <GROUP NAME="grp1">
            <LABEL>Group 1</LABEL>
        </GROUP>
        <GROUP NAME="grp2">
            <LABEL>Group 2</LABEL>
        </GROUP>
        <GROUP NAME="grp3">
           <LABEL>Group 3</LABEL>
        </GROUP>
    </GROUPS>
    <USERS>
        <USER NAME="adm1">
            <LABEL>admin 1</LABEL>
            <DFLT_GRP>adms</DFLT_GRP>
            <ADMIN>T</ADMIN>
        </USER>
        <USER NAME>="adm2">
            <LABEL>admin 2</LABEL>
            <DFLT_GRP>adms</DFLT_GRP>
            <ADMIN>T</ADMIN>
            <LOCKED>T</LOCKED>
        </USER>
        <USER NAME="usr1">
            <LABEL>user_1</LABEL>
            <DFLT_GRP>grp1</DFLT_GRP>
            <OTHER_GRPS>grp2</OTHER_GRPS>
        </USER>
        <USER NAME="usr2">
            <LABEL>user_2</LABEL>
            <DFLT_GRP>grp2</DFLT_GRP>
            <OTHER_GRPS>grp1,grp3</OTHER_GRPS>
        </USER>
        <USER NAME="usr3">
            <LABEL>user_3</LABEL>
            <DFLT_GRP>grp1</DFLT_GRP>
            <OTHER_GRPS>grp1</OTHER_GRPS>
        </USER>
    </USERS>
</USER_LIST>
The List Logged-In Users task can be used by the administrator to list all the users logged into the application.
The Dashboard is a feature in RPASCE that is loaded when a user first logs into the system. The dashboard gives you access to key statistics. You can use the dashboard to analyze the health of the business. The dashboard must be refreshed periodically, as new products and locations are added. This typically happens weekly, but depends on your administrator's settings. The measure data of existing products and locations in the dashboard can be refreshed at any time to view updated changes.
The dashboard is supported by a workbook template that must be configured based on the customer business. It also requires the configuration of a JSON file using the Config Tools and uploaded during the building of the application. See Oracle Retail Predictive Application Server Cloud Edition Configuration Tools User Guide for more information.
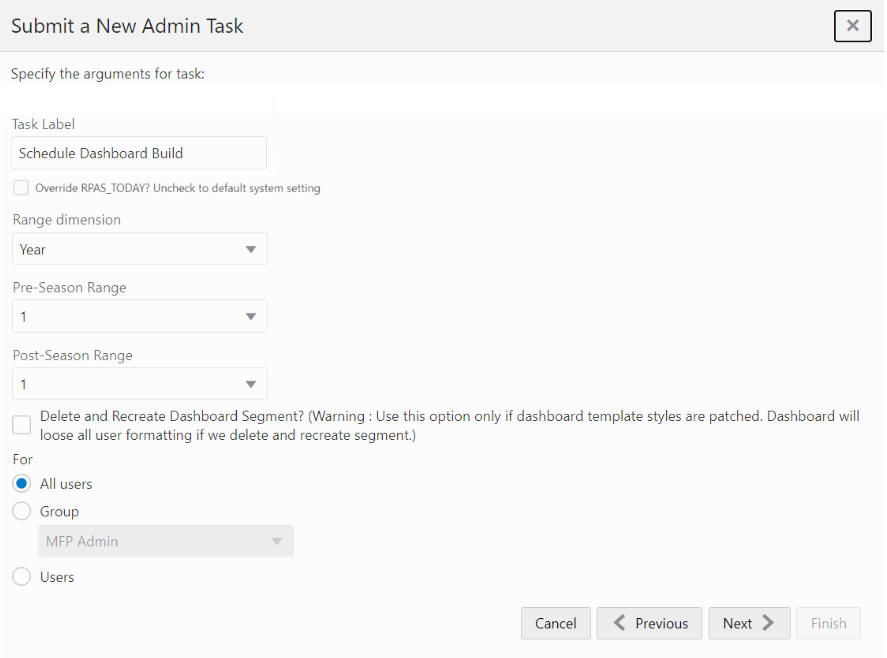
The dashboard workspace can be built using Schedule Dashboard Build, which can be accessed from the System Administration Tasks Online Admin task group.
The following options are available:
|
Note: For the configured GA dashboard profiles, the preferred selections are Range dimension: Half, Pre-Season Range: 1, and Post-Season Range: 1 |
Task Label. Enter the name of the build task in order to review the status of a build.
Override RPAS_TODAY (Optional). Select the check box to indicate that the task level RPAS_TODAY has priority over the application level RPAS_TODAY.
Range dimension. The Calendar dimension against which the dashboard is pre-ranged.
Pre-Season Range. The number of periods of the Range level that must be included before RPAS_TODAY.
Post-Season Range. The number of periods of the Range level that must be included after RPAS_TODAY.
Delete and Recreate Dashboard Segment. Use only if the dashboard template styles are patched. The use of this option results in the loss of all dashboard formats.
Note that if the Delete and Recreate Dashboard Segment is checked, the segment will not be deleted if the user is currently logged into the application. The task does not fail, but this message will be in the log: "Unable to delete the dashboard segment for the User." The effect of this is that the user will not see the dashboard template style changes (such as adding a new view) which necessitated the Delete and Recreate.
Users. Select who can access the dashboard: All Users or User Groups.