| Oracle® Retail Size Profile Optimization User Guide for the RPAS Fusion Client Release 14.1 E56467-01 |
|

 Previous |
| Oracle® Retail Size Profile Optimization User Guide for the RPAS Fusion Client Release 14.1 E56467-01 |
|
Previous |
This chapter contains the following sections:
Workflow for Prepack Optimization at the Complex Pack Level L02- Fashion Items
Workflow for Prepack Optimization at the Subclass/Class Level (L03 and L04)
Workflow for Prepack Optimization at the Complex Pack Level- Non-Fashion Items
Prepack Optimization can be used by Prepack Analysts to determine the optimal combination of prepack configurations to meet individual store-level requirements. While optimizing returns for the retailer, Prepack Optimization takes into account competing constraints such as presentation minimums, vendor specifications, and storage limitations.
The principles driving Prepack Optimization are:
Reducing supply chain handling costs
Minimizing misallocation, resulting in lost sales at some stores (Under-allocation Cost) and markdowns at other stores (Over-allocation Cost)
Striking a balance with the complexity due to multiple prepack configurations
Oracle Retail Prepack Optimization provides a unified workflow to determine prepack configurations for varied types of retail merchandise such as:
Sized merchandise (for example, fashion)
Single style - single color - multiple units of the same size (also called bundles)
Single style - multiple colors - multiple units of each style-color-size
Different styles - multiple units of different style-color-size
Non-sized merchandise (for example, hardlines)
This section details some of the basic concepts used in the Prepack Optimization module.
Clustering is widely used in retail to group large number of similar entities into a manageable number of clusters. Size profiles of each store tends to be unique, but grouping stores that have approximately the same profile helps reduce the complexity of the supply chain.
Stores/locations that have similar size profiles are grouped to form a size cluster. Size clusters in the context of SPO are useful for determining prepacks that are best suited to each cluster, and may be used in downstream applications such as Assortment Planning (AP) and Allocation. For more information on location clusters, see Chapter 6, "Location Clustering".
Prepacks are a predefined combination of multiple SKUs that facilitate efficient shipping, warehousing, handling, and distribution.
A complex pack is a prepack that contains more than one item. In the context of fashion merchandise, each style-color is referred to as an item; whereas, in the context of hardlines and grocery, each SKU is referred to as an item.
A pack that contains one unit of each available size in the specified size range is termed as a flat pack in prepack optimization. This classification is applicable only to fashion merchandise.
Some prepack configurations may have to be forced into Purchase Orders because they are mandated by the vendor or the buyer. This could be based on the vendor or buyer's past experience or logistical constraints. Such prepacks are termed fixed prepacks.
Prepack Optimization determines the optimal number of prepack configurations required to minimize misallocation of sales (resulting in lost sales or markdowns), while keeping the number of prepacks to a minimum (to reduce operational costs).
When the average size profile of a chain is analyzed, the sizes that contribute to the majority of sales across most stores are called the core sizes. The other sizes that contribute to lower sales or are sold at fewer stores are called the fringe sizes.
It represents costs such as those associated with picking, moving, and loading each unit of merchandise within a warehouse. Handling cost is represented as average cost per unit of merchandise and it usually varies by the class of merchandise, such as clothing, footwear, and home appliances.
This is the notional value lost (sales or margin) as a result of supplying any store with merchandise less than its true sales potential.
This is the loss incurred due to the supply of more merchandise to a store than it has potential to sell. This could result in clearance markdowns or expiration.
Some of the features of the Prepack Optimization activity of SPO are as follows:
Computes optimal prepack configurations, depending on the number of prepacks the retailer may be able to buy, optimized for each DC delivery or Purchase Order, while minimizing misallocation and handling cost
Suggests prepack configurations based on planned store receipts, historical sales, or a Bulk Purchase Order
Recommends the optimal number of prepack configurations to strike a balance with supply chain complexities
Takes into account pack-level constraints to ensure conformity to logistical and storage constraints
Accounts for size-level constraints to enable user-specified distribution of sizes
Enables the specification of pre-defined prepacks to accommodate reuse of existing or vendor-specified prepack configurations
Provides Prepack Analysts with the ability to alter parameters and perform what-if analysis
Offers the option to manually override the optimal solution recommended by the tool if the Analyst prefers
Specifies validity dates for the prepacks, based on the Purchase Orders with which they are associated
Enables prepack optimization at various levels- specifically for selected Items or generically at higher levels of merchandise dimension, such as Class or Department
Prepack optimization is implemented as a module within SPO. Retailers who have implemented AP and SPO can leverage this capability from within AP.
The Prepack Optimization activity contains a set of workbook templates to support the initialization, review, and approval of optimized prepacks. The process of optimization can be done online or as a batch process. For more details on the batch processes, see the Oracle Retail Size Profile Optimization Implementation Guide.
The typical users of Prepack Optimization are as follows:
Administrators: An administrator performs tasks such as defining items for complex packs, setting optimization parameters, and defining the fringe sizes. These tasks are performed using the following workbooks in the Prepack Optimization Administration group:
Fringe Size Management Task (for fashion merchandise only)
Analysts: A Prepack Optimization Analyst performs tasks such as initiation of optimization, review of the optimized configurations, and approval/overriding of the suggested configurations.
Initiation of optimization and approval of optimized prepacks can be executed in either of the following ways:
If a detailed review of the optimization configurations and what-if analysis is required, manual override of values is preferred, and automation is not of primary importance, use the Prepack Optimization and Analysis Task.
If there are multiple Prepack Optimization Analysts processing voluminous data simultaneously, optimization can be automated, using a batch process. In this case, the approval of the optimized prepacks can be executed using the Batch Result Approval Task. For more details on the batch processes, see Oracle Retail Size Profile Optimization Implementation Guide.
Prepack Optimization depends on several parameters that are specific to each department. For example, DC Weeks of Supply, Handling Costs, Maximum Pack Size, and Over/Under-allocation Cost are likely to be uniform within a department. The Prepack Administrator can maintain these department-specific values using the Set Default Optimization Parameters view. For more information on this view, see Set Default Optimization Parameters View.
On the other hand, some parameters are uniform across all departments. Such global parameters can be maintained using the Set Global Optimization Parameters view. For more information on this view, see Set Global Optimization Parameters View.
If the department-level defaults are not specified for certain departments, the tool uses the global-level values by default.
|
Note: Prepack Analysts can override some global and department-level parameters at the item-level in the later steps of the workflow. |
To open the Optimization Parameter Administration workbook, perform the following steps:
Click the Create New Workbook icon on the Optimization Parameter Administration task.
You may be prompted to select a domain if you have access to more than one domain. For information on domain selection, see "Selecting the Domain when Creating a New Workbook" in Chapter 2.
The Select Product screen appears. Select the departments in which you want to maintain default parameters and click Finish.
The Optimization Parameter Administration workbook is built and the following views are displayed:
Use this view to define the global parameters for prepack optimization. These values will take effect for all products unless default values are assigned using the Set Default Optimization Parameters View.
Table 7-1 Set Global Optimization Parameters Measures
| Measure | Description |
|---|---|
|
Global Incremental Improvement Threshold |
Use this parameter to assign the minimal cost saving (%) required to justify the adding of another prepack. For example, in the above figure, the value is 10%. So, additional prepack configurations will be suggested only if the associated cost savings is more than 10%. |
|
Global Eaches Enable Settings |
Use this parameter to define whether or not eaches can be purchased for the specified DC Receipt. The possible values for this measure are:
|
|
Global DC Week Of Supply |
Use this parameter to define the number of weeks of forward store receipts that needs to be covered by each DC Delivery. |
|
Global Handling Cost |
Use this parameter to specify the logistics and handling costs associated with the product. |
|
Global Maximum Pack Size |
Use this parameter to define the upper limit for the calculation of prepack size. The maximum pack size may be dictated by restrictions of storage and handling capacities. |
|
Global Maximum Units per SKU |
Use this parameter to define the highest number of units per pack that the solver uses for prepack optimization. |
|
Global Minimum Pack Size |
Use this parameter to define the lower limit for the calculation of prepack size. |
|
Global Minimum Units per SKU |
Use this parameter to define the least number of units per pack for prepack optimization. |
|
Global Over Allocation Cost |
Use this parameter to define the cost incurred due to the supply of more merchandise to a store than it has potential to sell. This could include the loss incurred due to clearance markdowns or expiration. |
|
Global Mandatory Flat Pack |
Use this drop-down to indicate whether or not flat packs should be compulsorily included in the optimization of prepacks. |
|
Global Under Allocation Cost |
Use this parameter to define the cost associated with the opportunity lost as a result of supplying any store with merchandise less than its true sales potential. |
|
Global Valid Pack Size |
Use this parameter to define the preferred pack sizes, other than the global minimum and maximum sizes defined above. Provide a list of comma-separated values. During pack size calculation, the tool will consider only the sizes mentioned here, and ignore the other values. If left blank, all values between the defined minimum and maximum will be considered valid. |
While the Set Global Optimization Parameters view enables you to define the parameters for the entire chain, the Set Default Optimization Parameters view aids in assigning department-specific values for the same parameters. For example, the item sizes and associated costs of footwear may vary vastly from those of garments; similarly, there are differences between fashion merchandise and electronics or hardware. Therefore, the Set Default Optimization Parameters view facilitates the definition of parameters for the departments whose values differ from the global values set in the Set Global Optimization Parameters View.
|
Note: If you define parameters for your department here, then the parameters defined in the global workbook are effectively ignored. |
Table 7-2 Set Default Optimization Parameters Measures
| Measure | Description |
|---|---|
|
Default Incremental Improvement Threshold |
Use this parameter to assign the minimal cost saving (%) required to justify the adding of another prepack. For example, in the above figure, the value is 10%. So, additional prepack configurations will be suggested only if the associated cost savings is more than 10%. |
|
Default Eaches Enable Settings |
Use this parameter to define whether or not eaches can be purchased for the specified DC Receipt. The possible values for this measure are:
|
|
Default DC Week Of Supply |
Use this parameter to define the number of weeks of forward store receipts that needs to be covered by each DC Delivery. |
|
Default Handling Cost |
Use this parameter to specify the logistics and handling costs associated with the product. |
|
Default Maximum Pack Size |
Use this parameter to define the upper limit for the calculation of prepack size. The maximum pack size may be dictated by restrictions of storage and handling capacities. |
|
Default Maximum Units per SKU |
Use this parameter to define the highest number of units per pack that the solver uses for prepack optimization.For larger packs, use this to restrict complexity. Set this value to 1 to define bundles. |
|
Default Minimum Pack Size |
Use this parameter to define the lower limit for the calculation of prepack size. |
|
Default Minimum Units per SKU |
Use this parameter to define the least number of units per pack for prepack optimization. |
|
Default Over Allocation Cost |
Use this parameter to define the cost incurred due to supply of more merchandise to a store than it has potential to sell. This could include the loss incurred due to clearance markdowns or expiration. |
|
Default Mandatory Flat Pack |
Use this drop-down to indicate whether or not flat packs should be compulsorily included in the optimization of prepacks. |
|
Default Under Allocation Cost |
Use this parameter to define the cost associated with the opportunity lost as a result of supplying any store with merchandise less than its true sales potential. |
|
Default Valid Pack Size |
Use this parameter to define the preferred pack sizes, other than the default minimum and maximum sizes defined above. Provide a list of comma-separated values. During pack size calculation, the tool will consider only the sizes mentioned here, and ignore the other values. If left blank, all values between the defined minimum and maximum will be considered valid. |
To open the Complex Pack Maintenance workbook, perform the following:
Click the Create New Workbook icon on the Complex Pack Maintenance task.
You may be prompted to select a domain if you have access to more than one domain. For information on domain selection, see "Selecting the Domain when Creating a New Workbook" in Chapter 2.
The Select Product screen appears. Select the items to be included in the complex packs and click Next.
The Select Complex Pack screen appears. Select the IDs to be used for the complex packs and click Finish.
The Complex Pack Maintenance workbook is built and the Assign Items to Complex Packs View is displayed.
Use this view to select items for each complex pack. These items can belong to different Classes or Departments.
Use the Style-color to Complex Pack Map checkbox to include the items that can be packed together for the corresponding Complex Pack ID. The complex pack can be assigned a label using the Complex Pack Description measure so that the pack can be recognized in the downstream processes.
For example, in Figure 7-9, the items added to Complex Pack 02 are 1000002 Suede Loafer Tobacco and 1000003 Leather Loafer Tobacco and the label assigned to this complex pack is Tobacco Loafers.
To open the Fringe Size Management workbook, perform the following:
Click the Create New Workbook icon on the Fringe Size Management task.
You may be prompted to select a domain if you have access to more than one domain. For information on domain selection, see "Selecting the Domain when Creating a New Workbook" in Chapter 2.
The Fringe Size Management wizard is displayed. Select the size ranges for which you want to identify fringe sizes and click Finish.
The Size Range Management workbook is built and the Identify Fringe Size View is displayed.
Use this view to define fringe sizes for each size range. If this data is not maintained for a size range, then all sizes for that size range will be considered to be core sizes.
Use the Fringe Size Flag checkbox to define the fringe sizes. For example, in Figure 7-12, for Master Men's Shoes, the sizes 6-8 and 13-16 have been identified as fringe sizes and sizes 9-12 have been identified as core sizes.
|
Note: The views explained in Optimization Parameter Administration Task, Fringe Size Management Task and Complex Pack Maintenance Task are used primarily by the Prepack Optimization Administrators, whereas the views of Prepack Optimization and Analysis Task and Batch Result Approval Task are typically used by the Prepack Optimization Analysts. |
To open the Prepack Optimization and Analysis workbook, perform the following:
Click the Create New Workbook icon on the Prepack Optimization and Analysis task.
You may be prompted to select a domain if you have access to more than one domain. For information on domain selection, see "Selecting the Domain when Creating a New Workbook" in Chapter 2.
The Select Optimization Level screen appears. Select the level at which you want to perform optimization and click Next.
Based on the level selected, the dynamic workbook build capability is leveraged. This creates tasks and steps that are specific to the choice that is made in this step.
The parameters visible in the views of the Prepack Optimization and Analysis task are dependant on the optimization level selected for optimization.
Level1 (L01) corresponds to the item level and represents the lowest level at which prepack optimization can be performed. The workflow corresponding to this level is detailed in Workflow for Prepack Optimization at the Item Level L01.
Level2 (L02) corresponds to complex pack items. This level is selected by default if you select Level1.
The prepack optimization process for fashion items differs from that for non-fashion items. The workflow corresponding to the fashion items is detailed in Workflow for Prepack Optimization at the Complex Pack Level L02- Fashion Items. The workflow corresponding to the non-fashion items is detailed in Workflow for Prepack Optimization at the Complex Pack Level- Non-Fashion Items.
Level3 (L03) corresponds to the subclass level and Level4 (L04) corresponds to the class level. The workflow corresponding to these levels is detailed in Workflow for Prepack Optimization at the Subclass/Class Level (L03 and L04).
The Select Data Source screen is displayed. Select the required source for the data and click Next.
To seed the data for calculation of optimized prepacks, you can use data from either the assortment plan at the store level or the last year's sales. You can also override these values to provide ad-hoc values for calculation.
The Select Calendar screen is displayed. Select the period for prepack optimization and click Next.
Planned receipts or last year sales data for the selected weeks will be brought into the workbook after the items have been selected.
The Select Product screen is displayed. Select the items for prepack optimization and click Next.
The Select Profile screen is displayed. Select the desired source for seeding data in the views.
The Prepack Optimization and Analysis workbook is built and the following steps are displayed:
The views under this step are:
Use this view to input the parameters required to compute the DC Receipts for which the prepack configurations must be calculated.
The following table describes the measures available in this view.
Table 7-3 Measures in the Define Delivery Parameters View
| Measure | Description |
|---|---|
|
DC Weeks of Supply |
Use this measure to define the number of weeks of forward store receipts that needs to be covered by each DC delivery. Note: For fashion items that have only one store receipt, set a high value larger than the number of weeks in this task. |
|
Compute DC Delivery |
Select this checkbox to compute DC deliveries based on the seeded receipts, which may be from Assortment Plan or from History. |
The DC Receipts computed in the Define Delivery Parameters view are visible in the Review DC Delivery Units view. This view displays the store flow and DC flow across all weeks in the workbook. The store override quantities are freely editable, and can be used to optimize to a Bulk PO.
|
Note: This view is organized by item and is similar, irrespective of the level of optimization. While optimizing for any level higher than style-color (Level 1), analyze all the component items individually. |
The following table describes the measures available in this view.
Table 7-4 Measures in the Review DC Delivery Units View
| Measure | Description |
|---|---|
|
Store Receipt Units |
This displays the store receipts in each week, as per seeding. |
|
DC Receipt Units |
This displays the DC deliveries computed in the Define Delivery Parameters view. |
|
Aggregated Store Receipt |
You may use this to input store receipts derived outside of the seeding mechanism. This will supersede the value in the Store Receipt Units measure and drive the prepack optimization. This quantity will be spread down to individual stores. |
This section describes the workflow and steps involved in prepack optimization at the item level for fashion items.
This step contains the Review Average Store Receipt Units view (Level L01) .
This view displays the weekly planned store receipts and average receipt units (per delivery period) for each store. Data in this view is intended only for review and cannot be edited.
|
Note: This view is organized by item and is similar, irrespective of the level of optimization. While optimizing for any level higher than style-color (Level 1), analyze all the component items individually. |
The notation <Level L01> in the header indicates that this data is aggregated to the style-color level. When you optimize at the complex pack level, the header changes to <Level L02>. When you optimize at the subclass or class level, the header changes to <Level L03> and <LevelL04> respectively.
Table 7-5 Measures in the Review Average Store Receipt Units View (Level L01)
| Measure | Description |
|---|---|
|
Store Receipt Units |
This is the planned store receipts for this store per week. |
|
Average Store Receipt Units |
This measure represents the average units that a store must receive for each delivery within a certain DC delivery period. For each DC Delivery in a store, it is computed by dividing the Total Store Receipt Units until the next DC Delivery by the Store Receipt Units. |
If store receipts had been seeded in this workbook, the ratio of the seeded data is retained when a chain-level override is spread down to the stores, during computation of Average Store Receipt Units. If you do not intend to seed planned receipts, you can choose to load a store-level profile to drive this calculation; else, the total quantity will be spread down equally to all stores.
Use this step to specify user-defined constraints at various levels, in order to control the prepack recommendations being generated.
These constraints are optional. If these values are not maintained explicitly, the tool will use the default values set up in the Optimization Parameter Administration Task. If default values are not defined, the tool will optimize in an unconstrained scenario.
The views in this step are:
Define Prepack Constraints View (Level L01), which you can use to define constraints for each DC delivery. These include constraints such as the number of prepacks, pack sizes, flat packs, and eaches.
Define Size Level Constraints View (Level L01), which you can use to define the size-level minimum and maximum limits for each prepack.
Define Fixed Prepacks View (Level L01), which you can use to assign certain prepacks as fixed, based on past experience or vendor suggestions.
Use this view to define the constraints that are applicable for all prepacks attached to each DC delivery. You can define these constraints for each item and DC Delivery, or set them uniformly across all DC deliveries. They can also be defaulted from the global or default parameters for the department.
The following table describes the measures available on this view.
Table 7-6 Measures in the Define Prepack Constraints View (Level L01)
| Measure | Description |
|---|---|
|
Eaches Enabled |
This measure can have the following values:
|
|
Maximum Pack Size |
Use this measure to define the upper limit that the tool must use for the calculation of prepack size. |
|
Minimum Pack Size |
Use this measure to define the lower limit that the tool must use for the calculation of prepack size. If left blank, the default value is 1. |
|
Optimize |
Use this checkbox to indicate that when prepack optimization is initiated, this item should be included. |
|
Mandatory Flat Pack |
Use this drop-down to indicate that at least one of the recommended prepacks must contain a flat pack. |
|
Valid Pack Size |
Use this measure to specify the valid pack sizes you are considering, as a list of comma-separated values. During pack size calculation, the tool will consider only the sizes mentioned here, and excludes other possible packsizes. If left blank, all values between the defined minimum and maximum will be considered valid. |
|
Maximum Type of Prepacks |
Use this measure to specify the highest number of recommended prepacks that may be considered for optimization. |
Use this view to define size-level constraints for each prepack in each DC delivery. You can specify the minimum and the maximum units of SKU of specific sizes in a prepack.
Different limits can be set for different sizes for a particular delivery pack. Also, there can be different constraints per delivery pack.
|
Note: This limit is defined during the configuration of the application. Contact your system administrator, who maintains the requirements of all users in your company. For more information on the configuration plug-in, see Oracle Retail Size Profile Optimization Implementation Guide. |
Use this view to assign certain prepack configurations as fixed. This can be used to repeat known prepacks or if your vendor has stipulated certain prepacks.
In the example shown in Figure 7-24, select the DC delivery for which you want to assign fixed prepacks. For the respective delivery packs, manually key in the configuration as shown above and use the Assign Fixed Prepack checkbox to indicate that this prepack should be considered fixed.
You can assign multiple fixed prepacks per DC delivery, and you can assign different fixed prepacks for different DC deliveries.
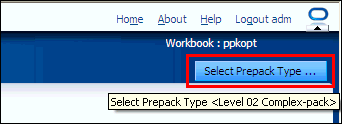
The views in the Compute DC Delivery Step and the Set Prepack Constraints Step (Level L01) provide the prerequisites for calculation of prepack optimization. The next step is to use the Optimize <Level L01 > planning action shown in Figure 7-25.
Following are the inputs that the prepack optimization solver uses to determine the recommended optimized prepack:
Size-level store receipts, computed from store
Size profile or cluster profile
Department-level admin parameters
User-defined constraints
On completion of prepack optimization, the following confirmation message is displayed.
The views of the Review Solver Results Step (Level L01) will now be populated with data.
The Prepack Solver returns the optimization results for each of the specified DC deliveries. For each DC delivery, it evaluates the best possible combination, starting with a single prepack, moving on to two prepacks, and so on, until the maximum number specified.
|
Note: The maximum number permitted is driven by a parameter that is set in the configuration plug-in tool of the application. Contact your system administrator to change the value. |
The views in this step are:
You can review the Prepack Optimization results beginning with the summary screen shown below.
The following table describes the measures available on this view.
Table 7-7 Measures in the Review Optimized Prepacks View (Level L01)
| Measure | Description |
|---|---|
|
System Selected Prepack Type |
This checkbox indicates the best, optimal prepack combination recommended by the solver. This recommendation is based on the optimization parameters and constraints that you had defined. |
|
Error Message From Optimization |
If the request to the solver was unsuccessful, the message displayed here could aid the refinement of inputs and resolution of any conflicting parameters. |
|
Recommended Prepack Sizes |
This displays all the unique pack sizes that the solver recommends, as a list of comma-separated values. |
|
Total Prepack Receipt |
This measure represents the total quantity of prepacks required, if you had selected this option. This value is for the average store receipt for this DC delivery period. |
|
Total Each Receipt |
This measure represents the total quantity of eaches required, if you had selected this option. This value is for the average store receipt for this DC delivery period. |
|
Fit% |
This indicates the percentage of match to the Buy Quantity when the corresponding prepack is selected. This is computed as 100% - mis-allocation %. Mis-allocation is computed at a store/SKU level for both over-allocation and under-allocation. |
|
Under Allocation Cost |
This is the aggregate of under-allocation costs from the SKU level to the store level in that DC delivery, for the corresponding set of prepacks. |
|
Over Allocation Cost |
This is the aggregate of over-allocation costs at a store/SKU level for an average store receipt in that DC delivery, for the corresponding set of prepacks. |
|
Mis-allocation Cost |
This is the sum of over-allocation cost and under-allocation cost. |
|
Handling Cost |
This represents the handling cost attached to the corresponding number of possible prepacks. |
|
Total Cost |
This is the sum of the mis-allocation cost and the handling cost for the corresponding set of prepacks. |
|
Select for Approval |
Use this checkbox to mark the prepack for approval and to be flowed down to other processes downstream. |
This view displays the details of the optimization for each delivery and for the options evaluated by the solver.
The example in the figure below shows the best possible prepack combinations if you want to approve three prepacks.
The following table describes the measures available on this view.
Table 7-8 Measures in the Recommended Prepack Configurations View (Level L01)
| Measure | Description |
|---|---|
|
Prepack Definition |
This indicates the number of the corresponding SKUs in the specified prepack configuration. |
|
Total Prepack Receipt |
This indicates the total quantity of each prepack required per average store receipt, if this option is approved. |
|
Total Each Receipt |
This indicates the total quantity of eaches required if this option is approved. |
This view displays the prepack options and their validity dates for the corresponding prepack configuration. The details in this view enable the Analysts to determine prepack recommendations for different receipt drops.
The checkboxes in this screenshot indicate that the corresponding prepack is valid for the specified time period.
The Approve step consists of the following views:
Use this view to select the items that are ready for approval. You can also use this to view the log of previous approvals, if any.
The following table describes the measures available on this view.
Table 7-9 Measures in the Approve Prepack Configuration View (Level L01)
| Measure | Description |
|---|---|
|
Approve |
Use this checkbox to indicate that you want to approve this item. |
|
Approve By |
This indicates the User ID of the Approver. This measure is populated when the approval process is successful. |
|
Approve Comment |
Use this measure to add comments, if required, for the approved prepack configuration. |
|
Approve Date |
This measure displays the system-generated time stamp of the approval. |
After selecting the Approve checkbox and adding comments as desired, click the Select Prepack planning action as shown in the figure below.
When the prepack has been approved, the Recommended Prepack Configuration View (Level L01) and Prepack Calendar View (Level L01) are populated.
This view displays the approved prepack configurations for each Item. Note that this view consolidates all the DC deliveries in this task and presents a unified view of the approved prepacks for each item. Each of the approved prepacks are now assigned to a generic pack ID.
The Approved Prepack Calendar measure shows the validity period of each Generic Pack IDs, based on the DC deliveries they are attached to. Optionally, these validity dates may be enforced for purchase validations in downstream processes like AP and Allocation.
|
Note: In the current release of the Fashion Planning Bundle, the validity dates for optimized prepacks are exported to downstream applications such as Assortment Planning. However, Assortment Planning does not force these validity dates on allocations. |
This section describes the workflow and the views involved in prepack optimization for fashion items at the complex pack level.
This step contains the Review Average Store Receipt Units view (Level L02).
|
Note: This view is organized by item and is similar, irrespective of the level of optimization. While optimizing for any level higher than style-color (Level 1), analyze all the component items individually. |
For details on the Review Average Store Receipt Units view (Level L02), see Review Average Store Receipt Units View (Level L01).
This step is used to specify user-defined constraints at various levels to control the prepack recommendations being generated. Use this step to determine prepacks for a complex items of multiple style-colors, belonging to a single style or different styles. This step is similar to the corresponding step for style-color, which is at Level 01. However, the views are organized at the level of complex packs, instead of items.
|
Note: These constraints apply to the individual component items in each complex prepack. |
The views in this step are:
Define Prepack Constraints View (Level L02), which you can use to define constraints for each DC Delivery. These include constraints such as the number of prepacks, pack sizes, flat packs, and eaches.
Define Size Level Constraints View (Level L02) , which you can use to define the size-level minimum and maximum limits for each prepack.
Define Fixed Prepacks View (Level L02), which you can use to assign certain prepacks as fixed, based on past experience or vendor suggestions.
Use this view to define the constraints that are applicable for all prepacks attached to each DC delivery. You can define these constraints for each complex item and DC Delivery, or set them uniformly across all DC deliveries. They can also be defaulted from the global or default parameters for the department. These constraints apply for the entire prepack and not components within the prepack.
The following table describes the measures available on this view.
Table 7-10 Measures in the Define Prepack Constraints View (Level L02)
| Measure | Description |
|---|---|
|
Eaches Enabled |
This measure can have the following values:
|
|
Maximum Pack Size |
Use this measure to define the upper limit that the tool must use for the calculation of prepack size. |
|
Minimum Pack Size |
Use this measure to define the lower limit that the tool must use for the calculation of prepack size. If left blank, the default value is 1. |
|
Optimize |
Use this checkbox to indicate that when prepack optimization is initiated, this item should be included. |
|
Mandatory Flat Pack |
Use this checkbox to indicate that at least one of the recommended prepacks must contain a flat pack. |
|
Valid Pack Size |
Use this measure to specify the valid pack sizes you are considering, as a list of comma-separated values. During pack size calculation, the tool will consider only the sizes mentioned here, and excludes other possible packsizes. If left blank, all values between the defined minimum and maximum will be considered valid. |
|
Maximum Type of Prepacks |
Use this measure to specify the highest number of recommended prepacks that must be considered for optimization. |
Use this view to define size-level constraints for each prepack in each DC delivery. You can specify the minimum and the maximum units of SKU of specific sizes in a prepack.
|
Note: Size-level constraints may be defined for each of the component items in each complex prepack. |
Use this view to assign certain prepack configurations as fixed. This can be used to repeat known prepacks or if your vendor has stipulated certain prepacks.
|
Note: Specify the exact quantities of each size of each component item of the complex prepack. |
In the example shown in Figure 7-36, select the DC delivery for which you want to assign fixed prepacks. For the respective Delivery Packs, manually key in the configuration as shown above and use the Assign Fixed Prepack checkbox to indicate that this prepack should be considered fixed.
You can assign multiple fixed prepacks per DC delivery, and you can assign different fixed prepacks for different DC deliveries.
The views in the Compute DC Delivery Step and the Set Prepack Constraints Step provide the prerequisites for calculation of prepack optimization. The next step is to use the Optimize <Level L02 > planning action shown in Figure 7-37.
Following are the inputs that the prepack optimization solver uses to determine the recommended optimized prepack:
Size-level store receipts, computed from store
Size profile or cluster profile
Department-level admin parameters
User-defined constraints
On completion of prepack optimization, the following confirmation message is displayed.
The views of the Review Solver Results Step (Level L02) will now be populated with data.
The solver returns the optimization results for each of the specified DC deliveries. For each DC Delivery, it evaluates the best possible combination, starting with a single prepack, moving on to two prepacks, and so on, until the maximum number specified.
The views in this step are:
You can review the Prepack Optimization results beginning with the summary screen shown below.
Based on the defined threshold, it looks for the option that is the least expensive and exceeds the threshold% in cost savings compared to the previous option. The tool does not necessarily recommend the lowest cost option for prepacks. In the example illustrated in Figure 7-39, as the three-prepacks option is only marginally cheaper than the two-prepacks option, the solver recommends the two-prepack option.
However, you can override the tool recommendation and select any of the other options.
The following table describes the measures available on this view.
Table 7-11 Measures in the Review Optimized Prepacks View (Level L02)
| Measure | Description |
|---|---|
|
System Selected Prepack Type |
This checkbox indicates the best, optimal prepack combination recommended by the solver. This recommendation is based on the optimization parameters and constraints that you had defined. |
|
Error Message From Optimization |
If the request to the solver was unsuccessful, the message displayed here could aid the refinement of inputs and resolution of any conflicting parameters. |
|
Recommended Prepack Sizes |
This displays all the unique pack sizes that the solver recommends, as a list of comma-separated values. |
|
Total Prepack Receipt |
This measure represents the total quantity of prepacks required, if you had selected this option. This value is for the average store receipt for this DC delivery period. |
|
Total Each Receipt |
This measure represents the total quantity of eaches required, if you had selected this option. This value is for the average store receipt for this DC delivery period. |
|
Fit% |
This indicates the percentage of match to the Buy Quantity when the corresponding prepack is selected. This is computed as 100% - mis-allocation %. Mis-allocation is computed at a store/SKU level for both over-allocation and under-allocation. |
|
Under Allocation Cost |
This is the aggregate of under-allocation costs from the SKU level to the store level in that DC delivery, for the corresponding set of prepack. |
|
Over Allocation Cost |
This is the aggregate of over-allocation costs at a store/SKU level for an average store receipt in that DC delivery, for the corresponding set of prepack.s |
|
Mis-allocation Cost |
This is the sum of over-allocation cost and under-allocation cost. |
|
Handling Cost |
This represents the handling cost attached to the corresponding number of possible prepacks. |
|
Total Cost |
This is the sum of the mis-allocation cost and the handling cost for the corresponding set of prepack. |
|
Select for Approval |
This checkbox indicates the system-recommended option by default. Use this measure to override the system recommendation. It marks the selected prepack for approval so that data can flow down to other processes downstream. |
This view displays the details of the optimization for each delivery and for the options evaluated by the solver.
The example in the figure below shows the recommended combination of the two colors in the complex prepack. Each pack of the optimized prepack will contain 12 units each of Black and Brown. The tentative total quantity of this prepack configuration is also available.
The following table describes the measures available on this view.
Table 7-12 Measures in the Recommended Prepack Configurations View (Level L02)
| Measure | Description |
|---|---|
|
Prepack Definition |
This indicates the number of the corresponding SKUs in the specified prepack configuration. |
|
Total Prepack Receipt |
This indicates the total quantity of each prepack required per average store receipt, if this option is approved. |
|
Total Each Receipt |
This indicates the total quantity of eaches required if this option is approved. |
This view displays the prepack options and their validity dates for the corresponding prepack configuration. The details in this view enable the Analysts to determine prepack recommendations for different receipt drops.
The views of the Approve step are similar for optimization of both single style-color (Level L01) and complex packs (Level L02). However, when you optimize for complex packs, perform a consolidated review for all the items that are packed together in each complex pack. For details on the views of this step, see Approve Step (Level L01).
This section describes the workflow and the views involved in prepack optimization at the subclass and class levels.
The Review Average Store Receipt Units step (Level L03) consists of the Review Average Store Receipt Units view.
This view displays the weekly planned Store Receipts and Average Receipt Units (per delivery period) for each location. Data in this view is intended only for review and cannot be edited.
In Figure 7-42, note that the Store Receipt Units are displayed as the total units for the stores in Charlotte. However, Average Store Receipt Units represents the average receipt units per style-color for the entire sub-class for this store.
Table 7-13 Measures in the Review Average Store Receipt Units View (Level L03)
| Measure | Description |
|---|---|
|
Store Receipt Units |
This is the planned store receipts for this store per week. |
|
Average Store Receipt Units |
This measure represents the average units that a store must receive for each delivery within a certain DC delivery period. For each DC delivery in a store, it is computed by dividing the Total Store Receipt Units until the next DC Delivery by the Store Receipt Units. |
This step is used to specify user-defined constraints at various levels to control the prepack recommendations being generated. These constraints are optional. If these values are not maintained explicitly, the tool will use the default values set up in the Optimization Parameter Administration Task. If default values are not defined, the tool will optimize in an unconstrained scenario.
The views in this step are:
Define Prepack Constraints View (Level L03), which you can use to define constraints for each DC Delivery. These include constraints such as the number of prepacks, pack sizes, flat packs, and eaches.
Define Size Level Constraints View (Level L03), which you can use to define the size-level minimum and maximum limits for each prepack.
Define Fixed Prepacks View (Level L03), which you can use to assign certain prepacks as fixed, based on past experience or vendor suggestions.
Use this view to define the constraints that are applicable for all prepacks attached to each DC delivery. You can define these constraints for each item and DC delivery, or set them uniformly across all DC deliveries. They can also be defaulted from the global or default parameters for the department.
The following table describes the measures available on this view.
Table 7-14 Measures in the Define Prepack Constraints View (Level L02)
| Measure | Description |
|---|---|
|
Eaches Enabled |
This measure can have the following values:
|
|
Maximum Pack Size |
Use this measure to define the upper limit that the tool must use for the calculation of prepack size. |
|
Minimum Pack Size |
Use this measure to define the lower limit that the tool must use for the calculation of prepack size. If left blank, the default value is 1. |
|
Optimize |
Use this checkbox to indicate that when prepack optimization is initiated, this item should be included. |
|
Mandatory Flat Pack |
Use this checkbox to indicate that at least one of the recommended prepacks must contain a flat pack. |
|
Valid Pack Size |
Use this measure to specify the valid pack sizes you are considering, as a list of comma-separated values. During pack size calculation, the tool will consider only the sizes mentioned here, and excludes other possible packsizes. If left blank, all values between the defined minimum and maximum will be considered valid. |
|
Maximum Type of Prepacks |
Use this measure to specify the highest number of recommended prepacks that must be considered for optimization. |
Use this view to define size-level constraints for each prepack in each DC delivery. You can specify the minimum and the maximum units of each size in a prepack for this subclass or class. Note that the constraints are only for each of size and not for individual SKUs of the selected items.
|
Note: The maximum limit is defined during the configuration of the application. Contact your system administrator, who maintains the requirements of all users in your company. For more information on the configuration plug-in, see Oracle Retail Size Profile Optimization Implementation Guide. |
Use this view to assign certain prepack configurations as fixed. This can be used to repeat known prepacks or if your vendor has stipulated certain prepacks for a certain subclass/class of products.
In the example shown in Figure 7-45, select the DC delivery for which you want to assign fixed prepacks. For the respective Delivery Packs, manually key in the configuration as shown above and use the Assign Fixed Prepack checkbox to indicate that this prepack should be considered fixed.
You can assign multiple fixed prepacks per DC delivery, and you can assign different fixed prepacks for different DC deliveries.
The views in the Review Average Store Receipt Units Step (Level L03) and the Set Prepack Constraints Step (Level L03) provide the prerequisites for calculation of prepack optimization. The next step is to use the Optimize <Level L03 > planning action shown in Figure 7-46.
Following are the inputs that the prepack optimization solver uses to determine the recommended optimized prepack:
Size-level store receipts, computed from store
Size profile or cluster profile
Department-level admin parameters
User-defined constraints
On completion of prepack optimization, the following confirmation message is displayed.
The views of the Review Solver Results Step (Level L03) will now be populated with data.
The Prepack Solver returns the optimization results for each of the specified DC Deliveries. For each DC Delivery, it evaluates the best possible combination, starting with a single prepack, moving on to two prepacks, and so on, until the maximum number specified.
The views in this step are:
You can review the Prepack Optimization results beginning with the summary screen shown below.
Based on the defined threshold, it looks for the option that is the least expensive and exceeds the threshold% in cost savings compared to the previous option. The tool does not necessarily recommend the lowest cost option for prepacks. In the example illustrated in Figure 7-48, the two-packs option is recommended.
However, you can override the tool recommendation and select any of the other options.
The following table describes the measures available on this view.
Table 7-15 Measures in the Review Optimized Prepacks View (Level L03)
| Measure | Description |
|---|---|
|
System Selected Prepack Type |
This checkbox indicates the best, optimal prepack combination recommended by the solver. This recommendation is based on the optimization parameters and constraints that you had defined. |
|
Error Message From Optimization |
If the request to the solver was unsuccessful, the message displayed here could aid the refinement of inputs and resolution of any conflicting parameters. |
|
Recommended Prepack Sizes |
This displays all the unique pack sizes that the solver recommends, as a list of comma-separated values. |
|
Total Prepack Receipt |
This measure represents the total quantity of prepacks required, if you had selected this option. This value is for the average store receipt for this DC delivery period. |
|
Total Each Receipt |
This measure represents the total quantity of eaches required, if you had selected this option. This value is for the average store receipt for this DC delivery period. |
|
Fit% |
This indicates the percentage of match to the Buy Quantity when the corresponding prepack is selected. This is computed as 100% - mis-allocation %. Mis-allocation is computed at a store/SKU level for both over-allocation and under-allocation. |
|
Under Allocation Cost |
This is the aggregate of under-allocation costs from the SKU level to the store level in that DC delivery, for the corresponding set of prepack. |
|
Over Allocation Cost |
This is the aggregate of over-allocation costs at a store/SKU level for an average store receipt in that DC delivery, for the corresponding set of prepack. |
|
Mis-allocation Cost |
This is the sum of over-allocation cost and under-allocation cost. |
|
Handling Cost |
This represents the handling cost attached to the corresponding number of possible prepacks. |
|
Total Cost |
This is the sum of the mis-allocation cost and the handling cost for the corresponding set of prepack. |
|
Select for Approval |
Use this checkbox to mark the prepack for approval and to be flowed down to other processes downstream. |
This view displays the details of the optimization for each delivery and for the options evaluated by the solver.
The figure below shows the recommended combination of two prepacks- one optimized prepack containing 10 units and another containing 12 units. The tentative total quantity of this prepack configuration is also available.
The following table describes the measures available on this view.
Table 7-16 Measures in the Recommended Prepack Configurations View (Level L03)
| Measure | Description |
|---|---|
|
Prepack Definition |
This indicates the number of SKUs in the specified prepack configuration. |
|
Total Prepack Receipt |
This indicates the total quantity of each prepack required per average store receipt, if this option is approved. |
|
Total Each Receipt |
This indicates the total quantity of eaches required if this option is approved. |
This view displays the prepack options and their validity dates for the corresponding prepack configuration. The details in this view enable the Analysts to determine prepack recommendations for different receipt drops.
If the Prepack Validation Calendar measure is set to true, then the corresponding prepack is valid for the specified time period.
The views of the Approve step are similar for optimization of both single style-color (Level L01) and complex packs (Level L02). However, when you optimize for Level 03, perform a consolidated review for all the items of the subclass or class. For details on the views of this step, see Approve Step (Level L01).
|
Note: When prepacks are approved at the the subclass or class level, they are exported to downstream systems at the style-color level. All the approved prepacks are treated as templates for which each style-color is considered eligible. Prepack configurations are replicated to each style-color before being exported to downstream applications. |
This section describes the workflow and the views involved in the prepack optimization of non-fashion items at the complex pack level.
|
Note: The Fringe Size Management task does not apply for the non-fashion items, as most non-fashion items are non-size. |
To instantiate this workflow, the complex packs created in Figure 7-51 have been used as an example.
This step contains the Review Average Store Receipt Units view (Level L02).
|
Note: This view is organized by item and is similar, irrespective of the level of optimization. While optimizing for any level higher than style-color (Level 1), analyze all the component items individually. |
For details on the Review Average Store Receipt Units view (Level L02), see Review Average Store Receipt Units Step (Level L01).
This step is used to specify user-defined constraints at various levels to control the prepack recommendations being generated. This tool allows you to combine items across different product classifications.
These constraints are optional. If these values are not maintained explicitly, the tool will use the default values set up in the Optimization Parameter Administration Task. If default values are not defined, the tool will optimize in an unconstrained scenario.
The views in this step are:
Define Prepack Constraints View (Level L02), which you can use to define constraints for each DC delivery. These include constraints such as the number of prepacks, pack sizes, flat packs, and eaches.
Define Size Level Constraints View (Level L02), which you can use to define the size-level minimum and maximum limits for each prepack.
Define Fixed Prepacks View (Level L02), which you can use to assign certain prepacks as fixed, based on past experience or vendor suggestions.
Use this view to define the constraints that are applicable for all prepacks attached to each DC delivery. You can define these constraints for each complex item and DC Delivery, or set them uniformly across all DC deliveries. They can also be defaulted from the global or default parameters for the department.
The following table describes the measures available on this view.
Table 7-17 Measures in the Define Prepack Constraints View (Level L02)- Non-Fashion
| Measure | Description |
|---|---|
|
Eaches Enabled |
This measure is not applicable for non-fashion merchandise. |
|
Maximum Pack Size |
Use this measure to define the upper limit that the tool must use for the calculation of prepack size. |
|
Minimum Pack Size |
Use this measure to define the lower limit that the tool must use for the calculation of prepack size. If left blank, the default value is 1. |
|
Optimize |
Use this checkbox to indicate that when prepack optimization is initiated, this item should be included. |
|
Mandatory Flat Pack |
This measure is not applicable for non-fashion merchandise. |
|
Valid Pack Size |
Use this measure to specify the valid pack sizes you are considering, as a list of comma-separated values. During pack size calculation, the tool will consider only the sizes mentioned here, and excludes other possible packsizes. If left blank, all values between the defined minimum and maximum will be considered valid. |
|
Maximum Type of Prepacks |
Use this measure to specify the highest number of recommended prepacks that must be considered for optimization. |
Use this view to define size-level constraints for each prepack in each DC delivery. Although most non-fashion items are non-size, you can specify the minimum and the maximum units of SKU in a prepack using this view.
|
Note: For non-fashion merchandise, size-level constraints must be defined for each of the component items in each complex prepack. |
|
Note: This maximum limit is defined during the configuration of the application. Contact your system administrator, who maintains the requirements of all users in your company. For more information on the configuration plug-in, see Oracle Retail Size Profile Optimization Implementation Guide. |
Use this view to assign certain prepack configurations as fixed. This can be used to repeat known prepacks or if your vendor has stipulated certain prepacks.
|
Note: Specify the exact quantity of each item of the complex prepack. |
In the example shown in Figure 7-54, select the DC delivery for which you want to assign fixed prepacks. For the respective Delivery Packs, manually key in the configuration as shown above and use the Assign Fixed Prepack checkbox to indicate that this prepack should be considered fixed.
You can assign multiple fixed prepacks per DC delivery, and you can assign different fixed prepacks for different DC deliveries.
The views in the Compute DC Delivery step and the Set Prepack Constraints Step (Level L02)- Non-Fashion provide the prerequisites for calculation of prepack optimization. The next step is to use the Optimize <Level L02 > planning action shown in Figure 7-55.
Following are the inputs that the prepack optimization solver uses to determine the recommended optimized prepack:
Size-level store receipts, computed from store
Cluster profile
Department-level admin parameters
User-defined constraints
On completion of prepack optimization, the following confirmation message is displayed.
The views of the Review Solver Results Step (Level L02)- Non-Fashion will now be populated with data.
The prepack solver returns the optimization results for each of the specified DC deliveries. For each DC delivery, it evaluates the best possible combination, starting with a single prepack, moving on to two prepacks, and so on, until the maximum number specified.
The views in this step are:
You can review the Prepack Optimization results beginning with the summary screen shown below.
Based on the defined threshold, it looks for the option that is the least expensive and exceeds the threshold% in cost savings compared to the previous option. The tool does not necessarily recommend the lowest cost option for prepacks. In the example illustrated in Figure 7-39, as the three-packs option is only marginally cheaper than the two-packs option, the solver recommends the two-prepack option.
However, you can override the tool recommendation and select any of the other options.
The following table describes the measures available on this view.
Table 7-18 Measures in the Review Optimized Prepacks View (Level L02)- Non-Fashion
| Measure | Description |
|---|---|
|
System Selected Prepack Type |
This checkbox indicates the best, optimal prepack combination recommended by the solver. This recommendation is based on the optimization parameters and constraints that you had defined. |
|
Error Message From Optimization |
If the request to the solver was unsuccessful, the message displayed here could aid the refinement of inputs and resolution of any conflicting parameters. |
|
Recommended Prepack Sizes |
This displays all the unique pack sizes that the solver recommends, as a list of comma-separated values. |
|
Total Prepack Receipt |
This measure represents the total quantity of prepacks required, if you had selected this option. This value is for the average store receipt for this DC delivery period. |
|
Total Each Receipt |
This measure represents the total quantity of eaches required, if you had selected this option. This value is for the average store receipt for this DC delivery period. |
|
Fit% |
This indicates the percentage of match to the Buy Quantity when the corresponding prepack is selected. This is computed as 100% - mis-allocation %. Mis-allocation is computed at a store/SKU level for both over-allocation and under-allocation. |
|
Under Allocation Cost |
This is the aggregate of under-allocation costs from the SKU level to the store level in that DC delivery, for the corresponding set of prepack. |
|
Over Allocation Cost |
This is the aggregate of over-allocation costs at a store/SKU level for an average store receipt in that DC delivery, for the corresponding set of prepack. |
|
Mis-allocation Cost |
This is the sum of over-allocation cost and under allocation cost. |
|
Handling Cost |
This represents the handling cost attached to the corresponding number of possible prepacks. |
|
Total Cost |
This is the sum of the mis-allocation cost and the handling cost for the corresponding set of prepack. |
|
Select for Approval |
Use this checkbox to mark the prepack for approval and to be flowed down to other processes downstream. |
This view displays the details of the optimization for each delivery and for the options evaluated by the solver.
The following table describes the measures available on this view.
Table 7-19 Measures in the Recommended Prepack Configurations View (Level L02)- Non-Fashion
| Measure | Description |
|---|---|
|
Prepack Definition |
This indicates the number of the corresponding SKUs in the specified prepack configuration. |
|
Total Prepack Receipt |
This indicates the total quantity of each prepack required per average store receipt, if this option is approved. |
This view displays the prepack options and their validity dates for the corresponding prepack configuration. The details in this view enable the Analysts to determine prepack recommendations for different receipt drops.
If the Prepack Validation Calendar measure is set to true, then the corresponding prepack is valid for the specified time period.
The views of the Approve step are similar for optimization of both single style-color (Level L01) and complex packs (Level L02). However, when you optimize for complex packs, perform a consolidated review for all the items that are packed together in each complex pack. For details on the views of this step, see Approve Step (Level L01).
To open the Batch Result Approval workbook, perform the following:
Click the Create New Workbook icon on the Batch Result Approval task.
You may be prompted to select a domain if you have access to more than one domain. For information on domain selection, see "Selecting the Domain when Creating a New Workbook" in Chapter 2.
The Select Optimization Level screen appears. Select the level at which you want to perform prepack optimization and click Next.
The Select Product screen appears. Select the items for which the results of prepack optimization in batch need to be analyzed and click Finish.
The Batch Result Approval workbook is built and the following views are displayed:
These views are similar in function and measures as the views of the Approve step of the Prepack Optimization and Analysis Task. See Approve Step (Level L01) for more details.