| Oracle® Retail Assortment Planning User Guide for the RPAS Fusion Client Release 14.1 E55312-01 |
|

 Previous |
 Next |
| Oracle® Retail Assortment Planning User Guide for the RPAS Fusion Client Release 14.1 E55312-01 |
|
Previous |
Next |
AP maintenance is the first step in the AP business process. This process step includes the following tasks:
Table 2-1 Business Roles in AP Maintenance
|
|
The Visual Merchant sets up fixtures and capacities (or loaded from an external source) in the Assortment Setup task. |
|
|
The Central Sales Planner supports the planning process in the Assortment Setup task. |
|
|
The Merchandise Planner creates the merchandise and location plans in the MFP & Loc Plan Target Maintenance task. |
|
|
The Buyer Analyst aligns looks with the floor set calendar in the Look Maintenance task. |
The Planning Administrator performs periodic administrative steps that drive some of the critical parts of the Assortment Planning process. These steps include defining product or Point of Commerce attributes/priorities, assigning a sister store, defining space capacity and constraints, and so on. These measures could be loaded from an external source, if they are maintained elsewhere, rather than keying them into AP.
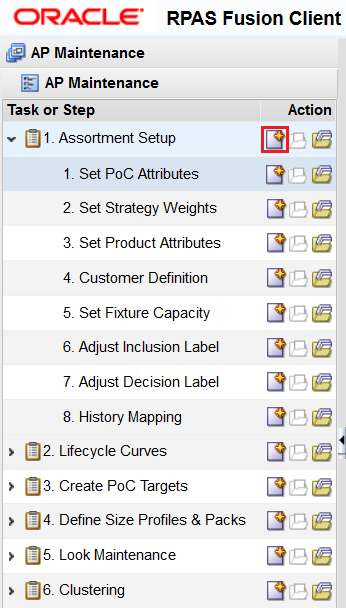
The Assortment Setup task has the following steps:
To create the Assortment Setup workbook, select the New Workbook icon in the Assortment Setup task.
The Assortment Setup workbook is built.
In the Set PoC Attributes step, the Planning Administrator defines site, application, and network attributes/values. The solution comes packaged with a number of attribute measures (such as Climate, Format, and so on), but more can be added as the attribute hierarchy is DPM enabled. This means that new attributes may be added by a designated user through the Fusion User Interface (UI) by using the Dynamic Position Maintenance option that is available on the right click menu, when the user clicks the PoC Attributes hierarchy.
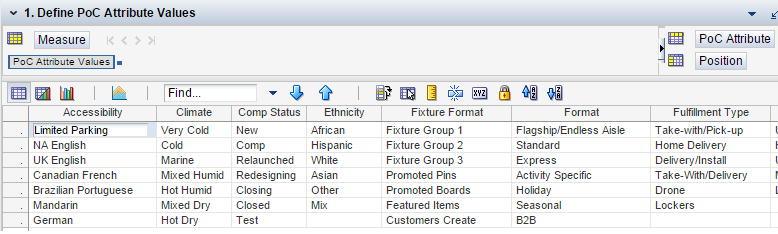
This step has the following views:
The Define PoC Attribute Values view enables the Planning Administrator to define and maintain sets of values for store, site, application, and network attributes.
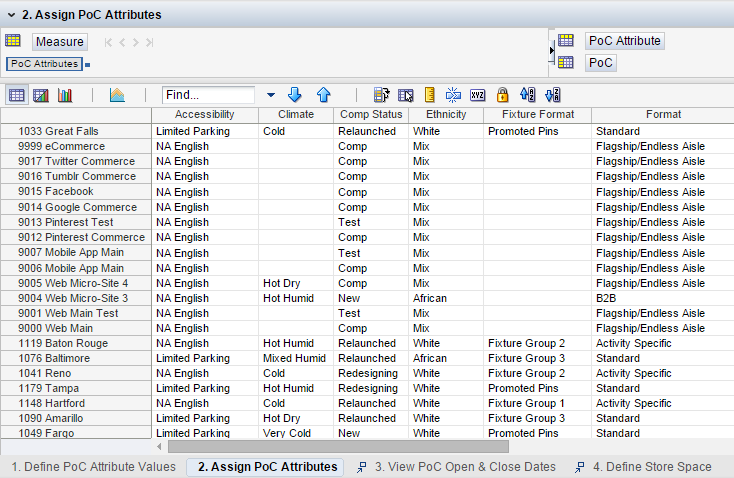
The Assign PoC Attributes view enables the Planning Administrator to associate stores with the appropriate store attributes.
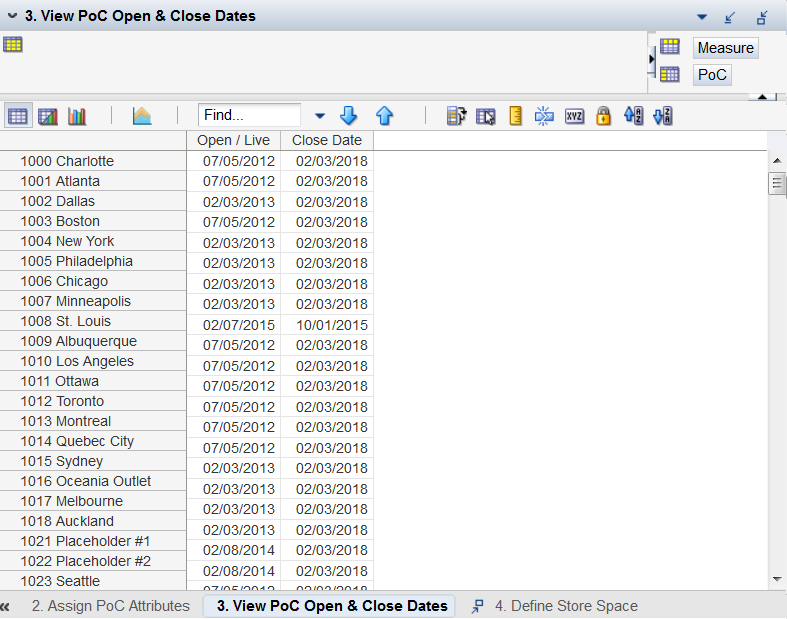
The store, site, application, and network closing and opening dates are defined and maintained in this view. When clustering, if the Point-of-Commerce is not yet open or has closed, it will not be used.
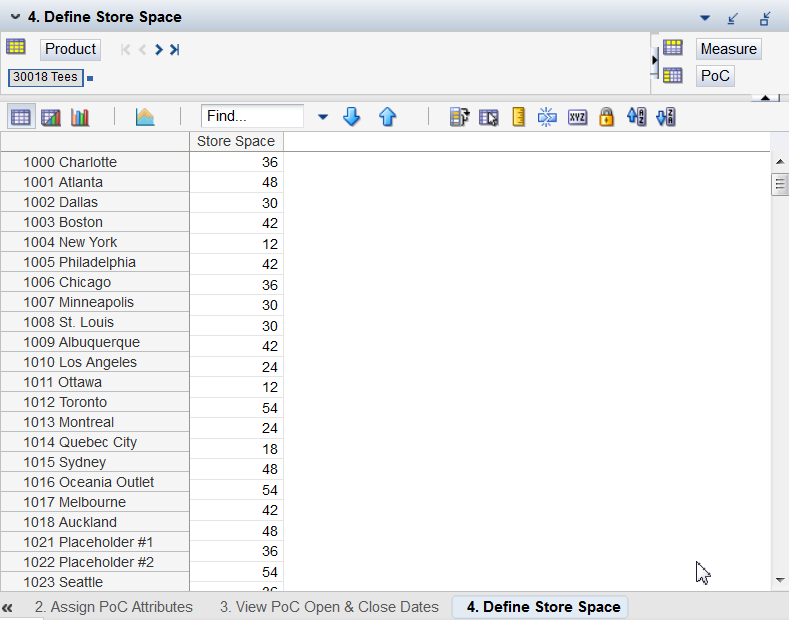
In this view, store space may be defined and maintained. It is used later in the Store Clustering workbook to group stores based on store capacity/constraints. While this view focuses on stores, this attribute may be used for sites, applications, and networks if needed.
In this step, the Planning Administrator:
Defines and maintains product attribute options that will appear on the picklists that merchants use when assigning attributes to a new style or style-color. The solution comes packaged with a number of attribute measures (such as Brand, Color, and so on), but more can be added as the attribute hierarchy is DPM enabled. This means that new attributes may be added by a designated user using the Fusion UI. The Dynamic Position Maintenance option is available on the right click menu, when you click on the Product Attributes hierarchy.
Activates product attributes for an aggregate intersection of the product hierarchy. For example, only the handbag attributes should be activated for the handbag classes. By activating them, only the handbag merchants, and so on, see them. This helps to reduce clutter in the workbooks and so on.
Builds color runs for use in the Shopping List process. At this stage, the merchant likely does not know the colors carried for a style, but will likely know whether they wish to carry it in basic, trend, or classic colors. A color run is just a set of color families to be carried for the style (such as black, white and grey or green, purple and orange, and so on).
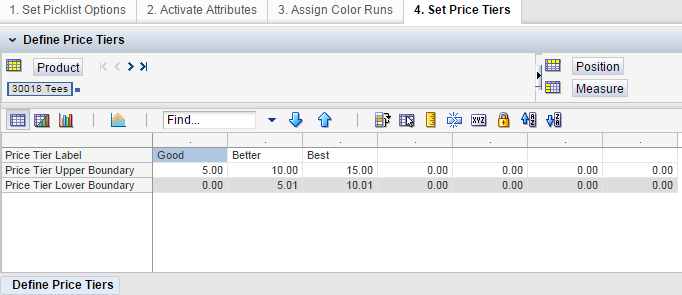
Sets price tiers by defining what price is a high, medium, low or good, better and best. These are used later to assign a price tier attribute to styles and style-colors based on their planned price.
This step has the following tabs and views:
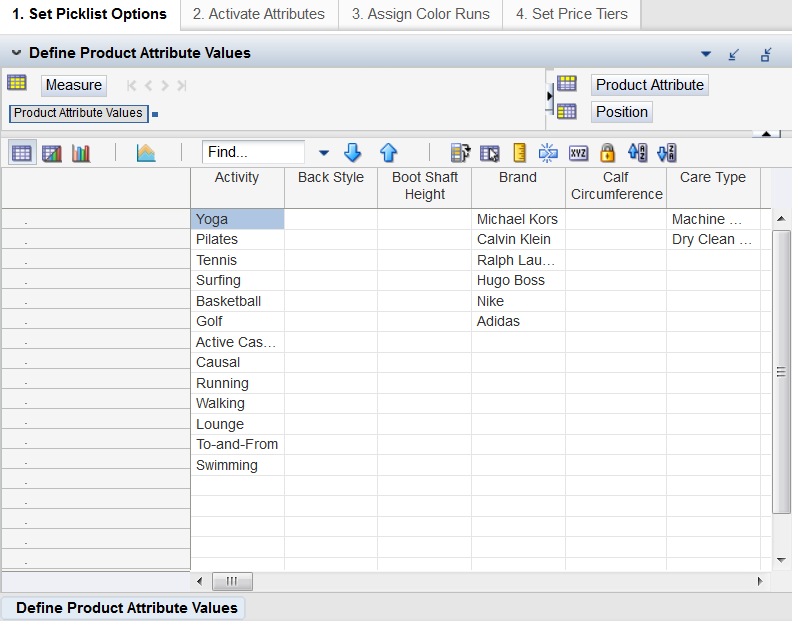
The Planning Administrator defines and maintains product attribute options that will appear on the picklists that merchants use when assigning attributes to a new style or style-color. The solution comes packaged with a number of attribute measures (such as Brand, Color, and so on), but more can be added as the attribute hierarchy is DPM enabled. This means that new attributes may be added by a designated user using the Fusion UI. The Dynamic Position Maintenance option is available on the right click menu, when you click on the Product Attributes hierarchy.
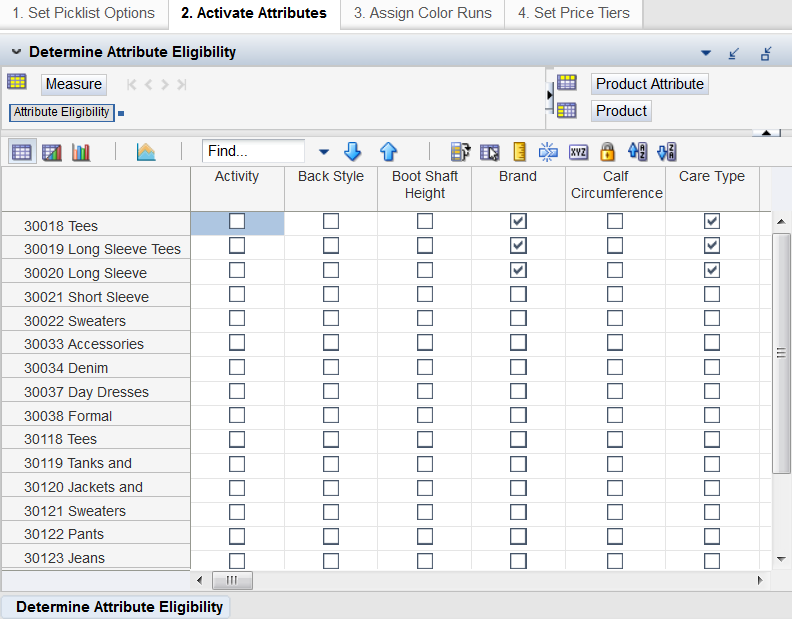
The Planning Administrator activates product attributes for an aggregate intersection of the product hierarchy. For example, only the handbag attributes should be activated for the handbag classes. By activating them, only the handbag merchants, and so on see them. This helps to reduce clutter in the workbooks and so on.
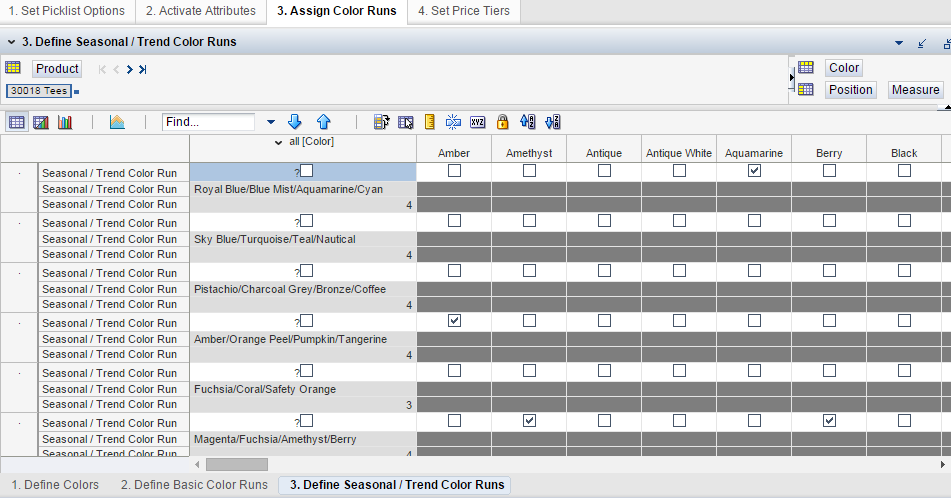
The Planning Administrator builds color runs for use in the Shopping List process. At this stage, the merchant likely does not know the colors carried for a style, but will likely know whether they wish to carry it in basic, trend, or classic colors. A color run is just a set of color families to be carried for the style (such as black, white and grey or green, purple and orange, and so on).
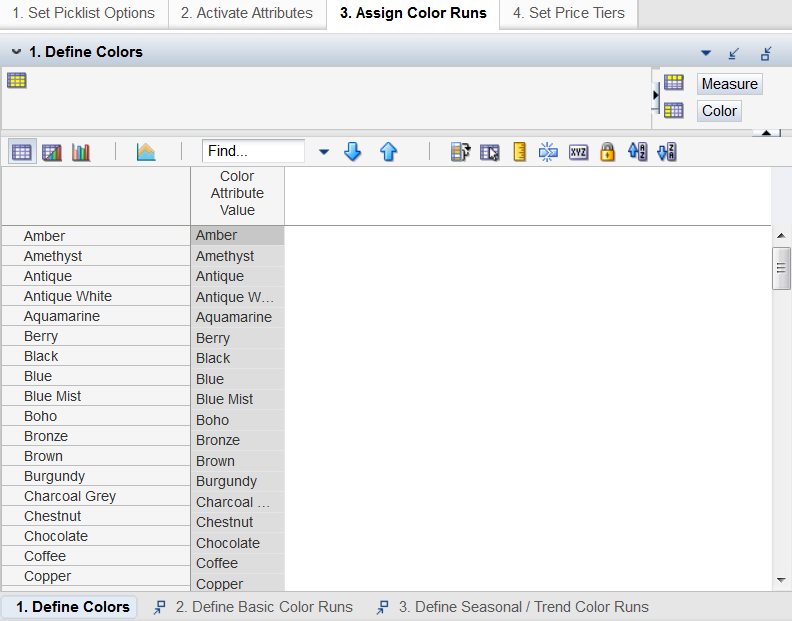
In this view, the Planning Administrator defines the color values.
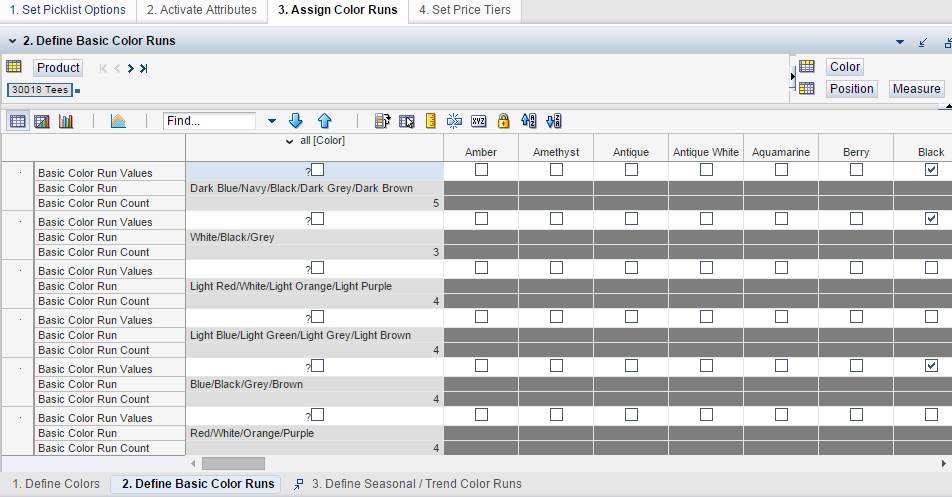
The basic color runs are defined and maintained in this view and used in the Create Shopping List task.
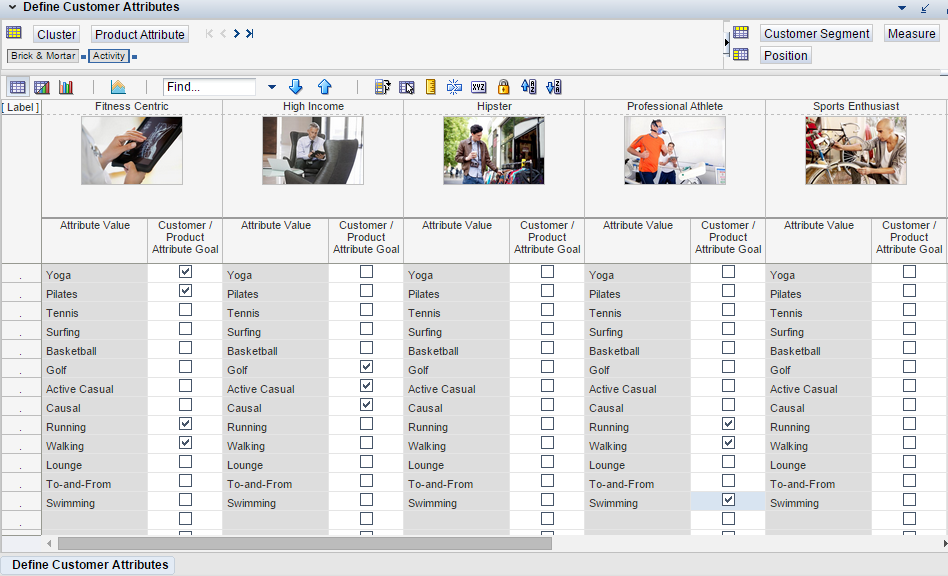
In this step, the Planning Administrator views loaded data or specifies the product attributes that define each customer segment. These attributes are used to assign each style to one or more customer segments when evaluating whether the assortment is appropriate for each segment.
In this step, the Planning Administrator views or defines fixture dimensions, max/min units, and options per fixture. This information is used to determine the number of style-colors based on capacity in the Create Shopping List and Build the Wedge tasks.
These capacities can be set for sites, applications, and networks, not just for stores. For example, a catalog may have a fixed page count or a micro-app may be focused on a time-pressed shopper. The retailer may decide that only 50 styles should be made available to avoid having to spend lots of time scrolling and to save the shopper time by focusing on just the best options for the target of the micro-app.
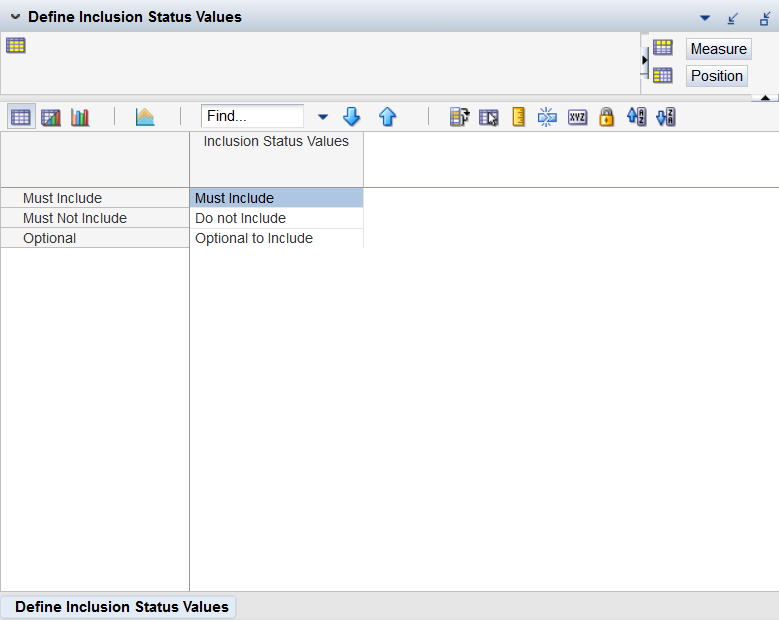
This step enables the Administrator to adjust the labels for the style-color inclusion status measure used in the Wedge Population Automation function in the Build the Wedge process. The default options are: Must Include, Must Not Include, and Optional. Any character choices may be entered.
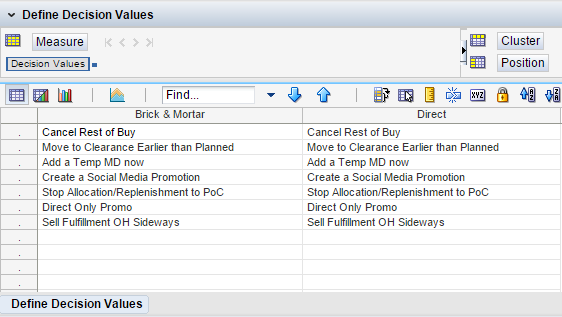
In this step, the Planning Administrator defines and maintains the list of possible Decision values from which a merchant selects in the Keep/Markdown/Drop process in the Weekly Analysis step of the task flow.
The solution comes packaged with a number of attribute measures (such as Brand, Color, and so on), but more can be added as the attribute hierarchy is DPM enabled. This means that new attributes may be added by a designated user using the Fusion UI. The Dynamic Position Maintenance option is available on the right click menu, when you click on the Product Attributes hierarchy.
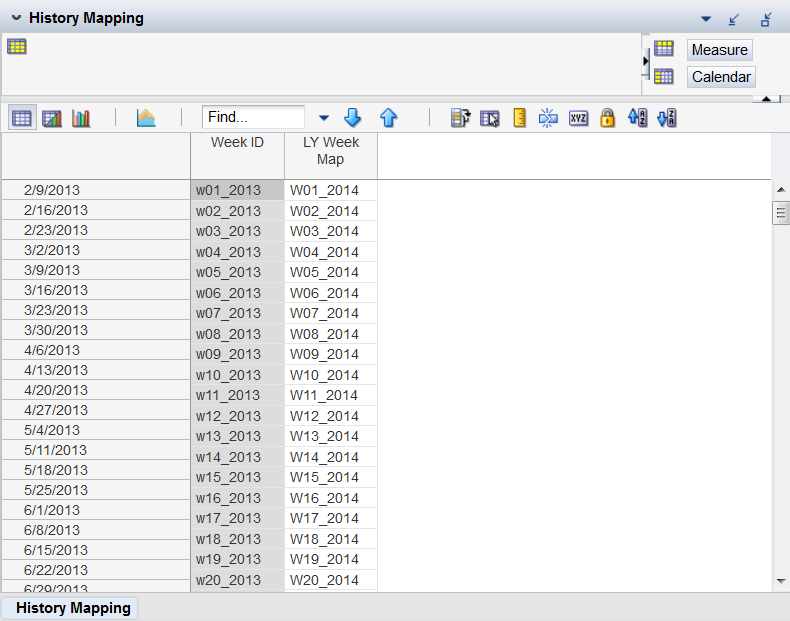
In this step, the Planning Administrator maps the history week to the weeks being planned.
In the Assortment Planning solution, actual values are loaded into the Working Plan (WP) version for elapsed time-frames and Last Year (LY) versions are derived using the WP version and a specified lag. Typically, this is performed by a standard lag of 52 weeks. Sometimes, there is the need to accommodate 53-week years or to shift weeks due to seasonality.
When setting History Mapping, the Planning Administrator enters values for the year they want to map to, not the year they are mapping from. For example, if the Administrator wanted to set the LY mapping for 2014, the Administrator should enter values for 2013, because those are the weeks being mapped to for 2014 LY. The Administrator should not map weeks that are not yet in the calendar master file, otherwise, an error occurs upon the workbook builds.
Three types of History Mapping can be entered:
One-to-One Week Mapping: Last Year lagged measures for 2013 will point to the same week number in 2014. This is used when This Year and Last Year are both 52-week years. In other words, 201452 (week 52 of 2014) map back to 201352 (week 52 of 2013).
One-to-Many: Last Year lagged measures for weeks 52 and 53 in 2017 are both mapped to Week 52 in 2016. This is used when the year you are mapping from (2017) has 53 weeks, but the year you are mapping to has 52. Note that the date entries should be separated by a space. In other words, 201752, 201753 (week 52 and 53 of 2017) map back to 201652 (week 52 of 2016).
Many-to-One Week Mapping: Last Year lagged measures for week 52 in 2018 points to the sum of values for weeks 52 and 53 in 2017 (weeks 4 and 5 of month 12). This is used when the year you are mapping to (2017) has 53 weeks, but the year you are mapping from (2018) has 52. In other words, 201852 (week 52 of 2017) maps back to 201752 and 201753 (week 52 and week 53 of 2017).
Once the style and style-color assortment has been determined, the merchant/trader determines the sizes in which each style or style-color will be carried and the prepacks in which it will be allocated. The size and prepack assignments can be typically interfaced from an external system, such as the Oracle Retail Size Profile Optimization (SPO) solution. However, not every retailer has such a solution. In that case, the merchant can assign the sizes and packs by style or style-color in AP.
This task enables a designated Administrator to create the pool of sizes and prepacks from which the merchant selects when assigning sizes and prepacks to a style or style-color. The pool can be loaded from an external solution and just reviewed here as well.
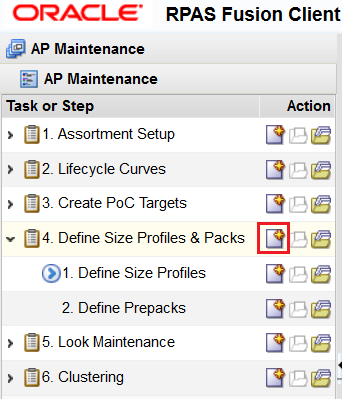
This task has the following steps:
To create the Define Size Profiles & Pack workbook:
Select the New Workbook icon in the Define Size Profiles & Pack task.
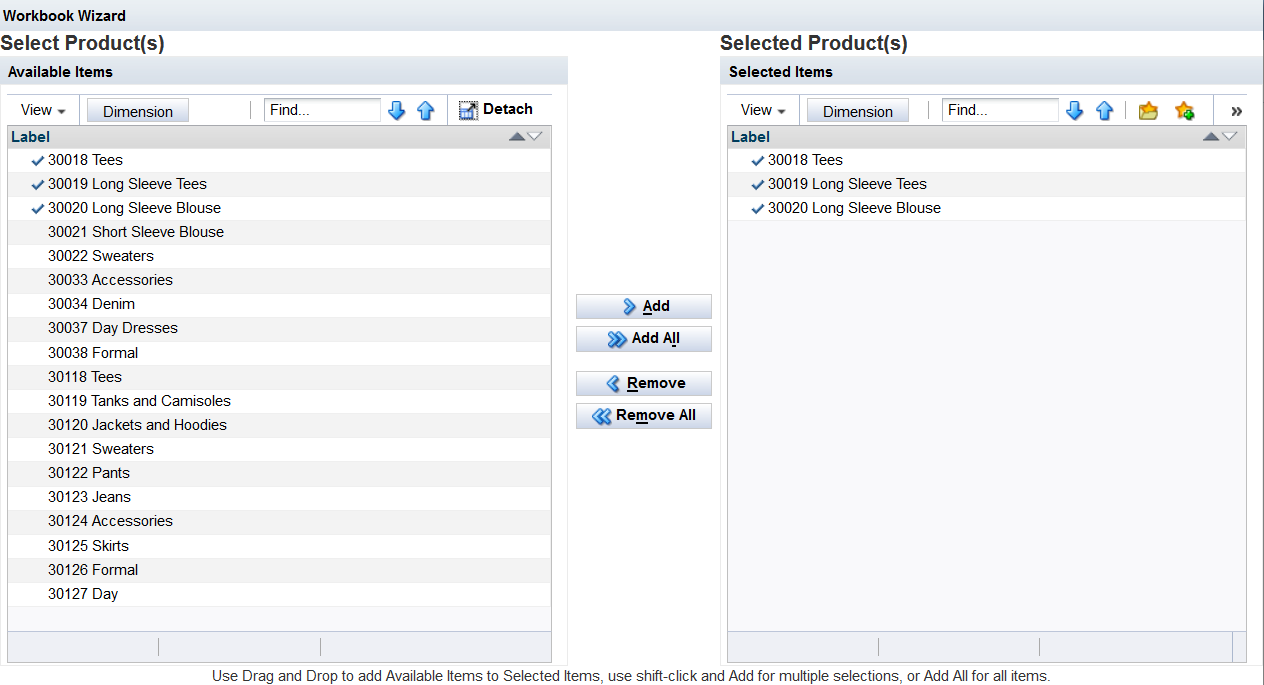
The workbook wizard opens.
In the Select Product(s) page, select the subclasses for which size profiles and prepack definitions are to be defined. Click Finish.
The workbook is created.
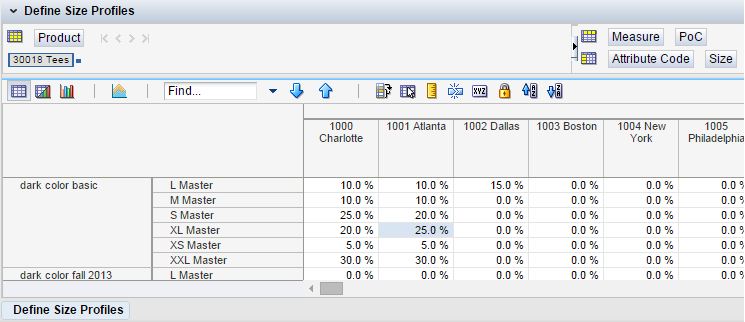
In this step, the designated Administrator defines and manages the pool of Size Profiles from which the merchant will later select. This information is typically interfaced from an external system, such as SPO, but may also be entered or edited manually when a SPO solution is not being used.
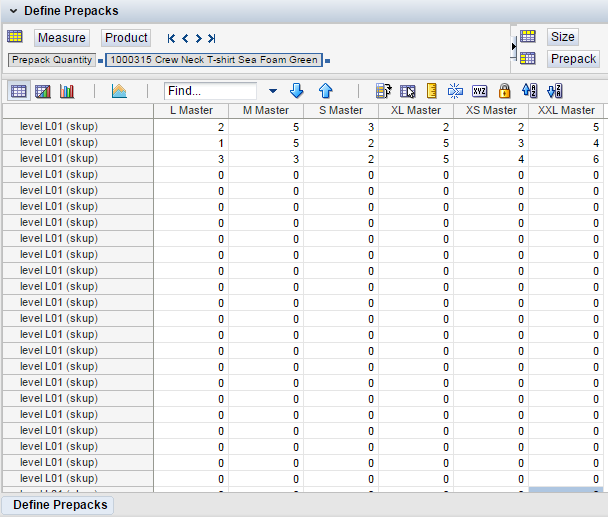
In this step, the designated Administrator defines and manages the pool of Prepack Profiles from which the merchant will later select. This information is typically interfaced from an external system, such as SPO, but may also be entered or edited manually when a SPO solution is not being used.
In this task, the merchant, Planner, or designated Administrator creates (if it cannot loaded from another source) simple store/site/application/network level (PoC) targets for the sales, margin, receipts, and returns plan at the Week/Subclass/Store.
The targets are used to calculate the number of style-colors for the shopping list and wedge, for reconciliation throughout the Assortment Planning process, and to spread the Buying Plan at the cluster to the Point of Commerce level, taking into consideration the performance of each PoC and distribution of sales and receipts across each one.
Merchandise Financial Plan (MFP) and Location Plan (LP) targets can be interfaced from an external system. In this task, if a Location Plan solution at this level is unavailable, last year can be used to spread the Merchandise Financial Plan down to the Week/Subclass/Store level. Then, the plan will be rolled up to the Week/Subclass/Cluster level once the clusters are created.
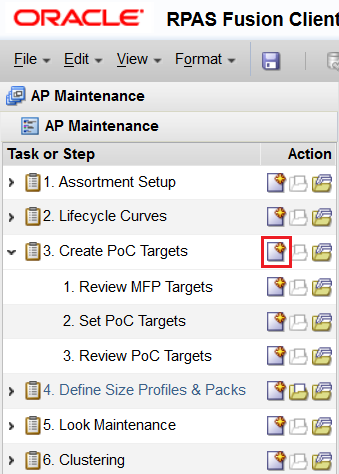
This task has the following steps:
To build the Create PoC Targets workbook:
Select the New Workbook icon in the Create PoC Targets task.
The workbook wizard opens.
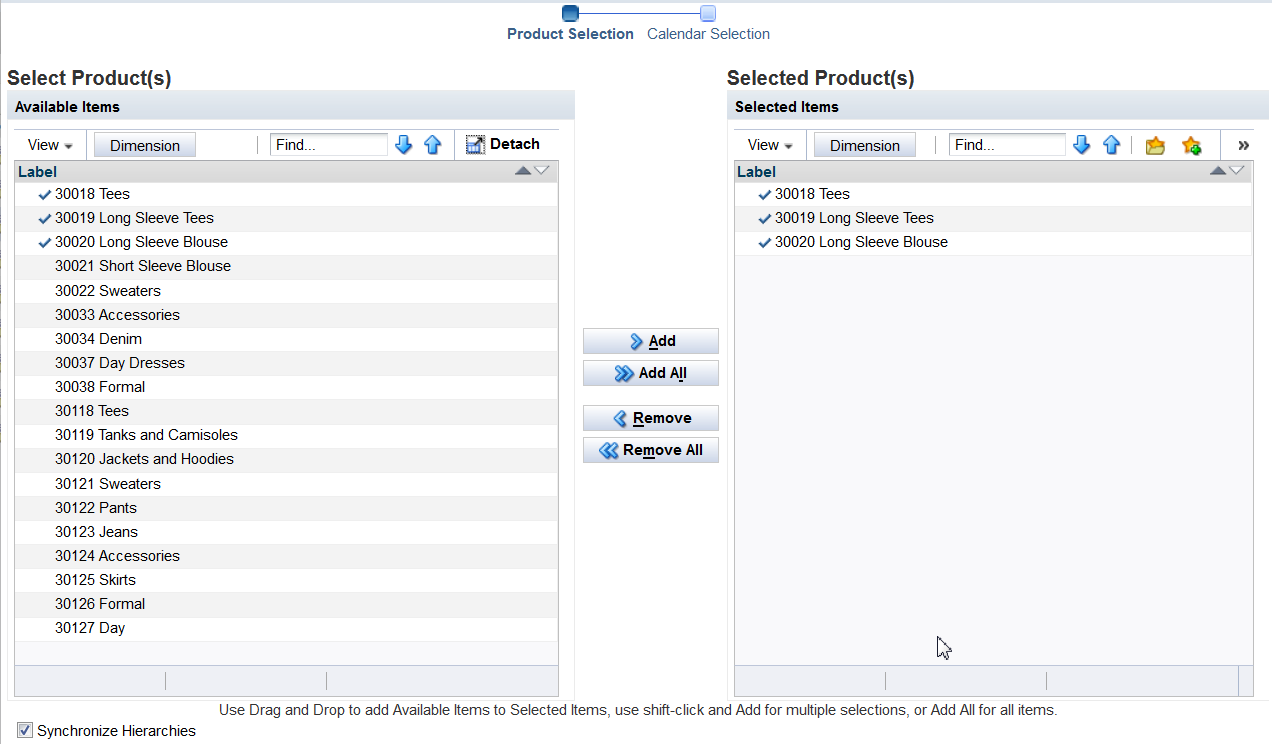
In the Select Product(s) page, select the merchandise levels for the MFP targets to be reviewed or maintained. Click Next.
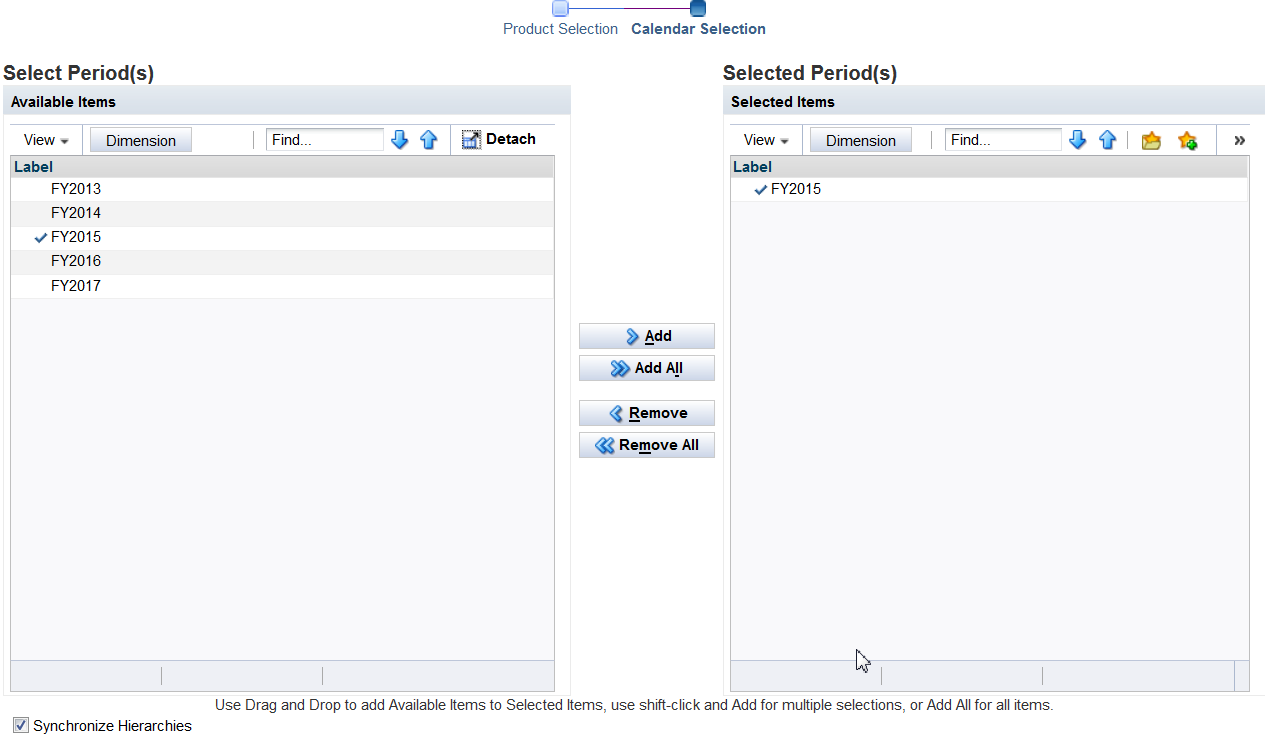
In the Select Period(s) page, select the time periods for examination. Click Finish.
The workbook is created.
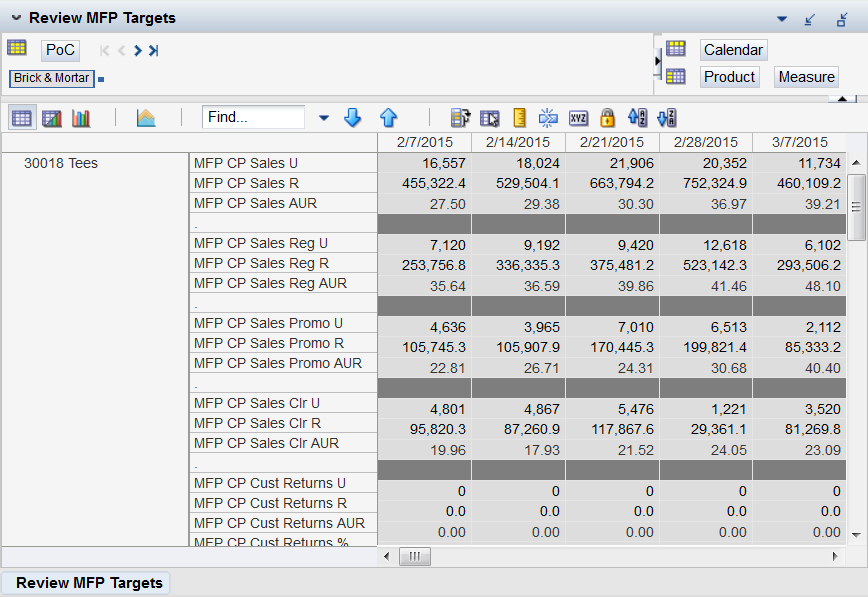
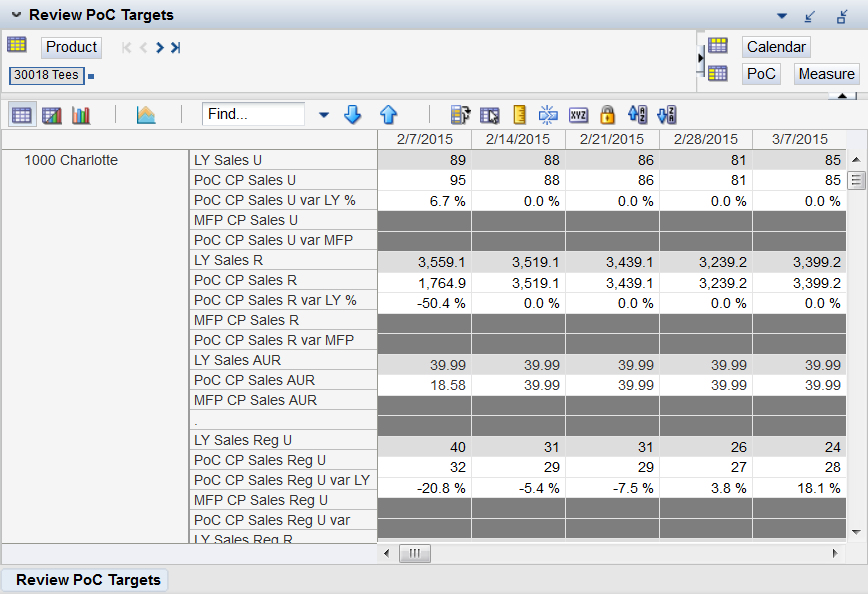
In this step, the merchant/trader can review the MFP targets, which may be used as a source for initializing the PoC level targets. The targets include Sales Retail, Sales Units, Gross Margin Retail, and Gross Margin %. If an MFP or Loc Plan solution is not being used, Last Year values can be used to spread the MFP plan to the Week, Subclass, PoC Level.
In this step, the merchant/trader selects a source calculating the targets and then runs the Custom Menu that creates them. There are several source options. You can use Last Year or MFP spread to store based on LY or copy from a Sister Subclass. All of these options can vary by any dimension of the Point of Commerce hierarchy (for example, mobile commerce can have one approach and stores in California another).
This step has one custom menu option.
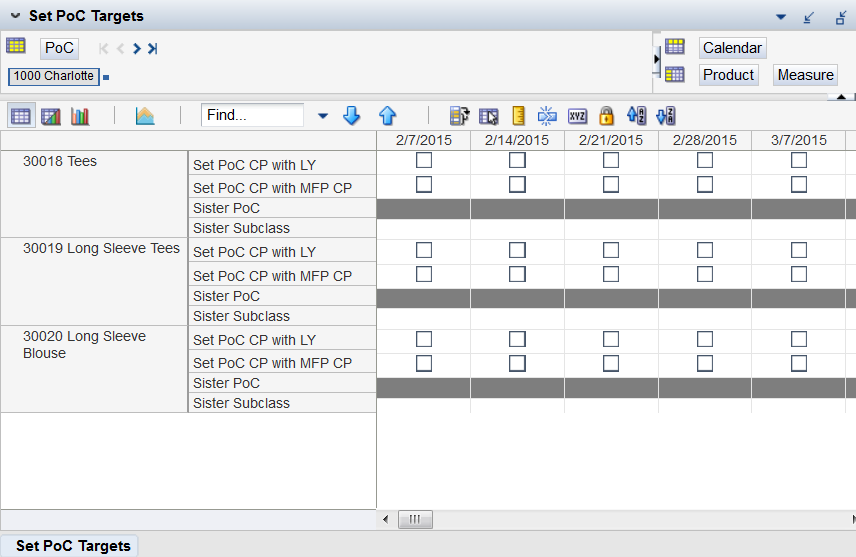
Set PoC Targets
This custom menu option uses your selections to calculate PoC level targets. MFP is assumed to be at the subclass level.
To run the custom menu option:
Select one of the following Boolean measure settings:
Set PoC CP with LY
Set PoC CP with MFP CP
For new store and new subclass, select Sister Store and Sister Subclass.
For new store and existing subclass, select Sister Store only.
Access the Custom Menu Option and select Set Location Plan Targets.
| Additional Detail |
* In the preceding list, Sls U is used as an example. The PoC measures get updated are shown in the following table.
After the custom menu option is executed, the following message appears: Set Loc Plan Targets is Successful. |
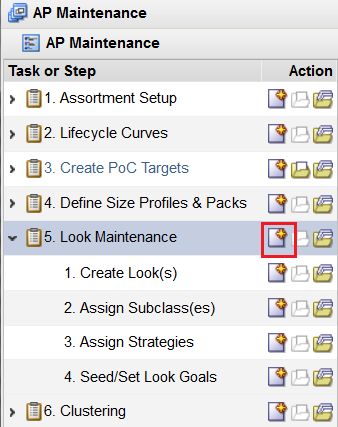
The merchant in the Look Maintenance task performs periodic steps that drive some of the critical parts of the Assortment Planning process. These steps include defining the Look Groups and Looks and assigning the subclasses, sales/margin weights used in clustering and product attribute targets (if desired). All of this data can be loaded from an external source such as a Floor Set calendar, and so on.
The Look Maintenance task has the following steps:
To create the Look Maintenance workbook:
Select the New Workbook icon in the Look Maintenance task.
The workbook wizard opens.
In the Select Look Group(s) page, select the Look Groups to be reviewed or maintained. Click Finish.
The workbook is created.
This custom menu option is available in all steps and views of this workbook.
Commit Plan
This custom menu option commits the Look Maintenance workbook.
To run the custom menu option, access the custom menu option and select Commit Plan.
| Menu Item | Commit Plan |
| Steps | Define Look
Assign Subclass Assign Strategy / Intent Seed/Set Look Goals |
| Trigger Measures | NA |
| Trigger Condition | NA |
| Additional Detail | If any of the following alerts have been triggered, the user is unable to commit the workbook until the associated errors have been resolved:
When the Commit Look Maintenance custom menu option is selected, the workbook is committed at that time. |
The following table lists the updated measures:
| Updated Measure | Source | Notes |
|---|---|---|
| Look Description | NA | In Define Look |
| Look Start Date | NA | In Define Look |
| Look End Date | NA | In Define Look |
| Look Duration (Days) | NA | In Define Look |
| Prior Look | NA | In Define Look |
| Sister Look | NA | In Define Look |
| Look / Subclass Assignment | NA | In Assign Subclass |
| Strategy / Intent | NA | In Define Strategy / Intent Weights |
| % of Style-Colors | Sister Look % of Style-Colors | Seeded at look/attribute level
Normalized to 100% In Seed From Sister Look |
| TGT % of Style-Colors | Sis Lk Tgt % of Style-Colors | Normalized to 100%
In Determine Attribute Mix, Determine Color Mix |
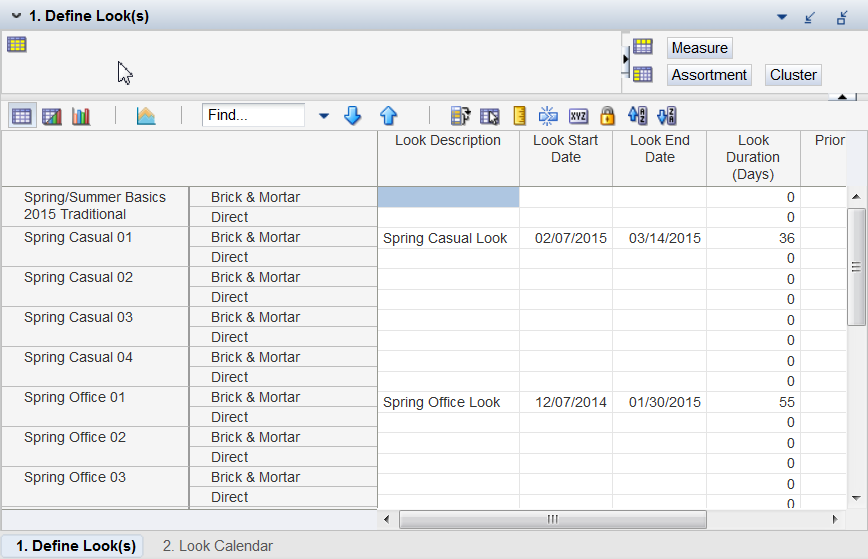
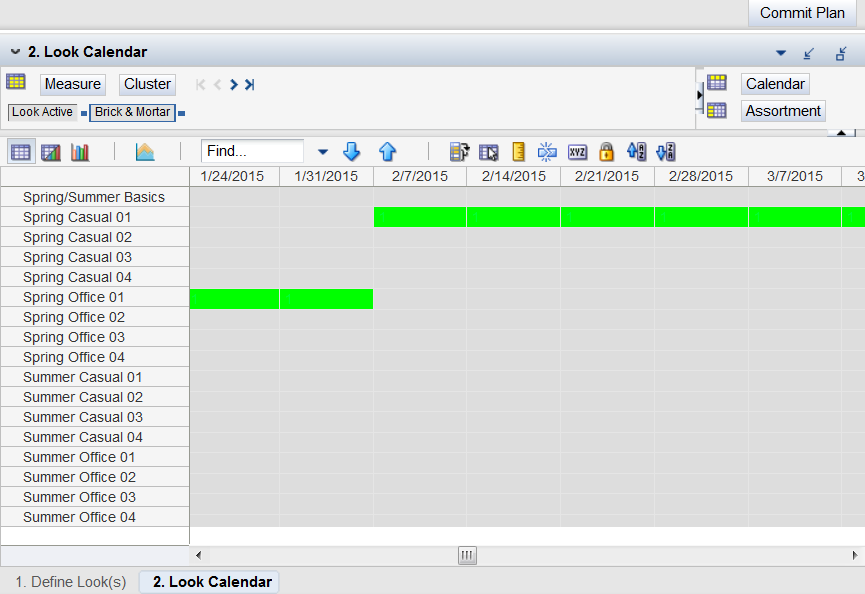
In this view, the Merchant/Trader defines all the pertinent aspects of a Look Group and its Looks and may review Looks using a visual representation of the Calendar hierarchy.
This step has the following views:
For information on the available custom menu option, see "Commit Plan" for this task.
In this view, the Look Groups and Looks are created/maintained.
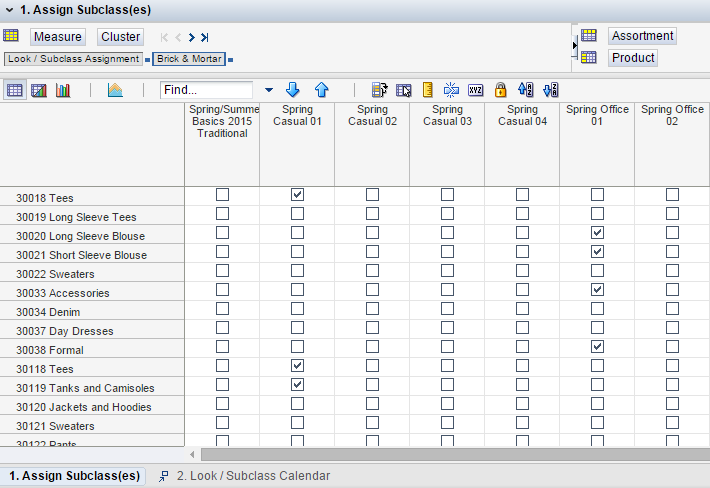
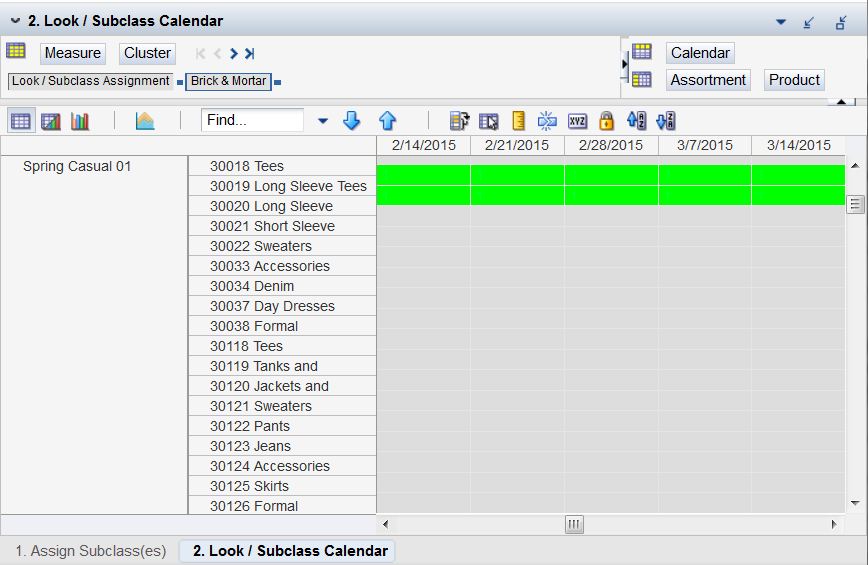
In this step, the merchant/trader defines and maintains subclass/look assignments.
This step has the following views:
This step has one custom menu option. For information on the available custom menu option, see "Commit Plan" for this task. This custom menu option is available in the Assign Subclass and Look/Subclass Calendar views.
In this view, the merchant/trader uses check boxes to indicate the subclasses that should be assigned to the Look.
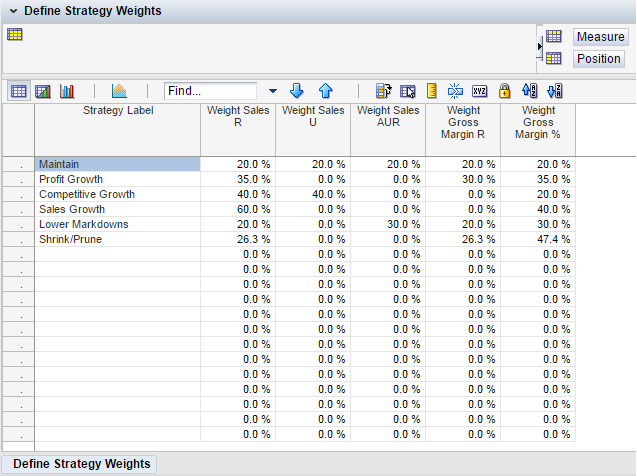
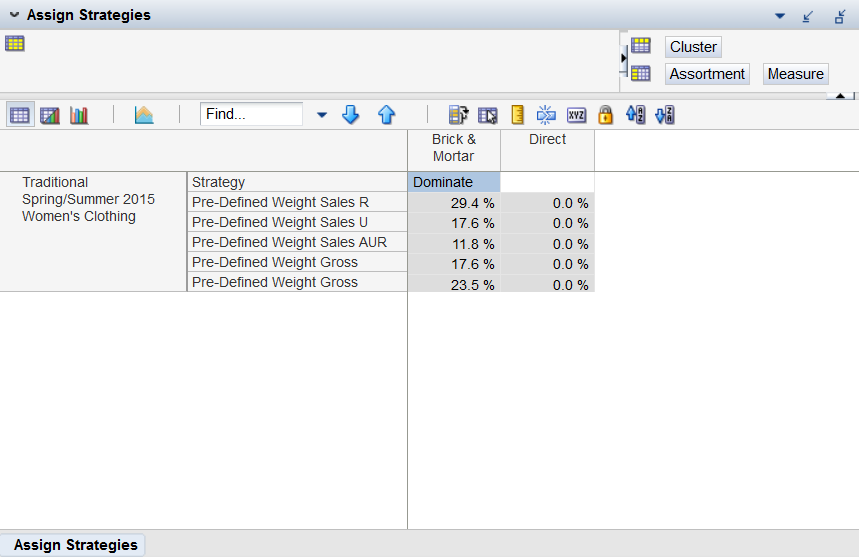
In this step, the merchant/trader designates the Strategy/Intent for each Look for use in clustering Points-of-Commerce into clusters and cluster parents. Each Strategy/Intent is defined and maintained in the Define Strategy/Intent Weights step of the Assortment Setup task.
This step has one custom menu option. For information on the available custom menu option, see "Commit Plan" for this task. This custom menu option is available in the Assign Strategy/Intent views.
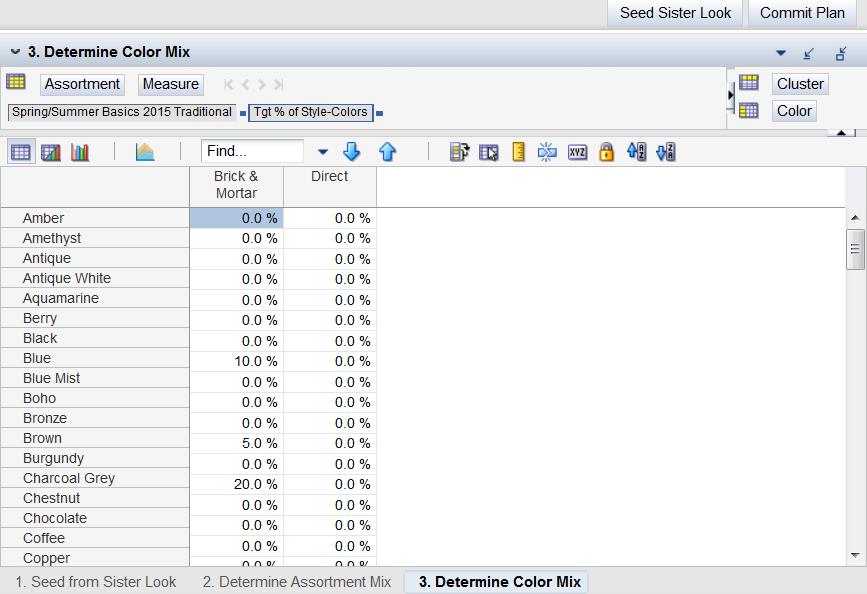
In this step, the Assortment Mix Targets by Product Attribute and/or Color can be determined (this step is optional) by specifying the percentage of Style-Colors by product attribute and color or by loading from an external source. These targets can be used throughout the assortment process to determine whether the assortment has the right mix of product attributes and colors, and so on. These will be shared with the Shopping List where they can be edited and then from the Shopping List spread to each cluster where again they can be edited. Once edited in the Wedge (if desired), they can be used by the Wedge Population Automation to recommend assortment decisions by Wedge (intersection of Cluster and Look).
This step has the following views:
In addition to the Commit Plan custom menu, this step also has the following custom menus:
This custom menu option copies the percentage of style-colors and attribute priorities from the Sister Look to the look that the merchant/trader is planning.
The merchant/trader should first specify the Sister Look in the Define Look view, and then run the custom menu option to copy the measures previously mentioned.
To run this custom menu option:
In the Define Look view, specify Sister Look from a pick list of Looks in the Assortment hierarchy for the same channel.
In the Determine Assortment Mix view, select the Boolean Seed from Sister Look at the Look and Channel level measures.
Access the custom menu option and select the Seed from Sister Look measure.
| Menu Item | Seed from Sister Look |
| Views | Determine Assortment Mix
Attribute Priority |
| Trigger Measures | Sister Look (Look/Channel)
Seed from Sister Look (Look/Channel) |
| Trigger Conditions | The Sister Look measure is selected from a pick list of looks in the Assortment hierarchy at the Look and Channel level in the Define Look view.
The Boolean Seed from Sister Look measure is checked at the Look and Channel level. |
| Additional Detail | If any of the following alerts have been triggered, the user is unable to commit the workbook until the associated errors have been resolved:
When the Commit Look Maintenance custom menu option is selected, the workbook is committed at that time. After the Custom Menu Option is run, the following message appears: Seed from Sister Look executed. The Boolean Seed from Sister Look measure should be unchecked after the custom menu is run. |
The following table lists the updated measure:
| Updated Measure | Source | Notes |
|---|---|---|
| % of Style-Colors | Sister Look % of Style-Colors | Seeded at look/attribute level
Normalized to 100% In Seed From Sister Look |
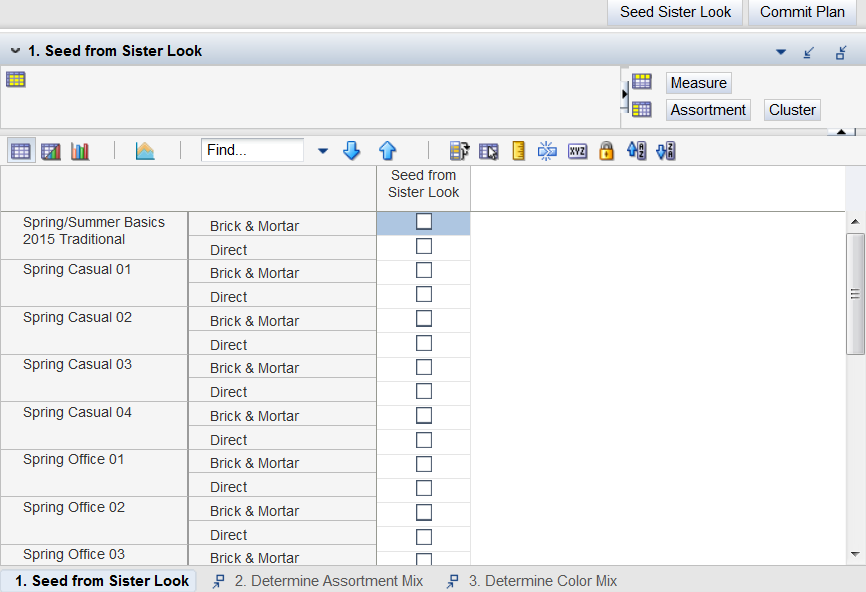
This custom menu option is available in the Seed from Sister Look view.
For information on this custom menu option, see "Commit Plan" for this task. This custom menu option is available in the Seed from Sister Look, Determine Assortment Mix, and Determine Color Mix views.
In this view, the merchant/trader selects which Looks should inherit values for % of Style-Colors and Attribute Priority from a Sister Look specified in the Define Look step. If the Seed from Sister Look custom menu is run without checking the Seed from Sister Look measure for at least one look/channel, a real-time alert is generated that notifies the user that this selection must be made.
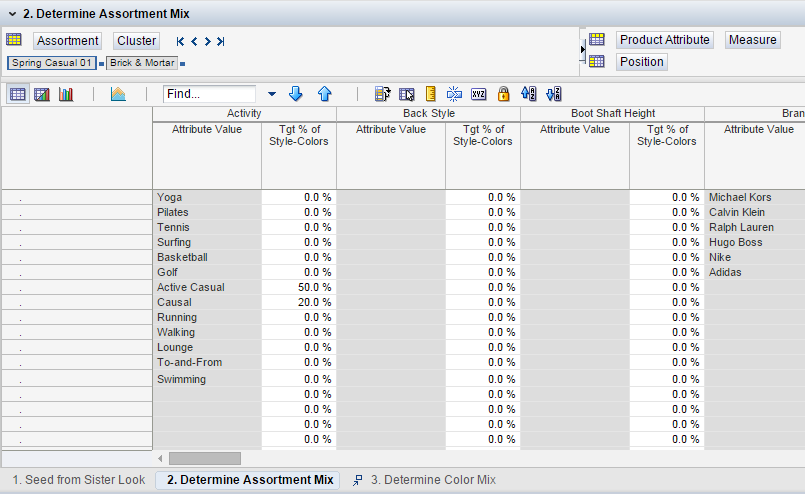
In this view, the assortment mix is determined by specifying the % of Style-Colors by product attribute.