| Oracle® Retail Assortment Planning User Guide for the RPAS Fusion Client Release 14.1 E55312-01 |
|

 Previous |
 Next |
| Oracle® Retail Assortment Planning User Guide for the RPAS Fusion Client Release 14.1 E55312-01 |
|
Previous |
Next |
Buying plan is the sixth step in the AP business process.
Table 7-1 Business Roles in Buying Plan
|
|
The Buyer Analyst creates and re-trends the Buying Plan. |
|
|
The Merchandise Planner reviews the Buying Plan in the MFP Review/Refine Buying Plan step of the Buying Plan task. This is an optional step and the Planners can be granted read-only access to the data. |
In this task, the Buyer builds a Buying Plan based on the assortment created in the Shopping List and Fill the Wedge Tasks. This plan includes time-phased (generally weekly) Sales, Margin, Inventory, and Receipt components. This GA version of the Buy Plan is meant to coexist with a more granular Item Plan. However, when implementing this solution, you can choose to add more detail to this plan to consolidate the Buy Plan and Item Plan processes into a single task.
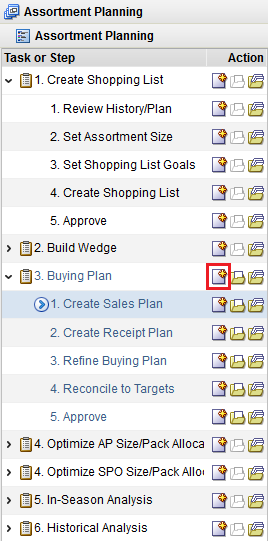
This task has the following steps:
To create the Buying Plan workbook:
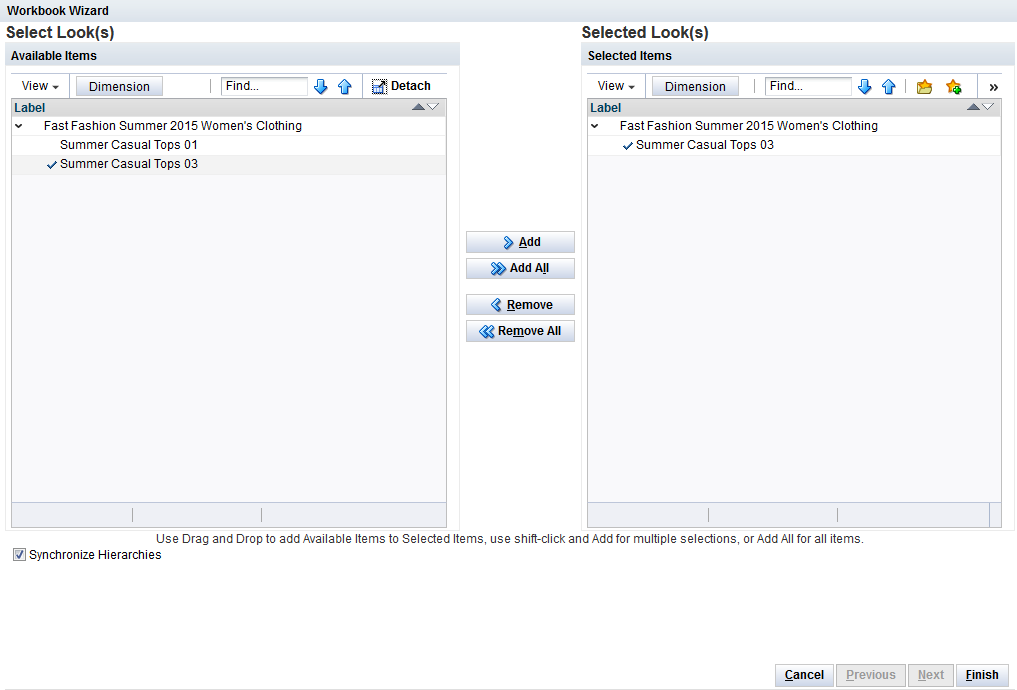
Select the New Workbook icon in the Buying Plan task.
The workbook wizard opens.
In the Select Looks page, select the looks to be loaded into the workbook. Click Finish.
The workbook is created.
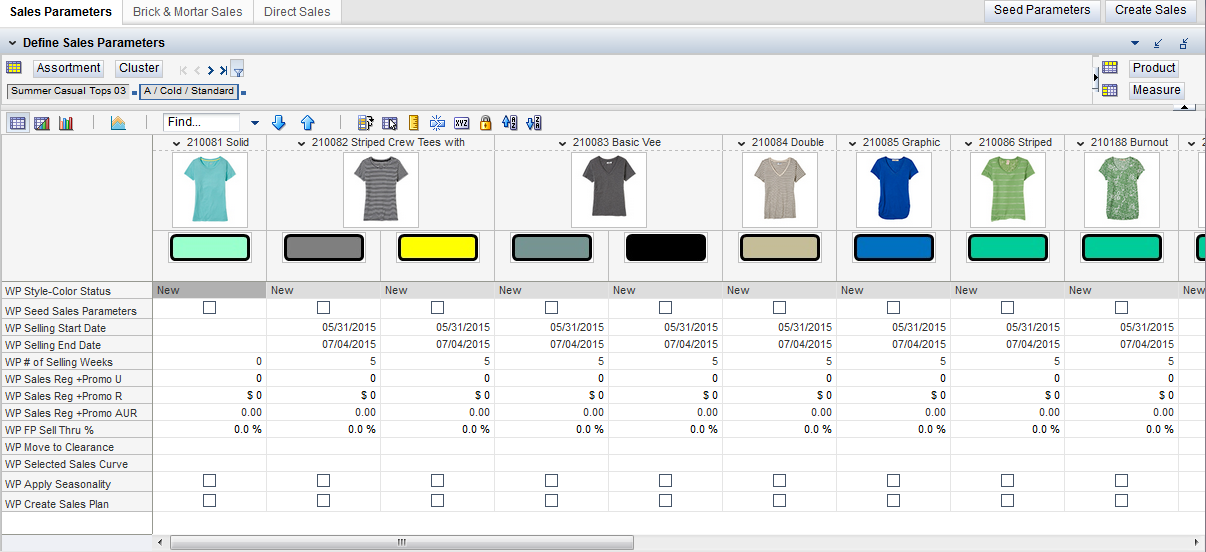
In this step, the Buyer seeds the sales plan with a sales curve and the total projected sales created in the Shopping List and/or Wedge processes and then revises as necessary. As in the Set Assortment Size steps, there are separate tabs for Brick and Mortar versus Direct sales planning as you may choose to use a different measure set for each type of sales planning: Net Sales versus Gross Sales (Net Sales minus Customer Returns, and so on). Any type of cluster can be planned in either approach. Both approaches result in calculating the Net Sales measures.
This step has the following tabs and views:
This step has the following custom menu options:
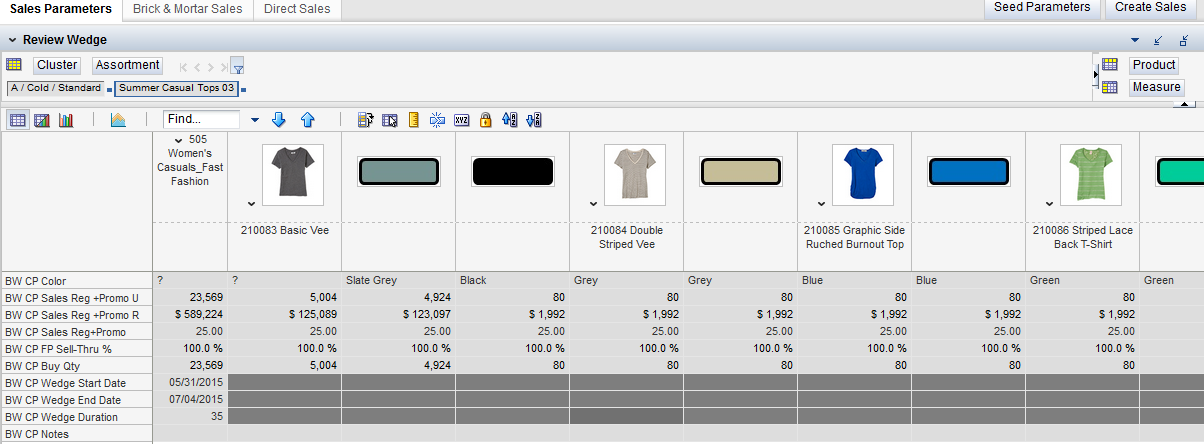
For those styles and style-colors that are being launched with this look as opposed to being carried over from a prior look, the Seed Parameters custom menu seeds the total gross sales, returns, start/end dates and cost/price, and so on, from the Wedge workbook. By seeding this through a Custom Menu, you can first seed the measures and then edit the very same measure cells.
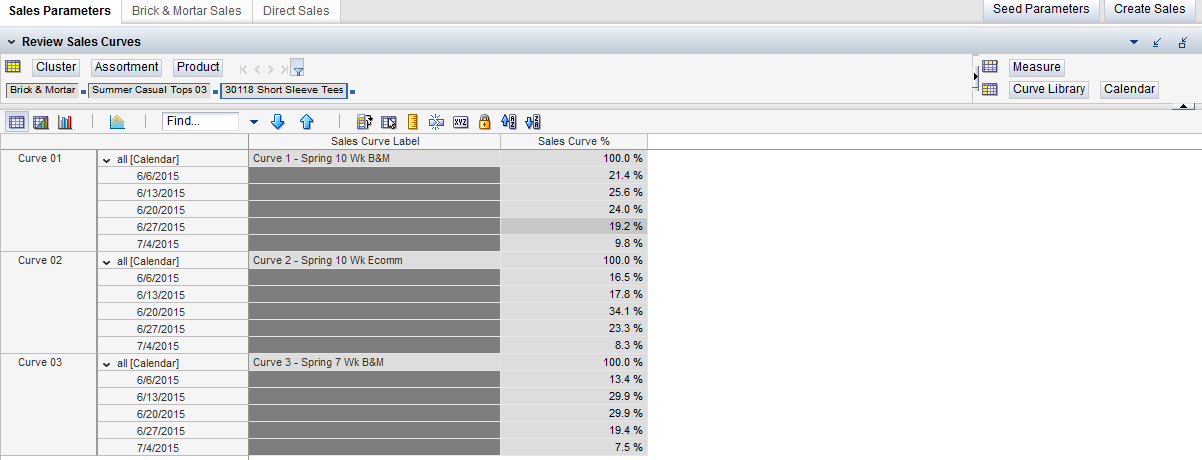
Once the parameters are set and the Buyer has selected a sales curve that represents the expected sales life of the style and/or style-color (the sales curve can be selected for a Subclass, a Style and/or a Style-color), this custom menu spreads the total sales over the life of the item using the sales curve. Since this process is completed through a custom menu, the Buyer can adjust the same weekly sales measure cells that are being calculated in the custom menu.
In this tab, the Buyer creates the Sales Plan by seeding parameters and using the Create Sales custom menu to spread the total life sales of the style-color to the week level with the assistance of a sales curve (that you select).
This view shows the start and end dates for each look by cluster in the workbook. The sister and prior looks for each look are also listed.
This view shows the Buyer, by style-color (and higher) and cluster (and higher), the sales start and end dates, the planned total sales, returns, cost, price, markup, buy quantity, and notes that were created in the Wedge process. These measures may have been seeded from the Senior Buyer's Shopping List in the Wedge process.
The start and end dates here will override the Look start and end dates for a given cluster, and so on.
In this view, the Buyer can view a library of sales curves from which you can choose for the purposes of seeding your sales plan. Your Central Planning Team likely crated these curves.
In this view, the Buyer is able to control the sales seeding process. The Buyer can both review the measures from which seeding occurs (sales, start and end dates, and so on) and select the sales curve to use when seeding the weekly sales plan (Create Sales custom menu option).
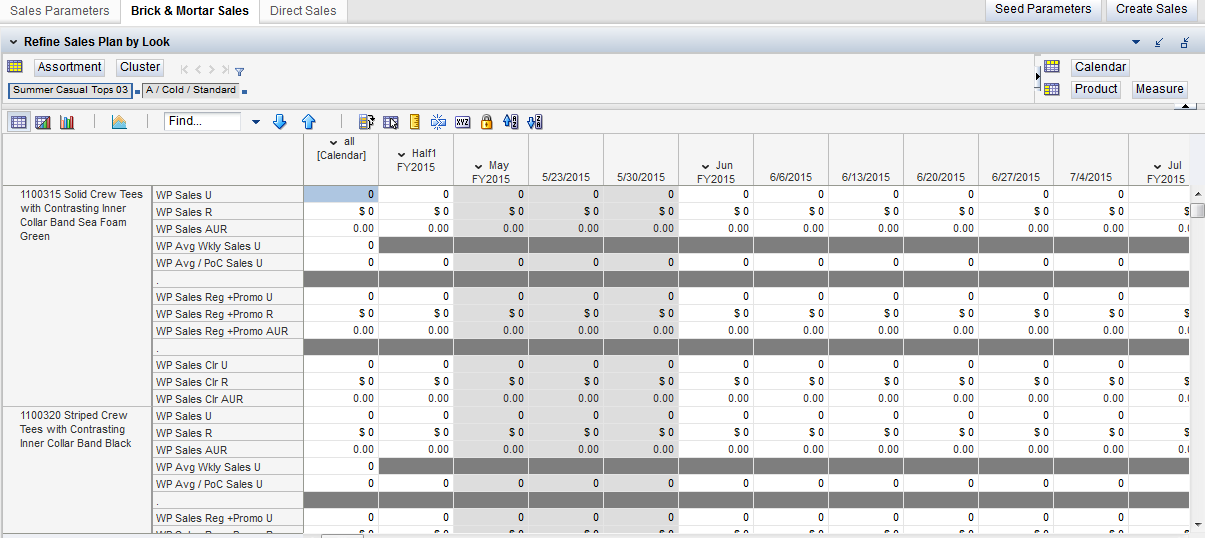
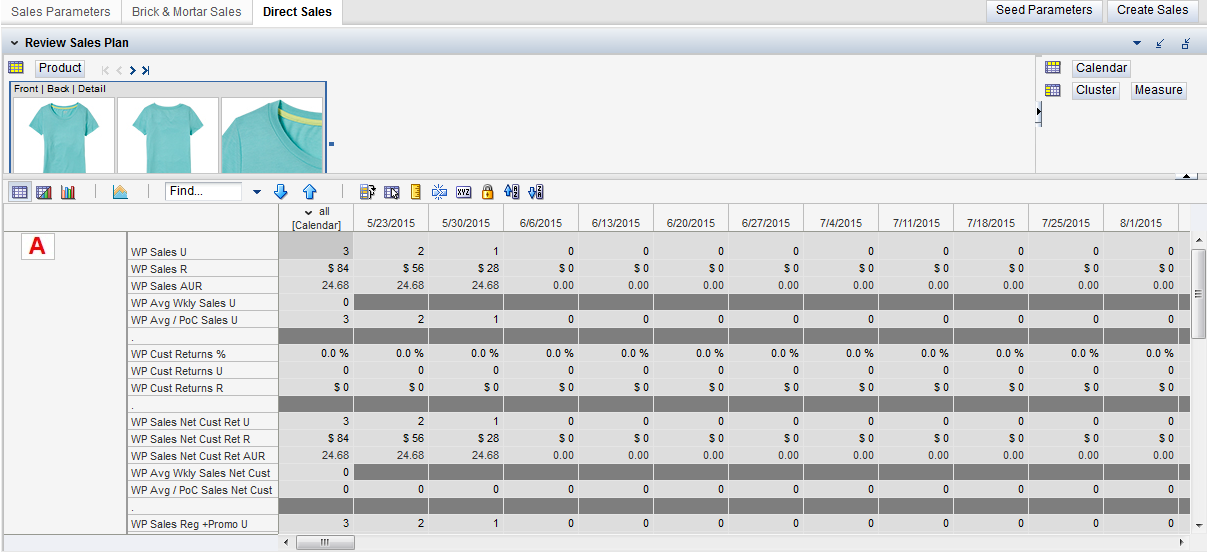
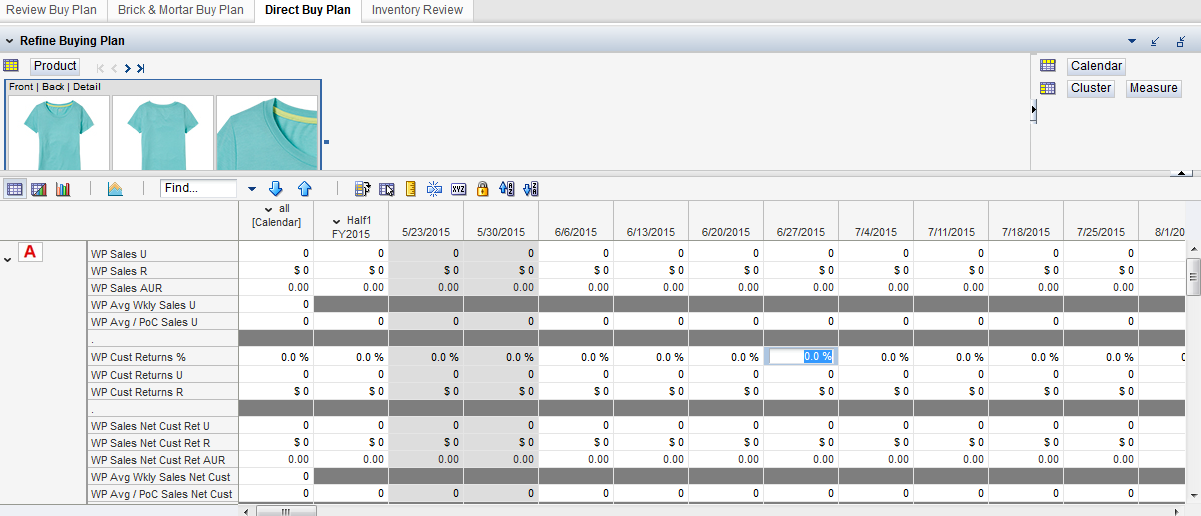
On this tab, the Buyer reviews and refines the seeded sales plan. This tab uses a typical Brick & Mortar approach to planning sales with Net Sales versus, on the next tab, the Direct Sales tab that uses Gross Sales leading to Net Sales (Net Sales equals Gross Sales minus Customer Returns). However, you can plan any of your clusters on either tab depending on your preference. You can think of the Brick & Mortar Sales tab as the Net Sales method and the Direct Sales tab as the Gross Sales method.
In this view, plan, review, and edit the seeded sales plan at the style-color (or higher), cluster (or higher) and look (or higher) level. This view uses the Brick & Mortar or Net Sales method, but you can plan any and all of your clusters with this method, if you wish.
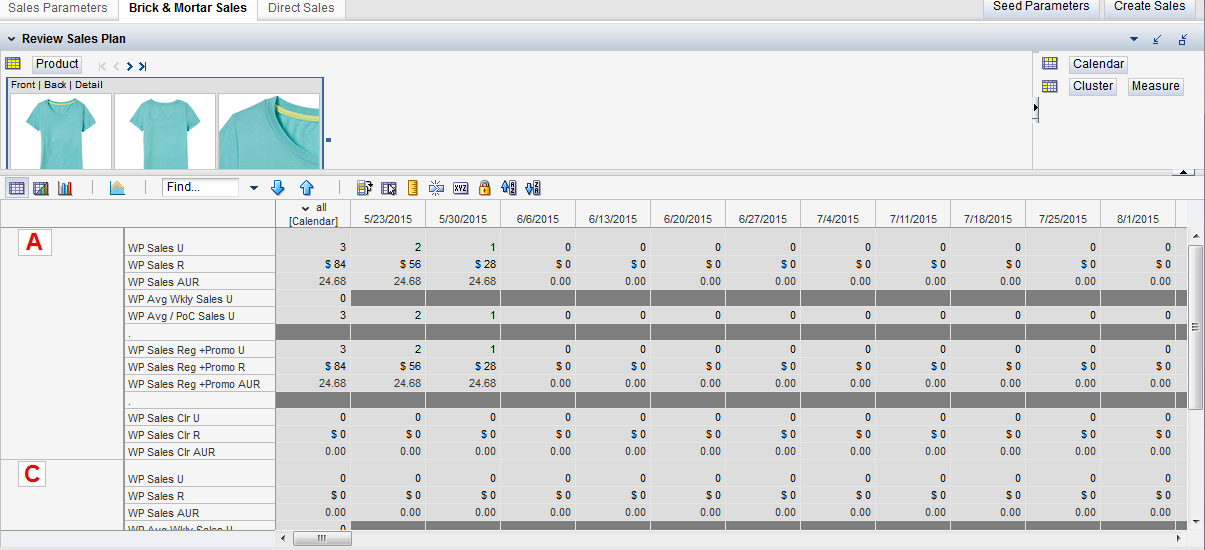
In this view, view the seeded and edited sales plan at the style-color (or higher), so without the Looks being in the way. This view summarizes all of the looks and removes the Look hierarchy from the view. This view uses the Brick & Mortar or Net Sales method, but you can plan any and all of your clusters with this method, if you wish.
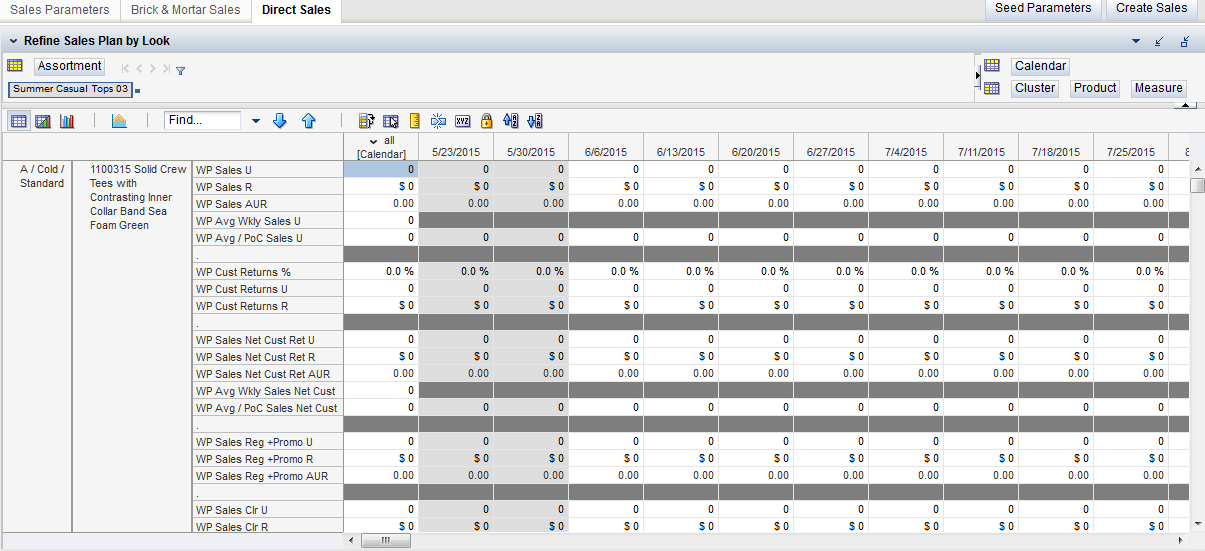
On this tab, you review and refine the seeded sales plan. This tab uses a typical Direct (Sites, Applications, and so on) approach to planning sales with Net Sales equals Gross Sales minus Returns versus, on the prior tab (Brick & Mortar Sales), that uses Net Sales without any upstream calculations. However, you can plan any of your clusters on either tab depending on your preference. You can think of the Brick & Mortar Sales tab as the Net Sales method and the Direct Sales tab as the Gross Sales method.
In this view, plan, review, and edit the seeded sales plan at the style-color (or higher), cluster (or higher) and look (or higher) level. This view uses the Direct or Gross Sales method, but you can plan any and all of your clusters with this method, if you wish.
In this view, view the seeded and edited sales plan at the style-color (or higher) and cluster (or higher). This view summarizes all of the looks and removes the Look hierarchy from the view. This view uses the Direct or Gross Sales method, but you can plan any and all of your clusters with this method.
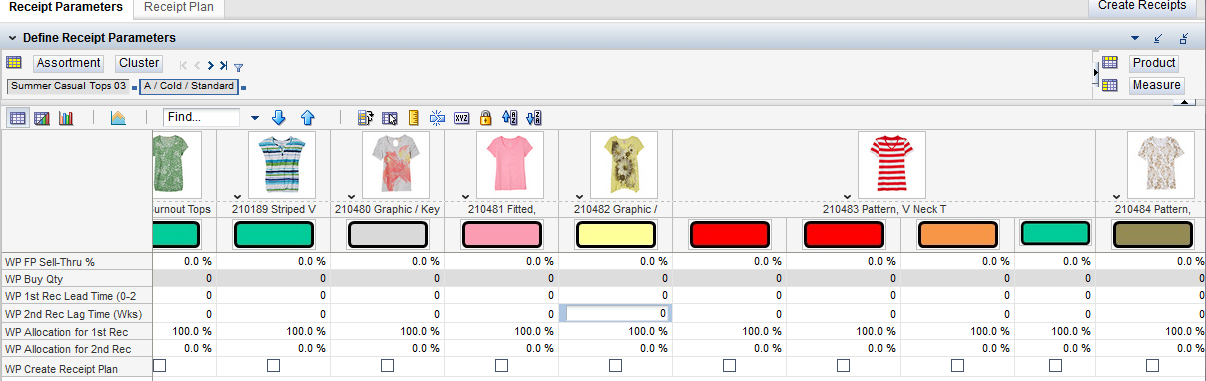
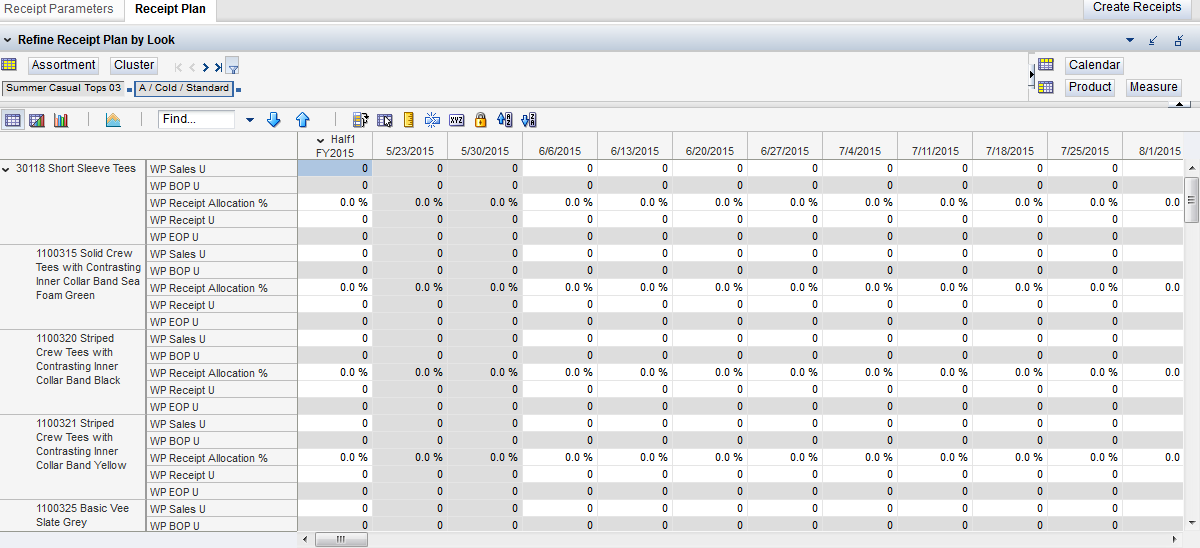
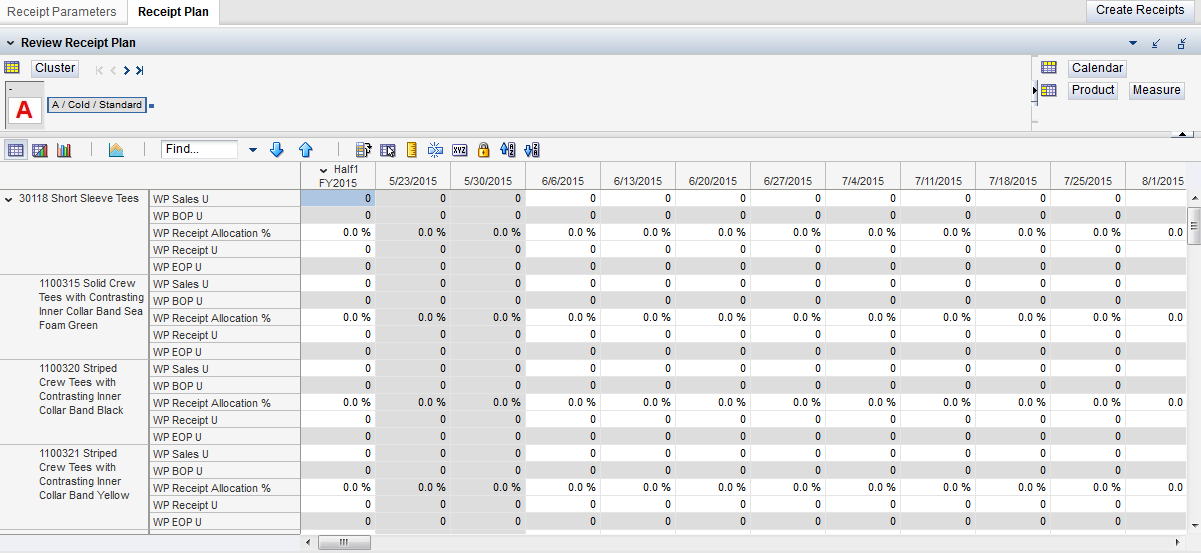
Now that the sales plan is created, you can create a receipt and inventory plan. In this step, you update key inputs seeded from the Shopping List and Wedge steps (Buy quantities and sell-thru % and so on) and select lead and lag times, and so on, that are used to seed a receipt plan. Then, you can review and edit the receipt and inventory plan as needed.
This step has the following tabs and views:
In this tab, update key inputs seeded from the Shopping List and Wedge steps (Buy quantities and sell-thru percentage and so on) and select lead and lag times, percentage of buy covered by each receipt, and so on, that are used to seed a receipt plan.
In this step, the Buyer reviews the end-to-end Buying Plan (sales, margin, inventory and receipts) and refines the plan. The Buyer can always go back to the prior steps and reseed the plan, if key assumptions about the plan change (start and end dates, major sales or events shift during the life of the style-colors, and so on).
This step has the following tabs and views:
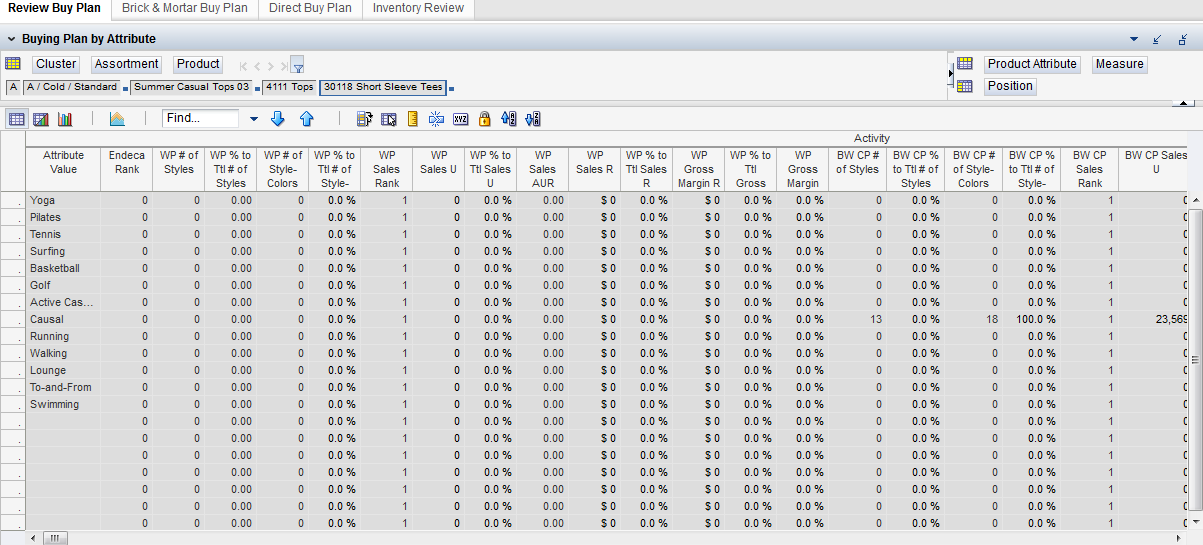
On this tab, the Buyer can roll up the buy plan to the attribute or color levels and compare the buy plan's sales and margin working plans to last year and to the plan approved in the Wedge step (that was seeded from the Shopping List).
In this view, roll up the buy plan to the attribute level and compare the buy plan's sales and margin working plans to last year and to the plan approved in the Wedge step (that was seeded from the Shopping List).
On this tab, the Buyer can review and refine the full Buying Plan (Sales, Margin, Returns, Receipts, and Inventory) and compare it to last year and the Current Plan version (last approved version of the Buying Plan).This view uses the Brick & Mortar or Net Sales method, but you can plan any and all of your clusters with this method, or use the Direct or Gross Sales method in the next tab.
In this view, the Buyer can review and refine the full Buying Plan (Sales, Margin, Returns, Receipts and Inventory) and compare it to last year and the Current Plan version (last approved version of the Buying Plan).
This view uses the Direct or Gross Sales method, but you can plan any and all of your clusters with this method, or use the Brick & Mortar or Net Sales method in the next tab.
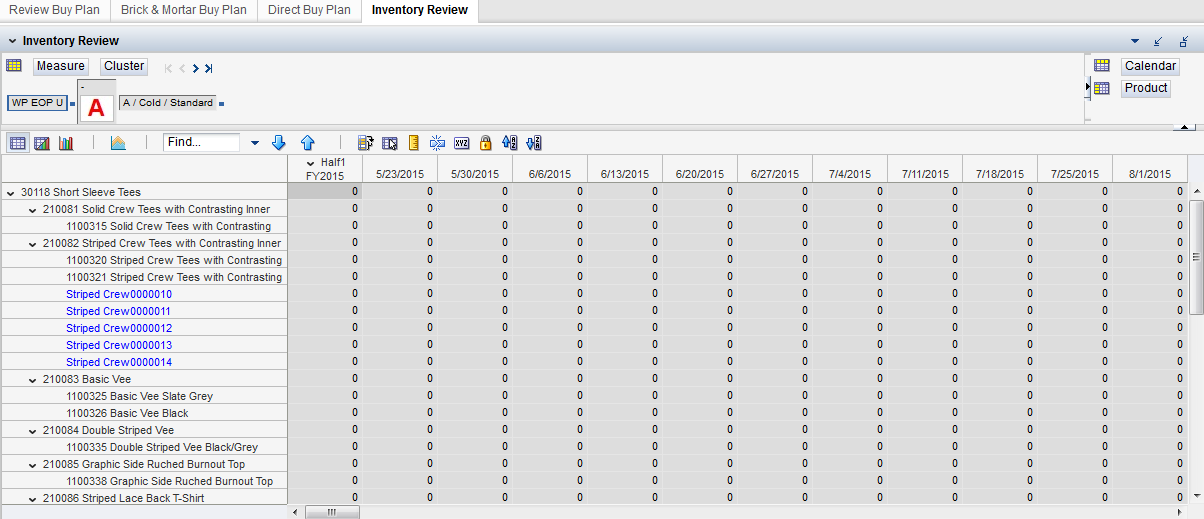
This tab shows an in-depth, time-phased view of the Receipts and Inventory component of the Buy Plan, regardless of whether you use the Brick & Mortar or Direct or both sales methods for planning.
The Buyer can compare their current Working Plan to Last Year (likely at an aggregate of the Product hierarchy) and to the last Current Plan version of the plan.
This step has one view.
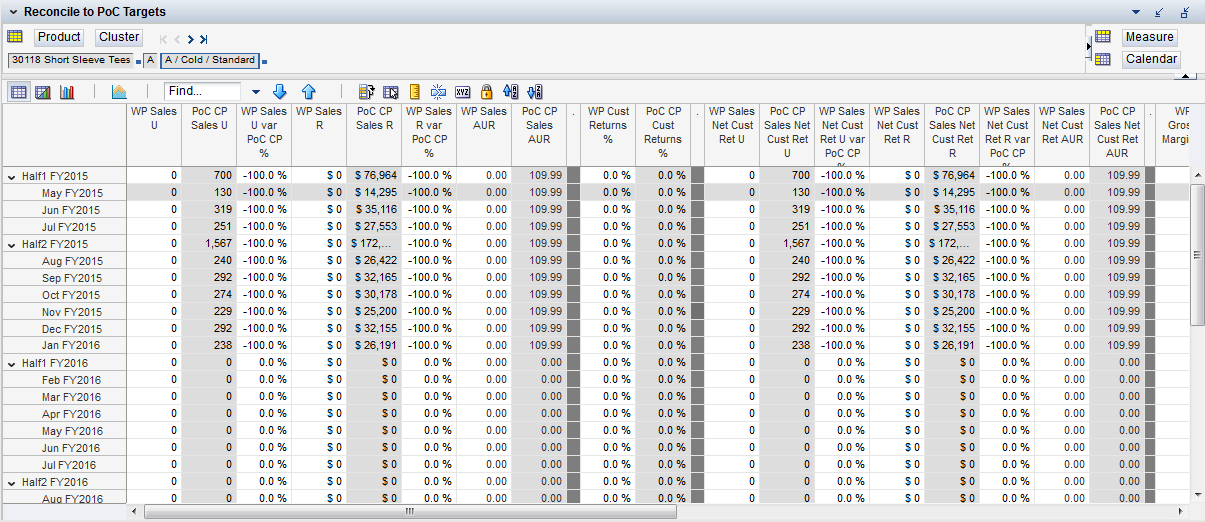
In this view, you can reconcile the Working Plan version of the Buy Plan to the following:
The last approved version of the Buy Plan (CP or Current Plan)
The Location Plan loaded from an external Location Plan and/or created in the Administrative section of AP:
This plan may have been created by spreading the Merchandise Financial Plan down to the store, site, app, and so on level
This spread-down plan has been rolled up to the cluster level from the store, site, or application level.
In this final step of the Buying Plan process, the Buyer decides they have completed creating or updating the Buying Plan and want to make it available to other designated users, in particular to their Senior Buyer or to the Planner building the Item Plan (and to Reporting). Some retailers create just a Buy Plan or an Item Plan or both types of plans.
This step copies the Working Plan sales, margin, inventory, and receipt measures into the Current Plan versions of the Working Plan measures. The Current Plan versions should be used for external reporting, and so on.
This step can be completed more than once, if the Plan requires additional changes after it has been approved. The Working Plan version overlays the Current Plan version if approved again.