Procedure - Remove Drive Module Assembly
- Verify that the drive module is locked in position and in use.
The switch lock release (C) is in the LOCKED position and the Status LED on the E5-APP-B card is OFF.
Move the switch lock release (C) to the "released" position by pressing in the direction indicated. Refer to Figure 1.
Drive Module Released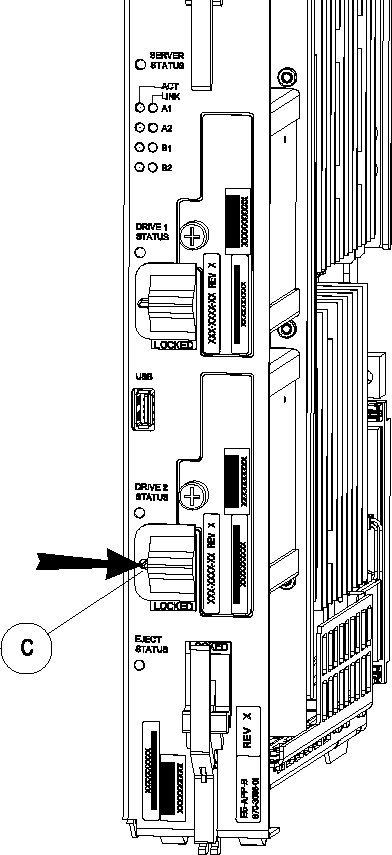
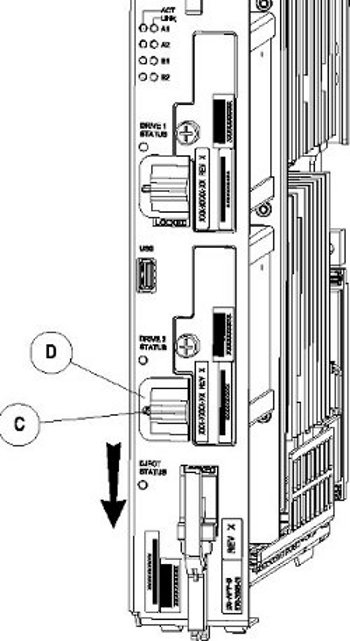
- Move drive module locking switch (D) from the LOCKED to the unlocked position and wait for the LED (B) to indicate a steady red state. See Figure 2 and Figure 3, respectively. When drive module locking switch (D) is transitioned from locked to unlocked, the LED will flash red to indicate the drive is unlocked and in process of shutting down.Drive Module UNLOCKED
 CAUTION: Removal of the drive prior to the LED indicating steady red could result in drive corruption.Drive Module Status
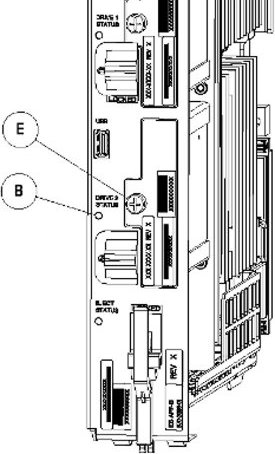
- Grasp the screw (E) and pull the drive out slowly until it is free from the card (see Figure 4). Drive Module Removal
