Procedure - Replace E5-APP-B card
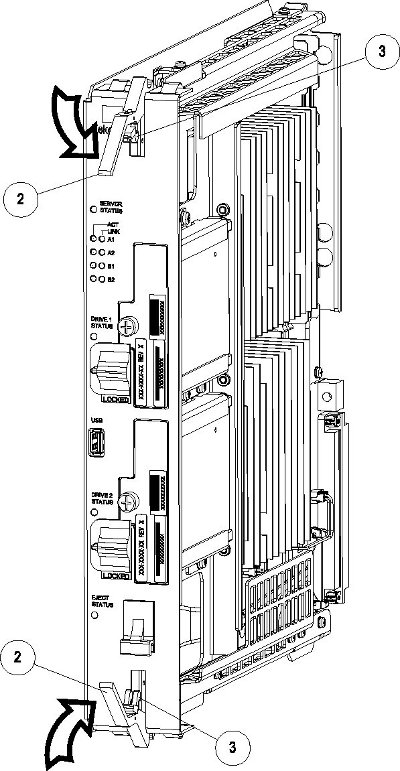
- While holding the I/E interlock and lever, pull the levers (2) away from the card until they are parallel to the floor.Figure 1 illustrates the angle of the interlocks and levers just before inserting E5-APP-B Card into the EAGLE shelf.E5-APP-B Card UNLOCKED

- Push in the top and bottom inject/eject clamps (see Figure 2). E5-APP-B Card Inject Levers
This locks the card in place and ensures a strong connection with the pins on the target shelf backplane.
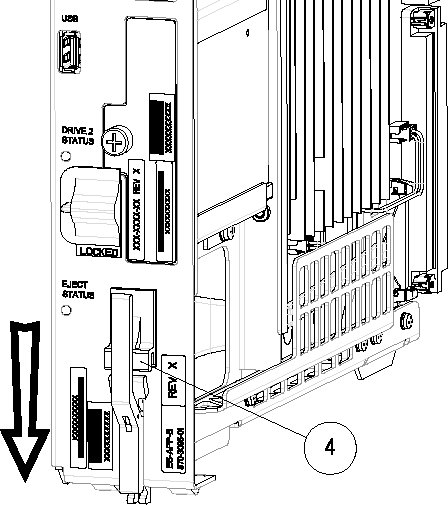
- Slide the E5-APP-B Ejector switch (4) down to the LOCKED position (see Figure 3).Note: When the Ejector switch goes from UNLOCKED to LOCKED, the E5-APP-B Eject Status LED blinks red as the E5-MASP card goes online.E5-APP-B Card Inject Hardware Switch, LOCKED