4 Configuring DIVArchive and Oracle Fail Safe (Performed by Oracle)
Configuring DIVArchive and Oracle Fail Safe is the responsibility of the Oracle Delivery and Installation Team. The customer should have successfully completed the installation and configuration of the cluster before the Oracle team arrives at their location. The following subsections describe what services the Oracle team will perform when they arrive.
Configuring DIVArchive
The procedures in this section will install and configure DIVArchive and the Oracle Database. These steps must be completed on both Cluster Node Servers.
Installing DIVArchive Prerequisites
Install the DIVArchive Prerequisites on both Cluster Node Servers using the following procedure:
-
Log on to the first node server as a dedicated cluster domain account user (DIVAClusterAdmin).
-
Open the User Account Control Settings from the Windows Control Panel.
-
Set the notifications to Never notify. This will reduce the amount of administrator approval request messages during installation.
-
Open a Windows command prompt as an administrator (use Run as Administrator).
Caution:
In Step 5, confirm that there are no spaces in the directory path. If there are spaces in the directory path, the Cygwin installation will fail after restarting the computer. -
If not already completed, copy the prerequisite directory, including all subdirectories and files, from the installation DIVArchive DVD to a temporary directory path (with no spaces).
The directory typically used is
C:\temp\Prerequisites_x.x.xwhere x.x.x is the DIVArchive release number. -
Change to the temporary directory containing the DIVArchive prerequisites installation files.
-
Enter the command
StartSetup.batand press Enter. -
When the name and password of the account to run the tasks are requested, enter the DIVAClusterAdmin account name and password and press Enter. The account name must be in the format Domain\User (for example,
QALAB\ClusterAdmin). -
Confirm that the prerequisites installation completes successfully. If any errors were identified, resolve the errors and repeat the previous steps again until the installation is successful.
-
Repeat all steps for the second node.
Next you will install the Oracle Database.
Installing Oracle Database
There are specific tasks that must be completed on one or both Cluster Node Servers. The tasks need to be completed on either or both servers are identified within the procedure steps. Install the Oracle Database on both Cluster Node Servers using the following procedures:
-
Log on to both node servers as a dedicated cluster domain account user (DIVAClusterAdmin).
-
Open a Windows command prompt as an administrator on both node servers (use Run as Administrator).
-
Mount the Oracle ISO file on each node server.
-
Enter
InstallEngine.cmdat the command prompt and press Enter. This will install the Oracle binary files inC:\app.
The following steps must be completed on Node 1 (active node) only:
-
Enter
InstallDatabase-huge.cmdat the command prompt and press Enter.Note:
Oracle Fail Safe will be used to configure Oracle services on Node 2 later in the procedures. -
Navigate to
C:\app\oracle\product\11.2.0\dbhome_1\NETWORK\ADMIN\and edit thelistener.orafile. -
Replace
HOSTwith the Oracle Cluster Group IP address. This IP address is required during Oracle Fail Safe installation. In our examples172.20.128.130(DIVA-CL_ORC) are used.
The following steps must be completed on Node 2 (standby or rebuilding node) only:
-
Copy the
C:\app\oracle\product\11.2.0\dbhome_1\database\initLIB5.orafile from Node 1 to Node 2. -
Navigate to
C:\app\oracle\product\11.2.0\dbhome_1\NETWORK\ADMIN\and edit thelistener.orafile. -
Replace
HOSTwith the Oracle Cluster Group IP address. This IP address is required during Oracle Fail Safe installation. In our examples172.20.128.130(DIVA-CL_ORC) are used. -
Open the Computer Properties window.
-
Select Advanced system settings in the menu on the left side of the screen.
-
Select the Advanced tab.
-
Click Environment Variables on the bottom right side of the screen.
-
Click New under the System Variables area.
-
Repeat steps 4 through 8 (inclusive) to set each of the following environment variables:
DIVA_ORACLE_HOME-
C:\app\oracle\product\11.2.0\dbhome_1 ORACLE _BASE-
C:\app\oracle PATH-
%SystemRoot%\system32;%SystemRoot%;%SystemRoot%\System32\Wbem;%SYSTEMROOT%\System32\WindowsPowerShell\v1.0\;C:\app\oracle\product\11.2.0\client32\bin;C:\app\oracle\product\11.2.0\dbhome_1\bin;C:\Oracle\Ofs41_1\FailSafe\ServerYou also must include the full path to your disk manufacturer's Disk Management Console software binaries and shared files. For example (assuming this is the basic path used for the manufacture's software installation):
C:\Program Files\DISK_MFG\binC:\Program Files\DISK_MFG\shared\binWhere
DISK_MFGis the disk manufacture's name.
The following procedure must be completed on both node servers:
-
Open the Computer Properties window.
-
Select Advanced system settings in the menu on the left side of the screen.
-
Select the Advanced tab.
-
Click Environment Variables on the bottom right side of the screen.
-
Click New under the System Variables area.
-
On the New System Variable dialog box, enter
ORACLE_SIDin the Variable name field, andLIB5(must be all uppercase) in the Variable value field.
The following procedure must be completed on Node 2 only:
-
Open the Computer Properties window.
-
Select Advanced system settings in the menu on the left side of the screen.
-
Select the Advanced tab.
-
Click Environment Variables on the bottom right side of the screen.
-
Click New under the System Variables area.
-
On the New System Variable dialog box, enter
ORACLE_BASEin the Variable name field, andC:\app\oraclein the Variable value field. -
Repeat steps 4 and 5.
-
On the New System Variable dialog box, enter
DIVA_ORACLE_HOMEin the Variable name field. -
On the New System Variable dialog box, enter
C:\app\oracle\product\11.2.0\dbhome_1in the Variable value field. -
Repeat steps 4 and 5.
-
On the New System Variable dialog box, enter
PATHin the Variable name field, and in the Variable value field enter the same path you entered for Node 1 (they must match).
Next you will install DIVArchive.
Installing DIVArchive
DIVArchive must be installed on both Cluster Node Servers. Use the following procedure to install DIVArchive:
-
Log on to both node servers as a dedicated cluster domain account user (DIVAClusterAdmin).
-
Install DIVArchive using the installation program. Refer to the Oracle DIVArchive Installation and Configuration Guide and the Oracle DIVArchive Operations Guide for additional details if necessary.
-
Start the DIVArchive installation program.
-
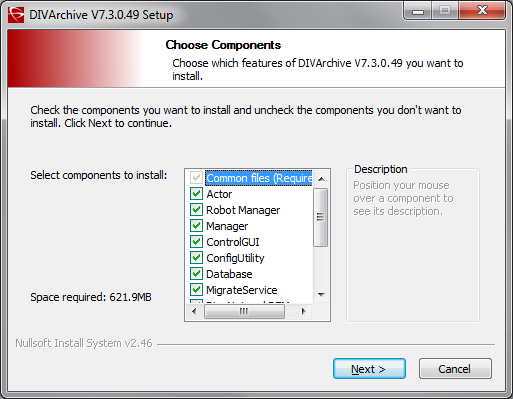
When the Choose Components dialog box is displayed, confirm that all check boxes for all components are selected.
-
Click Next.
-
Choose the installation location - Oracle recommends the default location (
C:\DIVA).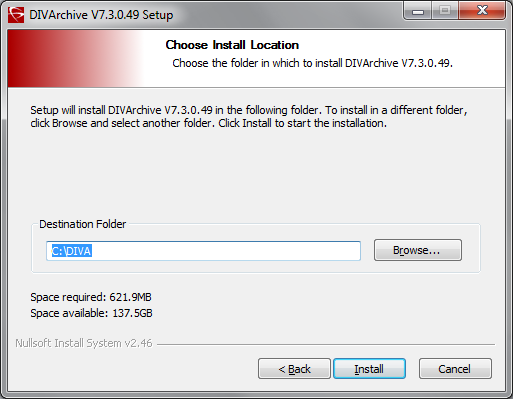
-
Click Install.
-
When installation is complete, click Close.
-
The DIVArchive Schema must be created on a shared disk (
E:andF:) from only one node. -
DIVArchive backup must be configured on a shared disk (
H:). -
The DIVArchive license must be configured with the
172.20.128.130(DIVA-CL-ORC) cluster IP address and applied to one node only. -
In the
manager.conffile, theDIVAMANAGER_DBHOSTparameter must be set to the DIVA Cluster Group's IP address (172.20.128.130-DIVA-CL-ORC). -
The Oracle DIVArchive Actor service must use the domain user account (
qalab\DIVAClusterAdmin). -
Your desired Manager Services must be installed now.
-
All DIVArchive services must be installed with the same exact name and configuration on both cluster nodes.
-
Install Oracle Secure Backup services.
-
The
SPMserviceuses the Oracle client. -
The file
tnsname.oralocated in theC:\app\oracle\product\11.1.0\client32\network\admindirectory must be updated to run theSPMserviceon both nodes.The
HOSTparameter should be changed to the IP address of the cluster (DIVA-CL-ORC). For example,HOST = 172.20.138.130. -
The Node 2 environment variables previously configured are required, otherwise an Oracle DIVArchive Storage Plan Manager (SPM) installation error will occur.
Next you will install and configure Oracle Fail Safe.
Configuring Oracle Fail Safe
The procedures in this section will install and configure Oracle Fail Safe. When the installation is complete, you will verify that it was installed properly.
Installing Oracle Fail Safe
The steps in this section must be completed on both Cluster Node Servers.
Fail Safe requires Microsoft's .NET 3.5 SP1 to be installed on the computer before installing Fail Safe. The Fail Safe installation program will notify you if it cannot find .NET 3.5 SP1 on the computer.
Fail Safe also requires that the Cluster Object (DIVA-CL-MSCS) must have full control permissions on the Cluster OU before installation proceeds so the cluster can create a Cluster Group Object.
Oracle Fail Safe 4.1 References:
- Oracle Fail Safe 4.1 Installation Guide
- Oracle 4.1 Fail Safe Tutorial
- Oracle Fail Safe 4.1 Concepts and Administrator Guide
-
Log on to both node servers as a dedicated cluster domain account user (DIVAClusterAdmin).
-
Install Microsoft .NET 3.5 SP1 on the computer if not already installed. You can install .NET from the Server Manager Console.
-
Use the following procedure to grant full control to the Cluster Object:
-
Open the Active Directory Users and Computers snap-in from the Windows Server Management console.
-
Right-click the DIVAClusterComputers computer object and select Properties to display the Properties dialog box.
-
Select the Security tab, and then select the Cluster Object (
DIVA-CL-MSCSin the examples) in the Group or user names area at the top of the screen. -
Click the Advanced button on the bottom right side of the screen to open the Advanced Security Settings screen.
-
On the Permissions tab, locate the domain user and click the listing one time to highlight the domain user.
-
Click Edit just under the Permission entries area to open the Permission Entry screen.
-
On the top of the screen, verify that the Type option is set to Allow, and the Applies to option is set to This object and all descendent objects.
-
Select all of the check boxes in the Permissions area.
-
Click OK on the bottom of the screen to apply the permissions.
-
-
Extract the Oracle Fail Safe 4.1.0 installation package into a temporary directory.
Oracle Fail Safe 4.1.0 has a known display issue with Windows 2012. Use the following example and website listed below to resolve the issue. MMC is still not 100% stable upon closing the program.
A reference to this issue can be found here:
http://www.oracle.com/technetwork/database/windows/sw-comp-41-1946549.html-
Create a plain text file named
mmc.exe.configin theC:\Windows\SysWOW64folder. -
Edit the file with a plain text editor (for example, Notepad) and enter the following text:
<?xml version="1.0" encoding="utf-8" ?> <configuration> <appSettings> <add key="UseSetWindowPosForTopmostWindows" value="True" /> </appSettings> </configuration> -
Save and close the file.
-
-
Execute the
temp_folder\install\setup.exefile to begin installation. -
On the first screen, click Next.
-
Select the Typical (178MB) installation.
-
Click Next.
-
Leave the Path as the pre-filled default and click Next.
Note:
The installation path must be the same on both nodes. -
Enter the Domain Username (
qalab\DIVAClusterAdmin) in the Username field. -
Click Next.
-
Enter the Domain User's password in the Enter Password field, and then enter it again to confirm it in the Confirm Password field.
-
Click Next.
-
Review the Summary. If everything is correct click Install; otherwise click Back and resolve any issues.
-
When installation is complete, click Exit.
-
Restart the node.
-
Repeat all of these steps for the second node.
Next you will verify the Fail Safe installation.
Verifying the Oracle Fail Safe Installation
The steps in this section must be completed on one Cluster Node Server only. Use the following procedure to verify the Fail Safe installation:
-
Log on to the node server as a dedicated cluster domain account user (DIVAClusterAdmin).
-
Launch the Oracle Fail Safe Manager.
-
Connect to the new cluster using the cluster alias (
DIVA-CL-MSCS) as follows:-
Select the cluster alias in the navigation tree on the left side of the screen.
Note:
If the cluster is not shown in the navigation tree, you must add it before proceeding - select Action, and then Add Cluster from the menu. -
Select Connect from the Actions menu on the right side of the screen. This should automatically connect to the cluster.
-
-
Select the cluster alias in the navigation tree on the left side of the screen.
-
Click Validate from the Actions menu on the right side of the screen. The cluster validation will begin.
-
You must resolve any warnings or errors before proceeding.
-
When issues are resolved, run the validation again.
-
Repeat Step 4 through Step 7 until the validation completes successfully.
Next you will create a Cluster Group and Role dedicated to DIVArchive.
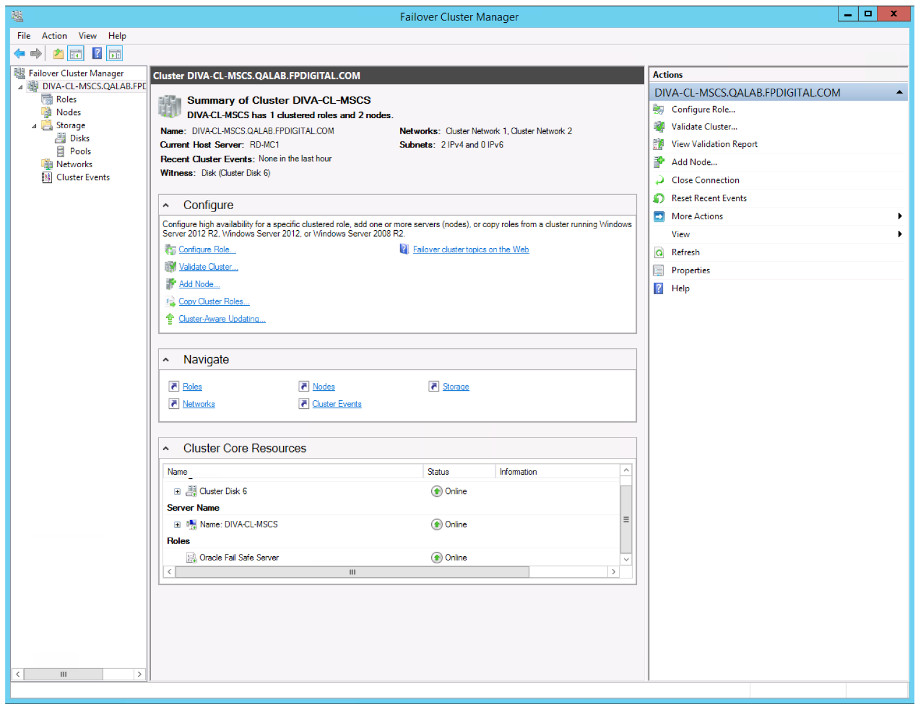
Creating a DIVArchive Dedicated Cluster Group and Role
The procedures in this section must be completed on one Cluster Node Server only. In the previous version of Oracle Fail Safe, this process was completed in the Fail Safe Manager. However, with Fail Safe version 4.1, this configuration is accomplished in the Windows Failover Cluster Manager. Use the following procedure to create the DIVArchive dedicated group and role:
-
Log on to the node server as a dedicated cluster domain account user (DIVAClusterAdmin).
-
Click Start, Administrative Tools, and then Failover Cluster Management.
-
Expand the cluster in the navigation tree on the left side of the screen, and then click Roles.
-
Click Configure Role under Roles on the right side of the screen.
-
On the first screen, click Next.
-
On the Select Role screen, select Generic Service in the list located in the middle of the screen, and then click Next.
-
On the Select Service screen, select DIVArchive Manager in the list in the middle of the screen, and then click Next.
-
On the Client Access Point screen, enter the Oracle Cluster Group Name (
DIVA-CL-ORC) in the Name field. -
Enter the Oracle Cluster IP address in the Address field, and then click Next.
-
On the Select Storage screen, select the check boxes next to each of the cluster storage disks to select all cluster disks, and then click Next.
-
On the Replicate Registry Settings screen, click Next.
-
Verify the configuration options you selected on the Confirmation screen, and then click Next.
-
When the configuration process is complete, click Finish.
Once the Cluster Role and Group have been created, you may need to add other DIVArchive services (for example, DIVArchive Backup) and other disks that need to be part of the cluster. Use the following procedure to add additional resources to the cluster. For the purpose of this example the DIVArchive Backup Service will be added.
-
In the Failover Cluster Manager expand the cluster (
DIVA-CL-ORC), and click Roles in the navigation tree on the left side of the screen. -
The Cluster Name (
DIVA-CL-ORC) will be visible on the right side of the screen with a menu underneath it. -
Under the Cluster Name, click Add Resource and then Generic Service.
Note:
If you are adding more storage, you will click Add Storage rather than Add Resource. -
Select the DIVArchive Backup service (or storage device) from the list in the displayed dialog box, and then click Next.
-
Verify that the selected options are correct on the Confirmation screen, and then click Next.
-
Click Finish when the configuration is complete.
Next you will configure Oracle Fail Safe.
Configuring Oracle Fail Safe Parameters
The procedure in this section must be completed on one Cluster Node Server only. Oracle Fail Safe will automatically configure some parameters and others you must manually configure. Use the following procedure to manually configure the necessary parameters:
-
Open the Oracle Fail Safe Manager. The resources will be displayed including the LIB5 Database.
-
Expand the Cluster Object (
DIVA-CL-MSCS) in the navigation tree on the left side of the screen. -
Click the Oracle Resources menu item.
-
On the right side of the screen, click Group Actions, then Add Resources to open the Add Resource To Group wizard.
-
On the Group screen, select the group to add the resource to from the list, and then click Next.
-
On the Nodes screen, select the nodes from the list, and then click Next.
-
On the Virtual Host screen, select the host from the list, and then click Next.
-
On the Parameters screen, you will point to the
initLIB5.orafile for automatic configuration of the Oracle System Parameters (C:\app\oracle\product\11.2.0\dbhome_1\database\initLIB5.ora). -
Click Next.
-
Follow through the remaining wizard screens using the default parameters until finished.
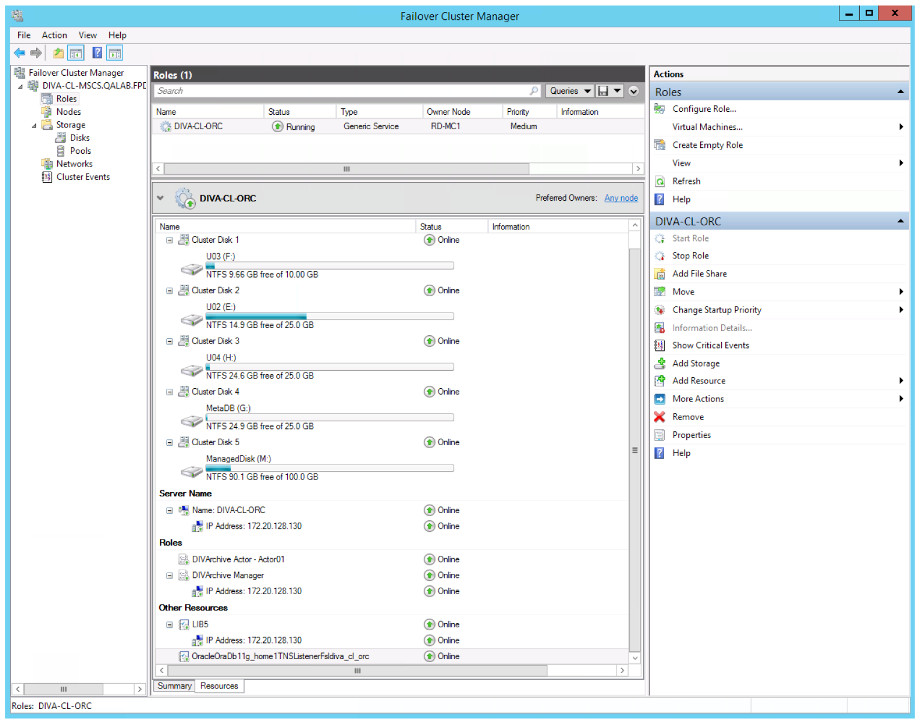
When finished with the wizard your configuration in the Oracle Fail Safe Manager should show all of the resources you added and configured. All other cluster configuration is completed within the Failover Cluster Manager. The Oracle Fail Safe Manager and the Failover Cluster Manager should both show the same resources.
Perform the following procedure in the Failover Cluster Manager:
-
In the middle of the Failover Cluster Manager, locate the entry for the DIVArchive Manager and click it one time to highlight the entry.
-
On the right side of the screen, click Properties to open the Properties dialog box for the Oracle DIVArchive Manager.
-
Click the Dependencies tab.
-
The last entry in the list displays Click here to add a dependency. Select the field, and then click Insert.
-
Select AND from the list.
-
Add the following resources to the dependencies:
-
IP address (
172.20.128.130in the examples) -
DIVA-CL-ORC -
LIB5
-
Oracle Database TNS Listening Service
-
All Cluster Storage Disks
-
-
Click OK.
-
Repeat Step 14 through Step 20 to add the following dependencies to the LIB5 service:
-
IP address (
172.20.128.130in our examples) -
All Cluster Storage Disks
-
-
Repeat Step 14 through Step 20 to add the
DIVA-CL-ORCto the dependencies for the OracleIORaDB11g Listener service.