| Oracle® Retail Advanced Inventory Planning Administration Guide Release 14.1 |
|

 Previous |
 Next |
You can set up information pertaining to security privileges.
System administration is secured by an administrator password. Only individuals with an administrator profile and password can log on to the system administration area of AIP.
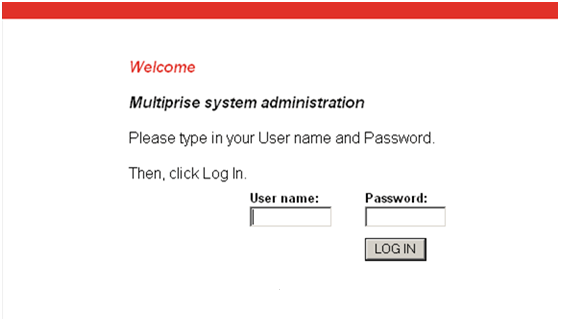
At the standard application login the address or URL should be modified to include phantasm after the AIP online location: http://servername:port/aiponline/phantasm
On the Oracle Retail Login window, enter your User ID in the User name field.
In the Password field, enter your password.
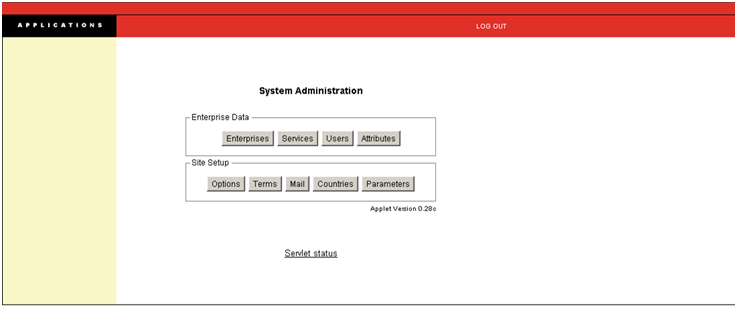
Click LOG IN. The System Administration Console Window opens.
Each user must have their application permissions granted by the administrator. The administrator can choose to set up default selections, remove options, or create new security roles. The security setup will be used during the set-up and maintenance of each user's security permissions.
The creation of screen privileges will be provided in the installation. Application upgrades may also provide new screen privileges when necessary. The table for the permission list is WT_SRVUSERTYPES. Permission groups will be defined only by the client, either during implementation or later.
Setting a privilege as a default will cause the privilege to be defaulted as a selected security option when the security privileges are displayed for a new user.
Adding a new permission group will allow you to set up groups of screen privileges which can be assigned to users. Assigning a permission group to a user grants them permission to all privileges assigned to the permission group. This provides a way to mass assign privileges. The permission group must first be created in the System Administration console before screen privileges can be assigned to the group.
Removing a privilege or permission group will prevent the privilege from being displayed as a user security privilege. This will prevent you or other administrators from assigning the privilege to any users.
Navigate: On the System Administration Console, click Services. The Services Administration window opens.
Select AIP Online in the services list.
Click the User Types tab.
Click Edit.
Click the Enable by default column next to the appropriate permission.
Click Save.
Navigate: On the System Administration Console, click Services. The Services Administration window opens.
Select AIP Online in the services list.
Click the User Types tab.
Click Edit.
Click the check mark in the Enable by default column next to the appropriate permission. The check mark is removed.
Click Save.
Navigate: On the System Administration Console, click Services. The Services Administration window opens.
Select AIP Online in the services list.
Click the User Types tab.
Click Edit.
Click Add Item.
Enter a key in the field.
|
Note: The key must start with sec: to be recognized as a permission group. |
Enter a description.
Determine the desired default option.
Click Save.
Permission groups are created in the System Administration console. Once created, you can assign privileges to them. By assigning privileges you are creating groupings of privileges that can be assigned to a user en masse rather than individually picking each privilege and assigning it to the user. This also provides a type of mass maintenance capability. By adding a privilege to a permission group you are automatically assigning the privilege to every user which is assigned the permission group. Similarly, removing a privilege from the permission group denies that privilege to all users which are assigned the permission group.
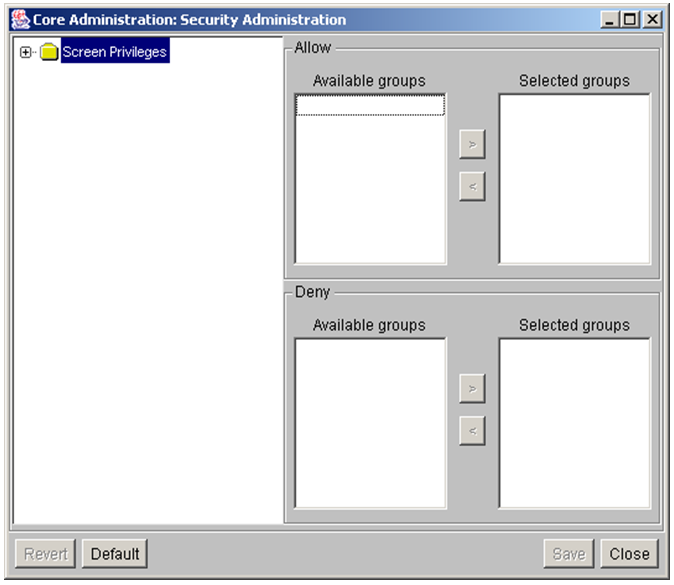
Navigate: On the AIP Administration Console, click Security. The Security Administration window opens.
Click + to display the screen privileges.
Select a screen privilege.
In the Allow Available groups select a permission group to be assigned to the screen privilege.
Click > to move the permission group to the Allow Selected groups list.
Click Save.
Navigate: On the AIP Administration Console, click Security. The Security Administration window opens.
Click + to display the screen privileges.
Select a screen privilege.
In the Allow Selected Groups, select a permission group to be removed from the screen privilege.
Click < to move the permission group to the Allow Available groups list.
Click Save.
Each user must be set up by an administrator. There are two types of users, administrators and users. Administrators have access to and can maintain the administration console. There must be at least one system administration user. This user is created during implementation and has the access to create new privilege types as described below.
Users have access to the User Console of AIP. They cannot maintain any of the system level settings. A user's permissions may be further limited by scope set by the administrator. Scope defines which departments a user has access to maintain tracks for.
|
Note: When you set up the users, you assign local user types. |
This section provides information on these topics:
Must be a minimum of 1 and a maximum of 16 characters in length
May contain any characters, which means that symbols, including spaces, are allowed
Must be unique
Must be a minimum of 6 and a maximum of 128 characters in length.
Must have at least five different characters.
Must not be simple. The following are not allowed:
Sequences (ABCDE or ABCXYZ)
Four consecutive characters as this results in pairing (ABCDEF results in give pairs AB, BC, CD, DE, EF)
Must not be easily derivable from the user name or full name.
Must not be easily derivable from the previous password.
Must not be derivable from a dictionary entry (the dictionary is configurable).
The rules are defined through the security.properties file. The format of this is:
Password:
trackeradmin.prop.pwrules.code=uk.co.webtrak.security.passwords.rules.simple.Checker
trackeradmin.prop.simplepw.dictionary=pw_dictionary
Three invalid entries of a password for a given user ID within twenty-four hours turns off that user ID for five days. The password must be reset using the Enterprise Administrator window shown in Figure 3-2.
The properties for setting the parameters, the number of failed login tries, and the number of days locked out can be set in the security.properties file:
Security changes and session activity are recorded in an audit table (ENT_AUDIT).
|
Note: Password cycling, failed logins, and so on are driven from this table. It is important to recognize the impact of clearing this table too frequently |
security.properties file setting:
The following list contains descriptions of values in the AUDIT_EVENT column of the ENT_AUDIT table:
USER EVENTS
AUDIT_EVENT VALUE KIND OF ACTIVITY
login 1 Login
logout 2 Login
badLogin 3 Login
passwordExpired 4 Login
loginTemporaryLock 5 Login
loginPermanentLock 6 Login
userCreated 50 Updates
passwordChangedByUser 51 Updates
passwordChangedByAdmin 52 Updates
accountTemporaryLock 53 Updates
accountPermanentLock 54 Updates
accountLockCleared 55 Updates
SYSTEM ADMIN EVENTS
AUDIT_EVENT VALUE KIND OF ACTIVITY
adminLogin 100 Login
adminLogout 101 Login
adminBadLogin 102 Login
adminForbiddenHost 103 Login
adminCreated 150 Updates
adminPasswordChanged 151 Updates
A password may be set to not be reused within N changes or M days. For example:
If an N change is set to 5, the first password cannot be used on turns 2, 3, 4, or 5. However, the first password can be used again in turn 6.
If an M change is set to 3, the same password cannot be used again in the space of three days.
These parameters are specified through the security.properties file.
Uniqueness parameters:
trackeradmin.prop.password.uniqueness=1
trackeradmin.prop.password.uniqueness.interval=120d
Here the password can be reused every time or after 120 days.
The aging of passwords can be set to be seconds, minutes, hours, or days. The settings are specified through the security.properties file. See the following format:
ENT_ATTRS
ENT_AUDIT
ENT_LOCATIONS
ENT_LOCKS
ENT_MCLDATA
ENT_MCLHEADINGS
ENT_PARAMETERS
ENT_PARAMVALUES
ENT_PARTNERDEPTS
ENT_PARTNERS
ENT_PHASES
ENT_RESOURCES
ENT_SEASONS
ENT_SRVUSERTYPES
ENT_STAMPS
ENT_USERS
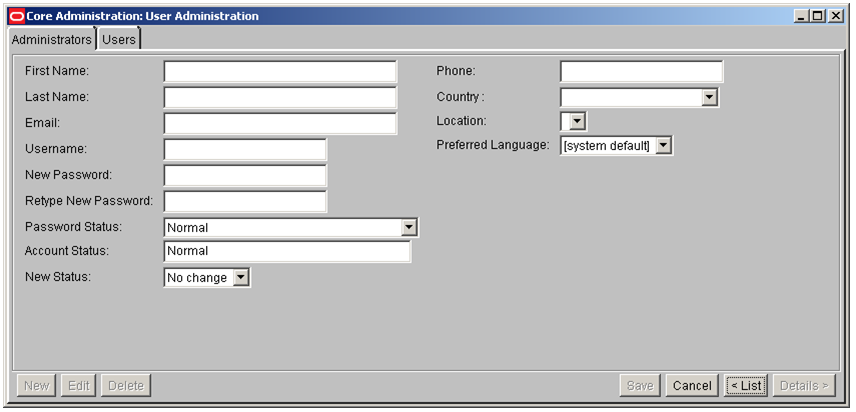
Navigate: On the AIP Administration Console, click Users. The User Administration window opens.
Click New. The details view of the Administrators tab is displayed.
Enter necessary information in the fields. Required fields are:
First Name
Last Name
Username
New Password
Retype New Password
|
Note: Save is not enabled until all required entries are made. |
Click Save to save the changes.
Click Close Window to return to the Administration Console window.
Navigate: On the AIP Administration Console, click Users. The User Administration window opens.
Select the name of an administrator.
Click Edit. The details list is displayed.
Update the information as necessary.
Click Save to commit the changes.
Click Close Window to return to the Administration Console window.
Navigate: On the AIP Administration Console, click Users. The User Administration window opens.
Select the name of an administrator. All contact information is highlighted.
Click Delete. A dialog box is displayed to confirm your decision.
To proceed, click OK. The administrator's name is deleted from the list.
Click Close Window to return to the Administration Console window.
Navigate: On the AIP Administration Console, click Users. The User Administration window opens.
Click the Users tab. The Users list is displayed.
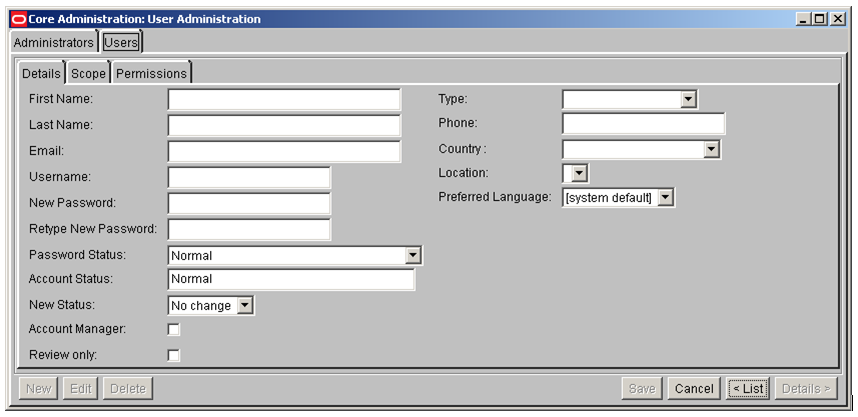
Click New. The details view of the Users tab is displayed.
Add user details.
On the Details tab, enter necessary information about the new user. Entries are required in these fields:
First Name
Last Name
Username
New Password
Retype New Password
Define a user's scope.
Select the Scope tab. The Scope tab is displayed.
In the Available Classes list, click on a class name to be assigned to the user. At least one Class is required to create a user.
Click > to move the class to the Selected Class list.
To remove a class from the Selected Classes list, select the class name. The Left Arrow at the center of the window is enabled. Click < to return the class to the Available Classes list.
|
Note: Save is not enabled until there are entries in all required fields. |
Define a user's system permissions.
Select the Permissions tab. The Permissions tab is displayed.
In the Enabled column, select AIP from the list of Services. The Available Types column lists the user roles for your Enterprise.
In the Available Types list, select the role that applies to this user.
|
Note: The permission groups are listed along with each individual screen privilege. The selected individual screen privileges along with the screen privileges assigned to any selected permissions groups comprise the list of the users security permissions. |
Click > to move the role to the Selected Types list.
Click Save to commit your changes.
Click Close Window to return to the Administration Console window.
Navigate: On the AIP Administration Console, click Users. The User Administration window opens.
Select the Users tab. The Users list is displayed.
Select the user name you wish to edit.
Click Edit. The Details tab is displayed with the entry fields enabled.
Change the information in any or all of the entry fields.
Click Save to save the changes.
Click Close Window to return to the Administration Console window.
Navigate: On the AIP Administration Console, click Users. The User Administration window opens.
Select the Users tab. The Users list is displayed.
Select the user name you wish to delete.
Click Delete. You are prompted to confirm your decision.
Click OK. The selected user is deleted from the list and the database.
Click List to return to the Users tab list view. The user's name is deleted from the list.
Click Close Window to return to the Administration Console window.