| Oracle® Retail Advanced Inventory Planning Data Management User Guide Release 14.1 |
|

 Previous |
 Next |
| Oracle® Retail Advanced Inventory Planning Data Management User Guide Release 14.1 |
|
Previous |
Next |
This chapter provides an introduction to using AIP.
How you access AIP depends on how the application is set up at your location. Contact your system administrator for instructions. After starting the application, you are prompted to log in. Your system administrator assigns a user name and a temporary password. You need to change the password after you log on the first time. Additionally, you password periodically expires, in a period of time as determined by your system administrator.
The following rules apply when you change your password:
Must be a minimum of six (6) characters and maximum of 128 characters.
Must contain at least five different characters.
Must not be simple.
Cannot include sequences such as ABCDE or ABCXYZ.
Cannot contain more than four consecutive characters.
Cannot be based on your user name or your full name.
Cannot be based on a previous password.
Cannot be based on a dictionary entry.
On the Login window, enter your user ID in the User Name field.
In the Password field, enter your password.
Click Log In.
In the Applications area, click AIP Online. AIP displays the User Console.
Select the application you want to use.
Click Start. The application opens in a new window.
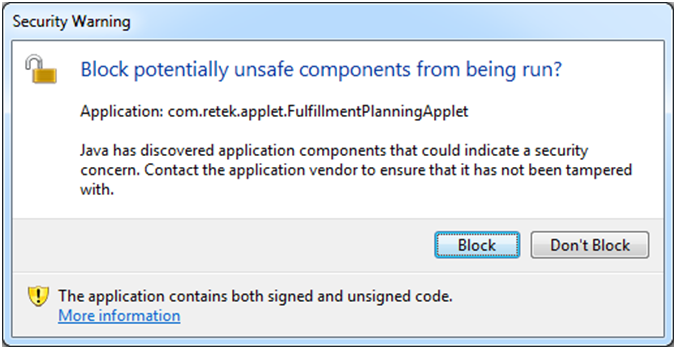
When launching this application, you may see the Security Warning shown in Figure 2-1. Click Don't Block to continue.
Perform the following steps to change your password:
Log on to Oracle Retail Advanced Inventory Planning (AIP).
On the User Console, click Applications.
Click Change Password.
In the Current Password field, enter the password you used to log in to the application.
In the New Password field, enter the password you want to use in the future.
In the Retype password field, enter the password you entered in the New Password field.
Click Change Password.
|
Note: Click the Return to front page without changing password link to cancel your changes. |
After logging into AIP, you have access to the application window. The primary elements of the application window are shown in Figure 2-2 and are described in Table 2-1.
Table 2-1 AIP Workspace Elements
| Item | Element | Description |
|---|---|---|
|
A |
Title Bar |
Located at the top of the application window. The title bar displays the product name and the area you are currently working in. The three buttons at the far right on the title bar allow you to minimize, restore, maximize, and close the application window. |
|
B |
Menu Bar |
Located underneath the title bar. The menu bar provides access to different areas of the application. |
|
C |
Primary Tabs |
Located at the top of the workspace. The primary tabs give you access to the functional areas available for the selections you made from the menu. |
|
D |
Secondary Tabs |
Located in the workspace, beneath the primary tabs. The secondary tabs give you access to the functional area within each primary tab, if they exist for a specific tab. |
|
E |
Standard Buttons |
Located at the left of the workspace. The standard buttons are enabled based on the work you have done or the selections you make in the workspace. |
The basic method for entering data in a text field is to type the text in the field.
The options for entering or selecting data depend on the type of data that may be required or permitted in the field. Some fields are restricted as to the type of data that may be entered and may only permit:
numeric data
alphabetic data
alphanumeric data
data in a specific format
Some fields permit only one value, while others permit multiple values.
Calendars, drop-down lists and lists of values provide you with access to pre-formatted, predefined values. Instructions for using these tools are provided in the following sections.
To look up the date, you can access a date picker window.
Perform the following steps to select a date:
Click the calendar button next to a date field. The calendar window opens.
|
Note: The calendar button appears as a drop-down button to the right of the date field. |
Select the desired date:
To select a year, press the left or right arrows next to the year field.
To select a month, click on the appropriate month abbreviation.
To select a day of the month, click the day on the calendar.
Click OK. The date field is automatically filled in when you select the day of the month.
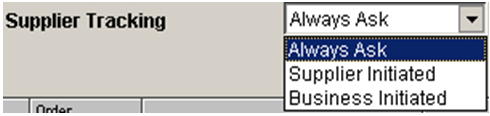
Some fields are restricted to a predefined list of values. You access a drop-down list from which you can pick the desired value.
Click the drop-down button next to a field. A list of predefined values appears.
If necessary, scroll through the list until the appropriate value appears.
Select the value. The field is automatically filled in with the selected value.
Some fields are filtered by the selections you have made in the previous field. These fields are indicated by arrows pointing to them from other fields.
|
Note: Fields that are required when searching are indicated with an asterisk (*). |
Table 2-2 Description of Field-Level Filters
| Field Name | Results in Limits to: | Indicated by: |
|---|---|---|
|
Order Source, Class, and SKU |
Stock Keeping Unit (SKU) |
Black arrow |
|
Class |
SKU |
Green arrow |
|
SKU |
Order Source |
Blue arrow |
|
Note: The colors indicated are specific to this example. The arrows in the window you are working in may be colored differently and serve only to help you distinguish the different lines. |
After you make a selection, the clear List of Values (LOV) button is enabled. If two fields filter each other as part of a field-level filter, you must clear your selections before you can make additional selections.
To clear the field, click the clear LOV button.
When certain elements are selected, related fields are filtered to only display data corresponding with the selected element. The following sections detail the impact of selection on these related fields.
When Profile is selected, the following field is filtered:
Class - Filtered to only display classes containing a SKU assigned to the selected profile.
When SKU is selected, the following fields are filtered:
SKU - Filtered to only display SKUs containing a pack-size of the selected SKU.
Order Source - Filtered to only display suppliers that supply a pack-size of the selected SKU, and warehouses that are ranged for a pack-size of the selected SKU.
When Class is selected, the following fields are filtered:
SKU - Filtered to only display SKUs containing a SKU belonging to the selected class.
SKU - Filtered to only display SKUs belonging to the selected class.
When Supplier is selected, the following fields are filtered:
SKU - Filtered to only display SKUs containing a SKU pack-size that is supplied by the selected supplier.
SKU - Filtered to only display SKUs having a pack-size supplied by the selected supplier.
Class - Filtered to only display classes containing a SKU that has a pack-size supplied by the selected supplier.
When Order Source is selected, the following field is filtered:
SKU - If the selected order source is a supplier, SKU is filtered to only display SKUs having a pack-size supplied by the supplier. If the selected order source is a warehouse, SKU is filtered to only display SKUs having a pack-size ranged to the warehouse.
Some fields need to filter a large amount of information. To help you select the information, there are two types of LOV buttons:
Table 2-3 LOV Button Descriptions
| Image | Button | Description |
|---|---|---|
|
|
LOV buttons |
Allow you to pick from a list of valid data that can be used in the field. LOV buttons only allow you to make one selection. |
|
|
Multi-select LOV buttons |
For fields that permit multiple values, you can access a list of value window in multi-select view. The box contains two blocks. One block contains the predefined values that are available to you. The second block contains the values that have already been assigned to the field, if any. You have the option of:
|
When a multi-select LOV button has multiple values selected, the first value that was selected is displayed followed by an ellipse.
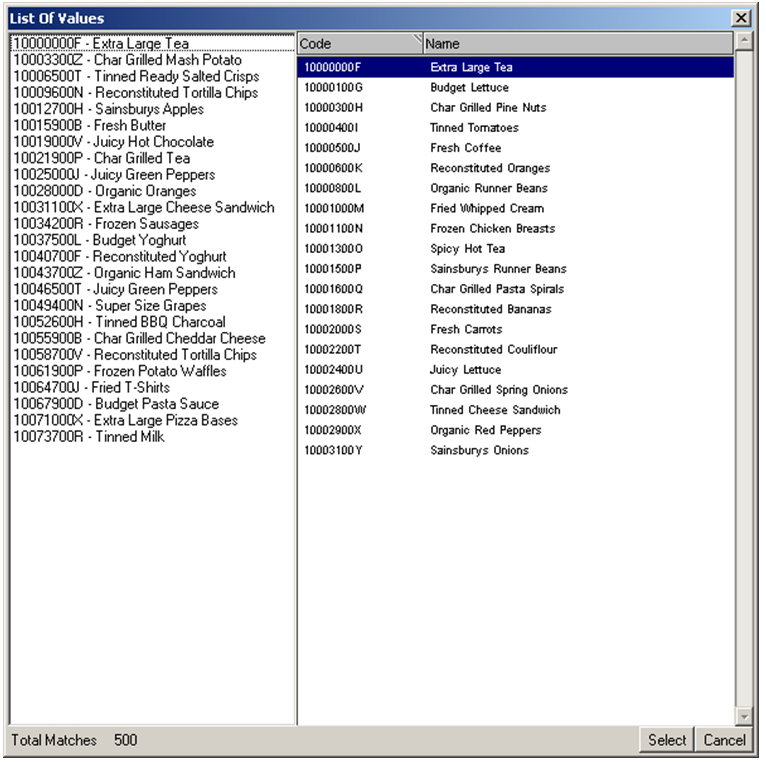
The list of values window displays the first set of 20 values and a paging mechanism. To view additional sets of information, select from the list on the left side.
Perform the following steps to use the LOV button:
Click the LOV button next to a text field. The list of values window opens. The total number of values appears on the footer of the window.
|
Note: You can enter information into the field before you click the LOV button. A partial list of values is returned that matches the information you entered. If you enter a complete, valid value and press Enter, the information is displayed without opening the list of values window. |
Select a value. Page as necessary to find your value.
Click Select. The field is automatically filled in with the selected value.
Perform the following steps to use the multi-select LOV button:
Click the multi-select LOV button next to a text field. The list of values window opens. The total number of values appears on the footer of the window.
|
Note: You can enter information into the field before you click the multi-select LOV button. A partial list of values is returned that matches the information you entered. If you enter a complete, valid value and press Enter, the information is displayed without opening the list of values window. |
Select the appropriate values:
Select one or more values in the selected values box. Page as necessary to find your value.
Click the Move Right button. The values are displayed in the selected values box.
|
Note: To move all values displayed in the available area, click the Move All Right button. |
Remove unnecessary values:
Select one or more values in the selected values box.
Click the Move Left button. The values are removed from the selected values box.
|
Note: To move all values displayed in the selected area, click the Move All Left button. |
Click Select. The field is automatically filled in with the selected values.
For fields that permit multiple values, you can use a transfer box. The box contains two blocks. One block contains the predefined values that are available to you. The second block contains the values that have already been assigned to the field, if any. You have the option of:
Removing assigned values, which places them in the available list.
Adding values, which places them in the selected list.
The move buttons allow you to transfer values between the transfer boxes.
Table 2-4 Move Button Descriptions
| Image | Button | Description |
|---|---|---|
|
|
Move Right |
Moves selected values to the right side transfer box. |
|
|
Move All Right |
Moves all values to the right side transfer box. |
|
|
Move Left |
Moves selected values to the left side transfer box. |
|
|
Move All Left |
Moves all values to the left side transfer box. |
Perform the following steps to use a transfer box:
Select the appropriate values:
Select one or more values in the available values box.
Click the Move Right button. The values are moved to the selected values box.
|
Note: To move all displayed values, click the Move All Right button. |
Remove unnecessary values:
Select one or more values in the selected values box.
Click the Move Left button. The values are returned to the available values list.
|
Note: To move all displayed values, click the Move All Left button. |
In a table you can sort the results:
To sort the list, click any column heading. Hatch marks indicates the column that is currently sorted, as well as the order: ascending or descending.
To reverse the current sort order, click the same column heading again.
To sort on multiple columns, where allowed, click the column heading to select the sort order and then right-click the column heading. The column heading turns red to indicate the column is locked. Repeat this process for other columns displayed on screen.
On some tabs, like the Alerts tab where numerous records may be displayed, paging controls appear at the bottom of the tab. This feature allows you to page through the records as needed. The total number of pages appears to the left of the paging controls.
Table 2-5 Description of Paging Controls
| Image | Button | Description |
|---|---|---|
|
|
Next |
To page forward, click the Next button. The next page of records appears. |
|
|
Previous |
To page backward, click the Previous button. The previous page of records appears. |
|
|
First Page |
To view the first page of records, click the First Page button. The first page of records appears. |
|
|
Last Page |
To view the last page of records, click the Last Page button. The last page of records appears. |
|
|
Go to Page |
Enter a page number in the Go to Page box and click Go. The specified page of records appears. |
This help site provides step-by-step procedures as well as other information about using Oracle Retail Advanced Inventory Planning. This page explains the tools available to assist your navigation of this help site.
The online help system uses Java Script for some of its functionality. Make sure you have enabled Java Script for your Web browser. Refer to the online help in your Web browser for instructions on enabling Java Script.
This section provides information about the documentation conventions used in the online help.
|
Note: Notes are displayed using this convention. Notes contain additional information about the process or procedure that you are performing. |
Navigate: The navigation sections of a procedure provides information about how to access the window that is the starting point of a procedure.
The table of contents is the most common way to navigate to your topic.
Select the Contents tab to display the table of contents on the left side of your screen.
Double-click on a book to expand it and view the topics.
Select a topic from the table of contents to view it.
Use the search feature to explore the contents of your topics and find matches to queries that you define. There are some basic rules for making queries in full-text searches.
Searches are not case sensitive. You can type your search in uppercase or lowercase characters.
You can search for any combination of letters (a-z) and numbers (0-9).
Punctuation marks such as the period, colon, semicolon, comma, and hyphen are ignored during a search.
Group the elements of your search using double quotes or parentheses.
You cannot search for quotation marks.
Follow this procedure to use the search feature.
Select the Search tab to display the search feature on the left side of your screen.
In the Search field, enter the word or words that you want to find.
Press Enter. Topics that match your search criteria display in the left pane.
Select a topic to view it.