| Oracle® Retail Merchandising System User Guide 14.1 E55773-01 |
|

 Previous |
 Next |
A deal is a set of one or more agreements that take place between the retailer and a vendor, which could be a supplier, wholesaler, distributor or manufacturer, based on which the retailer is entitled to receive discounts or rebates for goods that are either purchased or sold. It consists of a set of discounts and/or rebates that are negotiated with the supplier and share a common start and end date. Deals can cover a specified period of time such as a special deal set up based on a promotion or have an open-ended timeframe like a retailer getting a fixed percentage (For example, 5%) off on all merchandise ordered from a specific supplier. After a deal has been successfully negotiated, it needs to be defined within RMS in order to apply discounts on purchase orders or recover rebates from the supplier. This deal definition is carried out in terms of its components - item/locations, thresholds, discounts and funding percentages. Once this setup is complete, the deal can be approved.
The different types of deals supported within RMS are - Off Invoice, PO Specific, Bill Back, Bill Back Rebate, Vendor Funded Promotion (VFP), Vendor Funded Markdown (VFM) and Fixed Deals.
This chapter outlines the processes involved in setting up and maintaining all the above types of deals.
Deals management allows you to create and maintain deals with partners or suppliers. Deal partners can be suppliers, wholesalers, distributors, and manufactures. Within a deal, you create deal components, specify the items for each deal component, and define thresholds.
Components are deals or parts of that deal you receive from a supplier. Multiple components can exist in a single deal. After you add the components, you define thresholds to define the quantity or amount that must be purchased or sold to receive the deal.
Finally, you define the items and locations where the deal can be applied. You can choose to include or exclude locations as necessary.
Additionally, you can define the proof of performance (POP) terms for a deal. POP terms are defined by the deal vendor that offers the deal. For deals, POP terms can be defined at the deal, deal/component or deal/component/item-loc combination. For fixed deals, the POP terms are defined at the deal level.
Off-invoice deals are created when your organization receives a decrease in cost. The decrease in cost will be applied against the cost on the invoice.
Bill back deals allow your organization to receive money back after a specific event. Bill backs are calculated based on individual purchase orders or receipts. Since an individual PO can be set up at a higher level, you can set up multiple threshold levels for a bill back purchase order. A receipt-based bill back on the other can only contain one threshold.
Types of special bill backs:
Rebates: Deals are created when your organization receives money back from the supplier after you achieve a certain performance. Rebate deals can be based on:
Sales
Purchase Order (at receipt or PO approval time)
Vendor Funded Promotions: Deals are calculated on promotions through RPM and allow you to invoice your supplier or partner a certain percentage they contributed. Vendor Funded Promotion income is based on a vendor supplied contribution percentage. This percentage is added in RPM and indicates how much the vendor will contribute towards the promotion. Vendor Funded Promotions do not allow the user to enter budgeted for forecasted values.
Vendor Funded Markdowns: Deals are calculated on the retail markdown taken multiplied by the SOH.
Fixed deals are created when your organization receives payments from suppliers in return for mentioning their products in promotions, or for displaying their products on prime shelf space. You can create fixed deals and set up a collection schedule, from which you can make claims against the supplier and receive payments. Fixed deal payments can be claimed from the supplier either incrementally or all at once.
Bracket costing deals are created when your organization receives a certain deal price on an order depending on the size of the order. Different types of brackets can be established, based on mass, volume, pallet, case, each, or stat case.
The supplier establishes brackets and corresponding prices; for example, 0-99 sweatshirts cost $19 each, 100-199 sweatshirts cost $17 each, 200-299 sweatshirts cost $15 each, and 300-399 sweatshirts cost $13 each. You can indicate whether or not a particular supplier uses bracket costing, and you can choose whether or not to apply bracket costing to a particular order.
When the deal is set up, it can then be approved in RMS. This is not required to attach it to a promotion in RPM, but without approving the deal, then no income will be generated for the deal.
Once the deal is created, RPM will allow the user to pull in the financial deal information and supplier, as well as attach the deal and deal component to a promotion and promotion component. The user in RPM will attach a contribution percentage to the supplier.
The items and locations the user can add to the promotion will be limited by those added to the deal.
After the user has added the item, locations, and discount to the promotion and defined the contribution percentage, then the promotion can be submitted and approved.
Income is calculated on the promotional markdown taken, multiplied by the vendor's contribution percentage. Each promotional record is processed individually when sales are processed by RMS and added into the deals income tables.
Income will be assigned to the period where it is realized, except if that period is closed. Income will be displayed in the deals income window after the week, month, or quarter has been closed.
See "Add Primary and Secondary Bracket Values" in the Foundation Data chapter
See "Delete Primary and Secondary Bracket Values" in the Foundation Data chapter
See "Edit Bracket Costs for Worksheet Items" in the Item Maintenance chapter
Edit Proof of Performance Definition
See "Edit Proof of Performance fulfillment Information" in the Purchasing chapter
Maintain the Thresholds of a Deal
View Deals for an Item on a Purchase Order
View Proof of Performance Definitions
View Proof of Performance Fulfillment Information
See "View Transaction Level Discounts for a Purchase Order" in the Oracle Retail Sales Audit User Guide
The Add Deal Item/Location window allows you to select the items to which the deal components apply. You can also specify specific locations for the items. Items and items at specific locations can also be excluded from deal component.
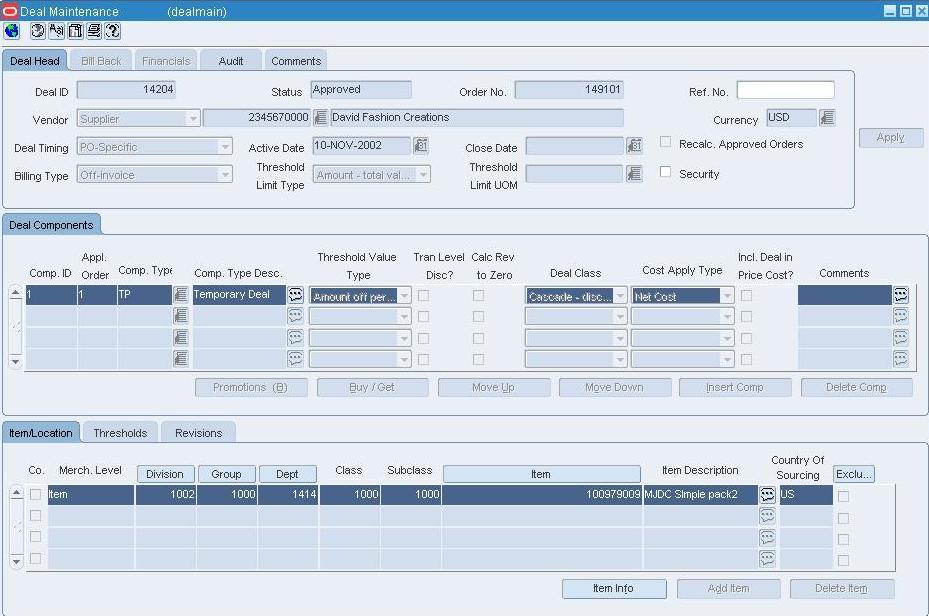
The Deal Maintenance window allows you to create, edit, and view deals with deal partners for items or items at specific locations. You can also create deals for items on a specific purchase order.
Items in a deal can exist at the department, class, or subclass level. Each item can also use up to four diffs to differentiate that item from a related higher level item. Deals can be created for any item that is at, or above, the transaction level.
The EDI Deal Upload process can be used to create off invoice deals through a batch upload. Deals that are entered into RMS through the EDI batch upload must be manually approved before they can be used. Bill back deals must be manually entered.
Off invoice deals are applied when purchase orders with the items on a deal are approved. If a manual cost is entered for the item on the purchase order, deals are not applied to the item unless you request an override of manual costs. Deals that cause the unit cost of an item to be below zero are not applied.
All purchases-based bill back deals will generate income on the net cost of the purchase order, after the off invoice deals have been applied.
In a multi-channel environment, you can set up a deal at the physical warehouse level. The application of the deals is done at the virtual warehouse level, since that is the level where purchase orders are created.
The Proof of Performance window can be accessed from Options > Proof of Performance Terms > Deal, Deal Component, or Deal Component/Item Loc. Each of the three windows displays similar information regarding the proof of performance terms for the selected Deal ID. The Component/Item Loc menu option displays the additional fields: Merchandise Level, Department, Class, Subclass, and Org. Level, and District.
This window is divided into several tabs and sections where you enter or view information about each deal.
On the Deal Head tab, you enter the foundation information for the deal. You select the deal partner and the type of deal. You also enter when the deal starts and ends. For PO-specific deals, this information is filled in automatically.
The status of a deal changes as it passes through an approval process. Depending on your user role, you can change the status of a deal. The status can be Worksheet, Submitted, Approved, Rejected, or Closed. A deal is not effective until it is approved.
On the Bill Back tab, you enter the bill back information for the deal. You select how often to bill the supplier, and how the amount you receive is calculated.
On the Financials tab, you review and update the financial information for the deal. You can also indicate if deal income should be included in the stock ledger and if VAT should be included in the deal calculations.
The component type description can be added for deal component information as well as a defaulting contribution percentage. This contribution percentage will only be used as the default when the deal is attached to RPM and never be updated by RPM. This allows the user to add all relevant Vendor Funded Promotion information to the deal and yet allows for the flexibility to define it at a promotion component level.
|
Note: RMS is the custodian of the invoicing logic and will drive the invoicing functionality. |
On the Deal Components tab, you enter deal component information. Deal components are discounts or rebates included in the deal. When you enter deal component information, you determine the billing type, the collection dates, how the deal component is calculated, and the value of the discount or rebate from the deal partner. You can create multiple deal components in a single deal. You can also specify that a deal component is a transaction level discount that applies to entire purchase orders rather than individual items.
On the Item/Location tab, you select the items to which the deal components are applied. You can also specify specific locations for the items. Items and items at specific locations can also be excluded from deal component.
The item/location information is set up per component. This information is shared with RPM and the promotion setup is restricted in RPM based on the information that is pulled in from the component detail if a Vendor Funded Promotional deal is attached to a promotion.
On the Thresholds tab, you specify how much must be purchased or sold in order to receive a discount or rebate. You also indicate the value of the discount or rebate.
The Revisions tab tracks changes to the threshold limits, why the changes were made and when the changes are active for the deal.
Add Bill Back Information to a Deal
Add Financial Information to a Deal
Add Item/Locations to the Deal
Maintain the Components of a Deal
Maintain the Item/Locations of a Deal
Navigate: From the main menu, select Ordering > Deals Management. The Deal Find window opens.
Search for and retrieve a deal in View mode. The Deal Maintenance window opens.
Select any of the enabled tabs to view additional information about a deal.
Click Close to close the window.
Navigate: From the main menu, select Ordering > Buyer Worksheet > Edit. The Buyer Worksheet opens.
Search for and retrieve items in the Buyer Worksheet.
Highlight the line you wish to view deal information for.
Click Deal Info. The Deal Find window opens.
Enter additional criteria as desired to make the search more restrictive.
Click Search. The Deal Find window displays the deals that match the search criteria.
Click OK to close the window.
Navigate: From the main menu, select Ordering > Deals Management. The Deal Find window opens.
Search for and retrieve a promotional deal in View mode. The Deal Maintenance window opens.
Click Deal Income. The Deal Performance window opens.
To view the deal income by component, select the Component tab.
To view the deal income for the aggregate of the components, select the Summary tab.
To view the a summary of the deal information, select the Deal Info tab.
Click Close to close the window.
Navigate: From the main menu, select Ordering > Deal Pass Through > View. The Deal Pass Through window opens.
Enter a department, or click the LOV button and select the department.
Enter a supplier, or click the LOV button and select the supplier.
Enter a warehouse, or click the LOV button and select the warehouse.
Select an Organization Level.
Enter an appropriate item in the field, or click the LOV button and select the appropriate item.
Click Search. The items matching your criteria will populate the table.
Select an item from the table.
Click OK.
Navigate: From the main menu, select Ordering > Deals Management. The Deal Find window opens.
Search for and retrieve a deal. The Deal Maintenance window opens.
or
From the main menu, select Ordering > Fixed Deals > Edit. The Fixed Deals window opens.
In the Supplier field, enter the ID of the supplier for which you want to edit a deal, or click the LOV button and select the supplier.
To further restrict your search for a supplier, enter search criteria in the Promotion No or Collect Dates field.
Click Search.
From the Options menu, select Proof of Performance Terms.
From the Proof of Performance Terms menu, select Deal, Deal Component, or Deal Component/Item Loc. The Proof of Performance Terms Definition window opens.
|
Note: If proof of performance information was created, but is not displayed at the deal level selected, you may have created the definition at a different deal level. |
Click OK to close the window.
Navigate: From the Main menu, select Ordering > Proof of Performance Fulfillment> View. The POP Terms Fulfillment window opens.
Select the level at which you want to search for proof of performance definitions. Options are: Deal, Deal Detail/Component, Deal Item/Location, Item, or Location.
Enter additional search criteria in the enabled fields.
Click Search to display deals with proof of performance definitions that match your criteria.
Select the definition that you would like to view.
If there is existing fulfillment information for that definition, it will be displayed in the Proof of Performance Fulfillment table.
Click OK to close the window.
Navigate: From the main menu, select Ordering > Fixed Deals > View. The Fixed Deals window opens.
Enter the ID of the supplier, or click the LOV button and select the supplier.
To further restrict your search for a supplier, enter search criteria in the Collect Dates fields.
Click Search.
Click VAT to view associated VAT information for the deal. The Value Added Tax window opens.
Click Merchandise to view associated item/location information for the deal. The Fixed Merchandise window opens.
Click Promotions to view associated promotion information for the deal. The Deal Promotions window opens.
Click OK to close the windows.
The Fixed Deal Transaction Data Window allows you to search for transactions and view data about the current transaction.
Fixed Deal Transaction Data Window [fdltrandata]
|
Note: If the Financials installed, your view may differ than what is shown in the procedure. |
Navigate: From the main menu, select Ordering > Fixed Deals > Fixed Deal Transaction Data View. The Fixed Deal Transaction Data window opens.
To view information about a deal:
Enter search criteria to narrow the list of deals.
Click Search. The list box populates with the data that matches the search criteria.
Select a deal. Choose one of the following:
Click Drill to Finance to open a window in the financial system.
Click Detail to open the Fixed Deal Transaction Detail window.
Click Refresh to start another search process.
Click Close to exit the Fixed Deal Transaction Data window.
Navigate: From the main menu, select Ordering > Orders. The Order Selection window opens.
Search for and retrieve a purchase order in View mode. The PO Header Maintenance window opens.
Click Items. The PO Item Maintenance window opens.
Click Locations.
From the Options menu, select Discount Detail. The PO Item Level Deals window opens.
Click OK to close the window.
Navigate: From the main menu, select Ordering > Deals Management. The Deal Find window opens.
In the Action field, select New.
Click OK. The Deal Maintenance window opens.
In the Vendor field, select the type of deal vendor.
Enter the ID of the deal vendor, or click the LOV button and select the deal vendor.
In the Deal Timing field, select the type of deal:
Annual: A yearlong deal you have with a deal partner. Only one annual deal can be applied to an item at a time. You close the deal manually when it expires, or the deal is closed automatically when you create another annual deal with the deal partner. Only an Off Invoice deal can be annual.
Promotional: A deal that is generally shorter than an annual deal. Multiple promotional deals can be applied to an item at the same time. The deal closes automatically on the specified end date. Bill Back, Vendor Funded Promotion, Vendor Funded Markdown and off invoice can all be promotional deals.
In the Active Date field, enter the date on which the deal becomes active, or click the calendar button and select the date.
In the Close Date field, enter the date on which the deal ends, or click the calendar button and select the date.
|
Note: This field is not required for annual deals. |
In the Billing Type field, select how monies from the deal are received:
|
Note: If you selected Annual in the Deal Timing field, Off-Invoice is the default for the Billing Type and cannot be changed. |
Off-Invoice: The deal is reflected as an amount decremented from the cost on the invoice.
Bill Back: The deal income amount is invoiced to the supplier after the goods are purchased. A special type of a bill back is a rebate, which can be calculated on sales, purchase orders or receipts.
Vendor Funded Promotion: A promotion sponsored by the deal vendor. The deal will close automatically on the end date. Multiple vendor-funded promotional deals can be applied to an item at the same time.
Vendor Funded Markdown: A markdown sponsored by the deal vendor. The deal will close automatically on the end date. Multiple vendor-funded markdown deals can be applied to an item at the same time.
In the Threshold Limit Type field, select how the threshold is defined.
Enter optional information as necessary.
If the deal has a Billing Type of Bill Back, Vendor Funded Promotion, or Vendor Funded Markdown, add the bill back information to the deal.
Click Apply.
Add deal components.
Add item/locations to a deal.
Add proof of performance definitions as necessary.
Navigate: From the main menu, select Ordering > Deals Management. The Deal Find window opens.
Search for and retrieve a deal in Edit mode. Restrict the search to deals in Worksheet or Submitted status. The Deal Maintenance window opens.
Click Delete Deal.
When prompted to delete the record, click Yes.
Navigate: From the main menu, select Ordering > Deals Management. The Deal Find window opens.
In the Action field, select either Edit or View.
Enter additional criteria as desired to make the search more restrictive.
Click Search. The Deal Find window displays the deals that match the search criteria.
Select a task:
To perform another search, click Refresh or Back.
To display the deal information, select a record and click OK. The Deal Maintenance window opens.
Click Close to close the window.
Navigate: From the main menu, select Ordering > Deals Management. The Deal Find window opens.
Search for and retrieve a deal in Edit mode. Restrict the search to deals in Worksheet status. The Deal Maintenance window opens.
On the Deal Components Tab, click Insert Comp. The table is enabled.
In the Comp. field, enter the ID of the deal component, or click the LOV button and select the deal component.
In the Cost Apply Type field, select how the deal component is used to calculate future costs:
|
Note: The value in this field is defaulted based on the type of deal you selected, but can be changed. |
Net cost: Base cost of the item less off-invoice discounts.
Net net cost: Net cost of the item less bill-back amounts.
Dead net cost: Net net cost of the item less rebate amounts.
For an off-invoice deal, in the Deal Class field, select how the components are calculated in relation to each other.
|
Note: For a Bill Back, Vendor Funded Promotion, and Vendor Funded Markdown this field will default to Cascade and cannot be changed. |
Cumulative: The values of the deal components are added together and then applied to the total purchase amount to determine the discount or rebate.
Cascade: Each value of the deal components is applied to the total purchase amount minus the value of the previous deal component.
Exclusive: Exclusive deal components supersede any other deal components, and only one exclusive deal component can be applied to an item at any time. Exclusive deals at the highest level in the item hierarchy are applied instead.
In the Threshold Value field, select the what you get when the threshold is reached. If you selected Buy/Get Free or Disc Items, the Buy/Get Item/Location Threshold Information window opens.
Enter the appropriate information in each of the fields as appropriate.
After you complete both windows, click Finish.
On the Thresholds tab, click Add Thresh.
Enter the limits and value of the threshold.
Select the Target Lvl Ind of the threshold that your organization plans to meet.
Add item/locations to a deal.
Navigate: From the main menu, select Ordering > Deals Management. The Deal Find window opens.
Search for and retrieve a deal in Edit mode. Restrict the search to deals with a status of Worksheet. The Deal Maintenance window opens.
|
Note: You can edit the Ref No, Comp Type, Comments, and Close Date fields when the status is Worksheet, Submitted, or Approved because these fields do not affect the calculation of the deal. |
|
Note: The existence of a promotion on the Deal Maintenance window is not enough to guarantee that income will be generated. It could be that the promotion in RPM is not in an approved status. This window will only give an indication of all promotions and contribution percentages that the buyer thought would be assigned to the deal when the buyer approved the promotion. |
Edit the enabled fields as necessary.
Select the deal component.
Click Move Up or Move Down to reorder the components.
Click Close to close the window. You are prompted to save your changes.
Click Yes.
|
Note: The application order of a Bill Back deal does not generate different income. Each component will individually be compared against the respective turnover the deal has been set up for. |
Navigate: From the main menu, select Ordering > Deals Management. The Deal Find window opens.
In the Action field, select New.
Click OK. The Deal Maintenance window opens.
In the Vendor field, select the type of deal vendor.
Enter the ID of the deal vendor, or click the LOV button and select the deal vendor.
In the Deal Timing field, select Promotional.
In the Active Date field, enter the date on which the deal becomes active, or click the calendar button and select the date.
In the Close Date field, enter the date on which the deal ends, or click the calendar button and select the date.
In the Billing Type field, select how the bill back monies from the deal are received.
Bill Back: The deal income amount is invoiced to the supplier after the goods are purchased.
Bill Back Rebate: A special type of a bill back is a rebate, which can be calculated on sales, purchase orders or receipts.
In the Threshold Limit Type field, select how the threshold is defined.
Enter optional information as necessary.
Click Apply.
Click the Bill Back tab.
Select the Deal Reporting Level.
Enter the Rebates information as necessary.
Click Apply.
Add deal components.
Add item/locations to a deal.
Add proof of performance definitions as necessary.
Navigate: From the main menu, select Ordering > Deals Management. The Deal Find window opens.
Search for and retrieve a deal in Edit mode. Restrict the search to deals with any status but Closed. The Deal Maintenance window opens.
If the deal is not in worksheet status, from the Options menu, select Worksheet. The Status field changes to Worksheet.
|
Note: You can edit the Ref No, Comp Type, Comments, and Close Date fields when the status is Worksheet, Submitted, or Approved because these fields do not affect the calculation of the deal. |
|
Note: Only items at the transaction level or above can be added to deals. |
Select the deal component to which you want to add the item/location.
Click Add. The Add Deal Item/Location window opens.
Select or enter the merchandise and organizational level parameters.
Click OK to save your changes and close the window.
Click Close to exit. You are prompted to save the changes.
Click Yes.
Select the deal component from which you want to delete the item/location.
On the Item/Location tab, select the item/location record.
Click Delete Item/Loc. You are prompted to delete the item/location record.
Click Yes.
Click Close to exit. You are prompted to save the changes.
Click Yes.
Navigate: From the main menu, select Ordering > Deals Management. The Deal Find window opens.
Search for and retrieve a deal in Edit mode. Restrict the search to deals with any status but Closed. The Deal Maintenance window opens.
For an inactive, off invoice deal, if the deal is not in Worksheet status, select Worksheet from the Option menu. The Status field changes to Worksheet.
Edit the enabled fields as necessary. If the deal is a bill back deal, an audit trail is created.
|
Note: Because they do not affect the calculation of the deal, you may edit the Ref No, Comp Type, Comments, and Close Date fields when the status is Worksheet, Submitted, or Approved. For Bill Back deals changing the close date will affect the forecasted and budgeted income values if the deal is pro-rated. Additional periods will be created for 0 turnover. |
Navigate: From the main menu, select Ordering > Deals Management. The Deal Find window opens.
Create a promotional deal.
Select the Financials tab.
Values in the fields are based on the data you have entered on the Deal Head and Bill Back tabs. Update the enabled fields as necessary.
Billing Vendor: The vendor who is charged for the bill back. If the Bill Back Vendor is different than the deal supplier, select the vendor type. In the next field, enter the vendor ID, or click the LOV button and select a vendor.
Bill Back Period: The frequency that the vendor is charged for the bill back. Select when to charge the vendor.
Est Next Invoice Date: The estimated date the next invoice is going to be sent to the vendor. Enter the correct date or click the calendar button and select the correct date. The effective date of raising the invoice will depend on when the financial month is closed.
Last Invoice Date: The date of the period the last invoice was raised for.
Bill Back Method: The type of invoice that is created for the supplier. Select the appropriate option.
Deal Income Calculation: The basis for calculating the amount earned from the deal. Actual will only generate income on real turnover. Pro-rated calculates income based on forecasts and actual turnover and distributing this income over all open periods.
Invoice Processing Logic: The method used to create invoices. Invoices are created automatically, manually, or not at all depending on the option selected.
Include Deal Income in Stock Ledger: Select the check box to indicate that deal income accrual should be written to the stock ledger.
Include VAT in Deal: Select the check box to indicate that VAT should be included in the invoice information.
Click Save to save any changes.
Navigate: From the main menu, select Ordering > Deals Management. The Deal Find window opens.
Search for and retrieve a deal in Edit mode. Restrict the search to deals with any status but Closed. The Deal Maintenance window opens.
On the Item/Location tab, click Add. The Add Deal Item/Location window opens.
In the Item area:
In the Merch. Level field, select the merchandise level that the deal applies to.
In the appropriate fields, enter the IDs or click the LOV to choose an ID.
In the Location area:
In the Org. Level field, select the organization level that the deal applies to.
In the appropriate fields, enter the IDs or click the LOV to choose an ID.
In the Country of Sourcing field, select the country the goods originate from for this deal.
Select the Exclude item/loc from deal? check box to indicate that the item/locations identified are excluded from the deal.
|
Note: You can only exclude item/locations after item/locations have been added |
Click OK to close the window and save any changes.
|
Note: For transaction level discounts, you do not specify any merchandise or organizational level. |
Navigate: From the main menu, select Ordering > Deals Management. The Deal Find window opens.
Search for and retrieve a deal. The Deal Maintenance window opens.
From the Options menu, select Proof of Performance Terms.
From the Proof of Performance Terms menu, select Deal, Deal Component, or Deal Component/Item Loc. The Proof of Performance Terms Definition window opens.
or
From the main menu, select Ordering > Fixed Deals > Edit. The Fixed Deals window opens.
In the Supplier field, enter the ID of the supplier for which you want to edit a deal, or click the LOV button and select the supplier.
To further restrict your search for a supplier, enter search criteria in the Promotion No or Collect Dates field.
Click Search.
From the Options menu, select Proof of Performance Terms. The Proof of Performance Terms Definition window opens.
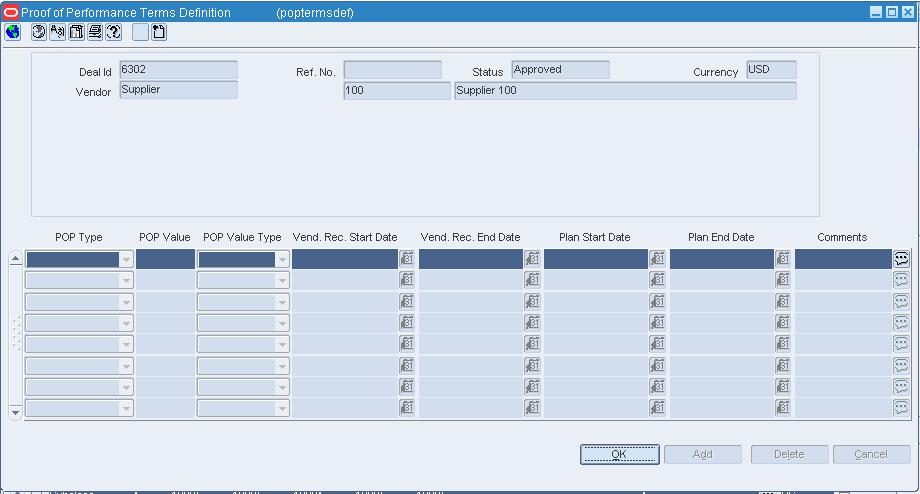
In the POP Type field, select what must be done to comply with the terms of the deal.
In the POP Value field, enter the monetary amount you receive by complying with the terms of the deal.
In the POP Value Type field, select the period of time that you have to comply to the terms of the deal.
In the Vend Rec Start Date field, enter the vendor's recommended start date, or click the LOV button and select a date.
In the Vend Rec End Date field, enter the vendor's recommended end date, or click the LOV button and select a date.
In the Plan Start Date field, enter the date you intend to start complying, or click the LOV button and select a date.
In the Plan End Date field, enter the date you intend to finish complying, or click the LOV button and select a date.
In the Comments field, enter any additional comments as necessary.
Click OK to save your changes and close the window.
Navigate: From the main menu, select Ordering > Proof of Performance Fulfillment> Edit. The POP Terms Fulfillment window opens.
In the Search By field, select the level at which you want to search for proof of performance definitions.
Enter or select the additional search criteria in the enabled fields.
Click Search. Deals that match your search criteria appear in the Proof of Performance Definitions area.
In the Proof of Performance Fulfillment area:
In the Promotion field, enter the ID of the promotion, or click the LOV button and select a promotion.
In the Start Date field, enter the start date of the promotion, or click the calendar button and select a date.
In the End Date field, enter the end date of the promotion, or click the calendar button and select a date.
Click OK to save your changes and close the window.
Navigate: From the main menu, select Ordering > Orders. The Order Selection window opens.
Search for and retrieve a purchase order in Edit mode. The PO Header Maintenance window opens.
Click Items. The PO Item Maintenance window opens.
From the Options menu, select PO-Specific Deal > Create/Edit. The Deal Maintenance window opens.
On the Deal Head tab, in the Threshold Limit Type field, select how the threshold is defined.
Add deal components.
Add item/locations to a deal.
Add threshold information.
Click Close to exit.
When prompted to save the changes, click Yes.
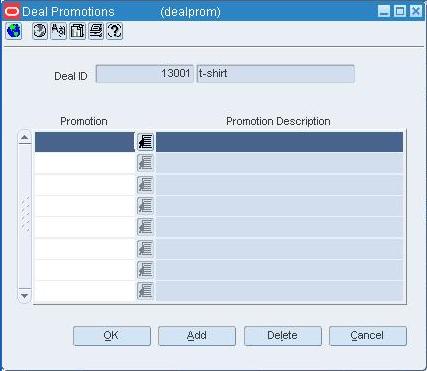
The Deal Promotions window allows you to associate a fixed deal with a promotions. You can attach multiple promotions to a fixed deal. The promotion is set up in the pricing system and can then be attached to the fixed deal.
Add a Promotion to a Fixed Deal
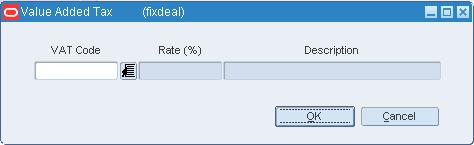
The Value Added Tax window allows you to define the VAT rates for non-merchandise items on a fixed deal.
Navigate: From the main menu, select Ordering > Deals Management. The Deal Find window opens.
Create a deal.
|
Note: You can define deal income only for bill back and rebate deals. |
Click Deal Income. The Deal Performance window opens.
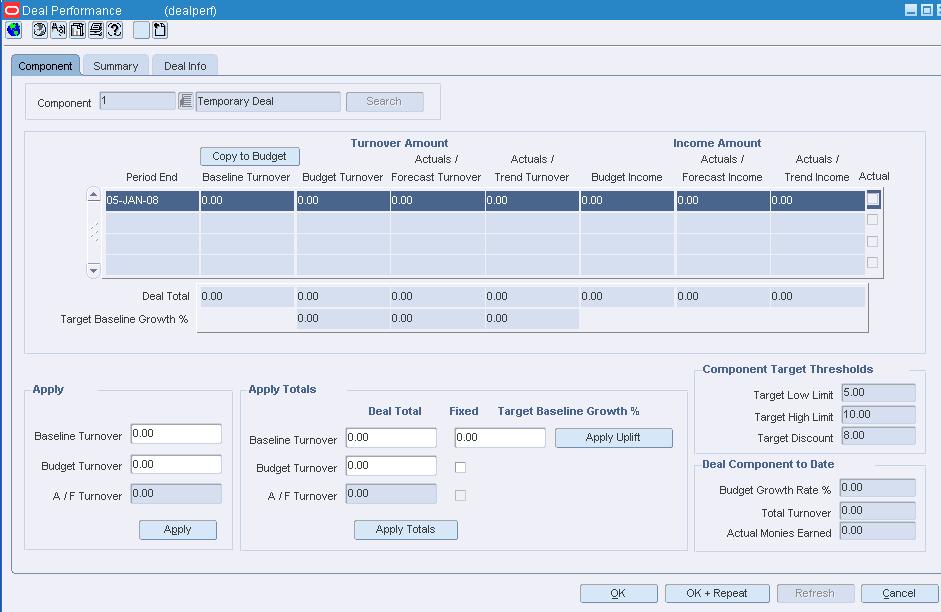
In the Apply Totals area, in the Baseline Turnover field, enter the previous year's turnover.
In the Apply Totals area, in the Budget Turnover field, enter the expected amount of turnover.
Click Apply Totals.
|
Note: You can click Copy Budget at any time to apply the baseline turnover totals to the Budget Turnover field. |
In the Target Baseline Growth % field, enter the percentage you expect the baseline to grow.
Click Apply Uplift. The Budget Turnover field is updated with the new totals.
When the budget turnovers are set, select the Fixed check box to the right of the Budget Turnover field.
Click OK to save any changes and close the window.
Select the period you want to update.
In the Apply area, in the Baseline Turnover field, enter the previous year's turnover.
In the Apply area, in the Budget Turnover field, enter the expected amount of turnover.
Click Apply.
Click OK to save any changes and close the window.
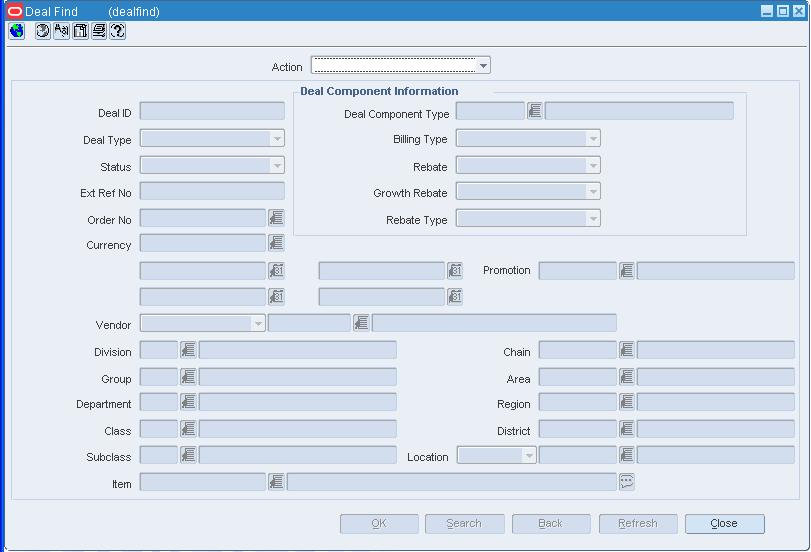
The Deal Find window allows you to enter criteria in order to search for deals and view the results of the search.
The default view for the Deal Find window opens when you open the window for the first time. You can also create a custom view.
This Deal Pass through window allows the user to set a pass-through percent value for each combination of department/supplier/warehouse/location. These values can be available to use to calculate a franchise store's acquisition cost.
Deal passthrough allow RMS to pass on a percentage of deal savings from one location to another. For example, if a client has a source warehouse (1000) and a WF store (2000) serviced by it, they could setup a deal passthrough of 50%. In this case if warehouse 1000 realized a deal value of $10 for an item the WF store would have $5 (.50 * $10) of the deal ”passed on” to it. The system takes the base cost for the source warehouse and subtracts the savings resulting from a deal passthrough.
Navigate: From the main menu, select Ordering > Deal Pass Through > Edit. The Deal Pass Through Window opens.
Enter Department or select from the list.
Enter Supplier or select from the list.
Enter Costing Location or select from the list.
Select an Organization Level from the list.
Enter an appropriate item in the field, or select from the list.
Click Search. The items matching your criteria will populate in the grid.
Select an item from the table.
Enter a Department or select from the list.
Enter Supplier or select from the list.
Enter Costing Location or select from the list.
Select an Organization Level.
Enter Pass-Through% to pass along to the customer location.
Click Apply.
Click OK.
The Deal Performance window allows you to enter forecasts for a deal, view period by period performance, and compare the actual deal performance against the actual results. The Deal Performance window is composed of three tabs:
Component tab: The Component tab allows you to enter the budgeted turnover expected for the deal component. The budgeted turnover is compared against the baseline turnover. The baseline turnover is the previous year's turnover. The baseline turnover can be entered manually if no information exists for a deal component.
As actuals are accrued, you can view the actual performance of the deal, at the component level, against the forecasted performance of the deal.
Summary tab: The Summary tab allows you to view the deal performance for the deal for all components on the deal. The periods displayed on the tab depends on the bill back periods that were selected during deal set up.
Deal Info tab: The Deal Info tab displays deal information, including a summary of deal performance to date.
More information can be found in these related topics:
This form is used to define proof of performance terms for a given deal, deal/deal component or deal/deal component/deal item-loc combination. These terms are defined by the deal partner that offers the deal. Access this window from the Options menu on the Deal Maintenance window.
Navigate: From the main menu, select Ordering > Deals Management. The Deal Find window opens.
Search for and retrieve a deal. The Deal Maintenance window opens.
or
From the main menu, select Ordering > Fixed Deals > Edit. The Fixed Deals window opens.
In the Supplier field, enter the ID of the supplier for which you want to edit a deal, or click the LOV button and select the supplier.
To further restrict your search for a supplier, enter search criteria in the Promotion No or Collect Dates field.
Click Search.
From the Options menu, select Proof of Performance Terms.
From the Proof of Performance Terms menu, select Deal, Deal Component, or Deal Component/Item Loc. The Proof of Performance Terms Definition window opens.
Edit the enabled fields as necessary.
Click OK to save any changes and close the window.
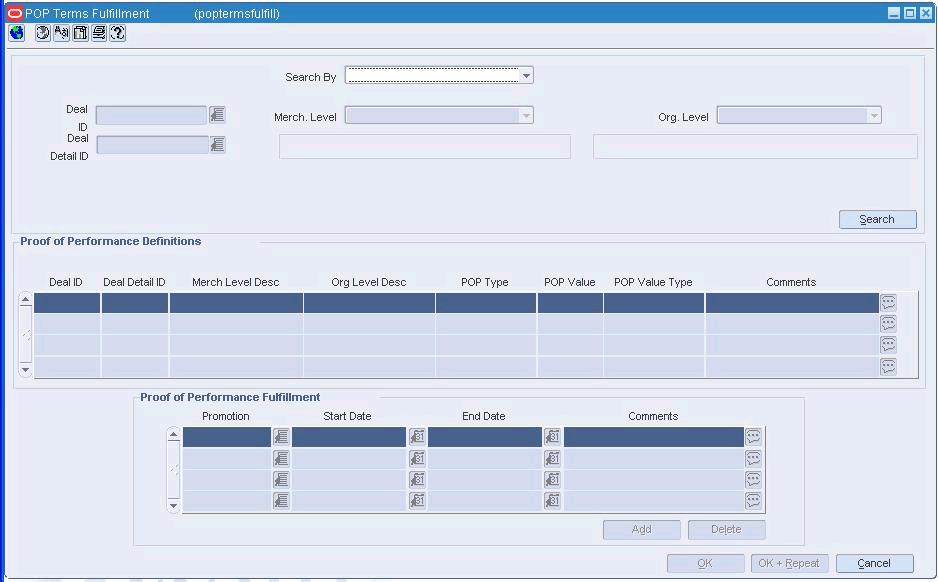
Use this form to record or view proof of performance term fulfillment for a deal at the following levels:
Deal
Deal/deal component
Deal Item/Location
Item
Location
Recording the fulfillment of these terms is a manual process and no fulfillment is calculated from other merchandising transactions.
An example: A supplier may define a proof of performance stating: "In order to qualify for the deal, the retailer needs to promote the item by displaying it on an end cap for 28 days." You may want to enter the start and end dates of the display period and/or promotion as a proof of performance fulfillment requirement.
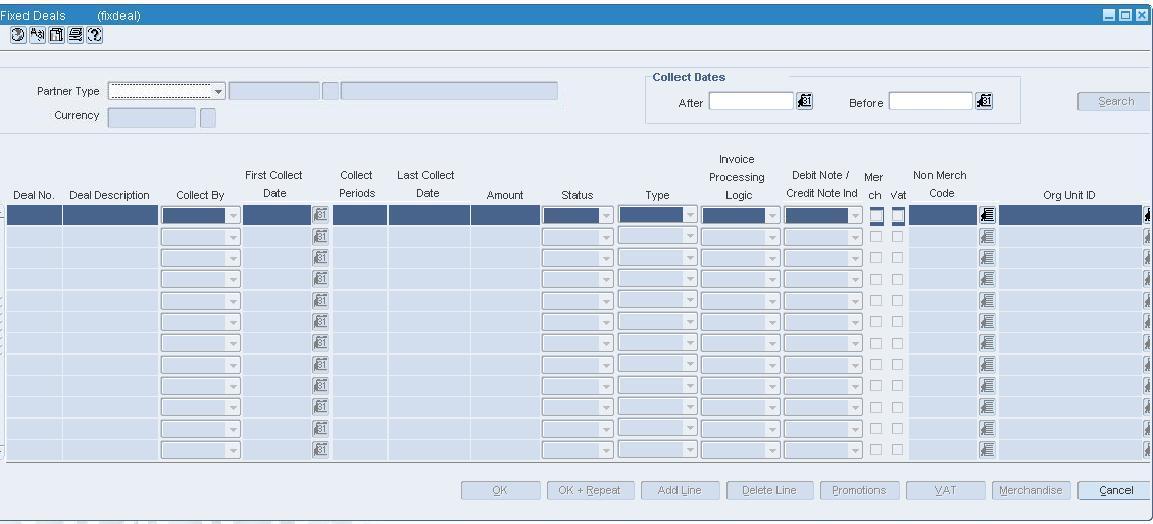
The Fixed Deals window allows you to create, edit, or view fixed deals. With fixed deals, your organization receives payments from suppliers in return for mentioning their products in promotions or for displaying their products on prime shelf space. Fixed deal payments can be claimed from the supplier either periodically or all at once.
You can create fixed deals and set up a collection schedule, from which you can make claims against the supplier and receive payments.
To create a fixed deal, you must first specify a supplier and then search for all fixed deals for that supplier. Then you can edit existing fixed deals or add a new fixed deal.
Fixed deals are typically created in Active status; however, you can create a fixed deal in Inactive status. Inactive status holds the claim in merchandising.
The Fixed Deal Report provides you with information about active claims. Claim information for inactive fixed deals is not included in the report.
Navigate: From the main menu, select Ordering > Fixed Deals > Edit. The Fixed Deals window opens.
In the Partner Type field, select the type of vendor for which you are creating the fixed deal. Enter the ID of the supplier for which you want to create a deal, or click the LOV button and select the vendor.
Click Search. The Deal No field is filled in automatically with a unique ID for the fixed deal.
In the Deal Description field, enter a description of the deal.
In the Collect By field, select how often payment for the fixed deal is collected from the supplier.
In the First Collect field, enter the date, or click the calendar button and select the date.
In the Collect Period field, enter the number of collection periods.
|
Note: If you select Date in the Collect By field, the number of collection periods is always one. |
In the Amount field, enter the payment amount from the supplier.
In the Status field, select the status of the deal.
In the Invoice Processing Logic field, select how invoices are created for the fixed deal.
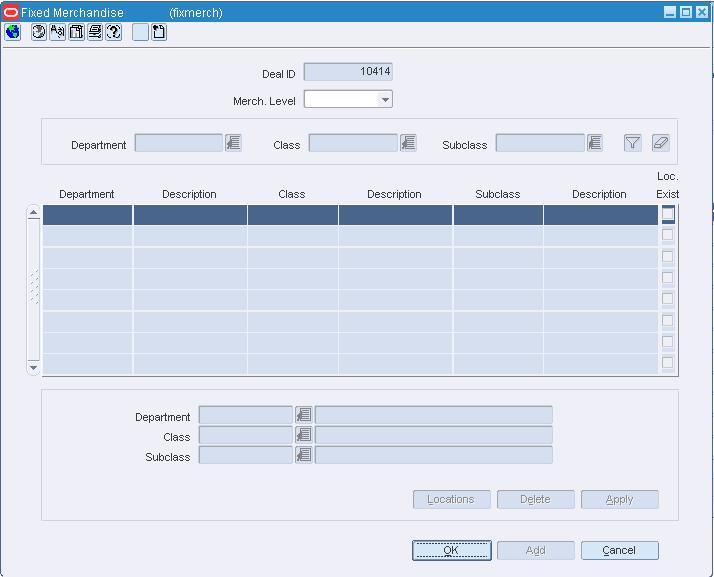
If the deal is associated to the merchandise hierarchy, select the Merch check box. The Fixed Merchandise window opens.
In the Merch Level field, select the merchandise level that the deal information is held at.
In the Apply area, enter the ID of the department, class and subclass in the appropriate fields, or click the LOV button and select the department, class, and subclass.
Click Apply. The merchandise level is added to the table.
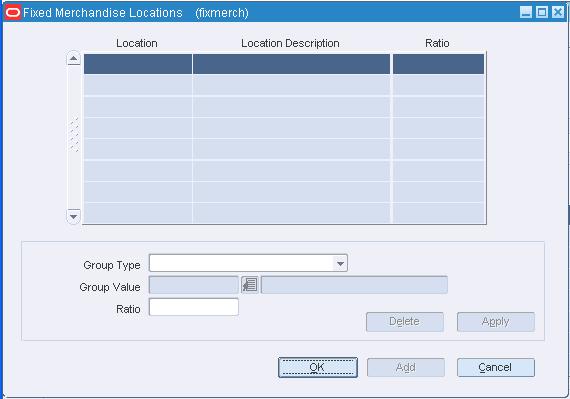
Click Locations. The Fixed Merchandise Locations window opens.
In the Group Type field, select the location type you want to add to the deal.
In the Group Value field, enter the ID of the location group or click the LOV button and select the group.
In the Ratio field, indicate what percentage of the deal the location contributes.
Click Apply. The location and ratio is added to the table.
Click OK to save any changes and close the window.
Click OK to save any changes and close the window.
If the Debit Memo/Credit Note Ind, select whether you want to send a Debit Memo or Credit Note request to the supplier.
In the Non Merch Code field, select the appropriate code.
|
Note: The Non Merch field is required only if the Merch check box is not selected. |
If VAT is included in the deal, select the VAT check box.
Click VAT. The Value Added Tax window opens.
In the VAT Code field, enter the VAT code to apply to the fixed deal, or click the LOV button and select a VAT code.
Click OK to save any changes and close the window.
In the Type field, select the type of allowance you receive for completing the deal.
Add proof of performance definitions as necessary.
Click OK to save your changes and close the window.
Navigate: From the main menu, select Ordering > Fixed Deals > Edit.
The Fixed Deals window opens.
In the Supplier field, enter the ID of the supplier for which you want to edit a deal, or click the LOV button and select the supplier.
To further restrict your search for a supplier, enter search criteria in the Promotion No or Collect Dates field.
Click Search.
Edit the fields in the table as necessary.
Click VAT to update Value Added Tax information for the deal. The Value Added Tax window opens.
Click Merchandise to update the item/location information for the deal. The Fixed Merchandise window opens.
Click OK to save your changes and close the window.
Navigate: From the main menu, select Ordering > Fixed Deals > Edit. The Fixed Deals window open.
In the Partner Type field, select the type of vendor for which you are creating the fixed deal. Enter the ID of the supplier for which you want to create a deal, or click the LOV button and select the partner.
Click Search. The Deal No field is filled in automatically with a unique ID for the fixed deal.
Create a fixed deal, or select an existing deal.
Click Promotions. The Deal Promotions window opens.
In the Promotion field, enter the promotion ID, or click the LOV button and select a promotion.
Click OK to save any changes and close the window.
Navigate: From the main menu, select Ordering > Fixed Deals > Edit. The Fixed Deals window opens.
In the Partner Type field, select the type of vendor for which you are creating the fixed deal. Enter the ID of the supplier for which you want to create a deal, or click the LOV button and select the vendor.
Click Search. The Deal No field is filled in automatically with a unique ID for the fixed deal.
Select an existing deal.
Click Promotions. The Deal Promotions window opens.
Click Add. The next line is enabled.
In the Promotion field, enter the promotion ID, or click the LOV button and select a promotion.
Click OK to save any changes and close the window.
The Fixed Merchandise window allows you to define which items are associated to the a fixed by merchandise hierarchy.
The Fixed Merchandise Locations window allows you to indicate at which locations the deal is effective.
Navigate: From the main menu, select Finance > Transaction Data View. The Transaction Data window opens.
|
Note: If the Financials installed, your view may differ than what is shown in the procedure. |
|
Note: You can also access this window from the Average Cost Adjustment window and Receiver Cost Adjustment window. Some search criteria are automatically filled in depending on how you access the Transaction Data window. |
In the From Date and To Date fields, enter the range of dates for which you want to view transactions, or click the calendar buttons and select the dates.
In the Department field, enter the ID of a department, or click the LOV button and select the department.
Enter additional search criteria as desired to further restrict the range of transactions that you want to view.
Click Search. The results appear in the table.
To view additional details for a specific transaction:
Select the transaction and click Detail. The details appear in the Transaction Data Detail window.
Click Prev or Next to view the details of the previous or next transaction on the list.
Click Close to close the window.
When a deal is added to the system, it must go through a series of checks before it is accessible in the system. Depending on your user role, you may not be able to move the deal to the next status. A deal may be in any of the following statuses:
Table 7-1 Deals Approval Process Status
| Status | Definition |
|---|---|
|
Worksheet |
The deal has been started, but not completed. |
|
Submitted |
The deal has been completed and is pending review. |
|
Approved |
The deal has been reviewed and has been approved. |
|
Rejected |
The deal has been submitted, reviewed, and has been rejected. |
|
Closed |
The deal is complete. |
Navigate: From the main menu, select Ordering > Deals Management. The Deal Find window opens.
Search for and retrieve a deal in Edit mode. Restrict the search to deals in Worksheet status. The Deal Maintenance window opens.
From the Options menu, select Submit. The Status field changes to Submitted.
Click Close to exit. You are prompted to save the changes.
Click Yes.
Navigate: From the main menu, select Ordering > Deals Management. The Deal Find window opens.
Search for and retrieve a deal in Edit mode. Restrict the search to deals in Submitted status. The Deal Maintenance window opens.
From the Option menu, select Approve. The Status field changes to Approved.
Click Close to exit.
When prompted to save the changes, click Yes.
Navigate: From the main menu, select Ordering > Deals Management. The Deal Find window opens.
Search for and retrieve a deal in Edit mode. Restrict the search to annual deals. The Deal Maintenance window opens.
From the Option menu, select Close. The Status field changes to Closed.
Click Close to exit.
When prompted to save the changes, click Yes.
Navigate: From the main menu, select Ordering > Deals Management. The Deal Find window opens.
Search for and retrieve a deal in Edit mode. Restrict the search to deals in Submitted status. The Deal Maintenance window opens.
From the Options menu, select Reject. The Status field changes to Rejected.
Click Close to exit. You are prompted to save the changes.
Click Yes.