| Oracle® Retail Merchandising Suite Administration Guide Release 19.2.000 F37131-01 |
|

 Previous |
 Next |
| Oracle® Retail Merchandising Suite Administration Guide Release 19.2.000 F37131-01 |
|
Previous |
Next |
When implementing the Merchandising suite as a cloud service, Merchandising uses Oracle Identity Cloud Service (IDCS) as its identity provider (https://www.oracle.com/cloud/paas/identity-cloud-service.html).
If you are implementing the Merchandising suite on premise, then IDCS is not currently supported and it is recommended that Oracle IDM stack be used instead. https://www.oracle.com/middleware/technologies/identity-management/
IDCS is Oracle's cloud native security and identity platform. It provides a powerful set of hybrid identity features to maintain a single identity for each user across cloud, mobile, and on-premises applications. IDCS enables single sign on (SSO) across all applications in your Oracle Cloud tenancy. You can also integrate IDCS with other on-premise applications to extend the scope of this federated identity management.
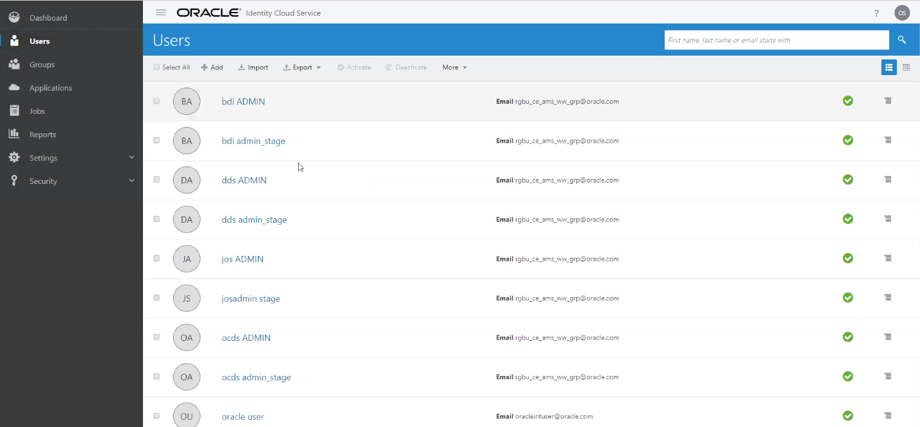
All application user maintenance is performed by the Identity Domain administrator via IDCS. A key feature of IDCS is that basic user maintenance can be further delegated via identity self-service.
For Merchandising cloud service implementations, all the default roles will be created for you in IDCS for both production and non-production environments, including the administration roles described below. The non-production version of the roles will include a "_PREPROD" extension. This is because a single instance of IDCS will hold both production and non-production roles for your Merchandising cloud solutions, so the names need to be differentiated. These roles should not be removed. If you choose to create any custom roles in IDCS, then it is recommended you use a similar naming convention.
Additionally, a number of users will be added in IDCS for your Merchandising cloud service implementation that are used for running batch processes, web service calls, and so on. These users will be managed by the Oracle Cloud Operations team and should also not be removed.
The Oracle Identity Management (IDM) platform delivers scalable solutions for identity governance, access management and directory services. This modern platform helps organizations strengthen security, simplify compliance and capture business opportunities around mobile and social access. Oracle Identity Management is a member of the Oracle Fusion Middleware family of products.
Within the IDM platform, Oracle Internet Directory (OID) is a LDAP v3 compliant directory. Oracle Identity Manager (OIM) provides identity governance.
For more information on both of these identity management solutions, see the Oracle Retail Merchandising Suite Security Guide - Volume 1.
When application users are created in IDCS, they must be associated with an appropriate Oracle Retail enterprise role to access the Merchandising suite. Some application power users must be assigned Merchandising application administration role(s):
Merchandising: RMS_APPLICATION_ADMINISTRATOR_JOB
Sales Audit: RESA_APPLICATION_ADMINISTRATOR_JOB
Pricing: PRICING_APPLICATION_ADMINSTRATOR_JOB
Invoice Matching: REIM_APPLICATION_ADMINSTRATOR_JOB
Allocation: ALLOCATION_APPLICATION_ADMINSTRATOR_JOB
Power users with application administration roles have permissions to UIs which allow them to update the default role to application access mappings. These job roles by default will contain two duties:
SETTINGS_MENU_DUTY
ADMIN_CONSOLE_DUTY
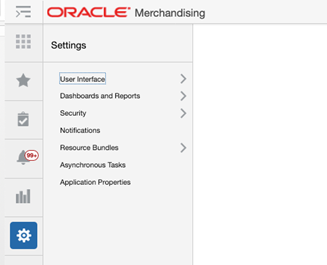
The Settings Menu Duty provides access to all the menu options under the Settings menu in each of the solutions, except the Security folder. The Admin Console Duty provides access to the Security option. This allows you to create a new role that assigns only the non-security related duties, if desired.
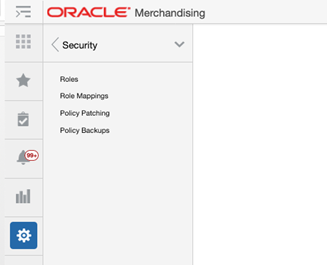
As part of the Merchandising solutions security set up, default enterprise roles and their mappings to application roles are provided with every application. Additionally, each solution has a default configuration of duties assigned to application roles, and privileges assigned to duties. The details for each of these are outlined in volume 2 of the specific solution's security guide. If you wish to change the privileges assigned to base duties, create new duties, or remove or add duties to default roles or your custom roles, you will do this by accessing the Security menu options in the Settings menu in each of the Merchandising solutions.
|
Note: The roles, duties, and privileges for each solution area are viewed and managed separately. For example, you will not be able to view or update Allocation duties when accessing the security setup from the Merchandising solution. |
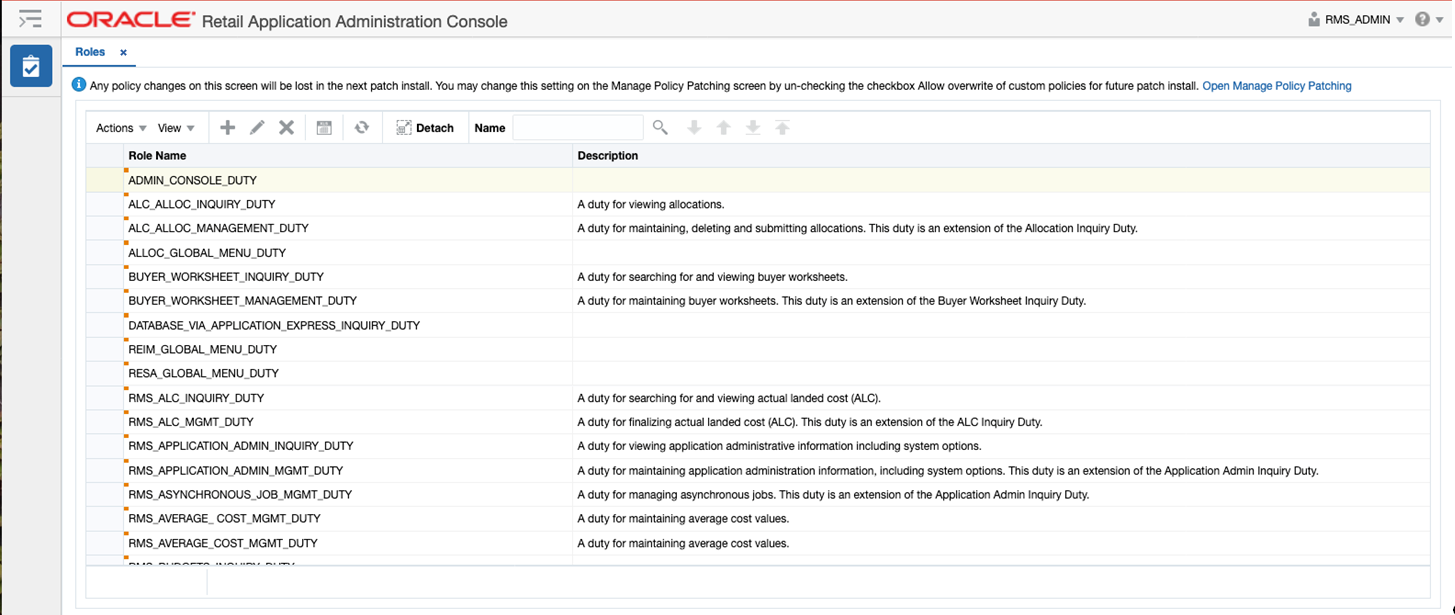
Clicking on the Roles option in the Security menu will launch the Oracle Retail Application Administrator Console. This page allows you to view and edit all the existing duties that exist for the solution, including the description of how a duty is expected to be used. You can also add custom duties or remove duties, as needed.
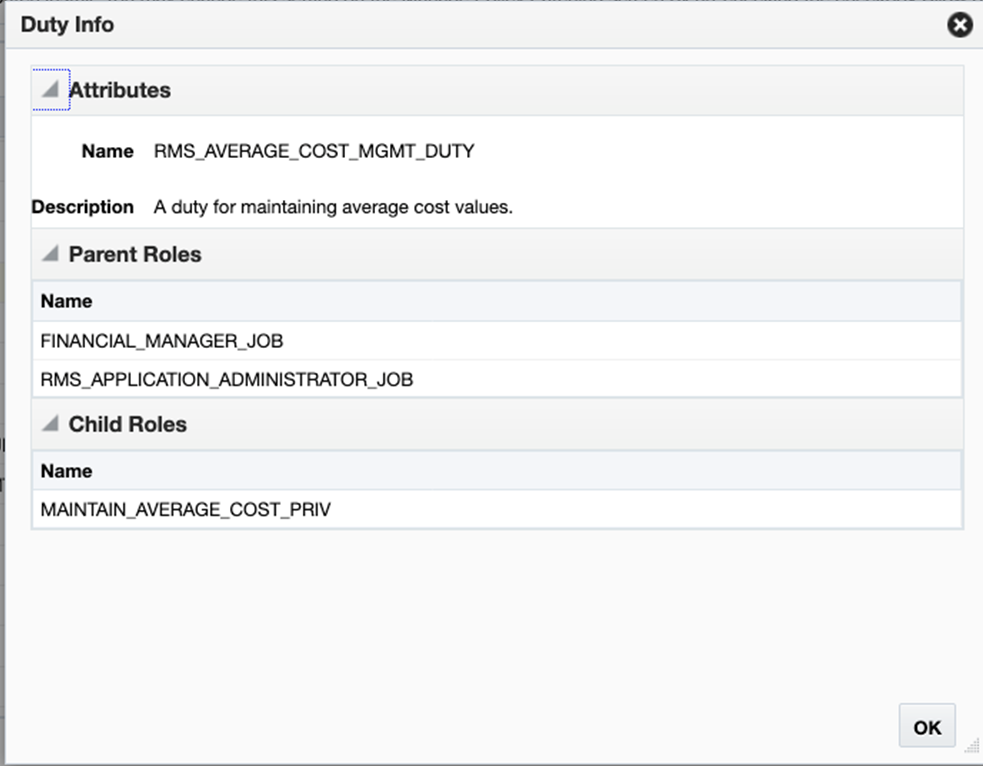
Additionally, hovering over the orange square in the top left of each role name allows you to click on the "carrot" that appears to display additional information about the role, including roles it is assigned to, and which privileges are contained in the duty.
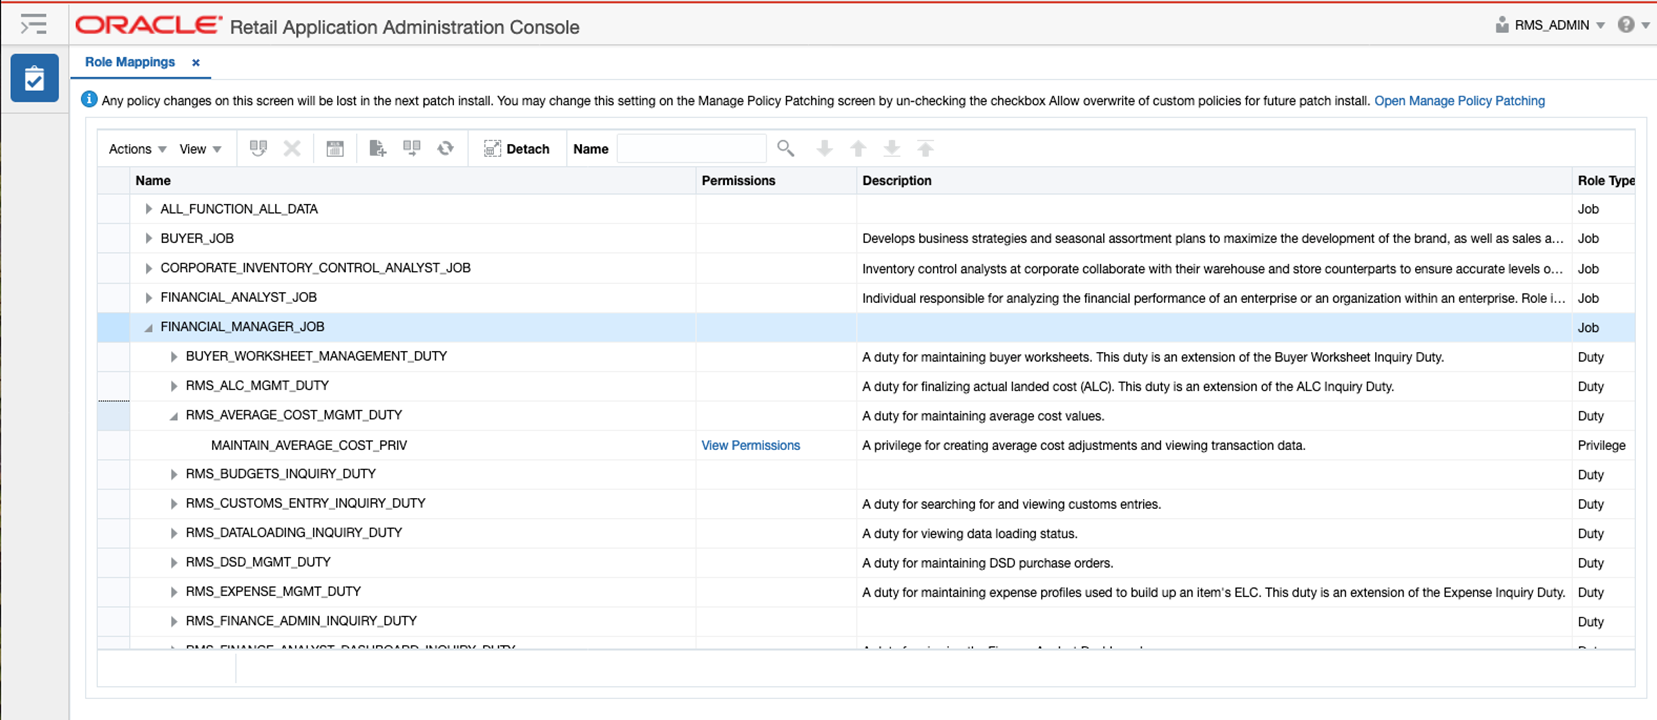
The relationship between roles and duties and/or privileges is managed in the Role Mappings page, which is accessed from the Security menu. Like the Roles screen, this will also launch the Oracle Retail Application Administrator Console. In this screen, you will see all the roles that have had duties and privileges assigned. Clicking on the arrow next to the role name will show you the list of duties currently assigned to the role. Clicking on the arrow next to the duty name will show you the privileges assigned to that duty. Descriptions are also shown for the duties and privileges to help with understanding of what functions they control in the solution. You can also click on the View Permissions link for privileges to see the technical details related to the privilege.
There are several actions that you can take in this screen: Duplicate, Delete, Select and Add, and Remap. You also have the option to export this list to Excel.
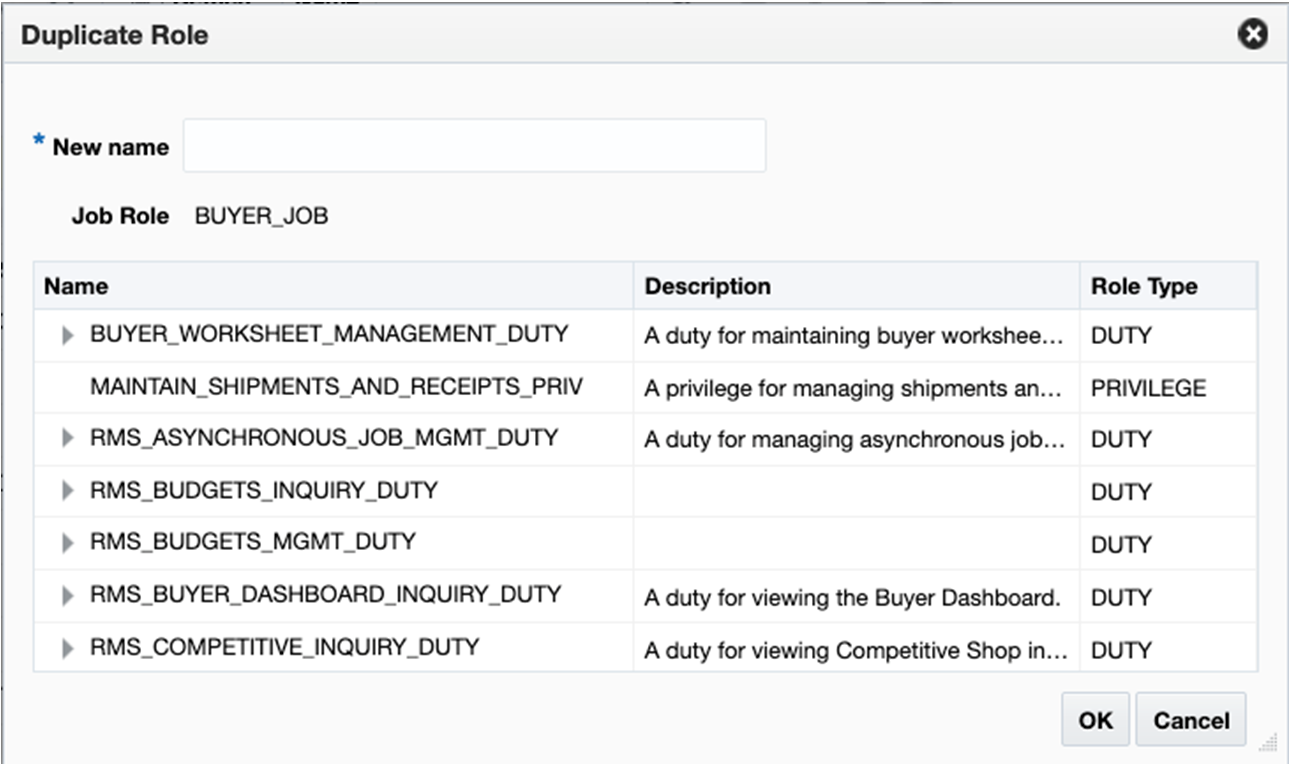
The Duplicate action allows you to copy the duty and privilege configuration of one role to another. This may be useful if you have two roles that are very similar to each other but have slightly different duties.
To use this function, highlight the role you wish to copy and select the Duplicate option from the Actions menu or by clicking on the iconic button. Then, enter the name of the new role where the copied duties and privileges should be added. The application role must not already have duties/privileges assigned in the solution and must have already been created in IDCS prior to this step. Once they are copied to the new role, you can remove any duties or privileges that don't apply or add new.
The Delete action is enabled when a duty or privilege role is selected. To delete a duty assigned to a role or a privilege assigned to a duty, select the Delete option from the Actions menu or click on the ![]() iconic button.
iconic button.
|
Note: Any changes to the privileges assigned to duties in this screen will impact all job roles assigned to this duty. |
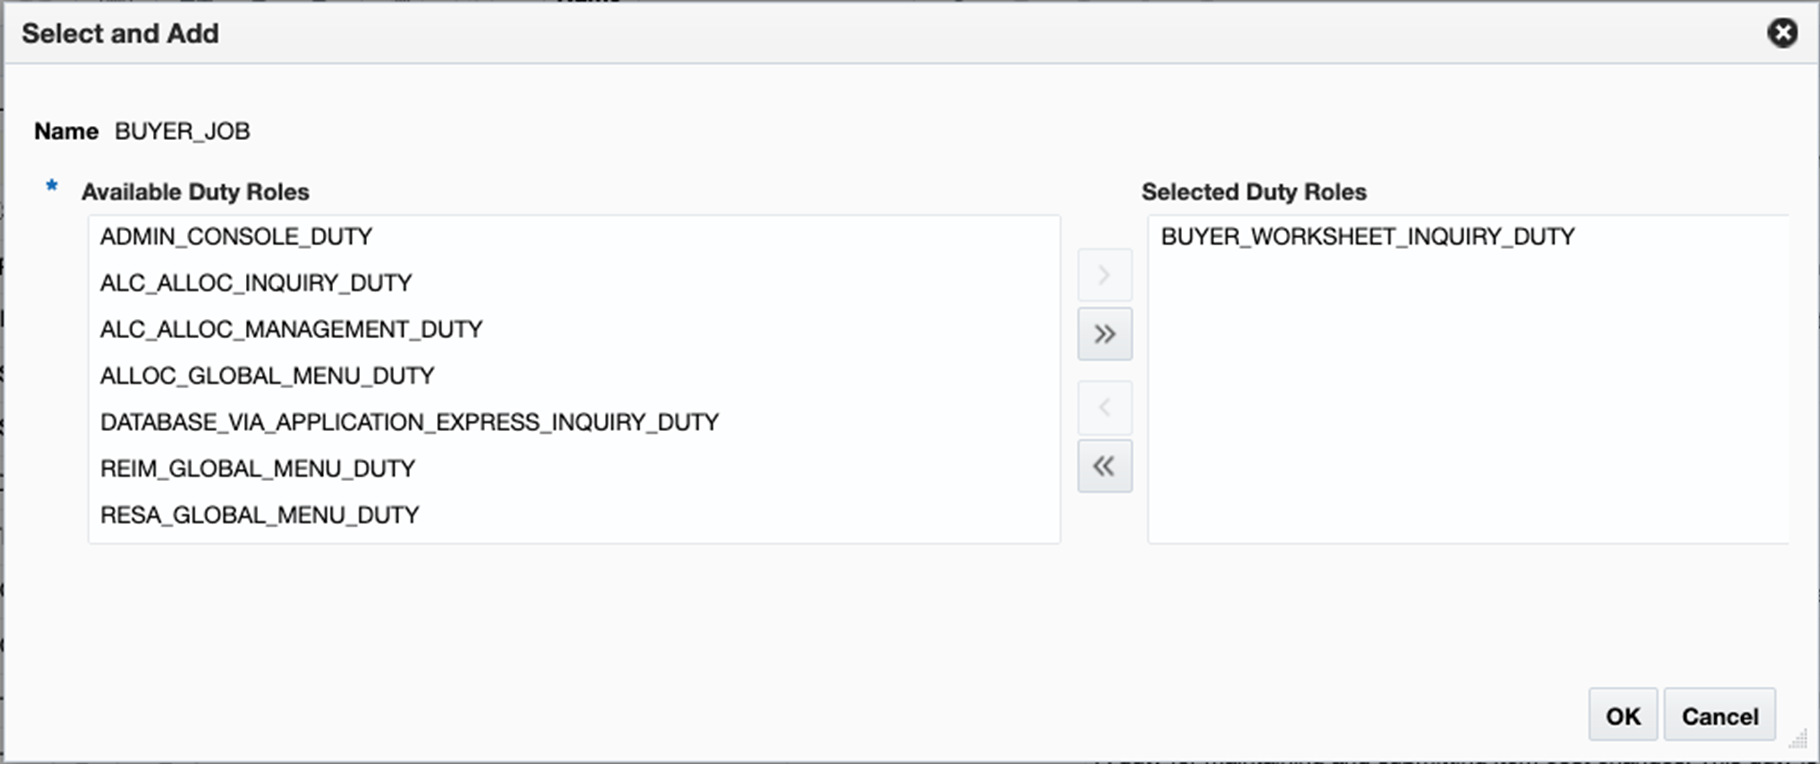
The Select and Add option allows you to add new duties to a role or add new duties or privileges to a duty. To add new duties to a role, highlight the role in the table and then select the Select and Add option in the Actions menu or click on the  iconic button. This will open a popup displaying all the available duties that can be added to the role. Highlight the duties to be added and use the arrows to add to the box on the right. Once all have been added, click OK to save your changes.
Similarly, to add privileges or child duties to duty, highlight the duty in the table and select the Select and Add option in the Actions menu or click on the iconic button. Select the duties or privileges from the list of available options and click OK to save your changes. It should be noted that any child duties or privileges you add to a duty will be added to all roles that have the parent duty, not just the selected role.
The Remap action and iconic button ( ![]() ) is enabled when a job or duty is selected. The Remap action is used to move mappings from one role to another role. During this process, a new role is created and all the associated roles beneath the previous role are moved into the new role, leaving the old role as an orphan or with other roles associated with it. It is not recommended that this be used in Merchandising solutions. Instead, create a new role using the Duplicate feature.
) is enabled when a job or duty is selected. The Remap action is used to move mappings from one role to another role. During this process, a new role is created and all the associated roles beneath the previous role are moved into the new role, leaving the old role as an orphan or with other roles associated with it. It is not recommended that this be used in Merchandising solutions. Instead, create a new role using the Duplicate feature.
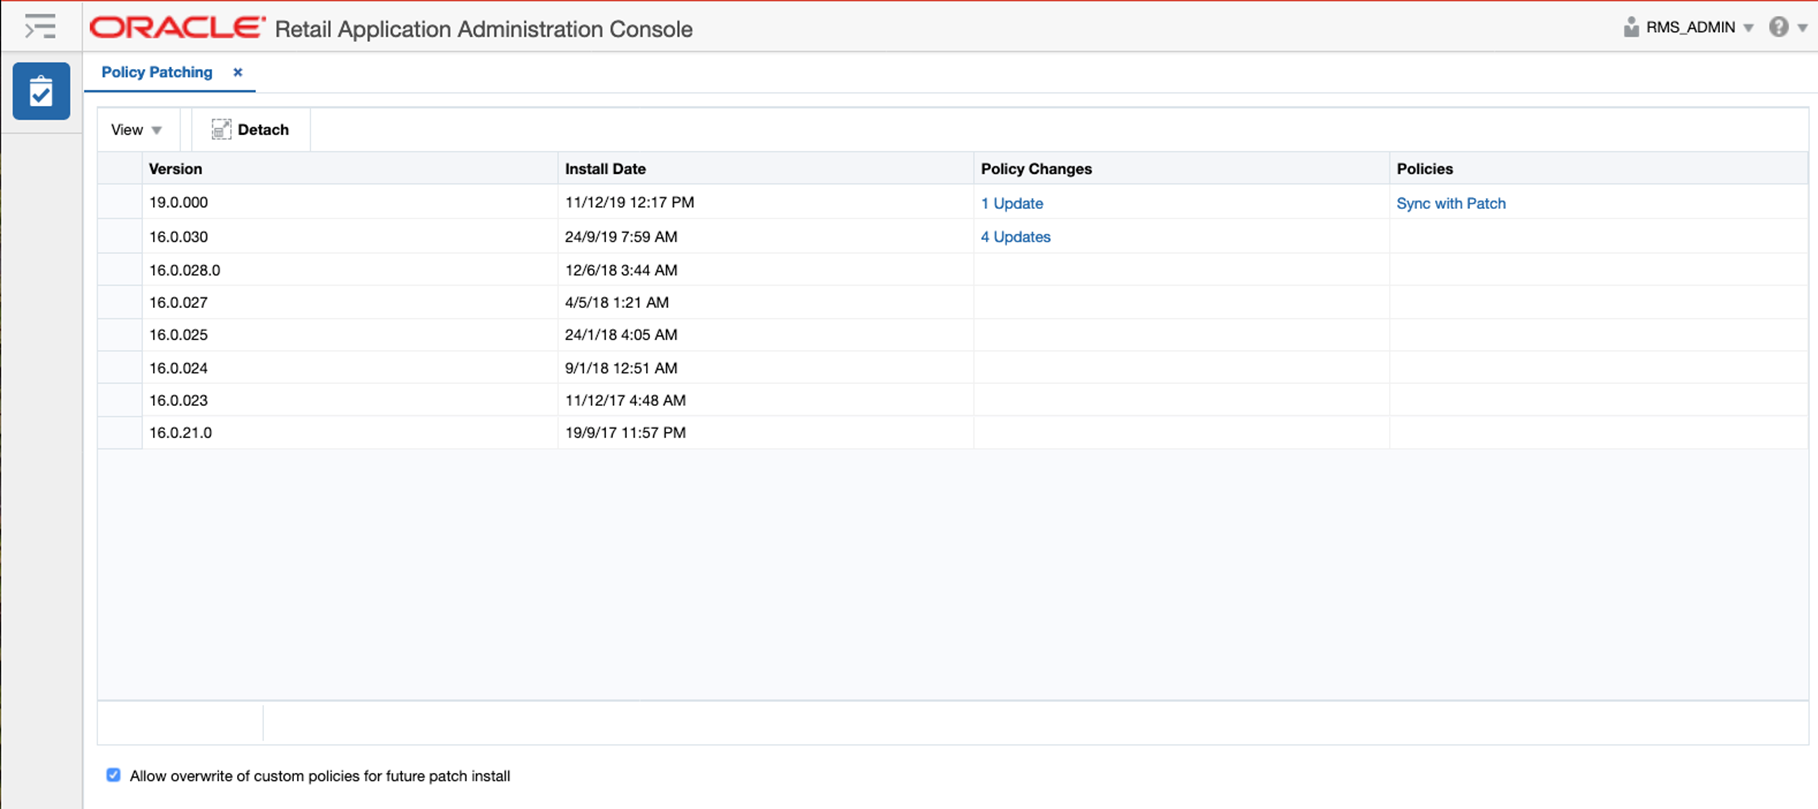
The Policy Patching screen displays two different views. The first view is called the Patch History view. The Patch History view displays the list of patches that have been applied to the solution. The latest patch provides a link to synchronize the changes introduced in the patch with your role configurations. The Patch History view also has a check box at the bottom of the page to indicate whether to overwrite your configurations when the application is patched in the future. By default, this should be unchecked to prevent overwriting of your custom policies when patches are applied, so that you can review and apply changes to how your custom policies have been designed.
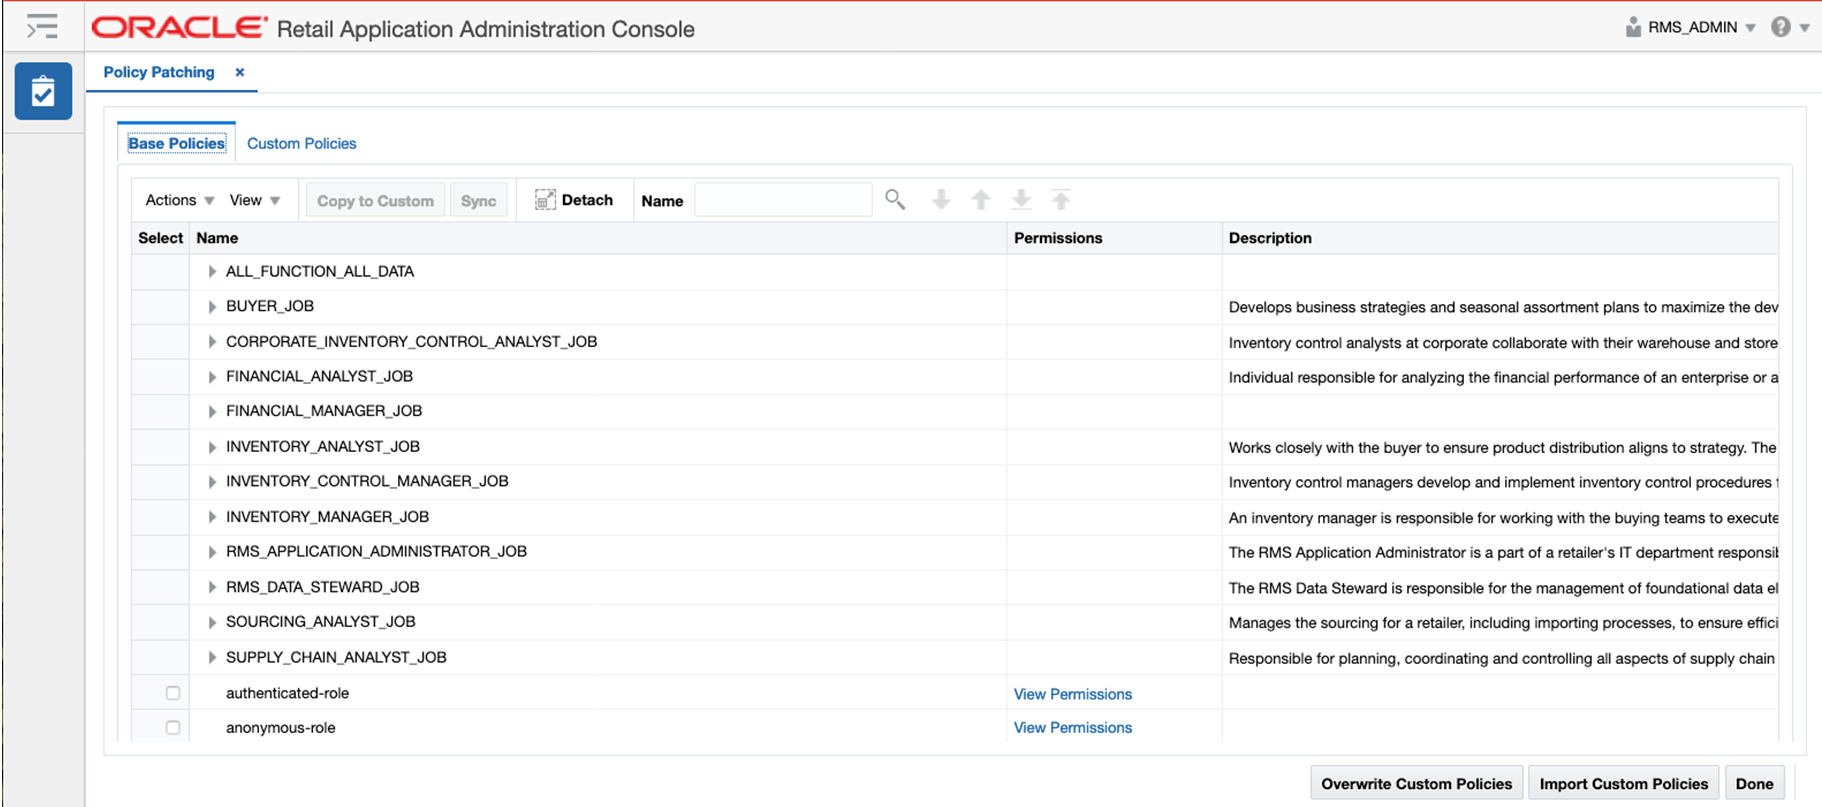
Click the Sync with Patch link to access the second view, which shows you the base policies and your custom policies.
This view provides a way for you to synchronize the changes introduced in a patch with your configuration. The first tab called Base Policies displays the application policies that came in the patched application. The second tab called Custom Policies displays the application policies that you configured. Details on the changes in duties and privileges are provided in the Advanced Release Notes for each patch.
The Copy to Custom action is enabled when a privilege is selected in the Base Policies tab and the privilege does not exist in the custom application policies. The Copy to Custom action copies the privilege to a selected duty in the custom policy setup.
The Sync action is enabled when a privilege that changed in the patch is selected that exists in the custom policy. The Sync action synchronizes the permissions in the selected privilege with the same privilege in the custom application policy setup.
The View Permissions link is used to display the permissions associated with a privilege. This link opens up a popup that displays the Resource Name, Permission Actions and Permission Class.
The Overwrite Custom Policies action overwrites the current custom policy setup with the base policy in the patched application. The action will cause the loss of your configured policy changes. The action backs up the application policies before overwriting and can be retrieved using the Manage Backups screen.
The Import Custom Policies action overwrites the current application policy setup with the application policies available in a jazn-data.xml file. The action opens up a pop-up, which provides an option to choose a file from your local machine, such as one that you may have created using the Policy Backup screen. This action is useful when migrating policies from one environment to another.
The Refresh action is only available in the Custom Policies tab and may be used to refresh the custom application policies. The action can be used to verify the changes in the custom policies after a successful Sync or Copy to Custom action from the base policies.
|
Note: If a new duty has been introduced in a patch then the Roles page should be used to create the duty and Role Mappings should be used to assign it to the appropriate job roles. Once the new duty role has been created and assigned to a job role, the Copy to Custom action can be used to assign privileges to that duty. |
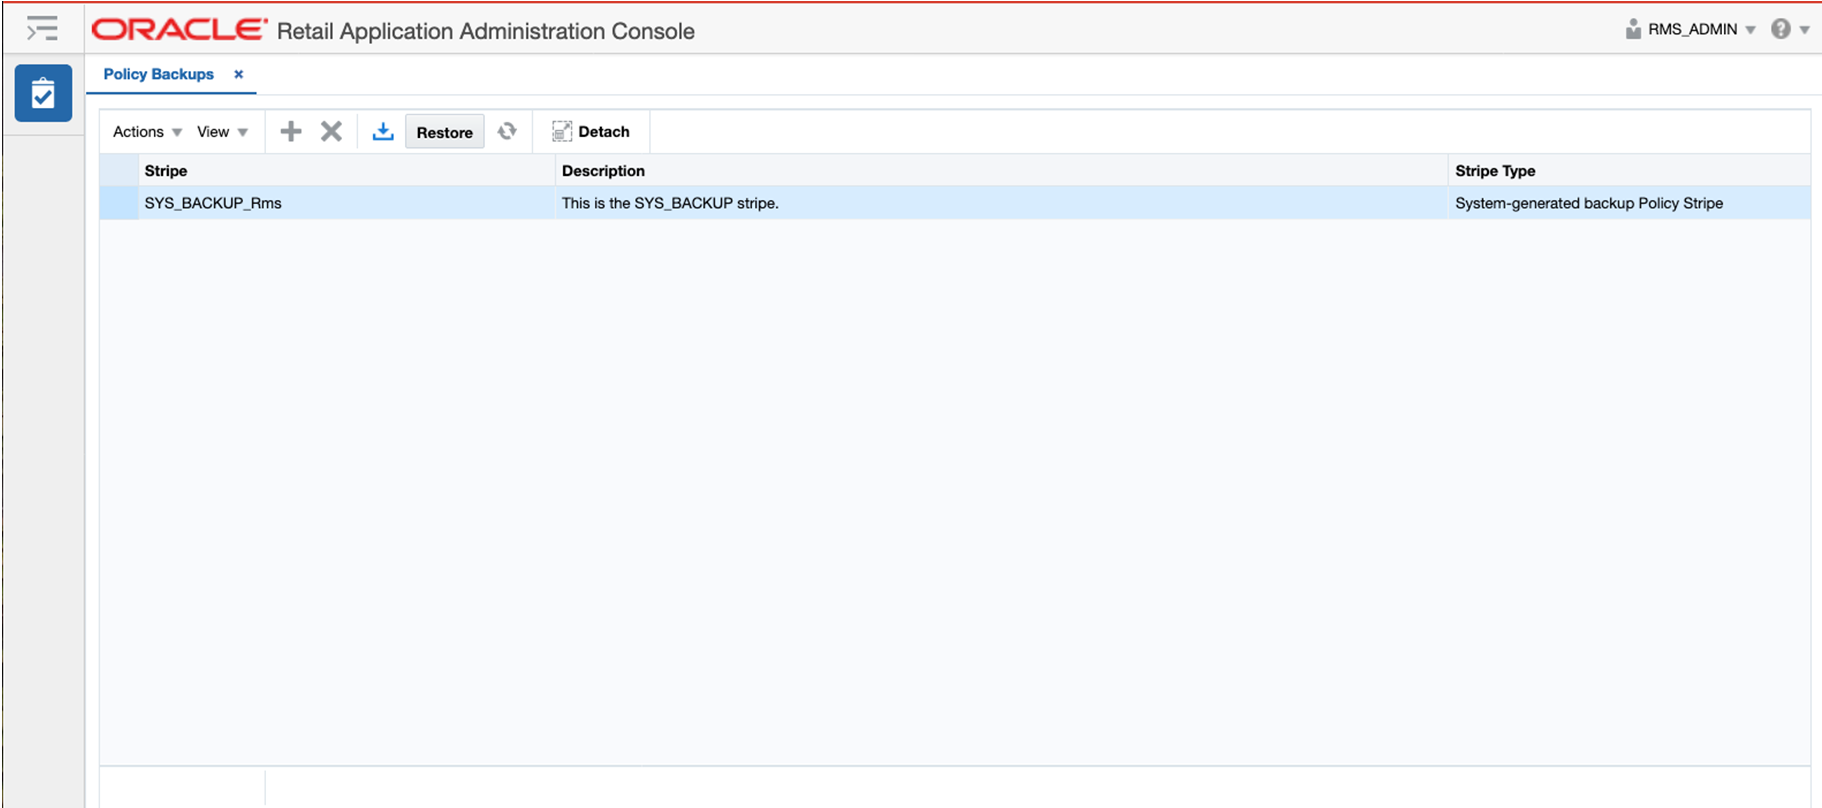
The Policy Backups screen is used to maintain the application policy backups. The backups can be used to restore the application policies back to the original state if something goes wrong with the application policy setup.
The backups can be created by the following actions:
Before overwriting the application polices during a patch install. The installer created backup is prefixed with the name SYS_BACKUP. The installer overwrites the application policies and creates a backup only if the Allow Overwrite of Custom Policies flag is checked in the Policy Patching screen.
Selecting the Create action on the Manage Backups screen. The user created backup is prefixed with the name USER_BACKUP.
Using the Overwrite Custom Policies action on the Policy Patching screen. The Overwrite Custom Policies action creates a backup before overwriting the custom policies. The backup created by the Overwrite Custom Policies action is prefixed with the name SYS_BACKUP.
This action is used to create a backup of the current policies. The backup stripe name will be prefixed with the text USER_BACKUP. The create action opens up a popup where you can enter the comments for why the backup is being taken.
|
Note: Only one user-initiated backup is allowed. If a backup already exists, it will be overwritten. |
The download action is used to download the selected backup stripe in an xml format. It will generate a file called backup.xml which can be stored on the device where the browser is running. The xml file can be opened to look at the changes in the backup.