| Oracle® Retail Merchandising Suite Administration Guide Release 19.2.000 F37131-01 |
|

 Previous |
 Next |
| Oracle® Retail Merchandising Suite Administration Guide Release 19.2.000 F37131-01 |
|
Previous |
Next |
Some of the Merchandising suite integrations involve flat files as inputs or outputs of the process. In order to support uploading files in a SaaS implementation, you must generate private and public keys and the public key must be associated with your SFTP account for the file uploads. A unique public key must be created for each of your environments (e.g. production, stage, and so on).
The following is the process to generate a 2048 bit RSA key and add the same to the SFTP server. This is done with the help of WinSCP tool on Windows. However the same can be done using ssh-keygen on Linux as well.
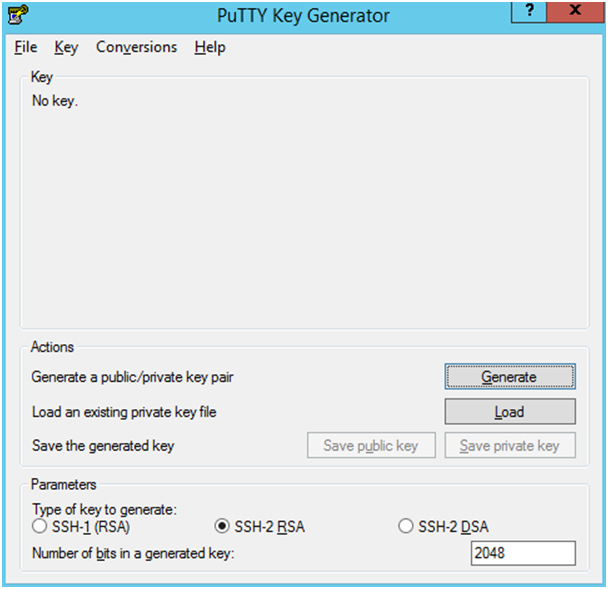
Launch WinSCP and select Tools -> Run PuttyGen.
Select "SSH-2 RSA" for the type of key to generate and enter "2048" for the number of bits in a generated key field and click Generate.
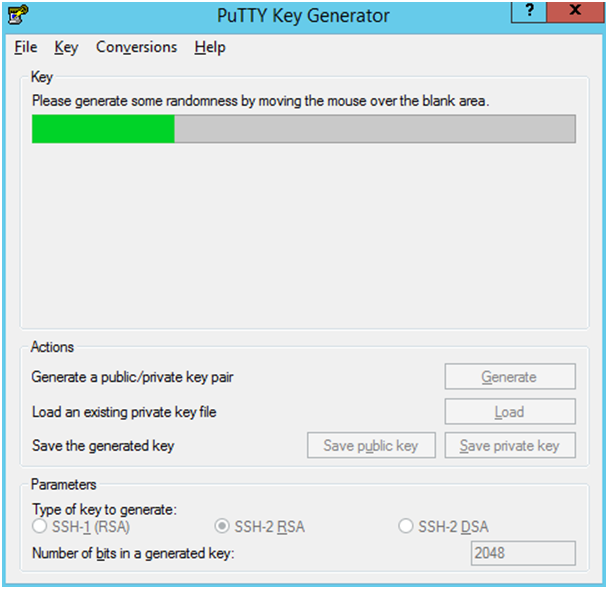
Move the mouse over the blank space in the window until the key is generated.
Once the key is generated, click the Save public key button to save the public key to a file.
Click the Save private key button to save the Private key to a file. Confirm to save it with/without a passphrase.
Open an SR with Oracle Support, to associate the Public half of the Key with your SFTP account (attach the Key with the SR).
The Upload steps use the private key generated in the earlier section.
Launch WinSCP and connect to <SFTP Server> using port 22.
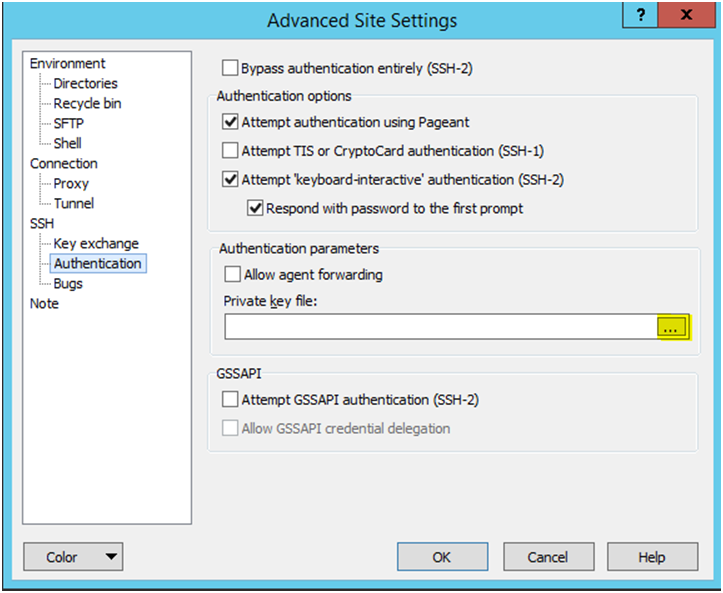
Enter the username and click Advanced.
Click Authentication.
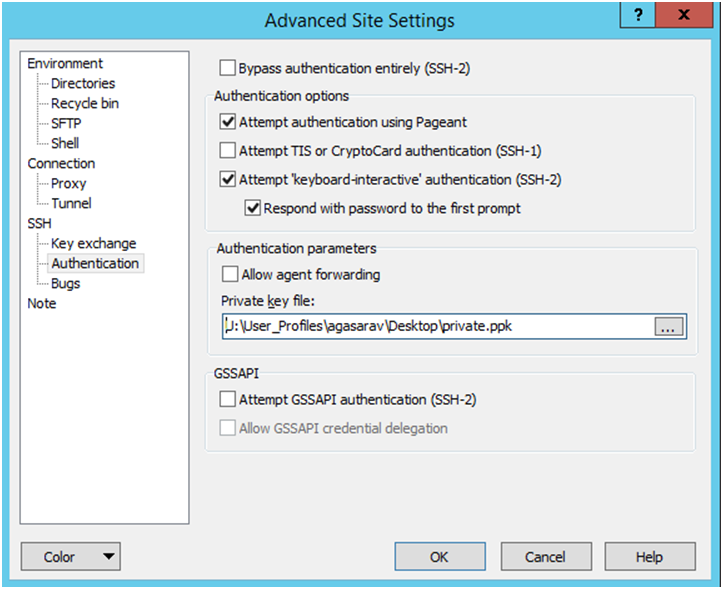
In the Private Key File field, click the Browse button and select the private key created in the earlier section.
After loading the private key file, click OK.
Click Login. The window does not prompt for a password and logs into the SFTP server. Provide a passphrase if one has been set up.
Transfer all data files to the directory /<SFTP User>.
For each data file transferred to /<SFTP User>, transfer a corresponding file <filename>.complete
For example, if data_file1.dat, data_file2.dat, data_file3.dmp are the files to transfer, then transfer the below files to the /<SFTP User>/ directory.
data_file1.dat.complete
data_file2.dat.complete
data_file3.dmp.complete
Launch WinSCP and connect to <SFTP Server> using port 22.
Enter the username and click Advanced.
Click Authentication.
In the Private Key File field, click the Browse button and select the private key created in the earlier section.
After loading the private key file, click OK.
Click Login. The window does not prompt for a password and logs into the SFTP server. Provide a passphrase if one has been set up.
Change directory to /<SFTP User>/EXPORT.
Download all data files.