| Oracle® Retail Merchandising Foundation Cloud Service Oracle Retail Merchandising System User Guide Release 19.3.000 F83161-01 |
|

 Previous |
 Next |
| Oracle® Retail Merchandising Foundation Cloud Service Oracle Retail Merchandising System User Guide Release 19.3.000 F83161-01 |
|
Previous |
Next |
Cost Management refers to the procedure of maintaining the cost of the different items that are used in the retailer's setup and allow the user to manage any cost changes that occur during the lifecycle of these items.
You can manage cost changes in two different ways:
The Cost Change by Item option is used when a cost change needs to be defined at the item/supplier/country of sourcing level.
The Cost Change by Location option is used when a cost change needs to be defined at the item/supplier/country of sourcing/location level.
Open the Cost Change or Cost Change by Item page:
From the Tasks menu, select Cost > Cost Change by Item. The Cost Change by Item page appears.
Additionally, you can access the Cost change through the Item Search page.
From the Tasks menu, select Items > Manage Items. The Item Search page appears, search for the desired item.
In the Results section, select Actions > Cost Change or use the Cost Change button. The Cost Change page appears.
In the Cost Change field, enter a description for the change.
In the Reason field, enter, select or search for a reason code for the cost change.
In the Effective Date field, enter the effective date for the cost change, or use the Calendar icon to select a date.
The initial cost of an item is established at item set-up. The cost of an item can be adjusted in the item record till the item is approved. Any cost changes past that will need to be handled through the cost change pages.
When submitted through EDI, you review the cost change, then submit the cost change for approval.
When entered manually, you enter the cost change, an event description, an effective date and a reason code. Then you can submit the cost change for approval.
|
Note: You cannot create a cost change for a transformed sellable item. |
After you approve the cost change, the item/supplier cost record is updated and any outstanding purchase orders that have not been received are recalculated, if designated on the cost change, based on the updated cost.
You can access the Cost Change by Item page in different ways:
From the Tasks menu, select Cost > Create Cost Change by Item. The Cost Change by Item page appears.
You can also access the Cost Change by Item page through the Cost Change Search.
From the Tasks menu, select Cost > Manage Cost Changes. The Cost Change Search page appears.
Enter or select search criteria as desired to make the search more restrictive.
Click Search. The cost changes that match the search criteria are displayed in the Results section.
In the Results section, select a cost change.
Select Actions > Edit, or use the Edit icon ![]() . The Cost Change by Item page appears.
. The Cost Change by Item page appears.
Additionally, you can access the Cost change through the Item Search page.
From the Tasks menu, select Items > Manage Items. The Item Search page appears.
Search for the desired item.
In the Results section, select a record.
Then select Actions > Cost Change, or use the Cost Change button. The Cost Change by Item page appears.
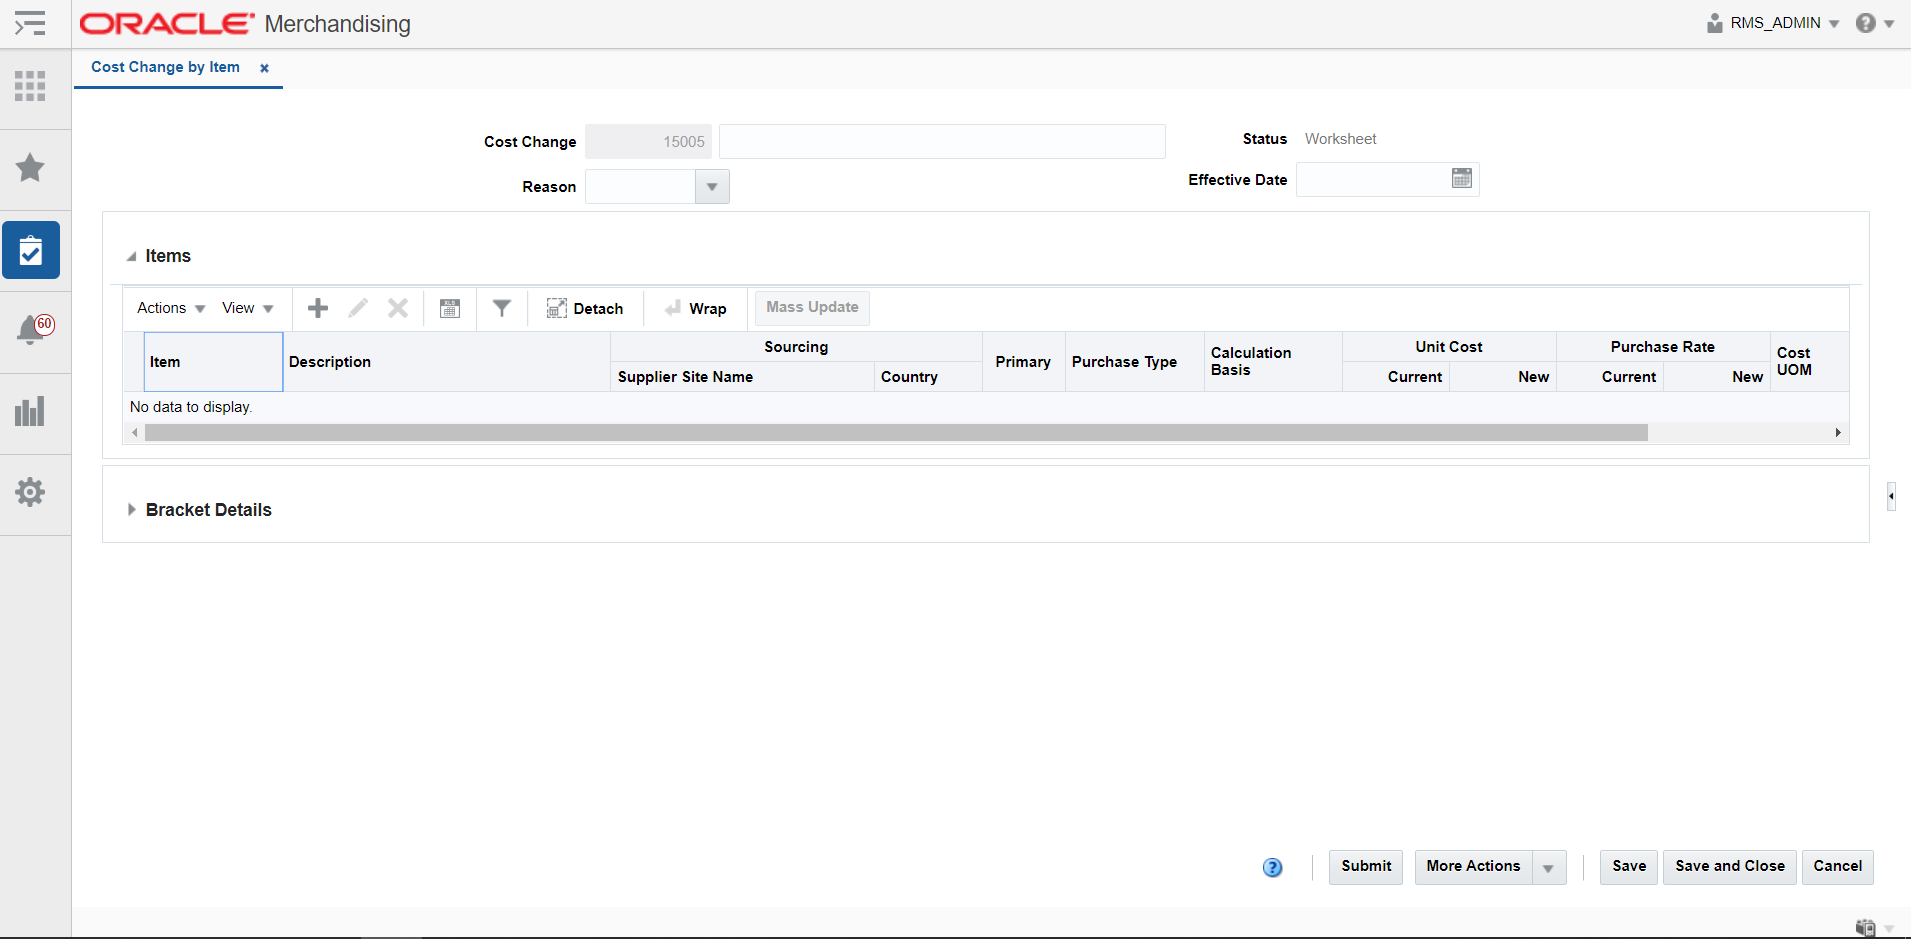
The page includes the following sections:
The cost change header section includes the following fields.
Table 7-1 Cost Change Header - Fields and Description
| Fields | Description |
|---|---|
|
Cost Change |
Enter a description for the cost change. This field contains the cost change number by default. |
|
Reason |
Enter, select or search for the reason for the cost change. |
|
Status |
The cost change status is displayed. |
|
Effective Date |
Enter the date on which the cost changes become effective, or use the Calendar icon to select a date. |
In the Items section you can add, delete and mass update items for the cost change.
The Bracket Details section is only available, if bracket costing is applicable. The table contains the bracket details for the highlighted item for a supplier that supports bracket costing.
For items with brackets defined, the old unit cost and the new unit cost information is shown in the Bracket Details section and not in the Items section.
For items with no brackets defined, the cost information is displayed in the Item section and the Bracket Details section remains collapsed.
To add items for a cost change, follow the steps below.
In the Cost Change or Cost Change by Item page, go to Items section.
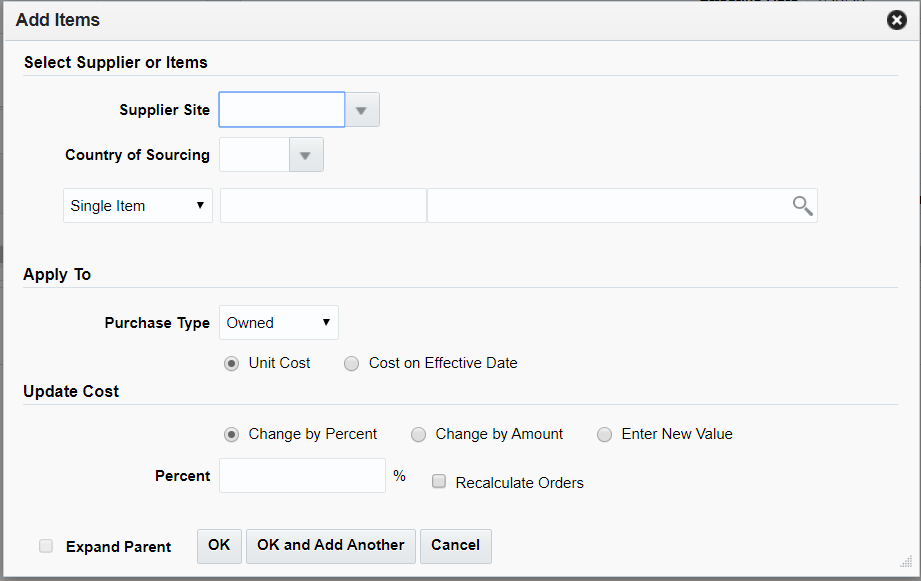
Select Actions > Add, or use the Add icon ![]() . The Add Items pop-up appears.
. The Add Items pop-up appears.
In the Select Supplier or Items section, enter the following fields.
In the Supplier Site field, enter, select or search for the supplier site.
In the Country of Sourcing field, enter, select or search for the sourcing country.
In the Item field, enter, select or search for the item.
|
Note: If you have accessed the Cost Change page through the Item Search, the selected item is displayed in this field. You cannot change the item and the Item List field is disabled. |
In the Item List field, enter, select or search for the item list.
Select the Expand Parent checkbox to indicate that all the child items linked with the selected parent item need to be added to the cost change.
In the Apply To section, select the Purchase Type of the Items to which the Cost Change should be applied. In case of the Purchase Type is Owned, Select whether the change is applicable to Unit Cost or Cost on Effective Date. In case the Purchase type is Consignment or Concession specify if the Calculation basis should be overridden.
The Update Cost section is refreshed based on the Purchase Type selected
For a Purchase type of Owned, in the Update Cost section, select the mode of how the cost change should be applied through one of the following radio buttons.
Select Change by Percent to indicate the cost change in percent. The Percent field enables, enter the percent by which the cost changes. Use a negative symbol (-) before the percent to indicate a decrease in cost by percent.
Select Change by Amount to indicate the cost change by a certain amount. The Amount field enables, enter the amount by which the cost changes. Use a negative symbol (-) before the amount to indicate a decrease in cost by amount. Then enter, select or search for the currency.
Select Enter New Value to enter a new unit cost value for the item. The New Value field enables, enter the new cost of the item. The amount entered becomes the cost of all items selected for the cost change. Then enter, select or search for the currency.
Select the Recalculate Order checkbox to recalculate any outstanding purchase orders that have not been received based on the updated cost.
For a Purchase type of Consignment or Concession, the cost can be modified based on the Calculation basis which can be set to be either Cost per Unit or Purchase Rate. For a Calculation basis of Cost per Unit the cost change can specified by percent, by amount or based on a new value in a manner similar to the how a change is specified for a Purchase Type of Owned. For a Calculation basis of Purchase Rate, the New Purchase Rate value will need to be specified in percentage
Select the Expand Parent checkbox to indicate that all the child items linked with the selected parent item need to be added to the cost change.
Then choose one of the following options:
Click OK to add the item.
Select OK and Add Another to add additional items.
Click Cancel to reject all entries and close the pop-up.
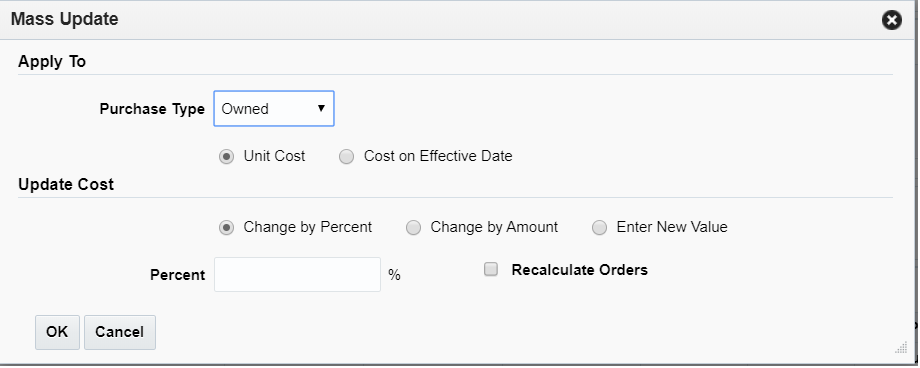
Use the Mass Update option in the actions menu to apply the cost changes to the selected items in the table. To update the costs for multiple items, follow the steps below.
In the Cost Change or Cost Change by Item page, go to the Items section.
Mark the records you want to update in the table. Click the Mass Update button. The Mass Update pop-up appears.
In the Apply To section, select the Purchase Type of the Items to which the Cost Change should be applied. In case of the Purchase Type is Owned, select whether the change is applicable to Unit Cost or Cost on Effective Date. In case the Purchase type is Consignment or Concession specify if the Calculation basis should be overridden.
The Update Cost section is refreshed based on the Purchase Type selected.
For a Purchase type of Owned, in the Update Cost section, select the mode of how the cost change should be applied through one of the following radio buttons.
Select Change by Percent to indicate the cost change in percent. The Percent field enables, enter the percent by which the cost changes. Use a negative symbol (-) before the percent to indicate a decrease in cost by percent.
Select Change by Amount to indicate the cost change by a certain amount. The Amount field enables, enter the amount by which the cost changes. Use a negative symbol (-) before the amount to indicate a decrease in cost by amount. Then enter, select or search for the currency.
Select Enter New Value to enter a new unit cost value for the item. The New Value field enables, enter the new cost of the item. The amount entered becomes the cost of all items selected for the cost change. Then enter, select or search for the currency.
Select the Recalculate Order checkbox to recalculate any outstanding purchase orders that have not been received based on the updated cost.
For a Purchase type of Consignment or Concession, the cost can be modified based on the Calculation basis which can be set to be either Cost per Unit or Purchase Rate. For a Calculation basis of Cost per Unit the cost change can specified by percent, by amount or based on a new value in a manner similar to the how a change is specified for a Purchase Type of Owned. For a Calculation basis of Purchase Rate, the New Purchase Rate value will need to be specified in percentage
Then choose one of the following options:
Click OK to apply the change to items in the selection.
Click Cancel to reject changes made and close the pop-up.
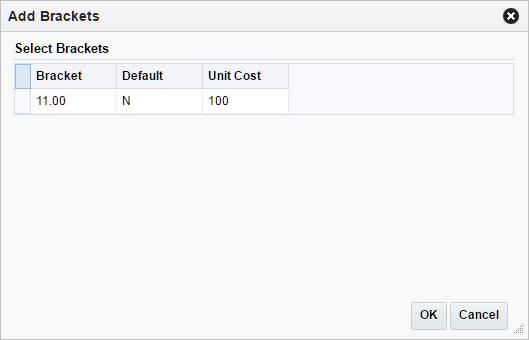
This option is only available, if there are already existing brackets set up in the system. A location may have multiple brackets linked to it, all of which are added when the location is added. You can delete one or more of the brackets. Later, you can add these deleted brackets again by using the Add option.
To add the bracket details of cost change:
In the Cost Change or Cost Change by Item page, go to the Bracket Details section.
Select Actions > Add, or click the Add icon ![]() . The Add Brackets pop-up appears.
. The Add Brackets pop-up appears.
Select one or more of these brackets to add them back to the current cost change.
Then choose one of the following option.
Click OK to add the brackets to the current cost change.
Click Cancel to close the pop-up.
The Cost Change by Location option is used when a cost change needs to be defined at the item/supplier/country of sourcing/location level.
When submitted through EDI, you review the cost change, then submit the cost change for approval.
When entered manually, you enter the cost change, an event description, an effective date and a reason code. Then submit the cost change for approval.
|
Note: You cannot create a cost change for a transformed sellable item. |
After you have approved the cost change, the item/supplier cost record is updated and any outstanding purchase orders that have not been received are recalculated.
You can access the Cost Change by Item page in different ways:
From the Tasks menu, select Cost > Manage Cost Changes. The Cost Change Search page appears.
Enter or select search criteria as desired to make the search more restrictive.
Click Search. The cost changes that match the search criteria are displayed in the Results section.
In the Results section, select a cost change by location.
Select Actions > Edit, or use the Edit icon ![]() . The Cost Change by Location page appears.
. The Cost Change by Location page appears.
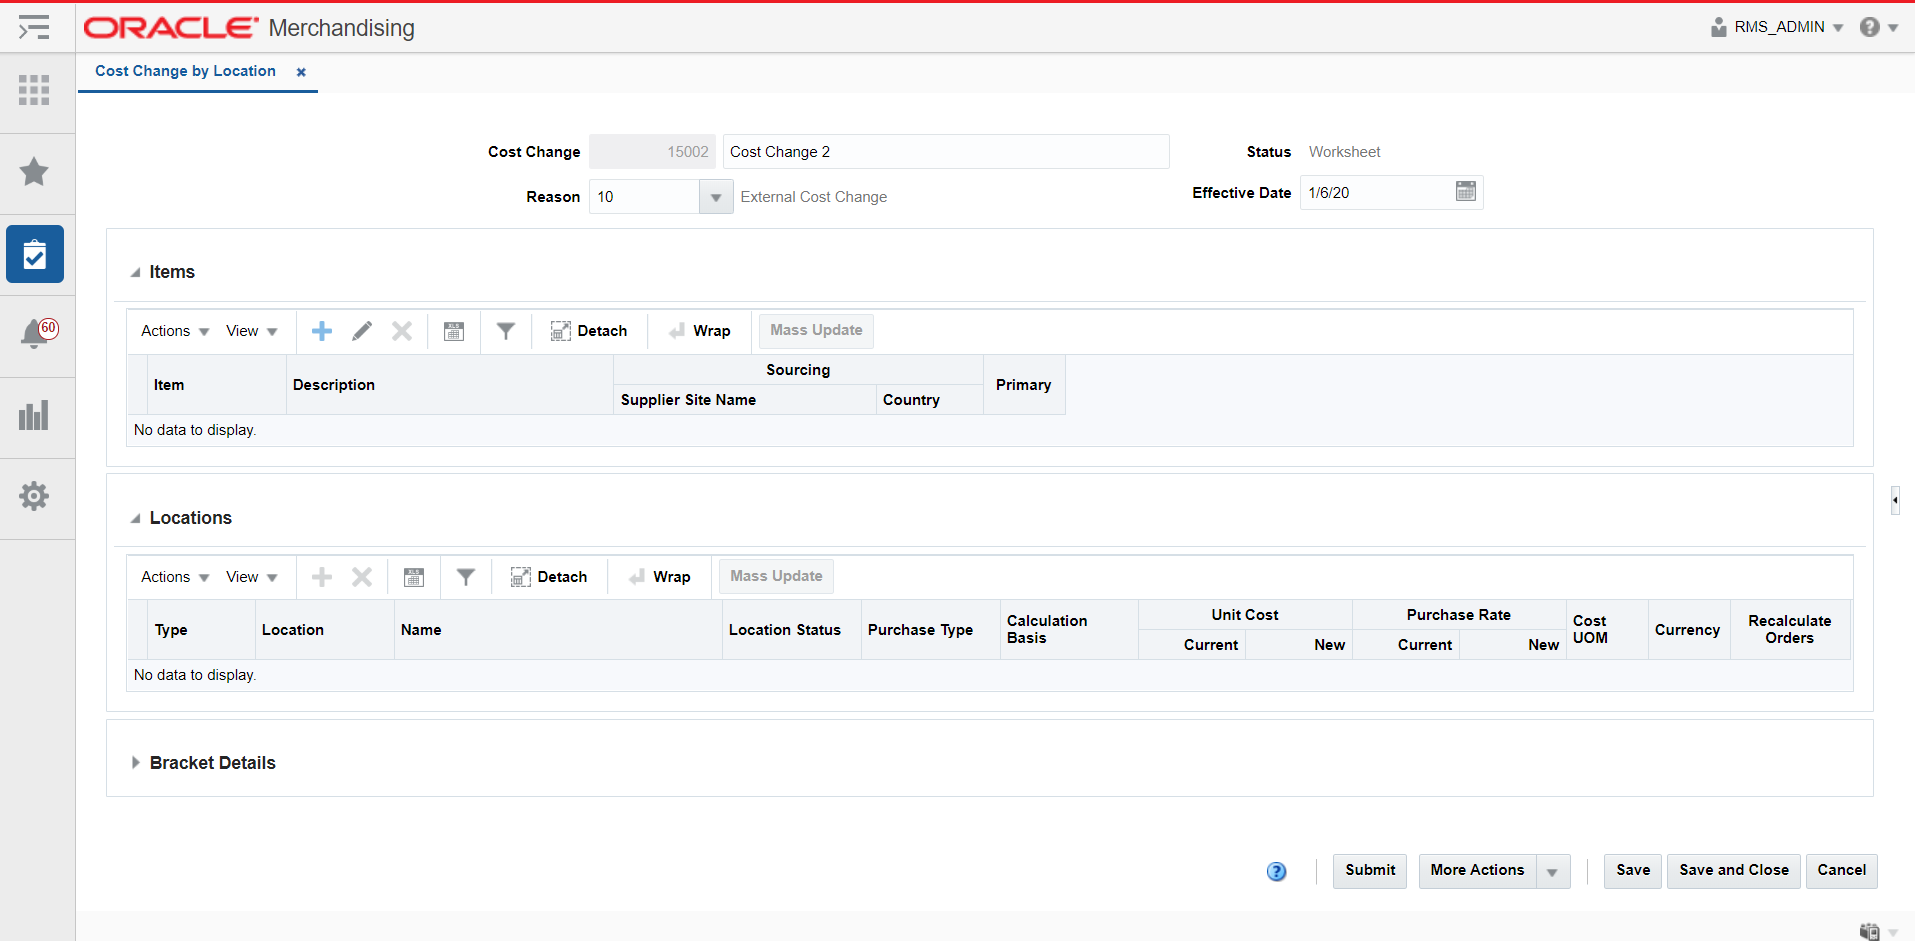
The page includes the following sections:
The cost change header section includes the following fields.
Table 7-2 Cost Change Header - Fields and Description
| Fields | Description |
|---|---|
|
Cost Change |
Enter a description for the cost change. This field contains the cost change number by default. |
|
Reason |
Enter, select or search for the reason for the cost change. |
|
Status |
The cost change status is displayed by default. |
|
Effective Date |
Enter the date on which the cost changes become effective, or use the Calendar icon to select a date. |
In the Items section you can add, delete and mass update items for the cost change.
The Locations section contains the location details for the selected record in the Items section. You can add, delete and mass update locations for the cost change.
The Bracket Details section is only available, if bracket costing is applicable. The table contains the bracket details for the highlighted item for a supplier that supports bracket costing.
For items with brackets defined, the old unit cost and the new unit cost information is shown in the Bracket Details section and not in the Items section.
For items with no brackets defined, the cost information is displayed in the Item section and the Bracket Details section remains collapsed.
For information about the toolbar, see ”Screen Level Action - Icons and Buttons” in the Oracle Retail Merchandising Do the Basics User Guide.
To create a cost change by location, follow the steps below.
Open the Cost Change or Cost Change by Item page:
From the Tasks menu, select Cost > Create Cost Change by Location. The Cost Change by Location page appears.
In the Cost Change field, enter a description for the change.
In the Reason field, enter, select or search for a reason code for the cost change.
In the Effective Date field, enter the effective date for the cost change, or use the Calendar icon to select a date.
To add items to a cost change, follow the steps below.
In the Cost Change by Location page, go to the Items section.
Select Actions > Add, or use the Add icon ![]() . The Add Items pop-up appears.
. The Add Items pop-up appears.
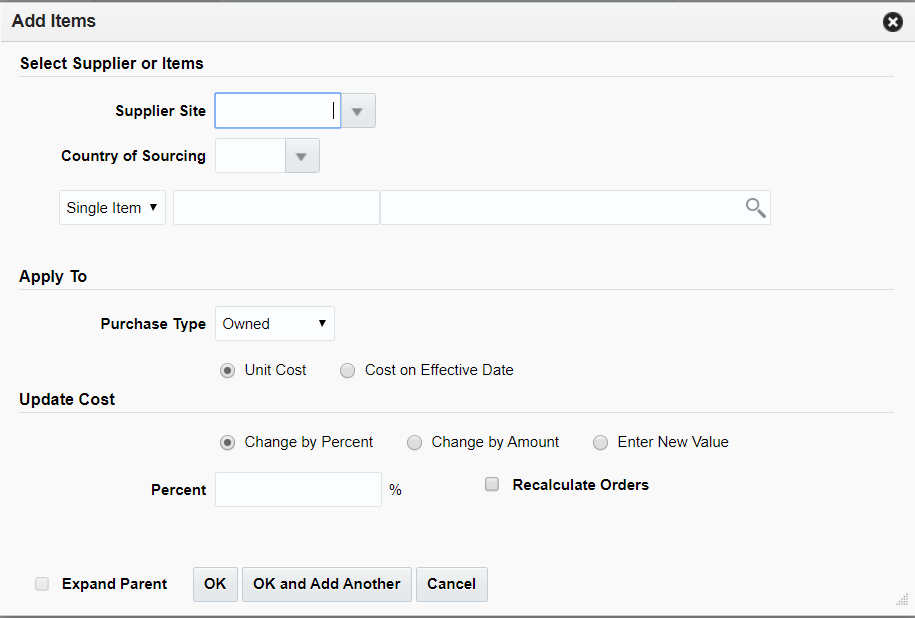
In the Select Supplier or Items section, enter the following fields.
In the Supplier Site field, enter, select or search for the supplier site.
In the Country of Sourcing field, enter, select or search for the sourcing country.
In the Item field, enter, select or search for the item.
|
Note: If you have accessed the Cost Change page through the Item Search, the selected item is displayed in this field. You cannot change the item and the Item List field is disabled. |
In the Item List field, enter, select or search for the item list.
In the Apply To section, select the Purchase Type of the Items to which the Cost Change should be applied. In case of the Purchase Type is Owned, Select whether the change is applicable to Unit Cost or Cost on Effective Date. In case the Purchase type is Consignment or Concession specify if the Calculation basis should be overridden.
The Update Cost section is refreshed based on the Purchase Type selected.
For a Purchase type of Owned, in the Update Cost section, select the mode of how the cost change should be applied through one of the following radio buttons.
Select Change by Percent to indicate the cost change in percent. The Percent field enables, enter the percent by which the cost changes. Use a negative symbol (-) before the percent to indicate a decrease in cost by percent.
Select Change by Amount to indicate the cost change by a certain amount. The Amount field enables, enter the amount by which the cost changes. Use a negative symbol (-) before the amount to indicate a decrease in cost by amount. Then enter, select or search for the currency.
Select Enter New Value to enter a new unit cost value for the item. The New Value field enables, enter the new cost of the item. The amount entered becomes the cost of all items selected for the cost change. Then enter, select or search for the currency.
Select the Recalculate Order checkbox to recalculate any outstanding purchase orders that have not been received based on the updated cost.
For a Purchase type of Consignment or Concession, the cost can be modified based on the Calculation basis which can be set to be either Cost per Unit or Purchase Rate. For a Calculation basis of Cost per Unit the cost change can specified by percent, by amount or based on a new value in a manner similar to the how a change is specified for a Purchase Type of Owned. For a Calculation basis of Purchase Rate, the New Purchase Rate value will need to be specified in percentage.
Select the Expand Parent checkbox to indicate that all the child items linked with the selected parent item need to be added to the cost change.
Then choose one of the following options:
Click OK to add the item.
Select OK and Add Another to add additional items.
Click Cancel to reject all entries and close the pop-up.
Use the Mass Update option in the actions menu to apply the cost changes to the selected items in the table. To update the costs for multiple items, follow the steps below.
In the Cost Change by Location page, go to the Items section.
Mark the records you want to update in the table. Click the Mass Update button. The Mass Update pop-up appears.
In the Apply To section, select the Purchase Type of the Items to which the Cost Change should be applied. In case of the Purchase Type is Owned, Select whether the change is applicable to Unit Cost or Cost on Effective Date. In case the Purchase type is Consignment or Concession specify if the Calculation basis should be overridden.
The Update Cost section is refreshed based on the Purchase Type selected.
For a Purchase type of Owned, in the Update Cost section, select the mode of how the cost change should be applied through one of the following radio buttons.
Select Change by Percent to indicate the cost change in percent. The Percent field enables, enter the percent by which the cost changes. Use a negative symbol (-) before the percent to indicate a decrease in cost by percent.
Select Change by Amount to indicate the cost change by a certain amount. The Amount field enables, enter the amount by which the cost changes. Use a negative symbol (-) before the amount to indicate a decrease in cost by amount. Then enter, select or search for the currency.
Select Enter New Value to enter a new unit cost value for the item. The New Value field enables, enter the new cost of the item. The amount entered becomes the cost of all items selected for the cost change. Then enter, select or search for the currency.
Select the Recalculate Order checkbox to recalculate any outstanding purchase orders that have not been received based on the updated cost.
For a Purchase type of Consignment or Concession, the cost can be modified based on the Calculation basis which can be set to be either Cost per Unit or Purchase Rate. For a Calculation basis of Cost per Unit the cost change can specified by percent, by amount or based on a new value in a manner similar to the how a change is specified for a Purchase Type of Owned. For a Calculation basis of Purchase Rate, the New Purchase Rate value will need to be specified in percentage
Then choose one of the following options:
Click OK to apply the change to items in the selection.
Click Cancel to reject changes made and close the pop-up.
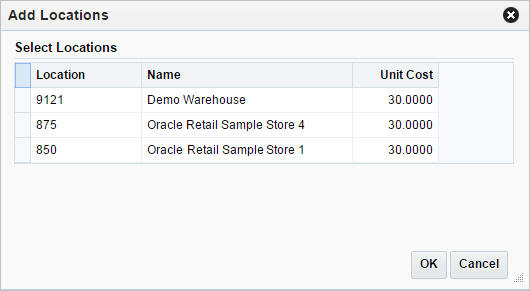
To add the locations to a cost change:
In the Cost Change by Location page, go to the Locations section.
Select Actions > Add, or click the Add icon ![]() . The Add Locations pop-up appears.
. The Add Locations pop-up appears.
All locations initially removed from the cost change, because no new cost was specified, are displayed.
Select one or more locations in the table.
Then select one of the following options.
Click OK to add the locations to the cost change and close the pop-up.
Click Cancel to reject all entries and close the pop-up.
Use the Mass Update option in the actions menu to apply the cost changes to the selected locations in the table. To update the costs for multiple locations, follow the steps below.
In the Cost Change by Location page, go to the Locations section.
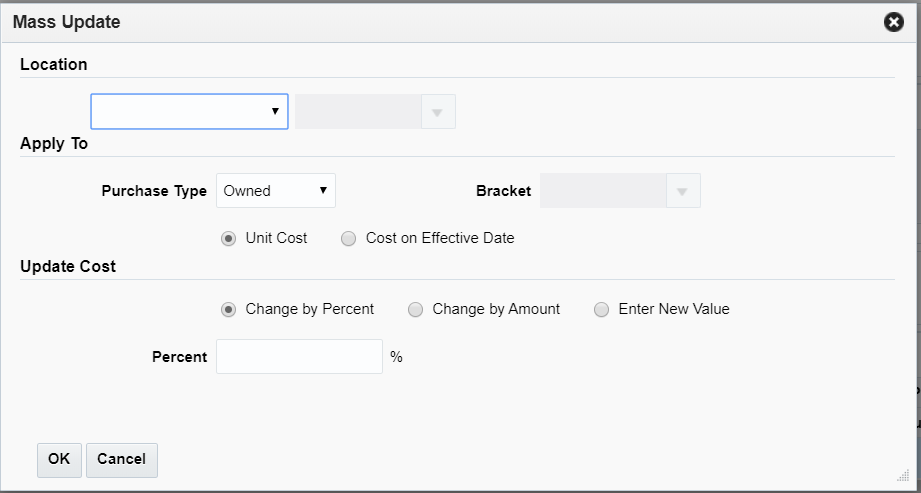
Mark the records you want to update in the table. Click the Mass Update button. The Mass Update pop-up appears.
In the Location section, select the location information for the mass update.
In the Apply To section, select the Purchase Type of the Items to which the Cost Change should be applied. In case of the Purchase Type is Owned, Select whether the change is applicable to Unit Cost or Cost on Effective Date. In case the Purchase type is Consignment or Concession specify if the Calculation basis should be overridden.
The Update Cost section is refreshed based on the Purchase Type selected. The user can also select a bracket for update.
For a Purchase type of Owned, in the Update Cost section, select the mode of how the cost change should be applied through one of the following radio buttons.
Select Change by Percent to indicate the cost change in percent. The Percent field enables, enter the percent by which the cost changes. Use a negative symbol (-) before the percent to indicate a decrease in cost by percent.
Select Change by Amount to indicate the cost change by a certain amount. The Amount field enables, enter the amount by which the cost changes. Use a negative symbol (-) before the amount to indicate a decrease in cost by amount. Then enter, select or search for the currency.
Select Enter New Value to enter a new unit cost value for the item. The New Value field enables, enter the new cost of the item. The amount entered becomes the cost of all items selected for the cost change. Then enter, select or search for the currency.
Select the Recalculate Order checkbox to recalculate any outstanding purchase orders that have not been received based on the updated cost.
For a Purchase type of Consignment or Concession, the cost can be modified based on the Calculation basis which can be set to be either Cost per Unit or Purchase Rate. For a Calculation basis of Cost per Unit the cost change can specified by percent, by amount or based on a new value in a manner similar to the how a change is specified for a Purchase Type of Owned. For a Calculation basis of Purchase Rate, the New Purchase Rate value will need to be specified in percentage
Then choose one of the following options:
Click OK to apply the change to items in the selection.
Click Cancel to reject changes made and close the pop-up.
The Manage Cost Changes option opens the Cost Change Search page. In this page you can perform the following actions.
Search for cost changes by various search criteria
View the search results
View cost change information
Create cost changes by item or location
Edit cost change information
View cost changes
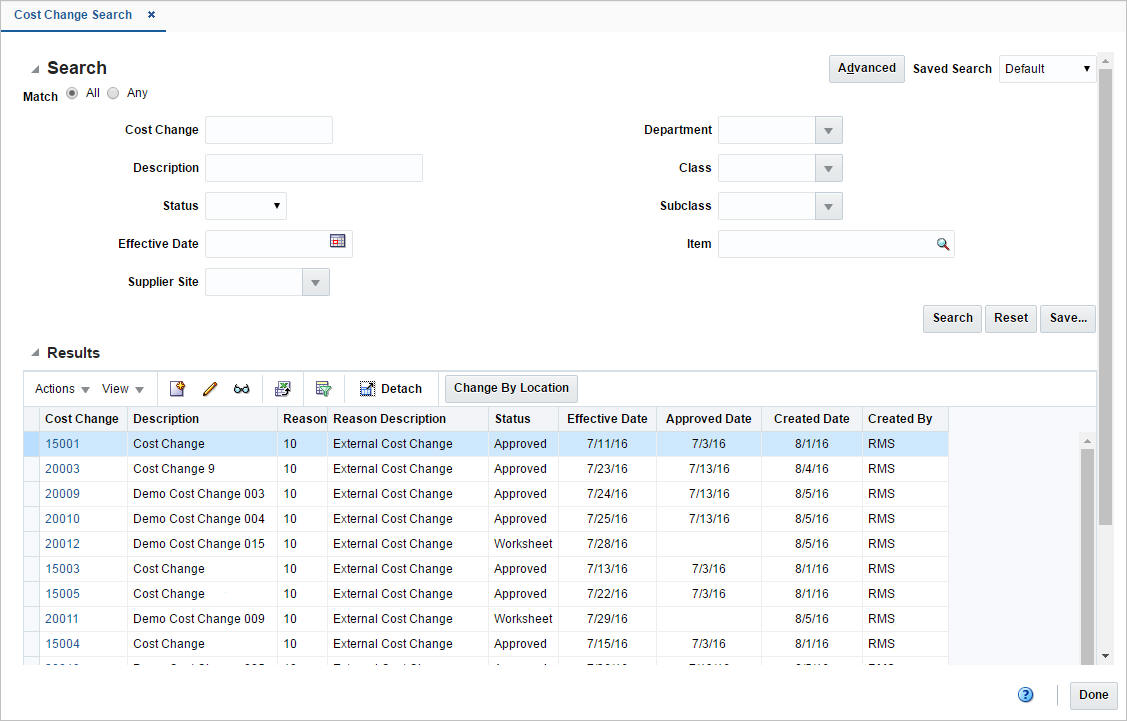
You can access the Cost Change Search page from the Task menu, select Cost > Manage Cost Changes. The Cost Change Search page appears.
The Cost Change Search page contains the following sections.
Search
For more information about how to search for cost changes, see the Search for a Cost Change section.
Cost change reasons are a required attribute on any supplier cost changes created in Merchandising. New codes can be added as desired by implementation to configure the solution to meet your company's needs. There are also several that are automatically added to certain systematic events in the solution. Note: the system required codes cannot be deleted, but can have their descriptions updated, if desired. The system required reason codes are:
| Code | Description |
|---|---|
| 1 | New bracket |
| 2 | New bracket structure |
| 3 | Default bracket change |
| 4 | Primary Supplier Changed |
| 5 | Primary Country Changed |
| 6 | Primary Loc Changed |
| 7 | ItemLoc Supplier/Country Chg |
| 8 | RCA cost change |
| 9 | Tax Law Changed |
The list of valid cost change reasons is defined by a configurable list of codes and descriptions. That list is managed through spreadsheet download and upload processes. These processes are accessed through the main Merchandising task list under Foundation Data > Download Foundation Data and Foundation Data > Upload Foundation Data.
To add, update, or remove cost change reasons:
Select the Price and Cost template type in the Download Data screen.
Select the Cost Change Reasons template.
Click the Download button.
When prompted do one of the following:
Open the .ods file.
Save the file, then open it in the spreadsheet application of your choice.
Once opened, there are two sheets that can be modified:
Cost Change Reasons - Create, update, or delete existing reason in this tab.
Cost Change Reasons Translations - Add translated values in this tab.
To add a new reason:
Open the Cost Change Reasons tab.
Select the Create action type in a blank line.
Enter the Description for the reason in the primary language (up to 120 characters).
|
Note: The primary language is defined in the Merchandising system options. |
Enter a unique code for the reason (up to 2 digits).
If necessary, add reason descriptions in other languages:
Select the Cost Change Reasons Translations tab.
Select the Create action type in a blank line.
Enter the language for the translated description.
Enter the code for the new reason.
Enter the translated description (up to 120 characters.
If you would like to update any details for existing reasons, a similar process will be followed as that described above for creating new reasons. First, download the spreadsheet, and then navigate to the tab where you would like to make your updates.
The following columns can be updated in each tab:
Cost Change Reasons – Description
Cost Change Reasons Translations – Description
To update a reason:
Select the Update action type in the row to update.
Enter the correct description.
To delete a reason that is no longer used by your business, select Delete in the action column for each row to delete. Do this in both the Cost Change Reasons and Cost Change Reasons Translations tabs.
|
Note: You cannot delete a reason code that is currently associated with a cost change. You will get an error if this occurs when the changes are uploaded.As noted above, system-generated codes cannot be deleted. |
Once all updates have been made to the data in the spreadsheet, upload the spreadsheet to Merchandising:
Save the file and close it.
Return to the Merchandising screens.
Select Foundation Data > Upload Foundation Data from the main task list.
Select the Price and Cost template type.
Select the Cost Change Reasons template.
This automatically generates a process description. This can be updated, if desired.
Select and upload the file:
Click the Browse button.
Navigate to the directory where you saved the spreadsheet.
Select the file.
Click Upload.
The spreadsheet is uploaded and entered into Merchandising.
To review the status of the upload and check whether any errors occurred, select the Foundation Data > Review Status task from the main task list.
For more information about uploading data through a spreadsheet, see ”Data Upload” in the Oracle Retail Merchandising Do the Basics User Guide.
To search for a cost change:
From the Task menu, select Cost > Manage Cost Changes. The Cost Change Search page appears.
You can search for a cost change by using basic or advanced search criteria, depending on the requirement. The basic mode is the default search mode.
Click Advanced to access the search section in advanced mode.
Click Basic to return to the basic mode.
To search for a cost change using basic search criteria:
Enter, select or search for one or all of the following basic search criteria.
Table 7-3 Cost Change Search - Basic Search Criteria and Description
| Fields | Description |
|---|---|
|
Match option |
Check radio button All or Any. All - only suppliers matching all entered search criteria are shown. Any - suppliers matching any of the entered search criteria are shown. |
|
Cost Change |
Enter the cost change number. |
|
Description |
Enter the cost change description. |
|
Status |
Select the status of the cost change from the list. |
|
Effective Date |
Enter the effective date for the cost change, or use the Calendar icon to select a date. |
|
Supplier Site |
Enter, select or search for the supplier site. |
|
Department |
Enter, select or search for the department. |
|
Class |
Enter, select or search for the class. |
|
Subclass |
Enter, select or search for the subclass. |
|
Item |
Enter, select or search for the item. |
Click on the Saved Search list to select one of the saved search criteria. Selecting a saved search populates the search section with the saved search criteria. If the run automatically function is enabled for the search, the search is executed immediately.
You can also personalize your saved searches by selecting Personalize. The Personalize Saved Searches page appears.
For more information about the Personalized Saved Search, see Personalize Saved Search in the Oracle® Retail Merchandising Do the Basics User Guide.
Click Search. The cost changes that match the search criteria are displayed in the Results section.
Click Reset to clear the search section and results.
Click Save As... to save the current search criteria. The Create Saved Search page appears.
For more information about how to save your search criteria, see Create Saved Search in the Oracle® Retail Merchandising Do the Basics User Guide.
Click Done to close the page.
To search for a cost change using advanced search criteria:
To search using advanced search criteria, enter or select one or all of the advanced search criteria.
To narrow down the search, use the list next to the search fields. For example, determine if the entered value should equal or not equal the search result.
Click on the Saved Search list to select one of the saved search criteria. Selecting a saved search populates the search section with the saved search criteria. If the run automatically function is enabled for the search, the search is executed immediately.
You can also personalize your saved searches by selecting Personalize. The Personalize Saved Searches page appears.
For more information about the Personalized Saved Search, see Personalize Saved Search in the Oracle® Retail Merchandising Do the Basics User Guide.
Click Search. The cost changes that match the search criteria are displayed in the Results section.
Click Reset to clear the search section and results.
Click Save As... to save the current search criteria. The Create Saved Search page appears.
For more information about how to save your search criteria, see Create Saved Search in the Oracle® Retail Merchandising Do the Basics User Guide.
Click Add Fields to add more fields for the advanced search. To remove the field from the search, click the x right next to the field.
Click Reorder to change the order of the available search fields. The Reorder Search Fields page appears.
Select the desired search field and use the up and down arrows to rearrange the order of the fields.
Click OK to confirm the new order of the fields and close the page.
Click Cancel to reject any changes and close the page.
Click Done to close the page.
The Results section lists the retrieved cost changes.
For information about the toolbar, see ”Screen Level Action - Icons and Buttons” in the Oracle Retail Merchandising Do the Basics User Guide.
To edit a cost change event, follow the steps below.
From the Tasks menu, select Cost > Manage Cost Changes. The Cost Change Search page appears.
Enter or select search criteria as desired to make the search more restrictive.
Click Search. The cost changes that match the search criteria are displayed in the Results section.
Select a cost change in the Results section.
Then select Actions > Edit, or use the Edit icon ![]() , or click on the cost change link. The Cost Change page appears.
, or click on the cost change link. The Cost Change page appears.
Edit the information in the individual sections.
Cost Changes by Item
In the Items section, edit the new unit cost in the Unit Cost New column.
|
Note: If the cost change contains items with defined bracket costs, you can edit the new unit cost in the Bracket Details section, in the Unit Cost New column. |
|
Note: For items with a change type based on the Purchase Rate, the Purchase Rate field can be edited. |
Select the Recalculate Order checkbox to recalculate any outstanding purchase orders that have not been received.
For more information about the available sections of the Cost Change by Item page, see the Cost Change by Item section.
Cost Change by Location
In the Locations section, edit the new unit cost in the Unit Cost New column.
|
Note: If the cost change contains items with defined bracket costs, you can edit the new unit cost in the Bracket Details section, in the Unit Cost New column. |
|
Note: For items with a change type based on the Purchase Rate, the Purchase Rate field can be edited. |
Select the Recalculate Order checkbox to recalculate any outstanding purchase orders that have not been received.
For more information about the available sections of the Cost Change by Location page, see the Create Cost Changes by Location section.
Then choose one of the following options.
Click Save to save your changes.
Click Save and Close to save your changes and close the page.
Click Cancel to reject all entries and close the page.
For a cost change to take affect, it needs to be in approved status. Depending on your user role, you may be able to move the cost change to the next status. A cost change may be in any of the following statuses:
Table 7-4 Cost Change Statues
| Status | Description |
|---|---|
|
Worksheet |
The cost change event is incomplete. You can edit, submit, or delete the cost change event. |
|
Submitted |
The cost change event is complete and submitted for approval. You can approve, reject, or delete the cost change event. |
|
Approved |
The cost change event is complete and has been approved. You can return the cost change event to Worksheet status for editing or cancel the cost change event. |
|
Rejected |
The cost change event is complete and has been approved. You can return the cost change event to Worksheet status for editing or cancel the cost change event. |
|
Extracted |
The details of the cost change event were extracted to the locations affected by the cost change event. Only cost change events in Approved status are extracted. |
|
Cancelled |
The cost event is deleted. |
To submit a cost change for approval, follow the steps below.
From the Tasks menu, select Cost > Manage Cost Changes. The Cost Change Search page appears.
Restrict the search to cost changes in Worksheet status.
Click Search. The cost changes that match the search criteria are displayed in the Results section.
Select a cost change in the Results section.
Then select Actions > Edit, or use the Edit icon ![]() , or click on the cost change link. The Cost Change page appears.
, or click on the cost change link. The Cost Change page appears.
Select the Submit button.
You are prompted to submit the cost change. Click Yes to confirm the prompt. The status of the cost change changes to Submitted.
Then choose one of the following options.
Click Save to save your changes.
Click Save and Close to save your changes and close the page.
Click Cancel to reject all entries and close the page.
To approve a cost change, follow the steps below.
From the Tasks menu, select Cost > Manage Cost Changes. The Cost Change Search page appears.
Restrict the search to cost changes in Submitted status.
Click Search. The cost changes that match the search criteria are displayed in the Results section.
Select a cost change in the Results section.
Then select Actions > Edit, or use the Edit icon ![]() , or click on the cost change link. The Cost Change page appears.
, or click on the cost change link. The Cost Change page appears.
Select the Approve button.
You are prompted to approve the cost change. Click Yes to confirm the prompt. The status of the cost change changes to Approved.
Then choose one of the following options.
Click Save to save your changes.
Click Save and Close to save your changes and close the page.
Click Cancel to reject all entries and close the page.
To reject a cost change, follow the steps below.
From the Tasks menu, select Cost > Manage Cost Changes. The Cost Change Search page appears.
Restrict the search to cost changes in Submitted status.
Click Search. The cost changes that match the search criteria are displayed in the Results section.
Select a cost change in the Results section.
Then select Actions > Edit, or use the Edit icon ![]() , or click on the cost change link. The Cost Change page appears.
, or click on the cost change link. The Cost Change page appears.
Select the Reject button.
You are prompted to reject the cost change. Click Yes to confirm the prompt. The status of the cost change changes to Rejected.
Then choose one of the following options.
Click Save to save your changes.
Click Save and Close to save your changes and close the page.
Click Cancel to reject all entries and close the page.
To cancel a cost change, follow the steps below.
From the Tasks menu, select Cost > Manage Cost Changes. The Cost Change Search page appears.
Restrict the search to cost changes in Approved status.
Click Search. The cost changes that match the search criteria are displayed in the Results section.
Select a cost change in the Results section.
Then select Actions > Edit, or use the Edit icon ![]() , or click on the cost change link. The Cost Change page appears.
, or click on the cost change link. The Cost Change page appears.
Select the Cancel button.
You are prompted to cancel the cost change. Click Yes to confirm the prompt. The status of the cost change changes to Cancelled.
Then choose one of the following options.
Click Save to save your changes.
Click Save and Close to save your changes and close the page.
Click Cancel to reject all entries and close the page.
Merchandising supports downloading of cost changes into a spreadsheet to allow you to carry out updates. The updated data can be re-uploaded into a staging area or uploaded into Merchandising. New cost changes can also be created through the upload flow. This section summarizes the workflow for both download and upload of cost change data.
For more information about loading cost change reasons, see ”Download/Upload Data from Spreadsheets” in the Merchandising Do the Basics User Guide.
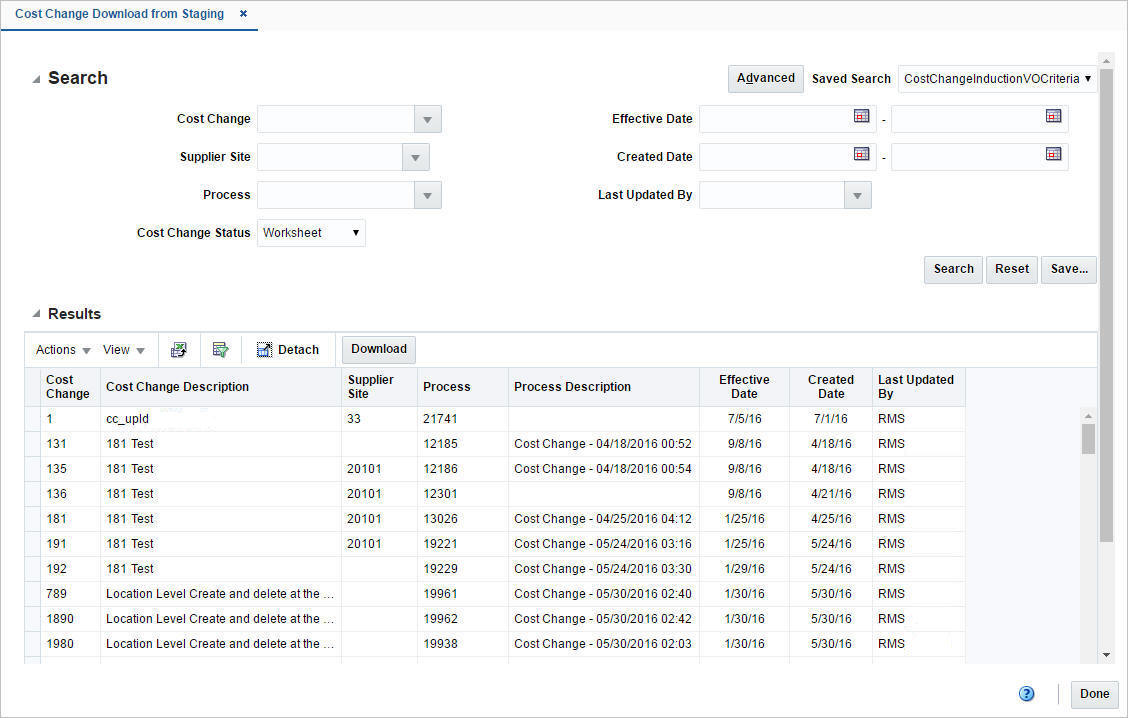
You can download cost changes either from the staging area or from Merchandising. Typically cost changes are downloaded from the staging areas for purposes of workflow updates such as cost change approval or rejection. The data set to be downloaded can be selected using filter criteria that includes the effective and last update date ranges together with the user ID of the user who carried out the last update for easier workflow tracking. Alternately, you can also select all data that was part of an earlier upload or download request by selecting the process ID that uniquely identifies the request.
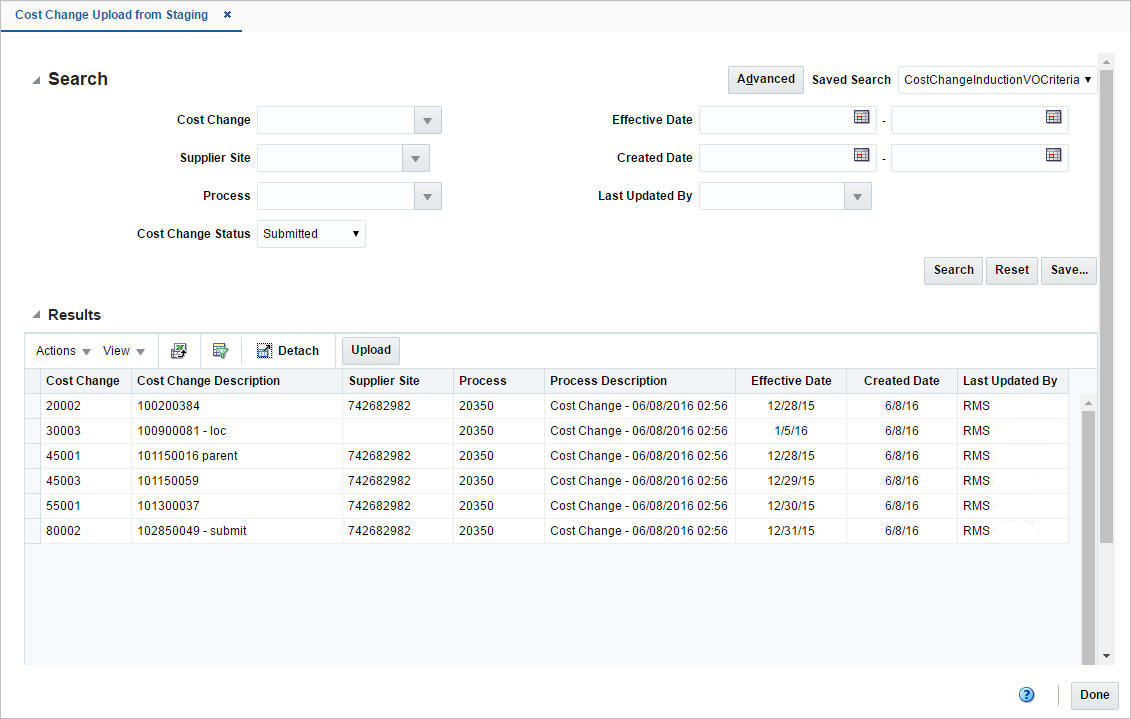
Data currently available in the staging area can be uploaded into Merchandising. This is typically for cases wherein the cost change data might have been uploaded into the staging area for review and submission before the upload into Merchandising.
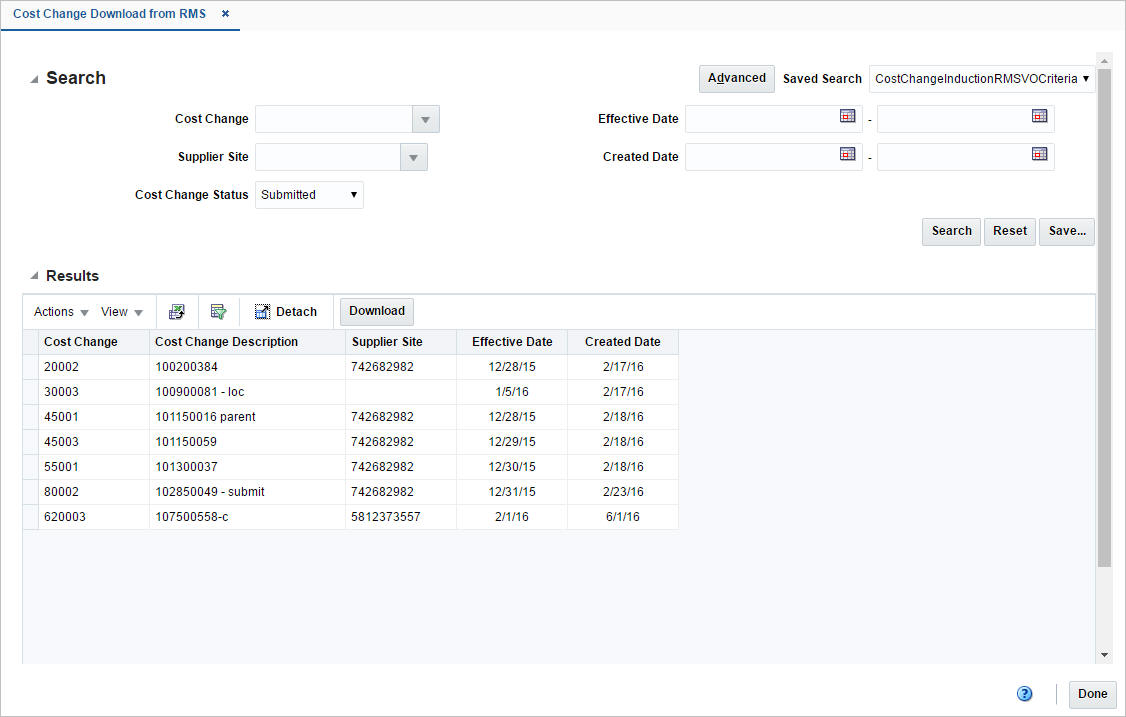
Similarly data can be downloaded from Merchandising. Cost change data is typically downloaded for purposes of updates such as effective date changes, workflow changes or reporting considerations.
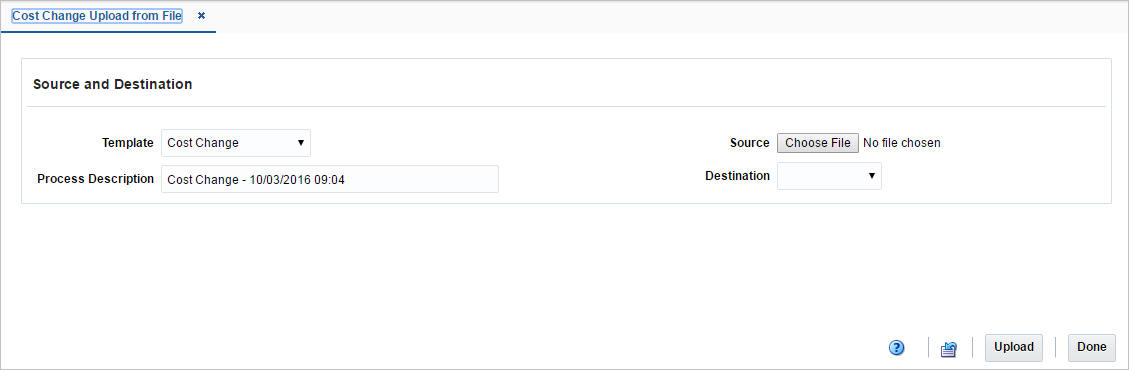
In addition to downloading cost change data, you can also download blank templates, in a specified template format, that carry just the worksheets and column headers without any data. Such templates are generally used for creating new cost changes manually. Blank Templates can be downloaded from by navigating to Foundation Data > Data Loading > Download Blank Template. You need to select the Type as Cost Change and one of the Templates from the list available before opting to download the template. For more detail on using Blank Templates see ”Download Blank Templates” in the Oracle Retail Merchandising Do the Basics User Guide.
Once updates have been carried out to downloaded data, you can upload the spreadsheet to have your updates applied in Merchandising or to update the staged cost change data.
For downloads that occur in the background or uploads, you will receive a notification when the processing is complete. The notification will specify whether the process was executed successfully or not. Clicking on the link in the notification will take you to the Data Loading Status page in order to see the details. Alternatively, this page can be accessed by navigating to the Data Loading > Review Status option in the task list.
This task flow opens up the Data Loading status page, which lists the status of each upload/download request. Requests that were processed successfully will have their status set to Processed Successfully. Requests that were not processed successfully will have their status set to either Processed with Errors or Processed with Warnings. For such requests, you can access the View Issues page by clicking on the View Issues button to review details of the errors or warnings associated with a selected upload or download request.
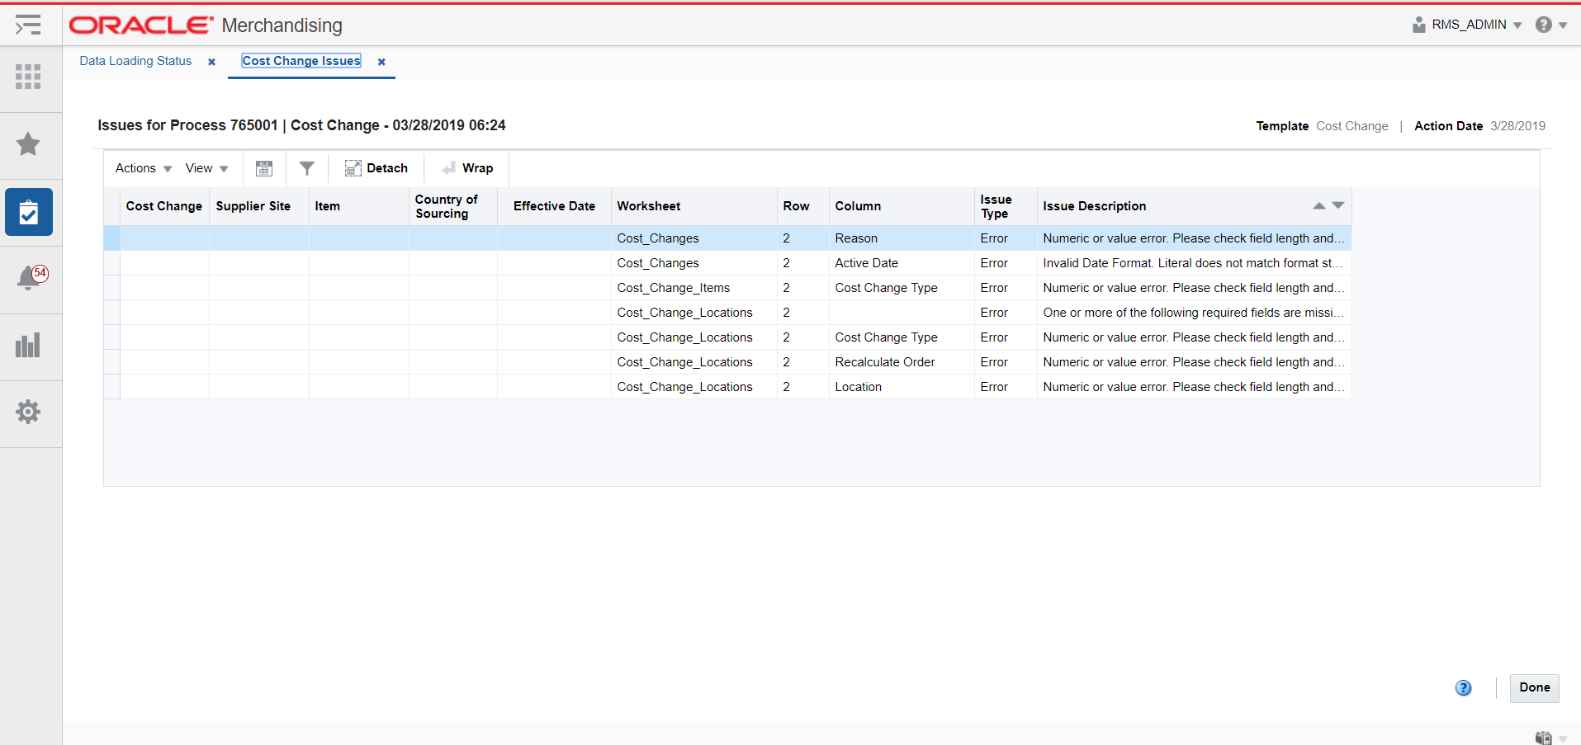
The details provided typically include the worksheet in which the error was encountered, the row and column in the spreadsheet that is in error, and the error description. Issues that are flagged as errors will need to be fixed in order to successfully create or update the cost change in Merchandising. Issues that are warnings can be ignored, but may also require updates to data depending on the warning.
Errors in download processing are typically due to the inability to access the data or insufficient privileges to create and write to the specified location. These errors can be resolved by removing any constraints that might have placed a lock on the data or ensuring that any constraints on creation of the spreadsheet are relaxed.
Errors in upload request processing are typically data-related and likely require data correction. You can use the error details in the View Issues screen as a guide to make corrections to the originally uploaded spreadsheet or download a new version through the Data Loading Status screen. If using this method, a worksheet containing a list of errors associated with the data set will be included as a separate tab in the downloaded spreadsheet to serve as an offline reference for carrying out the corrections. Once the errors have been corrected, the data can be re-uploaded into the staging area or Merchandising as needed, using the corrected file.