| Oracle® Retail Merchandising Foundation Cloud Service Oracle Retail Merchandising System User Guide Release 19.3.000 F83161-01 |
|

 Previous |
 Next |
| Oracle® Retail Merchandising Foundation Cloud Service Oracle Retail Merchandising System User Guide Release 19.3.000 F83161-01 |
|
Previous |
Next |
This chapter includes the following topics to help you understand and manage prices:
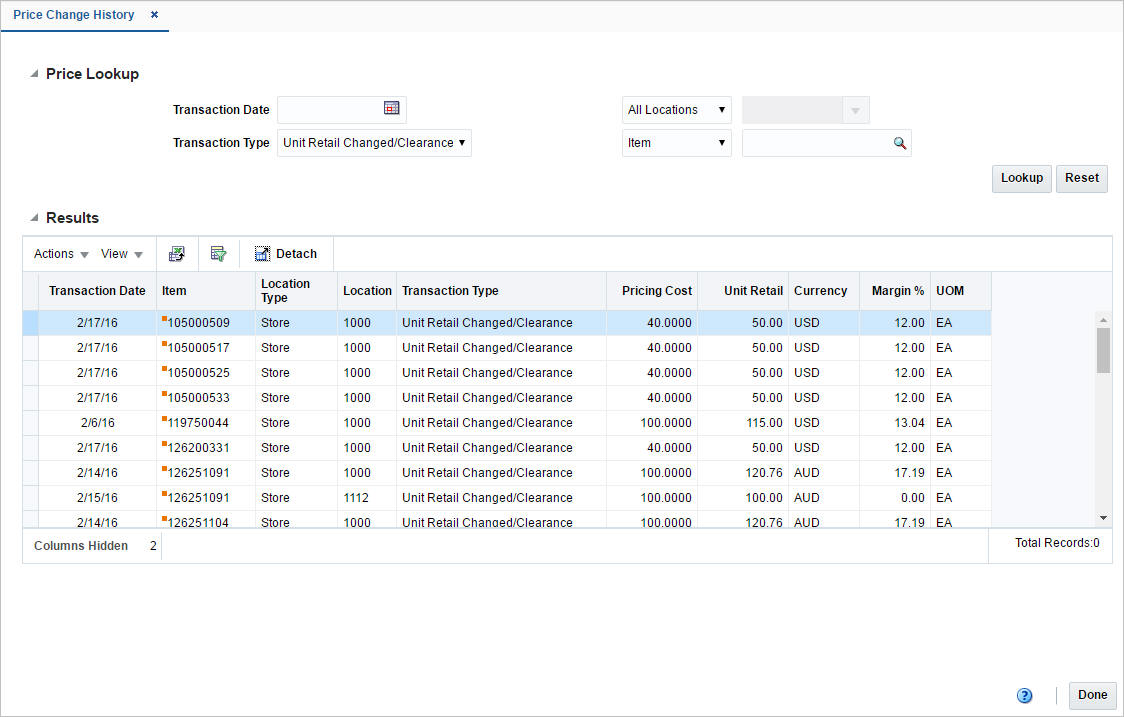
In the Price Change History page you can view the transactions for an item, the locations, pricing, and margins.
In this page you can perform the following actions.
Search for transactions for an item, locations, pricing, and margins by using various search criteria
View the search results
You can access the Price Change History page from the Task menu, select Price > Price Change History. The Price Change History page appears.
To look up price history:
Enter, select or search for one or all of the following search criteria.
Table 8-1 Price Change History Lookup - Search Criteria and Description
| Fields | Description |
|---|---|
|
Transaction Date |
Enter a transaction date or use the Calendar icon to select a date. |
|
Transaction Type |
Select the transaction type from the list. |
|
Location Type |
Select a location type from the list. Then enter, select or search for the location ID. |
|
Item/Item Parent |
Select item or item parent from the list. Then enter, select or search for the item or item parent |
Click Lookup. The transactions that match the search criteria are displayed in the Results section.
Click Reset to refresh the page. All entries are reset and not saved.
Click Done to close the page.
Competitive pricing is the process of reviewing prices offered by competitors in order to strategically set price points relative to competition. Competitive shop requests are created in the Competitor Shop Request page, and then once a shopper has performed a competitive shop, the competitive prices can be recorded. A history of the competitive prices is also retained which can be updated or deleted. This information is only available for reporting purposes in Merchandising.
Competitors, competitor stores, competitor store associations with your stores, and competitive shoppers are maintained through the upload/download process. This functionality is accessed from the main Merchandising task list under Foundation Data > Download Foundation Data and Foundation Data > Upload Foundation Data.
To add, update, or remove competitor information, select the template type of Price and Cost from the Download Data screen and then the template Competitors. Click the Download button and when prompted, choose to either open the .ods file that is generated or save the file and open it separately in the spreadsheet application of your choice.
Add a Competitor
To add a new competitor, start in the Competitor tab, and, in a blank line in the template, select the action type of Create. Next enter a unique competitor identifier (up to 10 digits) and the name for the competitor in the primary language (as defined in the Merchandising system options) of up to 120 characters. Optionally, you can also enter the address, phone, fax, website or jurisdiction of the competitor in the subsequent columns.
Next, the stores that belong in this competitor can be added. To do this, move to the Competitor Stores tab in the spreadsheet. Again, navigate to a blank row in the sheet and select an action type of Create. Enter the first store (up to 10 digits), along with your new competitor and the store's name and currency. The store name should be in the primary language (as defined in the Merchandising system options) and can be up to 150 characters. Optionally, you can also enter the store's address, phone, fax and additional store attributes. Continue this process until all the competitor stores for the competitor have been added. If you are adding a new competitor store to an existing competitor, this same process would apply, just using the existing competitor instead.
Next, you can associate your stores with competitor stores. To do this, move to the Store Associations tab in the spreadsheet. Again, navigate to a blank row in the sheet and select an action type of Create. Enter one of your stores you'd like to associate a competitor store. Next, enter the competitor store that you added in the Competitor Stores tab. The Target Competitor column, which determines which of the competitor stores is the target competitor for your store, must be set to Yes or No. Next enter the rank of the competitor store when compared to other competitor stores linked to your store. Lastly enter the distance between your store and the competitor's store along with the unit of measure in which the distance value was entered. Continue this process until all the competitor store associations have been made for your stores. If you are adding a new store association to an existing competitor store, this same process would apply, just using the existing competitor store instead.
Lastly, you can add competitive shoppers. To do this, move to the Competitive Shoppers tab in the spreadsheet. Again, navigate to a blank row in the sheet and select an action type of Create. Enter the first shopper (up to 4 digits), along with a name. The shopper name should be in the primary language (as defined in the Merchandising system options) and can be up to 120 characters. Optionally, you can also enter the shopper's phone and fax. Continue this process until all competitive shoppers have been added.
Update a Competitor
If you would like to update any details for an existing competitor, a similar process will be followed as that described above for creating new competitors. First, download the spreadsheet, and then navigate to the tab where you would like to make your updates.
The following columns can be updated in each tab:
Competitor - Competitor Name, Address 1, Address 2, Address 3, City, State, Country, Postal Code, Phone, Fax, Website, Jurisdiction
Competitor Stores - Store Name, Address 1, Address 2, Address 3, City, State, Country, Postal Code, Phone, Fax, Website, Store Format, Currency, Total Area, Selling Area, Store Open Date, Store Close Date, Estimated Yearly Volume, Jurisdiction
Competitor Store Associations - Target Competitor, Rank, Distance, Unit of Measure
Competitive Shoppers - Shopper Name, Shopper Phone, Shopper Fax
In the tab where you are going to make your updates, select the action type of Update, and then correct the value in the spreadsheet.
Deleting a Competitor
If you wish to delete a competitor, update the action column to select Delete in each of the tabs where it occurs. Competitor stores for the competitor can be deleted from an existing competitor in a similar manner. A Competitor or competitor stores cannot be deleted if they are associated with a competitive shop request. Competitor store associations and competitive shoppers can also be deleted in a similar manner.
Uploading Changes
For all actions defined above, once all the updates have been made to the data in the spreadsheet, save the file and close it. Then, return to the Merchandising screens and select Foundation Data > Upload Foundation Data from the main task list. In this screen, select the template type Price and Cost and the template Competitor. This will generate a process description automatically, but this can be updated if desired. Lastly, select the Browse button and navigate to the directory where you saved the updated spreadsheet.
To review the status of the upload and check whether any errors occurred, select the Foundation Data > Review Status task from the main task list.
See also Download/Upload Data from Spreadsheets and View Data Loading Status.
Competitive prices and competitive price history are maintained through the download/upload process. This functionality is accessed from the main Merchandising task list under Foundation Data > Download Foundation Data and Foundation Data > Upload Foundation Data.
To enter, update, or remove a competitive prices, select the template type of Price and Cost from the Download Data screen and then the template Competitive Prices. Optionally enter a specific competitor or department for which you wish to download competitive prices. Leaving these fields blank will download all competitive prices. Click the Download button and when prompted, choose to either open the .ods file that is generated or save the file and open it separately in the spreadsheet application of your choice.
Enter Competitive Prices
To enter the results of a competitive shop, first, download the spreadsheet, and then navigate to the Competitor Price Entry tab. Next, find the competitive shop details requested for the competitor, competitor store and item for which you wish to enter the competitor's price. Select the action type of Update and enter the date on which the competitor's price was recorded. Next, enter the competitive retail and price type, Regular, Clearance or Promotion. If applicable enter the competitor's multi unit retail and promotion offer dates and type in the subsequent columns. Continue this process until all competitive shop prices have been entered. After uploading all competitive shop prices can be reviewed, updated and deleted as Competitive Price History.
Update Competitive Price History
If you would like to update any details for historical competitor prices, a similar process will be followed as that described above for entering prices. First, download the spreadsheet, and then navigate to the Competitive Price History tab to make your updates.
The following columns can be updated:
Competitor Retail, Price Type, Multi Units, Multi Unit Retail, Promotion Start Date, Promotion End Date, Offer Type
In the tab, select the action type of Update, and then correct the value in the spreadsheet.
Deleting Competitive Price History
If you wish to delete competitive price history, select the action type of Delete in each of the rows you wish to delete.
Uploading Changes
For all actions defined above, once all the updates have been made to the data in the spreadsheet, save the file and close it. Then, return to the Merchandising screens and select Foundation Data > Upload Foundation Data from the main task list. In this screen, select the template type Price and Cost and the template Competitive Prices. This will generate a process description automatically, but this can be updated if desired. Lastly, select the Browse button and navigate to the directory where you saved the updated spreadsheet.
To review the status of the upload and check whether any errors occurred, select the Foundation Data > Review Status task from the main task list.
See also Download/Upload Data from Spreadsheets and View Data Loading Status.
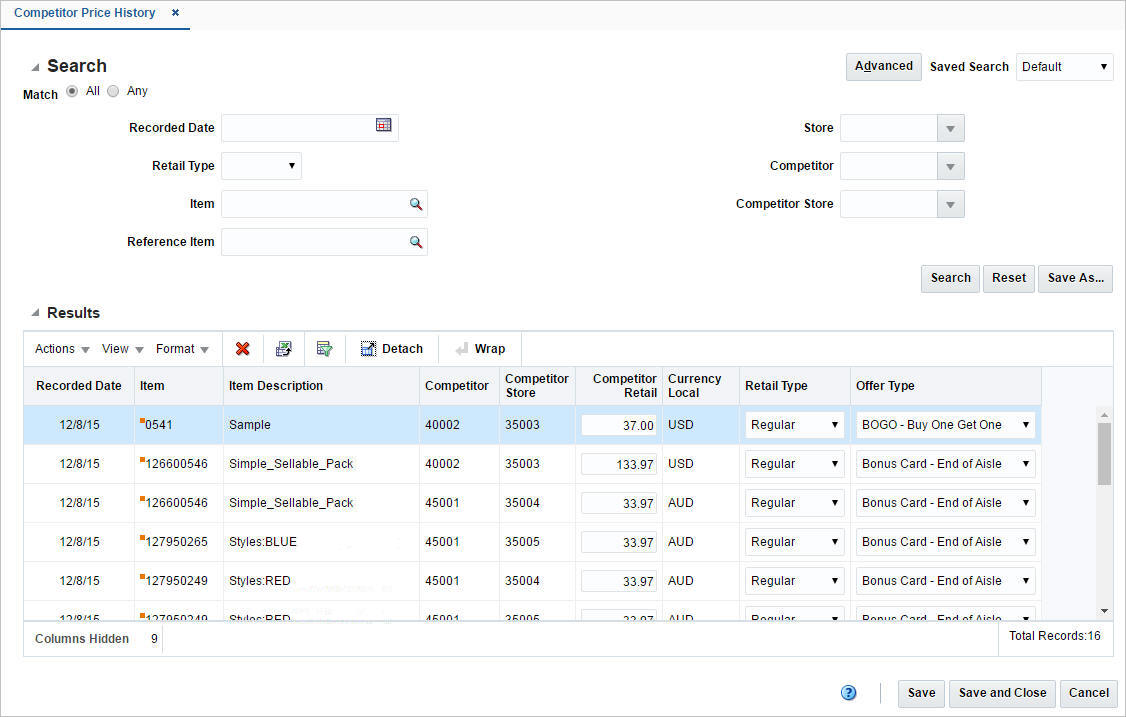
The Competitor Price History page you can perform the following actions.
Search for competitor prices by various search criteria
View the search results
View competitor price information
Edit competitor price information
You can access Competitor Price History page from the Task menu, select Price > Competitor Price History. The Competitor Price History page appears.
To search for a competitor price:
From the Task menu, select Price > Competitor Price History. The Competitor Price History page appears.
You can search for a competitor price using basic or advanced search criteria, depending on the requirement. The basic mode is the default search mode.
Click Advanced to access the search section in advanced mode.
Click Basic to return to the basic mode.
To search for a competitor price using basic search criteria:
Enter, select or search for one or all of the following basic search criteria.
Table 8-2 Competitor Price History - Basic Search Criteria and Description
| Fields | Description |
|---|---|
|
Match option |
Check radio button All or Any. All - only competitor price matching all entered search criteria are shown. Any - competitor prices matching any of the entered search criteria are shown. |
|
Recorded Date |
Enter a recorded date or use the Calendar icon to select a date. |
|
Retail Type |
Select a retail type from the list. |
|
Item |
Enter, select or search for an item. |
|
Reference Item |
Enter, select or search for the reference item. |
|
Store |
Enter, select or search for the store. |
|
Competitor |
Enter, select or search competitor. |
|
Competitor Store |
Enter, select or search for the competitor store. |
Click Search. The competitor prices that match the search criteria are displayed in the Results section.
Click Reset to clear the search section and results.
For more information about searches, see Search Screens in the Oracle® Retail Merchandising Do the Basics User Guide.
Click Save As... to save the current search criteria. The Create Saved Search page appears.
Click Done to close the page.
To search for a competitor price using advanced search criteria:
To search using advanced search criteria, enter or select one or all of the advanced search criteria.
To narrow down the search, use the list next to the search fields. For example, determine if the entered value should equal or not equal the search result.
Click Search. The competitor prices that match the search criteria are displayed in the Results section.
Click Reset to clear the search section and results.
Click Add Fields to add more fields for the advanced search. To remove the field from the search, click the x right next to the field.
Click Done to close the page.
To edit a competitor price, follow the steps below.
From the Tasks menu, select Price > Competitor Price Change. The Competitor Price History page appears.
Enter or select search criteria as desired to make the search more restrictive.
Click Search. The competitor prices that match the search criteria are displayed in the Results section.
In the Competitor Retail column, enter the price for the item.
In the Retail Type column, select the retail type from the list.
In the Offer Type column, select the offer type from the list.
Then choose one of the following options.
Click Save to save your changes.
Click Save and Close to save your change and close the page.
Click Cancel to reject all entries and close the page.
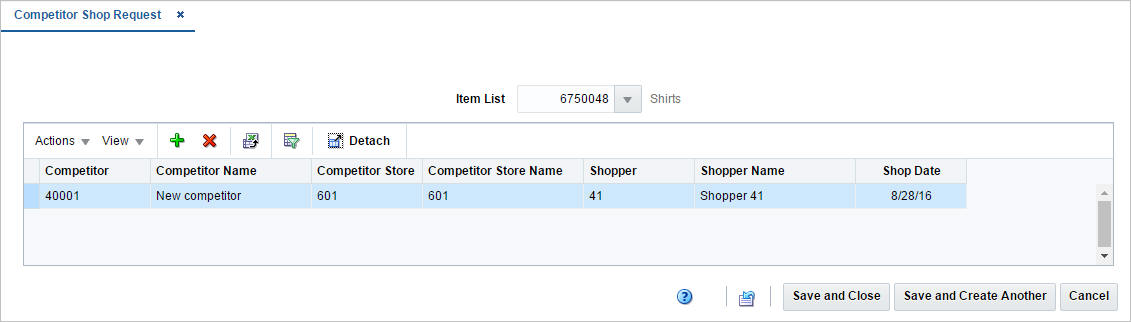
In the Competitor Shop Request page you can create a list of competitor's shops for an item list. You can than record the competitor's prices of these items.
In the table you can maintain a list of competitor shops. The table displays the name, store, store name, shopper, shopper name and shop date.
You can create a competitive shop list in two different ways, either through the Price module or in the Foundation Data module.
To create a competitive shop list in the Foundation Data module, follow the steps below.
From the Tasks menu, select Foundation Data > Items > Manage Item Lists. The Item List page appears.
Enter or select search criteria as desired to make the search more restrictive.
Click Search. The item lists that match the search criteria are displayed in the Results section.
Select a record in the Results table.
Then select Actions > Create > Competitive Shop List. The Competitor Shop Request page appears.
To create a competitive shop list in the Price module, follow the steps below.
From the Tasks menu, select Price > Competitor Shop Request. The Competitor Shop Request page appears.
In the Item List field, enter, select or search for the item list.
|
Note: If you have opened the Competitor Shop Request page through the Item List Search, the item list ID and description of the selected item list is displayed. |
Select Actions > Add, or use the Add icon ![]() . The Add Competitor Shop Request page appears.
. The Add Competitor Shop Request page appears.
In the Competitor field, enter, select or search for the competitor.
In the Competitor Store field, enter, select or search for the store.
In the Shopper field, enter, select or search for the shopper.
In the Shop Date field, enter a shop date or use the Calendar icon to select a date.
Then choose one of the following options.
Click OK to add the competitor and close the page.
Click OK and Add Another to add additional competitors.
Click Cancel to reject all entries and close the page.
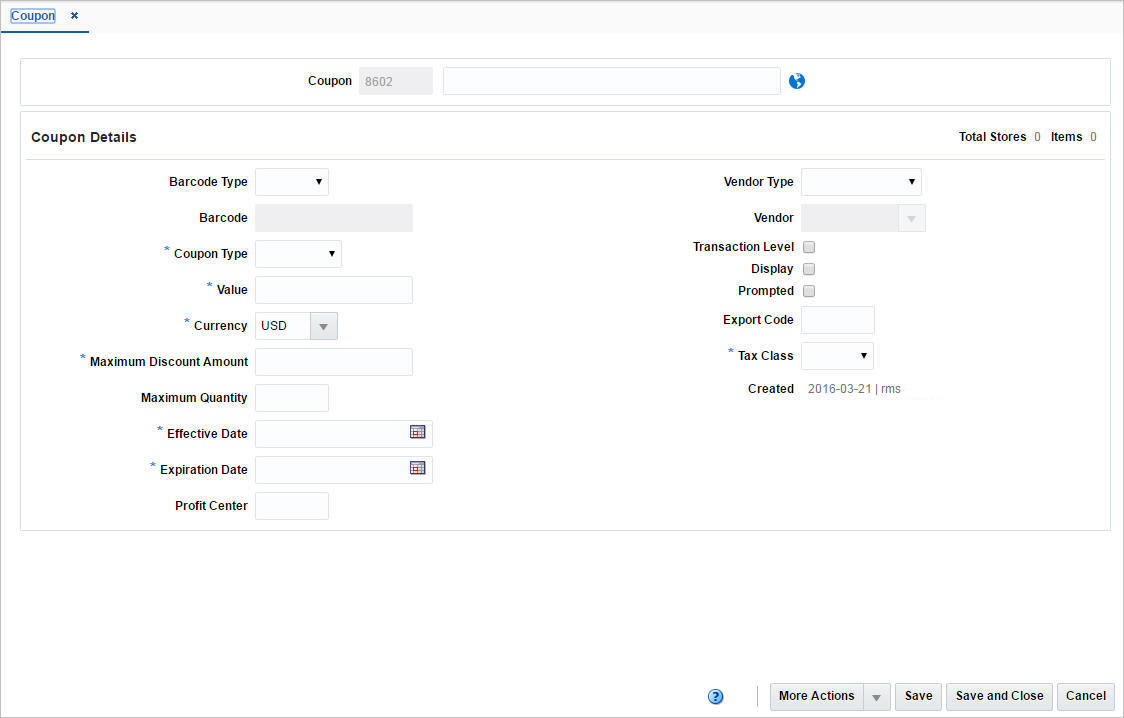
A coupon is a voucher entitling the holder to a discount for a particular product. Merchandising supports the creation and maintenance of coupon configurations which are regularly downloaded to the point of sale (POS) system for processing after they are associated with items, locations, and a timeframe. How the coupon configuration is interpreted depends on the type of POS system used.
The Create Coupon option opens the Coupon page. The Coupon page allows you to create, edit, and copy coupon configurations.
You can specify each coupon that can be used at the stores. You can specify the coupon type, the coupon amount, and the tax class for the coupon. You can also select the dates on which the configuration is valid at the stores.
You can associate stores and items with the configuration. You can indicate what items the coupon can be used for by associating items with the configuration. You can only associate stores with the coupons that have the same currency as the configuration. The configuration is then downloaded to the POS registers of the associated stores in a nightly batch process.
When you copy a configuration, the basic configuration information, such as coupon type and amount, is copied into a new configuration and assigned a new ID. However, the associated stores and items are not copied, therefore you must add stores and items to the new configuration.
The header section contains the following fields and icon.
Table 8-3 Header - Fields/Icon and Description
| Fields/Icon | Description |
|---|---|
|
Coupon |
Displays the number that uniquely identifies the coupon. Enter a description for the coupon associated with the coupon number. |
|
Translate icon |
You can create a translation by using the Translate icon |
The Coupon Details section contains the following fields and checkboxes.
Table 8-4 Coupon Details - Fields/Checkboxes and Description
| Fields/Checkboxes | Description |
|---|---|
|
Total Stores |
In the title of the Coupon Details section, the system displays the total number of stores associated with the current coupon configuration. |
|
Items |
In the title of the Coupon Details section, the system displays the total number of items associated with the current coupon configuration. |
|
Barcode Type |
Select the barcode type from the list. |
|
Barcode |
Enter the barcode. You can only enter an EAN13 barcode or free text. |
|
Coupon Type |
Select the coupon type from the list. This field is a required field. |
|
Value |
Enter the value of the coupon. |
|
Currency |
Enter, select, or search for the currency of the coupon. This field is a required field. |
|
Maximum Discount Amount |
Enter the maximum discount amount value that can be gained from the coupon. This field is a required field. |
|
Maximum Quantity |
Enter the maximum quantity for the coupon. |
|
Effective Date |
Enter the date on which the coupon is active or use the Calendar icon to select a date. |
|
Expiration Date |
Enter the date on which the coupon expires or use the Calendar icon to select a date. |
|
Profit Center |
Enter the profit center which specifies that the data is exported to a back office accounting system. |
|
Vendor Type |
Select the vendor type from the list. |
|
Vendor |
Enter, select or search for the vendor for which the coupon is related to. |
|
Transaction Level checkbox |
Select the checkbox to indicate that the coupon is a transaction coupon. |
|
Display checkbox |
Select the checkbox to specify that the coupon is displayed in the list of valid coupons on the register. |
|
Prompted checkbox |
Select the checkbox to indicate that the cashier is prompted to ask for a coupon. |
|
Export Code |
Enter the export code which specifies that the data is exported to a back office accounting system. |
|
Tax Class |
Select the tax class from the list. |
|
Created |
Displays the user who created the coupon. |
You can create a coupon in two different ways.
From the Tasks menu, select Price > Create Coupon. The Coupon page appears.
From the Tasks menu, select Price > Manage Coupons. In the Results section, select Actions > Create. The Coupon page appears.
Then follow the steps below:
In the Coupon Description field, enter a description for the coupon.
In the Coupon Details section, enter, select or search the coupon details, as necessary.
You can add stores to the coupon configuration. For more information about this function, see the section.
You can add item restrictions to the coupon configuration. For more information about this function, see the Adding an Item section.
Then select one of the following options.
Click Save to save the entered records.
Click Save and Close to save the entered record and close the page.
Click Cancel to reject all entries and close the page.
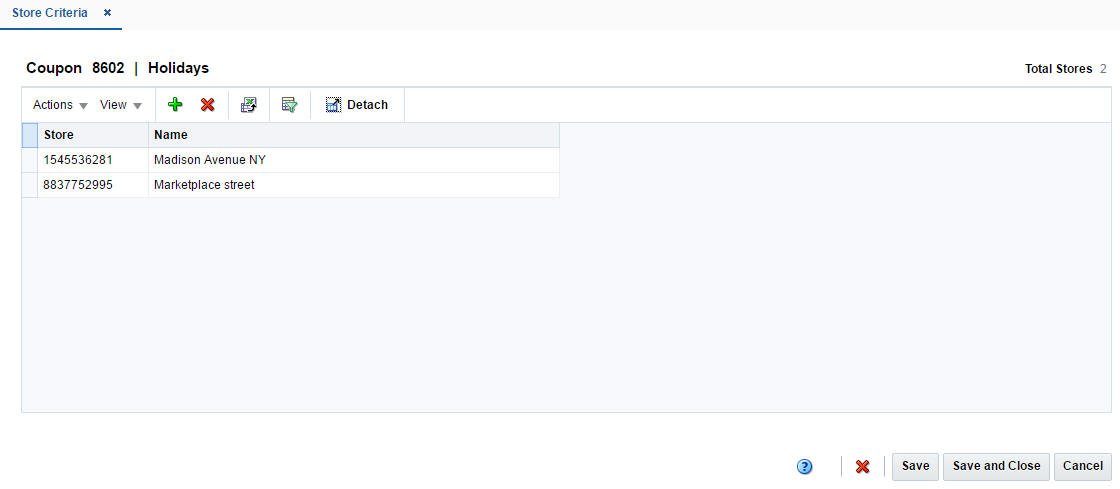
The Store Criteria page allows you to associate stores with the following coupon.
You can add individual stores, or you can add all stores in your organization. You can also associate stores using the following groups:
Area
Region
District
Location List
The configuration ID and description are displayed in the table title. Additionally, the total number of stores already associated with the configuration is displayed in the top right corner.
To add a store to the coupon, follow the steps below.
In the Coupon Toolbar, select More Actions > Stores. The Store Criteria page appears.
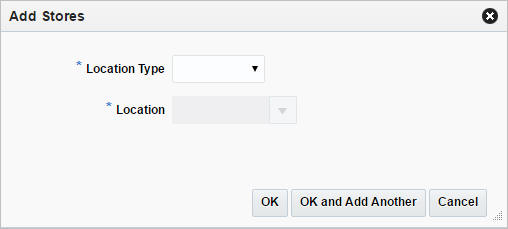
In the table, select Actions > Add, or use the Add icon ![]() . The Add Stores page appears.
. The Add Stores page appears.
In the Location Type field, select a location type from the list. This field is a required field.
In the Location field, enter, select or search for the location. This field is a required field.
Then choose one of the following options.
Click OK to add the location and close the page.
Click OK and Add Another to add additional locations.
Click Cancel to reject all entries and close the page.
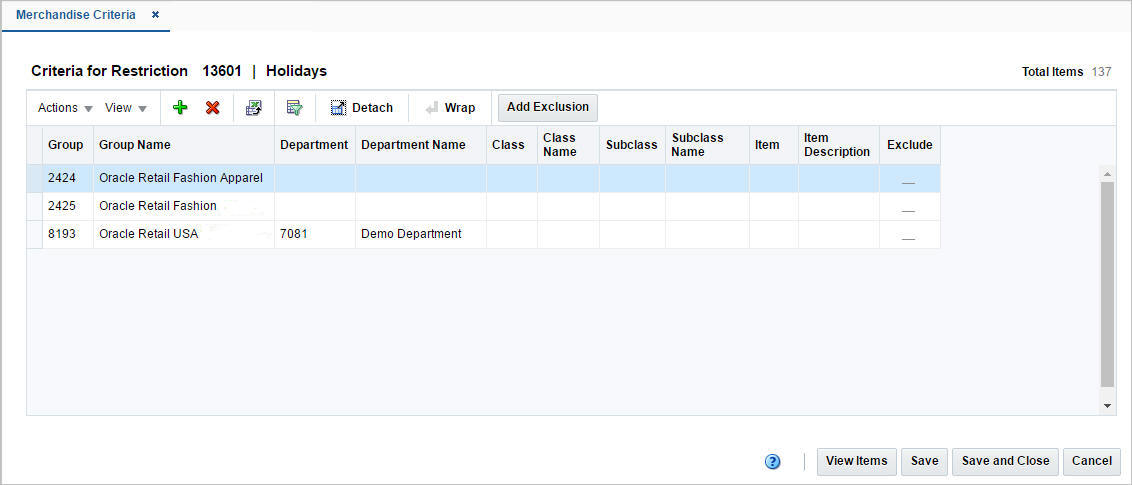
The Merchandise Criteria page allows you to associate items with coupons:
You can associate all the items in a group, department, class, or subclass with the coupon. You can also associate an individual item or all items on an item list with the coupon. After you have associated items with a coupon, you can exclude items. You can either exclude individual items or all items on an item list.
The coupon ID and description are displayed in the table title. Additionally, the total number of items already associated with the coupon are displayed in the top right corner.
To add an item to a coupon, follow the steps below.
In the table, select Actions > Add, or use the Add icon ![]() . The Add Criteria page appears.
. The Add Criteria page appears.
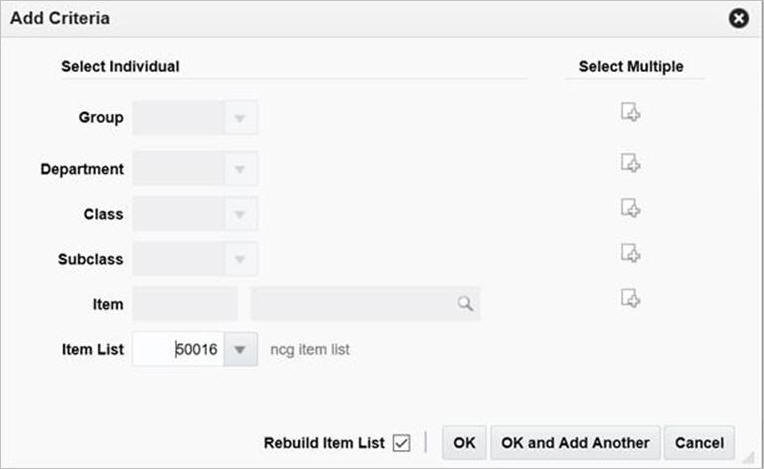
You can add criteria for coupon by individual or by multiple criteria:
Select individual criteria:
Enter, select or search for one of the following criteria in the individual fields:
Group
Department
Class
Subclass
Item
Item List
Then choose one of the following options.
Click OK to add the criteria and close the page.
Click OK and Add Another to add additional criteria.
Click Cancel to reject all entries and close the page.
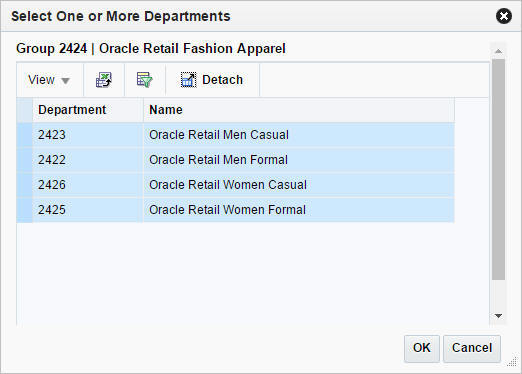
Select multiple criteria:
Select the Select One or More icon, for the desired field.
For example, select the Select One or More Department icon, the Select One or More page appears.
Select one or more rows in the table to add as criteria and confirm with OK. The criteria is added to the table. The page is closed.
Click Cancel to reject all entries and close the page.
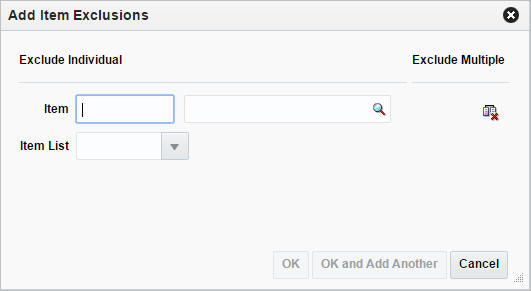
After you have entered all criteria for the coupon, you can exclude an individual item, multiple items or all items of an item list. To add an item exclusion, follow the steps below.
In the table, select Actions > Add Exclusion, or use the Add Exclusion button to add an item exclusion. The Add Item Exclusions page appears.
To exclude a single item:
In the Item field, enter, select or search for an individual item.
To exclude multiple items:
Select the Exclude One or More Items icon. The Select One or More page appears.
Select the items you want to exclude from the coupon.
Then click OK to exclude the items from the coupon and close the page.
Click Cancel to reject all entries and close the page.
Exclude all items of an item list:
In the Item List field, select an item list.
Then choose one of the following options.
Click OK to exclude the items and close the page.
Click OK and Add Another to add additional items.
Click Cancel to reject all entries and close the page.
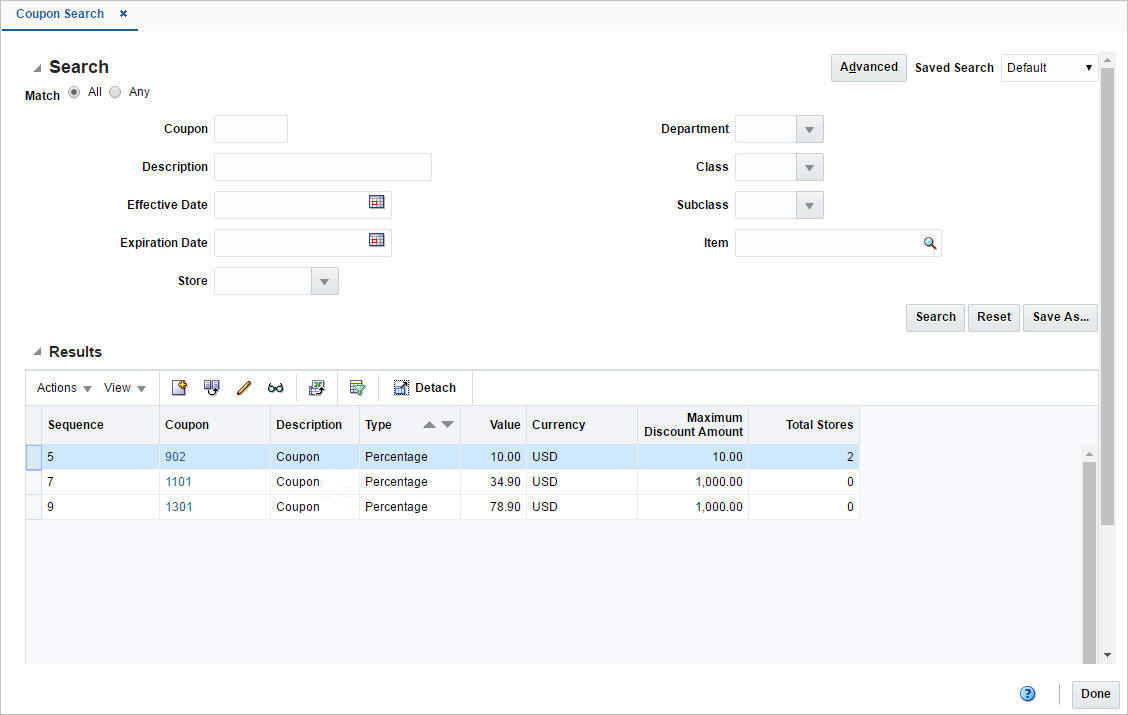
The Manage Coupons option opens the Coupon Search page. In this page you can perform the following actions.
Search for coupons by various search criteria
View the search results
View coupon information
Create coupon information
Edit coupon information
You can re-sequence how the coupons appear on the POS register. This allows you to group similar coupons together.
You can access the Coupon Search page from the Task menu, select Price > Manage Coupons. The Coupon Search page appears.
To search for a coupon:
From the Task menu, select Price > Manage Coupons. The Coupon Search page appears.
You can search for a coupon using basic or advanced search criteria, depending on the requirement. The basic mode is the default search mode.
Click Advanced to access the search section in advanced mode.
Click Basic to return to the basic mode.
To search for a coupon using basic search criteria:
Enter, select or search for one or all of the following basic search criteria.
Table 8-5 Coupon Search - Basic Search Criteria and Description
| Fields | Description |
|---|---|
|
Match option |
Check radio button All or Any. All - only coupons matching all entered search criteria are shown. Any - coupons matching any of the entered search criteria are shown. |
|
Coupon |
Enter the coupon ID. |
|
Description |
Enter the coupon description. |
|
Effective Date |
Enter the effective date or use the Calendar icon to select a date. |
|
Expiration Date |
Enter the expiration date or use the Calendar icon to select a date. |
|
Store |
Enter, select or search for the store associated to the coupon. |
|
Department |
Enter, select or search for the department associated to the coupon. |
|
Class |
Enter, select or search for the class associated to the coupon. |
|
Subclass |
Enter, select or search for the subclass associated to the coupon. |
|
Item |
Enter, select or search for the item associated to the coupon. |
Click Search. The coupons that match the search criteria are displayed in the Results section.
Click Reset to clear the search section and results.
Click Done to close the page.
The Results section lists the retrieved coupons.
To search for a coupon using advanced search criteria:
To search using advanced search criteria, enter or select one or all of the advanced search criteria.
To narrow down the search, use the list next to the search fields. For example, determine if the entered value should equal or not equal the search result.
Click Search. The coupons that match the search criteria are displayed in the Results section.
Click Reset to clear the search section and results.
Click Add Fields to add more fields for the advanced search. To remove the field from the search, click the x right next to the field.
Click Reorder to change the order of the available search fields. The Reorder Search Fields page appears.
Select the desired search field and use the up and down arrows to rearrange the order of the fields.
Click OK to confirm the new order of the fields and close the page.
Click Cancel to reject any changes and close the page.
Click Done to close the page.
The Results section lists the retrieved coupons.
When you copy a coupon, the basic coupon information, such as coupon type, are copied into a new coupon and assigned a new ID. However, the associated stores and items are not copied, you must add stores and items to the new coupon.
To create a coupon from an already existing one, follow the steps below.
From the Tasks menu, select Price > Manage Coupons. The Coupon Search page appears.
Enter or select search criteria as desired to make the search more restrictive.
Click Search. The coupons that match the search criteria are displayed in the Results section.
Select a record in the table.
Then select Actions > Create from Existing, or use the Create from Existing icon ![]() . The Coupon page appears. All data from the selected coupon is displayed.
. The Coupon page appears. All data from the selected coupon is displayed.
In the Coupon Details section, change the coupon details, as necessary. For more information about the Coupon section, see the Create a Coupon section.
You can add stores to the coupon. For more information about this function, see the Adding a Store to a Configuration section.
You can add items to the coupon. For more information about this function, see the Adding an Item section.
Then select one of the following options.
Click Save to save the entered records.
Click Save and Close to save the entered record and close the page.
Click Cancel to reject all entries and close the page.
To edit a coupon, follow the steps below.
From the Tasks menu, select Price > Manage Coupons. The Coupon Search page appears.
Enter or select search criteria as desired to make the search more restrictive.
Click Search. The coupons that match the search criteria are displayed in the Results section.
In the coupon column, click the coupon link, or mark a record and select Actions > Edit, or use the Edit icon ![]() . The Coupon page appears. The data of the selected coupon is displayed.
. The Coupon page appears. The data of the selected coupon is displayed.
In the Coupon Details section, change the coupon details, as necessary. For more information, see the Create a Coupon section.
You can add or remove stores from the coupon. For more information about this function, see the Adding a Store to a Configuration section.
You can add or remove items to the coupon. For more information about this function, see the Adding an Item section.
Then select one of the following options.
Click Save to save the entered records.
Click Save and Close to save the entered record and close the page.
Click Cancel to reject all entries and close the page.
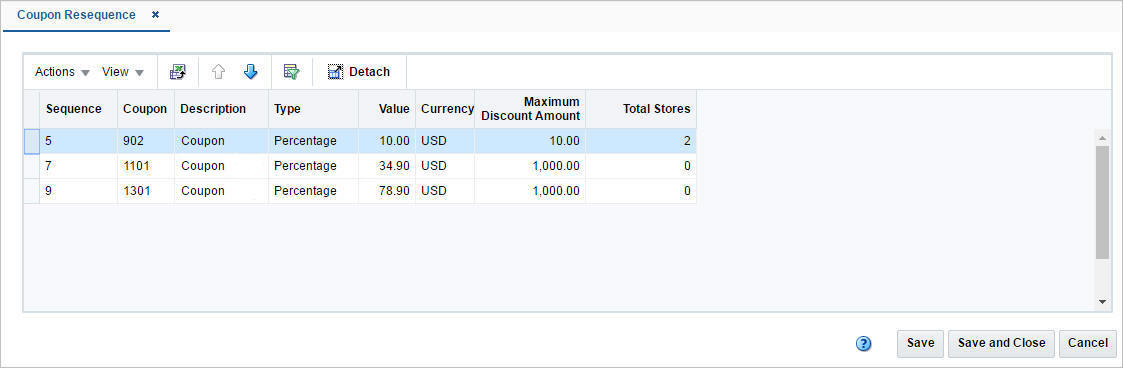
In the Coupon Resequence page you can change the sequence of how the coupons are displayed on the POS register.
The table displays the available coupons with the current sequence.
To change the sequence of how the coupons are displayed, follow the steps below.
From the Tasks menu, select Price > Manage Coupons. The Coupon Search page appears.
Enter or select search criteria as desired to make the search more restrictive.
Click Search. The coupons that match the search criteria are displayed in the Results section.
Select a record in the table.
Then select Actions > Resequence Coupons. The Coupon Resequence page appears.
Select Actions > Move Up/Move Down, or use the corresponding icons to rearrange the order of the coupons.
Then select one of the following options.
Click Save to save the changed order.
Click Save and Close to save the changed order and close the page.
Click Cancel to reject all entries and close the page.
Customer segments are groups of customers divided based on common characteristics in order to market to each group effectively and appropriately. Customer segment types and customer segments can be defined in Merchandising; however it is used for reporting purposes only.
Customer segment types and customer segments are maintained through the download/upload process. This functionality is accessed from the main Merchandising task list under Foundation Data > Download Foundation Data and Foundation Data > Upload Foundation Data.
To add, update, or remove customer segment information, select the template type of Price and Cost from the Download Data screen and then the Customer Segment template. Click the Download button and when prompted, choose to either open the .ods file that is generated or save the file and open it separately in the spreadsheet application of your choice.
Add a Customer Segment
To add a new customer segment, start in the Customer Segment Types tab, and, in a blank line in the template, select the action type of Create. Next enter a unique segment type identifier (up to 6 characters) and the description for the customer segment type in the primary language (as defined in the Merchandising system options) of up to 120 characters. Optionally, you can also enter the address, phone, fax, website or jurisdiction of the competitor in the subsequent columns.
Next, if you wish to add translations for the customer segment type in languages other than the primary language, this can be done in the Customer Segment Type Trans tab. Navigate to a blank row and select the action type of Create and the language in which the translated description will be entered. Then, enter the customer segment type for which the translation applies. Finally, enter the translated description. The translated description can also be up to 120 characters long. This is an optional step.
Next, the customer segments that belong in this customer segment type can be added. To do this, move to the Customer Segments tab in the spreadsheet. Again, navigate to a blank row in the sheet and select an action type of Create. Enter the first segment (up to 10 digits), and the segment's description. The segment description should be in the primary language (as defined in the Merchandising system options) and can be up to 120 characters. Then enter the segment type to which the segment is being added.
Lastly, if you wish to add translations for the customer segment in languages other than the primary language, this can be done in the Customer Segment Translations tab. Navigate to a blank row and select the action type of Create and the language in which the translated description will be entered. Then, enter the customer segment for which the translation applies. Finally, enter the translated description. The translated description can also be up to 120 characters long. This is an optional step.
Update a Customer Segment
If you would like to update any customer segment descriptions or translations, a similar process will be followed as that described above for creating new customer segments. First, download the spreadsheet, and then navigate to the tab where you would like to make your updates.
The following columns can be updated in each tab:
Customer Segment Types - Customer Segment Type Description
Customer Segment Type Trans - Customer Segment Type Description
Customer Segments - Customer Segment Description
Customer Segment Translations - Customer Segment Description
In the tab where you are going to make your updates, select the action type of Update, and then correct the value in the spreadsheet.
Deleting a Customer Segment
If you wish to delete a customer segment type, update the action column to select Delete in each of the tabs where it occurs. Customer segments can be deleted in a similar manner.
Uploading Changes
For all actions defined above, once all the updates have been made to the data in the spreadsheet, save the file and close it. Then, return to the Merchandising screens and select Foundation Data > Upload Foundation Data from the main task list. In this screen, select the template type Price and Cost and the template Customer Segments. This will generate a process description automatically, but this can be updated if desired. Lastly, select the Browse button and navigate to the directory where you saved the updated spreadsheet.
To review the status of the upload and check whether any errors occurred, select the Foundation Data > Review Status task from the main task list.
See also Download/Upload Data from Spreadsheets and View Data Loading Status.