| Oracle® Retail Merchandising Foundation Cloud Service Oracle Retail Merchandising System User Guide Release 19.3.000 F83161-01 |
|

 Previous |
 Next |
| Oracle® Retail Merchandising Foundation Cloud Service Oracle Retail Merchandising System User Guide Release 19.3.000 F83161-01 |
|
Previous |
Next |
The Oracle Retail Pricing module provides the ability to define, maintain, and review price changes, clearances, and promotions as well as provides the ability to pass approved price events onto downstream selling systems.
|
Note: Users should not access the Oracle Retail Pricing module during the Retail Merchandising System (RMS) batch window as it may cause some unpredictable results. |
The following information describes the foundation data within the pricing module.
The Data Loading Status window allows you to view the status of the upload and download processes happening in Pricing, so that you can rectify the issues associated with the upload/download process.
The window allows you to drill down to the errors or warnings associated with a selected upload/download request.
You can access the Data Loading Status window from the Task menu, select Foundation Data > Review Status. The Data Loading Status window appears.
The Data Loading Status window contains the following sections.
The table displays the process, process description, file name, template category and type, destination, action date and time, status and you, who initiated the process.
Table - Actions Menu and Icons
Use the Actions Menu and icons to apply actions to the table. You can perform the actions listed below.
Table 15-1 Data Loading Status Table - Actions Menu/Icons and Description
| Actions Menu/Icons | Description |
|---|---|
|
Delete and Delete icon |
You can delete a process by using the following steps:
|
|
Export to Excel and Export to Excel icon |
You can export the records in the table to a Microsoft Excel spreadsheet by selecting Actions > Export to Excel or by using the Export to Excel icon |
|
View Issues and View Issues button |
To view the warnings and errors associated with a selected upload/download request:
|
Data Loading Status - View Menu and Icons
You can customize the view of the table by using the options in the View Menu.
Table 15-2 Table Data Loading Status - View Menu/Icons and Description
| View Menu/Icons | Description |
|---|---|
|
Columns |
You can manage which of the columns will be shown in the table by clicking the Show All and Manage Columns options. |
|
Detach and Detach icon |
You can view the table in the application in a separate window by clicking Detach or by using the Detach icon |
|
Sort |
You can sort columns by the following options:
|
|
Reorder Columns |
You can reorder columns by clicking the Reorder Columns option. |
|
Query by Example and Query by Example icon |
You can filter the items by one or multiple column values by clicking the Query by Example option or by using the Query by Example icon |
The toolbar contains the following icons and buttons.
Table 15-3 Data Loading Status Toolbar - Icons/Buttons and Description
| Icons/Buttons | Description |
|---|---|
|
Help icon |
You can access the online help for a particular page by clicking the Help icon |
|
Refresh icon |
You can refresh the window by clicking the Refresh icon. All entries are reset and not saved. |
|
Save |
Click Save to save the entered records. |
|
Save and Close |
Click Save and Close to save the entered records and close the window. |
|
Cancel |
Click Cancel to reject all entries and close the window. |
|
Done |
If you open the window in view mode, the Done button is displayed. Click Done to close the window. |
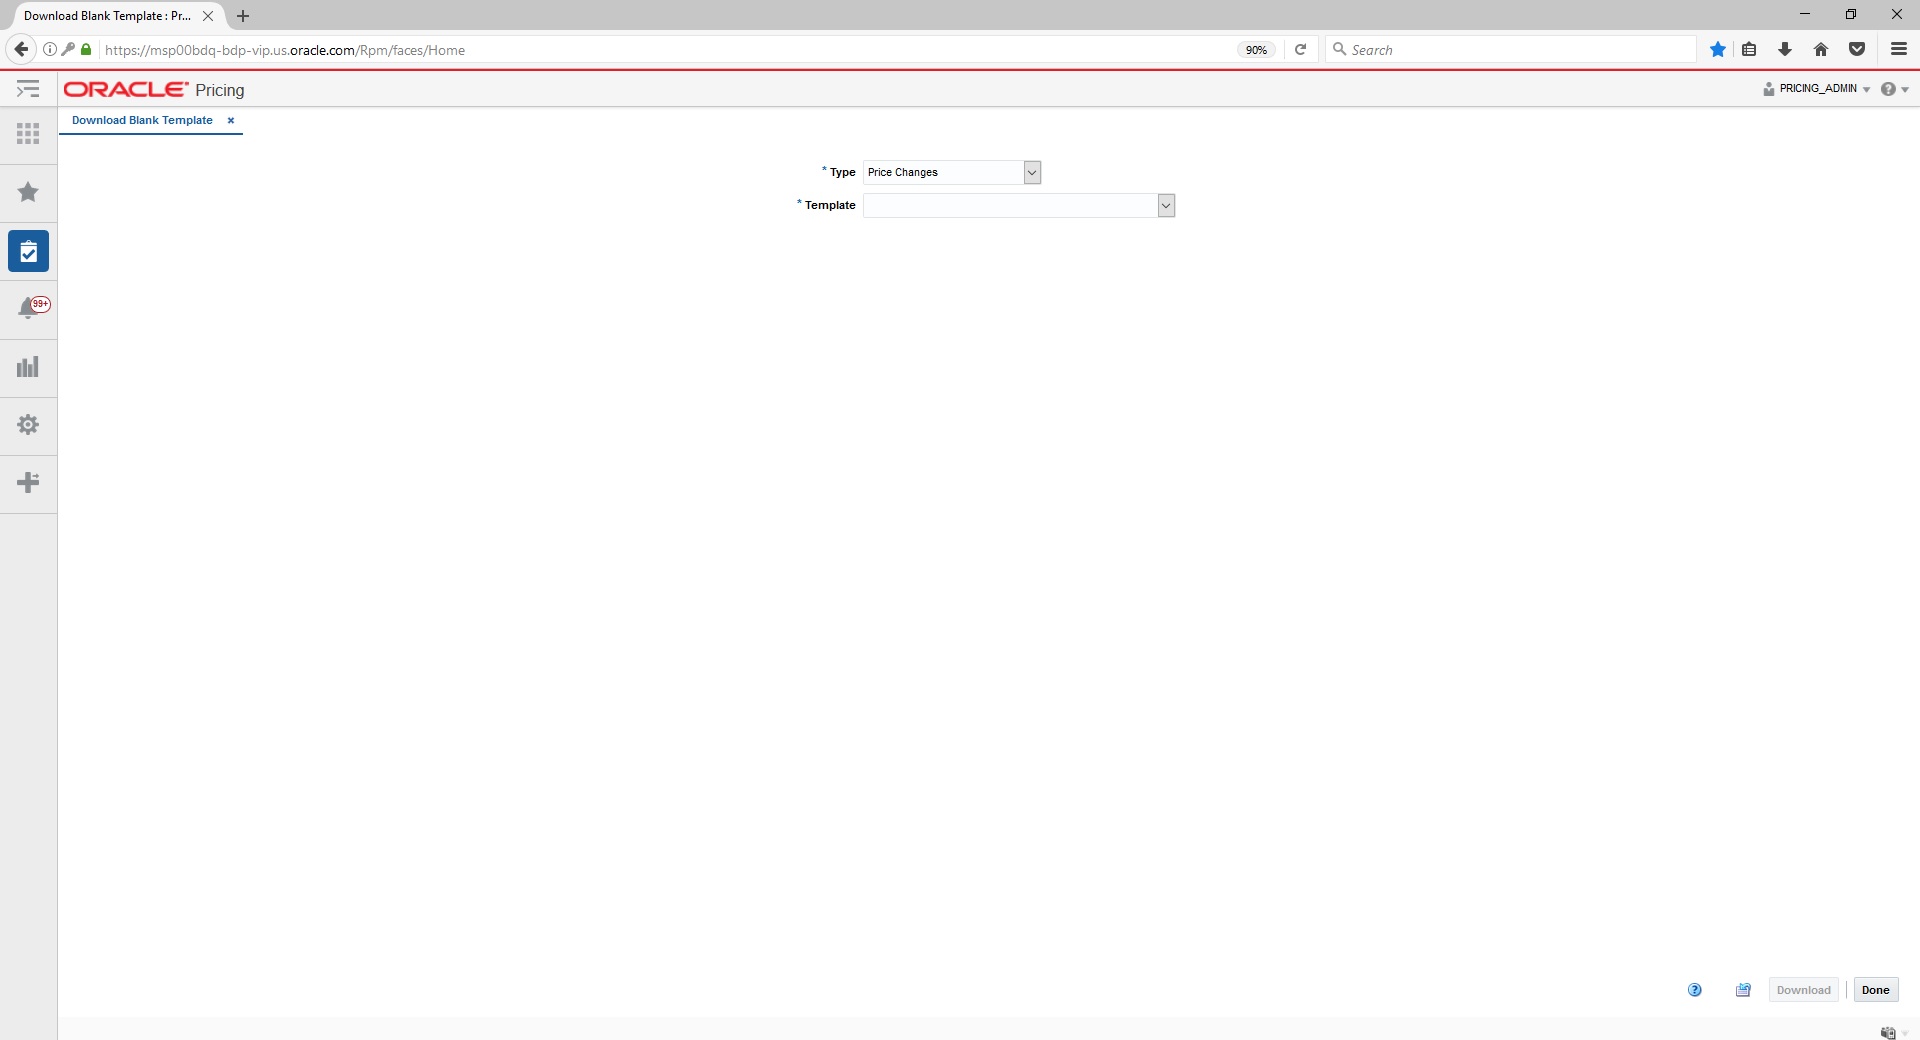
The Download Blank Template window allows you to download a predefined template for uploading price changes or clearances via a spreadsheet.
From the Tasks menu, select Download Blank Template under Foundation Data. The Download Blank Template tab appears.
From the Type field, select the type of template you want to download. Options are Price Change or Clearance.
From the Template field, select the specific template you want to download.
Click Download to download the specified template.
The zone structure in Pricing Cloud Service allows you to define groupings of locations for pricing purposes and eliminates the need to manage pricing at the, more granular, location level. At the highest level, these groupings are divided into categories called zone groups. Zone groups are used in regular, clearance and promotional pricing. You can determine how zone groups are created for your business based on a number of different factors, the type of pricing event, regular and/or clearance, or the items being priced, such as by department or division.
Within zone groups are groupings of locations (stores or warehouses) called zones. The function of these zones is to group locations together in a manner that best facilitates company pricing strategies. For example, you might choose to create a zone group based on geographic region such as the North America. Then, within the North America Zone Group, you could have regional zones, such as:
US East region
US West region
Mexico stores
Similarly, you can create a zone group based on customer characteristics. Then, within the zone group create zones with similar geographical or customer characteristics, such as
US urban stores
US rural stores
There are no restrictions on the number of locations a zone can contain and a location can (and likely will) exist in multiple zone groups. For example, a New York City store might exist in the US urban stores zone as well as the US East region zone, which is part of the North American Zone Group. However, two rules apply to the relationship between locations and zones:
A location cannot exist in more than one zone within a zone group.
All locations within the same zone must use the same currency.
When new stores or warehouses are added in Merchandising, a pricing location is designated for the new store or virtual warehouse. Pricing Cloud Service will take this information for the new location and attempt to add the new location to every zone group/zone in which the pricing location exists across all zone groups. If the pricing location and the new location are not of the same currency, then the new location will be added to every zone group where the pricing location exists, and the system will create a new zone for the location with the currency of the new location. This process applies for all store types, including company and customer (franchise, or wholesale) stores and stockholding or non-stockholding locations.
|
Note: Pricing of warehouses is determined by a system option in Pricing Cloud Service. |
You can create an empty zone and add locations to the zone at a later date. Price events can also be created against a zone with no locations, based on a system option setting; however, conflict checking will not run and future price detail is not created for these zones. Once locations have been added to those zones, any new item/location relationships created will be added to price events created for those zones.
When a location is added to an existing zone, the location will participate in any price events which are approved in the future, but it will not inherit any existing approved events. When a location is removed from a zone, it will stay on any existing approved events, but will not be included in any new events created for that zone. If a location needs to be added to or removed from an existing event, setting the event back to worksheet and then re-approving will add that location.
Once zone groups are created in Pricing Cloud Service, you are able to assign them to Initial Price Zone Definitions. This allows you to specify the zone structure that is used when pricing new items added in a particular department, class, or subclass, including markup percentage, and markup type (cost or retail), and rounding rules.
|
Note: Markup is also defined as part of the department creation process, but Pricing Cloud Service uses the Initial Zone Definition to determine initial price markup. |
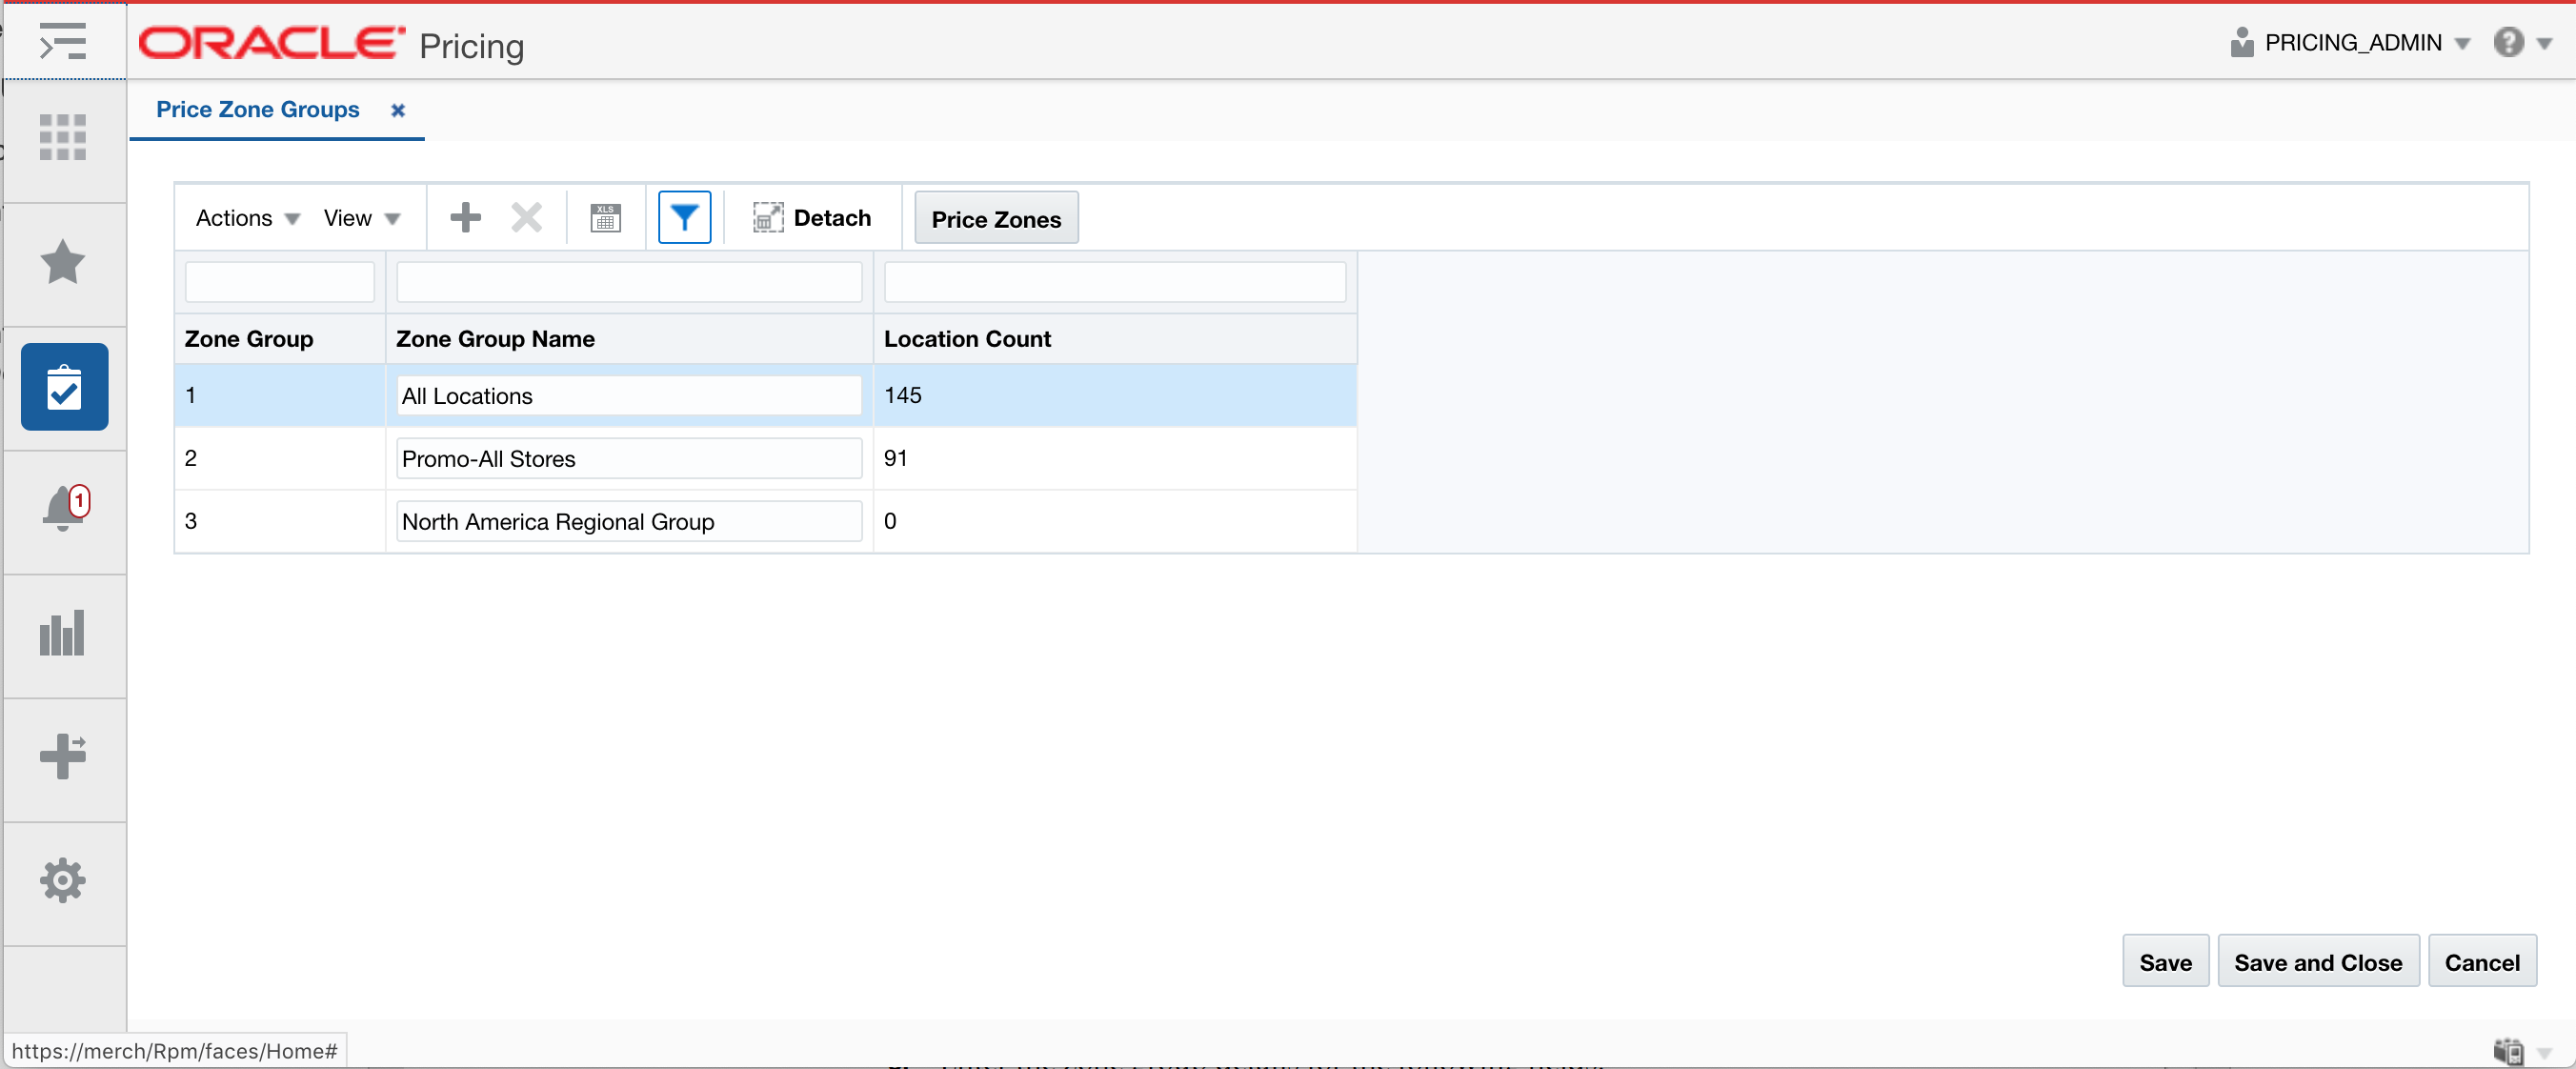
A Zone Group identifies a particular way of grouping locations for pricing purposes.
Perform the following procedure to create a price zone group:
From the Tasks menu, select Price Zones under Foundation Data. The Price Zone Groups tab appears.
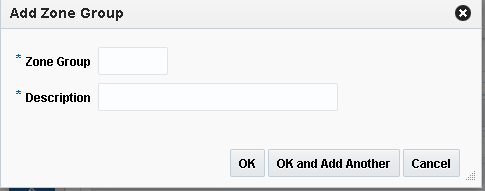
Select Add Zone Group from the Action menu. The Add Zone Group dialog appears.
Enter the zone group details for the following fields:
Zone Group – This field is a unique price zone group identifier.
Description – The description of the zone group.
Click OK to add the new price zone group. You are returned to the Price Zone Groups tab.
Click OK and Add Another to add the current price zone group to the table and add another without leaving the Add Zone Group dialog.
Perform the following procedure to edit a price zone group:
From the Tasks menu, select Price Zones under Foundation Data. The Price Zone Groups tab appears.
From the Zone Group table, highlight the zone group you want to edit and select Price Zones from the Actions menu. Alternatively, highlight the zone group and click the Price Zones button. The Price Zones tab appears.
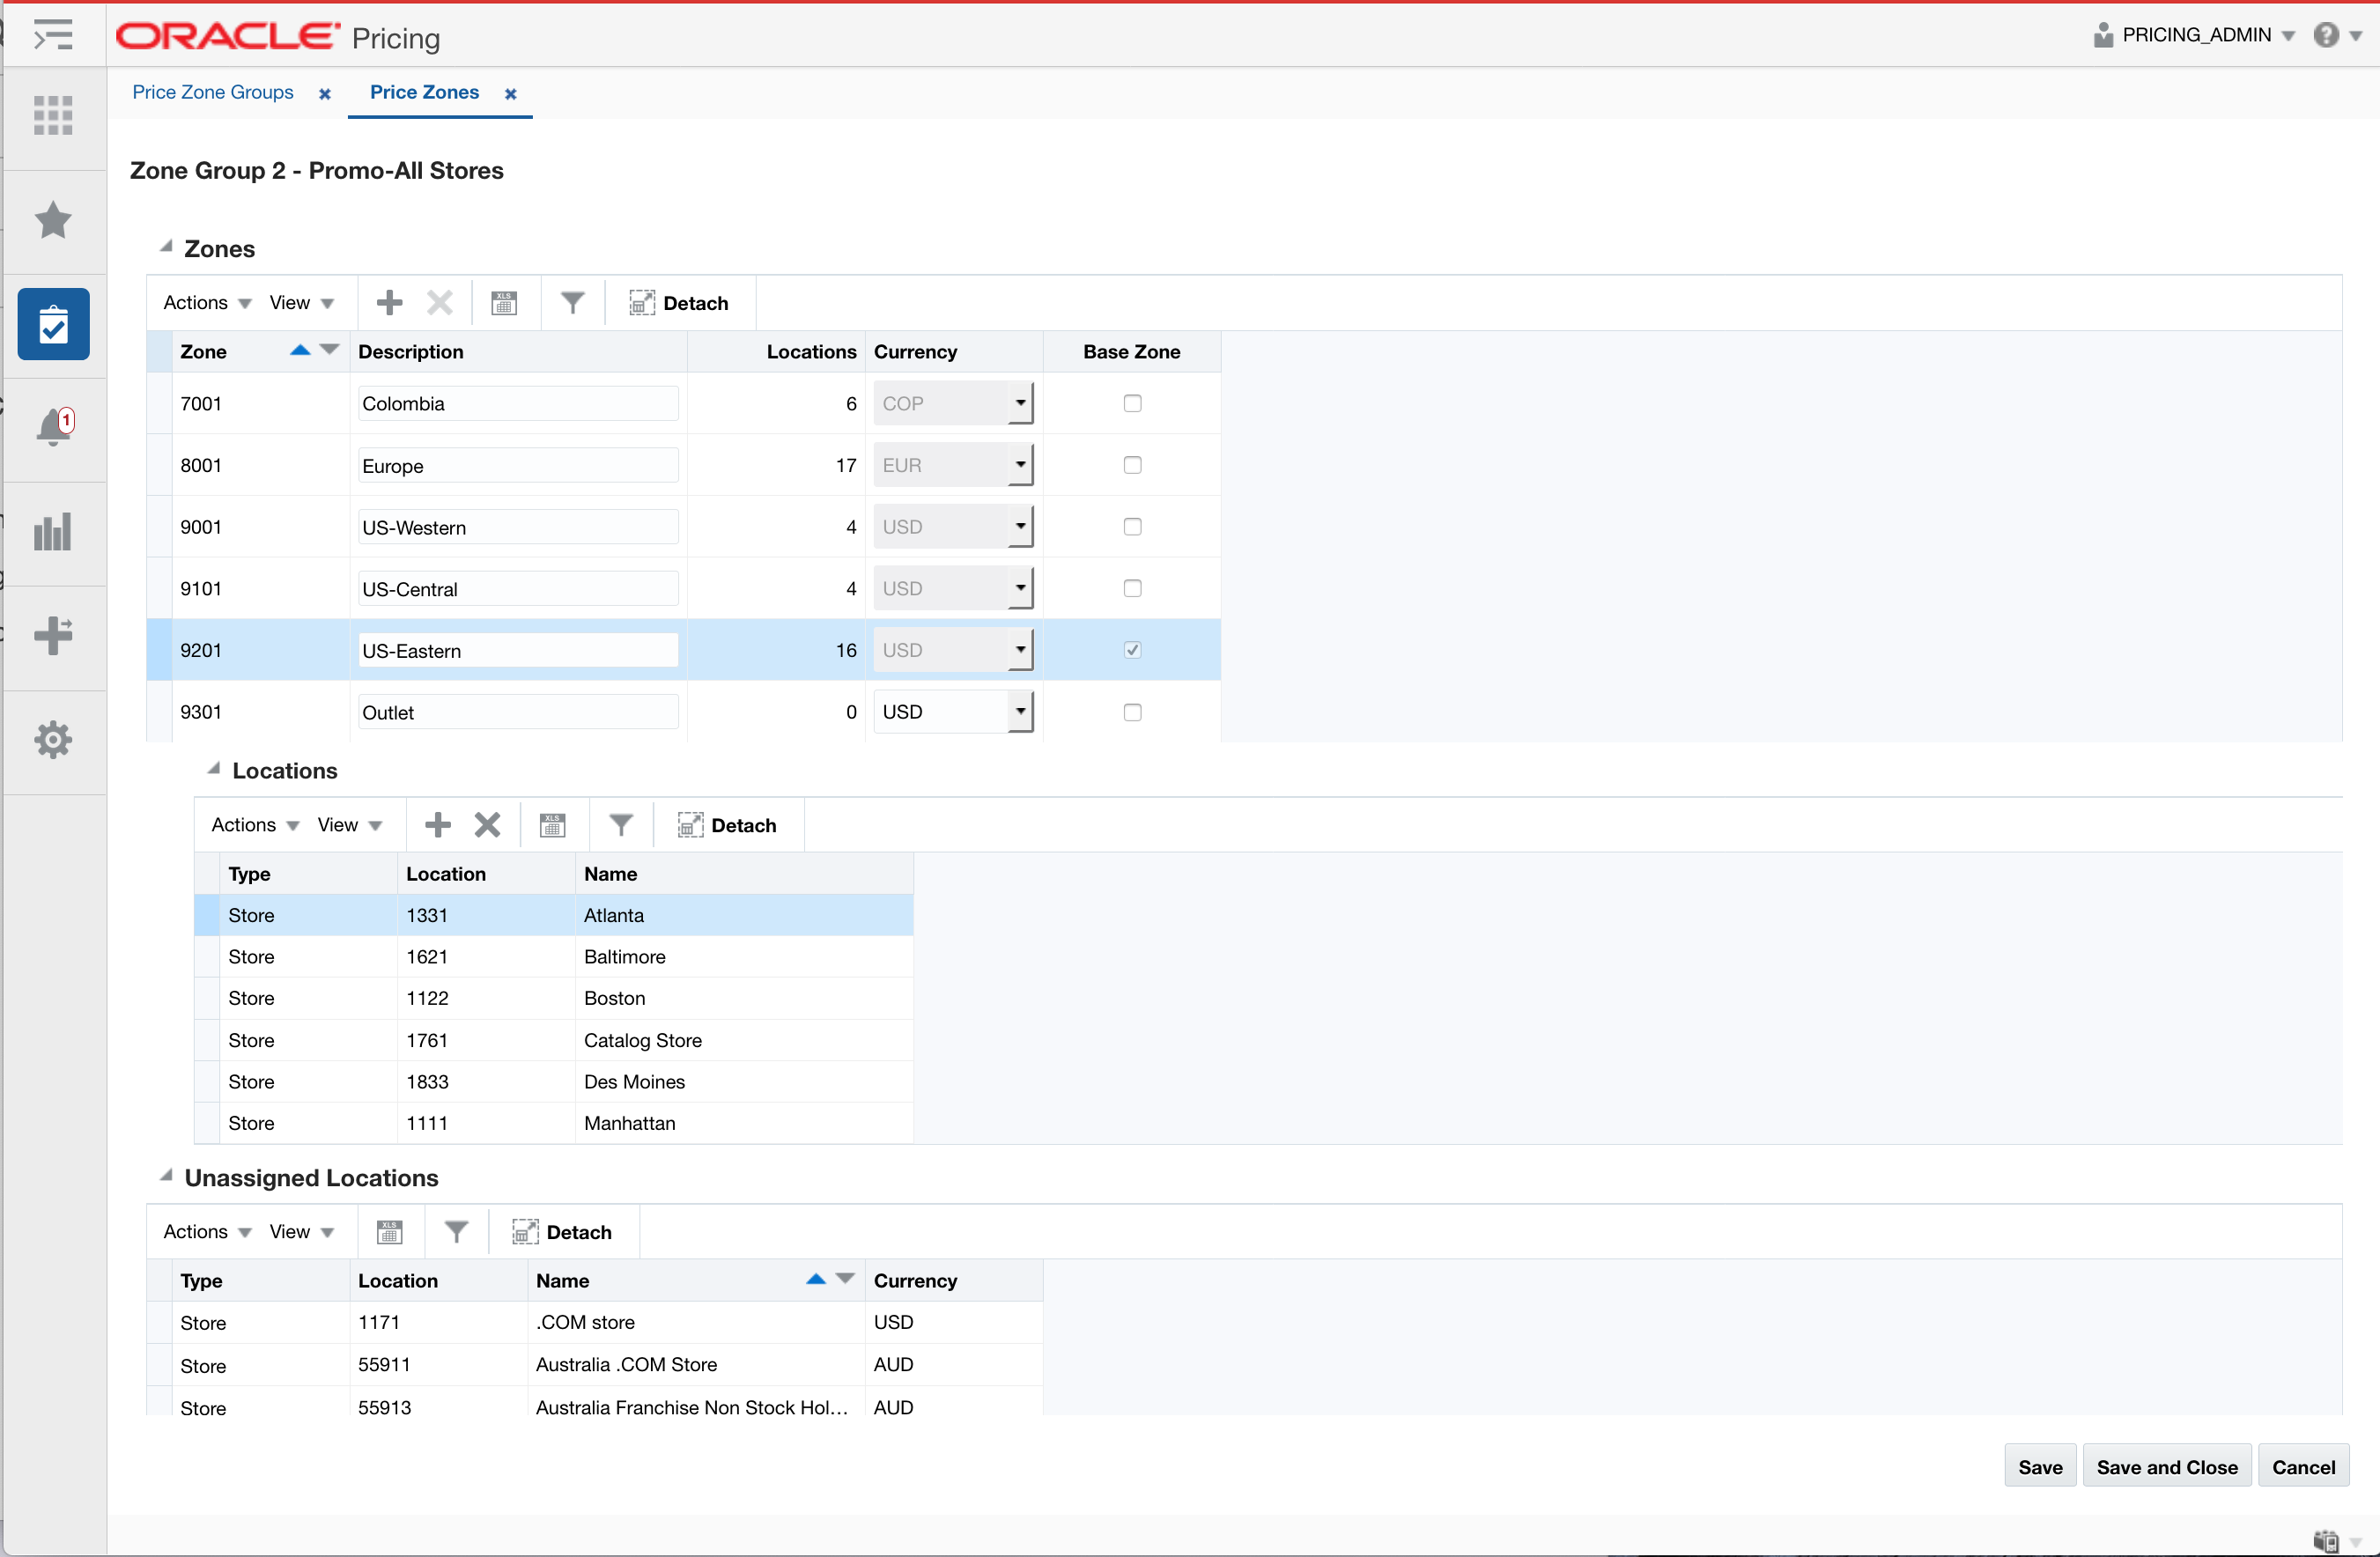
From the Zones tab, you can perform the following actions:
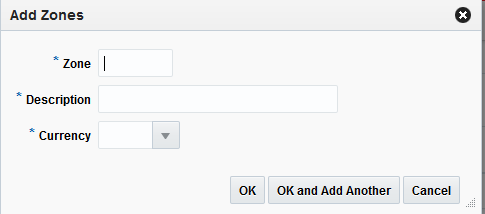
From the Zones table, select Add Zone from the Actions menu. The Add Zones dialog appears.
In the Zones field, enter a unique price zone identifier.
In the Description field, enter a description for the zone.
In the Currency field, select the currency for the price zone from the drop-down list.
Click OK to add the new zone. You are returned to the Zones tab.
Click OK and Add Another to add the current zone to the table and add another without leaving the Add Zones dialog.
From the Zones table, highlight the zone you want to delete and select Delete from the Action menu. The delete zone confirmation dialog appears.
Click Yes to confirm the deletion. You are returned to the Zones tab.
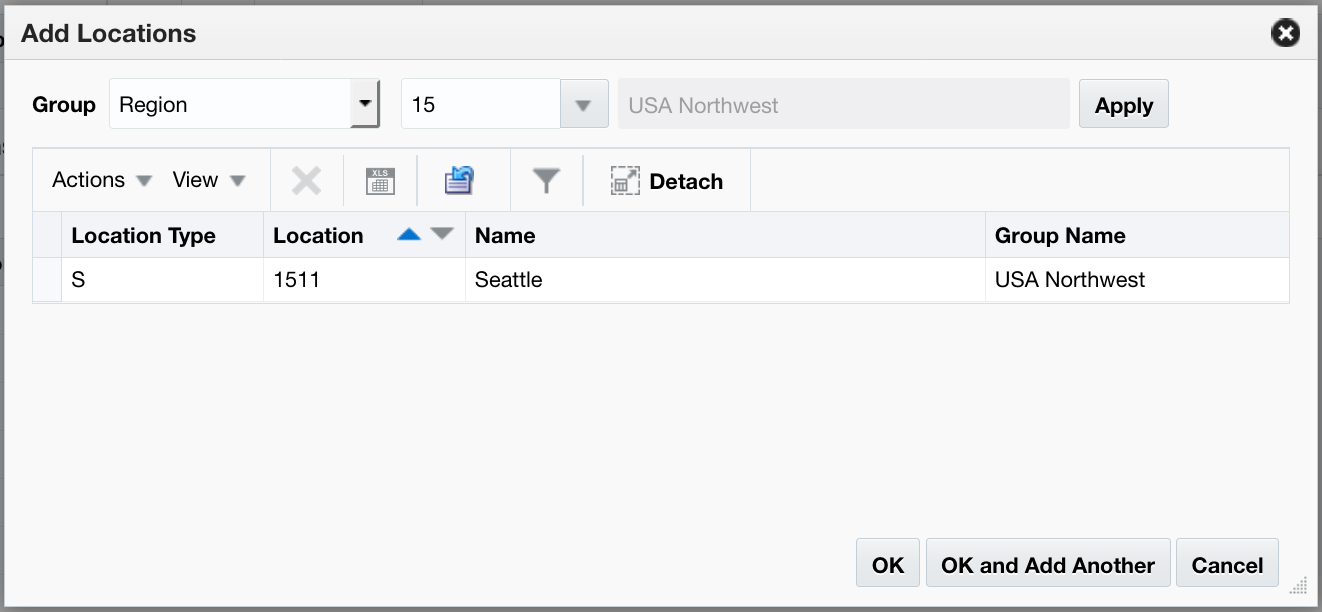
The Add Locations dialog allows users to assign locations to an existing zone.
|
Note: If a location is already in the Locations table, it will not be added a second time. |
From the Locations table, select Add Locations from the Actions menu. The Add Locations dialog appears.
From the Group field, select the group type for the location. Options are:
Location List
Chain
Area
Region
District
Store
Warehouse
|
Note: Warehouse is only shown as an option for group type if the Recognize Warehouses as Locations system option is enabled. |
Unassigned Locations
Once a Group is selected, select or enter a Group Value.
Click Apply to add the new location to the Location table.
When all locations are added, click OK to add the new locations. You are returned to the Zones tab.
Click OK and Add Another to add the current location to the table and add another without leaving the Add Locations dialog.
The Delete function allows a location to be removed from a zone.
From the Zones table, highlight the zone you want to delete and select Delete from the Action menu. The delete location confirmation dialog appears.
Click Yes to confirm the deletion. You are returned to the Zones tab.
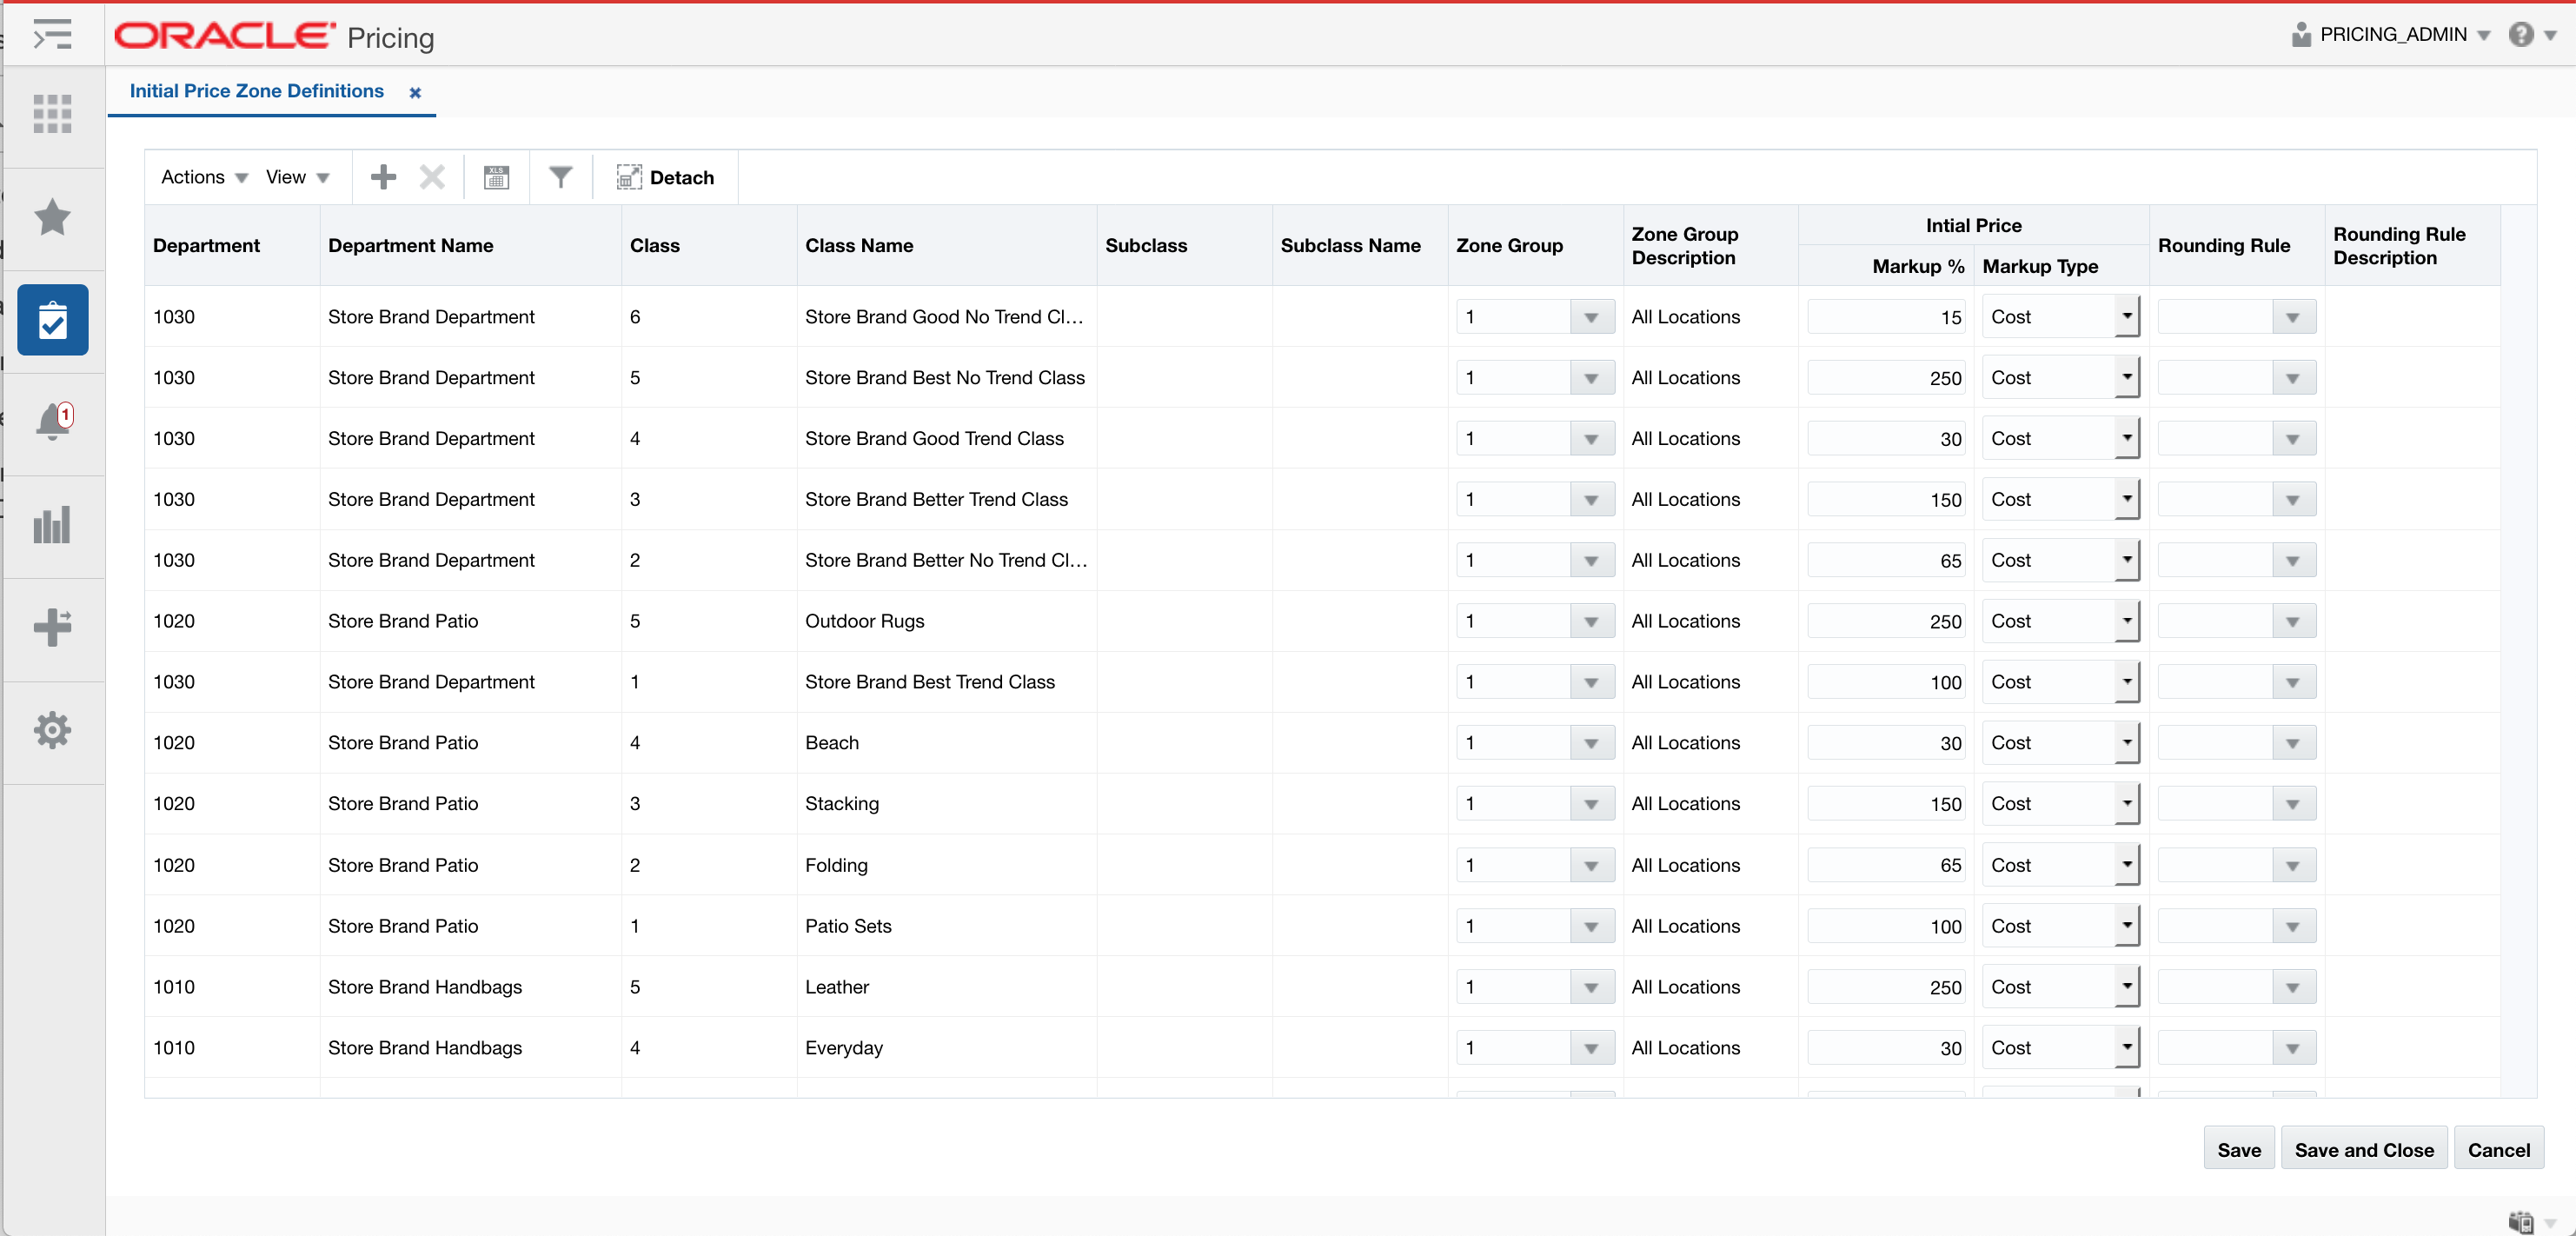
Perform the following procedure to set up initial price zone definitions:
From the Tasks menu, select Initial Price Zone Definitions under Foundation Data. The Initial Price Zone Definitions tab appears.
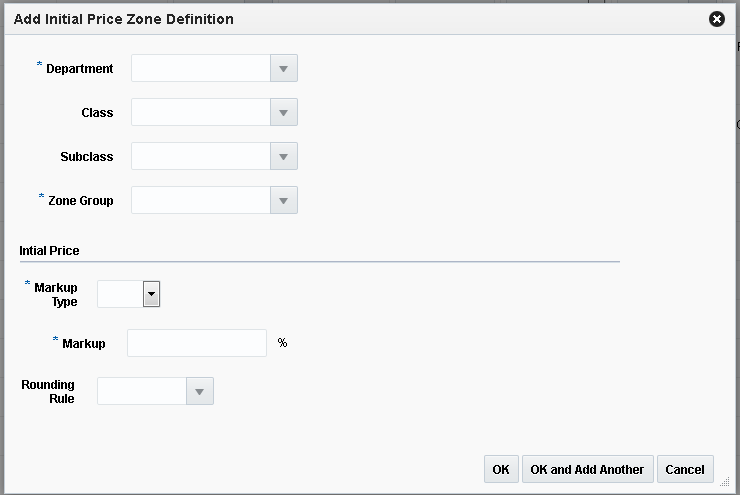
Select Add from the Action menu. The Add Initial Price Zone Definition dialog appears.
Enter the initial price zone definition details for the following fields:
Department – Enter or select a single department.
|
Note: The Department, Class, and Subclass fields have a cascading relationship. You can enter or select values for the three fields in any order but the values will vary depending on selections. |
Class – Enter or select a single class.
Subclass – Enter or select a single subclass.
Zone Group – The Zone Group specified here is used as the structure for the initial price setting for new items added to the defined level of the Merchandise Hierarchy.
Markup Type – The value entered in this field determines how markup is calculated for items existing in the defined hierarchy.
Markup – This percentage field is used to calculate the initial retail based on the item's cost.
Rounding Rule – This field allows you to assign a rounding rule to the initial price zone definition. The rounding rule is used to adjust final price used for the initial price of new items to meet the retailer pricing strategy.
Rounding rules help you create a uniform pricing strategy. They are used to smooth proposed retails in order to maintain a consistent set of price points by applying "ends in" logic to retail values. Rounding Rules are defined globally, but can also include exceptions or exclusions based on merchandise hierarchy and/or currency. This provides a simple but flexible configuration to handle a wide variety of scenarios.
|
Note: Editing rounding rules details will only affect retails derived by the rounding rules from that point on. It will not affect/overwrite any retails that have already been derived based on the old rounding rules. |
Rounding rules are optional. If you do not use rounding rules, the following rules are enforced for "percent off" price events, based on the number of decimal places defined as part of the currency set up in Merchandising:
Regular Price Changes: if the extra digit (beyond the number of digits for the currency) is between 0 and 4, round down; if it is between 5 and 9, round up.
Clearance Events: retail will always round down
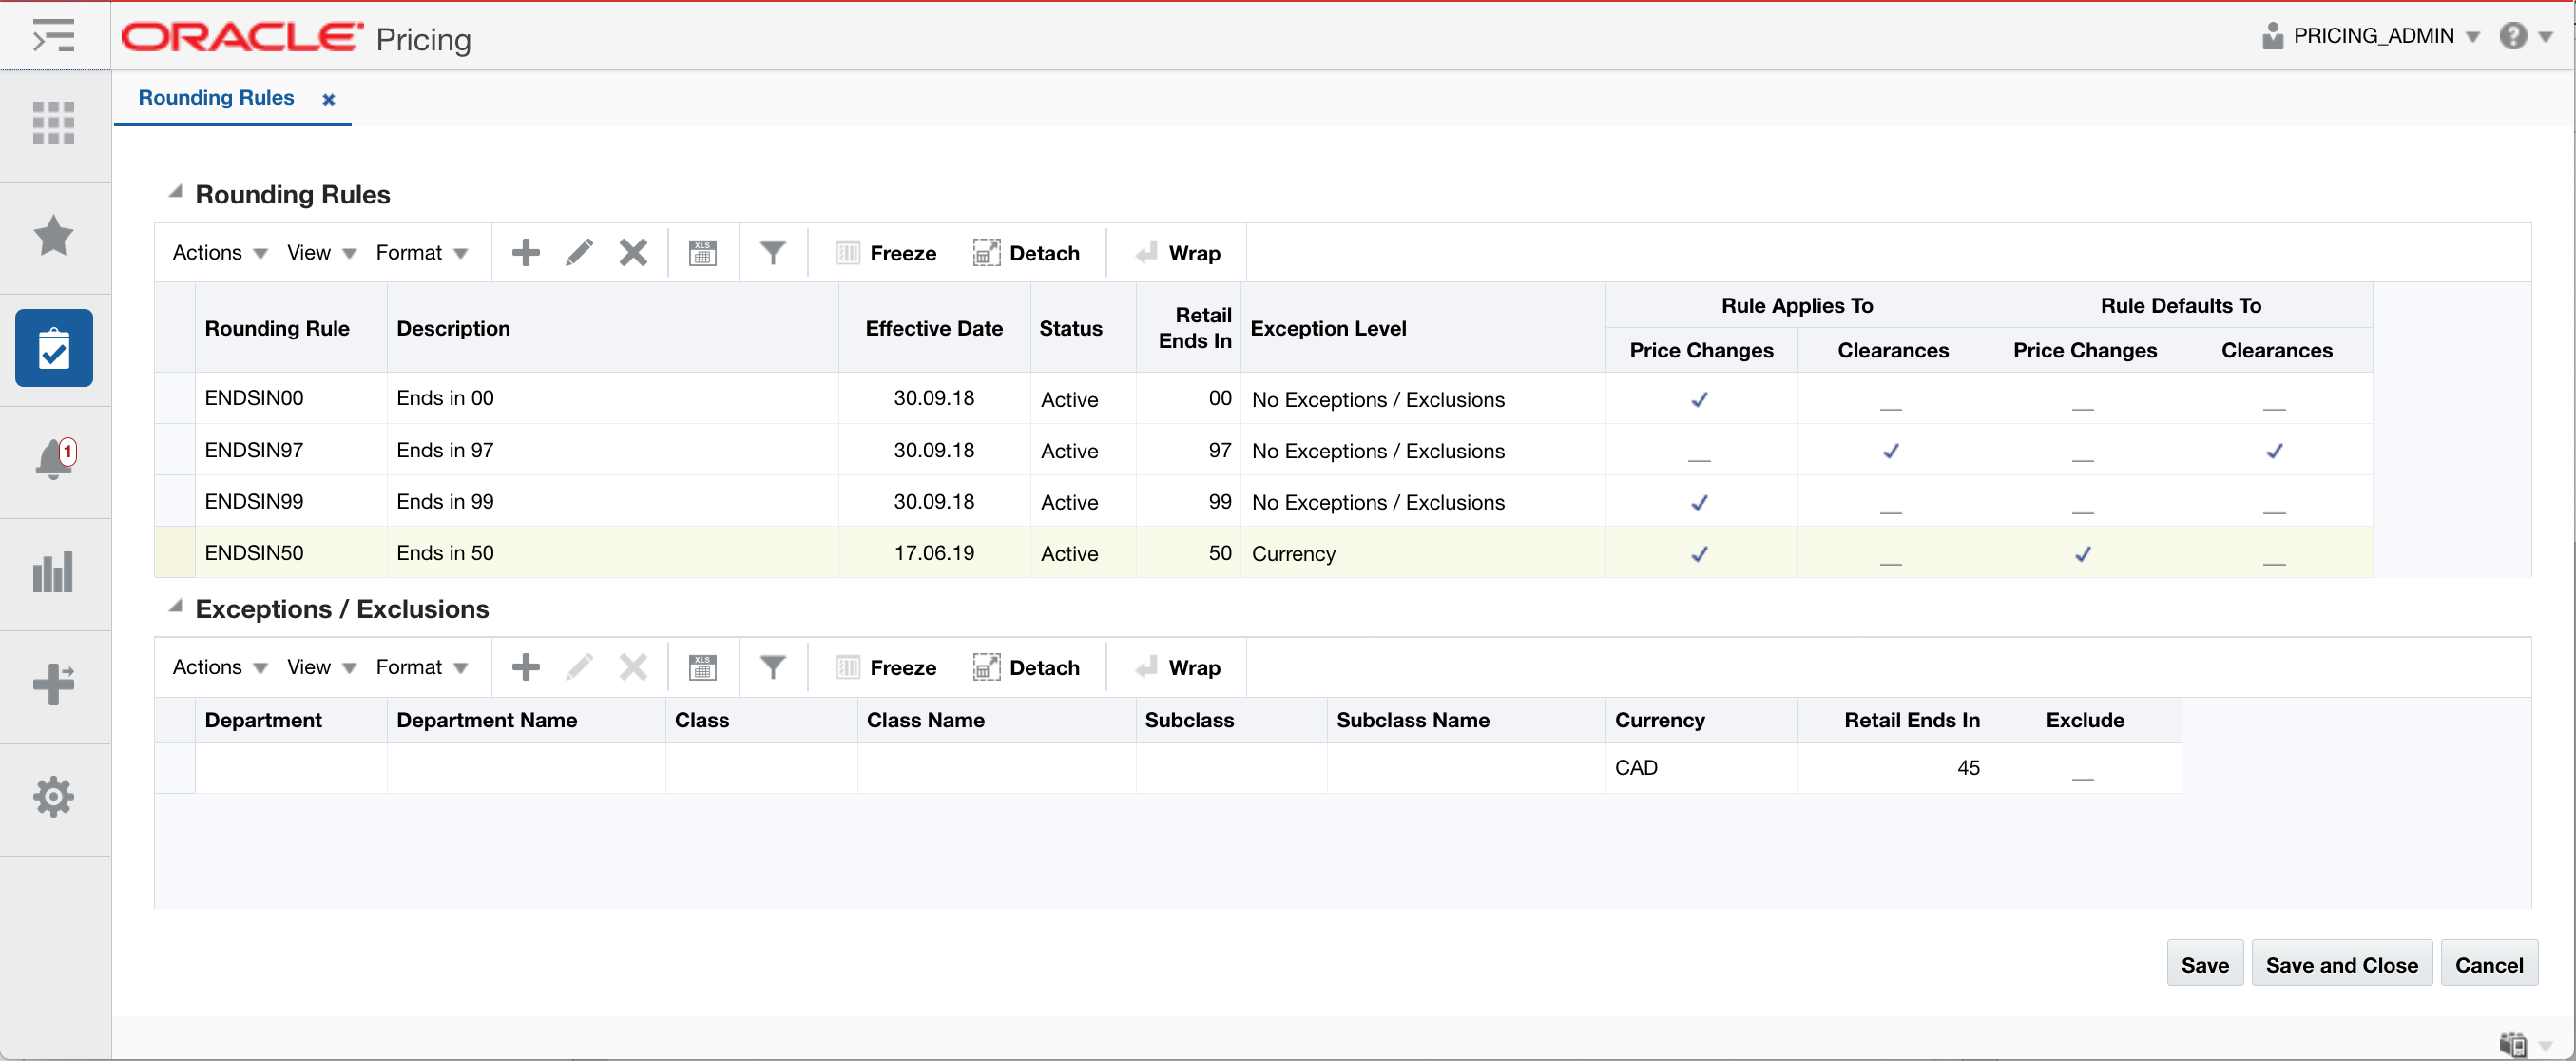
Perform the following procedure to create rounding rules:
From the Tasks menu, select Rounding Rules under Foundation Data. The Rounding Rules tab appears.
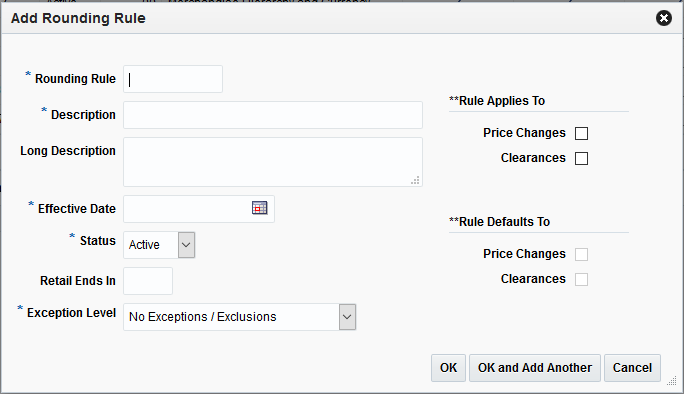
Select Add from the Action menu. The Add Rounding Rule dialog appears.
Enter the rounding rule details for the following fields:
Rounding Rule – The identification number of the rounding rule.
Description – The description of the rounding rule.
Effective Date – The date when the Rounding Rule will become available.
New Retail Ends In – Used for adjusting the decimal value. This field supports 1 to 4 positions. The Ends In value assumes to start in the right most decimal position. For example, if the Retail Ends In is 9 and the currency uses two decimal positions, the value is treated as x9.
Exception Level – The Exception/Exclusion Level of the rounding rule. This field allows the user to decide what type or exceptions or exclusions (if any) are allowed for the rounding rule. This value drives what fields are available in the Exceptions/Exclusions table.
Rule Applies To – The check boxes indicating if this rounding rule applies to Clearances or Price Changes.
Rule Defaults To – The check boxes indicating if this rounding rule is the default for Clearances or Price Changes.
Click OK to add the new rounding rule. You are returned to the Rounding Rule tab.
Click OK and Add Another to add the current rounding rule and create another.
The Exception or Exclusion table will show exceptions and exclusions related to the highlighted row in the Rounding Rules table. Actions taken in the Exception or Exclusion table are related to the highlighted rounding rule. For instance, when the Add action is taken on the Exception/Exclusion table, it means the Exception or Exclusion row being added is for the highlighted rounding rule.
Perform the following procedure to create exceptions or exclusions to rounding rules:
From the Tasks menu, select Rounding Rules under Foundation Data. The Rounding Rules tab appears.
From the Rounding Rules table, select the rounding rule to which you want to add an exception or exclusion.
|
Note: The rounding rule selected must have had the Exception Level specified when it was initially added. |
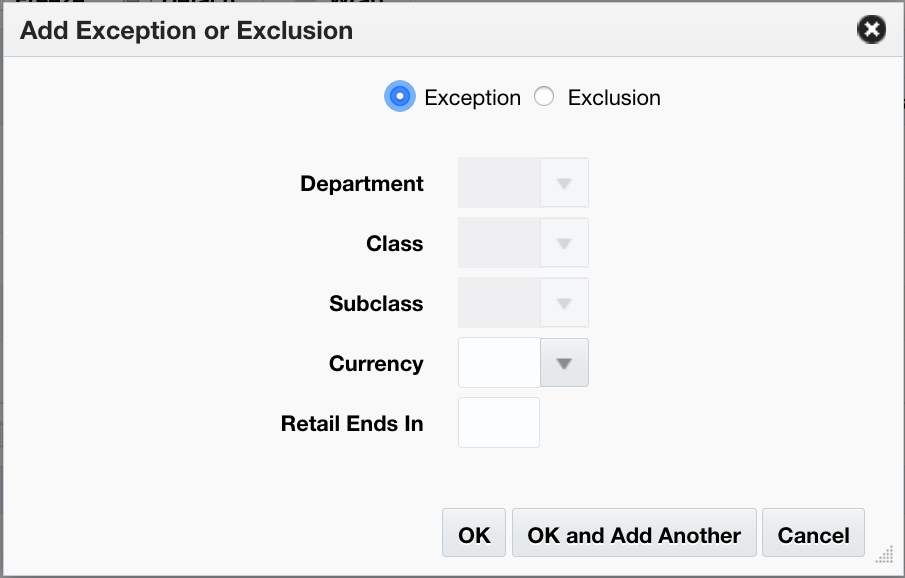
From the Exceptions/Exclusions table, select Add from the Action menu. The Add Exception or Exclusion dialog appears.
|
Note: Fields on the Add Exceptions and Exclusions are enabled or disabled based on the 'Exception Level selected on the Rounding Rule. For instance, when Merchandise Hierarchy is specified as the exception level, the Currency field is disabled. When Currency is specified as the exception level, the Department, Class, and Subclass fields are disabled. |
Enter the Exceptions/Exclusions details for the following fields:
Exclusion/Exception – The radio button for Exceptions and Exclusions defaults to Exceptions. When Exclusion is selected, the Retail Ends In field is cleared and disabled.
Department – The single department to use as an exception or exclusion to the rounding rule.
Class – The single class to use as an exception or exclusion to the rounding rule.
Subclass – The single subclass to use as an exception or exclusion to the rounding rule.
Currency – The currency to use as an exception or exclusion to the rounding rule.
Retail Ends In – Used for adjusting the decimal value. This field supports 1 to 4 positions. The Ends In value assumes to start in the right most decimal position. For example, if the Retail Ends In is 9 and the currency uses two decimal positions, the value is treated as x9.
|
Note: This field is enabled for exceptions but disabled for exclusions. |
Click OK to add the exception or exclusion. You are returned to the Rounding Rule tab.
Click OK and Add Another to add the current exception or exclusion and create another.
The Pricing Cloud Service module uses a number of system options to configure the functionality, which allows you to tailor the functionality for your business, including conflict checking options, defaulting commonly used values, and data retention.
All of the following system options can be viewed and edited through the Pricing Cloud Service screens.
| System Options | Functional Area | Description |
|---|---|---|
| Single UOM for All Items | Price Changes
Clearance Promotion |
When a value is designated for this system option, this value is used as the unit of measure (UOM) for all price events created and Pricing Cloud Service does not perform UOM validation when you create events. If a value is not selected, when you create fixed-price price changes or clearance events, either a UOM must be designated, or Pricing Cloud Service will attempt to derive one and will raise errors if it is not consistent amongst items in the event. |
| Price Event Processing Days | Price Changes
Clearance Promotion |
Number of days required between the current date and the effective date for price changes and clearance. It ensures that price events are created with enough advance timing that stores and other impacted areas can react accordingly.
Security will permit certain users to create price events inside this window, including creating same day price events, sometimes called "emergency" changes. This must be set to a value greater than zero. Note: this system option does not determine the communication processes to the selling systems. Default value: 1 |
| Offer End Date Required | Promotion | If this indicator is checked, the End Date on the Offer becomes a required field. The user must enter it before navigating to the next screen.
Default value: Unchecked. |
| Reset Clearance with Price Change | Price Change
Clearance |
If this indicator is set, it extends the functionality of a price change event. This enables the price change event to end a clearance cycle by acting as an implied clearance reset when the price change is executed. |
| Regular Retail Greater than Clearance Retail | Conflict Checking | If the indicator is checked, conflict checking will raise a conflict for the event when the retail of the clearance is greater than the regular retail for the item location. If the indicator is unchecked, conflict checking will skip this rule. Default value: checked |
| Clearance Retail Less than Previous Markdown | Conflict Checking | If the indicator is checked, conflict checking will raise a conflict for the clearance event when the retail of the clearance is greater than the previous markdown for the item/location. If the indicator is unchecked, conflict checking will skip this rule.
Default value: checked |
| Run for Submit | Conflict Checking | This option determines whether or not conflict checking will be performed when submitting a price event for both price changes and clearance. If this system option is checked, conflict checking process will be performed when you submit a price event. Otherwise, conflict checking will be skipped and not performed until approval.
Default value: No (unchecked) |
| Zone/Parent Ranging | Zones | If this system option is checked, when you create a price change/clearance at a level higher than transaction item/location, there must be at least one ranged item/location combination represented. If there is not at least one, then the system will not allow you to create the event.
If this system option is not checked, then ranging checks will not be performed on events created at a level higher than transaction item / location. Default value: Yes (checked) |
| Recognize Warehouses as Locations | Zones | This system option controls whether warehouses will exist in zone groups/zones and if price events can be created against warehouses. When the system option is checked, warehouses can be assigned to price zones and can be used in price events. When the system option is unchecked, warehouses cannot be added to zones or events.
Default value: No (unchecked) |
| Price Change/Clearance Rejects | Data Retention | This field defines the number of days after the effective date of a rejected price change or clearance the event should be purged from the system.
Valid values: 1- 999 Default values: 30 |
| Clearance Groups for Download or Search Results | Search Results | This option limits the data that is displayed in the Clearance Group Search results to a manageable number to review. You can enter additional criteria to narrow down the list if the groups they are searching for is not returned in the initial search.
This option is also used to limit the number of Clearance Groups to be downloaded. Valid values: 1-999 Default value: 100 |
| Price Change Groups for Download or Search Results | Search Results | This option limits the data that is displayed in the Price Change Group Search results to a manageable number to review. You can enter additional criteria to narrow down the list if the groups they are searching for is not returned in the initial search.
This option is also used to limit the number of Price Change Groups to be downloaded. Valid values: 1-999 Default value: 100 |
The following system defaults can be viewed and edited through the user interface. Also, there are separate options for price changes and clearance for each of these defaults, so that different values can be used for defaults by price event type.
| System Defaults | Functional Area | Description |
|---|---|---|
| Diff Type | Price Change
Clearance Promotion |
This defines a default value for the desired default diff type in price change and clearance events. Examples of diff types are color, size, flavor, and so on. Valid values for diff type are defined as part of Merchandising Foundation Data. |
| Item Level | Price Change
Clearance Promotion |
This defines the default item level that will be used when you create a price change or clearance. Valid values are Parent, Parent/Diff, or Transaction Item. If a value is not defined for this option, then Transaction Items will be used. |
| Change Type | Price Change
Clearance Promotion |
This defines a value for the change type that will be displayed when you are creating a price change or clearance.
Valid values (price change): Change by Percent, Change by Amount, or Fixed Price Valid values (clearance, promotion): Percentage Off, Amount Off, or Fixed Price Note: For promotion, this field is called Discount Type. Default value: Change by Amount |
| Reason Code | Price Change
Clearance |
This defines a value for the default reason code in price change and clearance events. Valid values are dependent on the values setup in the Pricing Cloud Service system. |
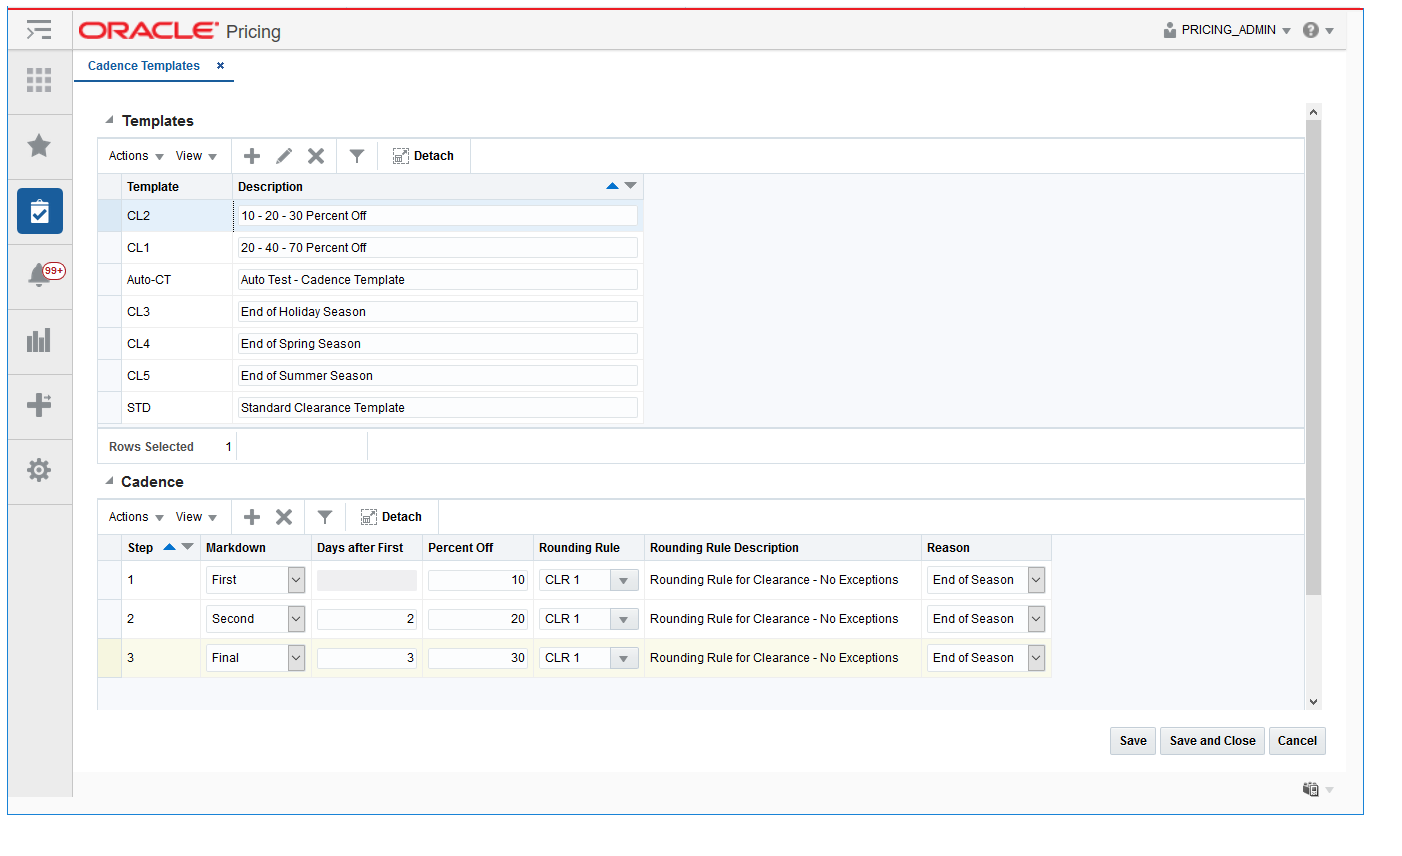
Clearance Cadence Templates allow you to create predefined templates which tie multiple markdowns together so they can be applied to and item/location quickly in a single action. When using the template, the user will pick an initial effective date for the first markdown. Subsequent markdowns will have an effective date based on the days from initial markdown. Other attributes on the markdowns generated from the template will come from the change values on the template.
Perform the following procedure to add a Clearance Cadence Template:
From the Tasks menu, select Clearance Cadence Templates under Foundation Data. The Cadence Templates tab appears.
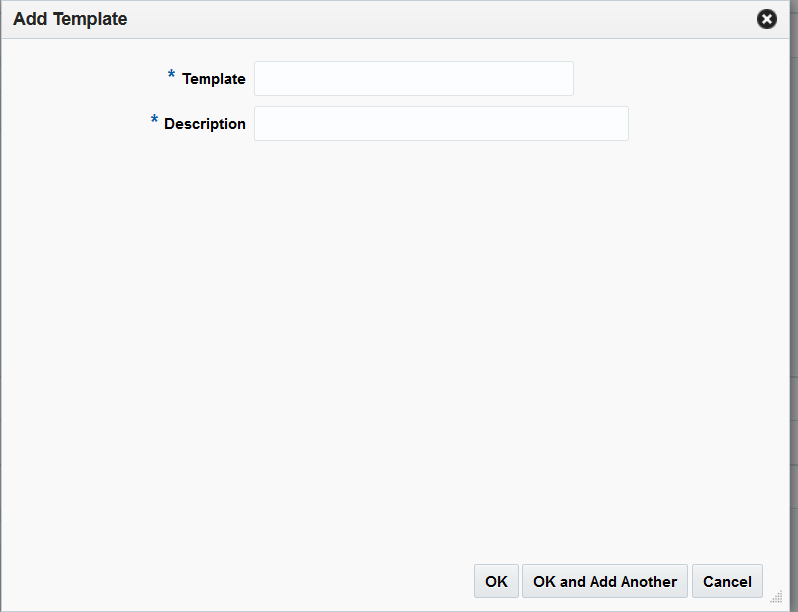
Select Add from the Action menu. The Add Template dialog appears.
Enter the template details for the following fields:
Template – This field is used for providing the template ID.
Description – The description of the cadence template.
|
Note: Additional fields may be displayed based on system option settings. |
Click OK to add the new template. You are returned to the Cadence Templates tab.
Click OK and Add Another to add the current template to the table and add another without leaving the Add Template dialog.
From the Tasks menu, select Clearance Cadence Templates under Foundation Data. The Cadence Templates tab appears.
From the Template table, highlight the template you want to edit and select Edit from the Actions menu. The Edit Template dialog appears.
From the Edit Template dialog, make any desired changes to the template.
When all edits are complete, click OK. You are returned to the Cadence Templates tab.
A price change is a permanent change to the retail price of an item. When a price change is created, the following occurs:
The item receiving the price change, by specifying items by parent, parent/diff, or transaction item.
Where the price change is occurring, by selecting zones or locations.
How the price is changing, by selecting a percent or amount change, or a new fixed price.
Optionally (based on the 'Allow Multi Unit Pricing') multi unit price changes are supported with or without changes to the single unit price.
When the price change will take effect, by designating an effective date
Why the price change is occurring, by optionally specifying a reason code
You can use rounding rules to move the new price to established price points, or to round the price. When a price change is added, it must go through a series of checks before it can be applied to an item/location. Depending on your user role, you may not be able to move the retail price to the next status. A change to submitted or approved status, or from approved back to worksheet, results in a conflict check.
The 'Allow Multi Unit Pricing' system option allows a retailer to maintain multi unit pricing for items through the price change process. When this system option is set, multi unit price changes can be created through the Price Change Wizard dialog, and can be edited through the Price Change Edit popup called from the Price Change Group screen.
Price change groups are used to group together multiple price change events for easier management. Mass maintenance including mass approval of the price change is supported within the price change group.
When price change events are approved, they are made available in advance of their effective date to multiple downstream systems for ticketing, and to prepare selling locations for upcoming changes.
Normally, only one price change for an item/location on a given day is allowed to be approved; however there can be more than one if an ’emergency' price change is entered and executed by an authorized emergency user. Once the emergency price is received by the selling system (for example, POS or ecommerce) it will overlay the other retail price that was received previously.
|
Note: When the Reset Clearance with Price Change system option is set, executing a price change will imply that the item is also no longer on clearance when the price change goes into effect. |
When creating price changes for a group of items, it is recommended to enter the item data at the highest level possible. For fashion items, this is generally parent item (style) or parent/diff (style/color), whereas for grocery and hardlines this is generally at the transaction item level (SKU). This is also true for the selection of locations; it is recommended creating price events at zone level, rather than by store or warehouse. This provides the following advantages:
Managing price events at the higher levels will increase the usability of the application by having fewer rows for you to manage. It will also help ensure pricing consistency for similar items and locations, in line with your company pricing strategy.
The Future Retail tables will have the ability to store data at the highest level possible which, in turn, will ensure that Pricing Cloud Service will run as efficiently as possible, including response time for processing and screen flow.
There is a system option called Price Event Processing Days that is set to designate the number of days required between the current date and the effective date of a price event. This rule ensures that price changes are created and approved with enough advance timing that stores and other impacted areas can react accordingly.
However, for situations where price events were missed for one or more items or locations, emergency price events can be created. This allows you to create events that go into effect less than the standard number of processing days, which can even include the current date. A separate security privilege provides the ability to limit the users that can create these emergency events, while preventing others who have the ability to create price change events from creating emergency events. For example, if the setting for price event processing is 3 days, you will be prevented from creating or approving an event that occurs within 3 days, unless you have emergency security privileges.
When an emergency price event is created and approved the information is passed to downstream systems the next time the batch extracts are run. If the price change is to go into effect on the current date, then the item/location price in Merchandising Foundation Cloud Service is done on approval, along with any markdowns or markups in the stock ledger.
Whenever a price change is submitted or approved, it will be subject to the conflict checking process. This ensures that invalid prices, or prices out of alignment with your pricing strategy, are not sent down to the point of sale. Conflicts that are checked can be configured using some of the Pricing Cloud Service system options, which are covered in detail below. It also relies on a calculated "future retail" to help determine when a conflict has occurred.
When price changes events are approved or unapproved, they can negatively impact the retail value of an item/location when it goes into effect, which can cause conflicts. As such, the Pricing Cloud Service module uses these events to calculate a future retail price for the impacted items and locations on the events. This allows it to have a view to the regular price on any given day and helps facilitate the conflict checking process.
A roll-up batch ensures the system holds future retail data at the highest level possible. This batch looks at lower-level timelines and attempts to roll up to a higher level where timelines match exactly between lower levels and higher levels.
When conflicts occur, the Conflicts window displays the price event at the level of the timeline where the conflict occurred, which could be higher than transaction item and location level.
New price changes can be added to a new price change group or an existing price change group. Creating a new price change group can be done by selecting the Create Price Change Group task from the Task List, or selecting the 'Create' action from the Price Change Group Search screen. Either of these steps create a new Price Change Group into which price changes can be added by following the steps below (starting with step 3). Adding a price change is performed using the Price Change Wizard. There are four potential stops within the wizard:
Items Page
Locations Page
Price Change Page
Summary Page
To add price changes to an existing Price Change group, perform a search for the price change group that you want to edit. See Search for a Price Change Group.
From the search results pane of the Price Change Group Search tab, highlight the price change group to which you want to add a price change and select Edit from the Actions menu. The Price Change Group tab appears.
From the Item table, select Add from the Actions menu. The Add Price Change Wizard launches. Continue with the Add Items.
The initial page in the Price Change Wizard allows you to select the items that you want to add to the price change.
From the Add Price Change Items page, enter the items to add to the new price change using the following criteria:
Table 15-4 Price Change Items Page Fields
| Field | Description |
|---|---|
|
Add Items by |
The Add Items by field allows you to select a category by which you can narrow the list of things to add to the price change. Options are:
|
|
Item |
The Item field is active if you select Item in the Add Items by field. Click the magnifying glass to search for an item to add to the price change. |
|
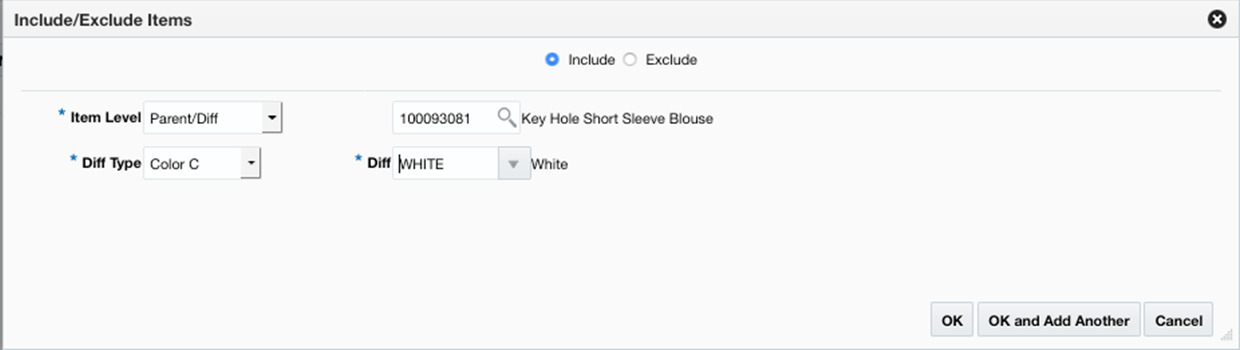
Parent/Diff |
When Parent/Diff is selected for 'Add Items by' the display of the screen changes, showing an item field and diff type field as the top row, with a Diffs table directly below. Entering an Item and Diff type will populate the diff table where diffs can then be selected. Combinations of the entered parent item and the selected diffs are added to the Selected Items table when the apply button is selected. |
|
Diff Type |
The Diff Type field is active if you select Parent/Diff in the Add Items by field. |
|
Item List |
The Item List field is active if you select Item List in the Add Items by field. Click the dropdown to select a defined list of items to add to the price change. |
|
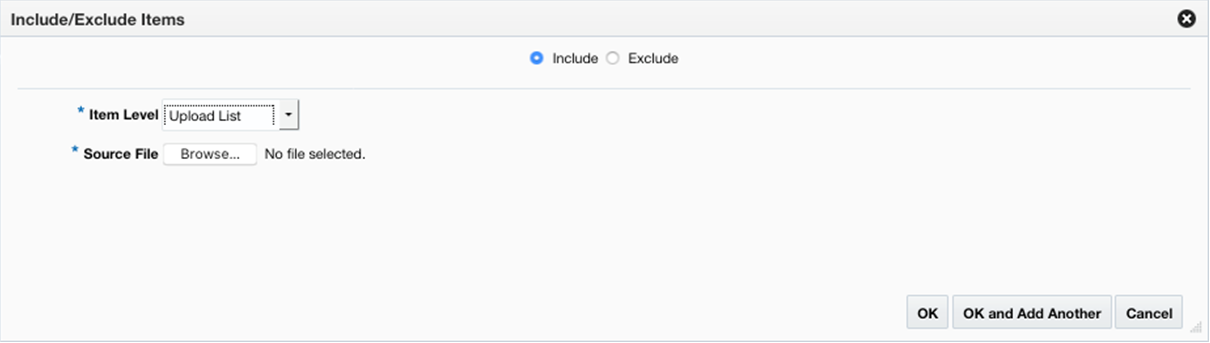
Source File |
Source File is active if you select Upload List in the Add Items by field. Click Browse to select the file to upload. |
Once you have entered your criteria, click Apply to move entered or selected data for the item selection option to the Selected Items table. In the case of an Item List or Upload List, the items in the list are populated into the Selected Items table. Once all your items are added to the price change, click Next. The Add Price Change Locations page appears. Continue Add Locations.
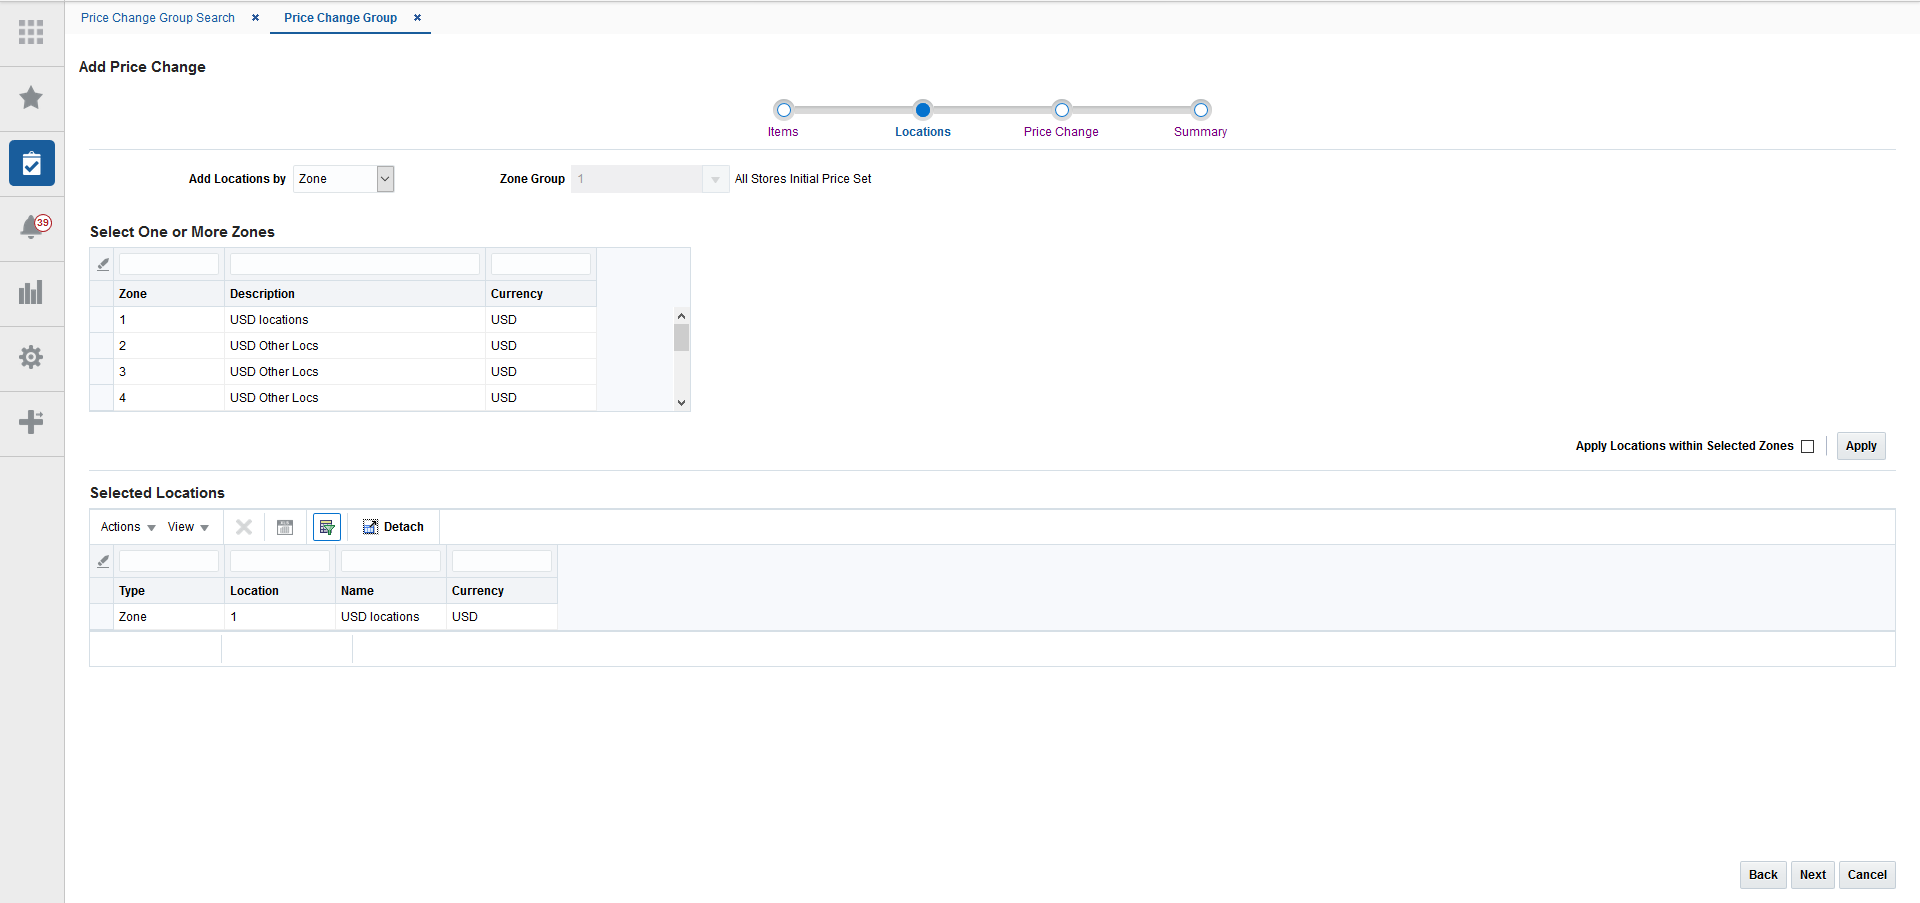
The Locations page of the Price Change Wizard allows you to define the locations associated with the price change.
From the Add Price Change Location page, select the location type you want to use for adding locations using the following criteria:
Table 15-5 Locations Page Fields
| Field | Description |
|---|---|
|
Add Locations by |
The Add Locations by field allows you to select a category by which you can narrow the list of locations to add to the price change. Options are:
Note: The Warehouse option is only displayed if the Recognize Warehouses as Locations option is set to Yes. |
|
Zone Group |
The Zone Group field is active if you select Zone in the Add Locations by field. |
|
Zone Table |
The Zone Table is active if you select Zone in the Add Locations by field. When a zone group is entered, the Zone Table will be populated with the zones in the zone group. |
|
Apply Locations within Selected Zones |
The Apply Locations within Selected Zones check box is active if you select Zone in the Add Locations by field. This checkbox allows exploding the zone into stores and warehouses for populating the Selected Locations table. If you have access to one location in a zone, you can use the zone to create events. |
|
Location List |
The Location List dropdown list is active if you select Location List in the Add Locations by field. Click the dropdown to select from a defined list of locations to add to the price change. |
|
Store |
The Store dropdown list is active if you select Store in the Add Locations by field. Click the dropdown to select from a defined list of stores to add to the price change. |
|
Warehouse |
The Warehouse dropdown list is active if you select Warehouse in the Add Locations by field. Click the dropdown to select from a defined list of warehouses to add to the price change. |
From the search results pane, select the location(s) to add to the price change and click Apply.
Once all your locations are added to the price change, click Next. The Add Price Change page appears. Continue with Add Price Change Attributes.
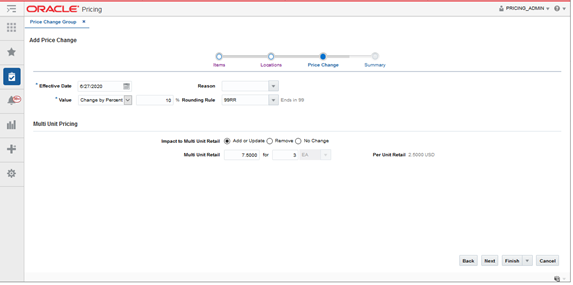
The Price Change page of the Price Change Wizard allows you to define the price change itself.
|
Note: Fields associated with Multi Unit Pricing will be hidden when the 'Allow Multi Unit Pricing' system option is unchecked. |
From the Price Change page, define the information for the price change(s) being added using the following criteria:
Table 15-6 Price Change Page Fields
| Field | Description |
|---|---|
|
Effective Date |
The date on which the price change is set to take effect. Users have the option to key in a date or select one using the calendar widget. |
|
Value |
The Value field provides the options that derive the new retail price. Users have the option to modify the value. Options are:
After selecting the change type, users will enter the actual value for the change. This field is required entry for every change type. The field supports up to four decimal places for Change by Percent value. For Change by Amount and Fixed Price, decimal placement is based on the currency of selected locations. |
|
Reason |
The Reason value defines the reason the price change is being created. Users have the option to update this field or remove the value in this field. |
|
Rounding Rule |
The Rounding Rule field provides the ability to smooth retails for an item or location. Users have the option to update this field or remove the value in this field. |
|
Impact to Multi Unit Retail |
This radio button indicates the type of action to be performed on the Multi Unit Retail for the items selected for this price change. Options include:
|
|
Multi Unit Retail |
The specified retail for the multiple units of the item. |
|
for (number of units) |
Indicates the number of units of the item which can be purchased for the specified multi unit retail. |
|
No label (Multi Unit UOM) |
The unit of measure associated with the multi unit retail. |
|
Per Unit Retail |
A calculation of the retail for a single unit of the multi unit retail (multi unit retail/number of units) |
Once all your price change information is entered, click Next. The Add Price Change Summary page appears. Continue with Review, Submit and Approve.
If you want to skip the Summary Page, you can double click on Finish or select Submit, or Approve options from the Finish drop down menu.
When a price change is added, it must go through a series of checks before it can be applied to an item/location. Depending on your user role, you may not be able to move the retail price change to the next status. A change to submitted or approved status, or from approved back to worksheet, results in a conflict check. A price change may be in any of the following statuses:
Table 15-7 Price Change Status
| Status | Definition |
|---|---|
|
Worksheet |
The price change has been started, but not reviewed or sent out. |
|
Submitted |
The price change has been completed and is pending review. Conflict checking may have occurred (depending on the run for submit system option) for the price change. |
|
Approved |
The price change has been reviewed and accepted. The price change is communicated to the locations for which the price change is effective. |
|
Executed |
The new prices established are effective for the item/location. |
|
Rejected |
The price change has been reviewed and declined. |
|
Processing |
While the price change is being processed through conflict check the status will be listed as Processing. |
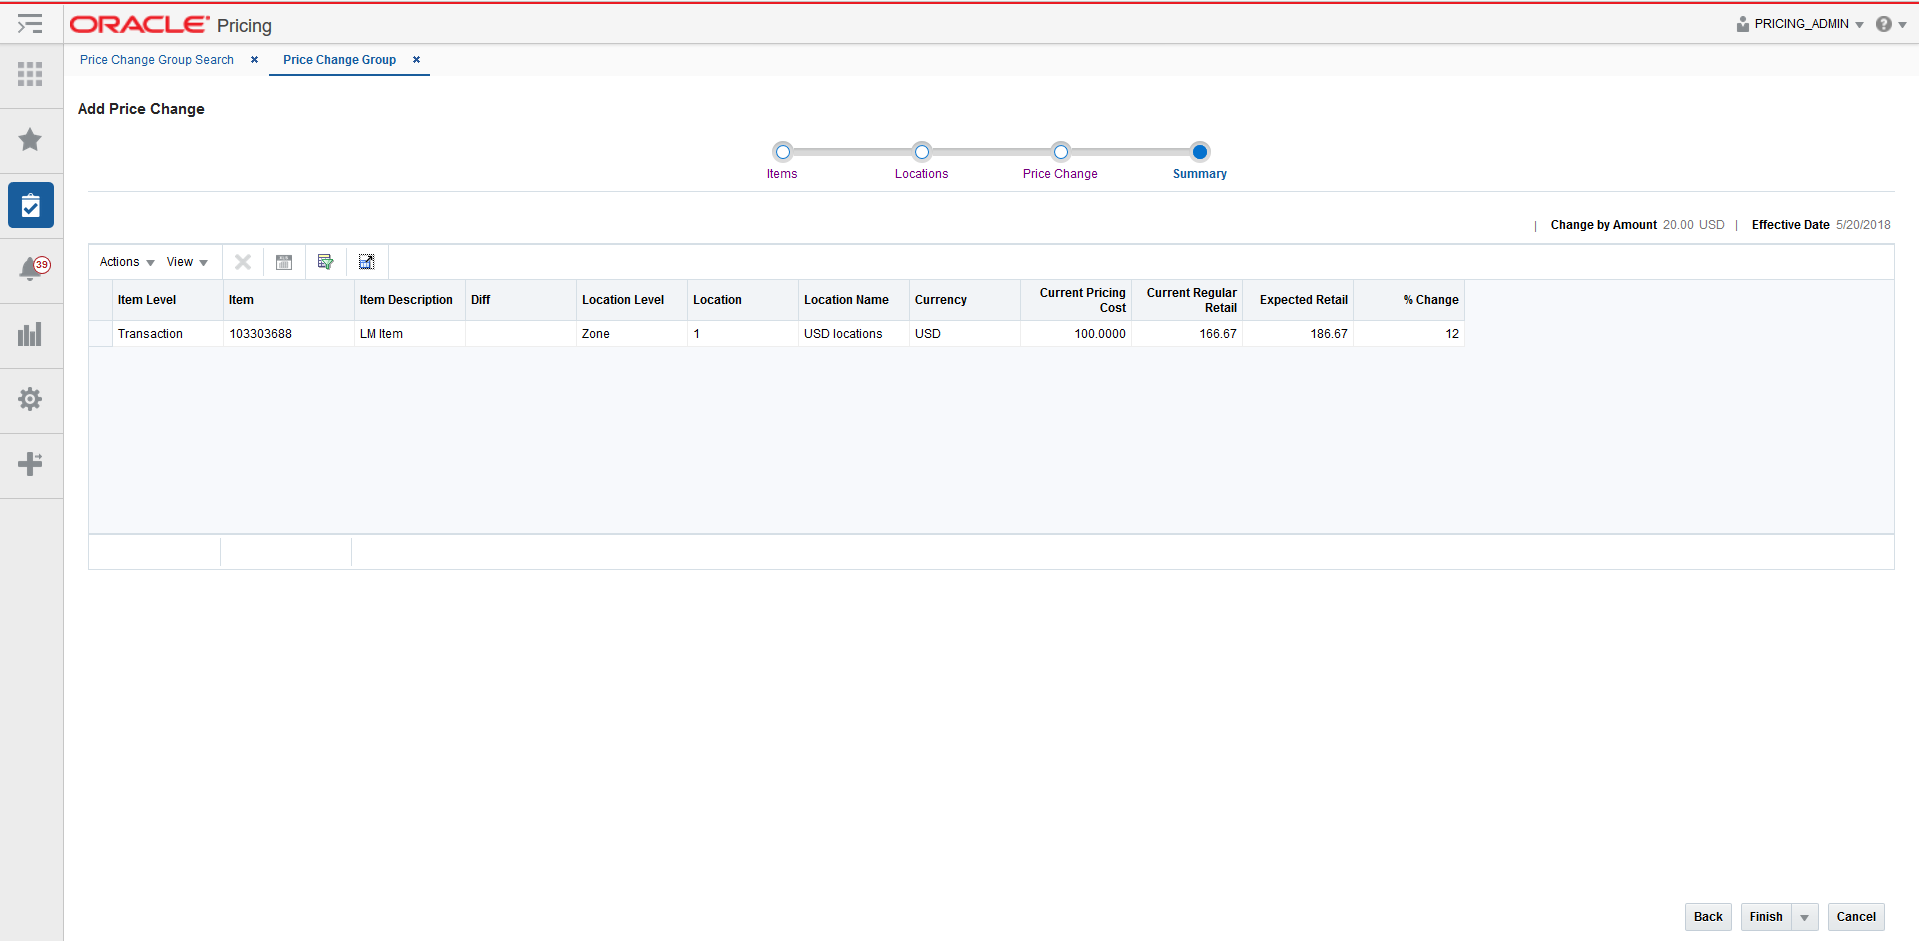
The Summary page displays the details of the price change before it is added to the Price Change Group.
Confirm the price change settings and double click on Finish or select Submit or Approve from the Finish drop down menu. You are returned to the Price Change Group screen. Your new price change is listed in the Item table.
|
Note: The Summary Page allows individual price changes to be removed before they are added to the Price Change Group. |
Users have options to perform status maintenance at Item level for one or many items, at the Item/Location level for one or more Locations tied to an item or they have the option to update for all displayed records using the page level buttons.
Updating Group Level Price Change Status
Perform the following procedure to update the price change status:
Perform a search for the price change group that you want to update. See Search for a Price Change Group.
From the search results pane, select the Price Change Group for which you want to update status. and select Edit from the Actions menu. The Price Change Group tab appears.
From the Price Change Group tab, use the buttons at the bottom of the page to update the price change group status. Options are:
Submit All
Approve All
Worksheet All (Select from the More Actions button menu.)
Reject All (Select from the More Actions button menu.)
After selecting the status change, click Save to save the updated status and remain on the Price Change Group Maintenance tab. Click Save and Close to save the updated status and return to the Price Change Group Search tab.
|
Note: If a price change is selected for a status change and the new status is not valid, the status change is ignored and the price change will not be updated. |
Update Item Level Price Change Status
Perform the following procedure to update the price change status:
Perform a search for the price change group that you want to update. See Search for a Price Change Group.
From the search results pane, select the Price Change Group for which you want to update status. and select Edit from the Actions menu. The Price Change Group tab appears.
From the Price Change tab, from the Items table, highlight the item or items for which you want to update status.
With the item highlighted, select the desired status update from the Actions menu.
After selecting the status change, click Save to save the updated status and remain on the Price Change Group Maintenance tab. Click Save and Close to save the updated status and return to the Price Change Group Search tab.
|
Note: If a price change is selected for a status change and the new status is not valid, the status change is ignored and the price change will not be updated. |
Update Location Level Price Change Status
Perform the following procedure to update the price change status:
Perform a search for the price change group that you want to update. See Search for a Price Change Group.
From the search results pane, select the Price Change Group for which you want to update status. and select Edit from the Actions menu. The Price Change Group tab appears.
From the Price Change tab, from the Locations table, highlight the location or locations for which you want to update status.
With the location highlighted, select the desired status update from the Actions menu.
After selecting the status change, click Save to save the updated status and remain on the Price Change Group Maintenance tab. Click Save and Close to save the updated status and return to the Price Change Group Search tab.
|
Note: If a price change is selected for a status change and the new status is not valid, the status change is ignored and the price change will not be updated. |
Whenever a price change is submitted or approved, it will be subject to the conflict checking process. This ensures that invalid prices, or prices out of alignment with your pricing strategy, are not sent down to the point of sale. Conflicts that are checked can be configured using some of the Pricing Cloud Service system options. It also relies on a calculated "future retail" to help determine when a conflict has occurred.
When a conflict occurs, a notification is sent to the user who attempted to approve the price event. The notification allows the user to navigate to the price change group of the price event with the conflict, and from there they can continue on to the conflict details screen to review the conflict. After identifying the cause of the conflict, the user can make adjustments to either the current price event which they are trying to approve, or to the approved event which conflicted with the current price event and then resubmit the price event for approval.
When price events are approved or unapproved, they can negatively impact the retail value of an item/location when it goes into effect, which can cause conflicts. As such, the Pricing module uses these events to calculate a future retail price for the impacted items and locations on the events. This allows it to have a view to the regular or clearance price on any given day and helps facilitate the conflict checking process.
A roll-up batch ensures the system holds future retail data at the highest level possible. This batch looks at lower-level timelines and attempts to roll up to a higher level where timelines match exactly between lower levels and higher levels.
When conflicts occur, the Conflicts window displays the price event at the level of the timeline where the conflict occurred, which could be higher than transaction item and location level.
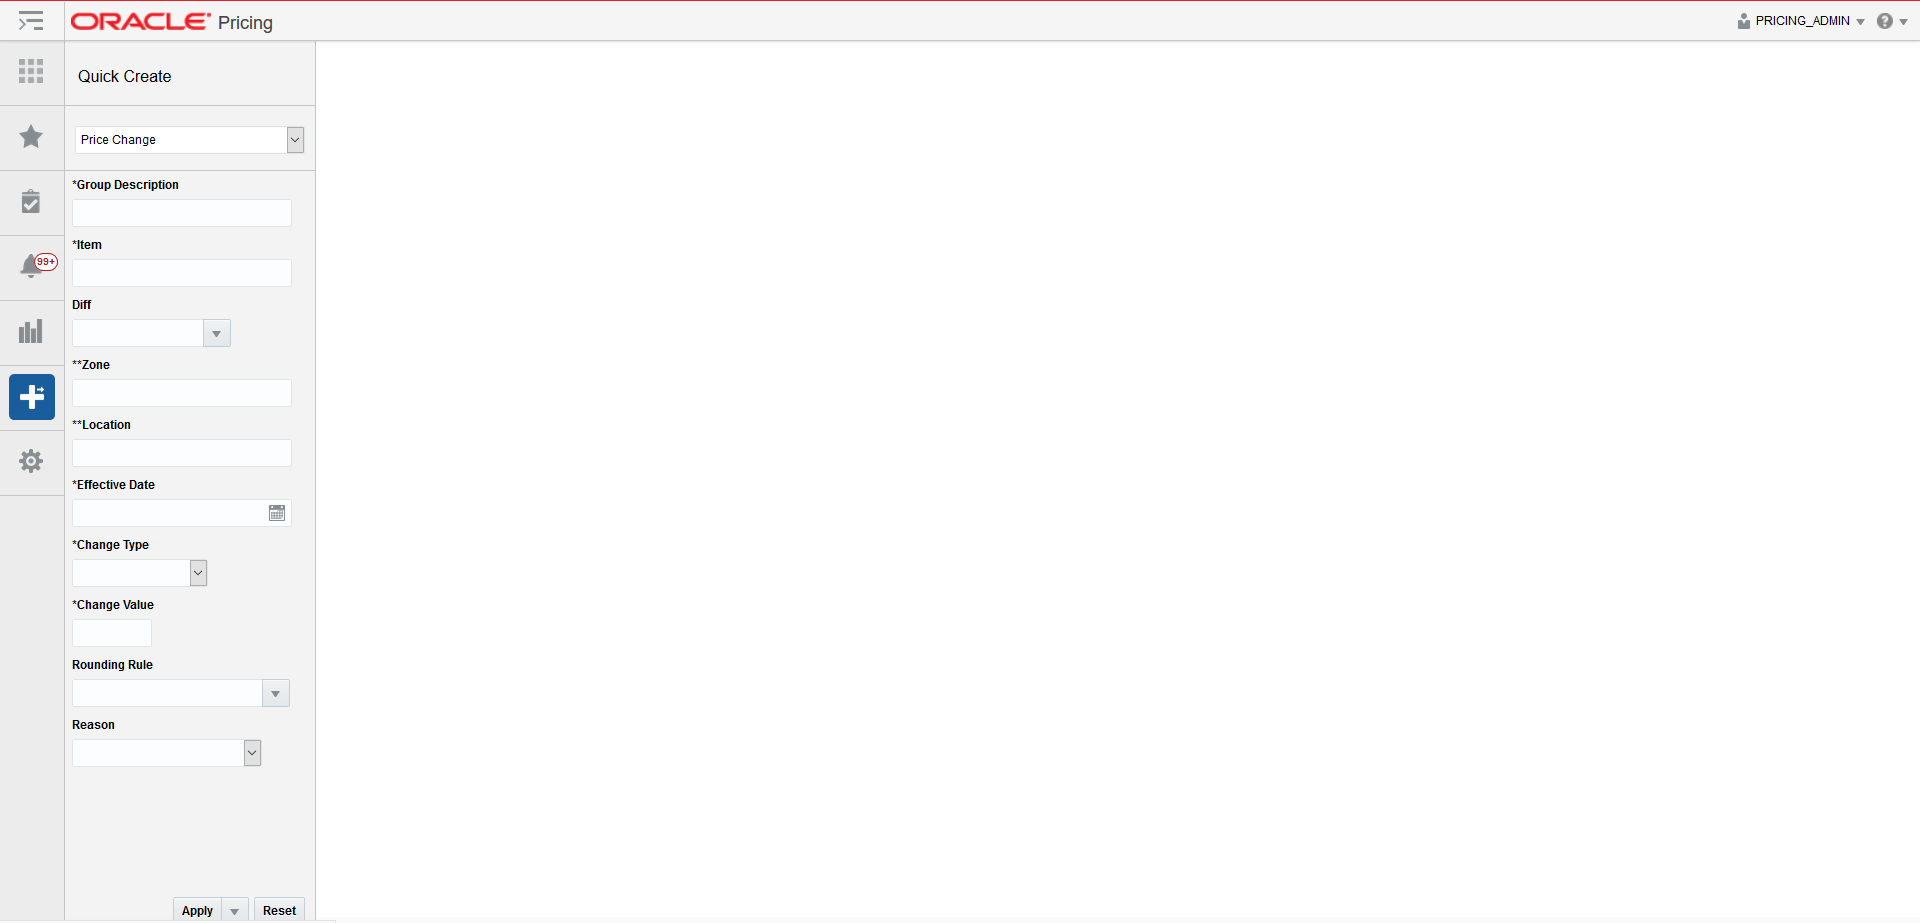
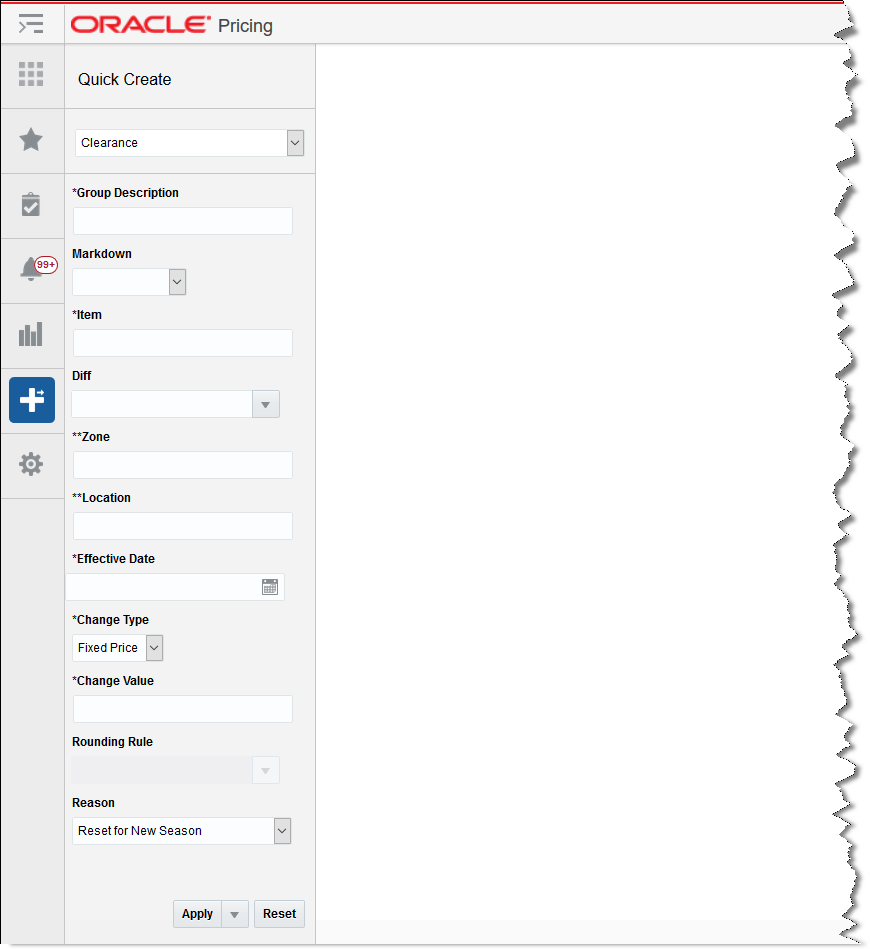
The Price Change Quick Create feature is designed as a key entry path for users to create a regular price change. The Quick Create feature supports grouping multiple price changes for different items and locations into a single Price Change Group. Mass maintenance can then be performed on this group later in the workflow through the Price Change Group Maintenance workflow.
Use the following procedure to quick create a price change:
|
Note: The Quick Create feature is available in the left pane menu and can be opened at any time regardless of what screens are open. |
From the Pricing tab Tasks list, click the Quick Create icon.
The Quick Create pane appears.
From the Quick Create pane, select Price Change from the Quick Create drop down list.
From the Quick Create pane, enter information for the following fields:
|
Note: Fields marked with an asterisk are required. Fields marked with a double asterisk means that one of the fields needs to be populated. |
Table 15-8 Price Change Quick Create Fields
| Field | Description |
|---|---|
|
Group Description |
This field allows for entry of a description that can be used on a new Price Change group. This description may then be used to search for the price change or price change group for maintenance purposes. |
|
Item |
The Item field allows for entry of a parent item or transaction level item. Users may enter a single item or multiple items. If multiple items are entered a semicolon is used to separate values. The field will accept up to 4000 characters. |
|
Diff |
The Diff field allows for entry or selection of a single Diff Value. Users have the option to use the list of values to search on Diff Type to find the Diff value. |
|
Zone |
The Zone field allows for entry of one or more zones within a single zone group If multiple zones are entered a semicolon is used to separate values. Note: Either a Zone(s) or Location(s) must be entered, but not both. |
|
Location |
The Location field allows for entry of a location. The user may enter a single location or multiple locations. If multiple locations are entered a semicolon is used to separate values. The field will accept up to 4000 characters. Note: Either a Zone(s) or Location(s) must be entered, but not both. |
|
Effective Date |
The Effective Date is the date when the price change will go into effect. Users have the option to key in a date or select one using the calendar widget. |
|
Change Type |
The Change Type field provides the options that will derive the new retail price. Options are:
|
|
Change Value |
The Change Value field contains the change by percent, change by amount, or fixed price value depending on the change type selected.
|
|
Rounding Rule |
The Rounding Rule field allows the user to associate a specific rule with a price change record. Users are allowed to enter a single Rounding Rule. A rounding rule helps users create a uniform pricing strategy. |
|
Reason |
The Reason field value defines the reason the price change is being created. |
Once you have entered all information for the newly created price change record, click Apply, Submit, or Approve. The new price change is created.
|
Note: If you select locations (or zones) with multiple currencies, you can only choose to create a price change by percent or to reset the point of sale (POS) price. You cannot create price changes by amount or for a fixed price across multiple currencies. |
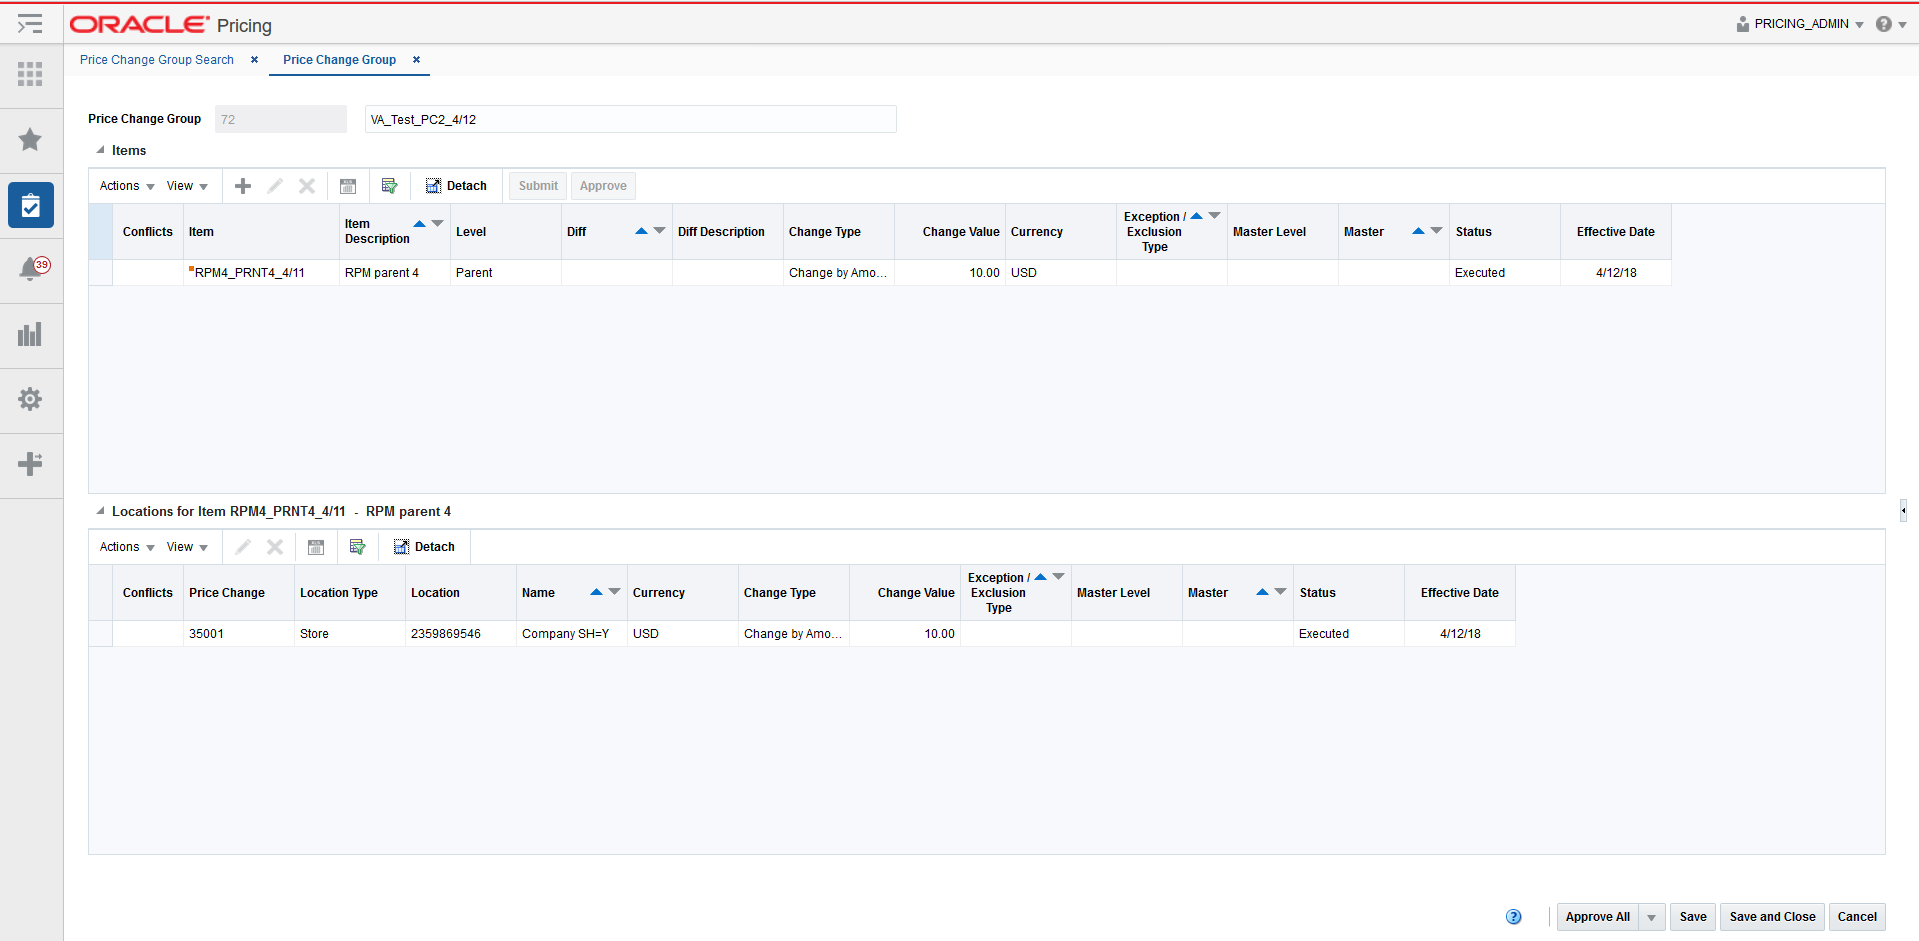
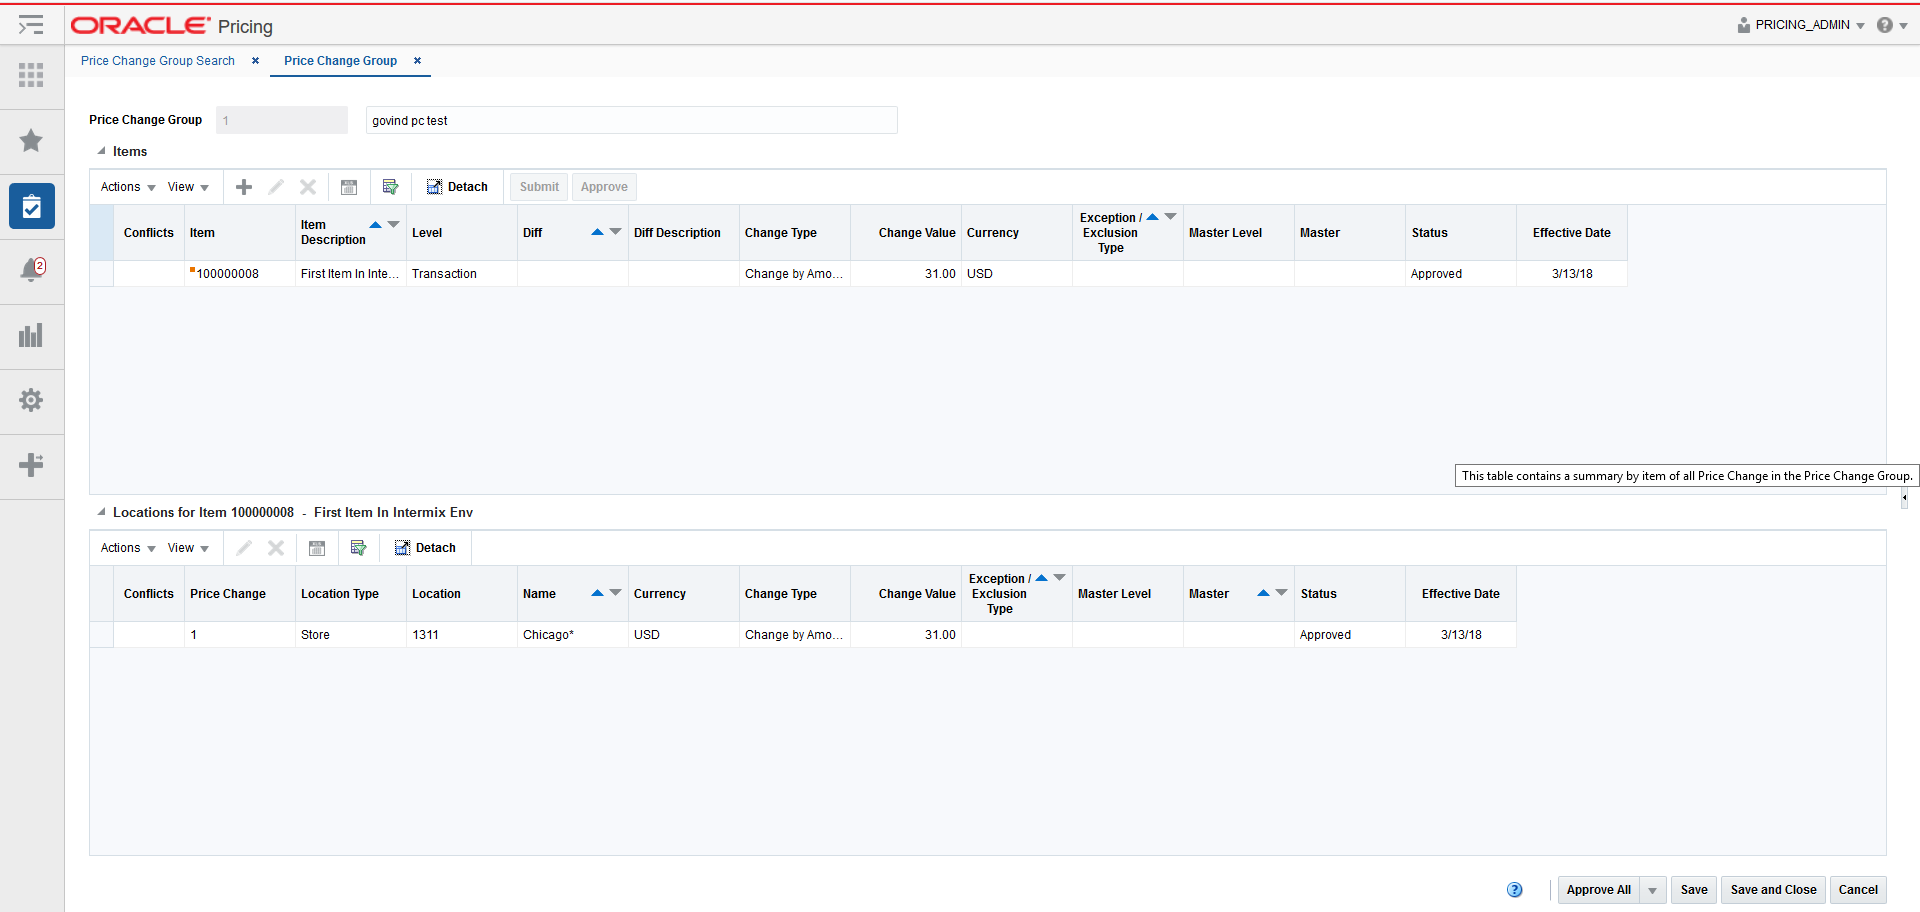
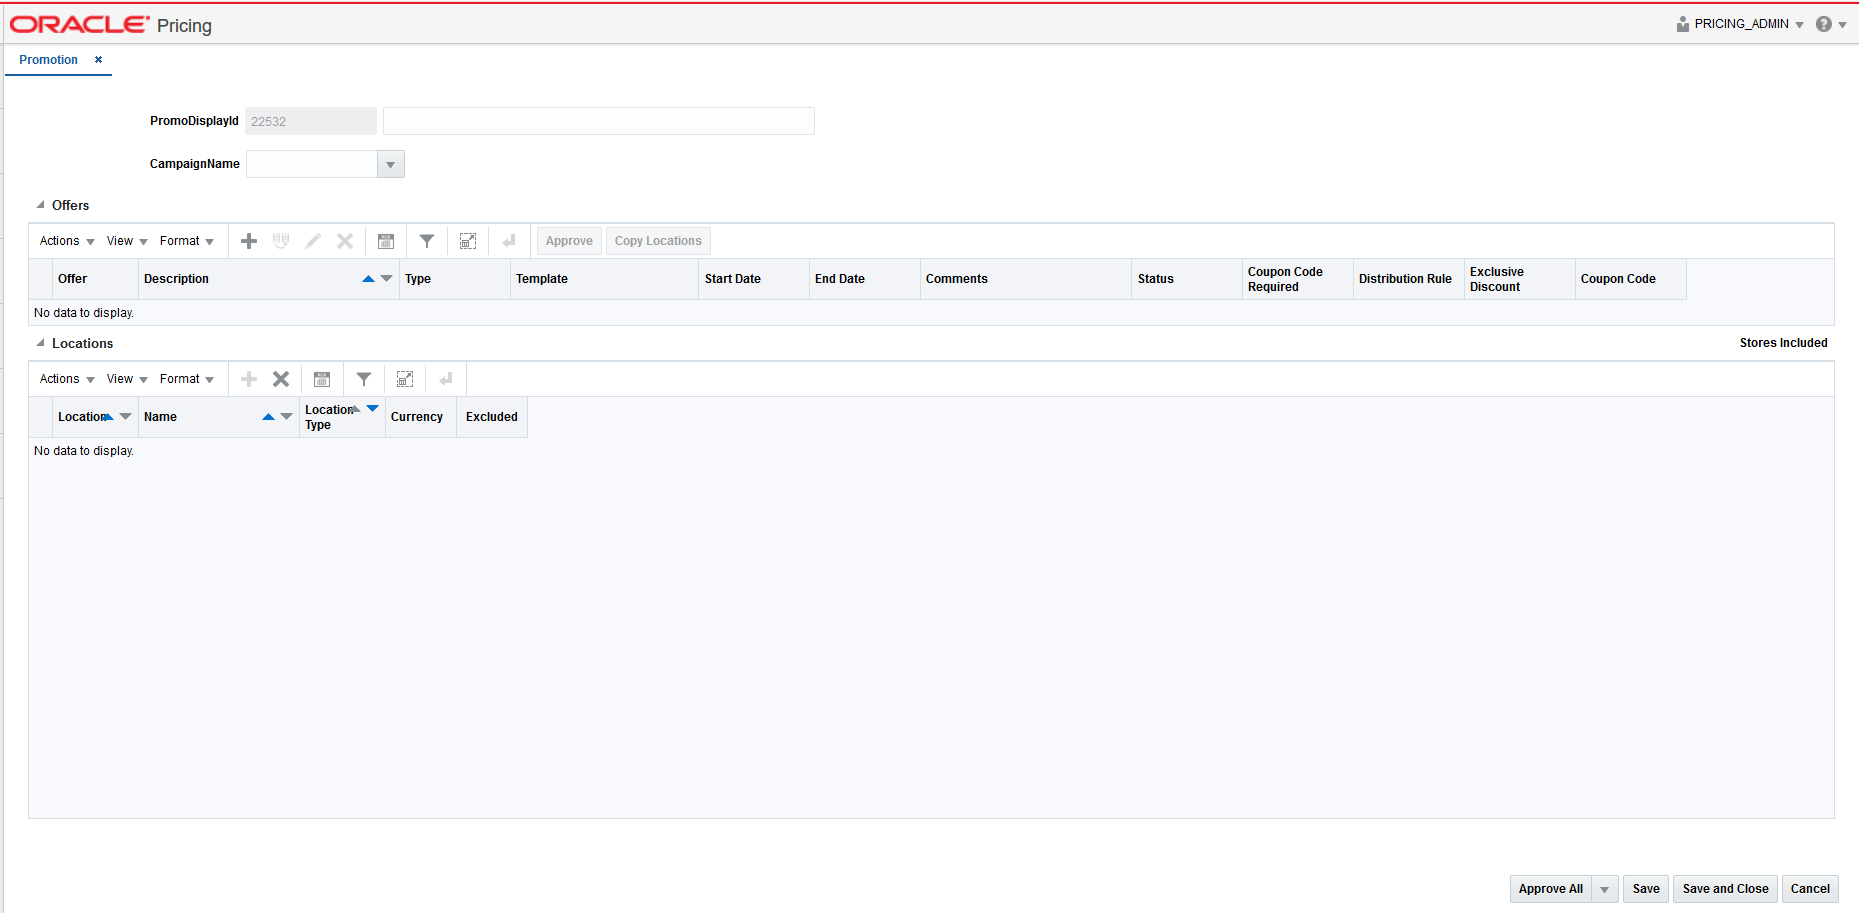
The Price Change Group screen allows you to add or maintain price changes within a price change group. Each price change will contain items needing a change along with the locations or zones where the change should be made.
The Price Change Group tab has three modes; Add, Edit, and View. If you enter this screen in View mode, all maintenance options are disabled and the Save, Save and Close, and Cancel buttons are replaced with Done. If you enter in Edit mode the following options are supported:
Perform the following procedure to search for an existing price change group.
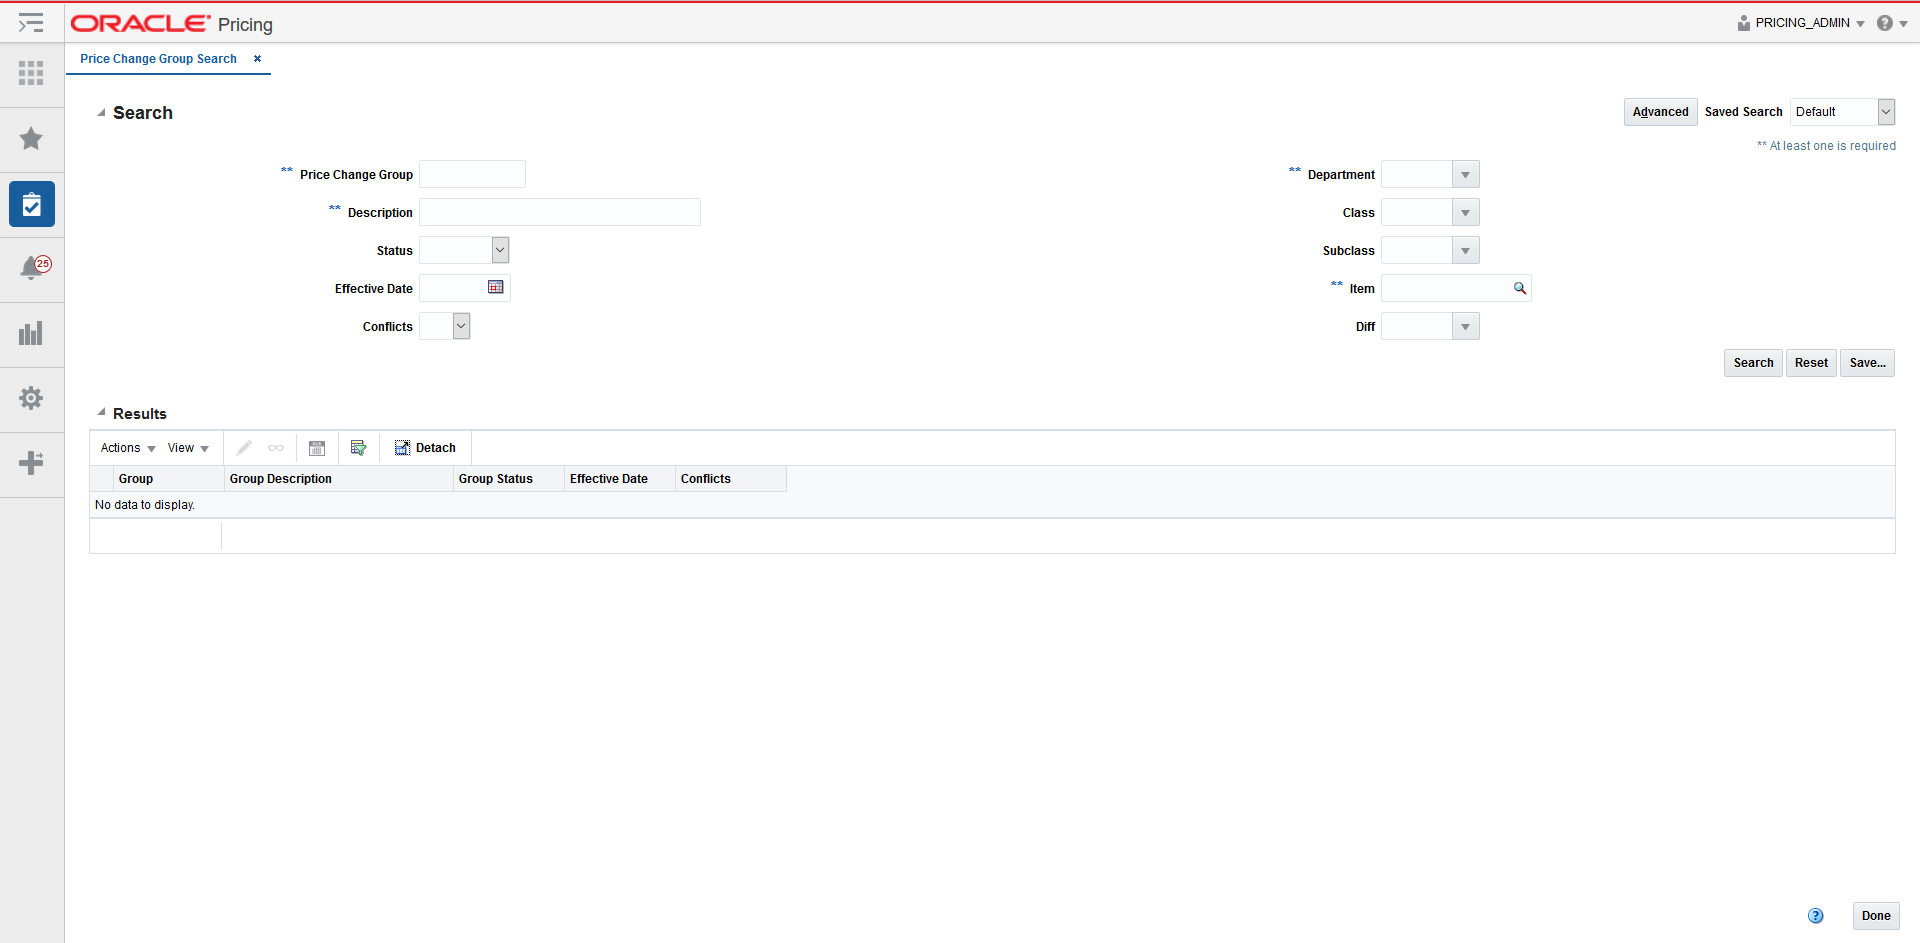
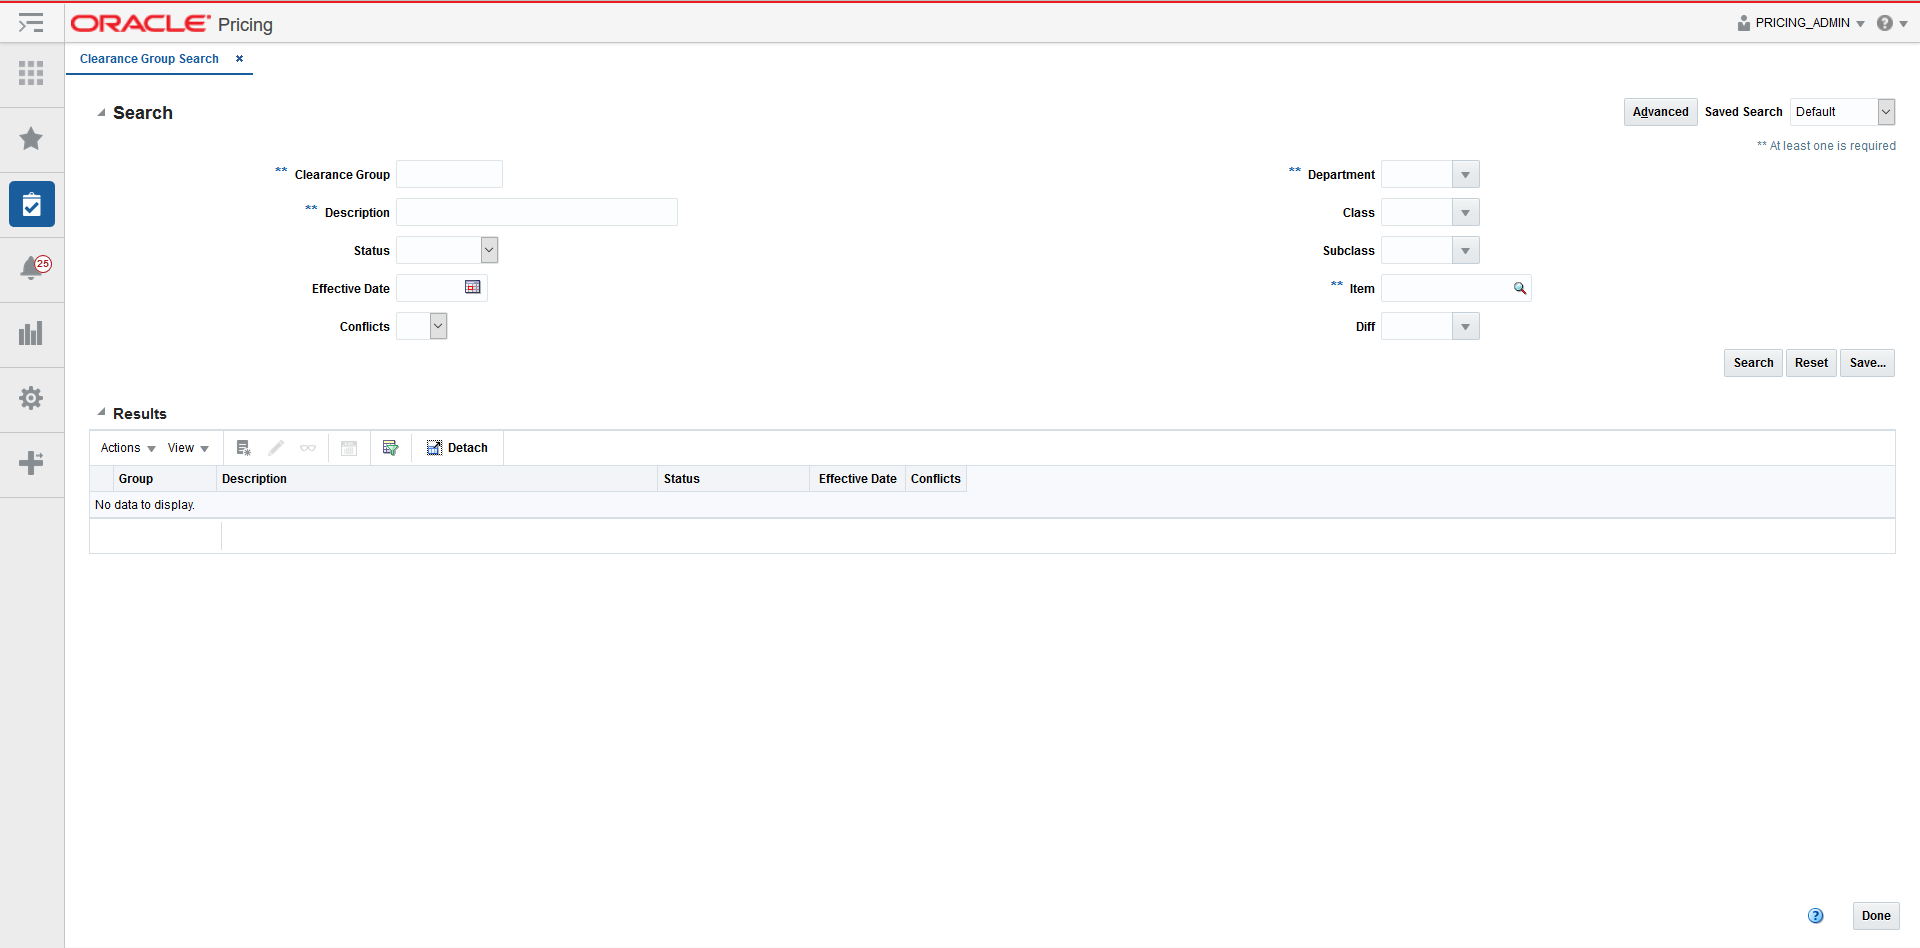
From the Tasks menu, select Manage Price Change Groups under Price Changes. The Price Change Group Search tab appears.
Enter your price group search criteria using the following fields:
|
Note: In order to conduct a price group search, users must enter at least one of the following; Department, Group, Group Description or Item. |
Table 15-9 Price Group Search Fields
| Field | Description |
|---|---|
|
Price Change Group |
The Price Change Group field allows the user to enter a Group ID to be used in search criteria. |
|
Description |
The Description field allows the user to enter a description to be used in search criteria. |
|
Status |
The Status field allows the user to select a Status to be used in search criteria. Values for the drop down include: Worksheet, Submitted, Approved, Rejected, Processing, or Executed. |
|
Effective Date |
The Effective Date field allows the user to enter or select an effective date to be used in search criteria. |
|
Conflicts |
The Conflicts field allows the user to select one of the following values; Yes, No or NULL (Blank) to be used in search criteria. |
|
Department |
The Department field allows the user to enter or select a Department to be used in search criteria. The Department list of values queries all Departments. Note: The Department, Class, and Subclass fields display the translated names if they exist. |
|
Class |
The Class field allows the user to enter or select a Class to be used in search criteria. The Class list of values queries all Classes or all Classes for the entered Department. |
|
Subclass |
The Subclass field allows the user to enter or select a Subclass to be used in search criteria. The Subclass list of values queries all Subclasses or all Subclasses for the entered Class. |
|
Item |
The Item field allows the user to enter or select an Item(s) to be used in search criteria. Users have the option to go directly to the search icon to look up items. |
|
Diff |
The Diff field allows the user to enter or select a Diff value to be used in search criteria. The Diff list of values includes both Diff Type and Diff Value. |
Once your search criteria are entered, click Search. The search results are displayed in the Results pane.
Editing price changes can be performed on price changes in multiple statuses with the following conditions:
If the Effective Date is in the past, no changes are allowed unless the status of the Price Change is Worksheet. If the status is Worksheet, you have the option to update the Effective Date.
If the date that the update is being performed falls within the Effective Date minus the Price Change Processing Days updates are only allowed for users with emergency security privileges.
Perform the following procedure to edit a price change:
Perform a search for the price change group that you want to edit. See Search for a Price Change Group.
From the search results pane of the Price Change Group Search tab, highlight the price change group you want to edit and select Edit from the Actions menu. The Price Change Group tab appears.
From the Price Change Group tab, you can select either items or locations to edit. (Locations shown are associated with the row in the items table which has focus.) Highlight the item(s) or location(s) you want to edit and select Edit from that tables' respective Action menu. The Edit Price Changes dialog appears.
|
Note: If a single location is selected for editing, the Clear Reasons and Clear Rounding Rules check boxes will not appear. |
|
Note: Fields associated with Multi Unit Pricing will be hidden when the 'Allow Multi Unit Pricing' system option is unchecked. |
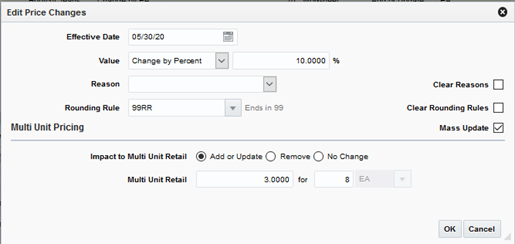
From the Edit Price Changes dialog, use the following fields to edit the price change details:
|
Note: When multiple price changes are selected for editing, fields in the popup may show up as empty. This indicates that the value may vary across the selected price changes. Entering a value and updating will update all the rows, leaving the value empty will leave the values unchanged on the individual price changes. |
Table 15-10 Edit Price Changes Fields
| Field | Description |
|---|---|
|
Effective Date |
The date on which the price change is set to take effect. Users have the option to key in a date or select one using the calendar widget. |
|
Change Type |
The Change Type field provides the options that derive the new retail price. Users have the option to modify the Change Type value. Change Type options:
|
|
Change Value |
Users enter the Change Value based on the Change Type entered, including Change by Percent, Change by Amount, or Fixed Price. This field is required entry for every Change Type other than Reset POS Price. The field supports up to four decimal places for Change by Percent value. For Change by Amount and Fixed Price, decimal placement is based on the currency of the selected locations.
|
|
Per (Selling UOM) |
Users have the option to update this field if the Change Type is currently set to Fixed Price or the Change Type field is updated to Fixed Price. For all other change types this field is hidden. |
|
Reason |
The Reason value defines the reason the price change is being created. Users have the option to update this field or remove the value in this field. |
|
Rounding Rule |
The Rounding Rule field provides the ability to smooth retails for an item or location. Users have the option to update this field or remove the value in this field. |
|
Clear Reasons |
The Clear Reasons checkbox displays next to the Reasons field when multiple items or locations are selected for Edit. If a users chooses to remove a Reason code for the price change the Clear Reasons checkbox can be clicked. The value for Reasons will be removed from price changes selected to edit. |
|
Clear Rounding Rules |
The Clear Rounding Rules checkbox displays when multiple items or locations are selected for Edit. When the Clear Rounding Rules checkbox is clicked the value for the rounding rule is removed. |
|
Mass Update |
When more than one price change is selected for edit, this checkbox allows the user to indicate a desire to mass update the multi unit pricing values on the selected price changes. When only one price change is selected for edit this checkbox will not be displayed |
|
Impact to Multi Unit Retail |
This radio button indicates the type of action to be performed on the Multi Unit Retail for the items selected for this price change. Options include:
|
|
Multi Unit Retail |
The specified retail for the multiple units of the item. |
|
for (number of units) |
Indicates the number of units of the item which can be purchased for the specified multi unit retail. |
|
No label (Multi Unit UOM) |
The unit of measure associated with the multi unit retail. |
|
Per Unit Retail |
A calculation of the retail for a single unit of the multi unit retail (multi unit retail / number of units) |
|
Note: If you select multiple items or locations to edit, some fields on the screen will not show a value if there are multiple values for a particular field. For example, if you select two price changes to edit and the Value field in both price changes is 10.00 then the Value field will be populated with 10.00. However, if the price changes have different values (like 10.00 and 11.00,) then the value field in the dialog is blank. If you enter a value, both price changes are changed to the new value. If you do not enter a value, then the original values stay. |
Once updates are complete on the Edit Price Changes dialog, click OK. The Edit Price Changes dialog closes and you are returned to the Price Change Group tab.
Users will have options to perform Delete maintenance at Item level for one or many items or at the Item/Location level for one or more Locations tied to an item.
Item Level: Users highlight one or more rows on the Items table and click Delete on the Items table
Location Level: Users will highlight a single row on the Items table and then highlight one or many rows on the Locations table and click Delete on the Locations table
Perform a search for the price change group that you want to delete. See Search for a Price Change Group.
From the search results pane, select the Price Change Group from which you want to delete an item or location and select Edit from the Actions menu. The Price Change Group tab appears.
From the Price Change Group tab, you can select either items or locations to delete. Highlight the item or location you want to delete and select Delete from that tables' respective Action menu. The Delete Confirmation dialog appears.
From the Delete Confirmation dialog, click OK to confirm the deletion. You are returned to the Price Change Group tab.
There is one method for uploading Price Changes into the Pricing system:
The Upload Price Changes window provides the ability to upload price changes via spreadsheet. In this process, the user uploads price change events using a spreadsheet (.ods file). The template for the spreadsheet should be configured using the Template Configuration screen in RMS. A standard template is available to the user for uploading price change events. The template that is explained in this document is the standard template that is available in Cloud Pricing.
Perform the following procedure to upload price changes via spreadsheet:
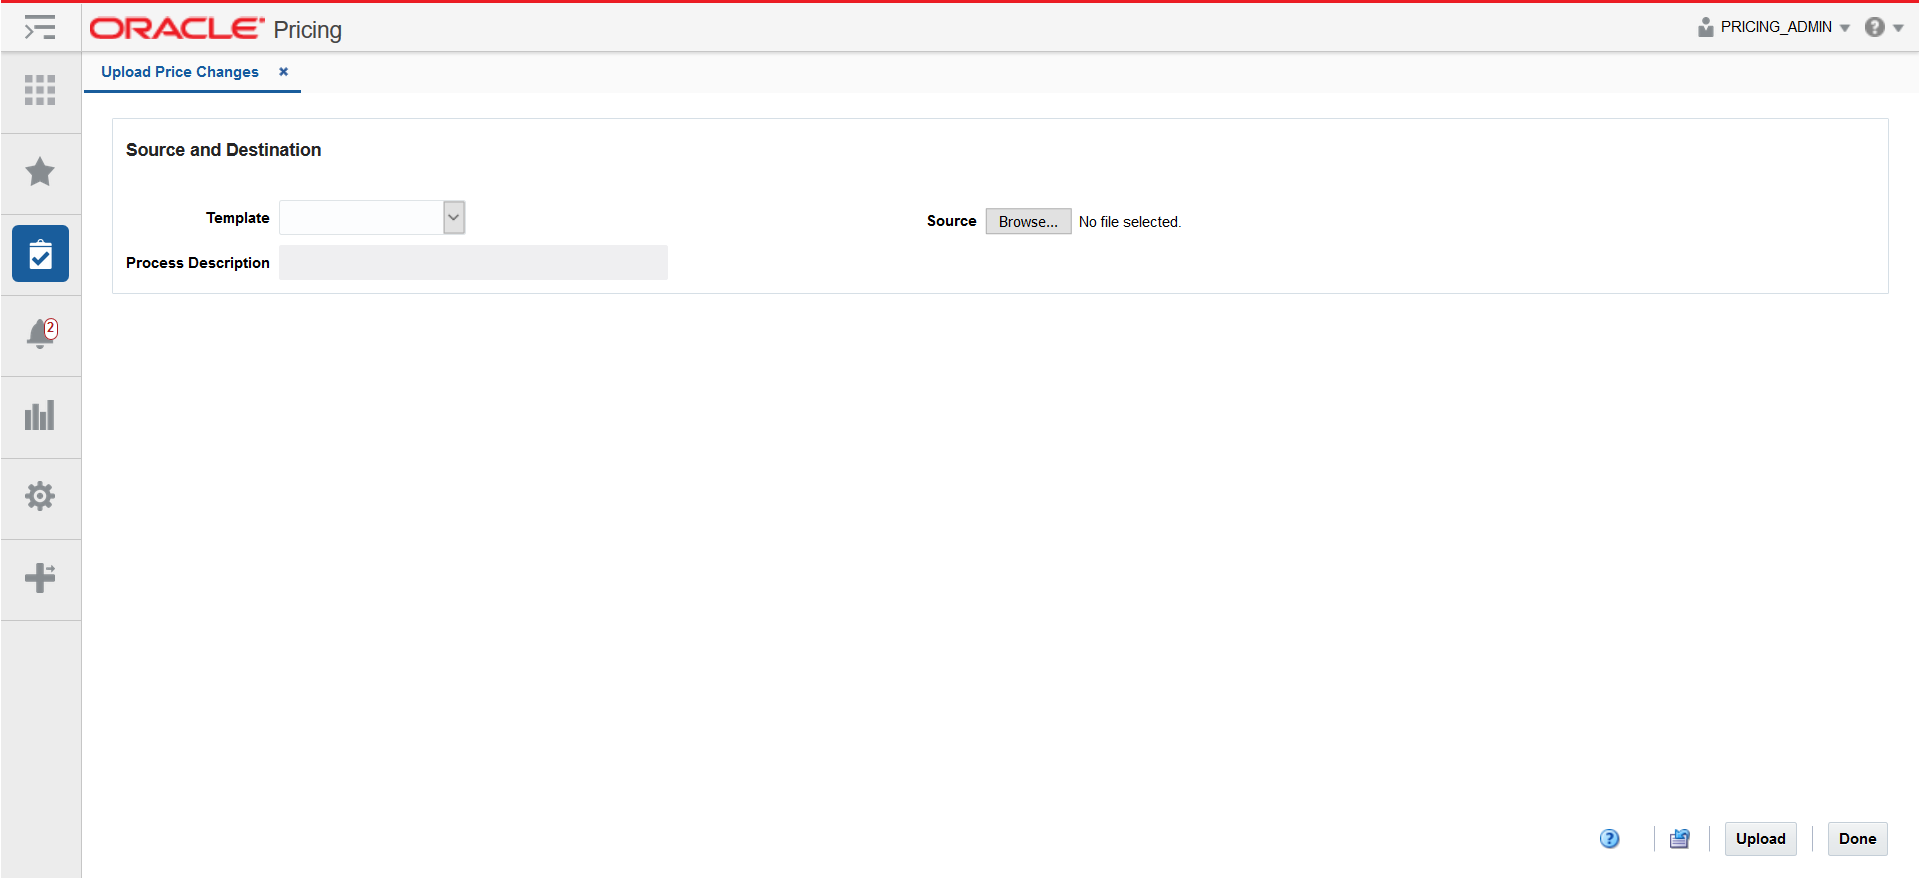
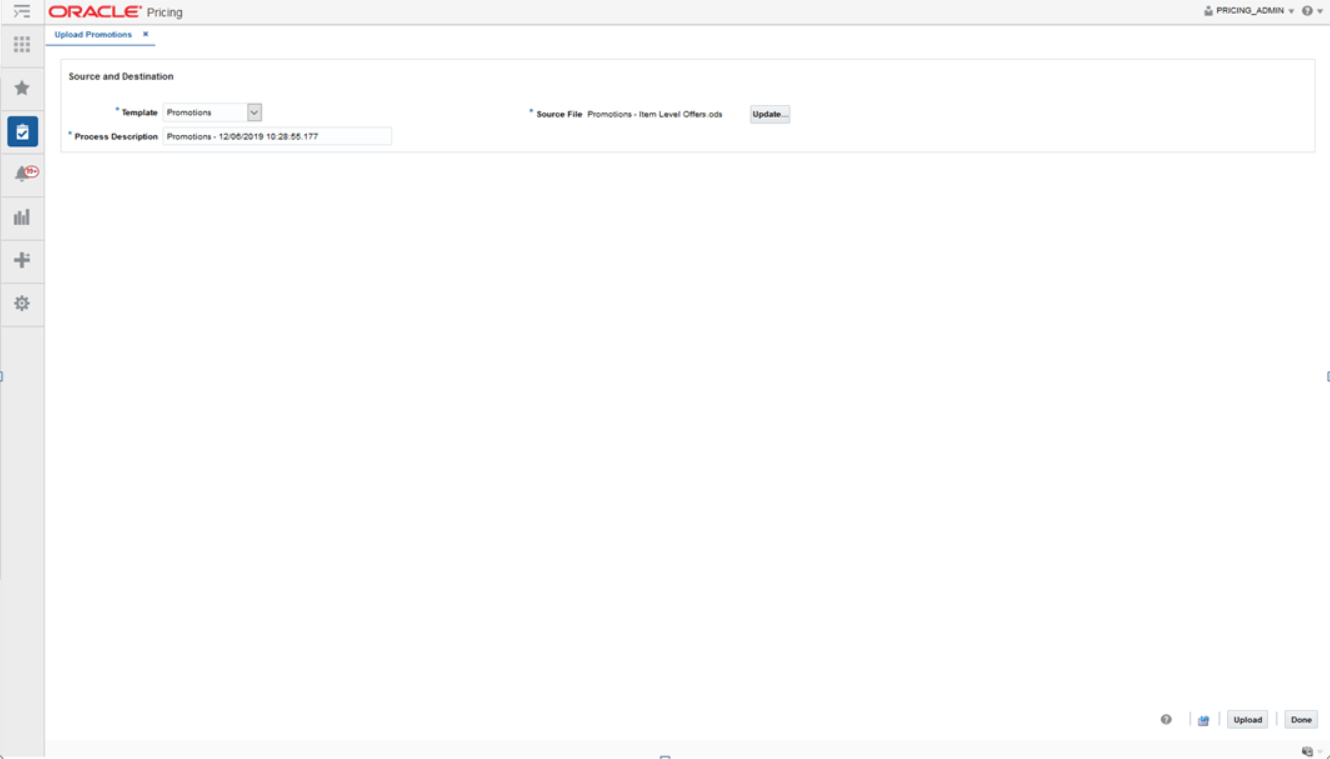
From the Tasks menu, select Upload Price Changes under Price Changes. The Upload Price Changes tab opens.
In the Template field, select Price Changes.
The Process Description field displays the default process name with the date and timestamp. You can edit the name of the upload process in this field.
In the Source field, click the Browse button to locate the spreadsheet file you want to upload and click Open.
Select one of the following options:
Click Upload to upload the file. If errors occur during the upload process, you will get a notification.
Click the Revert icon to clear out the screen inputs.
Click Done to close the Upload Price Changes window.
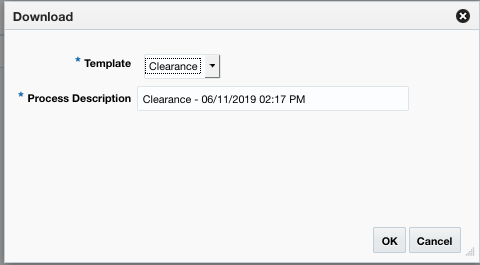
Perform the following procedure to download price changes:
Perform a search for the price change group(s) that you want to update. See Search for a Price Change Group for more information.
From the search results pane, select the Price Change Group(s) you wish to download.
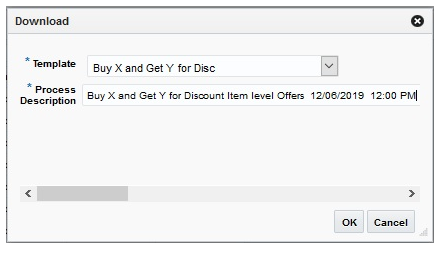
Select the Download Selected option from the Action Menu.
Select the Price Change template. This will automatically populate the Process Description field (which you can then change).
Select OK.
Open the file or save it on your system.
The Data Loading Status window allows you to view the status of the upload and download processes happening in Pricing, so that you can rectify the issues associated with the upload/download process.
The window allows you to drill down to the errors or warnings associated with a selected upload/download request.
You can access the Data Loading Status window from the Task menu, select Foundation Data > Review Status. The Data Loading Status window appears.
The Data Loading Status window contains the following sections.
The table displays the process, process description, file name, template category and type, destination, action date and time, status and the user, who initiated the process.
Table - Actions Menu and Icons
Use the Actions Menu and icons to apply actions to the table. You can perform the actions listed below.
Table 15-11 Data Loading Status Table - Actions Menu/Icons and Description
| Actions Menu/Icons | Description |
|---|---|
|
Delete and Delete icon |
You can delete a process by using the following steps:
|
|
Export to Excel and Export to Excel icon |
You can export the records in the table to a Microsoft Excel spreadsheet by selecting Actions > Export to Excel or by using the Export to Excel icon |
|
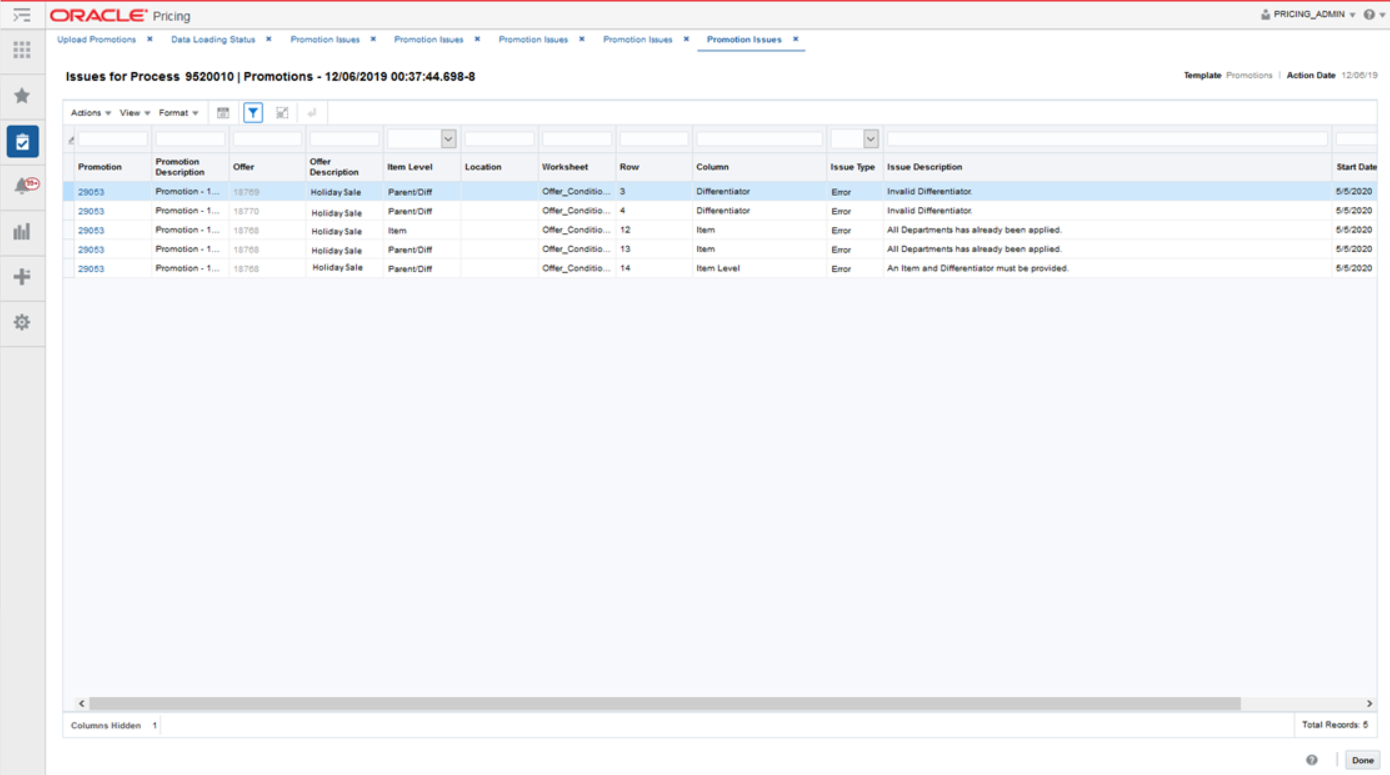
View Issues and View Issues button |
To view the warnings and errors associated with a selected upload/download request:
|
Data Loading Status - View Menu and Icons
You can customize the view of the table by using the options in the View Menu.
Table 15-12 Table Data Loading Status - View Menu/Icons and Description
| View Menu/Icons | Description |
|---|---|
|
Columns |
You can manage which of the columns will be shown in the table by clicking the Show All and Manage Columns options. |
|
Detach and Detach icon |
You can view the table in the application in a separate window by clicking Detach or by using the Detach icon |
|
Sort |
You can sort columns by the following options:
|
|
Reorder Columns |
You can reorder columns by clicking the Reorder Columns option. |
|
Query by Example and Query by Example icon |
You can filter the items by one or multiple column values by clicking the Query by Example option or by using the Query by Example icon |
The toolbar contains the following icons and buttons.
Table 15-13 Data Loading Status Toolbar - Icons/Buttons and Description
| Icons/Buttons | Description |
|---|---|
|
Help icon |
You can access the online help for a particular page by clicking the Help icon |
|
Refresh icon |
You can refresh the window by clicking the Refresh icon. All entries are reset and not saved. |
|
Save |
Click Save to save the entered records. |
|
Save and Close |
Click Save and Close to save the entered records and close the window. |
|
Cancel |
Click Cancel to reject all entries and close the window. |
|
Done |
If you open the window in view mode, the Done button is displayed. Click Done to close the window. |
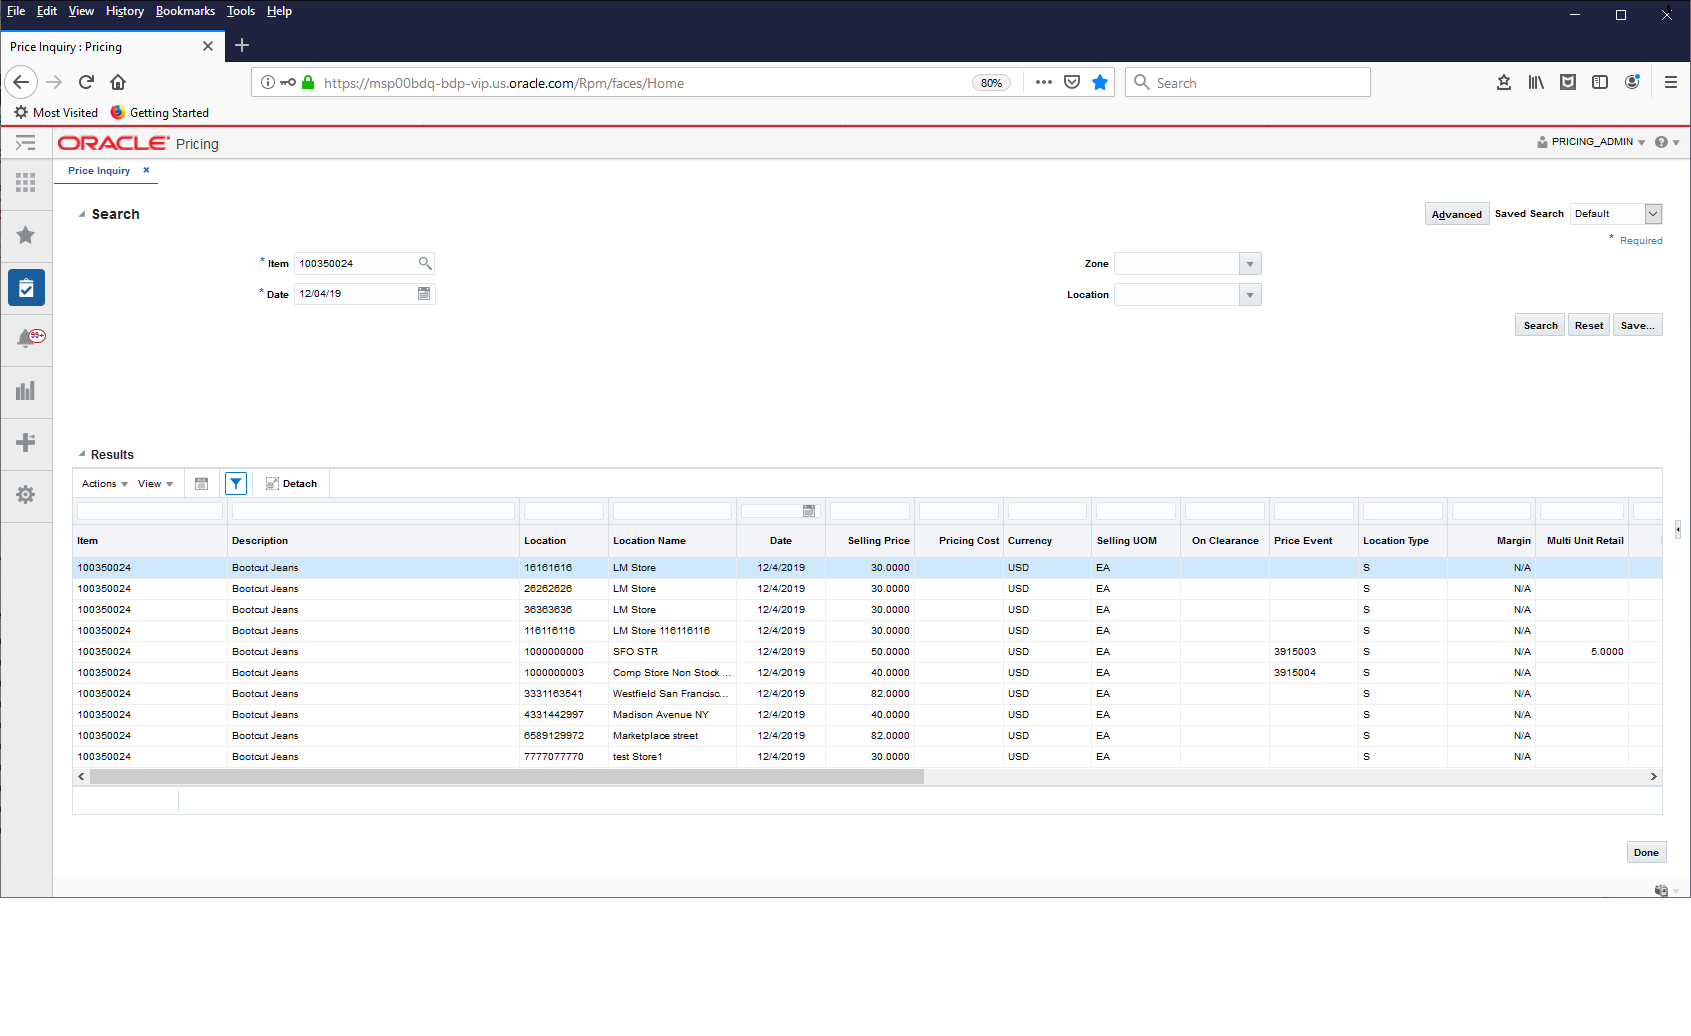
The Price Inquiry screen allows you to look up the price of an item for a selected date (or date range) and location or locations. The price inquiry search also supports searching for multiple items across multiple locations. The results will show the price of the item(s) at all the locations which match the criteria. The search criteria includes zone, enabling the user to request the price of an item on a particular date at all locations in the zone. The date specified can be the current date, a future date, or a past date. When a future date is specified the results come are the expected price on the future date based on future retail.
A clearance event is designed to clear out-of-date merchandise and slow-selling merchandise out of stores and warehouses. A clearance markdown is considered a permanent price change, and inventory is consequently revalued when it goes into effect. Item/location combinations on clearance can be optionally reset back to regular price. This may be done if an item will be brought back for a new season. When the reset date for a clearance has passed, the item's price and inventory value is returned to the regular price. In Pricing, clearance events are organized into groups. Clearance groups allow you to better manage your clearance events by keeping related markdowns and/or resets together and support mass update and approval for events in the group. The following clearance events can be created in a group:
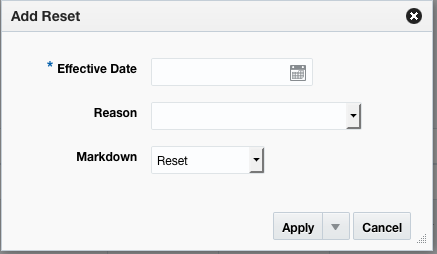
Markdown - Discounts the selling price of one or more item/location combinations.
Reset - A reset will close out the clearance event, setting the item/location combinations back to the last regular retail price.
When a clearance event is created, it must go through a series of checks before it can be applied to an item/location. A clearance may be in any of the following statuses:
Table 15-14 Clearance Status
| Status | Definition |
|---|---|
|
Worksheet |
The clearance has been created, but not reviewed or able to be executed. |
|
Submitted |
The conflict checking has been completed, if applicable, and the event is pending approval. Conflict checking is run for clearances that have been submitted based on the setting of a system parameter. |
|
Approved |
The clearance has passed all conflict checking and has been approved and will be sent to the store or warehouse for execution based on a system option defined number of days prior to its effective date. |
|
Executed |
The markdown or reset has been made effective for the item/locations on the event. |
|
Rejected |
The clearance event has been reviewed but could not be approved without updates. |
|
Processing |
The clearance is being processed in conflict checking. |
When creating clearance events for a group of items, it is recommended to enter the item data at the highest level possible. For fashion items, this is generally parent item (style) or parent/diff (style/color), whereas for grocery and hardlines this is generally at the transaction item level (SKU). This is also true for the selection of locations; it is recommended that clearance event are created at zone level, rather than by store or warehouse. This provides the following advantages:
Managing price events at the higher levels will increase the usability of the application by having fewer rows for you to manage. It will also help ensure pricing consistency for similar items and locations, in line with your company pricing strategy.
The Future Retail tables will have the ability to store data at the highest level possible which, in turn, will ensure that Pricing Cloud Service will run as efficiently as possible, including response time for processing and screen flow.
There is a system option, called Price Event Processing Days, that is set to designate the number of days required between the current date and the effective date of a price event. This ensures that clearances are created and approved with enough advance timing that stores and other impacted areas can react accordingly.
However, for situations where price events were missed for one or more items or locations, emergency price events can be created. This allows you to create events that go into effect less than the standard number of processing days, which can even include the current date. A separate security privilege provides the ability to limit the users that can create these emergency events, while preventing others who have the ability to create clearance events from creating emergency events. For example, if the setting for price event processing is 3 days, you will be prevented from creating or approving an event that occurs within 3 days, unless you have emergency security privilege.
When an emergency price event is created and approved, the information is passed to downstream systems the next time the batch extracts are run. If the clearance is to go into effect on the current date, then the item/location price in Merchandising is updated on approval, along with any markdowns or markups in the stock ledger.
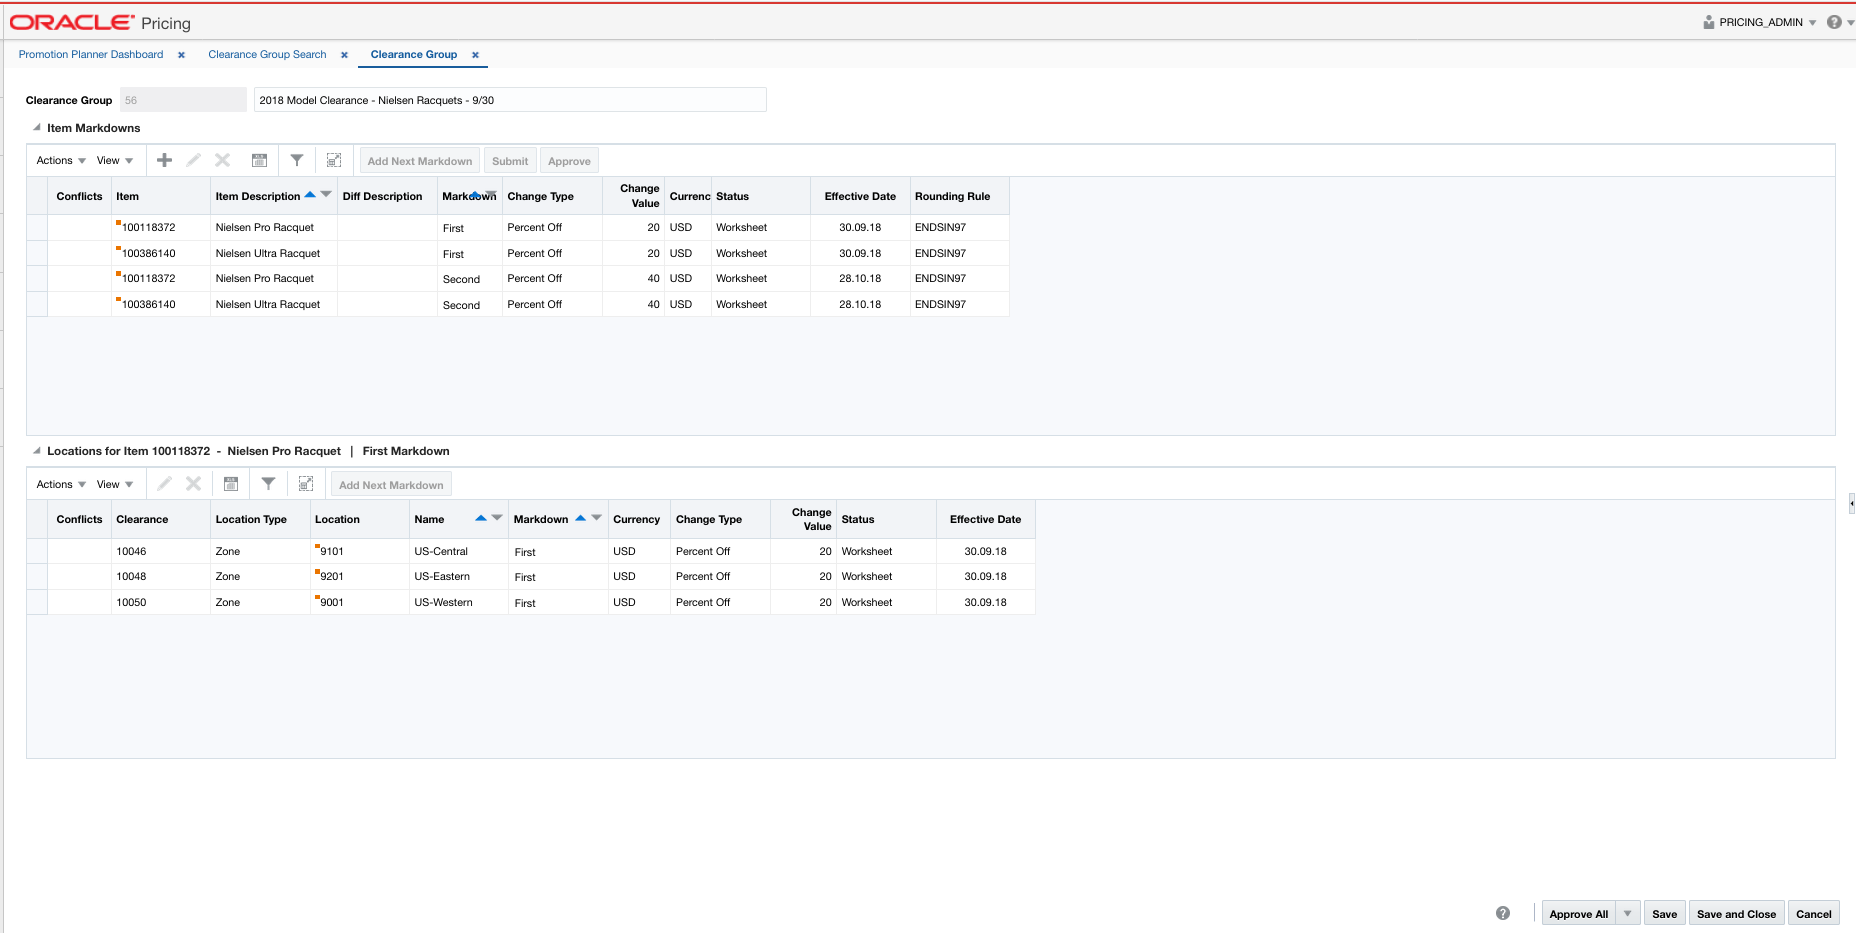
If you would like to create a new markdown for an item/location, you can do so by adding it to an existing group or creating a new group. Creating a new clearance group can be done by selecting the Create Clearance Group task from the Task List, or selecting the Create action from the Clearance Group Search screen. Either of these steps create a new Clearance Group into which markdown can be added.
To add markdowns to an existing Clearance group, perform a search for the clearance group that you want to edit. See Search for a Clearance Group. From the search results pane of the Clearance Group Search page, highlight the clearance group to which you want to add a clearance markdown and select Edit from the Actions menu. The Clearance Group page appears.
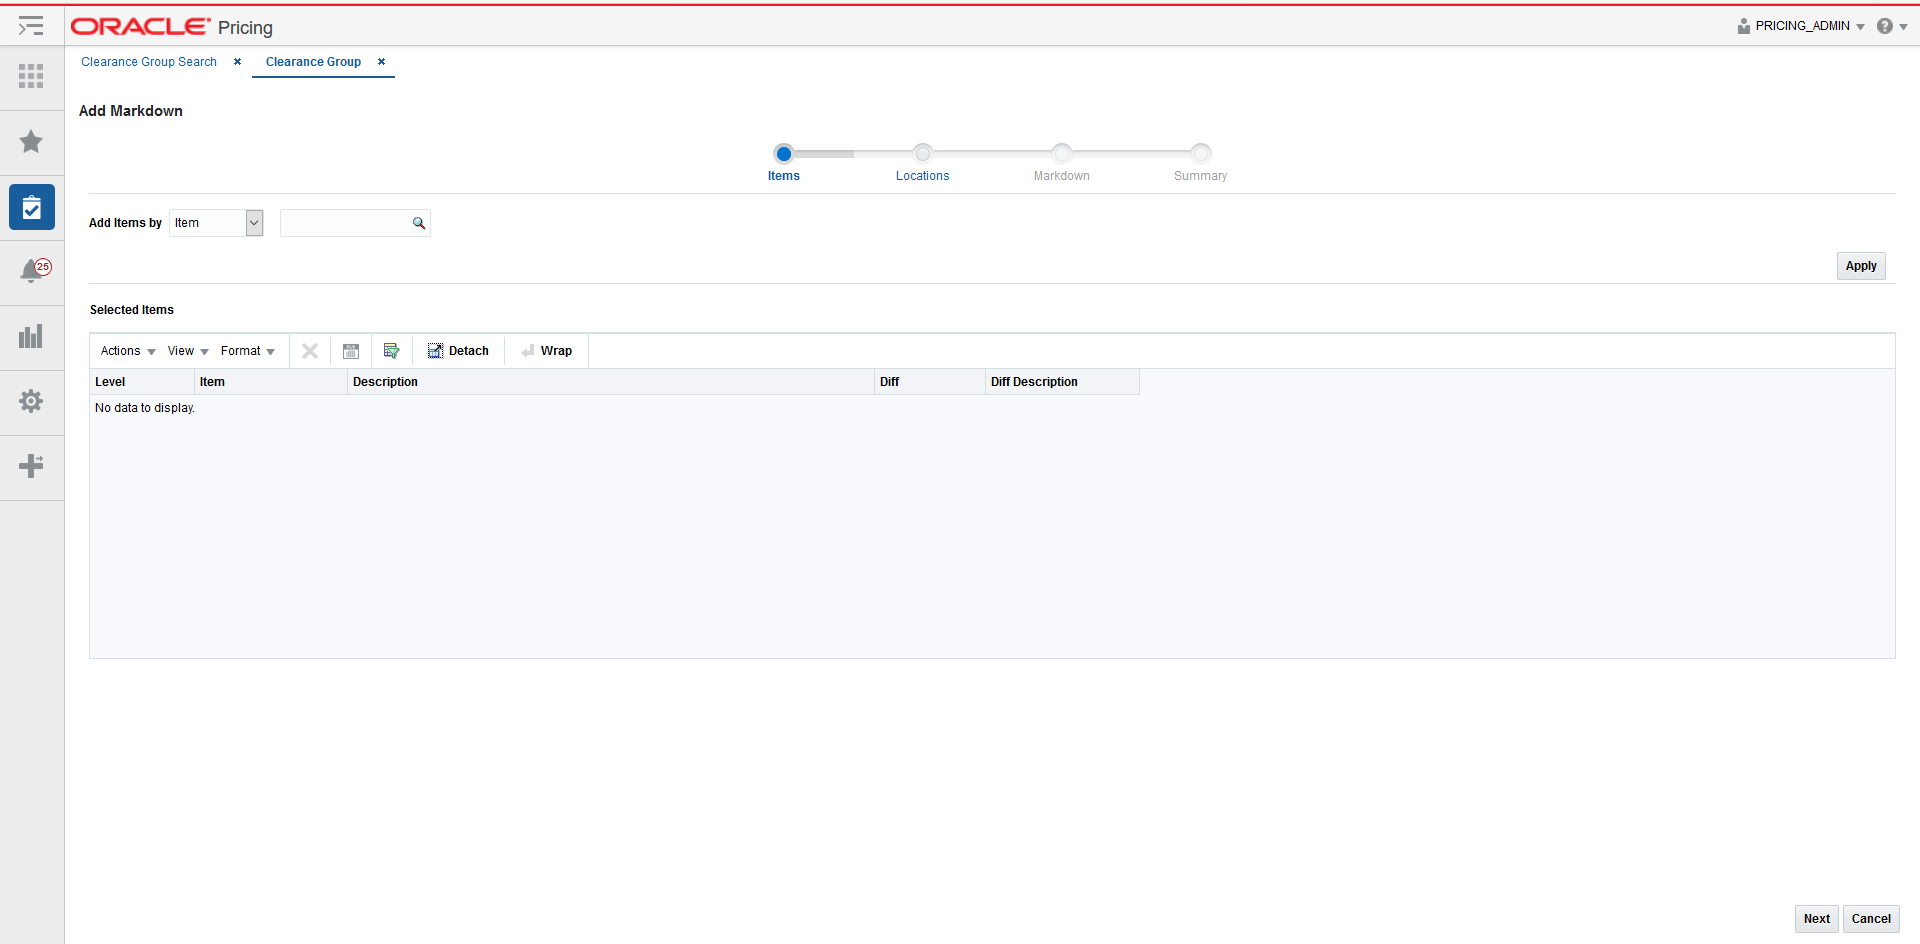
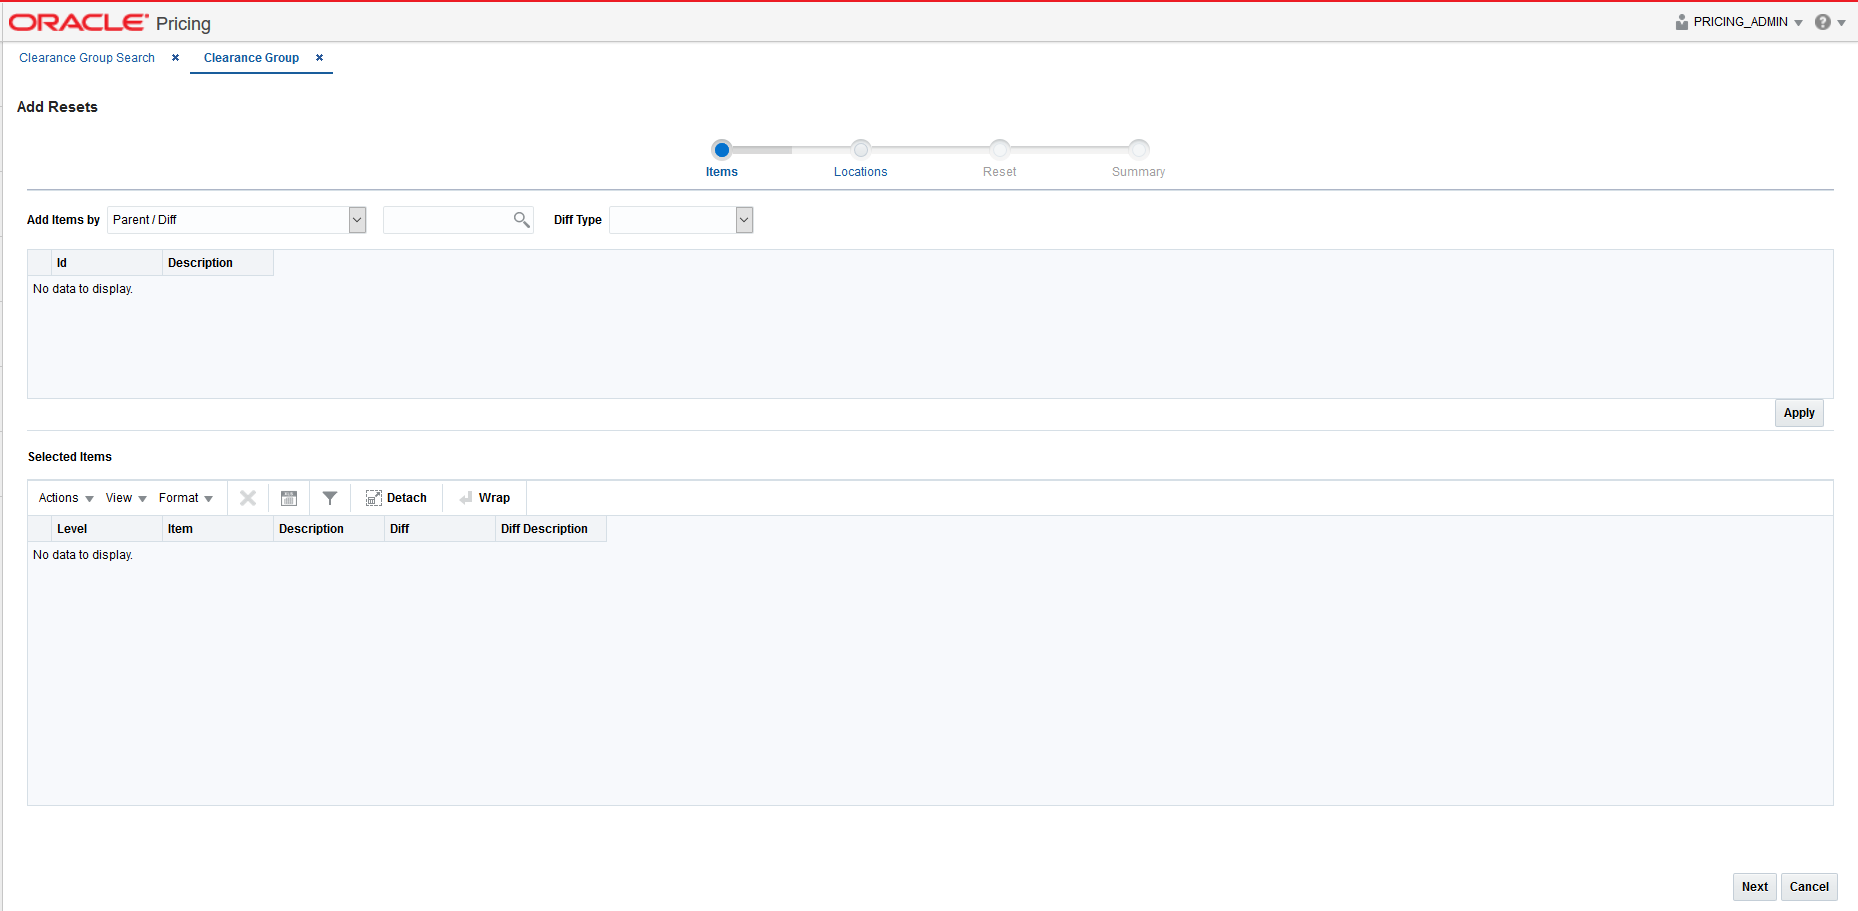
The initial page in the Markdown Wizard allows you to select the items that you want to add to the markdown.
From the Item Markdowns table, select Add from the Actions menu
The Add Markdown Wizard launches.
From the Add Markdown Items page, enter the items to add to the new markdown using the following criteria:
Table 15-15 Items Page Fields
| Field | Description |
|---|---|
|
Add Items by |
The Add Items by field allows you to select a category by which you can narrow the list of things to add to the markdown. Options are:
|
|
Item |
The Item field is active if you select Item in the Add Items by field. Click the magnifying glass to search for an item to add to the markdown. |
|
Parent/Diff |
When Parent/Diff is selected for 'Add Items by' the display of the screen changes, showing an item field and diff type field as the top row, with a Diffs table directly below. Entering an Item and Diff type will populate the diff table where diffs can then be selected. Combinations of the entered parent item and the selected diffs are added to the Selected Items table when the apply button is selected. |
|
Diff Type |
The Diff Type field is active if you select Parent/Diff in the Add Items by field. |
|
Item List |
The Item List field is active if you select Item List in the Add Items by field. Click the dropdown to select a defined list of items to add to the markdown. |
|
Source File |
Source File is active if you select Upload List in the Add Items by field. Click Browse to select the file to upload. |
Once you have entered your criteria, click Apply to move entered or selected data for the item selection option to the Selected Items table. In the case of an Item List or Upload List, the items in the list are populated into the Selected Items table. Once all your items are added to the markdown, click Next. The Add Markdown Locations page appears. Continue with Add Locations.
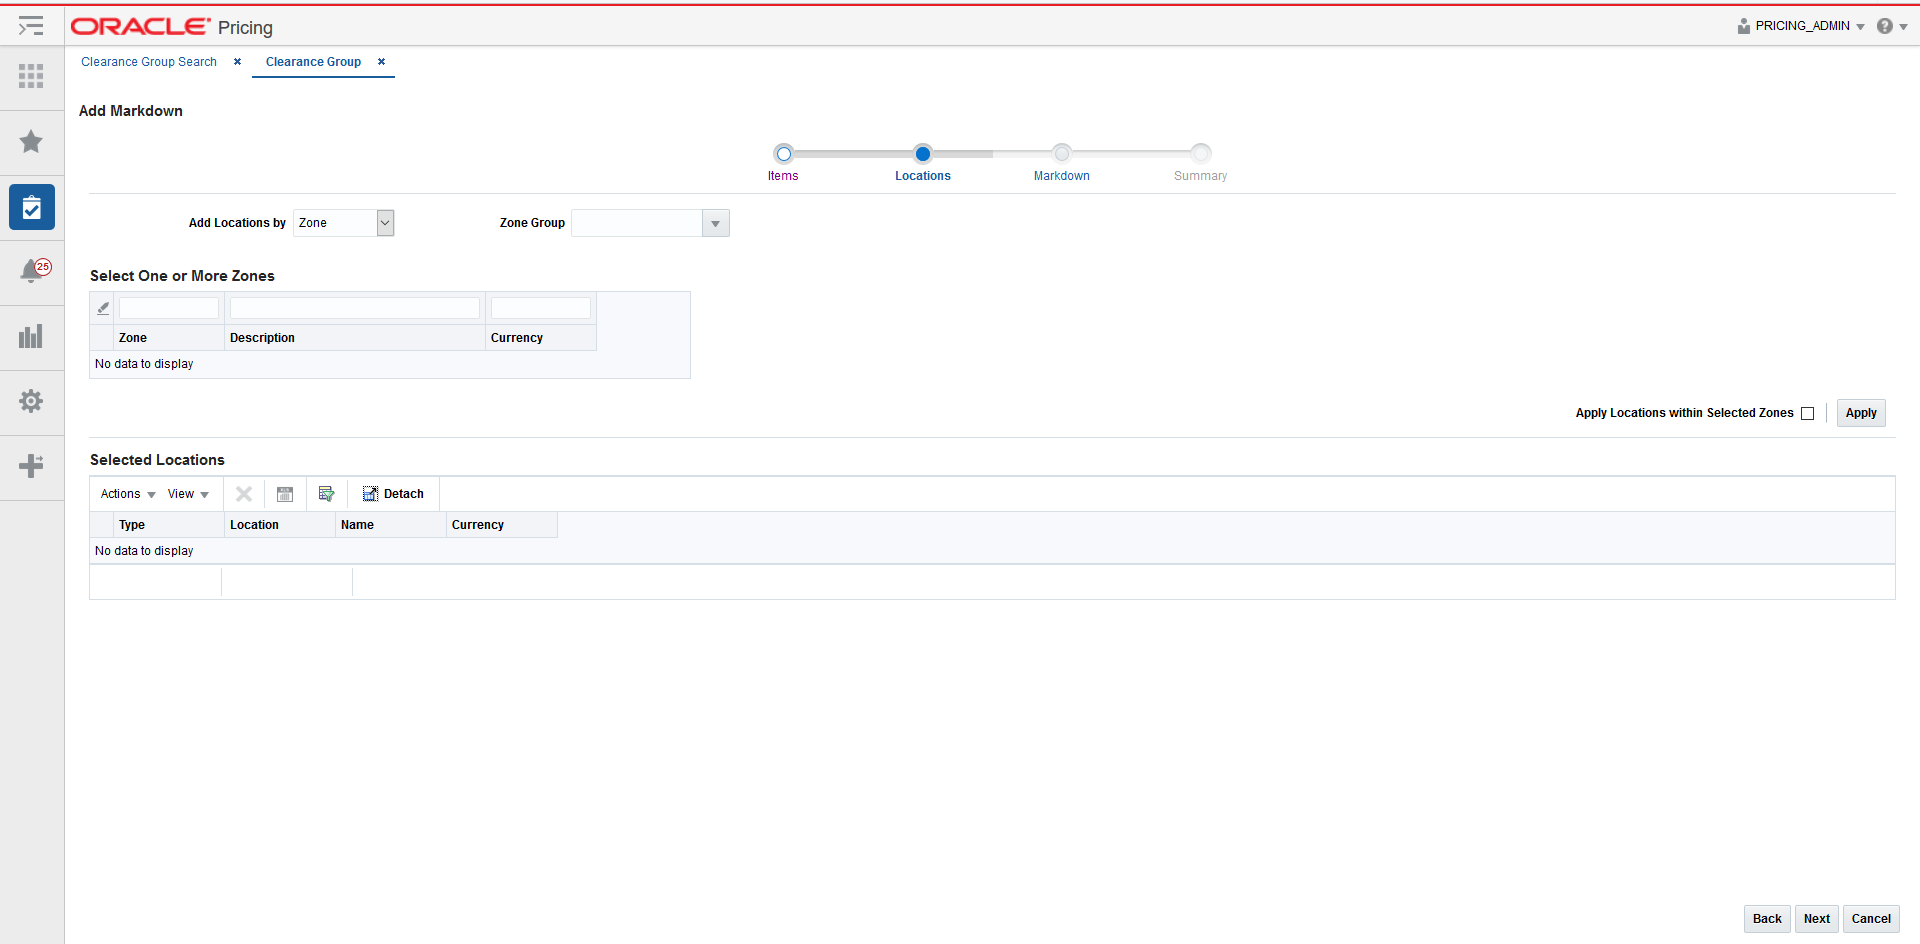
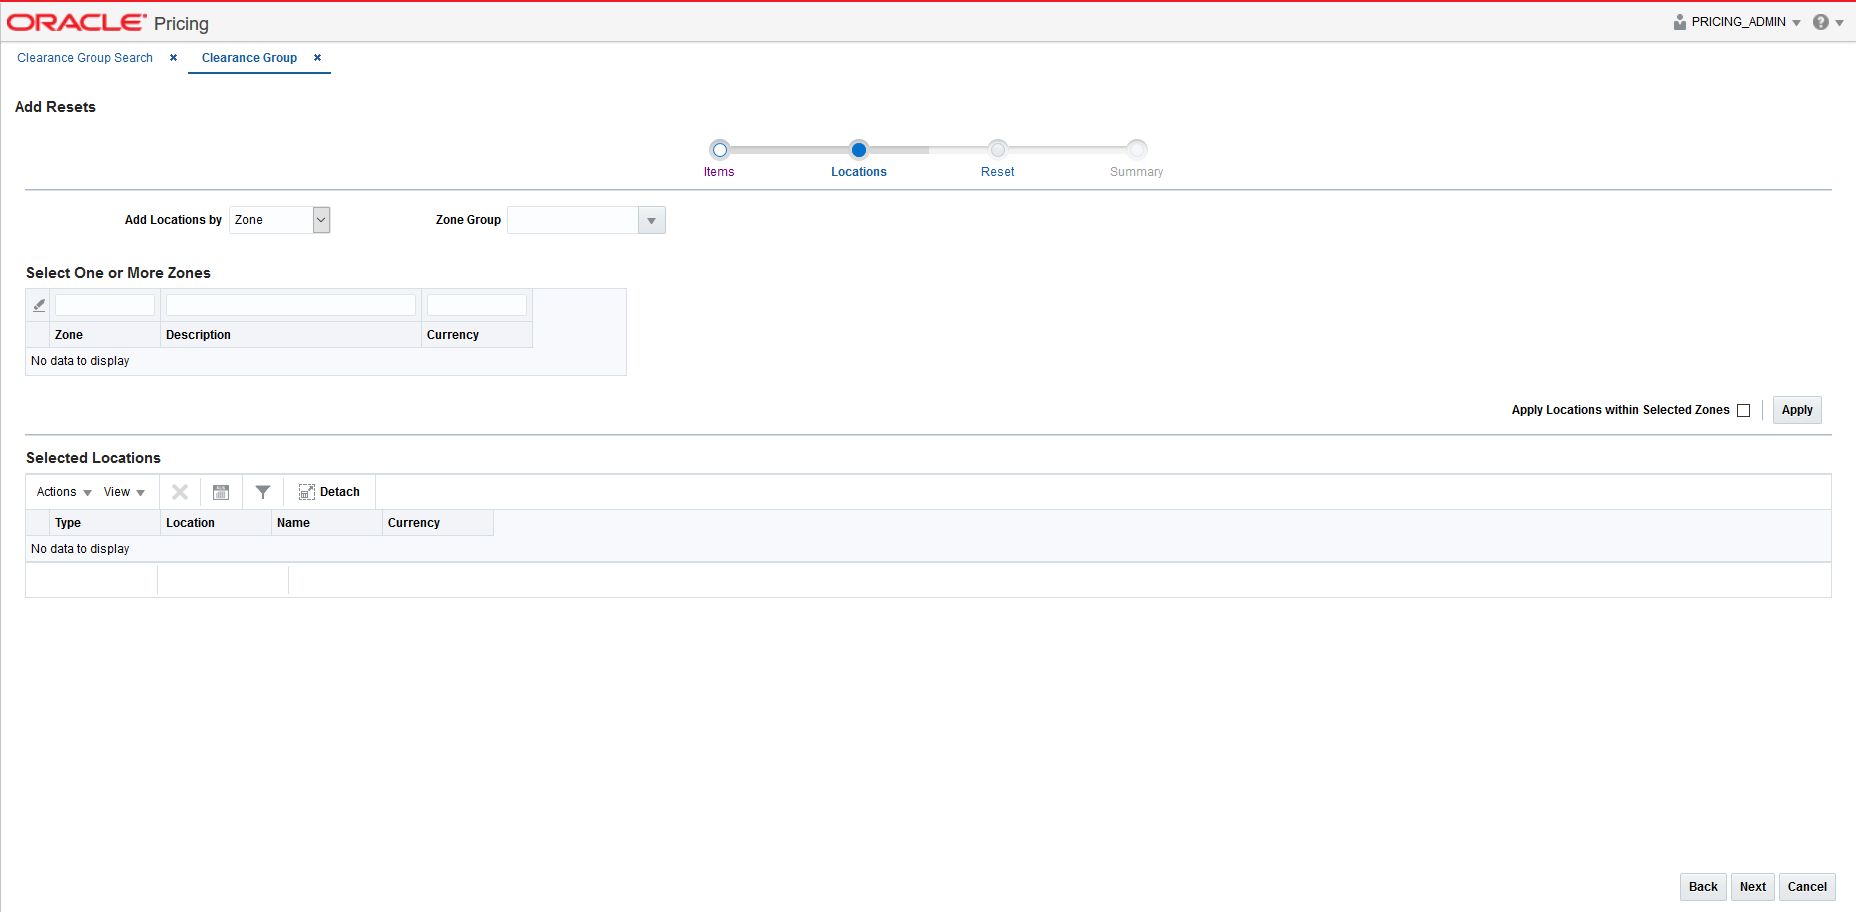
The Locations page of the Markdown Wizard allows you to define the locations associated with the markdown.
From the Add Markdown Location page, select the location type you want to use for adding locations using the following criteria:
Table 15-16 Locations Page Fields
| Field | Description |
|---|---|
|
Add Locations by |
The Add Locations by field allows you to select a category by which you can narrow the list of locations to add to the markdown. Options are:
Note: The Warehouse option is only displayed if the Recognize Warehouses as Locations system option is set to Yes. |
|
Zone Group |
The Zone Group field is active if you select Zone in the Add Locations by field. |
|
Zone Table |
The Zone Table is active if you select Zone in the Add Locations by field. When a zone group is entered, the Zone Table will be populated with the zones in the zone group. |
|
Apply Locations within Selected Zones |
The Apply Locations within Selected Zones check box is active if you select Zone in the Add Locations by field. This checkbox allows exploding the zone into stores and warehouses for populating the Selected Locations table. If you have access to one location in a zone, you can create events for the entire zone and markdowns can be created for all locations under the zone after exploding the zone. |
|
Location List |
The Location List dropdown list is active if you select Location List in the Add Locations by field. Click the dropdown to select from a defined list of locations to add to the markdown. |
|
Store |
The Store dropdown list is active if you select Store in the Add Locations by field. Click the dropdown to select from a defined list of stores to add to the markdown. |
|
Warehouse |
The Warehouse dropdown list is active if you select Warehouse in the Add Locations by field. Click the dropdown to select from a defined list of warehouses to add to the markdown. |
From the search results pane, select the location(s) to add to the markdown and click Apply.
Once all your locations are added to the markdown, click Next. The Add Markdown page appears. Continue with Add Markdown.
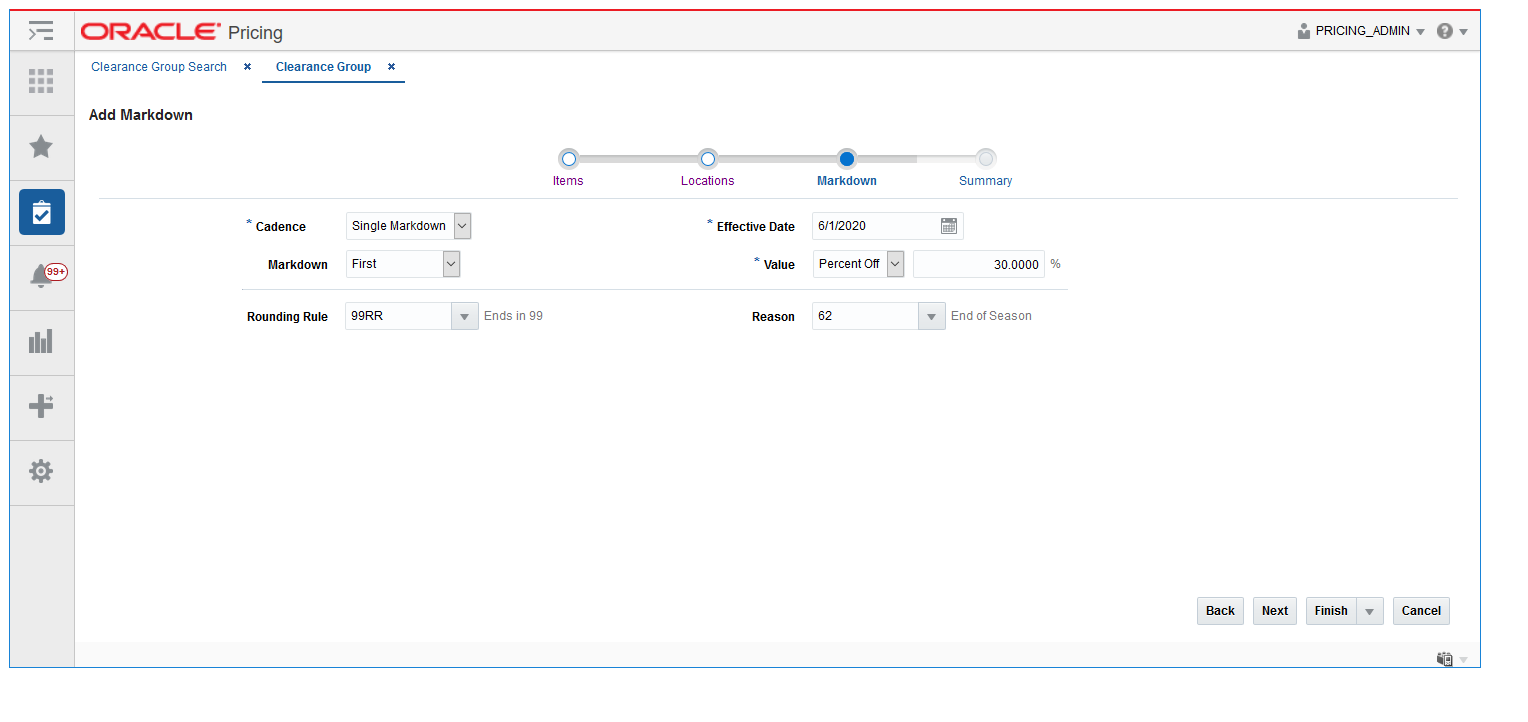
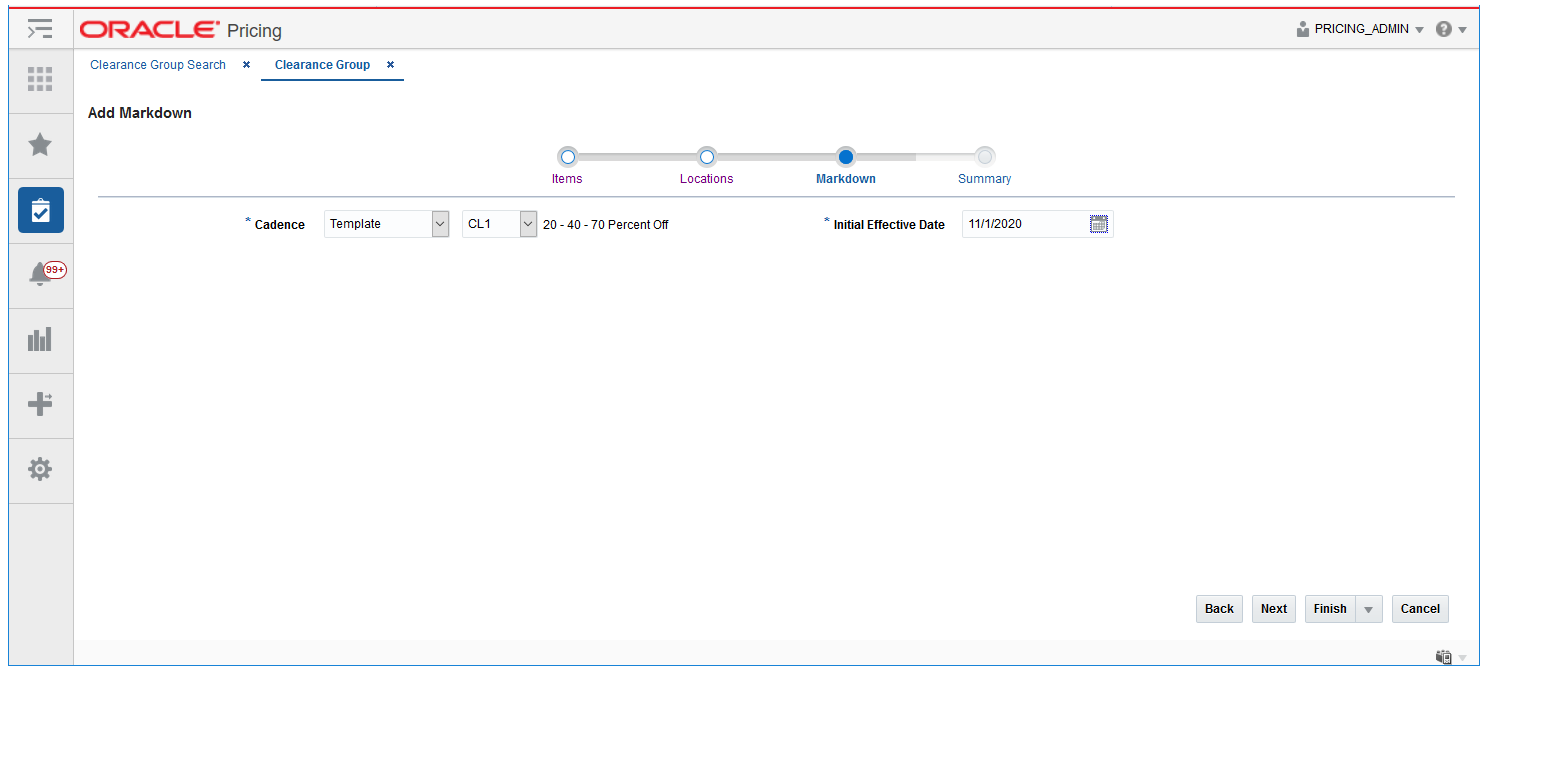
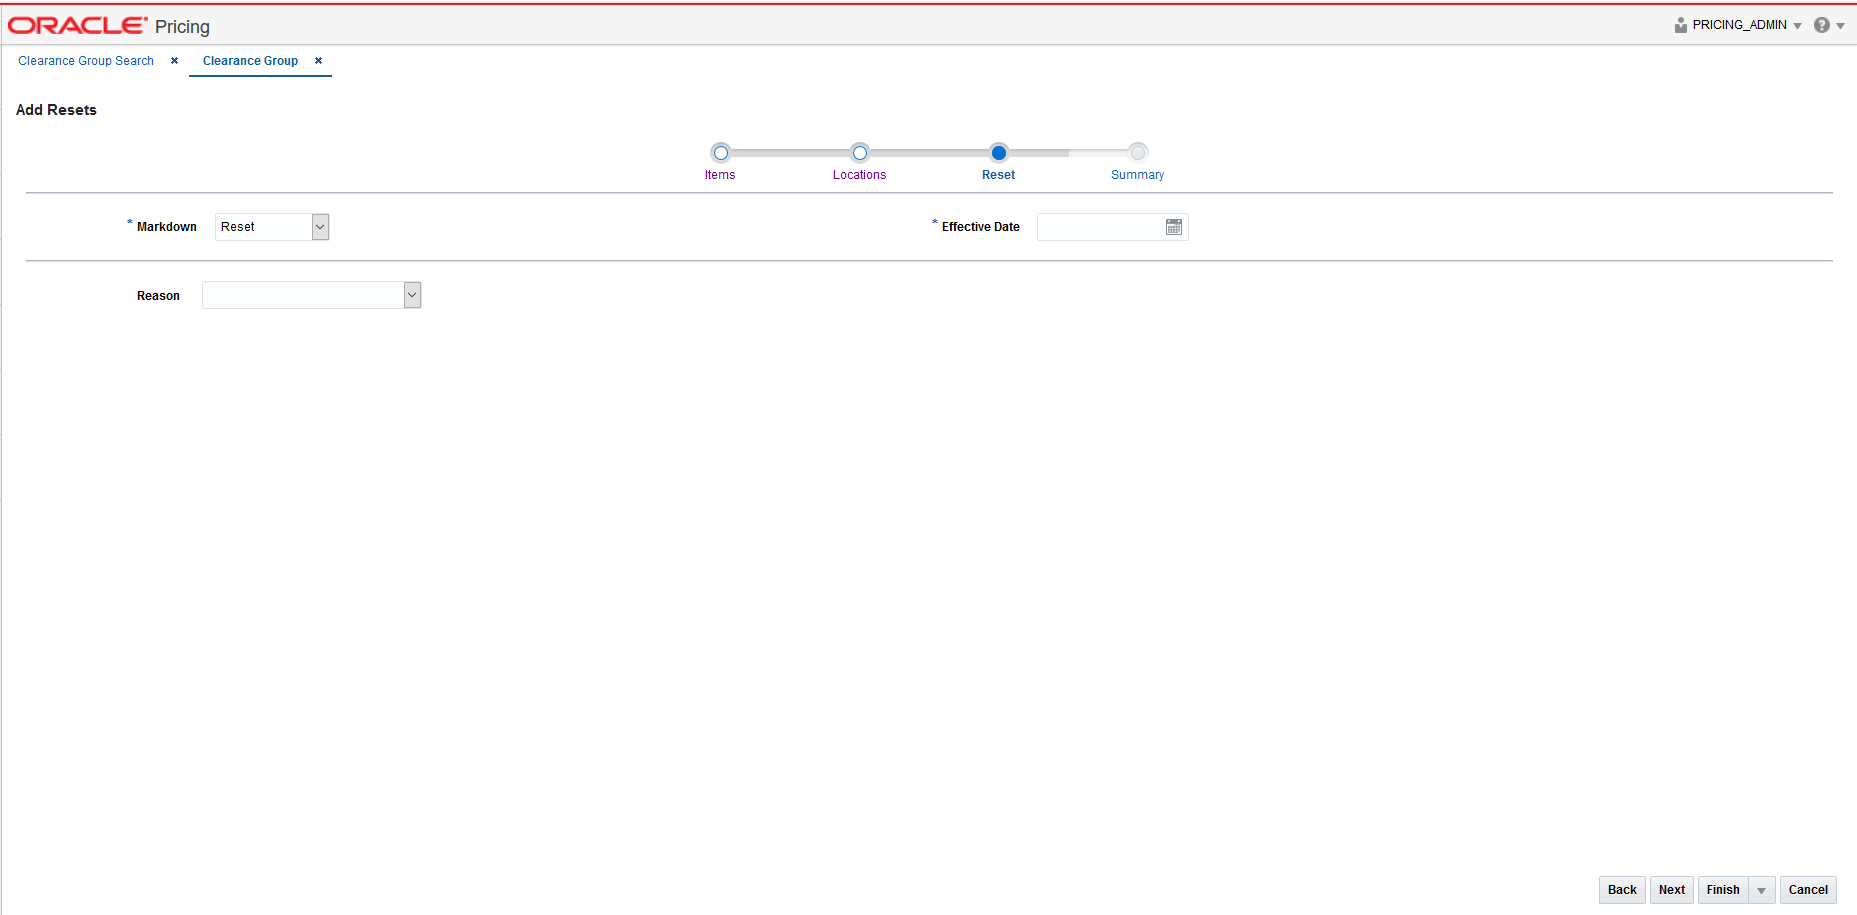
The Add Markdown page of the Markdown Wizard allows you to define the enter a single markdown or use a Cadence Template to generate multiple related markdowns for the item/location combinations. The screen has two different views, a Single Markdown view and a Template view base on the value selected in the Cadence dropdown. Below are the two views:
From the Add Markdown page, define the information for the markdown being added using the following criteria:
Table 15-17 Markdown Page Fields
| Field | Description |
|---|---|
|
Cadence |
This field is used to decide whether a single markdown or multiple markdowns will be created for each item/location combination based on the cadences in the template. The options are:
When Template is selected, the wizard will create multiple markdowns for the item/locations selected based on the number of markdowns defined in the template. |
|
Template |
Select the template you which to use to generate multiple markdowns for the item/location combinations selected. This field only shown in the Cadence Template view of the Add Markdown screen. |
|
Initial Effective Date |
Enter the date on which you want the first markdown of the cadence template to take effect. The effective date of subsequent markdowns is based on the initial effective date plus the days after first markdown parameter from the template. This field only shown in the Cadence Template view of the Add Markdown screen. |
|
The fields described below are only shown on the Single Markdown view of the Add Markdown screen. |
|
|
Markdown |
The Markdown field contains a predefined identifier for the Markdown to describe what the new markdown represents in the clearance lifecycle. For example, this could be first, second, final, and so on. This field can be left blank, if not required by a system option setting. |
|
Value |
The Value field provides the options that derive the new retail price. If a system option default has been defined, a value will be automatically added for your event. But this can be changed, if desired. Options are:
After selecting the change type, you will enter the actual value for the change. This field is required entry for every change type. The field supports up to four decimal places for Percent Off value. For Amount Off and Fixed Price decimal placement is based on currency of selected locations. |
|
Effective Date |
The date on which the markdown is set to take effect. You have the option to key in a date or select one using the calendar widget. |
|
Rounding Rule |
The Rounding Rule field provides the ability to smooth retails for an item or location. If a system option default has been defined, a value may be automatically added to your event. But, this can be changed or removed, if desired. |
|
Reason |
The Reason value defines the reason the markdown is being created. If a system option default has been defined, a value may be automatically added to your event. But, this can be changed or removed, if desired. |
Once all your markdown information is entered, click Next. The Add Markdown Summary page appears. Continue with Review, Submit and Approve.
If you want to skip the Summary Page, you can click on Finish or select Submit, or Approve options from the Finish drop down menu.
The Summary page displays the details of the markdown before it is added to the Clearance Group.
Confirm the markdown settings and click on Finish or select Submit or Approve from the Finish drop down menu. You are returned to the Clearance Group screen. Your new markdown events are listed in the Item Markdowns table.
|
Note: The Summary Page also allows individual markdowns to be removed before they are added to the Clearance Group. |
Whenever a clearance is approved, it will be subject to the conflict checking process. A clearance markdown may also be subject to conflict checking when it is submitted, depending on the system option settings. This ensures that invalid prices, or prices out of alignment with your pricing strategy, are not sent down to the selling solutions.
When a conflict occurs for a markdown you attempted to submit or approve, you will receive a notification. The notification allows you to navigate to the clearance group of the price event with the conflict. When viewing the clearance group with one or more conflicts an icon will be displayed at the clearance group, item, and markdown levels to help you see which had the issue. Clicking on the icon at any of these levels will take you to a page to view more details about the conflict. After identifying the cause of the conflict, you can make adjustments to either the current price event that you are trying to approve, or to the other event which conflicted with the current price event to resolve the conflict.
Additional markdowns for items already on markdown can be added to a clearance group through the Clearance Group page. For example, you might do this in order to add subsequent markdown to item/location combinations such that you can see each markdown level (for example, first, second, and so on) in the same group.
Perform the following procedure to add a Markdown:
Perform a search for the clearance group that you want to update. See Search for a Clearance Group.
From the search results pane, select the clearance group for which you want to add a markdown. and select Edit from the Actions menu. The Clearance Group page appears.
From the Clearance Group page, highlight the item markdown in the Item Markdowns table to which you want to add an additional markdown and select Add Next Markdown from the Action menu. The Add Next Markdown pop-up appears.
Table 15-18 Add Markdown Fields
| Field | Description |
|---|---|
|
Markdown |
The Markdown field contains a predefined identifier for the Markdown to describe what the new markdown represents in the clearance lifecycle. For example, this could be first, second, final, and so on. This field can be left blank, if not required by a system option setting. |
|
Effective Date |
The date on which the clearance is set to take effect. You have the option to key in a date or select one using the calendar widget. |
|
Value |
The Value field provides the options that derive the new retail price. If a system option default has been defined, a value will be automatically added for your event. But this can be changed, if desired. Options are:
After selecting the change type, you will enter the actual value for the change. This field is required entry for every change type. The field supports up to four decimal places for Percent Off value. For Amount Off and Fixed Price decimal placement is based on currency of selected locations. |
|
Reason |
The date on which the markdown is set to take effect. You have the option to key in a date or select one using the calendar widget. |
|
Rounding Rule |
The Rounding Rule field provides the ability to smooth retails for an item or location. If a system option default has been defined, a value may be automatically added to your event. But, this can be changed or removed, if desired. |
Once values are specified, click Apply, Submit, or Approve. The Add Next Markdown pop-up closes and you are returned to the Clearance Group page.
Additional markdowns for locations already on markdown can be added to a location through the Clearance Group page. For example, you might do this in order to add subsequent markdown to item/location combinations such that you can see each markdown level (for example, first, second, and so on) in the same group.
Perform the following procedure to add a Markdown:
Perform a search for the clearance group that you want to update. See Search for a Clearance Group.
From the search results pane, select the clearance group for which you want to add a markdown. and select Edit from the Actions menu. The Clearance Group page appears.
From the Clearance Group page, highlight the location markdown in the Locations for Item table to which you want to add an additional markdown and select Add Next Markdown from the Action menu. The Add Next Markdown pop-up appears.
Table 15-19 Add Markdown Fields
| Field | Description |
|---|---|
|
Markdown |
The Markdown field contains a predefined identifier for the Markdown to describe what the new markdown represents in the clearance lifecycle. For example, this could be first, second, final, and so on. This field can be left blank, if not required by a system option setting. |
|
Effective Date |
The date on which the clearance is set to take effect. You have the option to key in a date or select one using the calendar widget. |
|
Value |
The Value field provides the options that derive the new retail price. If a system option default has been defined, a value will be automatically added for your event. But this can be changed, if desired. Options are:
After selecting the change type, you will enter the actual value for the change. This field is required entry for every change type. The field supports up to four decimal places for Percent Off value. For Amount Off and Fixed Price decimal placement is based on currency of selected locations. |
|
Reason |
The date on which the markdown is set to take effect. You have the option to key in a date or select one using the calendar widget. |
|
Rounding Rule |
The Rounding Rule field provides the ability to smooth retails for an item or location. If a system option default has been defined, a value may be automatically added to your event. But, this can be changed or removed, if desired. |
Once values are specified, click Apply, Submit, or Approve. The Add Next Markdown pop-up closes and you are returned to the Clearance Group page.
Quick Create provides an alternative method for creating a markdown. It is best suited for small sets of items and locations - such as a single item in one or two zones. Perform the following procedure to create a clearance using this function.
From the Pricing Tasks list, click the Quick Create icon.
The Quick Create pane appears.
From the Quick Create pane, select Clearance from the Quick Create drop down list.
Enter information for the following fields:
|
Note: Fields marked with an Asterisk are required. Fields marked with a double asterisk means that one of the fields needs to be entered. |
Table 15-20 Clearance Quick Create Fields
| Field | Description |
|---|---|
|
Group Description |
This field allows for entry of a description that will be used to create a new clearance group. |
|
Markdown |
The Markdown field contains a predefined identifier for the Markdown to describe what the new markdown represents in the clearance lifecycle. For example, this could be first, second, final, and so on. This field can be left blank, if not required by a system option setting. |
|
Item |
The Item field is active if you select Item in the Add Items by field. Click the magnifying glass to search for an item to add to the markdown. |
|
Diff |
The Diff field allows for entry or selection of a single Diff Value. You have the option to use the list of values to search on Diff Type to find the Diff value. |
|
Zone |
The Zone field allows for entry of a zone within a single zone group. You may enter a single zone or multiple zones. If multiple zones are entered a semicolon is used to separate values. Note: Either a Zone(s) or Location(s) must be entered, but not both. |
|
Location |
The Location field allows for entry of a location. You may enter a single location or multiple locations. If multiple locations are entered a semicolon is used to separate values. Note: Either a Zone(s) or Location(s) must be entered, but not both. |
|
Effective Date |
The date on which the clearance is set to take effect. You have the option to key in a date or select one using the calendar widget. |
|
Change Type |
The Change Type field provides the options that will derive the new retail price. There is a system option default that may display for the Change Type if it exists. The default value can be overridden. Change Type options are:
|
|
Change Value |
The Change Value field contains the change by percent, change by amount, or fixed price value depending on the change type selected. |
|
Rounding Rule |
The Rounding Rule field provides the ability to smooth retails for an item or location. If a system option default has been defined, a value may be automatically added to your event. But, this can be changed or removed, if desired. |
|
Reason |
The Reason value defines the reason the markdown is being created. If a system option default has been defined, a value may be automatically added to your event. But, this can be changed or removed, if desired. |
Once you have entered all information for the newly created price change record, click Apply, Submit, or Approve. The new clearance is created.
If you select Apply, the Clearance Group will be opened so that you can review and approve the event from that page. Otherwise, the event is created and subjected to submit and approval validations in the background.
A clearance reset ends the clearance for a set of items at a set of locations which are presently on clearance. A clearance with a change type of Reset (also known as a clearance reset or a reset) ends the clearance on the user-defined effective date. The clearance reset is displayed in the Item Markdowns and Locations tables like any other clearance records.
Clearance resets can be added to a new clearance group or an existing clearance group. Creating a new clearance group can be done by selecting the Create Clearance Group task from the Task List, or selecting the Create action from the Clearance Group Search screen. Either of these steps create a new Clearance Group into which resets can be added by following the steps below (starting with step 3).
Adding a reset is performed using the Reset Wizard. There are four potential stops within the wizard:
To add resets to an existing Clearance group, perform a search for the clearance group that you want to edit. See Search for a Clearance Group.
From the search results pane of the Clearance Group Search page, highlight the clearance group to which you want to add a clearance reset and select Edit from the Actions menu. The Clearance Group page appears.
From the Item Markdowns table, select Add Reset from the Actions menu. The Add Resets Wizard launches. Continue with the Items.
Items
The initial page in the Reset Wizard allows you to select the items that you want to add to the reset.
From the Add Resets Items page, enter the items to add to the new reset using the following criteria:
Table 15-21 Items Page Fields
| Field | Description |
|---|---|
|
Add Items by |
The Add Items by field allows you to select a category by which you can narrow the list of things to add to the reset. Options are:
|
|
Item |
The Item field is active if you select Item in the Add Items by field. Click the magnifying glass to search for an item to add to the reset. |
|
Parent/Diff |
When Parent/Diff is selected for 'Add Items by' the display of the screen changes, showing an item field and diff type field as the top row, with a Diffs table directly below. Entering an Item and Diff type will populate the diff table where diffs can then be selected. Combinations of the entered parent item and the selected diffs are added to the Selected Items table when the apply button is selected. |
|
Diff Type |
The Diff Type field is active if you select Parent/Diff in the Add Items by field. |
|
Item List |
The Item List field is active if you select Item List in the Add Items by field. Click the dropdown to select a defined list of items to add to the reset. |
|
Source File |
Source File is active if you select Upload List in the Add Items by field. Click Browse to select the file to upload. |
Once you have entered your criteria, click Apply to move entered or selected data for the item selection option to the Selected Items table. In the case of an Item List or Upload List, the items in the list are populated into the Selected Items table. Once all your items are added to the reset, click Next. The Add Reset Locations page appears. Continue with Locations.
Locations
The Locations page of the Reset Wizard allows you to define the locations associated with the reset.
From the Add Resets Location page, select the location type you want to use for adding locations using the following criteria:
Table 15-22 Locations Page Fields
| Field | Description |
|---|---|
|
Add Locations by |
The Add Locations by field allows you to select a category by which you can narrow the list of locations to add to the reset. Options are:
Note: The Warehouse option is only displayed if the Recognize Warehouses as Locations option is set to Yes. |
|
Zone Group |
The Zone Group field is active if you select Zone in the Add Locations by field. |
|
Zone Table |
The Zone Table is active if you select Zone in the Add Locations by field. When a zone group is entered, the Zone Table will be populated with the zones in the zone group. |
|
Apply Locations within Selected Zones |
The Apply Locations within Selected Zones check box is active if you select Zone in the Add Locations by field. This checkbox allows exploding the zone into stores and warehouses for populating the Selected Locations table. If you have access to one location in a zone, you can create events for the entire zone and reset can be created for all locations under the zone after exploding the zone. |
|
Location List |
The Location List dropdown list is active if you select Location List in the Add Locations by field. Click the dropdown to select from a defined list of locations to add to the reset. |
|
Store |
The Store dropdown list is active if you select Store in the Add Locations by field. Click the dropdown to select from a defined list of stores to add to the reset. |
|
Warehouse |
The Warehouse dropdown list is active if you select Warehouse in the Add Locations by field. Click the dropdown to select from a defined list of warehouses to add to the reset. |
From the search results pane, select the location(s) to add to the reset and click Apply.
Once all your locations are added to the reset, click Next. The Add Reset page appears. Continue with Reset.
Reset
The Reset page of the Reset Wizard allows you to define the reset itself.
From the Resets page, define the information for the reset(s) being added using the following criteria:
Table 15-23 Reset Page Fields
| Field | Description |
|---|---|
|
Markdown |
If the Markdown Value for Resets system option is defined, this field is populated and the field is disabled. If the system option is not configured, then this field is enabled. This field can be left blank. |
|
Effective Date |
The date on which the reset is set to take effect. You have the option to key in a date or select one using the calendar widget. |
|
Reason |
The Reason value defines the reason the reset is being created. You have the option to update this field or remove the value in this field. |
Once all your markdown information is entered, click Next. The Add Resets Summary page appears. Continue with Summary.
If you want to skip the Summary Page, you can double click on Finish or select Submit, or Approve options from the Finish drop down menu.
Summary
The Summary page displays the details of the reset before it is added to the Clearance Group.
Confirm the reset details and click on Finish or select Submit or Approve from the Finish drop down menu. You are returned to the Clearance Group screen. Your new reset is listed in the Item Markdowns table.
|
Note: The Summary Page allows individual resets to be removed before they are added to the Clearance Group. |
Another way to add a reset is to highlight an existing markdown for the item/zone that you wish to add a reset for and select the Reset Item option.
Perform the following procedure to reset an item in an existing clearance group:
Perform a search for the clearance group that you want to update. See Search for a Clearance Group.
From the search results pane, select the clearance group for which you want to add a clearance reset. and select Edit from the Actions menu. The Clearance Group page appears.
From the Clearance Group page, highlight the item markdown or location to which you want to add a clearance reset and select Reset Item from the Action menu. The Add Reset pop-up appears.
Table 15-24 Add Reset Fields
| Field | Description |
|---|---|
|
Effective Date |
The date on which the clearance reset is set to take effect. You have the option to key in a date or select one using the calendar widget. |
|
Reason |
The Reason value defines the reason the clearance reset is being created. This field is optional. |
|
Markdown |
The Markdown field defaults the reset markdown value as defined in system options for the reset, but you can update, if desired. |
Once updates are complete on the Add Reset pop-up, click OK. The Add Reset pop-up closes and you are returned to the Clearance Group tab.
The Clearance Group page allows you to maintain markdowns within a clearance group. Each markdown will contain items selected for the markdown along with the locations where the markdown should be executed.
The Clearance Group screen has three modes; Add, Edit and View. If you enter this screen in View mode, all maintenance options are disabled and the Save, Save and Close, and Cancel buttons are replaced with Done. If you enter in Edit mode the following maintenance options are supported:
Perform the following procedure to search for an existing clearance group.
From the Tasks menu, select Manage Clearance Groups under Clearances. The Clearance Group Search page appears.
Enter your clearance search criteria using the following fields:
|
Note: In order to conduct a clearance search, you must enter at least one of the following; Department, Clearance Group, Description, or Item. |
Table 15-25 Clearance Search Fields
| Field | Description |
|---|---|
|
Clearance Group |
The Clearance Group field allows you to enter a group ID to be used in search criteria. |
|
Description |
The Description field allows you to enter a partial description to be used in search criteria. |
|
Status |
The Status field allows you to select a status to be used in search criteria. Values for the drop down include: Worksheet, Submitted, Approved, Rejected, Executed, and Processing. |
|
Effective Date |
The Effective Date field allows you to enter or select an effective date to be used in search criteria. |
|
Conflicts |
The Conflicts field allows you to select one of the following values; Yes, No or NULL (Blank) to be used in search criteria. |
|
Department |
The Department field allows you to enter or select a department to be used in search criteria. The department list of values queries all departments. |
|
Class |
The Class field allows you to enter or select a class to be used in search criteria. The class list of values queries all classes or all classes for the entered Department. |
|
Subclass |
The Subclass field allows you to enter or select a Subclass to be used in search criteria. The subclass list of values queries all subclasses or all subclasses for the entered class. |
|
Item |
The Item field allows you to enter or select an item(s) to be used in search criteria. You have the option to go directly to the search icon to look up items. |
|
Diff |
The Diff field allows you to enter or select a diff value to be used in search criteria. The diff list of values includes both diff type and diff value. |
Once your search criteria are entered, click Search. The search results are displayed in the Results pane.
Editing clearances can be performed on events in multiple statuses with the following conditions:
If the Effective Date is in the past, no changes are allowed unless the status of the Clearance is Worksheet, then you have the option to update the Effective Date.
If the date that the update is being performed falls within the Effective Date minus the Price Event Processing Days, updates are only allowed for you with emergency security privileges.
To edit a markdown, follow these steps:
Perform a search for the clearance group that you want to edit. See Search for a Clearance Group.
From the search results pane of Clearance Group Search, highlight the clearance group you want to edit and select Edit from the Actions menu. The Clearance Group page appears.
From the Clearance Group page, you can select either item markdowns or locations to edit. Highlight the item markdown or location you want to edit (locations shown are associated with the row in the item markdown table which has focus) and select Edit from that table's Action menu. The Edit Clearances pop-up appears. If you wish to modify multiple rows, click on each row to be updated while holding down the Ctrl or Shift button to multi-select.
|
Note: If more than one row is selected for update, then check boxes for clearing the markdown, reason code and rounding rules will appear. Selecting these options will remove the appropriate attribute from the selected events. |
From the Edit Clearances pop-up, use the following fields to edit the clearance details:
|
Note: When multiple clearances are selected for editing, fields in the popup may show up as empty. This indicates that the value may vary across the selected clearances. Entering a value and updating will update all the rows, leaving the value empty will leave the values unchanged on the individual clearances. |
Table 15-26 Edit Clearances Fields
| Field | Description |
|---|---|
|
Markdown |
The Markdown field contains the markdown identifier for the selected event. |
|
Effective Date |
The date on which the clearance is set to take effect. You have the option to key in a date or select one using the calendar widget. |
|
Value |
The Value field provides the options that derive the new retail price. You have the option to modify the Change Type value. Change Type options:
After selecting the change type, you will enter the actual value for the change. This field is required entry if a change type is selected. The field supports up to four decimal places for Percent Off value. For Amount Off and Fixed Price decimal placement is based on currency of selected locations. |
|
Reason |
The Reason value defines the reason the clearance is being created. |
|
Rounding Rule |
The Rounding Rule field provides the ability to smooth retails for an item or location. |
|
Clear Reasons |
The Clear Reasons checkbox displays next to the Reasons field when multiple items or locations are selected for edit. If you choose to remove a Reason code for the select clearances the Clear Reasons checkbox can be clicked and the reason will be removed from the selected events. |
|
Clear Rounding Rules |
The Clear Rounding Rules checkbox displays when multiple items or locations are selected for edit. When the Clear Rounding Rules checkbox is clicked the value for the rounding rule is removed from the selected events. |
|
Clear Markdown |
The Clear Markdown checkbox displays when multiple items or locations are selected for edit. When the Clear Markdown checkbox is clicked the value for the Markdown field is removed from the selected events. |
Once updates are complete on the Edit Clearances pop-up, click OK. The Edit Clearances pop-up closes and you are returned to the Clearance Group page.
You will have options to delete markdowns and resets at the item or location level. Multiple items or locations can be selected in the respective tables, as well, to delete multiple rows at a time.
Item Markdown Level: Highlight one or more rows on the Item Markdowns table and click Delete.
Location Level: Highlight a single row on the Item Markdowns table and then highlight one or many rows on the Locations table and click Delete.
Perform a search for the clearance group that you want to delete. See Search for a Clearance Group.
From the search results pane, select the Clearance Group from which you want to delete markdowns or resets and select Edit from the Actions menu. The Clearance page appears.
From the Clearance Group page, you can select one or more items or locations to delete. Highlight the items or locations you want to delete and select Delete from that table's Action menu. The Delete Confirmation message appears.
Click OK to confirm the deletion. You are returned to the Clearance Group page.
The status of clearance events can be updated at the group level, the item markdown level, or the item markdown/location level.
Update Clearance Status from Group Level
Perform the following procedure to update the clearance status for all events in the clearance group:
Perform a search for the clearance group that you want to update. See Search for a Clearance Group.
From the search results pane, select the clearance group for which you want to update status. and select Edit from the Actions menu. The Clearance Group page appears.
Use the dropdown button at the bottom of the page to update the price change group status. Options are:
Submit All
Approve All
Worksheet All
Reject All
After selecting the status change, click Save to save the updated status and remain on the Clearance Group tab. Click Save and Close to save the updated status and return to the Clearance Group Search tab.
|
Note: Depending on the status selected, the event may move to a Pending or Processing status prior to moving to its new status while conflicts are being checked. To see the updated status after conflict checking completes, close the page and re-open. |
Update Clearance Status from Item Markdown Level
Perform the following procedure to update the clearance status on item markdowns for all the locations:
Perform a search for the clearance group that you want to update. See Search for a Clearance Group.
From the search results pane, select the clearance group for which you want to update status. and select Edit from the Actions menu. The Clearance Group page appears.
From the Clearance Group tab, from the Item Markdowns table, highlight the records for which you want to update status.
With the records highlighted, select the desired status update from the Actions menu.
After selecting the status change, click Save to save the updated status and remain on the Clearance Group tab. Click Save and Close to save the updated status and return to the Clearance Group Search tab.
Update Clearance Status from Location Level
Perform the following procedure to update the clearance status on item markdowns at the location level:
Perform a search for the clearance group that you want to update. See Search for a Clearance Group.
From the search results pane, select the clearance group for which you want to update status. and select Edit from the Actions menu. The Clearance Group page appears.
From the Clearance Group page, from the Items Markdown table, highlight the item markdown for which you want to update status.
In the Locations table, highlight the location(s) for which you want to update status for one or more locations.
With the location highlighted, select the desired status update from the Actions menu.
After selecting the status change, click Save to save the updated status and remain on the Price Change Group page. Click Save and Close to save the updated status and return to the Clearance Group Search page.
|
Note: If a clearance is selected for a status change and the new status is not valid, the clearance will be ignored and will not be updated. |
Pricing supports downloading of clearance groups into a spreadsheet to allow you to perform mass maintenance on the data. This data can then be re-uploaded into Pricing to update the events. Additionally, the upload function provides the ability to create new events from a spreadsheet and have them added to an existing group or create a new group. This section summarizes the workflow for both download and upload of clearance groups.
Perform the following procedure to download clearances to a spreadsheet:
Perform a search for the clearance group(s) that you want to update. See Search for a Clearance Group for more information.
From the search results pane, select the clearance groups you wish to download.
Select the Download Selected option from the Action Menu.
In the Download pop-up, select the template to use for downloading the clearance groups. This will automatically generate a process description for the download, which you can update if desired.
Click OK.
When prompted, choose to either open the .ods file that is generated or save the file and open it separately in the spreadsheet application of your choice.
The Upload Clearances page provides the ability to upload clearances from a spreadsheet (.ods file) into Pricing.
All uploads are done using templates. You can use the default Clearance template or configure a template for use in your business such that certain fields are defaulted or hidden from users to streamline the uploading process. You can download a blank version of your template by selecting the Download Blank Template option under Data Loading in the task list. For more information on blank templates, see the Pricing Do the Basics User Guide.
|
Note: See the Oracle Retail Merchandising Do the Basics User Guide for information about template configuration. |
Perform the following procedure to upload clearances via spreadsheet:
From the Tasks menu, select Upload Clearances under Clearances. The Upload Clearances page opens.
In the Template field, select the template you are using.
The Process Description will default based on the template name and timestamp, but can be updated.
In the Source field, click the Browse button to locate the spreadsheet file (.ods file) you want to upload and click Open.
Select one of the following options:
Click Upload to upload the file.
Click Revert to clear out the screen inputs.
Click Done to close the Upload Clearances window.
|
Note: If any errors occur during the upload, you will receive a notification. Similarly, if the upload involves any status changes or new events created in submitted or approved status, you may receive a notification if the uploaded event conflicts with another event. If there are no issues with the new event, you will not receive a notification. For more information on data loading statuses, see the View Data Loading Status section in the Pricing Do the Basics User Guide. |
If you receive a notification about an error that occurred in the uploading of a Clearance, you can click on the link in the notification, which will take you to the Data Loading Status page to see the details. Alternatively, this page can be accessed by navigating to the Data Loading -> Review Status option in the task list.
This task flow opens up the Data Loading status page, which lists the status of each upload/download request. Requests that were processed successfully will have their status set to Processed Successfully. Requests that were not processed successfully will have their status set to either Processed with Errors or Processed with Warnings. For such requests, you can access the View Issues page by clicking on the View Issues button to review details of the errors or warnings associated with a selected upload or download request.
The details provided include the worksheet in which the error is encountered, the row and column in the spreadsheet that is in error, and the error description. Errors will need to be fixed in order to successfully create or update a clearance.
Errors in download processing are typically due to the inability to access the data or insufficient privileges to create and write to the specified location. These errors can be resolved by removing any constraints that might have placed a lock on the data or ensuring that any constraints on creation of the spreadsheet are relaxed.
Errors in upload request processing are typically data-related and likely require data correction. You can use the error details in the View Issues screen as a guide to make corrections to the originally uploaded spreadsheet. Once the errors have been corrected, the data can be re-uploaded into Pricing as needed, using the corrected file.
Promotional price changes are temporary reductions in price for one or more items at one or more stores for a defined amount of time. Promotions are made up of a collection of offers, which define the reward and the conditions to receive the reward. Offers can be applied to regular priced items, clearance items, or both.
Pricing supports two levels of offers, item and transaction. Each offer level has templates associated with it which define how the offer is set up. For example, some offer templates will require only reward related information to be defined, such as the item level offer Get Y for Discount. This type of offer requires only the list of items that can be discounted if purchased and the discount amount or percent. Whereas other offer types, such as the transaction level Spend X, Get Discount offer, require a conditional spend amount, as well as a list of items that must be purchased to reach that spend amount, along with reward details such as the discount amount/percent and, optionally, a list of items excluded from the transaction level discount.
Table 15-27 Offer Types
| Offer Type | Template | Examples |
|---|---|---|
|
Item Level Offers |
||
|
Simple Discount |
Get Y for Discount |
25% off all women's shoes |
|
Buy/Get |
Buy X, Get Discount |
Buy any 3 board games, get $10 off |
|
Buy/Get |
Spend X, Get Discount |
Spend $25 in Toys, get $5 off |
|
Buy/Get |
Buy X, Get Y for Discount |
Buy 2 pairs of shoes; get a pair of socks for 50% off |
|
Buy/Get |
Spend X, Get Y for Discount |
Spend $15 on breakfast cereal, get 25% off any 2 cartons of milk |
|
Buy/Get |
Buy X of Single Item for Discount |
Buy 2 watermelons for $6 |
|
Buy/Get |
Buy X and Y, Get Discount |
Buy a sandwich, chips, and drink for $5.00 |
|
Buy/Get |
Buy X and Y, Get Z for Discount |
Buy a scarf and hat, get 50% off gloves |
|
Gift with Purchase |
Buy X, Get Gift with Purchase |
Buy any 2 BBQ items, get a free beach towel |
|
Gift with Purchase |
Spend X, Get Gift with Purchase |
Spend $200 in racquets, get a free can of tennis balls |
|
Transaction Level Offers |
||
|
Simple Discount |
Get Discount |
10% off your purchase today only |
|
Buy/Get |
Buy X, Get Discount |
Buy 3 reams of paper, get $5 your purchase |
|
Buy/Get |
Spend X, Get Discount |
Spend $100 in cleaning supplies, get 5% off your purchase |
There is a system option called Price Event Processing Days that is set to designate the number of days required between the current date and the effective date of a price event. This rule ensures that promotions are created and approved with enough advance timing that stores and other impacted areas can react accordingly.
However, for situations where promotional offers were missed for one or more items or locations, emergency price events can be created. A separate security privilege provides the ability to limit the users that can create these emergency events.
When an emergency offer is created and approved the information is passed to downstream systems the next time the extracts are run.
Perform the following procedure to create a promotion and add an offer to the promotion:
From the Tasks menu, select Create Promotion under Promotions. The Promotion page appears.
Enter the Promotion Description and optionally select a campaign. See Manage Campaigns for more information.
In the Offers table, select Add from the Actions menu. The Offer Wizard is launched. Continue with Add Offer Details.
The initial page in the Offer Wizard allows you to set the basic criteria of the offer.
Set your offer criteria using the following options:
Table 15-28 Add Item Offer Fields
| Field | Description |
|---|---|
|
Offer |
The Offer field allows you to enter an offer description. |
|
Level |
The Level radio button allows you to select the type of offer to create. Options are Item or Transaction. |
|
Type |
The Type field allows you to select the type of offer template you will create. For item level offers, valid options are Simple Discount, Buy/Get, or Gift with Purchase. For transaction level offers, valid options are Simple Discount or Buy/Get. |
|
Template |
The Template field allows you to specify the template that will be used for creating this offer. The valid types will change based on the level and type selections. See table of offer templates in the Promotions section for valid values. |
|
Start Date |
The Start Date field allows you to enter or select a start date for the offer. |
|
Start Time |
The Start Time field allows you to enter a start time for the offer. |
|
End Date |
The End Date field allows you to enter or select an end date for the offer. |
|
End Time |
The End Time field allows you to enter an end time for the offer. |
|
Comments |
The Comments field displays any comments associated with the offer. |
|
Coupon Code |
The Coupon Code field displays the coupon code associated with the offer. |
|
Coupon Code Required |
When the Coupon Code Required flag is set, it indicates the customer, call center, or sales associate must enter the coupon in order to have the discount applied to their purchase. |
|
Distribution Rule |
The Distribution Rule field indicates how the discount should be distributed to items on the offer. Valid values include Buy Items, Get Items, Both Buy and Get Items. Distribution rules are applicable for the following Item Level Templates:
|
|
Exclusive Discount |
Selecting the Exclusive Discount indicator means this offer is exclusive of other discounts. |
|
Customer Description |
The Customer Description field displays the customer description for the offer. This can be used for printing on a receipt or displaying on your web site. |
Once your offer criteria are entered, click Next. The type of offer that you have selected will determine the next steps.
This type of offer is for a simple discount off a set of items when they are part of a customer's purchase. There are no pre-conditions for the reward for this type of offer, when this template is selected, you will go directly to the Rewards page.
The Rewards page allows you to define the rewards associated with the offer. For a Get Y for Discount offer, this consists of the following steps:
From the Add Offer Rewards page, set your item offer rewards criteria using the following options:
Table 15-29 Item Offer Rewards Criteria
| Field | Description |
|---|---|
|
Discount |
Allows you to select the type of discount and enter the amount. Options are:
If you select Amount Off or Fixed Price, you can select the specific currency to which the reward applies or whether the reward should be applied for all currencies. |
|
Apply To |
Allows you to select which types of retail price the reward applies. Options are:
|
|
Apply Discount Up To |
The Apply Discount up to field indicates the number of times that the discount can be applied to a customer's purchase. No entry means unlimited. |
For Get Y for Discount, the rewards page shows a qualifying items table which allows you to include or exclude items from the offer.
In the Items table, select Add from the Actions menu. The Include/Exclude Items pop-up opens.
Set the criteria of the included or excluded items using the following fields:
Table 15-30 Include/Exclude Item Criteria
| Field | Description |
|---|---|
|
Include/Exclude |
These radio buttons allow you to choose if the items are being added as inclusions to or exclusions from the offer. |
|
Item Level |
The Item Level field allows you to select a category by which you can narrow the list of things to include/exclude in the offer reward. Options are:
|
|
Department |
The Department field is active if you select Department, Class, or Subclass in the Item Level field. Enter a department or click the dropdown to select a department for the items you want to include/exclude. |
|
Class |
The Class field is active if you select Class or Subclass in the Item Level field. Enter a class or click the dropdown to select a class of items to include/exclude. |
|
Subclass |
The Subclass field is active if you select Subclass in the Item Level field. Enter a subclass or click the dropdown to select a subclass of items to include/exclude. |
|
Item |
The Item field is active if you select Item in the Item Level field. Enter an item number or click the magnifying glass to search for an item to include/exclude. |
|
Parent Item |
The Parent Item field is active if you select Parent/Diff in the Item Level field. This field appears with a magnifying glass next to the Item Level field and allows you to enter or search for a parent item to include/exclude. |
|
Diff Type |
The Diff Type field is active if you select Parent/Diff in the Item Level field. Select the diff type for the parent item that you want to include/exclude. |
|
Diff |
The Diff field is active if you select Parent/Diff in the Item Level field. Enter or click the dropdown to select a diff for the parent that you want to include/exclude. |
|
Item List |
The Item List field is active if you select Item List in the Item Level field. Enter or click the dropdown to select a defined list of items to include/exclude. |
|
Source File |
Source File is active if you select Upload List in the Item Level field. Click Browse to select the file to upload. |
|
Supplier Site/Brand |
The Supplier Site and Brand fields are active if you select Department, Class, Subclass, or Supplier Site/Brand in the Item Level field. Enter a supplier site or a brand or click the dropdown to select a supplier site or a brand. The supplier site or brand you provide will be used as additional criteria for the items you want to include/exclude. |
When you have entered the criteria for the inclusion or exclusion, click OK to accept the criteria and close the pop-up. Click OK and Add Another to remain on the Include/Exclude pop-up and add an additional inclusion or exclusion.
Once your offer criteria are complete, click Apply. You are returned to the Promotions page. Your new offer is displayed in the Promotion table.
This type of offer is based on a customer buying a certain quantity of items in order to get a discount on those items. Multiple offers of this type could be added in a promotion in order to create a tiered discount. This type of offer requires both conditions and rewards criteria to be entered.
From the Add Offer Conditions page, set your item offer condition criteria using the following options:
Table 15-31 Item Offer Condition Criteria
| Field | Description |
|---|---|
|
Buy Quantity |
The Buy Quantity field allows you set the number of items that need to be purchased in order to receive the offer reward. |
|
Unit of Measure |
You may also need to enter the unit of measure that applies for the quantity, if Pricing is configured to run with more than one unit of measure. |
|
Price Restriction |
Optionally you can choose to indicate a price range for the conditions. This will act as an additional filter on the included buy items, such that only items priced in the designated range will meet the condition of the offer. To add a price restriction, click on the pencil icon found in the title bar of the Qualifying Items section of the page ( In the pop-up, select a value for Items Priced, which can be either Greater than, Less than, or Between. Then, enter the appropriate values. If the restriction will be for a specific currency, then enter the currency as well. If not entered, the currency will be based on the store where the offer is active. After entering the restriction, the text in the title bar of the Qualifying Items section of the page will be updated to show the value ( |
Next, you will need to select the items that must be purchased in order to meet the condition of this offer in the Qualifying Items table.
In the Items table, select Add from the Actions menu. The Include/Exclude Items pop-up opens.
Set the criteria of the included or excluded items using the following fields:
Table 15-32 Include/Exclude Item Criteria
| Field | Description |
|---|---|
|
Include/Exclude |
These radio buttons allow you to choose if the items are being added as inclusions to or exclusions from the offer. |
|
Item Level |
The Item Level field allows you to select a category by which you can narrow the list of things to include/exclude in the offer conditions. Options are:
|
|
Department |
The Department field is active if you select Department, Class, or Subclass in the Item Level field. Enter a department or click the dropdown to select a department for the items you want to include/exclude. |
|
Class |
The Class field is active if you select Class or Subclass in the Item Level field. Enter a class or click the dropdown to select a class of items to include/exclude. |
|
Subclass |
The Subclass field is active if you select Subclass in the Item Level field. Enter a subclass or click the dropdown to select a subclass of items to include/exclude. |
|
Item |
The Item field is active if you select Item in the Item Level field. Enter an item number or click the magnifying glass to search for an item to include/exclude. |
|
Parent Item |
The Parent Item field is active if you select Parent/Diff in the Item Level field. This field appears with a magnifying glass next to the Item Level field and allows you to enter or search for a parent item to include/exclude. |
|
Diff Type |
The Diff Type field is active if you select Parent/Diff in the Item Level field. Select the diff type for the parent item that you want to include/exclude. |
|
Diff |
The Diff field is active if you select Parent/Diff in the Item Level field. Enter or click the dropdown to select a diff for the parent that you want to include/exclude. |
|
Item List |
The Item List field is active if you select Item List in the Item Level field. Enter or click the dropdown to select a defined list of items to include/exclude. |
|
Source File |
Source File is active if you select Upload List in the Item Level field. Click Browse to select the file to upload. |
|
Supplier Site/Brand |
The Supplier Site and Brand fields are active if you select Department, Class, Subclass, or Supplier Site/Brand in the Item Level field. Enter a supplier site or a brand or click the dropdown to select a supplier site or a brand. The supplier site or brand you provide will be used as additional criteria for the items you want to include/exclude. |
When you have entered the criteria for the inclusion or exclusion, click OK to accept the criteria and close the popup. Click OK and Add Another to remain on the Include/Exclude dialog pop-up and add an additional inclusion or exclusion.
Once your offer criteria are complete, click Next and move to the Rewards page.
The Rewards page allows you to define the rewards associated with the offer. For an item level Buy X, Get Discount offer, this consists of the following steps:
From the Add Offer Rewards page, set your item offer rewards criteria using the following options:
Table 15-33 Item Offer Rewards Criteria
| Field | Description |
|---|---|
|
Discount |
Allows you to select the type of discount and enter the amount. Options are:
If you select Amount Off or Fixed Price, you can select the specific currency to which the reward applies or whether the reward should be applied for all currencies. |
|
Apply To |
Allows you to select which types of retail price the reward applies. Options are:
|
|
Apply Discount Up To |
The Apply Discount up to field indicates the number of times that the discount can be applied to a customer's purchase. No entry means unlimited. |
Once your offer criteria are complete, click Apply. You are returned to the Promotions page. Your new offer is displayed in the Promotion table.
This type of offer is based on a customer spending a certain amount on particular items in order to get a discount on those items. Multiple offers of this type could be added in a promotion in order to create a tiered discount. This type of offer requires both conditions and rewards criteria to be entered.
From the Add Offer Conditions page, set your item offer rewards condition criteria using the following options:
Table 15-34 Item Offer Rewards Condition Criteria
| Field | Description |
|---|---|
|
Spend Amount |
The Spend field allows you to set the amount which needs to be spent to in order to receive the offer. |
|
Currency |
A currency can also be added, if the spend amount applies to just a single currency. If not entered, it will be assumed to apply in terms of the currency of the store where the offer is active. |
Next, you will need to select the items that must be purchased in order to meet the condition of this offer in the Qualifying Items table.
In the Items table, select Add from the Actions menu. The Include/Exclude Items pop-up opens.
Set the criteria of the included or excluded items using the following fields:
Table 15-35 Include/Exclude Item Criteria
| Field | Description |
|---|---|
|
Include/Exclude |
These radio buttons allow you to choose if the items are being added as inclusions to or exclusions from the offer. |
|
Item Level |
The Item Level field allows you to select a category by which you can narrow the list of things to include/exclude in the offer conditions. Options are:
|
|
Department |
The Department field is active if you select Department, Class, or Subclass in the Item Level field. Enter a department or click the dropdown to select a department for the items you want to include/exclude. |
|
Class |
The Class field is active if you select Class or Subclass in the Item Level field. Enter a class or click the dropdown to select a class of items to include/exclude. |
|
Subclass |
The Subclass field is active if you select Subclass in the Item Level field. Enter a subclass or click the dropdown to select a subclass of items to include/exclude. |
|
Item |
The Item field is active if you select Item in the Item Level field. Enter an item number or click the magnifying glass to search for an item to include/exclude. |
|
Parent Item |
The Parent Item field is active if you select Parent/Diff in the Item Level field. This field appears with a magnifying glass next to the Item Level field and allows you to enter or search for a parent item to include/exclude. |
|
Diff Type |
The Diff Type field is active if you select Parent/Diff in the Item Level field. Select the diff type for the parent item that you want to include/exclude. |
|
Diff |
The Diff field is active if you select Parent/Diff in the Item Level field. Enter or click the dropdown to select a diff for the parent that you want to include/exclude. |
|
Item List |
The Item List field is active if you select Item List in the Item Level field. Enter or click the dropdown to select a defined list of items to include/exclude. |
|
Source File |
Source File is active if you select Upload List in the Item Level field. Click Browse to select the file to upload. |
|
Supplier Site/Brand |
The Supplier Site and Brand fields are active if you select Department, Class, Subclass, or Supplier Site/Brand in the Item Level field. Enter a supplier site or a brand or click the dropdown to select a supplier site or a brand. The supplier site or brand you provide will be used as additional criteria for the items you want to include/exclude. |
When you have entered the criteria for the inclusion or exclusion, click OK to accept the criteria and close the pop-up. Click OK and Add Another to remain on the Include/Exclude pop-up and add an additional inclusion or exclusion.
Once your offer criteria are complete, click Next and move to the Rewards page.
The Rewards page allows you to define the rewards associated with the offer. For an item level Spend X, Get Discount offer, this consists of the following steps:
From the Add Offer Rewards page, set your item offer rewards criteria using the following options:
Table 15-36 Item Offer Rewards Criteria
| Field | Description |
|---|---|
|
Discount |
Allows you to select the type of discount and enter the amount. Options are:
If you select Amount Off or Fixed Price, you can select the specific currency to which the reward applies or whether the reward should be applied for all currencies. |
|
Apply To |
Allows you to select which types of retail price the reward applies. Options are:
|
Once your offer criteria are complete, click Apply. You are returned to the Promotions page. Your new offer is displayed in the Promotion table.
This type of offer is based on a customer buying a certain quantity of items in order to get a discount on a different set of items. Multiple offers of this type could be added in a promotion in order to create a tiered discount. This type of offer requires both conditions and rewards criteria to be entered.
From the Add Offer Conditions page, set your item offer condition rewards criteria using the following options:
Table 15-37 Item Offer Condition Criteria
| Field | Description |
|---|---|
|
Buy Quantity |
The Buy Quantity field allows you set the number of items that need to be purchased in order to receive the offer reward. |
|
Unit of Measure |
You may also need to enter the unit of measure that applies for the quantity, if Pricing is configured to run with more than one unit of measure. |
|
Price Restriction |
Optionally you can choose to indicate a price range for the conditions. This will act as an additional filter on the included buy items, such that only items priced in the designated range will meet the condition of the offer. To add a price restriction, click on the pencil icon found in the title bar of the Qualifying Items section of the page ( In the pop-up, select a value for Items Priced, which can be either Greater than, Less than, or Between. Then, enter the appropriate values. If the restriction will be for a specific currency, then enter the currency as well. If not entered, the currency will be based on the store where the offer is active. After entering the restriction, the text in the title bar of the Qualifying Items section of the page will be updated to show the value ( |
Next, you will need to select the items that must be purchased in order to meet the condition of this offer in the Qualifying Items table.
In the Items table, select Add from the Actions menu. The Include/Exclude Items pop-up opens.
Set the criteria of the included or excluded items using the following fields:
Table 15-38 Include/Exclude Item Criteria
| Field | Description |
|---|---|
|
Include/Exclude |
These radio buttons allow you to choose if the items are being added as inclusions to or exclusions from the offer. |
|
Item Level |
The Item Level field allows you to select a category by which you can narrow the list of things to include/exclude in the offer conditions. Options are:
|
|
Department |
The Department field is active if you select Department, Class, or Subclass in the Item Level field. Enter a department or click the dropdown to select a department for the items you want to include/exclude. |
|
Class |
The Class field is active if you select Class or Subclass in the Item Level field. Enter a class or click the dropdown to select a class of items to include/exclude. |
|
Subclass |
The Subclass field is active if you select Subclass in the Item Level field. Enter a subclass or click the dropdown to select a subclass of items to include/exclude. |
|
Item |
The Item field is active if you select Item in the Item Level field. Enter an item number or click the magnifying glass to search for an item to include/exclude. |
|
Parent Item |
The Parent Item field is active if you select Parent/Diff in the Item Level field. This field appears with a magnifying glass next to the Item Level field and allows you to enter or search for a parent item to include/exclude. |
|
Diff Type |
The Diff Type field is active if you select Parent/Diff in the Item Level field. Select the diff type for the parent item that you want to include/exclude. |
|
Diff |
The Diff field is active if you select Parent/Diff in the Item Level field. Enter or click the dropdown to select a diff for the parent that you want to include/exclude. |
|
Item List |
The Item List field is active if you select Item List in the Item Level field. Enter or click the dropdown to select a defined list of items to include/exclude. |
|
Source File |
Source File is active if you select Upload List in the Item Level field. Click Browse to select the file to upload. |
|
Supplier Site/Brand |
The Supplier Site and Brand fields are active if you select Department, Class, Subclass, or Supplier Site/Brand in the Item Level field. Enter a supplier site or a brand or click the dropdown to select a supplier site or a brand. The supplier site or brand you provide will be used as additional criteria for the items you want to include/exclude. |
When you have entered the criteria for the inclusion or exclusion, click OK to accept the criteria and close the pop-up. Click OK and Add Another to remain on the Include/Exclude pop-up and add an additional inclusion or exclusion.
Once your offer criteria are complete, click Next and move to the Rewards page.
The Rewards page allows you to define the rewards associated with the offer. For an item level Buy X, Get Y for Discount offer, this consists of the following steps:
From the Add Offer Rewards page, set your item offer rewards criteria using the following options:
Table 15-39 Item Offer Rewards Criteria
| Field | Description |
|---|---|
|
Discount |
Allows you to select the type of discount and enter the amount. Options are:
If you select Amount Off or Fixed Price, you can select the specific currency to which the reward applies or whether the reward should be applied for all currencies. |
|
Apply To |
Allows you to select which types of retail price the reward applies. Options are:
|
|
Apply Discount Up To |
The Apply Discount up to field indicates the number of times that the discount can be applied to a customer's purchase. No entry means unlimited. |
|
Price Restriction |
Optionally you can choose to indicate a price range for the conditions. This will act as an additional filter on the included buy items, such that only items priced in the designated range will meet the condition of the offer. To add a price restriction, click on the pencil icon found in the title bar of the Qualifying Items section of the page ( In the pop-up, select a value for Items Priced, which can be either Greater than, Less than, or Between. Then, enter the appropriate values. If the restriction will be for a specific currency, then enter the currency as well. If not entered, the currency will be based on the store where the offer is active. After entering the restriction, the text in the title bar of the Qualifying Items section of the page will be updated to show the value ( |
Next, you will need to select the items that are eligible to have the reward applied in the Qualifying Items table.
In the Items table, select Add from the Actions menu. The Include/Exclude Items pop-up opens.
Set the criteria of the included or excluded items using the following fields:
Table 15-40 Include/Exclude Item Criteria
| Field | Description |
|---|---|
|
Include/Exclude |
These radio buttons allow you to choose if the items are being added as inclusions to or exclusions from the offer. |
|
Item Level |
The Item Level field allows you to select a category by which you can narrow the list of things to include/exclude in the offer conditions. Options are:
|
|
Department |
The Department field is active if you select Department, Class, or Subclass in the Item Level field. Enter a department or click the dropdown to select a department for the items you want to include/exclude. |
|
Class |
The Class field is active if you select Class or Subclass in the Item Level field. Enter a class or click the dropdown to select a class of items to include/exclude. |
|
Subclass |
The Subclass field is active if you select Subclass in the Item Level field. Enter a subclass or click the dropdown to select a subclass of items to include/exclude. |
|
Item |
The Item field is active if you select Item in the Item Level field. Enter an item number or click the magnifying glass to search for an item to include/exclude. |
|
Parent Item |
The Parent Item field is active if you select Parent/Diff in the Item Level field. This field appears with a magnifying glass next to the Item Level field and allows you to enter or search for a parent item to include/exclude. |
|
Diff Type |
The Diff Type field is active if you select Parent/Diff in the Item Level field. Select the diff type for the parent item that you want to include/exclude. |
|
Diff |
The Diff field is active if you select Parent/Diff in the Item Level field. Enter or click the dropdown to select a diff for the parent that you want to include/exclude. |
|
Item List |
The Item List field is active if you select Item List in the Item Level field. Enter or click the dropdown to select a defined list of items to include/exclude. |
|
Source File |
Source File is active if you select Upload List in the Item Level field. Click Browse to select the file to upload. |
|
Supplier Site/Brand |
The Supplier Site and Brand fields are active if you select Department, Class, Subclass, or Supplier Site/Brand in the Item Level field. Enter a supplier site or a brand or click the dropdown to select a supplier site or a brand. The supplier site or brand you provide will be used as additional criteria for the items you want to include/exclude. |
When you have entered the criteria for the inclusion or exclusion, click OK to accept the criteria and close the popup. Click OK and Add Another to remain on the Include/Exclude pop-up and add an additional inclusion or exclusion.
Once your offer criteria are complete, click Apply. You are returned to the Promotions page. Your new offer is displayed in the Promotion table.
This type of offer is based on a customer spending a certain amount on particular items in order to get a discount on a different set of items. Multiple offers of this type could be added in a promotion in order to create a tiered discount. This type of offer requires both conditions and rewards criteria to be entered.
From the Add Offer Conditions page, set your item offer condition criteria using the following options:
Table 15-41 Add Conditions Criteria
| Field | Description |
|---|---|
|
Spend Amount |
The Spend field allows you to set the amount which needs to be spent to in order to receive the offer. |
|
Currency |
A currency can also be added, if the spend amount applies to just a single currency. If not entered, it will be assumed to apply in terms of the currency of the store where the offer is active. |
Next, you will need to select the items that must be purchased in order to meet the condition of this offer in the Qualifying Items table.
In the Items table, select Add from the Actions menu. The Include/Exclude Items pop-up opens.
Set the criteria of the included or excluded items using the following fields:
Table 15-42 Include/Exclude Item Criteria
| Field | Description |
|---|---|
|
Include/Exclude |
These radio buttons allow you to choose if the items are being added as inclusions to or exclusions from the offer. |
|
Item Level |
The Item Level field allows you to select a category by which you can narrow the list of things to include/exclude in the offer conditions. Options are:
|
|
Department |
The Department field is active if you select Department, Class, or Subclass in the Item Level field. Enter a department or click the dropdown to select a department for the items you want to include/exclude. |
|
Class |
The Class field is active if you select Class or Subclass in the Item Level field. Enter a class or click the dropdown to select a class of items to include/exclude. |
|
Subclass |
The Subclass field is active if you select Subclass in the Item Level field. Enter a subclass or click the dropdown to select a subclass of items to include/exclude. |
|
Item |
The Item field is active if you select Item in the Item Level field. Enter an item number or click the magnifying glass to search for an item to include/exclude. |
|
Parent Item |
The Parent Item field is active if you select Parent/Diff in the Item Level field. This field appears with a magnifying glass next to the Item Level field and allows you to enter or search for a parent item to include/exclude. |
|
Diff Type |
The Diff Type field is active if you select Parent/Diff in the Item Level field. Select the diff type for the parent item that you want to include/exclude. |
|
Diff |
The Diff field is active if you select Parent/Diff in the Item Level field. Enter or click the dropdown to select a diff for the parent that you want to include/exclude. |
|
Item List |
The Item List field is active if you select Item List in the Item Level field. Enter or click the dropdown to select a defined list of items to include/exclude. |
|
Source File |
Source File is active if you select Upload List in the Item Level field. Click Browse to select the file to upload. |
|
Supplier Site/Brand |
The Supplier Site and Brand fields are active if you select Department, Class, Subclass, or Supplier Site/Brand in the Item Level field. Enter a supplier site or a brand or click the dropdown to select a supplier site or a brand. The supplier site or brand you provide will be used as additional criteria for the items you want to include/exclude. |
When you have entered the criteria for the inclusion or exclusion, click OK to accept the criteria and close the popup. Click OK and Add Another to remain on the Include/Exclude pop-up and add an additional inclusion or exclusion.
Once your offer criteria are complete, click Next and move to the Rewards page.
The Rewards page allows you to define the rewards associated with the offer. For an item level Spend X, Get Y for Discount offer, this consists of the following steps:
From the Add Offer Rewards page, set your item offer rewards criteria using the following options:
Table 15-43 Item Offer Rewards Criteria
| Field | Description |
|---|---|
|
Discount |
Allows you to select the type of discount and enter the amount. Options are:
If you select Amount Off or Fixed Price, you can select the specific currency to which the reward applies or whether the reward should be applied for all currencies. |
|
Apply To |
Allows you to select which types of retail price the reward applies. Options are:
|
|
Apply Discount Up To |
The Apply Discount up to field indicates the number of times that the discount can be applied to a customer's purchase. No entry means unlimited. |
|
Price Restriction |
Optionally you can choose to indicate a price range for the conditions. This will act as an additional filter on the included buy items, such that only items priced in the designated range will meet the condition of the offer. To add a price restriction, click on the pencil icon found in the title bar of the Qualifying Items section of the page ( In the pop-up, select a value for Items Priced, which can be either Greater than, Less than, or Between. Then, enter the appropriate values. If the restriction will be for a specific currency, then enter the currency as well. If not entered, the currency will be based on the store where the offer is active. After entering the restriction, the text in the title bar of the Qualifying Items section of the page will be updated to show the value ( |
Next, you will need to select the items that are eligible to have the reward applied in the Qualifying Items table.
In the Items table, select Add from the Actions menu. The Include/Exclude Items pop-up opens.
Set the criteria of the included or excluded items using the following fields:
Table 15-44 Include/Exclude Item Criteria
| Field | Description |
|---|---|
|
Include/Exclude |
These radio buttons allow you to choose if the items are being added as inclusions to or exclusions from the offer. |
|
Item Level |
The Item Level field allows you to select a category by which you can narrow the list of things to include/exclude in the offer conditions. Options are:
|
|
Department |
The Department field is active if you select Department, Class, or Subclass in the Item Level field. Enter a department or click the dropdown to select a department for the items you want to include/exclude. |
|
Class |
The Class field is active if you select Class or Subclass in the Item Level field. Enter a class or click the dropdown to select a class of items to include/exclude. |
|
Subclass |
The Subclass field is active if you select Subclass in the Item Level field. Enter a subclass or click the dropdown to select a subclass of items to include/exclude. |
|
Item |
The Item field is active if you select Item in the Item Level field. Enter an item number or click the magnifying glass to search for an item to include/exclude. |
|
Parent Item |
The Parent Item field is active if you select Parent/Diff in the Item Level field. This field appears with a magnifying glass next to the Item Level field and allows you to enter or search for a parent item to include/exclude. |
|
Diff Type |
The Diff Type field is active if you select Parent/Diff in the Item Level field. Select the diff type for the parent item that you want to include/exclude. |
|
Diff |
The Diff field is active if you select Parent/Diff in the Item Level field. Enter or click the dropdown to select a diff for the parent that you want to include/exclude. |
|
Item List |
The Item List field is active if you select Item List in the Item Level field. Enter or click the dropdown to select a defined list of items to include/exclude. |
|
Source File |
Source File is active if you select Upload List in the Item Level field. Click Browse to select the file to upload. |
|
Supplier Site/Brand |
The Supplier Site and Brand fields are active if you select Department, Class, Subclass, or Supplier Site/Brand in the Item Level field. Enter a supplier site or a brand or click the dropdown to select a supplier site or a brand. The supplier site or brand you provide will be used as additional criteria for the items you want to include/exclude. |
When you have entered the criteria for the inclusion or exclusion, click OK to accept the criteria and close the popup. Click OK and Add Another to remain on the Include/Exclude pop-up and add an additional inclusion or exclusion.
Once your offer criteria are complete, click Apply. You are returned to the Promotions page. Your new offer is displayed in the Promotion table.
This type of offer allows you to specify two or more "buy" conditions in order to receive the discount. Both conditions and rewards are required for this type of offer.
From the Add Offer Conditions page, start with defining the number of conditions for your offer. For each condition, specify the following:
Table 15-45 Add Conditions Criteria
| Field | Description |
|---|---|
|
Condition |
This number is automatically generated and is used to order the conditions added to the offer. |
|
Buy Quantity |
The Buy Quantity field allows you set the number of items that need to be purchased in order to receive the offer reward. |
|
Unit of Measure |
You may also need to enter the unit of measure that applies for the quantity, if Pricing is configured to run with more than one unit of measure. |
|
Price Restriction |
Optionally you can choose to indicate a price range for the conditions. This will act as an additional filter on the included buy items, such that only items priced in the designated range will meet the condition of the offer. To add a price restriction, select a value for Items Priced, which can be either Greater than, Less than, or Between. Then, enter the appropriate values. If the restriction will be for a specific currency, then enter the currency as well. If not entered, the currency will be based on the store where the offer is active. |
Next, you will need to select the items that must be purchased in order to meet each set of conditions for this offer in the Qualifying Items table.
First, highlight the condition that you want to add items.
Then in the Items table, select Add from the Actions menu. The Include/Exclude Items pop-up opens.
Set the criteria of the included or excluded items using the following fields:
Table 15-46 Include/Exclude Item Criteria
| Field | Description |
|---|---|
|
Include/Exclude |
These radio buttons allow you to choose if the items are being added as inclusions to or exclusions from the offer. |
|
Item Level |
The Item Level field allows you to select a category by which you can narrow the list of things to include/exclude in the offer conditions. Options are:
|
|
Department |
The Department field is active if you select Department, Class, or Subclass in the Item Level field. Enter a department or click the dropdown to select a department for the items you want to include/exclude. |
|
Class |
The Class field is active if you select Class or Subclass in the Item Level field. Enter a class or click the dropdown to select a class of items to include/exclude. |
|
Subclass |
The Subclass field is active if you select Subclass in the Item Level field. Enter a subclass or click the dropdown to select a subclass of items to include/exclude. |
|
Item |
The Item field is active if you select Item in the Item Level field. Enter an item number or click the magnifying glass to search for an item to include/exclude. |
|
Parent Item |
The Parent Item field is active if you select Parent/Diff in the Item Level field. This field appears with a magnifying glass next to the Item Level field and allows you to enter or search for a parent item to include/exclude. |
|
Diff Type |
The Diff Type field is active if you select Parent/Diff in the Item Level field. Select the diff type for the parent item that you want to include/exclude. |
|
Diff |
The Diff field is active if you select Parent/Diff in the Item Level field. Enter or click the dropdown to select a diff for the parent that you want to include/exclude. |
|
Item List |
The Item List field is active if you select Item List in the Item Level field. Enter or click the dropdown to select a defined list of items to include/exclude. |
|
Source File |
Source File is active if you select Upload List in the Item Level field. Click Browse to select the file to upload. |
|
Supplier Site/Brand |
The Supplier Site and Brand fields are active if you select Department, Class, Subclass, or Supplier Site/Brand in the Item Level field. Enter a supplier site or a brand or click the dropdown to select a supplier site or a brand. The supplier site or brand you provide will be used as additional criteria for the items you want to include/exclude. |
When you have entered the criteria for the inclusion or exclusion for the condition, click OK to accept the criteria and close the popup. Click OK and Add Another to remain on the Include/Exclude pop-up and add an additional inclusion or exclusion.
Continue until qualifying items have been added for all conditions on the offer.
Once your offer criteria are complete, click Next and move to the Rewards page.
The Rewards page allows you to define the rewards associated with the offer. For an item level Buy X and Y, Get Discount offer, this consists of the following steps:
From the Add Offer Rewards page, set your item offer rewards criteria using the following options:
Table 15-47 Item Offer Rewards Criteria
| Field | Description |
|---|---|
|
Discount |
Allows you to select the type of discount and enter the amount. Options are:
If you select Amount Off or Fixed Price, you can select the specific currency to which the reward applies or whether the reward should be applied for all currencies. |
|
Apply To |
Allows you to select which types of retail price the reward applies. Options are:
|
|
Apply Discount Up To |
The Apply Discount up to field indicates the number of times that the discount can be applied to a customer's purchase. No entry means unlimited. |
Once your offer criteria are complete, click Apply. You are returned to the Promotions page. Your new offer is displayed in the Promotion table.
This type of offer allows you to specify two or more "buy" conditions in order to receive the discount on a different set of items. Both conditions and rewards are required for this type of offer.
From the Add Offer Conditions page, start with defining the number of conditions for your offer. For each condition, specify the following:
Table 15-48 Add Offer Conditions Criteria
| Field | Description |
|---|---|
|
Condition |
This number is automatically generated and is used to order the conditions added to the offer. |
|
Buy Quantity |
The Buy Quantity field allows you set the number of items that need to be purchased in order to receive the offer reward. |
|
Unit of Measure |
You may also need to enter the unit of measure that applies for the quantity, if Pricing is configured to run with more than one unit of measure. |
|
Price Restriction |
Optionally you can choose to indicate a price range for the conditions. This will act as an additional filter on the included buy items, such that only items priced in the designated range will meet the condition of the offer. To add a price restriction, select a value for Items Priced, which can be either Greater than, Less than, or Between. Then, enter the appropriate values. If the restriction will be for a specific currency, then enter the currency as well. If not entered, the currency will be based on the store where the offer is active. |
Next, you will need to select the items that must be purchased in order to meet each set of conditions for this offer in the Qualifying Items table.
First, highlight the condition that you want to add items.
Then in the Items table, select Add from the Actions menu. The Include/Exclude Items pop-up opens.
Set the criteria of the included or excluded items using the following fields:
Table 15-49 Include/Exclude Item Criteria
| Field | Description |
|---|---|
|
Include/Exclude |
These radio buttons allow you to choose if the items are being added as inclusions to or exclusions from the offer. |
|
Item Level |
The Item Level field allows you to select a category by which you can narrow the list of things to include/exclude in the offer conditions. Options are:
|
|
Department |
The Department field is active if you select Department, Class, or Subclass in the Item Level field. Enter a department or click the dropdown to select a department for the items you want to include/exclude. |
|
Class |
The Class field is active if you select Class or Subclass in the Item Level field. Enter a class or click the dropdown to select a class of items to include/exclude. |
|
Subclass |
The Subclass field is active if you select Subclass in the Item Level field. Enter a subclass or click the dropdown to select a subclass of items to include/exclude. |
|
Item |
The Item field is active if you select Item in the Item Level field. Enter an item number or click the magnifying glass to search for an item to include/exclude. |
|
Parent Item |
The Parent Item field is active if you select Parent/Diff in the Item Level field. This field appears with a magnifying glass next to the Item Level field and allows you to enter or search for a parent item to include/exclude. |
|
Diff Type |
The Diff Type field is active if you select Parent/Diff in the Item Level field. Select the diff type for the parent item that you want to include/exclude. |
|
Diff |
The Diff field is active if you select Parent/Diff in the Item Level field. Enter or click the dropdown to select a diff for the parent that you want to include/exclude. |
|
Item List |
The Item List field is active if you select Item List in the Item Level field. Enter or click the dropdown to select a defined list of items to include/exclude. |
|
Source File |
Source File is active if you select Upload List in the Item Level field. Click Browse to select the file to upload. |
|
Supplier Site/Brand |
The Supplier Site and Brand fields are active if you select Department, Class, Subclass, or Supplier Site/Brand in the Item Level field. Enter a supplier site or a brand or click the dropdown to select a supplier site or a brand. The supplier site or brand you provide will be used as additional criteria for the items you want to include/exclude. |
When you have entered the criteria for the inclusion or exclusion for the condition, click OK to accept the criteria and close the popup. Click OK and Add Another to remain on the Include/Exclude pop-up and add an additional inclusion or exclusion.
Continue until qualifying items have been added for all conditions on the offer.
Once your offer criteria are complete, click Next and move to the Rewards page.
The Rewards page allows you to define the rewards associated with the offer. For an item level Buy X and Y, Get Z for Discount offer, this consists of the following steps:
From the Add Offer Rewards page, set your item offer rewards criteria using the following options:
Table 15-50 Item Offer Rewards Criteria
| Field | Description |
|---|---|
|
Discount |
Allows you to select the type of discount and enter the amount. Options are:
If you select Amount Off or Fixed Price, you can select the specific currency to which the reward applies or whether the reward should be applied for all currencies. |
|
Apply To |
Allows you to select which types of retail price the reward applies. Options are:
|
|
Apply Discount Up To |
The Apply Discount up to field indicates the number of times that the discount can be applied to a customer's purchase. No entry means unlimited. |
|
Price Restriction |
Optionally you can choose to indicate a price range for the conditions. This will act as an additional filter on the included buy items, such that only items priced in the designated range will meet the condition of the offer. To add a price restriction, click on the pencil icon found in the title bar of the Qualifying Items section of the page ( In the pop-up, select a value for Items Priced, which can be either Greater than, Less than, or Between. Then, enter the appropriate values. If the restriction will be for a specific currency, then enter the currency as well. If not entered, the currency will be based on the store where the offer is active. After entering the restriction, the text in the title bar of the Qualifying Items section of the page will be updated to show the value ( |
Next, you will need to select the items that are eligible to have the reward applied in the Qualifying Items table.
In the Items table, select Add from the Actions menu. The Include/Exclude Items pop-up opens.
Set the criteria of the included or excluded items using the following fields:
Table 15-51 Include/Exclude Item Criteria
| Field | Description |
|---|---|
|
Include/Exclude |
These radio buttons allow you to choose if the items are being added as inclusions to or exclusions from the offer. |
|
Item Level |
The Item Level field allows you to select a category by which you can narrow the list of things to include/exclude in the offer conditions. Options are:
|
|
Department |
The Department field is active if you select Department, Class, or Subclass in the Item Level field. Enter a department or click the dropdown to select a department for the items you want to include/exclude. |
|
Class |
The Class field is active if you select Class or Subclass in the Item Level field. Enter a class or click the dropdown to select a class of items to include/exclude. |
|
Subclass |
The Subclass field is active if you select Subclass in the Item Level field. Enter a subclass or click the dropdown to select a subclass of items to include/exclude. |
|
Item |
The Item field is active if you select Item in the Item Level field. Enter an item number or click the magnifying glass to search for an item to include/exclude. |
|
Parent Item |
The Parent Item field is active if you select Parent/Diff in the Item Level field. This field appears with a magnifying glass next to the Item Level field and allows you to enter or search for a parent item to include/exclude. |
|
Diff Type |
The Diff Type field is active if you select Parent/Diff in the Item Level field. Select the diff type for the parent item that you want to include/exclude. |
|
Diff |
The Diff field is active if you select Parent/Diff in the Item Level field. Enter or click the dropdown to select a diff for the parent that you want to include/exclude. |
|
Item List |
The Item List field is active if you select Item List in the Item Level field. Enter or click the dropdown to select a defined list of items to include/exclude. |
|
Source File |
Source File is active if you select Upload List in the Item Level field. Click Browse to select the file to upload. |
|
Supplier Site/Brand |
The Supplier Site and Brand fields are active if you select Department, Class, Subclass, or Supplier Site/Brand in the Item Level field. Enter a supplier site or a brand or click the dropdown to select a supplier site or a brand. The supplier site or brand you provide will be used as additional criteria for the items you want to include/exclude. |
When you have entered the criteria for the inclusion or exclusion, click OK to accept the criteria and close the popup. Click OK and Add Another to remain on the Include/Exclude pop-up and add an additional inclusion or exclusion.
Once your offer criteria are complete, click Apply. You are returned to the Promotions page. Your new offer is displayed in the Promotion table.
This type of offer is for a discount on a single item, specifying a quantity that must be purchased in order to receive the discount. It requires both conditions and rewards be specified.
From the Add Offer Conditions page, set your item offer condition criteria using the following options:
Table 15-52 Item Offer Condition Criteria
| Field | Description |
|---|---|
|
Buy Quantity |
The Buy Quantity field allows you set the number of items that need to be purchased in order to receive the offer reward. |
|
Unit of Measure |
You may also need to enter the unit of measure that applies for the quantity, if Pricing is configured to run with more than one unit of measure. |
Next, you will need to select the item that must be purchased in order to meet the condition of this offer. Enter an item number or click on the magnifying glass icon to select an item from a list of values.
Once your offer criteria are complete, click Next and move to the Rewards page.
The Rewards page allows you to define the rewards associated with the offer. For a Buy X of a Single Item for Discount offer, this consists of the following steps:
From the Add Offer Rewards page, set your item offer rewards criteria using the following options:
Table 15-53 Item Offer Rewards Criteria
| Field | Description |
|---|---|
|
Discount |
Allows you to select the type of discount and enter the amount. Options are:
If you select Amount Off or Fixed Price, you can select the specific currency to which the reward applies or whether the reward should be applied for all currencies. |
|
Apply Discount Up To |
The Apply Discount up to field indicates the number of times that the discount can be applied to a customer's purchase. No entry means unlimited. |
Once your offer criteria are complete, click Apply. You are returned to the Promotions page. Your new offer is displayed in the Promotion table.
This type of offer involves receiving a free item based on purchasing the quantity of items specified as the buy condition on the offer. This type of offer requires both conditions and rewards.
From the Add Offer Conditions page, set your item offer condition criteria using the following options:
Table 15-54 Item Offer Condition Criteria
| Field | Description |
|---|---|
|
Buy Quantity |
The Buy Quantity field allows you set the number of items that need to be purchased in order to receive the offer reward. |
|
Unit of Measure |
You may also need to enter the unit of measure that applies for the quantity, if Pricing is configured to run with more than one unit of measure. |
|
Price Restriction |
Optionally you can choose to indicate a price range for the conditions. This will act as an additional filter on the included buy items, such that only items priced in the designated range will meet the condition of the offer. To add a price restriction, click on the pencil icon found in the title bar of the Qualifying Items section of the page ( In the pop-up, select a value for Items Priced, which can be either Greater than, Less than, or Between. Then, enter the appropriate values. If the restriction will be for a specific currency, then enter the currency as well. If not entered, the currency will be based on the store where the offer is active. After entering the restriction, the text in the title bar of the Qualifying Items section of the page will be updated to show the value ( |
Next, you will need to select the items that must be purchased in order to meet the condition of this offer in the Qualifying Items table.
In the Items table, select Add from the Actions menu. The Include/Exclude Items pop-up opens.
Set the criteria of the included or excluded items using the following fields:
Table 15-55 Include/Exclude Item Criteria
| Field | Description |
|---|---|
|
Include/Exclude |
These radio buttons allow you to choose if the items are being added as inclusions to or exclusions from the offer. |
|
Item Level |
The Item Level field allows you to select a category by which you can narrow the list of things to include/exclude in the offer conditions. Options are:
|
|
Department |
The Department field is active if you select Department, Class, or Subclass in the Item Level field. Enter a department or click the dropdown to select a department for the items you want to include/exclude. |
|
Class |
The Class field is active if you select Class or Subclass in the Item Level field. Enter a class or click the dropdown to select a class of items to include/exclude. |
|
Subclass |
The Subclass field is active if you select Subclass in the Item Level field. Enter a subclass or click the dropdown to select a subclass of items to include/exclude. |
|
Item |
The Item field is active if you select Item in the Item Level field. Enter an item number or click the magnifying glass to search for an item to include/exclude. |
|
Parent Item |
The Parent Item field is active if you select Parent/Diff in the Item Level field. This field appears with a magnifying glass next to the Item Level field and allows you to enter or search for a parent item to include/exclude. |
|
Diff Type |
The Diff Type field is active if you select Parent/Diff in the Item Level field. Select the diff type for the parent item that you want to include/exclude. |
|
Diff |
The Diff field is active if you select Parent/Diff in the Item Level field. Enter or click the dropdown to select a diff for the parent that you want to include/exclude. |
|
Item List |
The Item List field is active if you select Item List in the Item Level field. Enter or click the dropdown to select a defined list of items to include/exclude. |
|
Source File |
Source File is active if you select Upload List in the Item Level field. Click Browse to select the file to upload. |
|
Supplier Site/Brand |
The Supplier Site and Brand fields are active if you select Department, Class, Subclass, or Supplier Site/Brand in the Item Level field. Enter a supplier site or a brand or click the dropdown to select a supplier site or a brand. The supplier site or brand you provide will be used as additional criteria for the items you want to include/exclude. |
When you have entered the criteria for the inclusion or exclusion, click OK to accept the criteria and close the popup. Click OK and Add Another to remain on the Include/Exclude pop-up and add an additional inclusion or exclusion.
Once your offer criteria are complete, click Next and move to the Rewards page.
The Rewards page allows you to define the rewards associated with the offer. For a Buy X, Get Gift with Purchase offer, this consists of the following steps:
From the Add Offer Rewards page, set your item offer rewards criteria using the following options:
Table 15-56 Item Offer Rewards Criteria
| Field | Description |
|---|---|
|
Item |
Enter an item number or use the magnifying glass to select an item from the list of values. This will be the free item rewarded to the customer for meeting the conditions of the offer. |
|
Apply Discount Up To |
The Apply Discount up to field indicates the number of times that the discount can be applied to a customer's purchase. No entry means unlimited. |
Once your offer criteria are complete, click Apply. You are returned to the Promotions page. Your new offer is displayed in the Promotion table.
This type of offer involves receiving a free item based on purchasing the amount of the qualifying items specified as the buy condition on the offer. This type of offer requires both conditions and rewards.
From the Add Offer Conditions page, set your item offer condition criteria using the following options:
Table 15-57 Item Offer Conditions Criteria
| Field | Description |
|---|---|
|
Spend Amount |
The Spend field allows you to set the amount which needs to be spent to in order to receive the offer. |
|
Currency |
A currency can also be added, if the spend amount applies to just a single currency. If not entered, it will be assumed to apply in terms of the currency of the store where the offer is active. |
Next, you will need to select the items that must be purchased in order to meet the condition of this offer in the Qualifying Items table.
In the Items table, select Add from the Actions menu. The Include/Exclude Items pop-up opens.
Set the criteria of the included or excluded items using the following fields:
Table 15-58 Include/Exclude Item Criteria
| Field | Description |
|---|---|
|
Include/Exclude |
These radio buttons allow you to choose if the items are being added as inclusions to or exclusions from the offer. |
|
Item Level |
The Item Level field allows you to select a category by which you can narrow the list of things to include/exclude in the offer conditions. Options are:
|
|
Department |
The Department field is active if you select Department, Class, or Subclass in the Item Level field. Enter a department or click the dropdown to select a department for the items you want to include/exclude. |
|
Class |
The Class field is active if you select Class or Subclass in the Item Level field. Enter a class or click the dropdown to select a class of items to include/exclude. |
|
Subclass |
The Subclass field is active if you select Subclass in the Item Level field. Enter a subclass or click the dropdown to select a subclass of items to include/exclude. |
|
Item |
The Item field is active if you select Item in the Item Level field. Enter an item number or click the magnifying glass to search for an item to include/exclude. |
|
Parent Item |
The Parent Item field is active if you select Parent/Diff in the Item Level field. This field appears with a magnifying glass next to the Item Level field and allows you to enter or search for a parent item to include/exclude. |
|
Diff Type |
The Diff Type field is active if you select Parent/Diff in the Item Level field. Select the diff type for the parent item that you want to include/exclude. |
|
Diff |
The Diff field is active if you select Parent/Diff in the Item Level field. Enter or click the dropdown to select a diff for the parent that you want to include/exclude. |
|
Item List |
The Item List field is active if you select Item List in the Item Level field. Enter or click the dropdown to select a defined list of items to include/exclude. |
|
Source File |
Source File is active if you select Upload List in the Item Level field. Click Browse to select the file to upload. |
|
Supplier Site/Brand |
The Supplier Site and Brand fields are active if you select Department, Class, Subclass, or Supplier Site/Brand in the Item Level field. Enter a supplier site or a brand or click the dropdown to select a supplier site or a brand. The supplier site or brand you provide will be used as additional criteria for the items you want to include/exclude. |
When you have entered the criteria for the inclusion or exclusion, click OK to accept the criteria and close the popup. Click OK and Add Another to remain on the Include/Exclude pop-up and add an additional inclusion or exclusion.
Once your offer criteria are complete, click Next and move to the Rewards page.
The Rewards page allows you to define the rewards associated with the offer. For a Spend X, Get Gift with Purchase offer, this consists of the following steps:
From the Add Offer Rewards page, set your item offer rewards criteria using the following options:
Table 15-59 Item Offer Rewards Criteria
| Field | Description |
|---|---|
|
Item |
Enter an item number or use the magnifying glass to select an item from the list of values. This will be the free item rewarded to the customer for meeting the conditions of the offer. |
|
Apply Discount Up To |
The Apply Discount up to field indicates the number of times that the discount can be applied to a customer's purchase. No entry means unlimited. |
Once your offer criteria are complete, click Apply. You are returned to the Promotions page. Your new offer is displayed in the Promotion table.
This type of offer is for a straight discount off the customer's purchase. There is no pre-condition for receiving the discount other than making a purchase. The discount is applied to all items on the transaction unless there are specific exclusions specified.
The Rewards page allows you to define the rewards associated with the offer. For a transaction level Get Discount offer, this consists of the following steps:
From the Add Offer Rewards page, set your item offer rewards criteria using the following options:
Table 15-60 Item Offer Rewards Criteria
| Field | Description |
|---|---|
|
Discount |
Allows you to select the type of discount and enter the amount. Options are:
If you select Amount Off, you can select the specific currency to which the reward applies or whether the reward should be applied for all currencies. |
|
Apply To |
Allows you to select which types of retail price the reward applies. Options are:
|
Next, you can optionally add a list of items that should be excluded from having the discount applied.
In the Items table, select Add from the Actions menu. The Include/Exclude Items pop-up opens.
Set the criteria of the included or excluded items using the following fields:
Table 15-61 Include/Exclude Item Criteria
| Field | Description |
|---|---|
|
Include/Exclude |
These radio buttons allow you to choose if the items are being added as inclusions to or exclusions from the offer. |
|
Item Level |
The Item Level field allows you to select a category by which you can narrow the list of things to include/exclude in the offer conditions. Options are:
|
|
Department |
The Department field is active if you select Department, Class, or Subclass in the Item Level field. Enter a department or click the dropdown to select a department for the items you want to include/exclude. |
|
Class |
The Class field is active if you select Class or Subclass in the Item Level field. Enter a class or click the dropdown to select a class of items to include/exclude. |
|
Subclass |
The Subclass field is active if you select Subclass in the Item Level field. Enter a subclass or click the dropdown to select a subclass of items to include/exclude. |
|
Item |
The Item field is active if you select Item in the Item Level field. Enter an item number or click the magnifying glass to search for an item to include/exclude. |
|
Parent Item |
The Parent Item field is active if you select Parent/Diff in the Item Level field. This field appears with a magnifying glass next to the Item Level field and allows you to enter or search for a parent item to include/exclude. |
|
Diff Type |
The Diff Type field is active if you select Parent/Diff in the Item Level field. Select the diff type for the parent item that you want to include/exclude. |
|
Diff |
The Diff field is active if you select Parent/Diff in the Item Level field. Enter or click the dropdown to select a diff for the parent that you want to include/exclude. |
|
Item List |
The Item List field is active if you select Item List in the Item Level field. Enter or click the dropdown to select a defined list of items to include/exclude. |
|
Source File |
Source File is active if you select Upload List in the Item Level field. Click Browse to select the file to upload. |
|
Supplier Site/Brand |
The Supplier Site and Brand fields are active if you select Department, Class, Subclass, or Supplier Site/Brand in the Item Level field. Enter a supplier site or a brand or click the dropdown to select a supplier site or a brand. The supplier site or brand you provide will be used as additional criteria for the items you want to include/exclude. |
When you have entered the criteria for the exclusion, click OK to accept the criteria and close the popup. Click OK and Add Another to remain on the Exclude pop-up and add an additional exclusion.
Once your offer criteria are complete, click Apply. You are returned to the Promotions page. Your new offer is displayed in the Promotion table.
This type of offer requires that a customer purchase a certain quantity of items before receiving a discount on their transaction. The discount is applied to all items on the transaction unless there are specific exclusions specified.
From the Add Offer Conditions page, set your offer condition criteria using the following options:
Table 15-62 Item Offer Condition Criteria
| Field | Description |
|---|---|
|
Buy Quantity |
The Buy Quantity field allows you set the number of items that need to be purchased in order to receive the offer reward. |
|
Unit of Measure |
You may also need to enter the unit of measure that applies for the quantity, if Pricing is configured to run with more than one unit of measure. |
|
Price Restriction |
Optionally you can choose to indicate a price range for the conditions. This will act as an additional filter on the included buy items, such that only items priced in the designated range will meet the condition of the offer. To add a price restriction, click on the pencil icon found in the title bar of the Qualifying Items section of the page ( In the pop-up, select a value for Items Priced, which can be either Greater than, Less than, or Between. Then, enter the appropriate values. If the restriction will be for a specific currency, then enter the currency as well. If not entered, the currency will be based on the store where the offer is active. After entering the restriction, the text in the title bar of the Qualifying Items section of the page will be updated to show the value ( |
Next, you will need to select the items that must be purchased in order to meet the condition of this offer in the Qualifying Items table.
In the Items table, select Add from the Actions menu. The Include/Exclude Items pop-up opens.
Set the criteria of the included or excluded items using the following fields:
Table 15-63 Include/Exclude Item Criteria
| Field | Description |
|---|---|
|
Include/Exclude |
These radio buttons allow you to choose if the items are being added as inclusions to or exclusions from the offer. |
|
Item Level |
The Item Level field allows you to select a category by which you can narrow the list of things to include/exclude in the offer conditions. Options are:
|
|
Department |
The Department field is active if you select Department, Class, or Subclass in the Item Level field. Enter a department or click the dropdown to select a department for the items you want to include/exclude. |
|
Class |
The Class field is active if you select Class or Subclass in the Item Level field. Enter a class or click the dropdown to select a class of items to include/exclude. |
|
Subclass |
The Subclass field is active if you select Subclass in the Item Level field. Enter a subclass or click the dropdown to select a subclass of items to include/exclude. |
|
Item |
The Item field is active if you select Item in the Item Level field. Enter an item number or click the magnifying glass to search for an item to include/exclude. |
|
Parent Item |
The Parent Item field is active if you select Parent/Diff in the Item Level field. This field appears with a magnifying glass next to the Item Level field and allows you to enter or search for a parent item to include/exclude. |
|
Diff Type |
The Diff Type field is active if you select Parent/Diff in the Item Level field. Select the diff type for the parent item that you want to include/exclude. |
|
Diff |
The Diff field is active if you select Parent/Diff in the Item Level field. Enter or click the dropdown to select a diff for the parent that you want to include/exclude. |
|
Item List |
The Item List field is active if you select Item List in the Item Level field. Enter or click the dropdown to select a defined list of items to include/exclude. |
|
Source File |
Source File is active if you select Upload List in the Item Level field. Click Browse to select the file to upload. |
|
Supplier Site/Brand |
The Supplier Site and Brand fields are active if you select Department, Class, Subclass, or Supplier Site/Brand in the Item Level field. Enter a supplier site or a brand or click the dropdown to select a supplier site or a brand. The supplier site or brand you provide will be used as additional criteria for the items you want to include/exclude. |
When you have entered the criteria for the inclusion or exclusion, click OK to accept the criteria and close the popup. Click OK and Add Another to remain on the Include/Exclude pop-up and add an additional inclusion or exclusion.
Once your offer criteria are complete, click Next and move to the Rewards page.
The Rewards page allows you to define the rewards associated with the offer. For a transaction level Buy X, Get Discount offer, this consists of the following steps:
From the Add Offer Rewards page, set your item offer rewards criteria using the following options:
Table 15-64 Item Offer Rewards Criteria
| Field | Description |
|---|---|
|
Discount |
Allows you to select the type of discount and enter the amount. Options are:
If you select Amount Off, you can select the specific currency to which the reward applies or whether the reward should be applied for all currencies. |
|
Apply To |
Allows you to select which types of retail price the reward applies. Options are:
|
Next, you can optionally add a list of items that should be excluded from having the discount applied.
In the Items table, select Add from the Actions menu. The Include/Exclude Items pop-up opens.
Set the criteria of the included or excluded items using the following fields:
Table 15-65 Include/Exclude Item Criteria
| Field | Description |
|---|---|
|
Include/Exclude |
These radio buttons allow you to choose if the items are being added as inclusions to or exclusions from the offer. |
|
Item Level |
The Item Level field allows you to select a category by which you can narrow the list of things to include/exclude in the offer conditions. Options are:
|
|
Department |
The Department field is active if you select Department, Class, or Subclass in the Item Level field. Enter a department or click the dropdown to select a department for the items you want to include/exclude. |
|
Class |
The Class field is active if you select Class or Subclass in the Item Level field. Enter a class or click the dropdown to select a class of items to include/exclude. |
|
Subclass |
The Subclass field is active if you select Subclass in the Item Level field. Enter a subclass or click the dropdown to select a subclass of items to include/exclude. |
|
Item |
The Item field is active if you select Item in the Item Level field. Enter an item number or click the magnifying glass to search for an item to include/exclude. |
|
Parent Item |
The Parent Item field is active if you select Parent/Diff in the Item Level field. This field appears with a magnifying glass next to the Item Level field and allows you to enter or search for a parent item to include/exclude. |
|
Diff Type |
The Diff Type field is active if you select Parent/Diff in the Item Level field. Select the diff type for the parent item that you want to include/exclude. |
|
Diff |
The Diff field is active if you select Parent/Diff in the Item Level field. Enter or click the dropdown to select a diff for the parent that you want to include/exclude. |
|
Item List |
The Item List field is active if you select Item List in the Item Level field. Enter or click the dropdown to select a defined list of items to include/exclude. |
|
Source File |
Source File is active if you select Upload List in the Item Level field. Click Browse to select the file to upload. |
|
Supplier Site/Brand |
The Supplier Site and Brand fields are active if you select Department, Class, Subclass, or Supplier Site/Brand in the Item Level field. Enter a supplier site or a brand or click the dropdown to select a supplier site or a brand. The supplier site or brand you provide will be used as additional criteria for the items you want to include/exclude. |
When you have entered the criteria for the exclusion, click OK to accept the criteria and close the popup. Click OK and Add Another to remain on the Exclude pop-up and add an additional exclusion.
Once your offer criteria are complete, click Apply. You are returned to the Promotions page. Your new offer is displayed in the Promotion table.
This type of offer requires that a customer purchase a certain amount in order to qualify for a discount on their transaction. The discount is applied to all items on the transaction unless there are specific exclusions specified.
From the Add Offer Conditions page, set your item offer condition criteria using the following options:
Table 15-66 Item Offer Conditions Criteria
| Field | Description |
|---|---|
|
Spend Amount |
The Spend field allows you to set the amount which needs to be spent to in order to receive the offer. |
|
Currency |
A currency can also be added, if the spend amount applies to just a single currency. If not entered, it will be assumed to apply in terms of the currency of the store where the offer is active. |
Next, you will need to select the items that must be purchased in order to meet the condition of this offer in the Qualifying Items table.
In the Items table, select Add from the Actions menu. The Include/Exclude Items pop-up opens.
Set the criteria of the included or excluded items using the following fields:
Table 15-67 Include/Exclude Item Criteria
| Field | Description |
|---|---|
|
Include/Exclude |
These radio buttons allow you to choose if the items are being added as inclusions to or exclusions from the offer. |
|
Item Level |
The Item Level field allows you to select a category by which you can narrow the list of things to include/exclude in the offer conditions. Options are:
|
|
Department |
The Department field is active if you select Department, Class, or Subclass in the Item Level field. Enter a department or click the dropdown to select a department for the items you want to include/exclude. |
|
Class |
The Class field is active if you select Class or Subclass in the Item Level field. Enter a class or click the dropdown to select a class of items to include/exclude. |
|
Subclass |
The Subclass field is active if you select Subclass in the Item Level field. Enter a subclass or click the dropdown to select a subclass of items to include/exclude. |
|
Item |
The Item field is active if you select Item in the Item Level field. Enter an item number or click the magnifying glass to search for an item to include/exclude. |
|
Parent Item |
The Parent Item field is active if you select Parent/Diff in the Item Level field. This field appears with a magnifying glass next to the Item Level field and allows you to enter or search for a parent item to include/exclude. |
|
Diff Type |
The Diff Type field is active if you select Parent/Diff in the Item Level field. Select the diff type for the parent item that you want to include/exclude. |
|
Diff |
The Diff field is active if you select Parent/Diff in the Item Level field. Enter or click the dropdown to select a diff for the parent that you want to include/exclude. |
|
Item List |
The Item List field is active if you select Item List in the Item Level field. Enter or click the dropdown to select a defined list of items to include/exclude. |
|
Source File |
Source File is active if you select Upload List in the Item Level field. Click Browse to select the file to upload. |
|
Supplier Site/Brand |
The Supplier Site and Brand fields are active if you select Department, Class, Subclass, or Supplier Site/Brand in the Item Level field. Enter a supplier site or a brand or click the dropdown to select a supplier site or a brand. The supplier site or brand you provide will be used as additional criteria for the items you want to include/exclude. |
When you have entered the criteria for the inclusion or exclusion, click OK to accept the criteria and close the popup. Click OK and Add Another to remain on the Include/Exclude pop-up and add an additional inclusion or exclusion.
Once your offer criteria are complete, click Next and move to the Rewards page.
The Rewards page allows you to define the rewards associated with the offer. For a transaction level Spend X, Get Discount offer, this consists of the following steps:
From the Add Offer Rewards page, set your item offer rewards criteria using the following options:
Table 15-68 Item Offer Rewards Criteria
| Field | Description |
|---|---|
|
Discount |
Allows you to select the type of discount and enter the amount. Options are:
If you select Amount Off, you can select the specific currency to which the reward applies or whether the reward should be applied for all currencies. |
|
Apply To |
Allows you to select which types of retail price the reward applies. Options are:
|
Next, you can optionally add a list of items that should be excluded from having the discount applied.
In the Items table, select Add from the Actions menu. The Include/Exclude Items pop-up opens.
Set the criteria of the included or excluded items using the following fields:
Table 15-69 Include/Exclude Item Criteria
| Field | Description |
|---|---|
|
Include/Exclude |
These radio buttons allow you to choose if the items are being added as inclusions to or exclusions from the offer. |
|
Item Level |
The Item Level field allows you to select a category by which you can narrow the list of things to include/exclude in the offer conditions. Options are:
|
|
Department |
The Department field is active if you select Department, Class, or Subclass in the Item Level field. Enter a department or click the dropdown to select a department for the items you want to include/exclude. |
|
Class |
The Class field is active if you select Class or Subclass in the Item Level field. Enter a class or click the dropdown to select a class of items to include/exclude. |
|
Subclass |
The Subclass field is active if you select Subclass in the Item Level field. Enter a subclass or click the dropdown to select a subclass of items to include/exclude. |
|
Item |
The Item field is active if you select Item in the Item Level field. Enter an item number or click the magnifying glass to search for an item to include/exclude. |
|
Parent Item |
The Parent Item field is active if you select Parent/Diff in the Item Level field. This field appears with a magnifying glass next to the Item Level field and allows you to enter or search for a parent item to include/exclude. |
|
Diff Type |
The Diff Type field is active if you select Parent/Diff in the Item Level field. Select the diff type for the parent item that you want to include/exclude. |
|
Diff |
The Diff field is active if you select Parent/Diff in the Item Level field. Enter or click the dropdown to select a diff for the parent that you want to include/exclude. |
|
Item List |
The Item List field is active if you select Item List in the Item Level field. Enter or click the dropdown to select a defined list of items to include/exclude. |
|
Source File |
Source File is active if you select Upload List in the Item Level field. Click Browse to select the file to upload. |
|
Supplier Site/Brand |
The Supplier Site and Brand fields are active if you select Department, Class, Subclass, or Supplier Site/Brand in the Item Level field. Enter a supplier site or a brand or click the dropdown to select a supplier site or a brand. The supplier site or brand you provide will be used as additional criteria for the items you want to include/exclude. |
When you have entered the criteria for the exclusion, click OK to accept the criteria and close the popup. Click OK and Add Another to remain on the Exclude pop-up and add an additional exclusion.
Once your offer criteria are complete, click Apply. You are returned to the Promotions page. Your new offer is displayed in the Promotion table.
This feature allows the user to add locations to an Offer. Adding Locations to an Offer is executed from the Promotions page.
From the Offers table, highlight the offer to which you want to add a location. From the Locations table, select Add from the Actions menu. The Include/Exclude Locations pop-up appears.
From the Include/Exclude Locations pop-up, select the Include radio button and set the criteria for the location or locations being added using the following fields:
Table 15-70 Include/Exclude Locations Dialog Fields
| Field | Description |
|---|---|
|
Level |
The Level field allows you to select a category by which you can narrow the list of locations to add in the offer. Options are:
|
|
Zone Group |
The Zone Group field is active if you select Zone in the Level field. Click the dropdown to select a zone group for the location(s) you want to add. |
|
Zone |
The Zone field is active if you select Zone in the Level field. Click the dropdown to select a specific zone from the selected zone group from which to add the location(s). |
|
Location List |
The Location List field is active if you select Location List in the Level field. Click the dropdown to select from a defined list of locations from which to add the location(s). |
|
Store |
The Store field is active if you select Store in the Level field. Click the dropdown to select a store from which to add the location(s). |
Click OK to add the location(s) and close the pop-up. Click OK and Add Another to remain on the pop-up and add additional locations.
The copying locations feature allows users to select an offer and then copy the entries from the location table associated with that offer to one or more other offers within the same promotion.
From the Offers table, select the offer that contains the location to copy and select Copy Locations from the Actions menu. The Copy Locations to Offers pop-up appears.
From the Copy Locations to Offers pop-up, select one or more offers to which locations will be copied and click OK. You are returned to the Promotions page.
You also have the option to create a new offer using an existing offer as a template. This is helpful if you want to create a tiered offer, such as Buy 2 Get 10% off, Buy 3 Get 20% off, and so on.
Perform a search for the promotion that has an offer you want to copy. See Search for a Promotion.
From the search results pane, select Edit from the Actions menu. The Promotion page appears
From the Promotions page, select the Offer you want to use as a template for your new offer and select Create from Existing from the Actions menu. The Create Offer from Existing pop-up appears.
From the Create Offer from Existing pop-up, enter your new offer criteria using the following options:
Table 15-71 Create Offer from Existing Fields
| Field | Description |
|---|---|
|
Offer |
The Offer field allows you to enter an offer description. |
|
Start Date |
The Start Date field allows you to enter or select a start date for the offer. |
|
Start Time |
The Start Time field allows you to enter a start time for the offer. |
|
End Date |
The End Date field allows you to enter or select an end date for the offer. |
|
End Time |
The End Time field allows you to enter an end time for the offer. |
|
Coupon Code |
The Coupon Code field displays the coupon code associated with the offer. |
|
Customer Description |
The Customer Description field displays the customer description for the offer. |
|
Comments |
The Comments field displays any comments associated with the offer. |
When you have entered the criteria for the new offer, click OK. You are returned to the Promotion page.
The Promotion screen allows you to maintain the promotion description, offers within the promotion, and the locations associated with the offers. In addition, the promotion can optionally be assigned to a campaign. Offers are maintained using the offer wizard where you can navigate through multiple screens which specify the offer details, conditions to qualify for the offer, and the reward available for the offer. Locations are added to offers after they are created using the offer wizard.
The Promotion screen has three modes: Add, Edit, and View. If the user enters this screen in View mode, all maintenance options are disabled, and the Save, Save and Close, and Cancel buttons are replaced with Done.
The Manage Promotions tasks provide options for existing promotions, including:
Perform the following procedure to search for an existing promotion.
From the Tasks menu, select Manage Promotions. The Promotion Search tab appears.
Enter your promotion search criteria using the following fields:
|
Note: In order to conduct a promotion search, users must enter at least one of the following; Promotion, Description, Offer Description, Start Date, or Item. |
Table 15-72 Promotion Search Fields
| Field | Description |
|---|---|
|
Promotion |
The Promotion field allows the user to enter a promotion ID to be used in search criteria. |
|
Description |
The Description field allows the user to enter a promotion description to be used in search criteria. |
|
Offer Description |
The Offer Description allows the user to enter an offer description to be used in search criteria. |
|
Offer Type |
The Offer Type field allows the user to select an offer type to be used in search criteria. Promotions containing at least one offer with the entered type should be returned. Values for the drop down include:
|
|
Offer Template |
The Offer Template field allows the user to select an offer template to be used in search criteria. |
|
Start Date |
The Start Date field allows the user to enter or select a Start Date to be used in search criteria. |
|
End Date |
The End Date field allows the user to enter or select an End Date to be used in search criteria. |
|
Status |
The Status field allows the user to select a Status to be used in search criteria. Values for the drop down include:
|
|
Item |
The Item field allows the user to enter or select an Item(s) to be used in search criteria. Users have the option to go directly to the search icon to look up items. |
Once your search criteria are entered, click Search. The search results are displayed in the Results pane.
Editing a single offer is performed using the Offer Wizard. There are three potential pages within the wizard:
Offer Page
Conditions Page
Rewards Page
Perform the following procedure to edit a single offer:
Perform a search for the promotion that you want to edit. See Search for a Promotion.
From the search results pane of the Promotion Search tab, highlight the promotion you want to edit and select Edit from the Actions menu. The Promotion tab appears.
From the Promotion tab, highlight the offer you want to edit and select Edit from the Action menu.
|
Note: You may need to move your offer back to Worksheet status in order to make edits. |
If a single offer was selected, the Offer Wizard is launched. The initial page in the Offer Wizard allows you to edit the basic criteria of the offer. See the Add Offer Details section for information on each of the fields on this page.
Once you have edited the main offer criteria as needed, click Next to edit the Conditions and Rewards portions of the offer.
|
Note: Depending on the offer template, you may not have both Conditions and Rewards. |
The Conditions page is used to edit the conditions that a customer needs to meet in order to qualify for the rewards on the offer. The Conditions stop of the wizard allows you to edit the conditions associated with the offer. The offer template will determine which fields are available for editing. See the Create Promotions and Offers section for your offer template for details on the fields on this page.
Once your offer conditions criteria are entered, click Next. The Rewards Page opens. If you need to go back to edit the main offer criteria, the click on the Back button or click on the hyperlink for the appropriate train stop at the top of the page.
The Rewards page allows you to edit the rewards associated with the offer. As with the conditions page, the details of what is available for editing on this page will differ for each offer template. See the Create Promotions and Offers section for your offer template type for details on the fields on this screen for your template type.
If you have applied all your updates, click Apply to save the changes and return to the Promotions page. If you need to make changes to the Offer or Conditions for the offer, click the Back button or click on the hyperlinks for the appropriate train stop at the top of the page.
Several fields on an offer are eligible to be maintained via a mass maintenance screen. The fields which allow mass maintenance all reside on the Offers page in the Offer Wizard. The Mass maintenance functionality is called when multiple offers are selected from the Promotions screen and you select the Edit option from the menu or using the iconic button.
From the Mass Update Offers pop-up, edit your item offer criteria using the following options:
Table 15-73 Mass Update Offers Fields
| Field | Description |
|---|---|
|
Start Date |
The Start Date field allows the user update the start date for the all the selected offers. |
|
Start Time |
The Start Time field allows the user to update the start time for all the selected offers. |
|
End Date |
The End Date field allows the user to update the end date for all the selected offers. |
|
End Time |
The End Time field allows the user to update the end time for all the selected offers. |
|
Coupon Code |
The Coupon Code field allows the user to update the coupon code for all the selected offers. |
|
Comments |
The Comments field allows the user to update the comments for all the selected offers. |
|
Customer Description |
The Customer Description field allows the user to update the customer description for all the selected offers. |
|
Clear End Date |
Selecting Clear End Date will clear the End Date for all selected offers. |
|
Clear Coupon Code |
Selecting Clear Coupon Code will clear the Coupon Code for all selected offers. |
|
Clear Comments |
Selecting Clear Comments will clear the Comments for all selected offers. |
|
Customer Description |
Selecting Clear Customer Description will clear the Customer Description for all selected offers. |
When you have entered all the changes for the Mass Update, click OK to accept the criteria and close the pop-up.
Users have the option to cancel an offer from a Promotion. Cancelling an offer can only be done when the offer is in active status.
Perform a search for the promotion that has an offer in Active status. See Search for a Promotion.
From the search results pane, select the Promotion from which you want to cancel an offer and select Edit from the Actions menu. The Promotion tab appears.
From the Promotion tab, select the offer you wish to cancel and select Cancel from the Actions menu. The Cancel Offer pop-up appears.
Select a Reason for the cancellation.
Click OK to Cancel the Offer and close the pop-up.
Users have the option to cancel an item or items from an offer. Cancelling an item from an offer can only be done when the offer is in Active status.
Perform a search for the promotion that has an offer with items you want to cancel. See Search for a Promotion.
From the search results pane, select the Promotion from which you want to cancel items from an offer and select Edit from the Actions menu. The Promotion tab appears.
From the Promotion tab, select the offer that contains the item or items to cancel and select Edit from the Actions menu. The Offer Wizard is launched.
Navigate to the Conditions page in the wizard.
From the Qualifying Items table, select the item or items you want to cancel and select Cancel from the Actions menu. The Cancel Items pop-up appears.
From the Cancel Items pop-up, set the criteria for the items to be cancelled, using the following fields:
Table 15-74 Cancel Items Dialog Fields
| Field | Description |
|---|---|
|
Item Level |
The Item Level field allows you to select a category by which you can narrow the list of things to cancel in the offer. Options are:
|
|
Department |
The Department field is active if you select Department, Class, or Subclass in the Item Level field. Click the dropdown to select a department for the items you want to cancel. |
|
Class |
The Class field is active if you select Class or Subclass in the Item Level field. Click the dropdown to select a class of items to cancel. |
|
Subclass |
The Subclass field is active if you select Subclass in the Item Level field. Click the dropdown to select a subclass of items to cancel. |
|
Item |
The Item field is active if you select Item in the Item Level field. Click the magnifying glass to search for an item to cancel. |
|
Parent/Diff Search |
The Parent/Diff field is active if you select Parent/Diff in the Item Level field. This field appears as a magnifying glass next to the Item Level field and allows you to search for a parent/diff to cancel. |
|
Diff Type |
The Diff Type field is active if you select Parent/Diff in the Item Level field. |
|
Diff |
The Diff field is active if you select Parent/Diff in the Item Level field. |
|
Item List |
The Item List field is active if you select Item List in the Item Level field. Click the dropdown to select a defined list of items to cancel. |
|
Source File |
Source File is active if you select Upload List in the Item Level field. Click Browse to select the file to upload. |
|
Supplier Site/Brand |
The Supplier Site and Brand fields are active if you select Department, Class, Subclass, or Supplier Site/Brand in the Item Level field. Enter a supplier site or a brand or click the dropdown to select a supplier site or a brand. The supplier site or brand you provide will be used as additional criteria for the items you want to include/exclude. |
|
Reason |
The Reason field allows you to enter a reason for the item(s) cancellation. |
When you have entered the criteria for the item(s) being cancelled, click OK. Clicking OK and Cancel Another allows you to select another item to cancel. You are returned to the Edit Offer Conditions page.
From the Edit Offer Conditions page, click Next. The Edit Offer Rewards page appears.
From the Edit Offer Rewards page, click Apply. You are returned to the Promotions tab.
|
Note: You also have the opportunity to cancel items from the Items table on the Rewards page by following similar steps as outlined for cancelling from the Qualifying Items table on the Conditions page. |
Users also have the option to cancel locations from an offer. Cancelling locations from an offer can only be done when the offer is in Active status.
Perform a search for the promotion that has an offer in Active status. See Search for a Promotion.
From the search results pane, select the Promotion from which you want to cancel a location from an offer and select Edit from the Actions menu. The Promotion tab appears.
From the Promotion tab, highlight the offer which has the location you want to cancel.
From the Promotion tab, on the Locations table, select the location(s) to be canceled and select Cancel from the Actions menu (on the locations table). The Cancel Locations dialog appears.
From the Cancel Locations dialog, set the criteria for the location or locations being cancelled using the following fields:
Table 15-75 Cancel Locations Dialog Fields
| Field | Description |
|---|---|
|
Level |
The Level field allows you to select a category by which you can narrow the list of locations to cancel in the offer. Options are:
|
|
Zone Group |
The Zone Group field is active if you select Zone in the Level field. Click the dropdown to select a zone group for the location(s) you want to cancel. |
|
Zone |
The Zone field is active if you select Zone in the Level field. Click the dropdown to select a specific zone from the selected zone group from which to cancel the location(s). |
|
Location List |
The Location List field is active if you select Location List in the Level field. Click the dropdown to select from a defined list of locations from which to cancel the location(s). |
|
Store |
The Store field is active if you select Store in the Level field. Click the dropdown to select a store from which to cancel the location(s). |
|
Reason |
The Reason field allows you to enter a reason for the location(s) cancellation. |
Click OK to Cancel the location(s) and close the pop-up. Click OK and Cancel Another to remain on the dialog and cancel additional locations.
Users will have options to perform Delete maintenance at Offer level for one or many items or at the Offer/Location level for one or more Locations tied to an offer.
Offer Level: Users highlight one or more rows on the Offer table and click Delete on the Offer table
Location Level: Users will highlight a single row on the Offer table and then highlight one or many rows on the Locations table and click Delete on the Locations table
Perform a search for the promotion that you want to delete. See Search for a Promotion.
From the search results pane, select the Promotion from which you want to delete an offer and select Edit from the Actions menu. The Promotion tab appears.
From the Promotion tab, you can select either offers or locations to delete. Highlight the item or location you want to delete and select Delete from that tables' respective Action menu. The Delete Confirmation dialog appears.
From the Delete Confirmation dialog, click OK to confirm the deletion. You are returned to the Promotion tab.
A promotion campaign is an attribute that can be added to a promotion as a way of linking together related promotions. Usually campaigns are driven by a retailer's marketing department and are often initiated in a separate solution. Because of this, campaigns are maintained through the upload/download process for use in Pricing. Although a Pricing function, campaigns are actually loaded via Merchandising by accessing Foundation Data > Download Foundation Data and Foundation Data > Upload Foundation Data.
To add, update, or remove a promotion campaign, select the template type of Price and Cost from the Download Data screen and then the template Promotion Campaigns. Click the Download button and when prompted, choose to either open the .ods file that is generated or save the file and open it separately in the spreadsheet application of your choice.
Add a Campaign
To add a new campaign, select the action type of Create on an empty row of the Promotion Campaigns tab. Next enter a unique ID up to 10 characters in length for the campaign along with the description in the appropriate columns. The description should be entered in the primary language (as defined in the Merchandising system options) of up to 1000 characters.
Updating a Campaign
If you would like to update the description for a promotion campaign, a similar process will be followed as that described above for creating new. First, download the spreadsheet, and then navigate to the row where you would like to make your updates. Select the action type of Update, and then correct the description in the spreadsheet.
Removing a Campaign
If you wish to remove a campaign, select the Delete action on the row of the campaign you which to delete. Note that the removing a campaign is not allowed if it is still in use for a promotion.
Uploading Changes
For all actions defined above, once all the updates have been made to the data in the spreadsheet, save the file and close it. Then, return to the Merchandising screens and select Foundation Data > Upload Foundation Data from the main task list. In this screen, you'll again select the template type Price and Cost and the template Promotion Campaign. This will generate a process description automatically, but this can be updated if desired. Lastly, select the Browse button and navigate to the directory where you saved the updated spreadsheet.
To review the status of the upload and check whether any errors occurred, select the Foundation Data > Review Status task from the main task list.
See also Download/Upload Data from Spreadsheets and View Data Loading Status.
Pricing supports downloading of promotions into a spreadsheet to allow you to perform mass maintenance on the data. This data can then be re-uploaded into Pricing to update the events. Additionally, the upload function provides the ability to create new events from a spreadsheet and have them added to an existing group or create a new group. This section summarizes the workflow for both download and upload of promotions.
Perform the following procedure to download promotions to a spreadsheet:
Perform a search for the promotion that you want to update. See Search for a Promotion for more information.
From the search results pane, select the promotion you wish to download.
Select the Download Selected option from the Action Menu.
In the Download pop-up, select the template to use for downloading the promotion. This will automatically generate a process description for the download, which you can update if desired.
Click OK.
When prompted, choose to either open the .ods file that is generated or save the file and open it separately in the spreadsheet application of your choice.
The Upload Promotions page provides the ability to upload offers from a spreadsheet (.ods file) into Pricing.
All uploads are done using templates. You can use the default Promotion templates or configure a template for use in your business such that certain fields are defaulted or hidden from users to streamline the uploading process. You can download a blank version of your template by selecting the Download Blank Template option under Data Loading in the task list. For more information on blank templates, see the Pricing Do the Basics User Guide.
|
Note: See the Oracle Retail Merchandising Do the Basics User Guide for information about template configuration. |
Perform the following procedure to upload promotions via spreadsheet:
From the Tasks menu, select Upload Promotions under Promotions. The Upload Promotions page opens.
In the Template field, select the template you are using.
The Process Description will default based on the template name and timestamp, but can be updated.
In the Source field, click the Browse button to locate the spreadsheet file (.ods file) you want to upload and click Open.
Select one of the following options:
Click Upload to upload the file.
Click Revert to clear out the screen inputs.
Click Done to close the Upload Promotions window.
|
Note: If any errors occur during the upload, you will receive a notification. If there are no issues with the new event, you will not receive a notification. For more information on data loading statuses, see the View Data Loading Status section in the Pricing Do the Basics User Guide. |
If you receive a notification about an error that occurred in the uploading of a Promotion, you can click on the link in the notification, which will take you to the Data Loading Status page to see the details. Alternatively, this page can be accessed by navigating to the Data Loading -> Review Status option in the task list.
This task flow opens up the Data Loading status page, which lists the status of each upload/download request. Requests that were processed successfully will have their status set to Processed Successfully. Requests that were not processed successfully will have their status set to either Processed with Errors or Processed with Warnings. For such requests, you can access the View Issues page by clicking on the View Issues button to review details of the errors or warnings associated with a selected upload or download request.
The details provided include the worksheet in which the error is encountered, the row and column in the spreadsheet that is in error, and the error description. Errors will need to be fixed in order to successfully create or update a promotion.
Errors in download processing are typically due to the inability to access the data or insufficient privileges to create and write to the specified location. These errors can be resolved by removing any constraints that might have placed a lock on the data or ensuring that any constraints on creation of the spreadsheet are relaxed.
Errors in upload request processing are typically data-related and likely require data correction. You can use the error details in the View Issues screen as a guide to make corrections to the originally uploaded spreadsheet. Once the errors have been corrected, the data can be re-uploaded into Pricing as needed, using the corrected file.