5. Processing LC Contract
An LC contract is an instruction wherein a customer requests the bank to issue, advise or confirm a letter of credit, for a trade transaction. An LC substitutes a bank’s name and credit for that of the parties involved. The bank thus undertakes to pay the seller/beneficiary even if the remitter fails to pay.
For example, Ms. Keturah Smith (buyer or importer) in India and Mr. Silas Reed (seller or exporter) stationed in Paris agree to a sales contract. In this contract the buyer Keturah Smith, is required to arrange for her bank, Midas Bank, India (buyers bank) to open or issue an LC in favour of the seller, Mr. Reed.
Midas Bank sends the LC to Mr. Reed’s bank, Berliner Bank, Paris (advising bank). The advising bank then sends details of the credit to the seller, who is the beneficiary of the credit. On receiving the credit details Mr. Reed, ships the merchandise traded under the LC to Ms. Smith. He then presents the draft and documents to the advising bank. The negotiating bank pays Mr. Reed. On making the payment, Berliner Bank will send the documents to Midas Bank (issuing bank) and will debit the issuing bank’s account.
The issuing bank examines the document and charges Ms. Smith’s account. It releases the documents to her allowing her to claim the merchandise.
The sequence of the events involved, in processing the LC can be considered an LC contract. The specific letters of credit thus processed for the customers of your bank constitutes a contract. An LC Contract would therefore require information on:
- Who is the buyer or importer
- Who is the seller or the exporter
- The operation that your branch is performing on the LC
- The merchandise traded under the LC
- Specifications for the transportation of the consignment
- The documents that should accompany the LC
- The amount for which the LC is drawn
- Details of the parties involved in the LC
- The type of LC you are processing
- The details of the insurance company under which the goods traded are covered
You have defined products to group together or categorize LC which share broad similarities. Under each Product that you have defined, you can enter specific LCs based on your customers’ needs. Each of these will constitute a contract. While products provide a general framework and serve to classify or categorise LCs, contracts are customer specific.
By default an LC inherits the attributes of the product to which it is associated. This means that you will not have to define these general attributes each time you input an LC involving a product.
This chapter contains the following details:
- Section 5.1, "LC Contract Details"
- Section 5.2, "Contract Details"
- Section 5.3, "Viewing OFAC Check Response"
- Section 5.4, "Authorizing a Contract"
- Section 5.5, "Viewing LC Contract"
- Section 5.6, "Multilevel Authorization of a Contract"
- Section 5.7, "Cancel LC"
- Section 5.8, "Close LC"
- Section 5.9, "Reopening LC"
- Section 5.10, "Reassigning a Contract to another User"
- Section 5.11, "Liquidating Components"
- Section 5.12, "Lodging Guarantee Claim"
- Section 5.13, "Viewing Guarantee Claim Details"
- Section 5.14, "Specifying Import License Utilization"
- Section 5.15, "Viewing Import License Utilization Details"
5.1 LC Contract Details
This section contains the following details:
- Section 5.1.1, "Capturing LC Contract Details"
- Section 5.1.2, "Creating Contract"
- Section 5.1.3, "Uploading LCs"
5.1.1 Capturing LC Contract Details
You can invoke the ‘Letters of Credit Contract Input’ screen by typing ‘LCDTRONL’ in the field at the top right corner of the Application tool bar and clicking the adjoining arrow button. Click New icon. The LC contract screen with no values in the fields is displayed.
Click new icon in the toolbar.
For further information on User Maintenance screen, refer the ‘Defining a User Profile’ section in the ‘Security Management’ chapter in the ‘Security Management System’ User Manual.
If you are calling a contract that has already been created, click on the contract reference number in the Summary screen.
The details of the contracts that you have entered will be displayed in a tabular form. From the ‘Summary’ screen, you can open an existing contract by double clicking the contract.
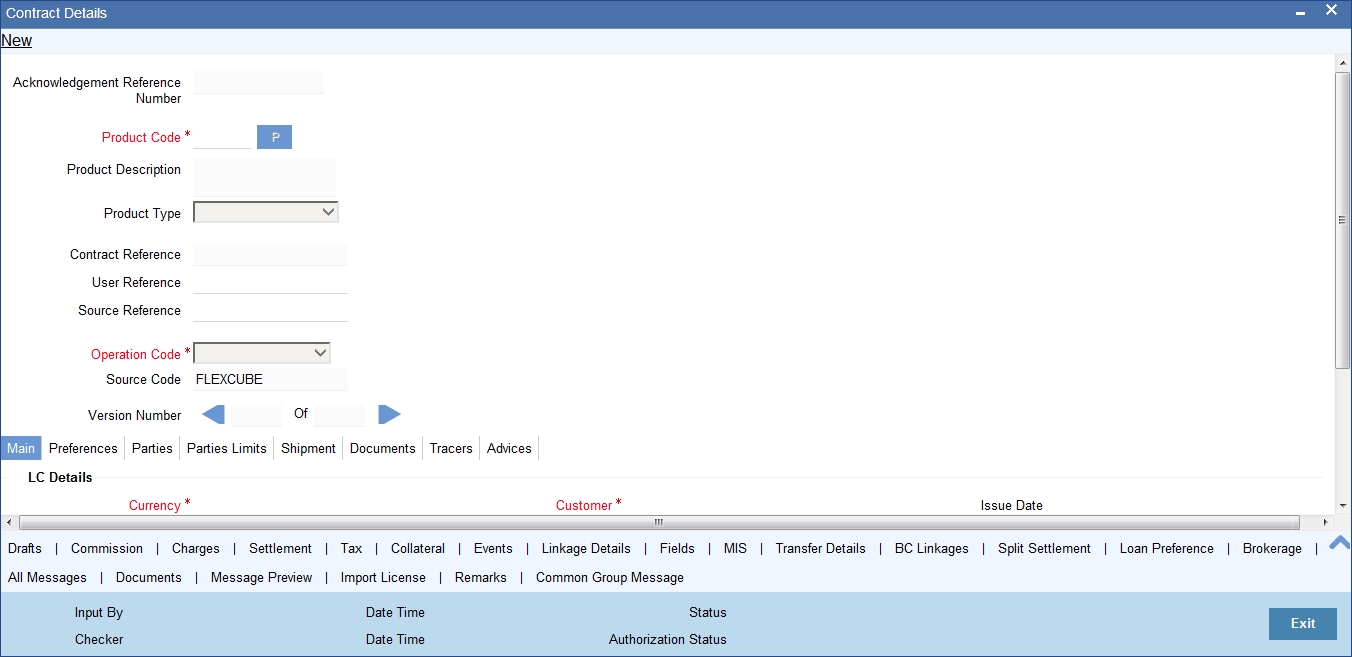
The LC Contract Details screen consists of a header and footer that contains fields specific to the contract being entered. Besides these, you will also notice six tabs and a vertical array of buttons along the lines of which you can enter details of the contract. Contract details are grouped into the various screens according to the similarities they share.
The LC Contract Screen contains eigt tabs along the lines of which you can enter details of the contract. The eight tabs are:
Tabs |
Description |
Main |
Click this tab to enter the essential terms of the LC. This screen along with its fields has been detailed under the head Entering Main Contract Details. |
Preferences |
Under this tab, you can set the preferences specific to the letter of credit contract |
Parties |
In the screen that corresponds to this tab, you can enter the details of all parties involved in the LC. This screen along with its fields has been detailed under the head Entering Party Details. |
Parties Limit |
Using this tab, you can track the limits for joint venture customers who are parties to the letter of credit contract |
Shipments |
In the screen that corresponds to this tab you can specify shipment details and description of goods traded under the LC and port information |
Documents |
In the screen that corresponds to this tab you can enter details of the documents required under an LC and the clauses that should accompany the documents |
Tracers |
Click on this tab to enter details of the tracers that should be generated for an LC. |
Advices |
In the screen corresponding to this tab you can view, suppress and prioritize the advices that are to be generated for a contract. This screen along with its fields has been detailed under the head Specifying Advises for an LC. |
On the Contract Detailed screen are also displayed some buttons. They enable you to invoke a number of functions vital to the processing of an LC contract. These buttons have been briefly described below.
Buttons |
Description |
Drafts |
Click this button to capture the details of draft drawn for the LC. You can specify the name of the insurance company that is covering the goods traded under the LC. |
Commission |
On invoking this button Commission details of the contract is displayed |
Charges |
This button invokes the Charges, Commissions and Fees (ICCF) service. On invoking this function you will be presented with a screen where the ICCF rate, amount, currency and the waive charge parameter can be specified. The Processing Charges and Fees manual, details the procedure for maintaining charge rules. It also deals with the linking of a charge rules to a product and the application of the rule on an LC. The Processing Commissions manual, details the procedure for maintaining commission rules. It also deals with the linking of a commission rule to a product and the application of the rule on an LC. |
Settlement |
Click this button to invoke the Settlement screens. Based on the details that you enter in the settlement screens the LC will be settled. The details of these screens have been discussed in the Settlements manual. |
Tax |
This button invokes the Tax services. The Processing Tax manual details the procedure for maintaining tax rules and schemes. It also deals with the linking of a tax scheme to a product and the application of the scheme on an LC. |
Collateral |
In the screen that corresponds to this button, you can specify details of the cash that you collect as collateral form a customer for the LC that you process. The details of this screen are discussed under the head Specifying Collateral details for an LC. |
Events |
Click this button to view the details of the events and accounting entries that a contract involves. |
Linkages Details |
Clicking this button invokes the Contract Linkages screen. In this screen, you can link an LC to a deposit or account, and indicate the funds that you would like to block. |
Fields |
Click this button to specify values for the user defined fields (UDFs). |
MIS |
Click this button to define MIS details for the LC. |
Transfer Details |
If the LC is transferred to a new party, you can view the transaction details. |
BC Linkages |
Click this button to specify BC linkages |
Split Settlement |
Click this button to specify split settlement details |
Loan Preference |
Click this button to specify loan preference details |
OFAC Check |
Click this button to call the OFAC service and view the response from the OFAC system. |
Brokerage |
Use this button to capture brokerage details for the LC contract and set your preferences for sharing the brokerage amount among multiple brokers. |
Documents |
Click this button to capture the customer related documents in central content management repository. |
All Messages |
Click this button to view all messages associated to contract. |
Import License |
Click this button to capture import license details, |
Message Preview |
Click this button to preview the messages/advices |
Remarks |
Click this button to view the remarks entered at different stages of the contract. |
Common Group Message |
Click this button to open the common group message call form |
Refer the chapter titled ‘Capturing Additional Details’ in this User Manual for further details about these buttons.
Enter valid inputs into all the mandatory fields or you will not be able to save the contract. After making the mandatory entries for the LC, save the contract by either clicking save icon in the toolbar. On saving the contract after entering all the required details in the system, the system validates the value of the contract amount against the following:
- Product transaction limit
- User Input limit
If the transaction currency and the limit currency are different, then the system converts the amount financed to limit currency and checks if the same is in excess of the product transaction limit and user input limit. If this holds true, the system indicates the same with below override/error messages:
- Number of levels required for authorizing the transaction
- Transaction amount is in excess of the input limit of the user
Note
You have the option to amend all the unauthorized entries made for an LC. However, after authorization, certain fields cannot be amended.
Click ‘Exit’ or ‘Cancel’ button to go back to the Application Browser.
5.1.2 Creating Contract
Through the screens that follow in this section, you can process all types of LCs (import, export, invoice, clean, guarantees, shipping guarantees). You can choose to enter the details of a contract using the following methods:
- Copying the details from an existing contract and changing only the details that are different for the LC you are entering.
- Using your keyboard or the option lists that are available at the various fields to enter the details of the LC afresh.
To facilitate quick input, you only need to input the product code. Based on the product code, many of the fields will be defaulted. Overwrite on these defaults to suit your requirement. You can add details that are specific to the LC like the LC amount, details of the buyer and the seller, etc.
5.1.3 Uploading LCs
Oracle FLEXCUBE allows you to automatically upload LCs.
The MT 700 and MT 701 messages that you receive can be uploaded into Oracle FLEXCUBE as LC contracts. Depending on whether confirmation is required, the uploaded LCs will be of type ‘advice’ or ‘advice and confirm’.
When LC is uploaded from incoming MT700 then ‘Partial Confirmation Allowed’ will be checked at the product level and the operation of the contract is set to ‘Confirm’ or ‘Advice and confirm’.
If the operation code is set to ‘Confirm’ and ‘Advice and Confirm’ for contracts uploaded from incoming MT700, then the system will default the Confirm Amount as LC Amount and confirm percent as 100
For contracts uploaded from incoming MT740, Undertaking Amount will be defaulted to LC Amount and undertaking expiry date will be null. Undertaking expiry date can be specified on amend of contract once the contract is created through incoming MT740.
If you modify the LC amount, the undertaken amount will not be impacted. However, the non-undertaken amount will be respectively modified based on the change in LC amount.
If the checkbox ‘Undertake Entire LC on STP’ is checked on ‘Letters of Credit branch Parameters Maintenance’ screen, the system will pass the following entries on receipt of MT740:
Dr/ Cr |
Account Role Code |
Amount Tag |
Amount Tag Description |
Dr |
LC_OCU_OFFSET (Unutilized Credit Offset) |
REIM_UND_AMT |
Reimbursement Undertaking Amount |
Cr |
LC_OCU (Outstanding Credit Unutilized) |
REIM_UND_AMT |
Reimbursement Undertaking Amount |
If the checkbox ‘Undertake Entire LC on STP’ is not checked, the system will pass the following entries on receipt of MT740:
Dr/ Cr |
Account Role Code |
Amount Tag |
Amount Tag Description |
Dr |
LC_REM_NU_OFF |
REIM_NON_UND_AMT |
Reimbursement Non-undertaking Amount |
Cr |
LC_REM_NU |
REIM_NON_UND_AMT |
Reimbursement Non-undertaking Amount |
Note
While liquidating a bill under an LC, the system verifies the liquidation amount and the undertaken amount. If the liquidation amount is greater than the undertaken amount, the system displays an override message. You may choose to proceed or cancel.
5.2 Contract Details
This section contains the following details:
- Section 5.2.1, "Specifying Contract Details"
- Section 5.2.2, "Main Tab"
- Section 5.2.3, "Preferences Tab"
- Section 5.2.4, "Parties Tab"
- Section 5.2.5, "Parties Limits Tab"
- Section 5.2.6, "Shipment Tab"
- Section 5.2.7, "Documents Tab"
- Section 5.2.8, "Advices Tab"
- Section 5.2.9, "Tracers Tab"
5.2.1 Specifying Contract Details
You can specify the following details:
Acknowledgement Reference Number
Specify the acknowledgement reference number. Alternatively, you can select the reference number from the option list. The list displays all the acknowledgement reference numbers and type of registration maintained at LC registration screen which are authorized and unprocessed.
The system defaults the details captured in registration screen if acknowlegement is captured on clicking populate (P) button beside Product Code.
If Registration is for LC issuance and product code is selected BG Issue/SG issue, then the sytem displays configurable override on product default.
Note
System will update the status of registration as ‘Processed’ and contract reference no at registration screen, if acknowledgement reference number is captured at contract screen and (new) contract is created.
Product Code
Select the product from the list of products created in the LC. Click ‘Populate’ button for details of this product to get defaulted from the Product screen.
Product Description
Product description given for this product gets defaulted from the Product screen.
Product Type
The type of product gets displayed here from the product screen, specifying if the product is of type import/export or revolving or non-revolving.
An arrangement, in which the continuing availability of the LC revolves upon shipment and/or presentation of documents and not upon specific amendment, is known as a Revolving LC.
Following are the product types:
- Import
- Export
- Guarantee
- Standby
- Shipping Guarantee
The Contract Reference Number identifies a contract uniquely. It is automatically generated by the system for each contract.
The Contract Reference Number is a combination of the branch code, the product code, the date on which the contract is booked (in Julian format) and a running serial number for the booking date. The Reference Number consists of a three-digit branch code, a four-character product code, a five-digit Julian Date and a four-digit serial number.
The Julian Date has the following format:
YYDDD Here, YY stands for the last two digits of the year and DDD for the number of day(s) that has/have elapsed, in the year.
In addition, a contract is also identified by a unique User Reference Number. By default, the Contract Reference Number generated by the system will be taken as the User Reference Number. But you have the option to change the User Ref Number. Oracle FLEXCUBE also provides you the facility to generate the user reference number in a specific format.
Note
You can specify a format for the generation of the User Reference Number in the ‘Sequence Generation’ screen available in the Application Browser.
Refer to the Core Services User Manual for details on maintaining a sequence format.
Source Reference
The system automatically generates the Source Reference number. You can change it if required.
This message identification number will be used to identify an incoming message coming from an external system. This is defined as the ICN number. On upload of an incoming message into Oracle FLEXCUBE, this number, given by the external system, will be stored in Oracle FLEXCUBE and passed on to the contract generated as a result of the incoming message. If the incoming message results in an outgoing message, the ICN number will be linked to the outgoing message also.
This number will help you in creating a relationship between the incoming message, the resultant contract in Oracle FLEXCUBE, and the outgoing message, if any.
For instance, if an incoming MT103 results in an FT transaction, then ICN number of the incoming MT103 will be linked to the FT contract generated due to the upload of the incoming payment message.
If an Incoming message results in an outgoing contract (outgoing message), Oracle FLEXCUBE will store the source reference number (ICN Number) at the following levels.
- Incoming Message Level
- Contract Level (Resulted due to the Incoming message)
- Outgoing message (As a result of the above contract)
You can capture the same source reference number for LC advising and reimbursement contracts if LC Issuance (MT700) and LC Reimbursement Authority (MT740) are received from the same issuing bank.
Note
The system will not allow to capture, the same source reference number for more than one advising or reimbursing contracts.
Operation Code
The operations that you can perform on an LC are determined by the type of LC being processed. The operation that you specify will determine the accounting entries that are passed and the messages that will be generated. You can select an operation from the option list available. The type of operation that you can perform on an LC has been listed below:
- Open an import LC or guarantee
- Open and confirm an import LC
- Pre-advice an export LC
- Advice an export LC
- Advice and confirm an export LC
- Confirm an export LC
- Advice a guarantee
- Import LC with pre-advice
5.2.2 Main Tab
While defining a product, you defined a broad outline that can be applied on LCs. However, while processing an LC involving a product, you need to enter information specific to the LC.
This information is captured through the LC Contract Details Main screen.
The following are the features of the contract details main screen.
5.2.2.1 LC Details
The terms defined for an LC, form the basis on which the LC will be processed.
Currency
The currency in which it is drawn
Language
The language to be used for the LC instrument
Contract Amount
Specify the amount for which the LC is drawn. If the contract is linked to an open insurance policy and the amount is greater than the available amount on the linked policy, the system will display an override/error message.
Similarly, if the amount is greater than the limit specified for every conveyance of the linked policy, the system will display an override.
Outstanding Amount
The balance amount available after the availment of an LC is displayed here.
Reference Number
The related LC Reference Number if the LC being processed has to be referred along with another already opened (for example, an import LC would be a related LC for a shipping guarantee).
Expiry Place
Specify the city, country, or the bank where the LC expires.
Applicable Rule
System defaults this value from the product level. However, you can modify it. The value displayed here is not picked up in the field 40F. Message type ‘MT740’ displays ‘URR LATEST VERSION’ irrespective of any value displayed in the option 'Applicable Rule'.
Issue Date
Enter the date on which the LC is issued.
Effective Date
In the LC Contract Details screen, you can capture the Effective Date of a guarantee. The effective date that you capture for a guarantee will be printed on the instrument.
By default, the system displays the Issue Date, in the Effective Date field. You can change the default value (for a guarantee) to a date in the past or future.
As stated earlier, the Effective Date along with the Tenor of the LC will be used to calculate the Expiry Date of the LC.
Note
Commission for a guarantee, will be calculated according to your specifications for the product that the guarantee involves. In the LC Product Definition screen, you can indicate if commission is to be calculated from:
- The Issue Date
- The Effective Date
- The earlier of the two
Tenor
All LC contracts will be associated with the standard tenor maintained for the product under which the contract is being processed.
The tenor of the LC will be used in combination with the Effective Date to arrive at the Expiry Date of the LC, as follows:
LC Expiry Date = Effective Date + Tenor
In case both the tenor and the expiry date are specified, the system will ignore the tenor that is manually entered and recalculate it based on the expiry date.
However, for a specific LC contract, you can choose to maintain a different tenor. The tenor of an LC can be expressed in one of the following units:
- Days (D)
- Months (M)
- Years (Y)
If you do not specify a unit, the system will automatically append ‘D’ with the numeric value (tenor) indicating that the tenor is expressed in Days.
When you change the tenor and move to the next field, the system automatically updates the expiry date based on the tenor specified.
Expiry Date
Specify the date on which the LC contract expires.
If you leave this field blank, the system will calculate the expiry date based on the tenor. Now, suppose that you have specified both the tenor and the expiry date. In that case, the system ignores the tenor and recalculates it based on the expiry date.
You can modify the expiry date. When you change the expiry date and move to the next field, the system automatically updates the tenor based on the expiry date specified. The closure date, which is dependent on the expiry date, will also be recalculated.
The system prompts override messages:
- If the LC expiry date is later than any linked collateral’s expiry date.
- If the LC expiry date extended as part of amendment is later than any limit line’s expiry date.
Note
The system will validate when a new limit line is attached during actions other than New.
Auto Closure
Check this option to indicate that the LC should be automatically closed.
Closure Date
The date of closure is based on the ‘Closure Days’ maintained for the product involved in the LC. The number of days specified as the Closure Days is calculated from the expiry date of the LC, to arrive at the Closure Date.
LC Closure Date = LC Expiry Date + Closure Days
If the ‘Closure Days’ are not maintained at the Product level, then the Closure Date is calculated as follows:
LC Closure Date = LC Expiry Date + 30
However, you can change the closure date, thus calculated, to any date after the expiry date.
Note
If the closure date falls on a holiday, the system will prompt you with an override message. Stop Date
This date will be defaulted to LC Expiry date. Stop date cannot be earlier than Issue date and later than expiry date.
Pre Advice Date
Specify date on which the pre-advice was initiated from the adjoining calendar. The current date is defaulted as pre-advice date, if the operation is Pre-advice LC; however you can change to an earlier date.
Note
Modifications are not allowed after first authorization.
Reference to Pre-advice
Specify reference to the pre-advice, if any, generated for the LC contract.
A pre-advice is a brief advice of documentary credit sent by the Issuing Bank to the Advising Bank. This is to be followed by the LC instrument that contains all the details of the LC. It notifies the recipient that the named buyer has opened an LC for a specified amount on a named seller (beneficiary).
Note
Modifications are not allowed after first authorization.
Rule Narrative
This is defaulted from the product level. The value displayed here can be amended at the contract level. However, once the contract is authorized, you cannot make any amendments. Oracle FLEXCUBE validates the rule narrative for any slashes.
Note
- The rule narrative should not start or end with ‘/’
- It should not have two consecutive slashes
This is enabled only if the Applicable Rule is ‘OTHR’.
This value will be repeated twice in field 79 of an outgoing MT707 message if the free format text associated with the LC_AMND_INSTR advice exceeds 1750 characters in length.
5.2.2.2 Tolerance
Tolerance denotes the variance that has to be built around the LC amount, to arrive at the actual availability amount for the LC. The tolerance percentage is used to build the Maximum LC amount, when some component of the trade transaction like the freight, insurance, etc., is not covered in the LC amount.
Positive %
The positive tolerance is the percentage that should be added to the LC amount, to arrive at the Maximum LC Amount. This amount will be considered as the LC outstanding LC amount.
Negative %
The negative tolerance is the percentage that should be subtracted from the LC amount, to arrive at the Minimum LC Amount. The negative tolerance is captured for information purposes only. It will form part of the LC and amendment instruments.
The positive and negative tolerance specified for the product associated with the LC is defaulted. If you change the defaulted Positive Tolerance, an override message is displayed.
Maximum Amount
The Maximum LC Amount indicates the maximum amount that can be availed under the LC. This amount is arrived at, by adding the positive tolerance to the LC amount.000
Max. LC Amount = LC Amount + Positive Tolerance
If you have indicated the positive tolerance to be zero then:
Max. LC Amount = LC Amount
A customer cannot, at any point in time, avail more than the Maximum LC amount.
About Clause
This clause further qualifies the LC amount. Select one of the following options from the adjoining drop-down list:
- About
- Approximately
- Circa
- None
Liability Amount
Based on the value you specify in ‘Revolves In’ field, the LC Liability Amount will be computed and displayed.
The liability percentage is used to track the maximum LC amount against a given percentage. A bank would like to limit its exposure to a new or existing customer as LC is a commitment given by the bank. Although the bank sanctions an LC limit (maximum LC amount which includes tolerance) to a customer it may like to specify a percentage over and above this limit .This will result in the customer being shown to be liable or tracked for a higher amount. Specifying a liability percentage is from the perspective of risk management and provides cushion to the bank.
The liability amount is arrived at in the following manner:
Liability Amount = Maximum LC Amount + Liability % of the LC amount
If you have indicated the liability percentage to be zero then,
Liability Amount = Maximum LC Amount
This amount is computed by the system using the method indicated above, only if you have specified a liability tolerance. If a Liability tolerance has not been specified, you can enter a liability amount of your choice. However, the liability amount that you can enter should be at least equal to the maximum LC amount.
Under the following circumstances, system will display an error message:
- Latest shipment date of the import LC is greater than the latest shipment date of export LC.
- Expiry date of import LC is greater than expiry date of export LC.
- Import LC amount is greater than export LC amount.
- If you check the option ‘Back to Back LC’ for an export LC.
Note
The system will display an override message if you try to amend, cancel or close an export LC that is linked to an import LC. The above mentioned validations are also done while uploading an LC contract.
5.2.2.3 Customer
One of the parties in the LC should be a customer of your bank with a valid CIF ID. The details of this party are captured in the Contract Main Screen. It is then defaulted to the Parties screen.
Customer Name
If none of the parties in the LC is a customer of the bank, you should enter the CIF ID defined for the walk-in customer and give the details of one of the parties for it.
The party type of the counterparty of the LC is defaulted based on the type of LC you are processing. If you process an import LC ‘APP’ (indicating applicant) is defaulted. If you process an export LC ‘BEN’ (indicating beneficiary) is defaulted. You can change the default.
Customer
If the applicant is a customer of your bank, specify the CIF ID assigned to the customer, the related details of the customer will be automatically picked up.
If you are processing an Export LC, you should typically specify details of the beneficiary.
Party Type
Indicate the party type of the customer who is the counter party of the LC. You can select the valid party type from the adjoining option list.
The details of the other parties involved in the LC are captured in the Parties screen. The Customer Details specified in this screen will be defaulted to the Parties screen.
License Expiry Date
After you capture the CIF ID of the customer involved in the contract, the Import License Expiry Date maintained for the selected customer is defaulted to the screen. The system does not do any validations based on the Expiry Date. It is used only for information purpose.
Dated
Enter the date of the Their Reference. This would normally be the date on which you have a correspondence from the party regarding the LC.
Their Reference
This is the reference of the party whose CIF ID you have input. This will be picked up appropriately in the correspondence sent for the LC.
For an export LC, a reference for the Issuing Bank is mandatory. It is optional for other parties.
5.2.2.4 Revolving
You can capture the following details.
Revolves In
LCs can revolve in Time or in Value. Select the appropriate option from the adjoining drop-down list.
Automatic Reinstatement
The mode of reinstatement for a revolving LC can be either automatic or manual. Check against this field to indicate that the mode of reinstatement is automatic.
This field is applicable only for an LC revolving in time.
Cumulative
Check this box to indicate that the LC is cumulative. Leave it unchecked to indicate otherwise.
Frequency
For the letters of credit that revolve in time, you can specify the reinstatement frequency. This frequency represents the maximum number of reinstatements applicable to the LC. Based on the value you specify, the LC Liability Amount is computed and displayed. During LC reinstatement, the system calculates the next reinstatement date based on the units and the current reinstatement date.
If the number of reinstatements exceeds the frequency set here, the system displays an override message when you save the LC. You need to ratify this override at the time of contract authorization.
Note
Frequency is not applicable to the LCs that revolve in value. In such cases, once the LC is availed, the system reinstates it with the maximum contract amount during end of day operations. For this, the reinstatement option should be set to 'Automatic'.
Units
For LCs, which revolve in time, the maximum number of reinstatements is calculated based on the Reinstatement Frequency you specify. In the Units field, you can choose one of the following:
- Months
- Days
Next REIN Date
The system computes and displays the date of next reinstatement based on the value in ‘Units’ field.
Partial Closure
Check this box to perform partial closure of LC manually.
You can check this box during the following conditions:
- ‘Unlock’ Operation
- If the product is not of Revolving type
- On or before the Expiry date of the LC
On saving the amendment after checking this option, PCLS event takes place. The Limits, Outstanding Liability and the Cash Collateral are released to the extent of unutilized amount.
Once PCLS event is fired for an LC contract, system does not allow any operation on the LC other than LC Closure (CLOS). You can reopen the closed LC as existing. While reopening the LCs for which PCLS is fired earlier, the Limits are tracked, OS Liability and Cash collateral is increased to the extent of the amount released as part of PCLS.
After PCLS event takes place on the LC contract, if the Bill contract to which the LC is linked is reversed, the corresponding availment on the LC is reversed and the Limits, OS Liability and the Cash Collateral are updated. The linkages to the LC are not released automatically as part of PCLS firing during batch. You have to manually release as part of manual partial closure.
The above processes are skipped for the LC contracts under the product for which the ‘Revolving’ option is indicated as ‘Yes’.
The system allows manual partial closure during the partial closure days, until the LC is closed.
In case of a partially confirmed export LC contract, the system excludes the bill amount in the initial stage from the confirmed and unconfirmed portions.
Guarantee
If the LC that you are processing is a guarantee you should specify its type. Click the adjoining drop-down list and select one of the following values:
- Bid
- Performance
- Retention
Current Availability
This field displays the current amount that is available for availment under the LC. This value is automatically updated when there are availments, amendments or reinstatements so that it reflects the current amount that is available under the LC.
Outstanding Liability
This field displays the current outstanding liability amount under the LC. This value is automatically updated when there are availments, amendments or reinstatements so that it reflects the current amount under the LC.
Memo
Enter information about the LC that is intended for the internal reference of your bank. This information will not be printed on any correspondence regarding the LC. However, the remarks are displayed when the details of the LC are displayed or printed.
5.2.2.5 Reimbursement Undertaking
You can capture the following details.
Undertaking Expiry Date
Specify the undertaking expiry date.
You can claim the reimbursement only till the undertaking expiry date, else, the system will display the following error message “The undertaking has been expired”.
Undertaking Amount
Specify the amount that can be reimbursed. It can be less than or equal to contract amount.
The system will default the Undertaking Amount value with the Max LC Amount initially when it is created through the incoming MT740. However you can amend this field by adding the undertaking amount.
Availed Undertaking Amount
The system displays the availed portion of undertaken amount.
Note
- Undertaking Expiry Date and Undertaking Amount fields can be entered for reimbursement contracts only.
- Undertaking Expiry date can be entered only when Undertaking Amount has been specified.
- Undertaking Expiry date cannot be earlier than the issue date or later than the LC Expiry date.
- In case when LC Expiry date is not input then Undertaking Expiry date cannot be greater than the LC closure date.
Status
Specify the following details:
User Defined Status
Specify the status of the LC contract. The option list displays all valid statuses that are applicable. Choose the appropriate one.
At the branch level, if you have enabled group level status change for the LC, the system displays the status of the group with which the LC is associated. However, you can unlock and modify the statuses of individual contracts. Thus, you can use this field for changing the status of an LC contract manually.
Derived Status
The system displays the derived status of the LC contract. You cannot modify this.
5.2.2.6 Credit
Here you can capture the following details.
Type
Indicate the type of credit for which the LC is being processed.
Mode
Indicate the mode of payment through which the LC will be settled.
If you indicate the LC type as sight in the LC Product Definition screen, then you can select the credit mode as:
- Sight Payment
- Negotiation.
If you indicate the LC type as Usance in the LC Product Definition screen, then you can choose the credit mode as:
- Acceptance
- Deferred Payment
- Mixed Payment
- Negotiation
These validations are applicable only if drafts information is maintained in the Drafts sub-system. These validations are applicable for both Import and Export LC products.
Details
Specify the details of the credit.
With
Specify details of the party with whom the credit will be available.
5.2.2.7 Reinstatement of Available Amount
The reinstatement of the amount available may be effected in one of two ways:
- Where reinstatement is dependent upon time - In these circumstances
a specific amount is allowed to be drawn within each specific period
as stipulated in the LC during its validity. For example, the credit
may indicate that:
- US$ 25,000 may be drawn each month during the six-month validity of the LC
- The reinstatement of the amount may be either cumulative or non-cumulative.
Cumulative Reinstatement - Where the credit indicates that the reinstatement is on a cumulative basis, in the above example the sixth installment may be the cumulative for 6 months, i.e., US$ 150,000
Non-Cumulative Reinstatement - In the above example, if the credit indicates that the reinstatement is on a non-cumulative basis, it means that if one month’s shipment of US$25,000 is not made (either completely or partially), it cannot be carried forward to the succeeding month. If, for example, no shipments have been effected for five months, the drawing for the sixth month is restricted to US$25,000
- Where reinstatement is dependent upon value - Sometimes Revolving Credits may indicate that the amount is to be reinstated upon utilization within the overall validity of the credit. For example: ‘This LC shall revolve for US$ 25,000 during its validity up to a maximum overall drawing value of US$ 25,000’.
Reinstatement can be done as Auto or Manual. If Auto reinstatement and revolves in time options are selected, then the system calculates maximum liability amount as per the frequency maintained and pass entries for the same.
If Auto reinstatement, revolves in time and Non cumulative options are selected, then the system calculates initially the maximum liability amount during booking of contract and reverse the unutilized value of the particular period at the end of respective period.
System calculates and displays the frequency of reinstatement as per the values maintained in Revolves and Units options. System calculates and display next reinstatement date as per the frequency maintained when reinstatement is maintained as auto and frequency as time.
If auto Reinstatement and Frequency options are selected, then the system reinstates during EOD after every availment is made. If you select manual Reinstatement and Frequency, then the user can reinstates the value of contract anytime after availment is made.
If reinstatement is dependent on value, then cumulative reinstatement is not supported by the system.
5.2.3 Preferences Tab
You can specify certain details for SWIFT messages specific to LC and set your preferences using ‘Preferences’ tab. Click the tab button ‘Preferences’ on the screen.
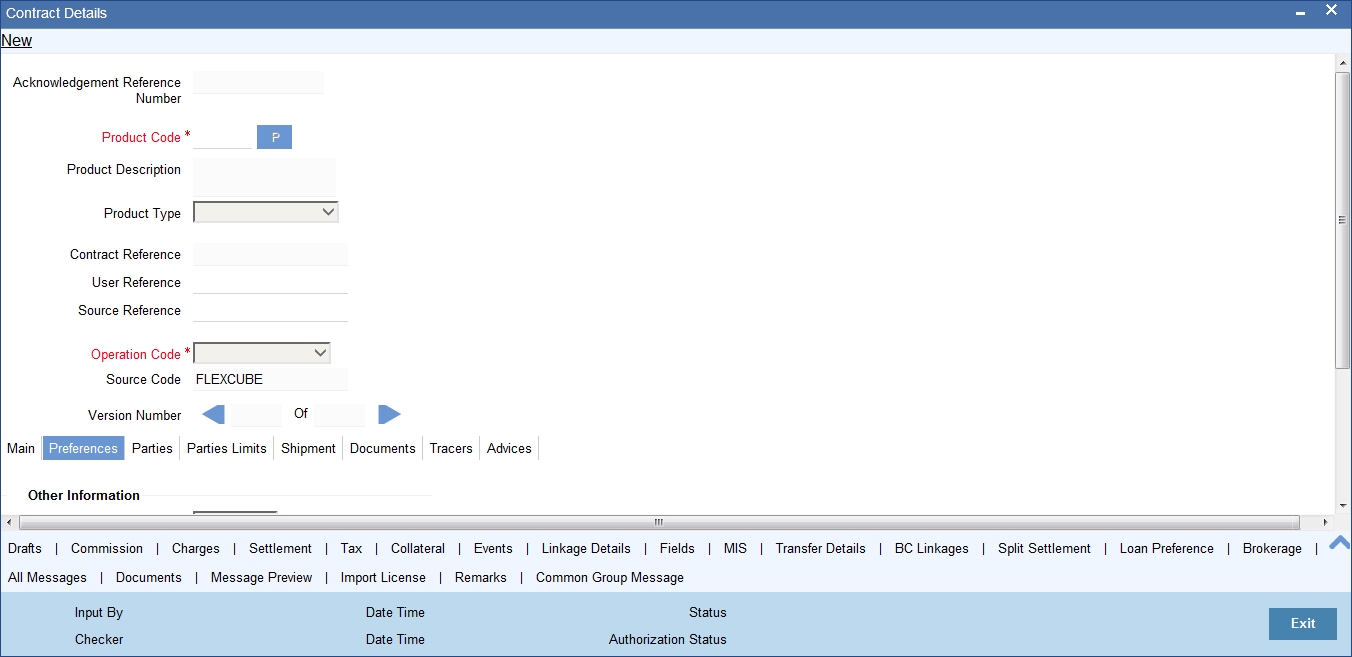
The details that you specify in the fields of this screen are picked up for SWIFT messages.
The SWIFT message that utilizes the information that you specify in this screen and the corresponding field of the SWIFT message which carries the input, has been listed below:
Field in Oracle FLEXCUBE |
SWIFT Message |
Field of the SWIFT message |
Charges From Beneficiary |
MT700 |
Field 71B |
Additional Amounts Covered |
MT 700 & MT 740 |
Field 39C |
Period For Presentation |
MT 700 |
Field 48 |
Charges From Issuing Bank |
MT 730 |
Field 71B |
Account For Issuing Bank |
MT 730 |
Field 57A |
Date |
MT 730 |
Field 32D |
Issuing Bank Amendment Date |
MT707 |
Field 30 |
Acknowledgement Received and Date |
MT768 |
Field 30 |
Template ID |
MT799 |
Field 79 |
5.2.3.1 Credit Line
Here you can capture the following details.
Limits Tracking Required
Specify whether the credit granted under the LC you are processing should be tracked against the credit limit assigned to the customer under a Credit Line.
Check this box to indicate that limit tracking is required for the LC. If left unchecked, the system will display an override message ‘Limit tracking not done for the contract’ while saving the record. In the subsequent fields of this screen, you can specify details of the line under which the credit is to be tracked.
Party Type
Specify the type of party involved in the LC you are processing, whose details you would subsequently enter. The parties involved in the LC can be specified in any sequence. However, a party code can be used only once in each LC.
Line
Specify the credit line under which you want to track the LC amount.
Customer
The system displays the customer for whom the LC is booked.
Limit Tracking Tenor
Specify the basis on which limits need to be tracked. Choose one of the following options:
- Letter Of Credit Tenor
- Max Draft Tenor
5.2.3.2 Other Information
Capture the following details.
Reimbursement Type
Specify the type of reimbursement. Choose the appropriate one from the dropdown list.
Charges From Beneficiary
Specify the charge amount borne by the beneficiary.
Additional Amounts Covered
Specify the additional amount covered.
Charges from
Indicate who bears the charges - claimant or your customer.
The Period for Presentation
The period of presentation defined for the product - or calculated for the LC, as the case may be - will be displayed in the ‘Period For Presentation’ field. You can change the default to suit the LC you are processing.
The system uses the Expiry Date and the Last Shipment Date specified for the LC you are processing, and arrives at the period of presentation.
If the sum of the latest shipment date and period for presentation is greater that the expiry date of an import LC, the system will display an override message. This is true only in cases where the ‘Latest Shipment Date’ field is not blank.
For details, refer the heading ‘Specifying the Period of Presentation’ in chapter ‘Creating Products’, in the LC User Manual.
5.2.3.3 Charges to be Claimed
Specify the following details.
Currency
Specify the currency of the charge.
Amount
Specify the charge amount.
Charge From Issuing Bank
Give a brief description of the charge.
Issuing Bank Acc
Specify the account from which charge should be collected.
Issuing Bank Date
Specify the date of charge collection.
5.2.3.4 Amendments
Specify the following details.
Amendment Number
The system displays the amendment number.
Increment Amendment Number
Check this box to indicate that the amendment number should be incremented with every amendment.
Issuing Bank Amendment Date
The date of amendment is displayed here.
5.2.3.5 Acknowledgement
Specify the following details.
Acknowledgement Received
Check this box to indicate that acknowledgement has been received.
Acknowledgement Date
Specify the date on which the acknowledgement is received.
5.2.3.6 Other Details
Specify the following details:
INCO Term
Specify the INCO term related to goods that are a part of the LC instrument. You can select one of the following values from the adjoining option list:
- EXW - EX Works (…named place)
- FCA - Free Carrier (…named place)
- FAS - Free Alongside Ship (…named port of shipment)
- FOB - Free On-Board (…named port of shipment)
- CFR - Cost and Freight (…named port of destination)
- CIF - Cost Insurance Freight (…named port of destination)
- CPT - Carriage Paid to (…named place of destination)
- CIP - Cost Insurance Paid (…named place of destination)
- DAF - Delivered at Frontier (…named place)
- DES - Deliver Ex Ship (…named port of destination)
- DEQ - Delivered Ex Quay (…named port of destination)
- DDU - Delivered Duty Unpaid (…named place of destination)
- DDP - Delivered Duty Paid (…named place)
Once you choose the INCO Term, the documents and clause details will be displayed based on the maintenance for the chosen INCO term in the ‘INCO Terms Maintenance’ screen. However, if you change the INCO term, the document and clause details will be not be updated automatically. You will have to manually change them if required. However, the system will check whether the document and clauses details are the same as those defined in the ‘INCO Term Maintenance’ screen.
The INCO term is picked up and displayed in field 45A of MT700.
Back to Back LC
Check this option if you want to link an export LC to an import LC. This field is applicable only for import LCs.
If you check this option, you will have to specify the export LC which you want to link to the import LC in the ‘Reference Number’ field. All active and authorized export LCs of the same counterparty will be available for selection in the option list adjoining ‘Reference Number’. An export LC can be linked to only one import LC.
Related Reference Number
Specify the related reference number. Choose the appropriate one from the option list.
While issuing a guarantee, the option list displays all valid bill of lading reference numbers and import LCs. Similarly, while issuing a back to back LC, the option list displays all valid export LCs maintained in the system. You can choose the appropriate one.
Claim Advice in Swift
Check this box to generate the charge claim advice in MT799 SWIFT format.
This field is initially defaulted from product level. However, you can then check or uncheck it at the contract level.
Template ID
Specify the template ID related to MT799 message types from the option list.
Note
You can enter the values only if the ‘Claim Advice in Swift’ field is checked.
User LC Reference Number
System displays the Contract User Reference as the User LC Reference Number. The reimbursement LC, under which the bill is availed, and the Export LC linked to the bill, should contain the same ‘User LC Reference Number’.
Application Rule
The system defaults the application rule from the product level. However, you can modify this.
Please refer to the section ‘Specifying the Applicable Rules’ under chapter ‘Defining Product Attributes’ in this user manual.
Rule Narrative
This is enabled only if ‘Applicable Rule’ is set to ‘OTHR’. The system defaults the rule narrative from the product level. However, you can modify this.
Please refer to the section ‘Specifying the Applicable Rules’ under chapter ‘Defining Product Attributes’ in this user manual.
Confirm Percentage
The system displays the percentage of confirmed amount.
Confirmed Amount
The system displays the current confirmed amount.
Unconfirmed Amount
The system displays the current maximum unconfirmed LC amount. This amount is derived by deducting the confirmed amount from the maximum LC amount.
Available Confirmed Amount
The system displays the available confirmed portion of the maximum LC amount.
Available Unconfirmed Amount
The system displays the available unconfirmed portion of the maximum LC amount.
Beneficiary Confirmation Required
The system checks this box by default for Letters of Credit. This box is unchecked for ‘Guarantees’. You can operationally control the beneficiary confirmation process for an LC, but you cannot modify it after the first authorization.
- When Beneficiary Confirmation Required is NOT SET
If Beneficiary Confirmation Required is selected then any financial amendment of the LC or Guarantee is done using LC Amendment Confirmation screen and non-financial amendment is done using LC Contract online screen. The system restricts the financial amendment of the LCs and Guarantees using LC Amendment Confirmation screen.
You can amend the financial fields in LC Contract Online screen. The Issue date in LC Contract Online screen is disabled. On saving the contract, the system triggers the AMND event and generates the messages MT707, MT747, and MT767 for the amendments. Authorization of these amendments is done through LC Contract online screen.
If Beneficiary Confirmation Requires is not selected at the contract level, then any financial and non-financial amendment is done using the LC Contract online screen. Financial amendments of LCs and Guarantees for which Beneficiary Confirmation Required is set is done using LC Amendment Confirmation screen. On saving the contract amendments, the system triggers the AMNV event and generates Message MT707 for the amendments. You can view the message using the Message Preview screen.
The Issue date in LC Amendment Confirmation screen is disabled.
5.2.3.7 Preferences
You can set the following preferences:
Allow Prepayment
Check this option to indicate that the customer can make a prepayment on the contract.
Transferable
Check this option to indicate that the LC is transferable.
May Confirm
Check this option to indicate that the LC can have an associated confirmation message. You can also specify the type of the confirmation instruction that should be sent to the advising/confirming bank if you are issuing the LC (whether Field 49 of MT 700 should be ‘Without’, ‘Confirm’, or ‘May add’).
Partial Confirmation Allowed
Check this box to confirm the partial amount. The remaining amount can be confirmed after you receive the approval from the external agent.
Note
This field is initially defaulted from product level. However, you can then check or uncheck it at the contract level.
Auto Status Change
The system defaults the status of the checkbox based on the product maintenance. However, you can modify this. If you check this box, the system picks up the contract during EOD operations for status processing. If you do not check this, the system will not consider the LC contract for automatic status processing.
Confirm Percentage
Specify the percentage of LC Amount to be confirmed. If percentage is not specified, the system will calculate the percentage based on the confirm Amount specified.
Confirmed Amount
Specify the amount to be confirmed. If Confirm Amount is not specified, the system will calculate the confirmed amount based on the Confirm Percentage specified.
Available Confirmed Amount
The system displays the available confirmed amount.
If both Confirm Amount and Confirm Percent are specified then the system will display an override message as “Both Confirm Amount and Confirm Percent are entered. Confirm Percent is considered for calculation.”
The system will calculate and display the ‘Confirm Amount’ based on the confirm percentage specified. Confirm Percentage and Confirm Amount can be changed or recalculated either on save or on pressing ‘LC Default Button’ available in Main tab of ‘LC Online’ screen.
The system will display an error message for the following conditions:
- If ‘Partial Confirmation Allowed’ box is unchecked and if you specify the values in ‘Confirmation Percentage’ and ‘Confirmation Amount’ fields
- If the value of the amount confirmed is greater than the unconfirmed unavailed amount.
- If the value of the confirm amount is lower than the availed confirmed amount.
- If Operation is confirm or advice and confirm and confirm percent is greater than 100 or confirm Amount is greater than LC current availability.
- If the operation code is set to ‘Advice’ or ‘Pre-Advice’ and if you specify the ‘Amount Confirmed’ and ‘Confirmation Percentage’.
- If the operation code is set to ‘Confirm’ or ‘Advice and Confirm’ and if you have not specified the values of the amount confirmed and the percentage of confirmation, then the system will default the percentage as 100, value of LC maximum amount
- If Partial Confirmation Allow flag is checked for product other than Export.
- If Partial Confirmation Allow flag is checked when LC Operation is other than Advice, Pre-advice, Confirm or Advice and Confirm.
5.2.4 Parties Tab
The Parties screen can be used to record the details related to all the parties involved in the LC. The documents, tracers and messages that are generated will be sent to the parties concerned, based on the details you specify in this screen.
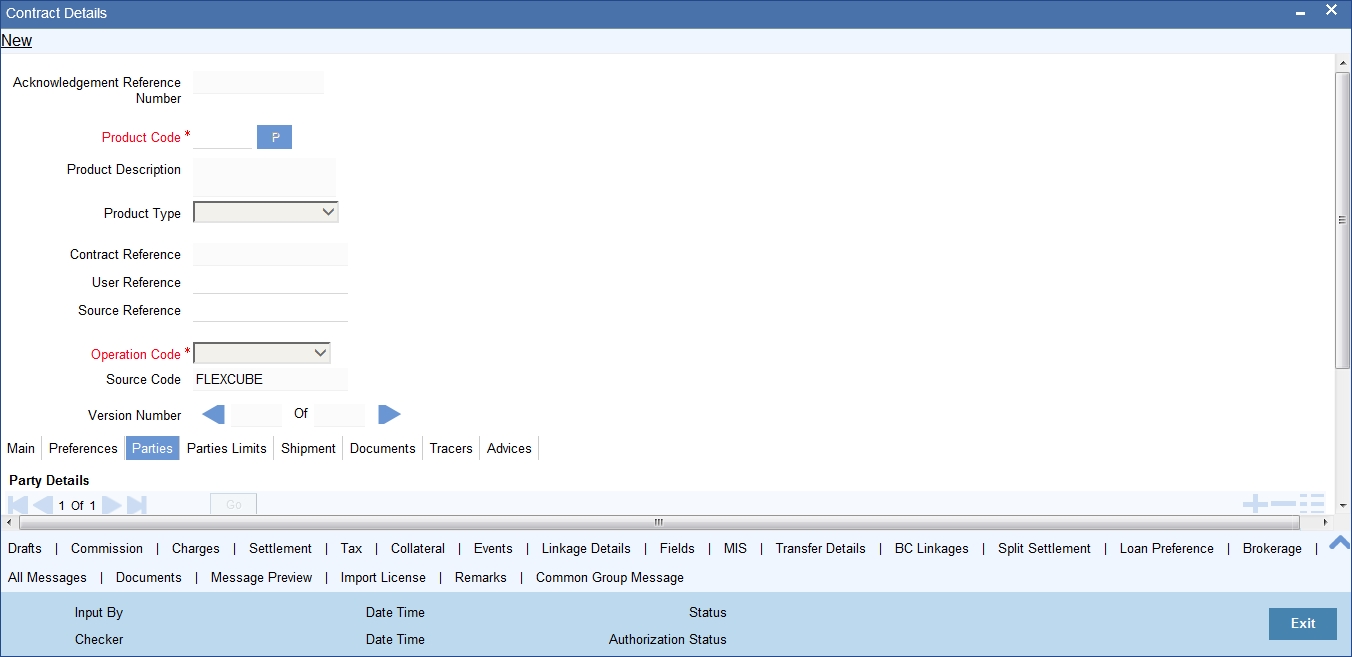
You can maintain the following details here:
Party Details
You should specify the following for each of the parties involved in the LC:
Party Type
Specify the party type (beneficiary, accountee, applicant, advising bank, issuing bank, reimbursing bank, advice through bank, confirming bank, claiming bank). The adjoining option list displays all party types available for the LC. You can choose the appropriate one. If the operation code of the LC is ‘Reimbursement’ the system will default the CIF party type as ‘ISB’ (issuing bank). The party type ‘CLB’ (claiming bank) will be available only if the LC is linked to a ‘Reimbursement’ type of product.
Once the record has been saved, you can change party names by amending the record, provided the LC is not linked to a bill. Also, you cannot change party names for a transferred or an availed LC.
Note that, you can change the following party types:
- REB
- ABK
- BEN
The following table gives the details of the messages when there is a change in parties:
Changed Party Name |
Messages |
Beneficiary party (BEN) (in case of import LC) |
MT707 will be sent to the advising bank. New party BEN will be sent in tag 79 of 707. If MT740 has been already sent to Reimbursing bank, then MT747 will be sent to the Reimbursing bank for intimating change of Beneficiary. |
Reimbursing bank (REB) (in case of import LC) |
MT799 will be sent to Advising bank. MT747 will be sent to old Reimbursing Bank Party. MT740 is sent to new REB party. FFT code ‘CANC’ must be attached manually to advice ‘LC_AMND_AUTH_REIMB’ (747), at contract level. |
Advising Bank (ABK) (in case of import LC) |
MT707 will be sent to the old Advising bank. MT700 will be sent to the new Advising bank. Also, FFT code ‘CANC’ must be attached to advices to 707 or 767 manually. |
BEN (in case of export LC) |
Counterparty will be changed and the limits, if any, for the old Beneficiary will be reinstated and will be tracked against the new Beneficiary. |
REB (in case of Guarantees and SGs) |
MT767 will be generated to the Advising bank. |
ABK (in case of export LC) |
You can change the ABK. |
ABK (in case of Guarantees and SGs) |
MT767 will be generated to the old Advising Bank. In Tag 77C, Code ‘CANCEL’ will be populated indicating that the Guarantee is cancelled. MT760 will be generated to the new Advising Bank. |
BEN, REB, and ABK |
MT707 will be sent to the old Advising Bank intimating the change of Advising Bank. MT700 will be sent to the new Advising Bank with the new parties for REB and BEN. MT747 will be sent to old REB and MT740 will be sent to the new REB party. |
BEN and REB |
MT707 will be sent to the Advising bank intimating the change of Beneficiary and Reimbursing bank. MT700 will be sent to the new Advising Bank with new Beneficiary If MT740 has already been sent to the REB, MT747 will be sent to the REB for intimating change of BEN. |
REB and ABK |
MT707 will be sent to the old ABK intimating the change of ABK. MT700 will be sent to the new ABK. MT747 will be sent to the old REB. MT740 will be sent to the new REB. |
Party Description
You can provide the description for the party type here.
Party ID
Specify a valid party ID against the party type. The adjoining option list displays all party IDs available for the LC. You can choose the appropriate one. On specifying REB in the party type, the adjoining option list will display all IDs having the contract currency as that of the LC currency.
Note
The system validates for the ADB membership of the selected Bank. If the Bank is not a member of ADB and the BIC code for the Bank is maintained as ‘ADB Member’ at BIC Maintenance level, then the system displays the following override message “Advising or Issuing Bank is not a member of ADB TFFP”.
5.2.4.1 Validations for ADB Member Status
Oracle FLEXCUBE validates ADB Member Status for a Bank, which is an ADB member, at each scenario with a different logic.
The system will not validate ‘ADB Member Status’ when the changed ‘ADB Member Status’ is maintained as ‘Not applicable’ in the following scenarios:
- When BIC is uploaded without maintaining initial status
- When a default value is maintained at BIC Code Maintenance level and initial status is not maintained
- When an initial status is changed from ‘Yes’ to ‘Not Applicable’
- When an initial status is changed from ‘No’ to ‘Not Applicable’
The system validates and displays an override message when the changed ‘ADB Member Status’ is maintained as ‘No’ in the following scenarios:
- When the initial status is changed from ‘Not Applicable’ to ‘No’
- When the initial status is changed from ‘Yes’ to ‘No’
The system validates and does not display an override message when the changed ‘ADB Member Status’ is maintained as ‘Yes’ in the following scenarios:
- When the initial status is changed from ‘Not Applicable’ to ‘Yes’
- When the initial status is changed from ‘No’ to ‘Yes’
The system validates the BIC code maintained in ‘Address 1’ field of the Advising Bank or Issuing Bank of LC contract with code maintained at ‘BIC Code Maintenance’ level. If the BIC code maintained in ‘Address 1’ field of LC contract is not an ADB member, then the system displays an override message.
Note
If the Advising Bank or the Issuing Bank is not a customer of the Bank, then the system validates the BIC maintained in ‘Address 1’ field of the Advising Bank or the Issuing Bank.
Customer
The CIF ID assigned to the party, if the party is defined as a customer in Oracle FLEXCUBE. If the applicant (APP) or beneficiary (BEN) is not a customer of your bank, you can use a walk-in customer ID.
Customer Name
Enter the name of the Customer. The party name can be 150 characters in length. However, please note that in the SWIFT messages that you generate only 35 characters will be included.
Country
Enter the country of the customer.
Address 1 to 4
Enter the address of the customer who has initiated the transaction.
Customer Reference
Specify the sender’s reference number. In case of an upload of MT768, the value in field 20 of the message is displayed here. Input to this field will be mandatory for the party type ‘ISB’.
Dated
Specify the date of transaction initiation.
Language
Specify the language in which advices should be sent to the customer.
Issuer
Check this option to indicate that the issuer is a bank.
Template ID
Specify the template ID. If you change REB party, then a template ID needs to be attached to send MT799 to Advising bank.
5.2.4.2 Other Addresses
Following details are displayed here:
- The media type through which the advises should be routed and the respective address(es)
- The party’s mail address
- The account
The advices for a party will be sent to the default media maintained in the Customer Addresses table. If you want to send the advices through another medium, you should indicate it in the Parties screen. The address should be also indicated. The advices will be sent through the new medium, only if you indicate so in the Advices screen of contract processing. If not, the advice will continue to be sent to the default address defined for the party.
You can use this feature to send a one-off advice, through a different medium. For example, for a particular customer, you normally send all advices through mail and hence haven’t defined SWIFT or TELEX advices. For an LC involving a customer, you want to send the advices through SWIFT. In such a case, you can specify the medium as SWIFT and specify the address only for the LC you are processing.
The issuer of LC is a bank or an individual. This is enabled only for the party type ISB (issuing Bank). The party type is defaulted from CIF maintenance. However, you can amend the value before authorizing the contract.
If issuer of LC is a bank, tags 52A and 52D will be populated. The message Types supported by these tags are MT710/MT720.
If issuer of LC is not a bank, 52B tag will be populated.
The parties involved in an LC depend upon the type of LC you are processing. The following table indicates the minimum number of parties required for the types of LC that you can process.
LC type |
Parties applicable |
Mandatory parties |
Parties not allowed |
Import LC |
Applicant/Accountee Advising Bank Beneficiary Confirming Bank Reimbursing Bank |
Applicant and Beneficiary
|
Issuing Bank |
Export LC |
Applicant/Accountee Issuing Bank Advising Bank Beneficiary Confirming Bank Reimbursing Bank |
Beneficiary and Issuing Bank |
Advising Bank |
Shipping Guarantee |
Applicant/Accountee Advising Bank Beneficiary Confirming Bank Advice Through Bank Reimbursing Bank |
Applicant and Beneficiary |
Issuing Bank |
Guarantee |
Applicant and Beneficiary |
Applicant and Beneficiary |
Advising Bank Advise Through Bank Reimbursement Bank Issuing Bank |
Standby |
Applicant/Accountee Advising bank Beneficiary Confirming bank Reimbursing bank |
Applicant and Beneficiary |
Issuing Bank |
Clean LC |
Applicant/Accountee Advising bank Beneficiary Confirming bank (for confirmed LCs only; could be more than one bank) |
Applicant and Beneficiary |
Issuing Bank |
Note
While processing LCs and guarantees, you can use the walk-in customer ID for the applicant (APP) and Beneficiary (BEN) party types. However, note that you can use a particular CIF ID only once in an LC.
5.2.5 Parties Limits Tab
Oracle FLEXCUBE allows you to track the credit limits for joint venture customers who are parties to an LC contract. Using ‘Parties Limits’ tab, you can track the limits of multiple credit lines in an LC contract. Click ‘Parties Limit’ tab on ‘LC Contract Details’.
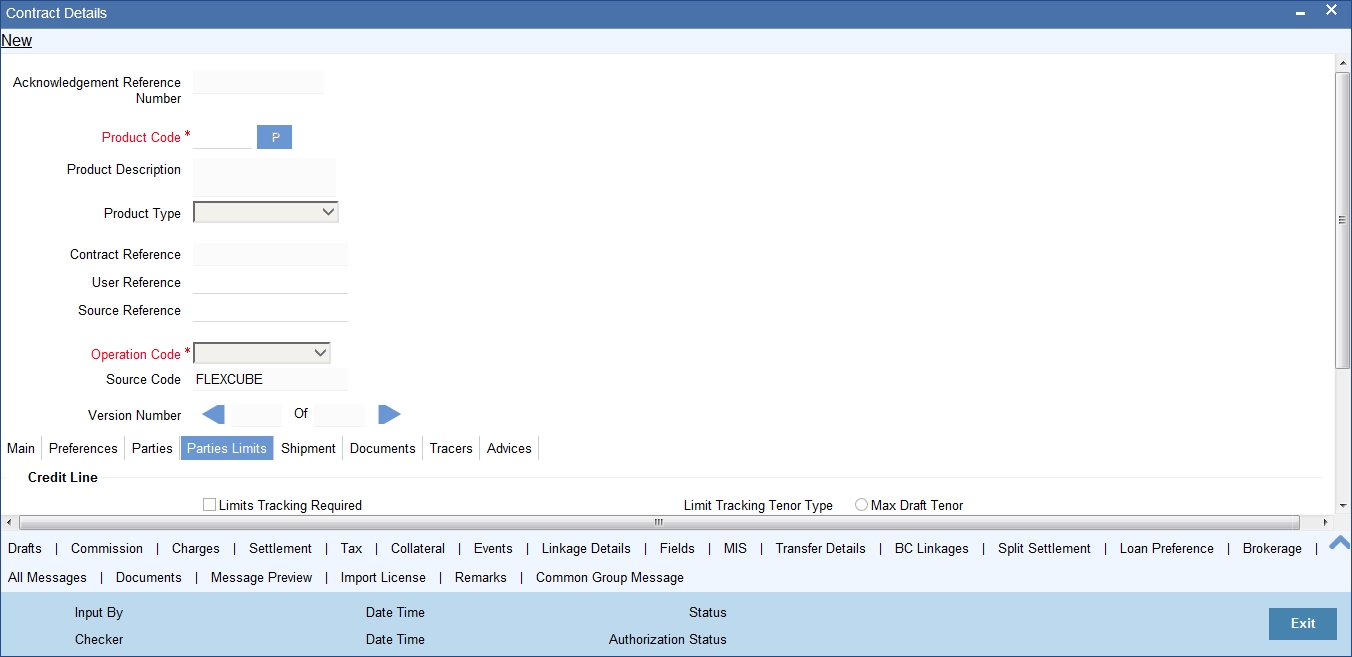
Specify the following details:
Limits Tracking Required
Check this box to indicate that limit tracking is required for the parties to the LC contract. If you check this box, the system will let you set the limits for multiple credit lines in the contract. If you do not check this box, the system will not track the parties’ limits.
On checking this box, the system enables ‘Default’ button. You can use this button to get the default values for the parties in the credit lines.
Limit Tracking Tenor Type
Choose the limit tracking tenor type from the following options:
- Letter of Credit tenor
- Max Draft Tenor
Party Type
Specify the type of the party whose credit limits need to be tracked.
If you click ‘Default’ button, in the first row, the system defaults the joint venture party type based on the joint venture party selected under ‘Parties’ tab of ‘LC Contract Details’ screen. However, you need to make sure that the mandatory party details have been maintained under ‘Parties’ tab of the screen.
When you add another row to the list, you can manually select the party type as required. If you leave it blank, the system will automatically update the party type when you save the contract.
Customer No
Specify the customer number of the party whose credit limits need to be tracked. The option list displays the customer numbers of all the parties selected under ‘Parties’ tab. Choose the appropriate one.
You need to make sure that the customer number corresponds to the party type selected above. If the customer number and party type do not match, the system displays an error.
JV Parent
When you click ‘Default’ button, the system defaults the joint venture customer number of the party. This customer number is defaulted based on the details maintained in ‘Joint Venture’ sub-screen of ‘Customer Maintenance’ screen.
Liability Number
When you click ‘Default’ button, the system defaults the liability number from ‘Joint Venture’ sub-screen of ’Customer Maintenance’ screen.
Linkage Type
Specify the linkage type. The drop-down list displays the following options:
- Facility (Credit Line)
- Collateral Pool
- Collateral
Choose the appropriate one.
Linkage Reference No
Specify the reference number that identifies the facility, collateral pool or collateral. The option list displays all valid facilities and collateral pools specific to the liability. Choose the appropriate one.
In case you choose the same linkage reference for more than one record in the list, the system displays an override message. You may choose to cancel or proceed with the selection.
% Contribution
Specify the proportion of limits to be tracked for the credit line or collateral pool for the joint venture customer. When you click ‘Default’ button, the system defaults the percentage of contribution maintained under ‘Joint Venture’ sub-screen of ‘Customer Maintenance’ screen.
It is mandatory to indicate the percentage of contribution if the party is a customer under joint venture. This is not applicable to customers who are not a part of joint venture.
Note
For one joint venture, the total percentage of contribution in all applicable credit lines together cannot be more than 100%.
Amount Tag
Specify the amount tag. The system tracks the limits for non joint venture customers based on the amount tag. The amount tags applicable to export and import LC contracts are listed below:
Amount tags applicable to Export LC:
- Liability Amount
- Confirmed Amount
- Unconfirmed Amount
Amount tags applicable to Import LC:
- Liability Amount
- Undertaking Amount
- Non Undertaking Amount
Choose the appropriate one based on the type of LC contract. If you do not specify the amount tag, the system will track the limits based on the liability amount and facility.
For joint venture customers, you need to choose ‘Liability Amount’ as the amount tag. Other amount tags are not applicable to joint venture customers.
The system verifies the amount tag against the product type. If you choose an amount tag, which is not supported by the product type, the system displays an error message.
Amount
When you click ‘Default’ button, the system defaults the amount tracked for each credit line. In case of joint venture customers, the amount is derived on the basis of the percentage of liability amount. In case of other customers, the amount is derived based on the amount tag specified above.
You can add more rows to the list of credit lines using add button. Similarly, you can remove a selected row from the list using delete button.
Once you have specified the details, save the contract. In case the limit for a credit line has been completely exhausted, the system displays a configurable override message. If you have not used ‘Default’ button while specifying the parties’ limit details, the system will automatically default the details and track the limits based on that.
For example, Customer A and Customer B enter into a joint venture. The credit lines are attached as shown below:
Joint Venture |
Party Type |
Customer |
Liability |
Amount Tag |
Facility/ Pool |
Percentage |
Customer JV |
BEN |
Customer A |
Customer A |
N/A |
FACILITY1 |
10 |
Customer JV |
BEN |
Customer A |
Customer A |
N/A |
FACILITY2 |
15 |
Customer JV |
BEN |
Customer A |
Customer A |
N/A |
POOL1 |
5 |
Customer JV |
BEN |
Customer B |
Customer B |
N/A |
FACILITY3 |
25 |
Customer JV |
BEN |
Customer B |
Customer B |
N/A |
FACILITY4 |
10 |
Customer JV |
BEN |
Customer B |
Customer B |
N/A |
POOL2 |
10 |
Customer JV |
BEN |
|
|
N/A |
FACILITY5 |
15 |
Customer JV |
BEN |
|
|
N/A |
POOL3 |
10 |
|
ISB |
Customer C |
Customer C |
Confirmed Amount |
FACILITY6 |
0 |
|
ISB |
Customer C |
Customer C |
Unconfirmed Amount |
FACILITY7 |
0 |
The joint venture of Customer A and Customer B results in the creation of a customer called ‘Customer JV’. Facilities/Pools are linked to the Customer A, Customer B and Customer JV. If the counterparty in the LC contract is ‘Customer JV’, then all credit lines and collateral pools belonging to the customers, Customer A, Customer B and Customer JV will be available for linkage.
The LC details are given below:
LC Amount : GBP 10000
Positive Tolerance : 10%
Liability Tolerance : 10%
Max LC Amount : GBP 11000
Liability Amount : GBP 12100
Confirmed Amount : GBP 7700 (70% of Max LC Amount)
Unconfirmed Amount : GBP 3300 (30% of Max LC Amount)
Limits are maintained for joint venture and non joint venture customers as follows:
Joint Venture |
Party Type |
Customer |
Liability |
Amount Tag |
Facility/ Pool |
% |
Amount (GBP) |
Customer JV |
BEN |
Customer A |
Customer A |
N/A |
FACILITY1 |
10 |
1210 |
Customer JV |
BEN |
Customer A |
Customer A |
N/A |
FACILITY2 |
15 |
1815 |
Customer JV |
BEN |
Customer A |
Customer A |
N/A |
POOL1 |
5 |
605 |
Customer JV |
BEN |
Customer B |
Customer B |
N/A |
FACILITY3 |
25 |
3025 |
Customer JV |
BEN |
Customer B |
Customer B |
N/A |
FACILITY4 |
10 |
1210 |
Customer JV |
BEN |
Customer B |
Customer B |
N/A |
POOL2 |
10 |
1210 |
Customer JV |
BEN |
|
|
N/A |
FACILITY5 |
15 |
1815 |
Customer JV |
BEN |
|
|
N/A |
POOL3 |
10 |
1210 |
|
ISB |
Customer C |
Customer C |
Confirmed Amount |
FACILITY6 |
0 |
7700 |
|
ISB |
Customer C |
Customer C |
Unconfirmed Amount |
FACILITY7 |
0 |
3300 |
In case of joint venture customers, limits are tracked on the basis of the percentage of liability amount. In this case, it is GBP 12100.
5.2.5.1 Using ‘Default’ Button
When you click ‘Default’ button on ‘Parties Limit’ tab of ‘LC Contract Details’ screen, the system defaults the following details in the credit lines:
- Party Type
- JV Parent
- Liability Number
- Percentage of Contribution
- Amount
You can use ‘Default’ button multiple times. Every time you click this button, the system defaults the values afresh in all applicable fields. Any prior modification made to the values in the above fields will be ignored. Hence, you need to verify the values in the modified fields each time after clicking ‘Default’ button.
5.2.5.2 Updating Parties’ Limits on Amendment of LC Contract
Oracle FLEXCUBE allows you to amend LC contracts. Such amendments may have direct impact on the parties limits defined in the contracts. This section examines the some amendments that can be made to an LC contract and their impact on the parties’ limits.
Increase in LC Amount
If there is an increase in the LC amount, based on the amount tag, the system updates the parties’ limits as follows:
Amount Tag |
Changes in Parties’ Limits |
Liability Amount |
The liability amount is used to track the delta amount |
Confirmed Amount |
The increased confirmed amount is used to track the parties’ limits |
Unconfirmed Amount |
The increased unconfirmed amount is used to track the limits |
Non-undertaken Amount |
The LC amount is used to track the limits for the line specified under ‘Non-Undertaken Amount’ |
After amendment, if there is an increase in the confirmed amount, the parties’ limits are updated as follows:
Amount Tag |
Changes in Parties’ Limits |
Liability Amount |
The system does not track the limits |
Confirmed Amount |
The increased confirmed amount is used to track the limits |
Unconfirmed Amount |
The increased confirmed amount is deducted from the credit line tracked for the unconfirmed portion |
After amendment, if there is an increase in the undertaking amount, the parties’ limits are updated as follows:
Amount Tag |
Changes in Parties’ Limits |
Liability Amount |
The system does not change the parties’ limits |
Undertaken Amount |
The increased undertaken amount is used to track the limits |
Non-undertaken Amount |
The increased undertaken amount is deducted from the credit line tracked for the non-undertaken portion |
After amendment, if there is a decrease in the LC amount, the system updates the parties’ limits as follows:
Amount Tag |
Changes in Parties’ Limits |
Liability Amount |
The decreased amount is deducted from the credit line tracked for the liability amount |
Confirmed Amount |
The decreased confirmed amount is deducted from the credit line tracked for the confirmed amount |
Unconfirmed Amount |
The decreased confirmed amount is deducted from the credit line tracked for the unconfirmed portion |
After amendment, if there is a decrease in the confirmed amount, the system updates the parties’ limits as follows:
Amount Tag |
Changes in Parties’ Limits |
Liability Amount |
The system does not change the parties’ limits |
Confirmed Amount |
The decreased confirmed amount is deducted from the credit line tracked for the confirmed amount |
Unconfirmed Amount |
The decreased confirmed amount is added to the credit line tracked for the unconfirmed portion |
After amendment, if there is a decrease in the undertaking amount, the system updates the parties’ limits as follows:;
Amount Tag |
Changes in Parties’ Limits |
Liability Amount |
The system does not change the parties’ limits |
Non-Undertaken Amount |
The decreased undertaken amount is added to the credit line tracked for the non-undertaken portion |
If the percentage of allocation is modified, the system updates the delta amounts accordingly. If the parties in the ‘Parties’ tab are changed and the old party happens to be a joint venture party, the limit tracked against all the joint venture customers will be reduced proportionately.
If the new party is a joint venture, the new JV customers along with the relevant details will be defaulted in the ‘Parties Limits’ tab when you click ‘Default’ button. Please notice that this is applicable only to joint venture customers of the changed parties.
5.2.5.3 Updating Parties’ Limits on LC Availments
On receipt of the bills or on notification from the negotiating bank, you can record an availment under an LC. The system updates the parties’ limits during availment of an LC contract.
At the time of availment, the system reinstates the limits for the lines under the joint venture customers. This reinstatement takes place proportionately based on the percentage of amount utilized.
In case of non joint venture customers, the reinstatement takes place based on the amount tag selected under ‘Parties Limits’ tab. The method of reinstatement for each amount tag is given below:
Amount Tag |
Changes in Parties’ Limits |
Liability Amount |
The limits are reinstated based on the LC amount availed so far |
Confirmed Amount |
The limits are reinstated based on the confirmed portion of the LC amount availed so far |
Unconfirmed Amount |
The limits are reinstated based on the unconfirmed portion of the LC amount availed so far |
Undertaken Amount |
The limits are reinstated based on the undertaken portion of the LC amount availed so far |
Non-undertaken Amount |
The limits are reinstated based on the non-undertaken portion of the LC amount availed so far |
5.2.5.4 Updating Parties Limits on Reinstatement of LC Contracts
You can mark specific LC contracts for automatic reinstatement. Such contracts will be reinstated as part of a batch process during BOD operations.
At the time of reinstatement, the system tracks the limits for the lines under the joint venture customers. This tracking takes place proportionately based on the percentage of amount.
In case of non joint venture customers, the system tracks the limits based on the amount tags selected under ‘Parties Limits’ tab. The method of tracking limits for each amount tag is given below:
Amount Tag |
Changes in Parties’ Limits |
Liability Amount |
The system tracks the limits based on the LC amount reinstated so far |
Confirmed Amount |
The system tracks the limits based on the confirmed portion of the amount reinstated so far |
Unconfirmed Amount |
The system tracks the limits based on the unconfirmed portion of the amount reinstated so far |
Undertaken Amount |
The system tracks the limits based on the undertaken portion of the amount reinstated so far |
Non-undertaken Amount |
The system tracks the limits based on the non-undertaken portion of the amount reinstated so far |
5.2.5.5 Updating Parties Limits on Closure of LC Contracts
You can mark specific LC contract for automatic closure. LC contracts marked for closure are closed as part of a batch processes. On closure of an LC, the system reinstates the limits from the linked lines/pools to the extent of tracking.
You can also close an LC contract partially. In case of a partial closure, the system tracks the limits separately for confirmed amount and unconfirmed amount. As part of PCLS event, the limits for the confirmed amount will be released after excluding the amount of bill in the initial stage. The entire portion of unconfirmed amount is tracked separately.
5.2.5.6 Updating Parties Limits on Reversal and Deletion of LC Contracts
Oracle FLEXCUBE allows you to reverse or delete an LC contract. On reversal or deletion of an LC, the limits tracked for all joint venture parties are reduced proportionately. The limits tracked for non joint venture customers are reduced to the extent to which it was tracked.
5.2.6 Shipment Tab
An LC instrument, which is an instrument of trade finance, involves details of merchandise. Hence, you will need to specify the following details for the LC:
- Details of the merchandise
- Details of the mode of transportation
You can also specify Preferences for the shipment of goods. Note that you will not be able to save shipment and goods related details for an LC under the operation code ‘Reimbursement’. Click on the tab titled ‘Shipment’ to specify shipment details of LC.

5.2.6.1 Shipment Details
There are certain standard clauses and conditions, associated with the shipment of the merchandise traded under an LC. You can specify the following shipping details for an LC that you process.
From
The location from which the goods transacted under the LC should be shipped. In international trading parlance, this is called the Loading on board/Dispatch/Taking in charge at/from.
To
The destination to which the goods transacted under the LC should be sent. In international trading parlance, this is called the ‘For transportation’ to.
‘Shipment From’ and ‘Shipment To’ are linked to the tags 44A and 44 B respectively. These tags are applicable to the following message types:
- MT700
- MT705
- MT707
- MT710
- MT720
Note
Specifying the ‘Shipment From’ and ‘Shipment To’ is optional.
Partial Shipment Allowed
Check this option if partial shipment of the goods is allowed under the LC.
Trans Shipment Allowed
Check this option if Trans-shipment is allowed under the LC.
Shipment Days
Specify the number of shipment days.
If you enter the shipment days and leave the field ‘Latest Shipment Date’ blank, on saving the contract, the system calculates the latest shipment date based on the number of shipment days and the effective date.
However, if you specify the latest shipment date, the system ignores the shipment days specified here. Instead, it recalculates the shipment days based on the latest shipment date and the effective date.
Latest Shipment Date
Specify the latest date for loading on board/despatch/taking in charge. If this date is greater than the linked policy expiry date, the system will display an override/error message. This corresponds to the field 44C in MT 700 and is a conditional field. Either field 44C (Latest Shipment date) or 44D (Shipment Period) will be present in the message, but not both.
In case you do not specify the latest shipment date, the system automatically calculates the date based on the number of shipment days and the effective date specified above.
Now, suppose that you have specified both the shipment days and the latest shipment date. In that case, the system ignores the shipment days and recalculates it based on the latest shipment date and the effective date.
If you modify the latest shipment date during amendment, the system recalculates the number of shipment days.
Shipment Period
Specify the period of time during which the goods are to be loaded on board/despatched/taken in charge. This corresponds to field 44D in MT 700 and is a conditional field. Either field 44C (Latest Shipment date) or 44D (Shipment Period) will be present in the message, but not both.
Additional Shipment Details
Specify additional shipment details.
Shipping Marks
Specify shipping marks.
5.2.6.2 Goods
The details of the merchandise that will be traded under the LC should be clearly specified.
Goods Code
You have maintained various codes that have been allotted, for commodities normally traded in your country. The commodities are available for selection in the form of an option-list. In addition, the list will also display whether a particular commodity is banned or not by indicating ‘YES’ (for a banned product) and ‘NO’ (for a product that is allowed for trade) against the product. You can select the applicable code for the LC you are processing, from the list.
Description
The description of this code (which could be 6500 characters long), can be changed to suit the LC you are processing. You can also enter specifications such as the quality and quantity of the merchandise.
INCO Term
Specify the INCO term related to goods that are a part of the LC instrument. You can select one of the following values from the adjoining option list:
- EXW - EX Works (…named place)
- FCA - Free Carrier (…named place)
- FAS - Free Alongside Ship (…named port of shipment)
- FOB - Free On-Board (…named port of shipment)
- CFR - Cost and Freight (…named port of destination)
- CIF - Cost Insurance Freight (…named port of destination)
- CPT - Carriage Paid to (…named place of destination)
- CIP - Cost Insurance Paid (…named place of destination)
- DAF - Delivered at Frontier (…named place)
- DES - Deliver Ex Ship (…named port of destination)
- DEQ - Delivered Ex Quay (…named port of destination)
- DDU - Delivered Duty Unpaid (…named place of destination)
- DDP - Delivered Duty Paid (…named place)
Once you choose the INCO Term, the documents and clause details will be displayed based on the maintenance for the chosen INCO term in the ‘INCO Terms Maintenance’ screen. However, if you change the INCO term, the document and clause details will be not be updated automatically. You will have to manually change them if required. However, the system will check whether the document and clauses details are the same as those defined in the ‘INCO Term Maintenance’ screen.
The INCO term is picked up and displayed in field 45A of MT700.
5.2.6.3 Port
Specify the following details.
Port of Loading
You can specify the name of the airport from where the goods transacted under the LC are loaded for shipping. This is called the Port of Loading.
Port of Discharge
You can also specify the name of the destination port to which the goods transacted under LC should be sent. This is called the Port of Discharge.
‘Port of Loading and ‘Port of Discharge’ are linked to the 44E and 44F tags respectively. These tags are applicable to the following message types:
- MT700
- MT705
- MT707
- MT710
- MT720
Note
It is not mandatory to specify the Port of Loading or Port of Discharge.
5.2.7 Documents Tab
Click on the tab titled ‘Documents’ to specify details of the documents and clauses that are part of the LC instrument and the documents that should accompany the goods.
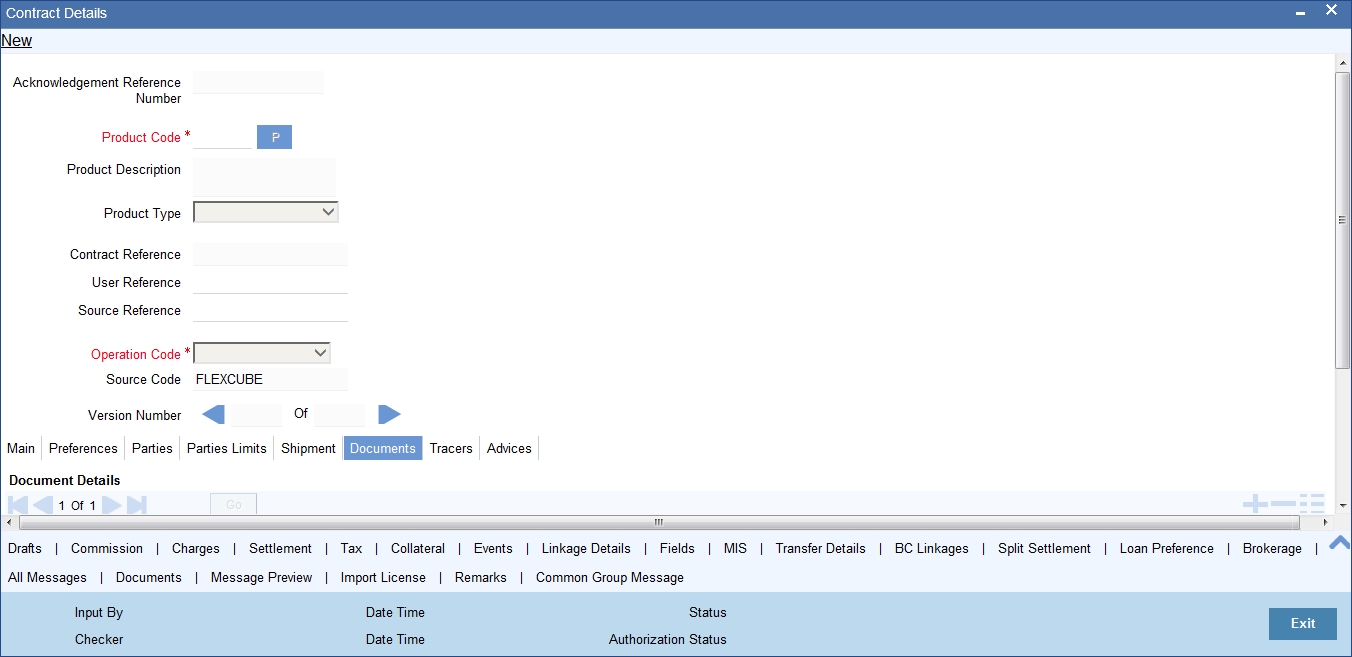
Here you can capture the following details:
5.2.7.1 Documents
There are some standard documents required under a documentary LC. In this screen you can specify the documents that are required under the LC being processed. These details will be a part of the LC instrument sent to the advising bank, the advice through bank or the beneficiary. All the documents specified for the product to which the LC is linked will be defaulted to this screen.
Code
Enter the document Code
Type
Enter the document type
Description
Enter the document description of the document that is defaulted to suit the LC you are processing. This field will be enabled only if the LC type is ‘Shipping Guarantee’, but not mandatory.
During copy operation, the value of this field will not be copied to the new contract.
Document Reference
Enter the document reference number based on which the Shipping Guarantee issued.
Number of Copies
Enter the number of copies of the document.
Number of Originals
Enter the number of Original documents here.
Original Receipt
Enter the receipt details here.
You can add to or delete from the list of documents that are defaulted. To add a document for the LC, click add icon and then on option list positioned next to the ‘Code’ field. Select the code of the appropriate document from the list of document codes maintained in the Documents Maintenance screen. The other details of the document will be defaulted to this screen.
To delete a document that is not required for the LC, highlight the document code and click on the delete icon.
5.2.7.2 Clauses Details
In addition to the other details, the clauses specified for a document while defining the product, are also defaulted to this screen.
Code and Description
When you highlight a document code, all the clauses defined for the document are displayed in the Clauses window. You can add to or delete from, the list of clauses that are defaulted.
To add a clause to a document for the LC, click add icon. Then, click adjoining option list. Select the code of the applicable clause from the list of clause codes maintained, in the Clause Maintenance screen. The description of the clause will be defaulted, based on the clause code that you select.
To delete a clause that is not required for the LC, highlight the Clause code and click delete icon.
5.2.8 Advices Tab
An important part of processing an LC is the generation of various advices applicable for a contract.
The advices that can be generated for the events that occur during the lifecycle of an LC are defined for the product, to which the LC is linked. For example, you may have specified the following advices for a product:
- Issue of an import LC: pre-advice by SWIFT and LC instrument by mail to the advising bank, the authorization to reimburse to the reimbursing bank.
- Advice of an export LC: the acknowledgement advice to the advising bank.
- Issue of a guarantee: the guarantee instrument to the beneficiary.
The details of the advices for an event are displayed in the Advices screen. The party type to whom a specific advice should be sent is picked up automatically based on the type of LC being processed and the parties involved.
From the LC Contract Details screen click ‘Advices’ tab. The advices screen is displayed.
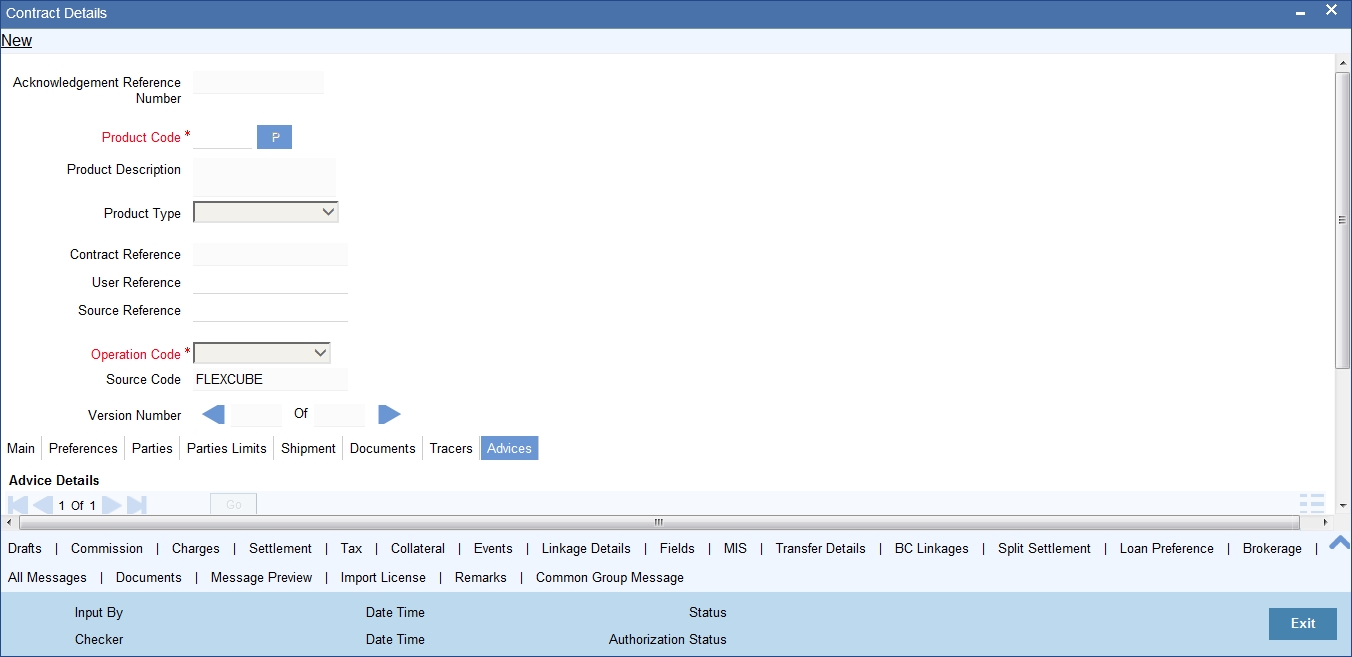
The advices defined for the event you are processing will be displayed. You can choose to suppress any of them. The address of the party to whom the advice is addressed to will be picked up by default, based on the media and address maintenance for the party. These can be changed if required.
For a payment message by SWIFT, you also have the option to change the priority of the message.
You can capture the following details.
Suppress
By default, all the advices that have been defined for a product will be generated for the LCs involving it. If any of the advices are not applicable to the LC you are processing, you can suppress its generation by Checking against the suppress field.
Priority
For a payment message by SWIFT, you also have the option to change the priority of the message. By default, the priority of all advices is marked as Normal. The priority of a payment message can be changed to one of the following:
- Normal
- Medium
- High
Medium
The medium by which an advice will be transmitted and the corresponding address will be picked up based on the media and address maintenance for a customer.
You can, however, change either of these while processing the LC. Typically, if changed, both of them will be changed.
After selecting the advices to be generated for the LC, click on ‘Ok’ to save it. Click ‘Exit’ or ‘Cancel’ button to reject the inputs you have made. In either case, you will be taken to the Contract Main screen.
5.2.8.1 FFT Details
Free Format Text instructions (FFTs) are a set of instructions or statements that are applicable to the LC that you process. It can be used to enter additional details related to the LC you are processing. In the LC Contract - Advices screen you can specify the FFTs that should accompany an advice, generated for an LC. When you select an advice code on this screen, the advice code together and the party type, to which it is to be sent, is displayed in the FFT section. This indicates that the FFTs that you specify will appear on the advice, which is displayed and will be sent to the party type that is displayed.
All the FFTs defined for the advice, at the product level will also be displayed. You have the option to add to or delete from the list of FFTs defaulted for an advice.
Free Format Text Code
To add an FFT to the list, click add icon. Select an FFT code from the adjoining option list that is displayed.
Text
After selecting the code that identifies the FFT you wish to attach to the advice, its description is automatically picked up and displayed. The FFT description can be changed to suit the requirements of the LC you are processing.
Single
Check this option to indicate that the FFT is a single message.
Guarantee Reference Number
Choose the guarantee whose details you would like to upload (from the Incoming Message Browser) in the FFT Description fields.
A FFT Description field can contain 2000 characters. If the details of the guarantee you specify exceeds 2000 characters, the system will automatically stagger the remaining text into subsequent FFT Description fields.
To delete an FFT from the list, highlight the code that identifies the FFT and click delete icon. The free format codes for the following purposes have the fixed codes:
SND2RECMTxxx |
Sender to receiver information (Field 72 of SWIFT). |
INSTRUCTION |
Instructions to the Paying/Accepting/Negotiating bank (Field 78 of SWIFT). |
Sender to Receiver Info Tag
FFT codes “SND2RECMTxxx” will be used to pick up the sender to receiver information in various swift messages. In the FFT code “MTxxx” will stand for the SWIFT message type in which the FFT code will be picked up. This facilitates defining a separate FFT code for each of the SWIFT message.
This will be applicable for the following swift messges: MT700, 707, 705, 710, 720, 730, 740, 747, 760, 767, 768, 400, 410, 412, 420,422, 430, 734, 732, 742, 756, 750, 752, 754
The various FFT codes for SND2RECMTxxx are maintained in the Free Format Code maintenance screen. During contract processing, based on the event being processed system defaults the advices maintained for the particular event. For messages of SWIFT type ,you can select the corresponding SND2RECMTxxx FFT code from the list of values
In the SWIFT message generated , the tag 72 will be populated with the text associated with the FFT code SND2RECMTxxx attached for the advice at the contract level.System will not validate the FFT code SND2RECMTxxx being attached with the advice. This has to be operationally controlled.
During advice generation, if the FFT code SND2RECMTxxx corresponding to the advice is not attached or if a different SND2RECMTxxx is attached, system will not populate the tag 72 in the advice generated.
5.2.9 Tracers Tab
Tracers are reminders that can be sent to various parties involved in an LC. The list of tracers that you can send for an LC is predefined (hard coded in the system) and can be classified into the following types:
- The acknowledgement tracer (sent to the advising bank when an import LC is issued and an acknowledgement is sought)
- The charge-commission tracer (sent to the party who has to bear the commission or charges for an LC, pending the payment of the charge or commission)
- The confirmation tracer (sent to the confirming bank, seeking a letter of confirmation).
You can specify the tracers to be sent for an LC, in the LC Contract Tracers screen. To invoke this screen, click on the tab titled Tracers in the LC Contract Details screen. The LC Product Tracers screen is displayed.

The tracers, specified for the product to which you have linked the LC, will be defaulted to this screen. The following details will be displayed:
- Tracer Code
- Description of the tracer
- Party ID and type to which the tracer is to be sent
- Number of tracers sent thus far, to the party
- Date on which the tracer was last sent to the party
For the tracer code that is highlighted, the details are defaulted from the product and can be changed to suit the LC you are processing.
Required
You can stop the generation of a tracer at any point during the life cycle of an LC contract.
For instance, you had specified that an acknowledgement tracer is to be generated for a contract. When you receive the acknowledgement from the concerned party, you can disable its generation. At a later stage when you wish to generate the tracer again, you only need to enable it for the LC by using this facility.
If this box is checked, it means that the tracer should be applied for all new LCs involving the product. If not, it means that it should not be applied for new LCs involving the product. Amen
If for some reason you want to stop generating the tracer for a product, uncheck this box through the product modification operation. The tracer will not be generated for new LCs involving the product.
Maximum Tracers
You can specify the maximum number of tracers that should be sent for the LC. The value is defaulted from the product under which you are processing the LC.
Start Days
The tracers that you specify for an LC can be generated only after it has been authorized. Specify the default number of days that should elapse after an LC has been authorized, on which the first tracer should be sent.
By default, the first tracer for an authorized LC contract will be sent, after the number of days prescribed for the product under which it is processed.
Frequency
You can specify the frequency (in days) with which the tracer should be re-sent, for the LC you are processing.
Medium
If you have specified that tracers should be generated for an LC, you should also specify the medium through which it is to be generated. A tracer for an LC can be sent through Mail, Telex or other compatible media.
Template ID
Specify the template ID for the SWIFT message type.
If the medium is SWIFT, then the system will generate the tracers in the SWIFT MT799 format based on the template ID mentioned at the LC Contract level for populating the tag 79.
5.3 Viewing OFAC Check Response
OFAC check enables the application to call an external web service to perform black list check for customer and customer accounts and give warnings appropriately while transacting with black listed customers. You can also capture your remarks before overriding the black list warning.
Click ‘OFAC Check’ button in ‘Letters of Credit - Contract Input - Detailed’ screen to view the OFAC check response in the ‘External System Detail’ screen On clicking ’OFAC Check’ button, system will build the request XML and call the web service. The ‘External System details’ screen displays the response is received from the external system and you will be also allowed to enter your remarks in this screen. The response received will also be sent to Oracle FLEXCUBE Database layer for any further interpretations of the same. This button can be made visible while carrying out the actual customization. Request building response interpretation in the database layer needs to be done as part of customization to enable this.
Here, you can view /capture the following details:
External System Response
The response from the external system regarding the black listed customer is displayed here.
User Remarks
Specify your remarks regarding the black listed customer here.
5.3.1 Viewing Different Versions of Contract
When you enter a contract, it is allotted the version number, 1.Every amendment and reinstatement results in the next version of the contract being created.
While viewing the Detailed View screen for a contract, the latest version will be displayed. To navigate between the different versions, use the arrow buttons to view the previous and next version.
The LC contract will become effective in the system only after you ‘Save’ the details and your supervisor authorizes it.
Note
The system will display an override message if you save the contract with the drawee and applicant being the same. You may use your discretion to proceed or cancel the contract. You can also have this override configured as an error message in which case, the system will not allow you to proceed until you make the necessary changes.
5.4 Authorizing a Contract
Every Letters of Credit transactions that you enter manually must be verified and authorized. Only a user who has appropriate rights can perform the verification and authorization functions. Such a user is called an authorizer. You can invoke the ‘Letters Of Credit Authorise Contract’ screen by typing ‘LCDTRAUT’ in the field at the top right corner of the Application tool bar and clicking the adjoining arrow button.
You can authorize a contract by clicking the ‘Authorize’ icon on the Application toolbar.
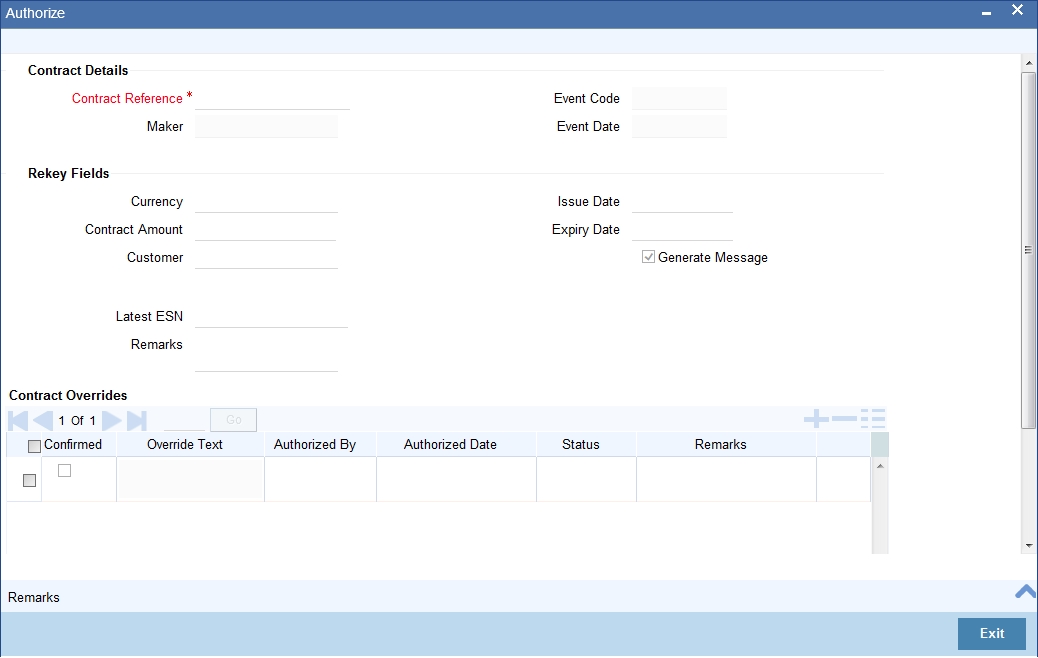
Remarks
Specify any remarks or instruction.
Note
You cannot authorise a contract in the following cases:
- the contract has multilevel of authorization pending, the same will be done using the ‘Multilevel Authorization Detailed’ screen
- the level of authorization is greater than or equal to ‘N’
- the ‘Nth’ or the final level of the users authorisation limit is less than the difference between amount financed and sum of the limits of all the users involved in authorizing a transaction, this case holds good when the ‘Cumulative’ field is checked in the ‘Product Transaction Limits Maintenance’ screen
- the transaction amount is greater than the authoriser’s authorisation limit if the ‘Cumulative’ field is unchecked in the ‘Product Transaction Limits Maintenance’ screen
Click Remarks button to view the ‘History of Remarks’ screen.
For more details on this screen refer the Section 6.21, "Remarks" in this user manual.
5.5 Viewing LC Contract
You can view the LC contract using ‘Letters of Credit Contract Summary’ screen.
To invoke this screen, type ‘LCSTRONL’ in the field at the top right corner of the Application tool bar and click the adjoining arrow button.

You can click ‘Search’ button to view all the pending functions. However, you can to filter your search based on any of the following criteria:
Authorized
Select the authorization status of the contract from the drop-down list.
Contract Reference
Select the contract reference number from the option list.
Currency
Select the currency of the transaction from the option list.
Branch
Select the branch code for which you want to check the contract from the option list.
Contract Status
Select the status of the contract for which you want to check the pending function from the drop-down list.
Product Code
Select the product code from the option list.
Contract Amount
Select the contract amount.
Operation Code
Select status of the operation code from the adjoining option list.
When you click ‘Search’ button the records matching the specified search criteria are displayed. For each record fetched by the system based on your query criteria, the following details are displayed:
- Authorized
- Contract Status
- Contract Reference
- Product Code
- Currency
- Contract Amount
- User Reference
- Source Reference
- Date
- Party Type
- Issue Date
- Expiry Date
- Branch
Click ‘Advanced Search’ to display the screen below:
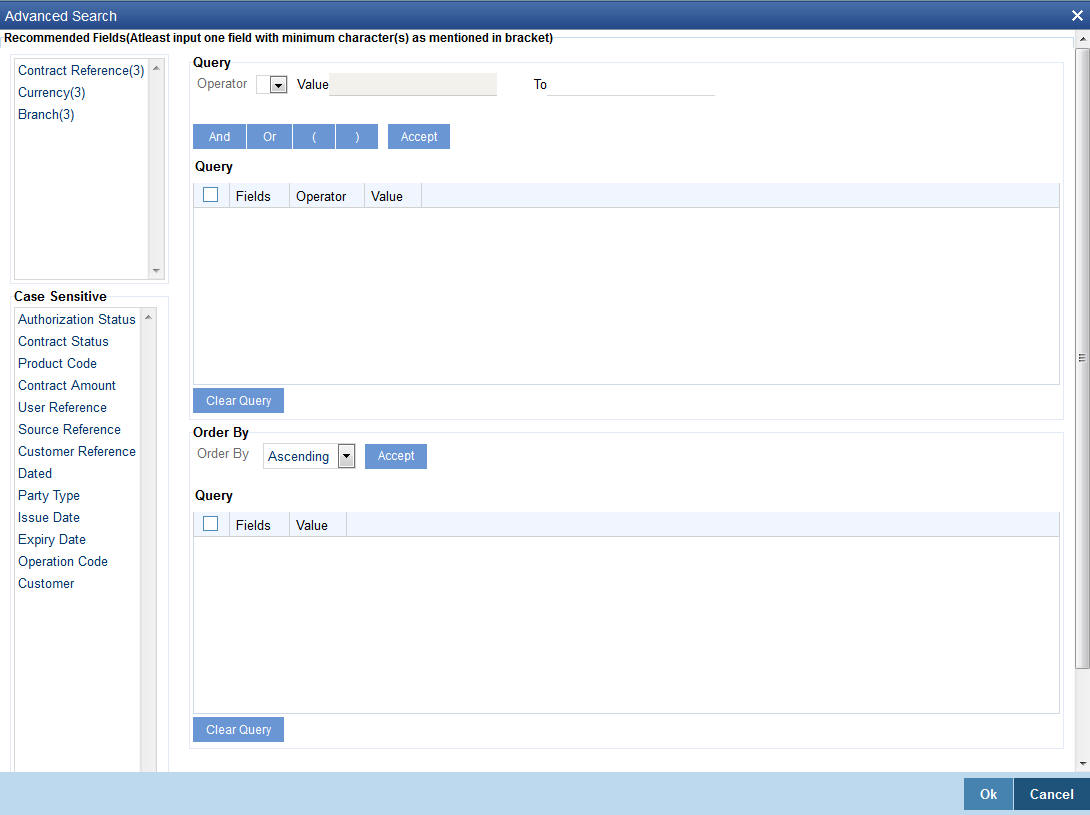
You can query a contract based on any of the following details:
- Authorized
- Contract Status
- Contract Reference
- Product Code
- Currency
- Contract Amount
- User Reference
- Source Reference
- Customer Reference
- Date
- Party Type
- Issue Date
- Expiry date
- Branch
5.6 Multilevel Authorization of a Contract
High value transactions may require multilevel of authorization. The levels of authorizations are defined in the ‘Product Transaction Limits’ screen. You can use the ‘Multilevel Authorization Detailed’ screen for authoring a contract n-1 times. However, final authorization can take place only in the contract screen.
For more details, refer the ‘Multilevel Authorization of Contract/Loan Account’ section in the ‘Procedures’ User Manual.
5.7 Cancel LC
This section contains the following details:
- Section 5.7.1, "Cancelling LC"
- Section 5.7.2, "Procedure for Cancelling LC"
- Section 5.7.3, "Generating Cancellation Advice in SWIFT Format"
- Section 5.7.4, "Cancellation of Shipping Guarantee"
5.7.1 Cancelling LC
You may have to cancel an LC that has been opened, before its Expiry Date. An example for a cancellation is when the trade deal for which the LC is opened falls through. A cancelled LC will not be available for any availment. However, you can cancel an LC that has been availed partially.
A Pre-advice Import LC contract can also be cancelled like any other LC contract.
In Oracle FLEXCUBE, the following are the prerequisites for cancellation:
- The LC has not yet reached its expiry date
- The cancellation event - CANC, has been defined
The accounting entries for this event are generally the reversal of the accounting entries passed for liability and collateral, when the LC was opened. In addition, a charge can be levied for canceling the LC. A cancellation advice informing, the advising bank or beneficiary, about the cancellation may be generated.
On cancelling of an LC, if there are any outstanding receivable components in the LC( Charges meant to be collected from the bills availed againist the LC), then the system will display an error message indicating the same.
5.7.2 Procedure for Cancelling LC
From the Contract Detailed View:
- Click cancel icon in the Toolbar
You will be prompted to confirm the cancellation.
5.7.3 Generating Cancellation Advice in SWIFT Format
For generating LC cancellation advice in SWIFT MT799 format, you need to maintain the template for cancellation advice using ‘SWIFT FFT Template’ screen. The template ID needs to be the same as the message ID.
Additionally, you need to set the default media as ‘SWIFT’ at the customer level and customer address levels. The advice format also needs to be set to SWIFT. Further, you need to attach the advice to PCLS event at the product maintenance level.
If the above settings are done, the system will generate the cancellation advice in MT799 format during manual partial as well as auto partial closures of an LC.
5.7.4 Cancellation of Shipping Guarantee
Manual Cancellation of shipping guarantee issued against LC is not allowed from LC contract online screen.
5.8 Close LC
This section contains the following details:
5.8.1 Closing an LC
Normally, an LC that is opened will be negotiated within its expiry date. If the negotiation does not happen even after the expiry date, you can close the LC.
By closing an LC, you will be reversing the liability entries passed for the LC. This ensures that the credit limit that was taken by the LC is released and is available for future utilization.
A similar process is followed to cancel a Pre-advice Import LC.
On closure of an LC, if there are any outstanding receivable components in the LC (Charges meant to be collected from bills availed againist the LC), then the system will display an error message indicating the same.
5.8.2 Procedure for Closing an LC
In Oracle FLEXCUBE, you can close an LC under the following circumstances:
- The event ‘CLOS’ is defined for the LC
- The LC is beyond its Expiry Date
The accounting entries defined for this event is generally the reversal of the outstanding liability. No availment can be made against an LC that is closed. You should reopen a closed LC if you have to make an availment against it. This would be required in a situation when the LC comes in for negotiation after it has been closed. The reopening of the LC will put back the outstanding liability and availability for the LC.
5.8.2.1 Closing an LC Automatically
In the LC Contract Main screen, you can specify the following dates related to the closure of an LC:
- Whether auto closure is allowed
- The date on which the LC should be automatically closed
To recall, the date of automatic closure is based on the ‘Closure Days’ maintained for the product involved in the LC. However, you can change the closure date, to any date, after the expiry date of the LC.
An LC that is defined for automatic closure will be closed during the End of Day processes on the closure date.
5.8.2.2 Closing LC Manually
An LC that is not defined for automatic closure can be closed any time after its Expiry Date.
Click ‘Close’ icon, when the details of the LC are displayed in the Detailed View screen.
Oracle FLEXCUBE displays a message prompting you to confirm the closure. The closure of an LC should be authorized by a user, bearing a different User ID, before the End of Day operations begin.
5.9 Reopening LC
To avail against a closed LC, you have to reopen it. This occurs when the LC comes in for negotiation after it has been closed. The reopening of the LC will put back the outstanding liability and availability for the LC.
To reopen a closed LC, you should have defined the event ‘ROPN’ for the product under which the LC is processed. For this event, you should have ideally defined the same entries for the LC outstanding amount and the liability, as you would for the opening (issue or advice) of an LC. You can levy a charge for reopening an LC.
5.9.1 Procedure for Reopening LC
Click ‘Reopen’ icon when the details of the LC are being displayed in the Detailed View screen.
Oracle FLEXCUBE will prompt you to confirm the reopening of the LC.
When you reopen a letter of credit, the system automatically levies a charge based on a given tariff. The system uses the amount tag ‘OLD_OS_AMT’ for the charge. This charge is calculated for a period between the last expiry date and the new expiry date defined while reopening the LC.
At times, the customer may request to reopen an expired LC with an increment in the LC amount. In such cases, the system considers the new LC amount as the basis amount for computation of the commission. Based on the LC product preferences, this commission can be collected in advance or arrears. This commission is applied during ROPN event.
You can modify the following details while reopening an LC:
- LC Amount
- Expiry Date
- Shipment Details
- Details under Party Limits Tab
- Cash Collateral Details
However, you cannot modify the other details of the LC.
Once you have made the required modifications, save the contract. The system posts contingent entries defined for ROPN event with the modified LC amount. The system also tracks the limits for the LC.
When the LC amount is increased, there may be a corresponding increment against the respective parties in the New Limits tab. However, you need to manually handle such changes.
Reopening of an LC needs to be authorized by a different user having sufficient user rights.
Reopening Import LC
On authorization of reopening of an import LC, the system generates MT707. If a reimbursement bank is also involved in the import LC, MT747 is generated.
Reopening Export LC
When an export LC is closed, the system receives MT707 as a request for amendment. This message is moved to the repair queue. In such cases, you need to manually reopen and amend the LC. If a reimbursement bank is involved, the system receives MT747. Reopening and amendment need to be handled manually.
If the parent LC of a transferred export LC is closed, you need to reopen the parent LC first. If you directly try to reopen the transferred export LC, the system displays an error message. This is applicable to reopening of back-to-back LCs as well.
Reopening Letter of Guarantee
In case of a letter of guarantee, the system generates MT767 on authorization of reopening.
Note
You can reopen the closed LCs only. In case PCLS event has been triggered, you need to manually close the LC before reopening.
5.10 Reassigning a Contract to another User
A contract can be deleted only by the user who entered it. If a contract has to be deleted and the user who input the same is not available to do it, you can reassign the contract to another user so that the other user can delete it. Typically, this situation may arise during EOD operations, when a contract that is not authorized has to be deleted and the user who input it has left office for the day.
You can invoke the ‘Letters of Credit Contract Reassign’ screen by typing ‘LCDTREAS’ in the field at the top right corner of the Application tool bar and clicking on the adjoining arrow button.
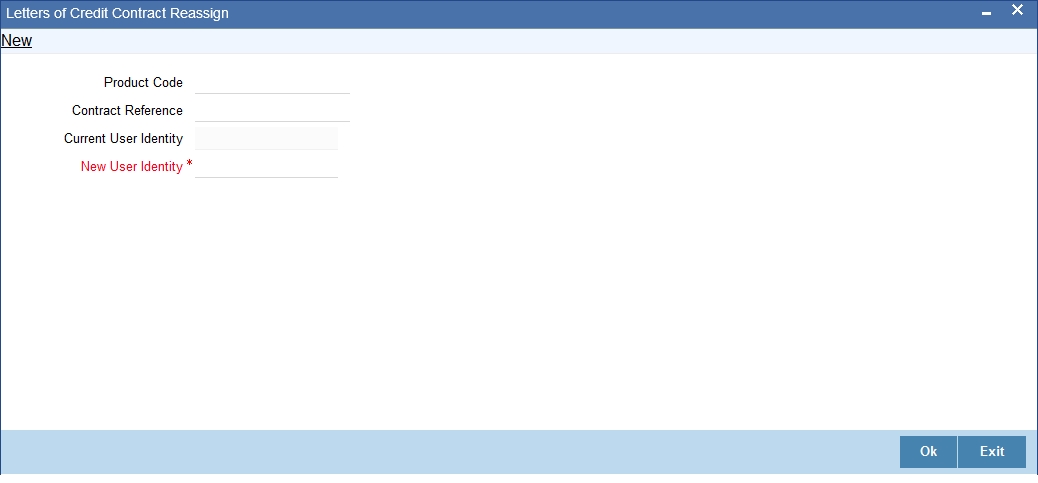
To reassign a contract to another user, the following steps are required:
Product Code
Indicate the product associated with the bill. You can select a product code from the option list, which contains a list of the authorized products that you have created.
Contract Reference Number
Indicate the contract reference number of the bill you wish to reassign, to another user. You can select a reference number from the option list, which contains a list of all the active bills.
Current User ID
The current user ID is displayed.
New User ID
Select the User ID of the user to whom you are assigning the contract.
Note
This user to whom you reassign a contract should have access rights to enter bill contracts.
Your User ID will be defaulted from the login screen. Click save icon to save the specifications you have made. Click ‘Exit’ or ‘Cancel’ button if you do not want to save the details that you entered.
5.11 Liquidating Components
You can prepay the commission or liquidate the overdue components i.e. Normal and Penal components partially or fully through the ‘Payment Input’ screen.
You can invoke the ‘Letters of Credit Payment Input’ screen by typing ‘LCDTRPAY’ in the field at the top right corner of the Application tool bar and clicking on the adjoining arrow button.
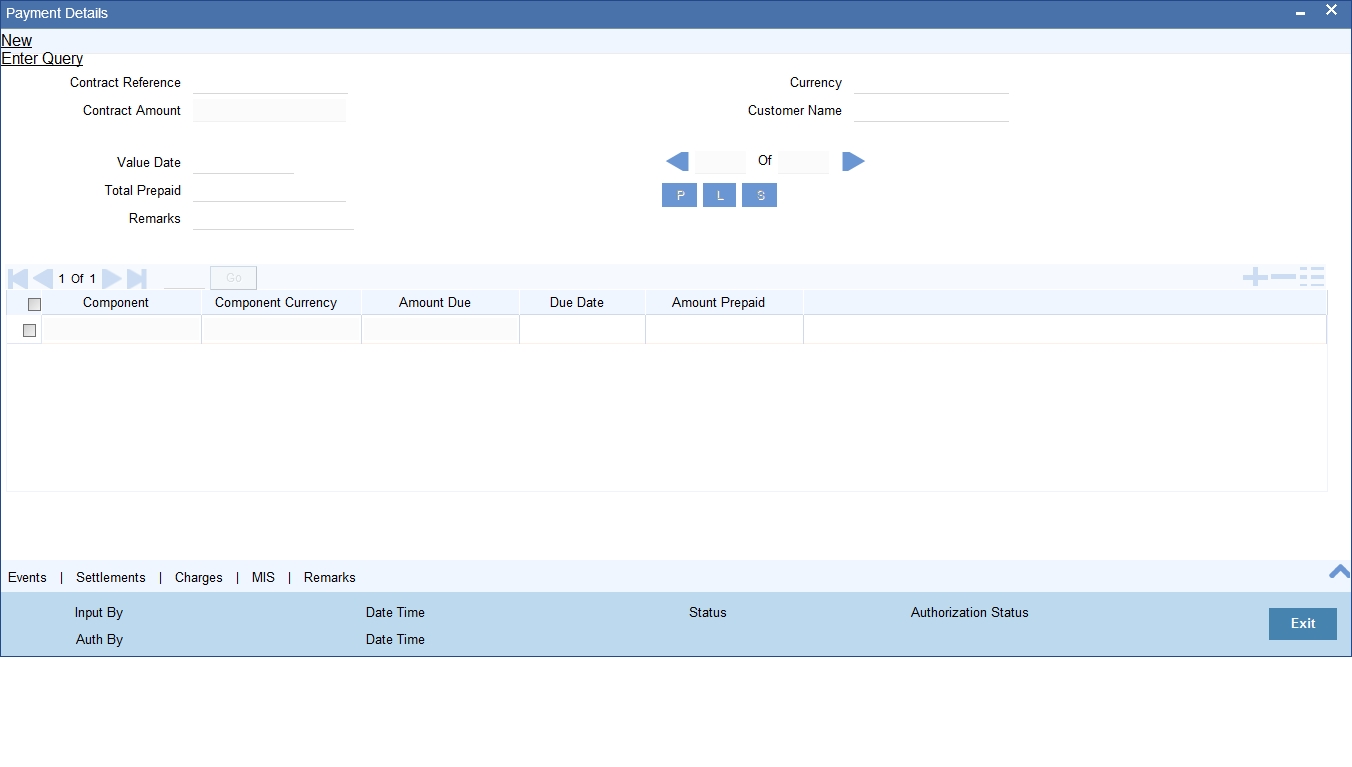
Specify the following in this screen:
Contract Reference
Specify the contract you want to liquidate. You can also select the contract from the adjoining option list. The list displays all the active contracts with bill amount ‘zero’
Click ‘P’ button to display the outstanding amount. This screen also displays all the overdue interest and penalty interest on Principal.
On clicking ‘L’ button, the system will allocate the payment amount towards each component. On clicking ‘S’ button, the system displays the total amount paid and this total amount will be displayed in the ‘Total Paid’ field.
Note
You can choose to liquidate the overdue components only if the interest component is specified as Arrears.
In case the components are liquidated, the screen amends the status of the contract as liquidated. You can also reverse the interest component that is liquidated.
On saving the transaction after entering all the required details in the system, the system validates the value of the contract amount against the following:
- Product transaction limit
- User Input limit
If the transaction currency and the limit currency are different, then the system converts the amount financed to limit currency and checks if the same is in excess of the product transaction limit and user input limit. If this holds true, the system indicates the same with below override/error messages:
- Number of levels required for authorizing the transaction
- Transaction amount is in excess of the input limit of the user
5.11.1 Authorizing a Contract
A contract that you have entered should be authorized before the EOD is run. You can authorize a payment by clicking the ‘Authorize’ icon on the Application toolbar.
Note
You cannot authorize a contract from the ‘Letters of Credit Payment Input’ screen in the following cases:
- The contract has multilevel of authorization pending, the same will be done using the ‘Multilevel Authorization Detailed’ screen
- The level of authorization is greater than or equal to ‘N’
- The ‘Nth’ or the final level of the users authorization limit is less than the difference between amount financed and sum of the limits of all the users involved in authorizing a transaction, this case holds good when the ‘Cumulative’ field is checked in the ‘Product Transaction Limits Maintenance’ screen
- The transaction amount is greater than the authorizer’s authorization limit if the ‘Cumulative’ field is unchecked in the ‘Product Transaction Limits Maintenance’ screen
5.12 Lodging Guarantee Claim
This section contains the following details:
- Section 5.12.1, "Lodging Guarantee Claim"
- Section 5.12.2, "Specifying Main Details"
- Section 5.12.3, "Specifying Advise Details"
5.12.1 Lodging Guarantee Claim
You can lodge claim on guarantee contract through ‘Guarantee Claim Lodging’ screen. You can invoke this screen by typing ‘LCDGCLM’ in the field at the top right corner of the Application tool bar and clicking the adjoining arrow button.
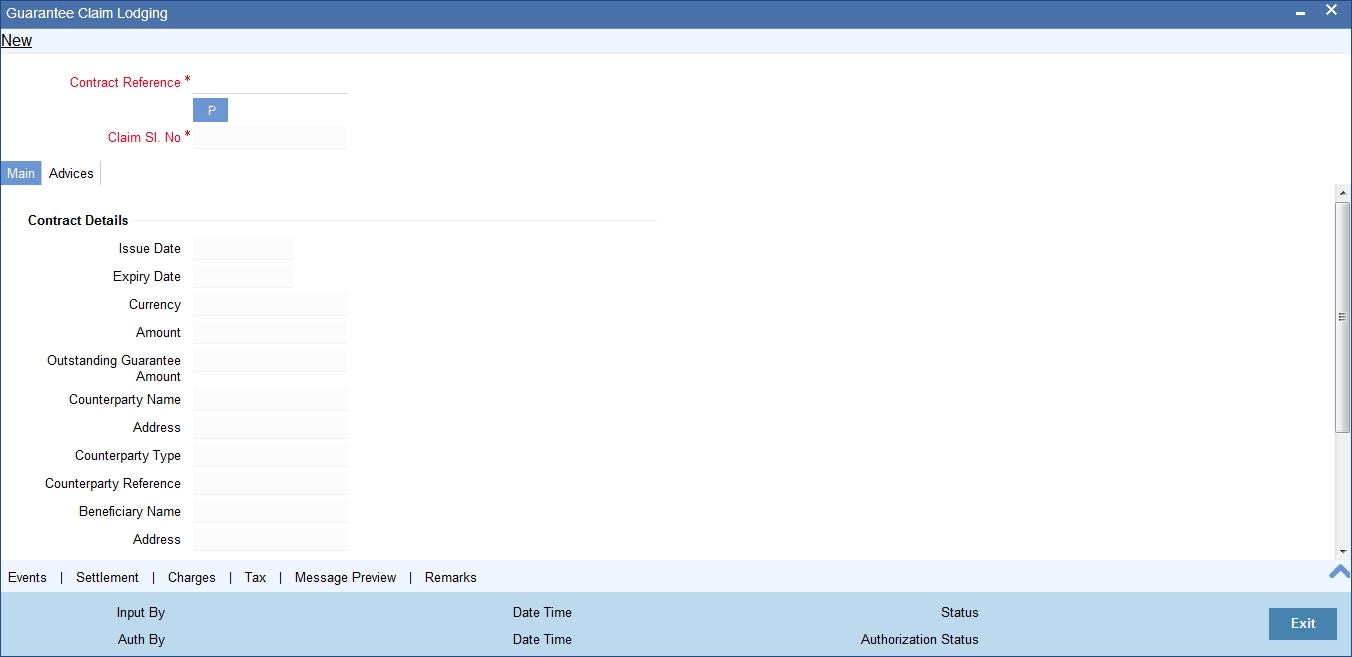
You can specify the following here:
Contract Reference
Select the guarantee contract reference number from the adjoining option list.
Claim Sl. No
The system displays the claim serial number.
5.12.2 Specifying Main Details
The system displays the following contract details:
- Issue Date - Date on which the guarantee is issued
- Expiry Date - Date of expiry of the guarantee
- Currency - Currency of the guarantee
- Amount - Amount of the guarantee
- Outstanding Guarantee Amount - Outstanding amount of the guarantee
- Counterparty Name - Name of the counterparty
- Address - Address of the counterparty
- Counterparty Type - Party type of the counterparty
- Counterparty Reference - Reference Number of the counterparty.
- Beneficiary Name - Name of the beneficiary.
- Address - Address of the beneficiary
Claim Details
Claim Date
Specify the date on which claim is received by the bank.
The claim date should not be greater than the expiry date and the current business date of the system.
Note
If multiple claims are lodged against a contract and the claim date is same for all claims, then the system displays an override message.
Claim Amount
Specify the amount of the claim.
The claim amount should not be greater than the guarantee amount and the outstanding guarantee amount.
Remarks
Specify remarks, if any.
Template Id
Select the template ID from the adjoining option list.Template ID is applicable only when the party type is applicant bank or issuing bank.
Note
The claim message is generated only if the template is selected.
5.12.3 Specifying Advise Details
Click on the ‘Advices’ tab to capture the advise details.
Advise Details
Message Type
The system displays the message type of the advice generated.
Party Type
The system displays the party type for which the message is generated.
Party Id
The system displays the party ID for which the message is generated.
Party Name
The system displays the name of the party for which the advice is generated.
Medium
Select the medium through which the message has to be sent from the adjoining option list.
Priority
Select the priority of sending message from the adjoining drop-down list.
Suppress
Check this box to suppress the message.
Charges
The system displays the charges configured.
FFT Details
Free Format Text Code
Select the free format text code from the adjoining option list.
Text
The system displays a brief description on free format text.
5.12.3.1 Event Details
Click on ‘Event’ link of the ‘Guarantee Claim Lodging’ screen to view the event details.
The system displays the events, accounting entries and advices here.
5.12.3.2 Settlement Details
Click on ‘Settlement’ link of the ‘Guarantee Claim Lodging’ screen to view the settlement details.

The system displays the settlement information for charges here.
5.12.3.3 Charges Details
Click on ‘Charges’ link of the ‘Guarantee Claim Lodging’ screen to view the charge details.
The system displays the charges configured for the event at product definition here.
For more details on the Charges Details screen, refer section ‘Contract Charge Details’ in Charges and Fees User Guide under Modularity.
5.12.3.4 Tax Details
Click on ‘Tax’ link of the ‘Guarantee Claim Lodging’ screen to view the tax details.
The system displays the details of the tax configured in the screen.
5.12.3.5 Previewing Message Details
Click on ‘Preview Message’ link of the ‘Guarantee Claim Lodging’ screen to view the message details.
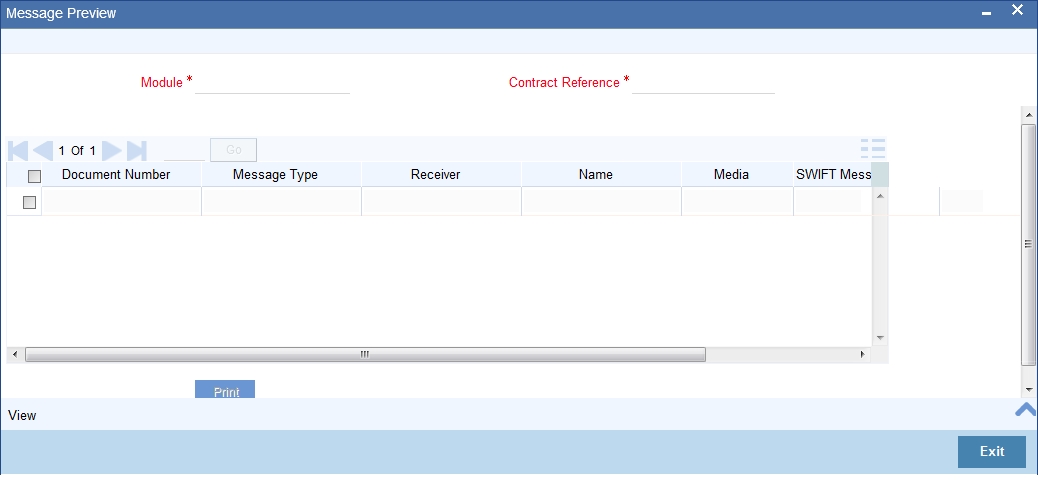
You can view the message or advice generated in the screen.
For more details on this screen, refer Capturing Additional Details chapter in this user manual.
5.12.3.6 Remarks
Click Remarks button to view all the intructions captured on authorization of the contract in ‘History of Remarks’ screen.

For more details on this screen refer the Section 6.21, "Remarks" in this user manual..
5.13 Viewing Guarantee Claim Details
You can view the guarantee claim details maintained in the ‘Guarantee Claim Lodging’ screen using the ‘Guarantee Claim Summary’ screen. You can invoke this screen by typing ‘LCSGCLM’ in the field at the top right corner of the Application tool bar and clicking on the adjoining arrow button.
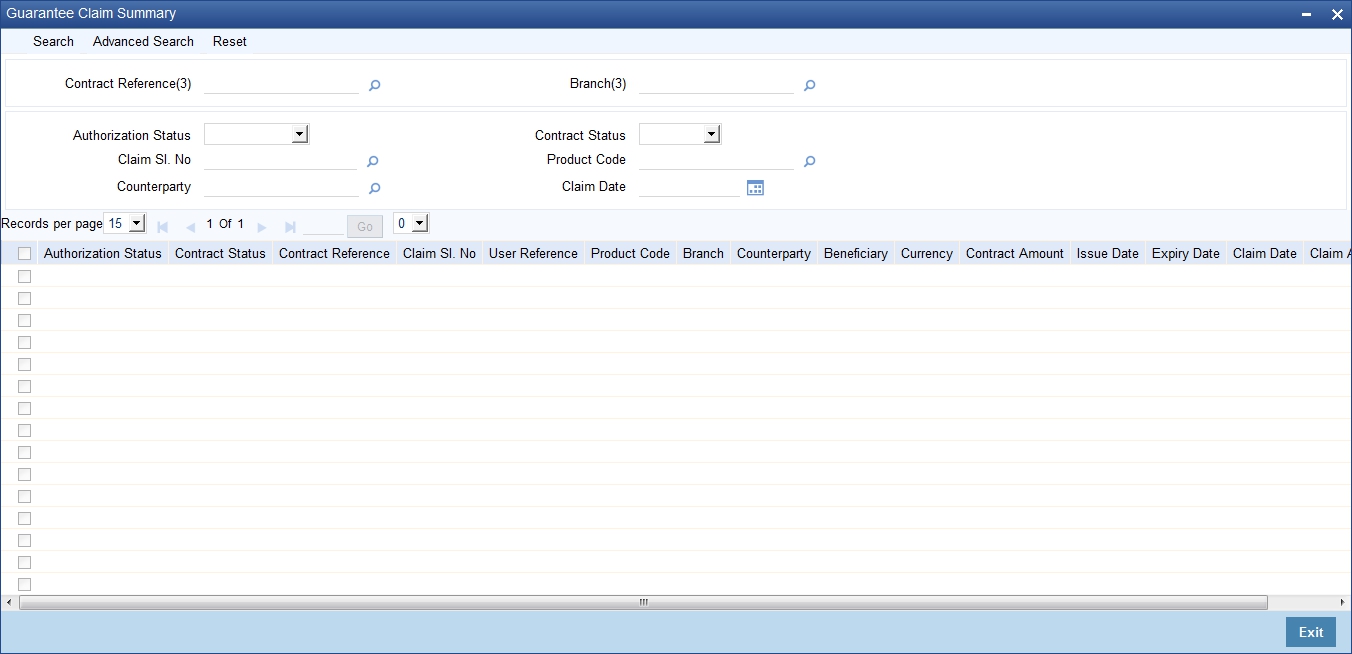
In the above screen, you can base your queries on any or all of the following parameters and fetch records:
- Authorization Status
- Contract Reference
- Claim Date
- Counterparty
- Contract Status
- Claim Sl. No
- Product Code
- Branch
Select any or all of the above parameters for a query and click ‘Search’ button. The system displays the following records meeting the selected criteria:
- Authorization Status
- Contract Status
- Contract Reference
- Claim Sl. No
- User Reference
- Product Code
- Branch
- Counterparty
- Beneficiary
- Currency
- Contract Amount
- Issue Date
- Expiry Date
- Claim Date
- Claim Amount
5.14 Specifying Import License Utilization
The transactions for licensed import goods can be executed from different banks. You can record the portion of import license utilized by other banks through ‘Import License Utilization’ screen. You can also reinstate the quantity or license amount marked as utilized for the physical import of goods.You can invoke this screen by typing ‘LCDILUTL’ in the field at the top right corner of the Application tool bar and clicking on the adjoining arrow button.
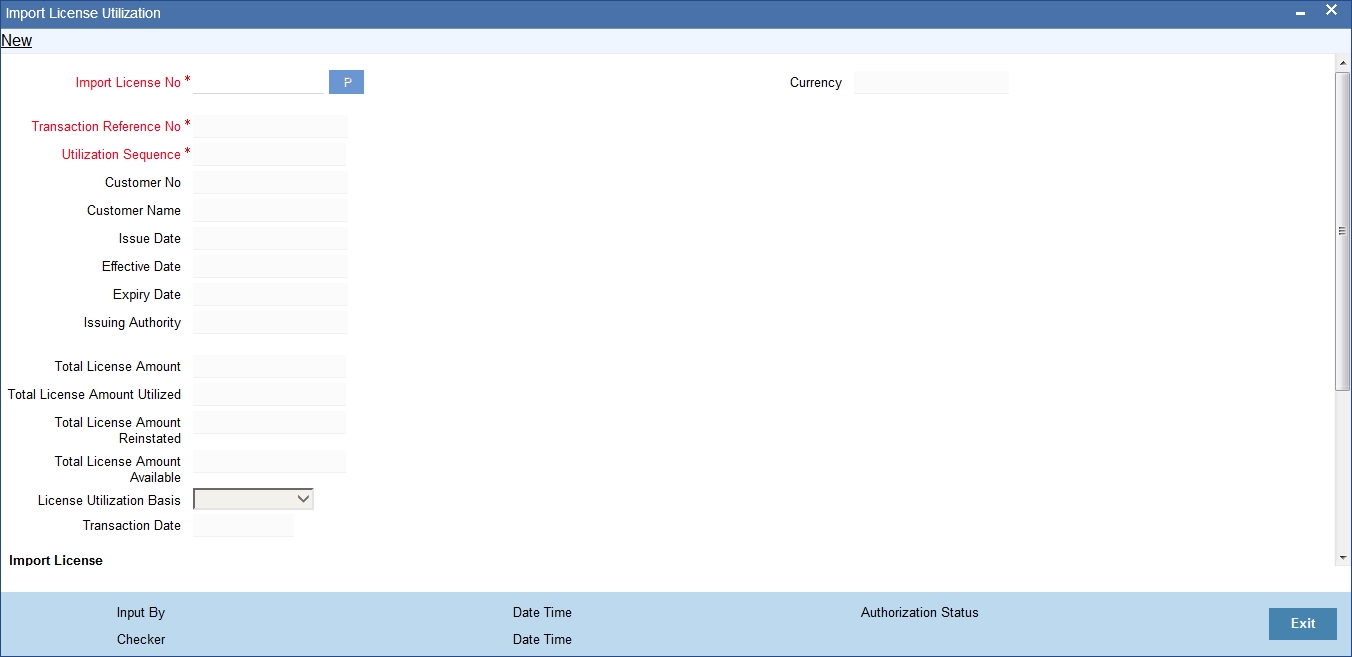
Specify the following here:
Import License No
Select the import license number for which utilization or reinstatement should be performed from the adjoining option list.
Transaction Reference No
The system displays the transaction reference number.
Utilization Sequence
The system displays the utilization sequence number.
Customer No
The system displays the customer id captured for the import license.
Customer Name
The system displays the name of the customer id.
Issue Date
The system displays the issue date recorded for the import license.
Effective Date
The system displays the effective date.
Expiry Date
The system displays the expiry date here.
Issuing Authority
The system displays the issuing authority of import license.
Currency
The system displays the currency of the sum total of the license amount.
Total License Amount
The system displays the total license amount.
Total License Amount Utilized
The system displays the sum total of licensed amount utilized for all goods code.
Total License Amount Reinstated
The system displays the sum total of license amount reinstated for all goods code.
Total License Amount Available
The system displays the sum total of available license amount of all goods.
License Utilization Basis
The system displays the utilization basis captured.
Transaction Reference No
The system displays unique transaction number for each utilization.
Transaction Date
The system defaults the current date.
Import License
You can capture multiple goods code, quantity or amount details here.
Goods Code
The system displays the goods code.
Goods Short Description
The system displays the short description captured for the goods code.
UoM/Currency
The system displays the unit of measurement or currency captured for the goods code of import license.
If the basis is ‘Quantity’, then the system displays UoM maintained for the goods code.
If the basis is ‘Amount’, then the system displays the currency maintained for the import license.
Qty/License Amt
The system displays the Quantity or License Amount captured for the goods code of import license.
Qty/License Amt Already Utilized
The system displays the sum total of Quantity or License Amount already utilized for the goods code.
Qty/License Amt Already Reinstated
The system displays the sum total of Quantity or License Amount already reinstated for the goods code.
Available Qty/ License Amt
The system displays either the Available Quantity or Available License Amount for the goods code.
Qty/License Amount Utilized
Specify the quantity or the license amount utilized.
If the license utilization basis is ‘Quantity’, then the system updates license amount utilized as (Quantity Utilized * Rate / Unit).
Qty/License Amount Reinstated
Specify the quantity or the license amount reinstated.
If utilization in Qty/License Amount is maintained for a goods code of an import license using Import License Utilization, then the system allows reinstatement of the same.
The value specified for Qty / License Amt Reinstated should be less than or equal to sum total of (Qty/License Amt Already Utilized - Qty/License Amt Already Reinstated) through ‘Import License Utilization’ screen.
Reinstatement is displayed on authorization of transaction. You can specify either Qty / License Amt Utilized or Qty/License Amt Reinstated for a goods code.
Internal Remarks
Specify remarks if any.
5.15 Viewing Import License Utilization Details
You can view the import license utilization details in Import License Utilization Summary Screen. You can invoke this screen by typing ‘LCSILUTL’ in the field at the top right corner of the Application tool bar and clicking on the adjoining arrow button.
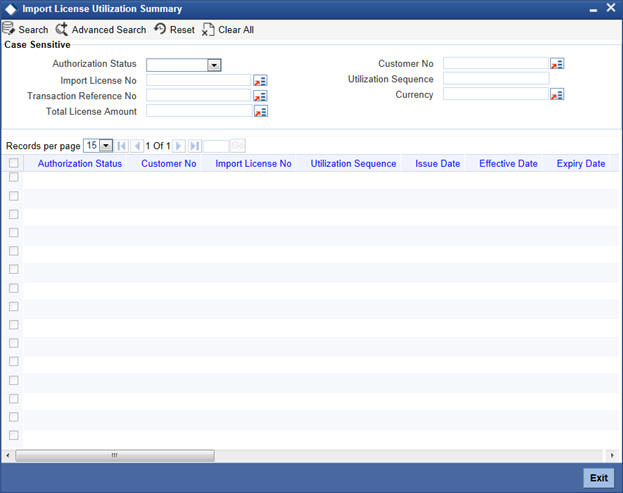
In the above screen, you can base your queries on any or all of the following parameters and fetch records:
- Authorization Status
- Customer No
- Import License No
- Utilization Sequence
- Transaction Reference Number
- Currency
- Total License Amount
Select any or all of the above parameters for a query and click ‘Search’ button. The records meeting the selected criteria are displayed.
If you are allowed to query import license utilization details, then system displays the following details pertaining to the fetched records:
- Authorization Status
- Customer Number
- Import License No.
- Utilization Sequence
- Issue Date
- Effective Date
- Expiry Date
- License Utilization Basis
- Utilization Branch
- Transaction Reference No.
- Currency
- Total License Amount
- Utilization Date
- Reinstatement Date
- Event Code
- Total License Amount Available
- Total License Amount Utilized
- Total License Amount Reinstated
5.15.1 Operations on Import License Utilization
On an Import License record, you can perform of the following operations (if any icon is disabled in the application toolbar, it means that the function is not allowed for the record):
- Amend the details of a record
- Authorize a record
- Copy the details of a commodity, on to a new record
- Close a record
- Print the details of a record
- Delete a record
Please refer to the manual on Common Procedures for details of these operations.