| Oracle® Retail Service Backbone Installation Guide Release 14.1.2 E68063-02 |
|

 Previous |
 Next |
This chapter describes how to install the necessary database.
Many of the Oracle Fusion Middleware components require the existence of schemas in a database prior to installation. These schemas are created and loaded in your database using the Repository Creation Utility (RCU).
See Repository Creation Utility documentation for more information:
http://docs.oracle.com/cd/E12839_01/doc.1111/e14259/toc.htm
RCU can be downloaded from following link:
http://www.oracle.com/technetwork/middleware/data-integrator/downloads/index.html
After downloading the .zip file, extract the contents to a directory of your choice; this directory will be referred to as the RCU_HOME directory.
The repository for Oracle Service Bus (OSB) must be created using RCU tool. The repository must contain SOA Infrastructure (SOAINFRA) schema. For OWSM domain, RCU must create Meta Data Services (MDS) schema too. The User Messaging (ORASDPM) schema is automatically created by RCU tool.
While creating a schema using RCU tool, user must select/mention a prefix which is added to all the schemas created by RCU. In the following example, RCU tool is used to create a repository with SOA Infrastructure schema as RSB_SOAINFRA, Metadata Services schema as RSB_MDS. The User messaging schema i.e. RSB_ORASDPM is automatically selected by RCU.
Run rcu executable from RCU_HOME/bin
cd RCU_HOME/bin
rcu
The Welcome page appears.
Click Next to continue.
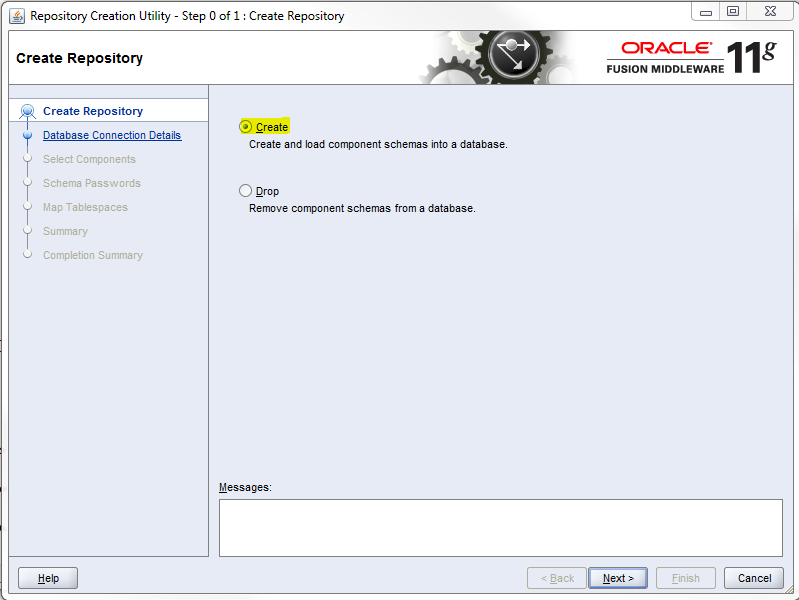
In Create Repository window, Select Create option and click Next. 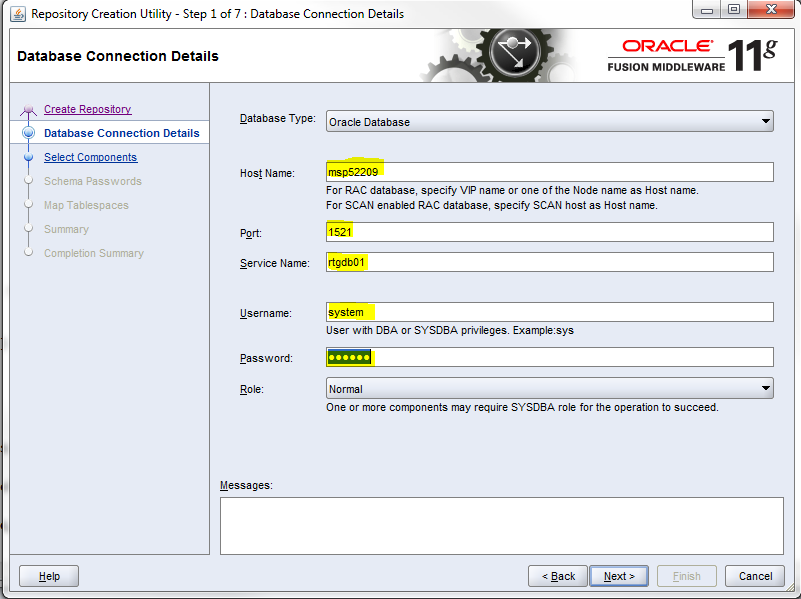
In Database Connection Details window, provide database details and click Next.
Database Type: Oracle Database
Role: SYSDBA
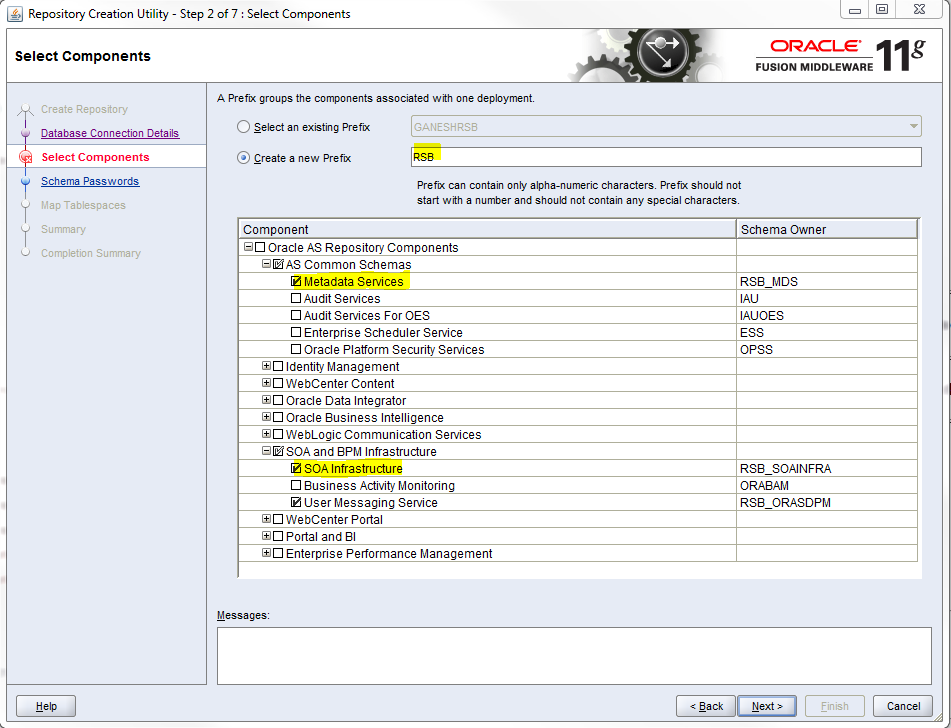
In Select Components window, provide a prefix (Select an existing prefix from drop down or give a new one). In Component box, select SOA Infrastructure under SOA and BPM Infrastructure. Also, select Metadata Services as shown.
Once the SOA Infrastructure option is selected, automatically User Messaging Service and Metadata services options get selected.

In Schema Passwords window, provide password and Click Next. Note down the schema name and passwords. These are needed during the domain creation time for configuring the OSB schemas and RSB compilation phase as credentials for sidb-jdbc-user-alias.
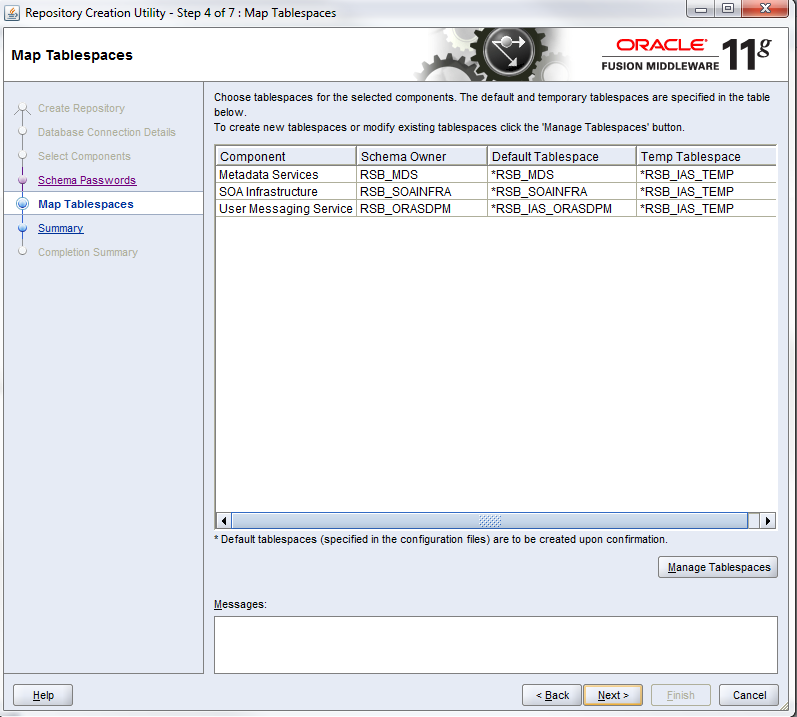
In Map Tablespaces window, check tablespace mapping details and click Next.
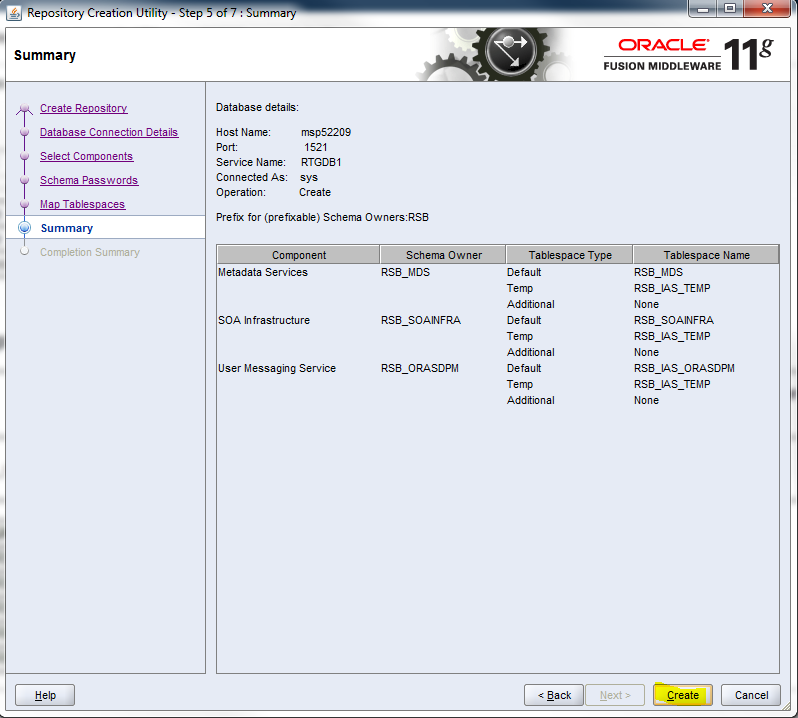
In Summary window, check database details and click Create.
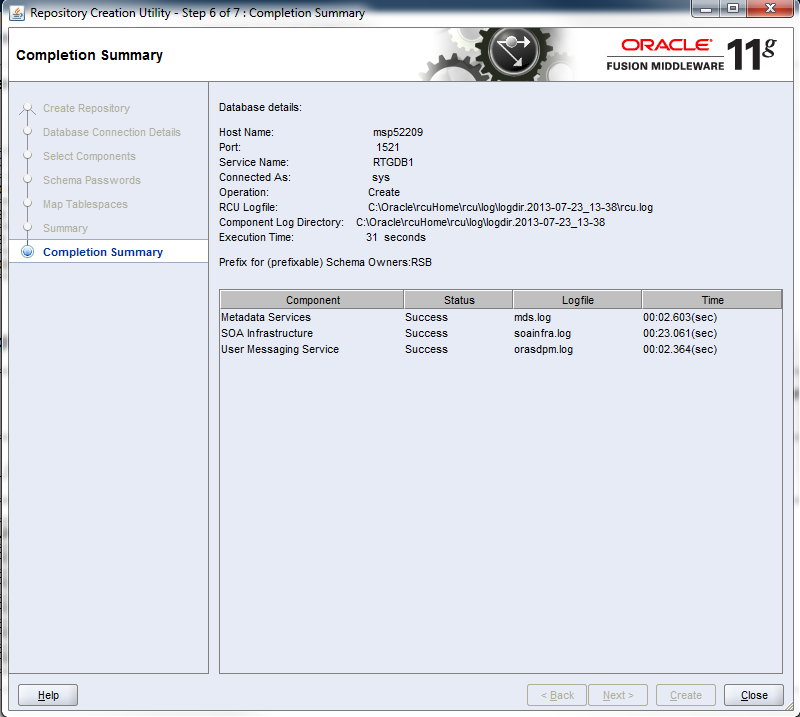
In Completion Summary window, click Close.
