6 Installing Oracle Utilities Data Model on Oracle Cloud
Describes how to install Oracle Utilities Data Model on Oracle Cloud.
- Installing Oracle Utilities Data Model on Oracle Cloud
To install Oracle Utilities Data Model on Oracle Cloud, use the Oracle Database Cloud Service and the Oracle Business Intelligence Cloud Service. - Oracle Database Cloud Service Requirements
Installing Oracle Utilities Data Model on Oracle Cloud requires a correctly configured Oracle Database Cloud Service instance. - Install Oracle Utilities Data Model on Oracle Cloud
Install Oracle Utilities Data Model on Oracle Database Cloud Service after you complete the configuration. Oracle Utilities Data Model shiphome for the on-premise install is the same as the Cloud version. - Oracle Business Intelligence Cloud Service Requirements
Installing Oracle Utilities Data Model on Oracle Cloud requires a configured Oracle Business Intelligence Cloud Service instance. - Uploading Oracle Utilities Data Model RPD to Oracle Business Intelligence Cloud Service
You upload the modified on-premise Oracle Utilities Data Model RPD to Oracle Business Intelligence Cloud Service. - Uploading Oracle Utilities Data Model Catalog to Oracle Business Intelligence Cloud Service
After you create an Oracle Business Intelligence Cloud Service instance and upload the modified on-premise Oracle Utilities Data Model RPD to Oracle Business Intelligence Cloud Service, then upload the OUDM catalog.
Installing Oracle Utilities Data Model on Oracle Cloud
To install Oracle Utilities Data Model on Oracle Cloud, use the Oracle Database Cloud Service and the Oracle Business Intelligence Cloud Service.
See the following to obtain the required cloud services: http://docs.oracle.com/cloud/latest/trial_paid_subscriptions/index.html.
After the Oracle Cloud subscriptions are processed and the Oracle Cloud account is set up, you deploy Oracle Utilities Data Model on Oracle Cloud.
Oracle Database Cloud Service Requirements
Installing Oracle Utilities Data Model on Oracle Cloud requires a correctly configured Oracle Database Cloud Service instance.
Purchase subscription of Database Cloud Service (DBCS). Oracle Cloud offers following types of subscriptions:
-
Metered Subscription
-
Non-metered Subscription
- Creating a Secure Shell (SSH) Public/Private Key Pair
Create anSSHkey pair with a public key and a private key to access the Oracle Database Cloud Service instance. - Creating the Oracle Database Cloud Service Instance
If the subscription type allows you to create an Oracle Database Cloud Service instance, then create the Oracle Database Cloud Service instance from the Cloud My Services console. - Requirements for Service and Database Configuration Parameters
Specifies the service configuration and database configuration requirements for Oracle Utilities Data Model installation. - Requirements for Backup and Recovery Configuration Parameters
Specifies the backup and recovery configuration requirements for Oracle Utilities Data Model installation. - Monitoring Oracle Database Cloud Service Status
After the Oracle Database Cloud Service request is accepted, you can monitor the status of the Oracle Database Cloud Service instance.
Creating a Secure Shell (SSH) Public/Private Key Pair
Create an SSH key pair with a public key and a private key to access the Oracle Database Cloud Service instance.
SSH public key is used when you request the Oracle Database Cloud Service instance. After the Oracle Database Cloud Service instance is created you can access the instance by authenticating with the SSH private key.- By default, network access to the compute nodes associated with Oracle Database Cloud - Database as a Service is provided by Secure Shell (
SSH). The first step to access the network is to create anSSHkey pair.
Related Topics
Creating the Oracle Database Cloud Service Instance
If the subscription type allows you to create an Oracle Database Cloud Service instance, then create the Oracle Database Cloud Service instance from the Cloud My Services console.
- To create a Oracle Database Cloud Service Instance, see: Creating a Database Deployment.
Requirements for Service and Database Configuration Parameters
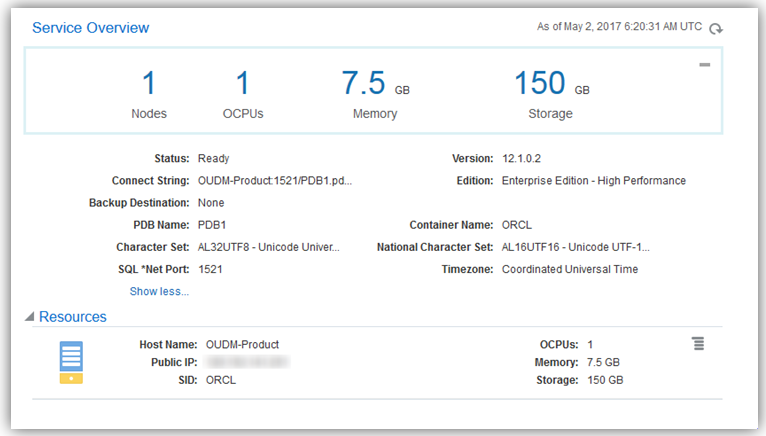
Specifies the service configuration and database configuration requirements for Oracle Utilities Data Model installation.
Oracle Database Cloud Service Configuration
Check the following table for detailed service configuration parameter information:
Note:
There are several parameters that are mandatory for which you must provide input.
Table 6-1 Oracle Database Cloud Service Service Configuration Requirements
| Parameter Name | Parameter Description | Mandatory/Optional | Valid Values/Format |
|---|---|---|---|
|
Service Name |
Name of Oracle Database Cloud Service instance |
Mandatory |
Must not exceed 50 characters. Must start with a letter. Must contain only letters, numbers, or hyphens. Must not contain any other special characters. Must be unique within the identity domain. |
|
Description |
Free-form text that provides additional information about the service instance |
Optional |
No Value |
|
Service Level |
Service level for the service instance |
Mandatory |
Oracle Database Cloud Service |
|
Metering Frequency |
Metering frequency for chosen Service Level. |
Mandatory |
Hourly Monthly |
|
Software Release |
Oracle Database software version |
Mandatory |
Oracle Database 12c Release 1 |
|
Software Edition |
Database edition for the service instance |
Mandatory |
Enterprise Edition – High Performance or Enterprise Edition – Extreme Performance |
|
Database Type |
Database Type |
Mandatory |
Single Instance |
Oracle Database Cloud Service Database Configuration
Note:
There are several parameters that are mandatory for which you must provide input.
Table 6-2 Oracle Database Cloud Service Database Configuration Requirements
| Parameter Name | Parameter Description | Mandatory/Optional | Default Value | Valid Values/Format |
|---|---|---|---|---|
|
DB Name (SID) |
Database Name (sid) for the Database as a Service instance |
Mandatory |
ORCL |
string |
|
PDB Name |
Pluggable Database Name for the Database as a Service instance. |
Mandatory |
PDB1 |
string |
|
Administration Password |
Password for Oracle Database administrator users sys and system. |
Mandatory |
No value |
Starts with a letter;Between 8 and 30 characters long;Contains letters, at least one number, and optionally, any number of these special characters: dollar sign ($), pound sign (#), and underscore (_); |
|
Usable Database Storage |
Storage volume size for data. Default value is 25 GB. Minimum allowed size is 15 GB. Maximum allowed size is 1200 GB if backup destination is specified and 2048 GB if no backup destination is specified. |
Mandatory |
25 |
15 to 500 |
|
Compute Shape |
Desired compute shape. A shape defines the number of Oracle Compute Units (OCPUs) and amount of memory (RAM) |
Mandatory |
oc3: 1 OCPU, 7.5 GB memory |
oc3: 1 OCPU, 7.5 GB memory oc4: 2 OCPUs, 15 GB memory oc5: 4 OCPUs, 30 GB memory oc6: 8 OCPUs, 15 GB memory oc1m: 1 OCPU, 15 GB memory oc2m: 2 OCPUs, 30 GB memory oc3m: 4 OCPUs, 60 GB memory oc4m: 8 OCPUs, 120 GB memory |
|
SSH Public Key |
Public key for the secure shell (SSH). This key will be used for authentication when connecting to the Database as a Service instance using an SSH client. You generate an SSH public-private key pair using a standard SSH key generation tool. |
Mandatory |
No Value |
No Value |
Requirements for Backup and Recovery Configuration Parameters
Specifies the backup and recovery configuration requirements for Oracle Utilities Data Model installation.
Oracle Database Cloud Service Backup and Recovery Configuration
Note:
There are several parameters that are mandatory for which you must provide input.
Table 6-3 Oracle Database Cloud Service Database Backup and Recovery Requirements
| Parameter Name | Parameter Description | Mandatory/Optional | Default Value | Valid Values/Format |
|---|---|---|---|---|
|
Backup Destination |
Backup destination |
Mandatory |
Both Cloud Storage and Local Storage |
|
|
Cloud Storage Container |
Name of the Oracle Storage Cloud Service container used to provide storage for your service instance backups. Use the following format to specify the container name: <storageservicename>-<storageidentitydomain>/<containername> |
Provide when Backup Destination is not set to None |
No Value |
No Value |
|
Cloud Storage Username |
Username for the Oracle Storage Cloud Service administrator. |
Provide when Backup Destination is not set to None |
No Value |
No Value |
|
Cloud Storage Password |
Password for the Oracle Storage Cloud Service administrator |
Provide when Backup Destination is not set to None |
No Value |
No Value |
|
Create Cloud Storage Container |
This item is a check box. Check this option if you want to create a new container with the information specified above. |
Provide when Backup Destination is not set to None |
No Value |
No Value |
Monitoring Oracle Database Cloud Service Status
After the Oracle Database Cloud Service request is accepted, you can monitor the status of the Oracle Database Cloud Service instance.
Related Topics
Install Oracle Utilities Data Model on Oracle Cloud
Install Oracle Utilities Data Model on Oracle Database Cloud Service after you complete the configuration. Oracle Utilities Data Model shiphome for the on-premise install is the same as the Cloud version.
- Connect to Oracle Database Cloud Service VM
Connect to the Oracle Database Cloud Service VM. - Adding the SYSTEM Username and Password to the Wallet
Connect to the Oracle Database Cloud Service and set theSYSTEMpassword in the wallet for the Oracle Utilities Data Model installation. - Install Oracle Utilities Data Model Shiphome
Provides the steps required to run the install script to install the Oracle Utilities Data Model shiphome. - Monitor Oracle Utilities Data Model Installation Status
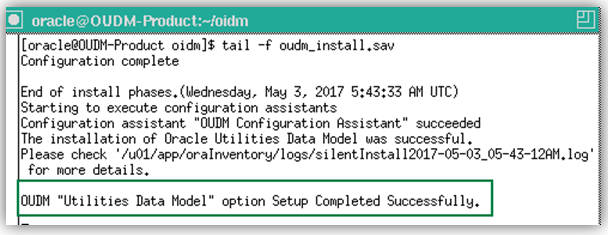
The Utilities Data Model installation takes about fifteen minutes; the Sample Reports installation takes about 30 minutes. Check the progress of the installation in the log files. - Unlock Oracle Utilities Data Model Database Accounts
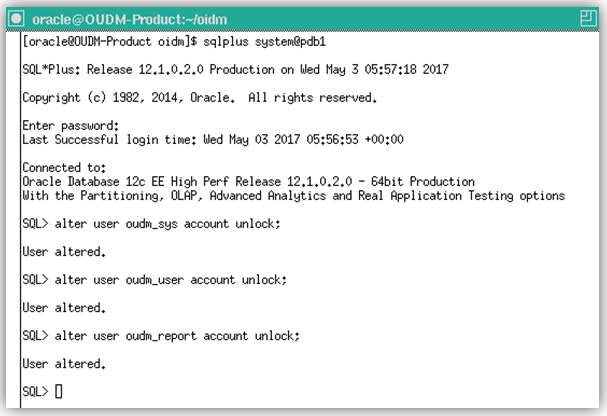
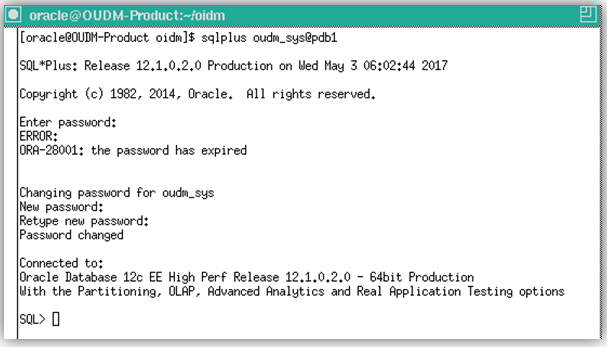
The Utilities Data Model installation option creates the Oracle Database accounts:oudm_sys,oudm_user, andoudm_report. The Sample_Reports installation option creates the Oracle Database account:oudm_sample. The accounts are locked. Depending on the installation type, unlock the accounts and set the passwords.
Adding the SYSTEM Username and Password to the Wallet
Connect to the Oracle Database Cloud Service and set the SYSTEM password in the wallet for the Oracle Utilities Data Model installation.
Install Oracle Utilities Data Model Shiphome
Provides the steps required to run the install script to install the Oracle Utilities Data Model shiphome.
Note:
Enter the pdb_name in the same case as you provided while requesting the Oracle Database Cloud Service instance.
For example:
[oracle@DBCS_Service_Name oidm]$ ./oidm_install.sh db_oidm_prod_name=OUDM pdb_name=PDB1 db_oidm_install_type=Utilities_Data_Model
Related Topics
Monitor Oracle Utilities Data Model Installation Status
The Utilities Data Model installation takes about fifteen minutes; the Sample Reports installation takes about 30 minutes. Check the progress of the installation in the log files.
Note:
When installation completes with errors, report the errors to Oracle Support.
Unlock Oracle Utilities Data Model Database Accounts
The Utilities Data Model installation option creates the Oracle Database accounts: oudm_sys, oudm_user, and oudm_report. The Sample_Reports installation option creates the Oracle Database account: oudm_sample. The accounts are locked. Depending on the installation type, unlock the accounts and set the passwords.
Oracle Business Intelligence Cloud Service Requirements
Installing Oracle Utilities Data Model on Oracle Cloud requires a configured Oracle Business Intelligence Cloud Service instance.
The Oracle Utilities Data Model product includes the OUDM reports RPD and catalog. To use the out of the box sample reports, upload the RPD and catalog to Oracle Business Intelligence Cloud Service instance. If you already have the Oracle Business Intelligence Cloud Service instance, skip the first step.
- Creating the Oracle Business Intelligence Cloud Service Instance
If the subscription type allows you to create an Oracle Business Intelligence Cloud Service instance, you create the Oracle Business Intelligence Cloud Service instance from the Cloud My Services console. If you are using a trial subscription, the instance is provided by Oracle and a service instance is provided in the My Services console. - Downloading Oracle Utilities Data Model RPD and Catalog
Oracle Utilities Data Model installation copies product files to$ORACLE_HOME/oudmdirectory on the Oracle Database Cloud Service instance. - Modifying Oracle Utilities Data Model RPD
Describes required modifications for the RPD file for Data Source Name, User Name, and Password for accessing the Oracle Utilities Data Model reports.
Creating the Oracle Business Intelligence Cloud Service Instance
If the subscription type allows you to create an Oracle Business Intelligence Cloud Service instance, you create the Oracle Business Intelligence Cloud Service instance from the Cloud My Services console. If you are using a trial subscription, the instance is provided by Oracle and a service instance is provided in the My Services console.
- To create a Oracle Business Intelligence Cloud Service Instance, see: Creating a Service Instance.
Downloading Oracle Utilities Data Model RPD and Catalog
Oracle Utilities Data Model installation copies product files to $ORACLE_HOME/oudm directory on the Oracle Database Cloud Service instance.
Modifying Oracle Utilities Data Model RPD
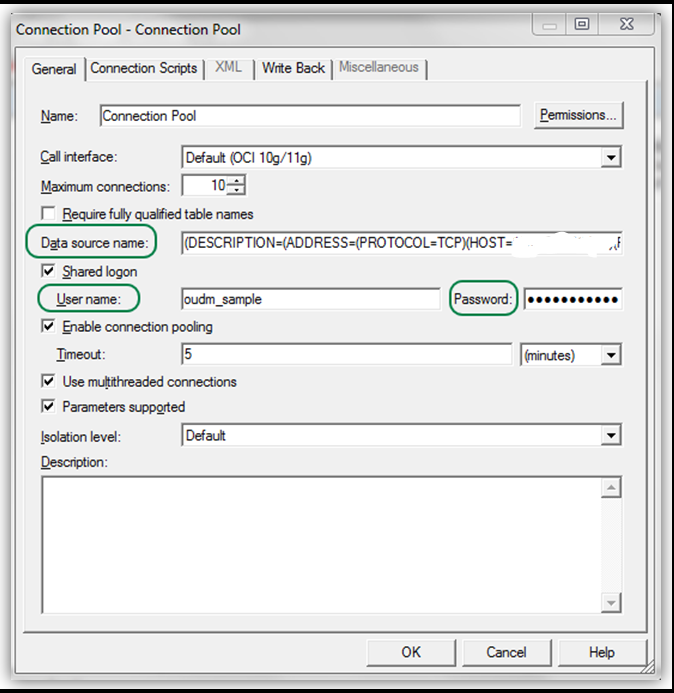
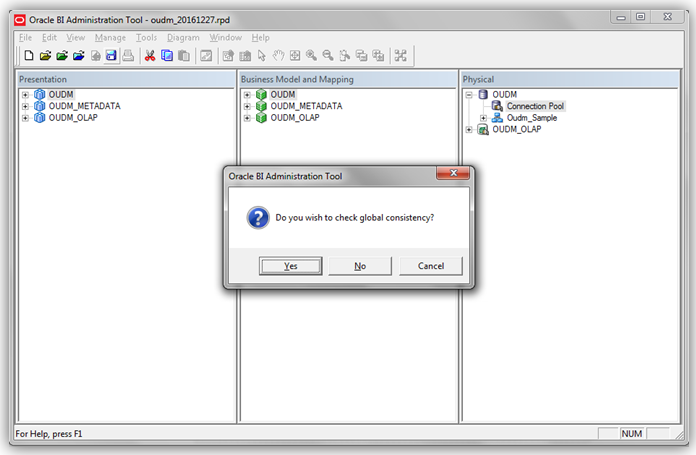
Describes required modifications for the RPD file for Data Source Name, User Name, and Password for accessing the Oracle Utilities Data Model reports.
oudm.rpd to the windows machine, ensure that the Oracle Business Intelligence Developer Client tool is installed on the windows machine. If you do not have the Client tool, download it from OTN and install:
-
Accept the OTN License Agreement on the following page:
http://www.oracle.com/technetwork/middleware/bi-enterprise-edition/downloads/index.html -
Download the appropriate Oracle Business Intelligence Developer Client Tool from OTN and install:
http://download.oracle.com/otn/nt/bi/111190/biee_client_install_x64.zip
or
http://download.oracle.com/otn/nt/bi/1221/Setup_BI_Client_12.2.1.0.0_Windows.X64.zip
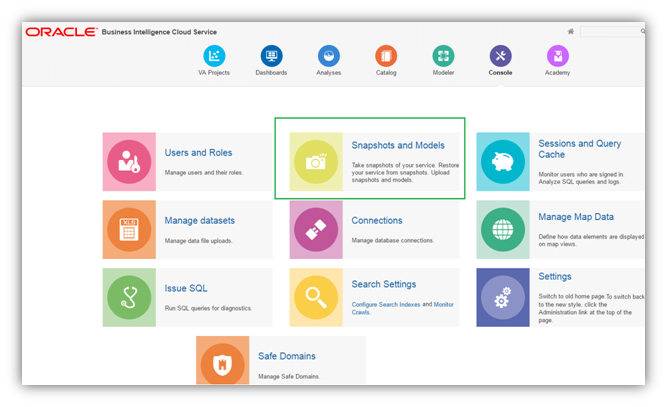
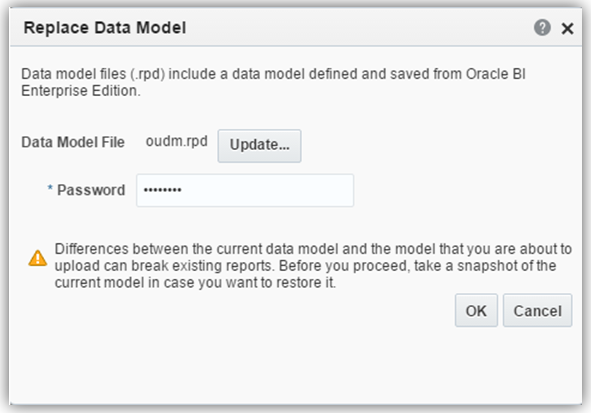
Uploading Oracle Utilities Data Model RPD to Oracle Business Intelligence Cloud Service
You upload the modified on-premise Oracle Utilities Data Model RPD to Oracle Business Intelligence Cloud Service.
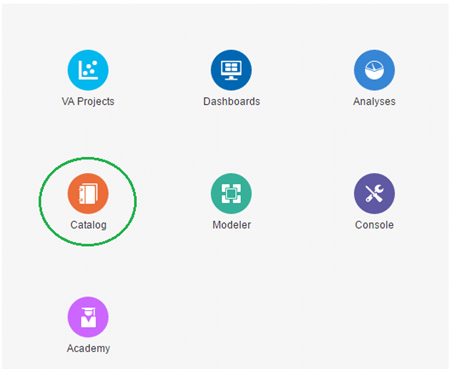
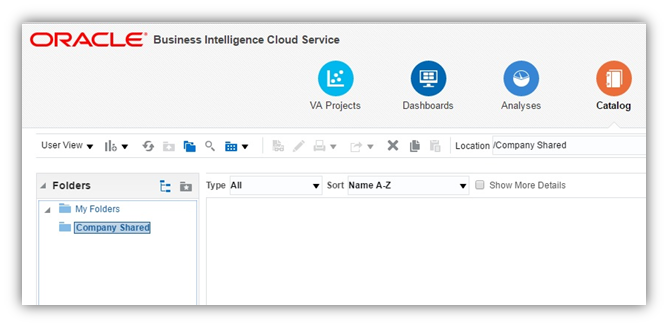
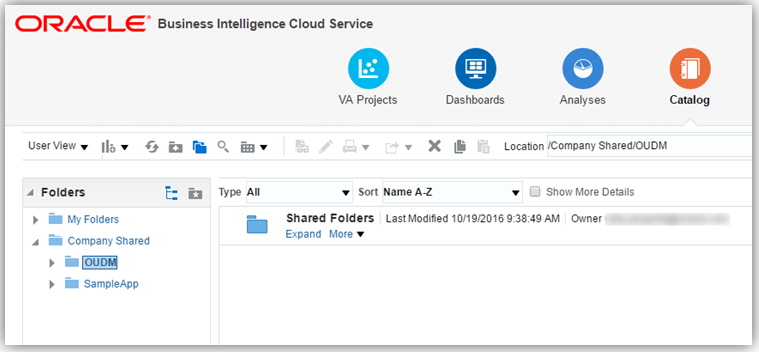
Uploading Oracle Utilities Data Model Catalog to Oracle Business Intelligence Cloud Service
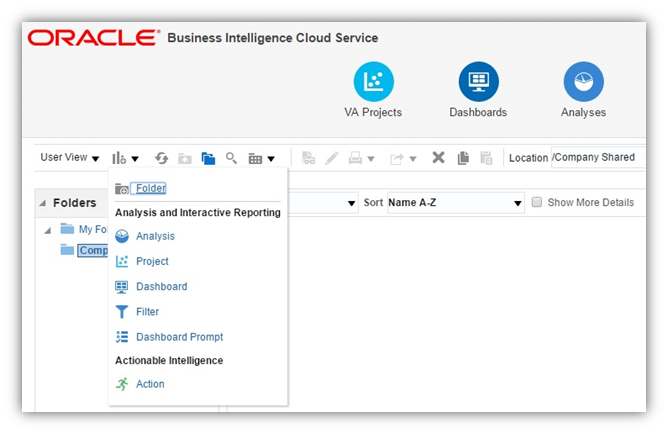
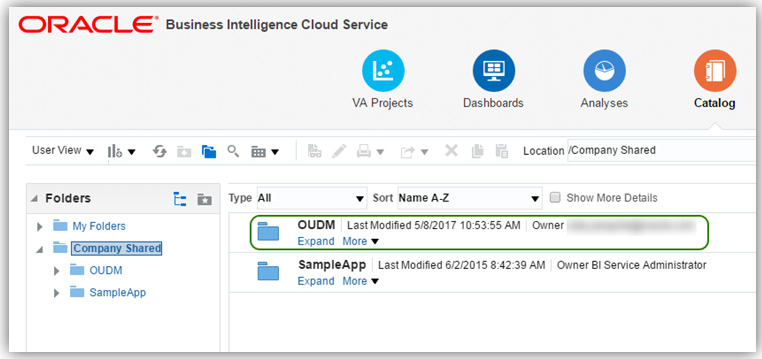
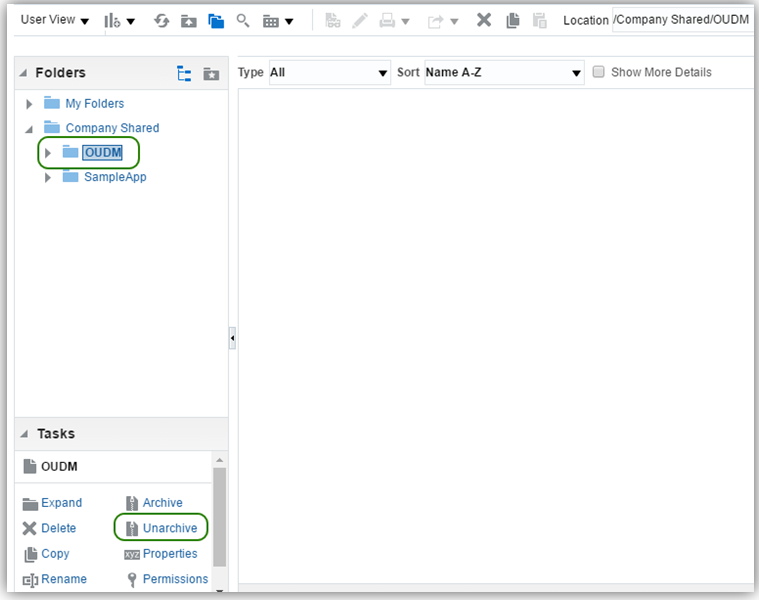
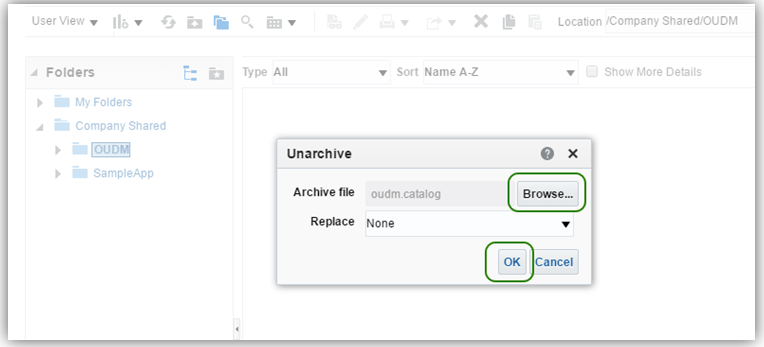
After you create an Oracle Business Intelligence Cloud Service instance and upload the modified on-premise Oracle Utilities Data Model RPD to Oracle Business Intelligence Cloud Service, then upload the OUDM catalog.

