| Agile Product Lifecycle Management SDK Developer Guide - Developing PLM Extensions Release 9.3.6 E71153-01 ,Oracle and/or its affiliates. All rights reserved. |
|

 Previous |
 Next |
| Agile Product Lifecycle Management SDK Developer Guide - Developing PLM Extensions Release 9.3.6 E71153-01 ,Oracle and/or its affiliates. All rights reserved. |
|
Previous |
Next |
This chapter includes the following:
About Process Extensions
Developing Custom Autonumber Sources
Configuring Custom Autonumber Sources in Java Client
Developing Custom Actions
Working with AutoView Extensions
Defining and Deploying URL-Based Process Extensions
Creating an External Report
Deploying Process Extensions in Clustered Environments
Best Practices for Copying third Party JAR Files
Process Extensions FAQs
Process extension (PX) is a framework for extending the functionality of the Agile PLM system. The functionality can be server-side extensions, such as custom workflow actions and custom auto numbering, or extensions to client-side functionality, such as external reports or new commands added to PLM's Actions menu or the Tools menu. Regardless of the type of functionality that a process extension provides, all custom actions are invoked on the Agile Application Server rather than the local client.
|
Note: In addition to server-side functionalities that you can develop in the PX framework, Agile PLM's Event framework also supports developing extensions using Java and Groovy Script, called Java PXs and Script PXs respectively. Although you can a subset of the custom actions developed in the PX framework to the Events framework, the two frameworks have their own unique interfaces and are different. |
A process extension is either a Java class deployed on the Agile Application Server, or a link to a URL. The URL can be a simple website or the location of a Web-based application. Process extensions enable the Agile PLM server and Agile PLM users to connect to external systems. You can also use process extensions to add functionalities that are not provided by the standard Agile PLM client. Using a simple yet powerful approach, process extensions open the Agile PLM system, allowing you to tailor the application to your specific business requirements.
You can use process extensions to create:
Custom reports
User-driven and workflow-triggered custom actions
Custom tools accessible through Agile PLM clients
Custom auto numbering
Multiple process extensions can be linked together within a workflow, with each process extension performing a discrete business function. Process extensions can also be used to make requests to Web services, such as services built with Agile's Web service extensions framework.
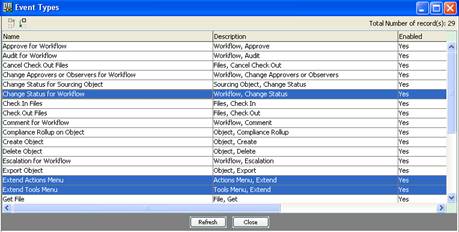
There are five integration points for process extensions available in Agile PLM clients. You can invoke process extensions from the following areas:
External reports
Actions menu
|
Note: The user can not select the PX from the Action menu in the Web Client when the current object is in the edit mode. |
Tools menu
Workflow Status
Autonumber sources
The additive value, extensibility, and increased usability enabled by custom actions are innumerable. Oracle Consulting Services (OCS) can help your organization develop process extensions, including reporting, data import/export, process automation, validation, and other areas across different Agile modules (PC, PG&C, PPM, PCM, EC). For more information and to purchase these PXs, please contact your Oracle representative, Oracle Agile Consulting Services, or you can attend Process Extension training through Oracle University.
Most Agile PLM object classes have at least one default autonumber source that lets you create a new object and automatically number it with the next number in the sequence. Autonumbers can have both an alphanumeric prefix or suffix. You can also specify the length of the autonumber (a string) and which alpha-numeric characters to use.
Despite the flexibility that autonumbers provide, some companies have specific numbering requirements that are not accommodated by Agile PLM's standard autonumbering capabilities. Such companies can define custom autonumber sources and add them to the Agile PLM system using the process extensions framework.
If you have administrator privileges, you can define autonumber sources in Agile Java Client. An autonumber source can use the client's standard numbering capabilities, or it can be associated with a custom autonumber source. When an Agile PLM client uses a custom autonumber source to create a new object, the Agile Application Server invokes the custom Java code to generate the number.
To define a custom autonumber source, create a Java class that implements the ICustomAutoNumber interface, a server-side API in the com.agile.px package. The code should define the autonumbering logic, for example, prefix, suffix, number of digits, character set, and so on, and the persistence mechanism. Regarding persistence, the location where your custom autonumber source stores numbers is entirely up to your program. For example, you can store numbers in a SQL database like Oracle or in a file.
The Agile PLM server gets the next number from the custom autonumber source by calling the getAutoNumber() method, which must be provided in your class. The following example shows how to implement a Java class for a custom autonumber source.
import com.agile.px.*;
import com.agile.api.*;

public class ResistorNumber implements ICustomAutoNumber{
        public ActionResult getAutoNumber(IAgileSession session, INode actionNode)     {
       String num;
     // Write your code here to define the custom autonumber source for
        Resistors
     return new ActionResult(ActionResult.STRING, num);    }
}
After you develop classes for a custom autonumber source, follow these instructions to properly package and deploy them.
To package and deploy a custom autonumber source:
Use your Java development environment or the Java Archive tool (or JAR tool) to create one or more JAR files for the custom autonumber source. Make sure the JAR file(s) includes a META-INF/services directory that contains a file named com.agile.px.ICustomAutoNumber which is a text file that lists the fully qualified Java class names, one class per line, for the custom autonumber source.
|
Note: When creating the Jar files, make sure you are using the Java version that is running on the Agile server. |
Multiple custom autonumber sources can be included in one package. For example, the com.agile.px.ICustomAutoNumber file could look like this:
autonumbers.ResistorNumber
autonumbers.CapacitorNumberautonumbers.DiodeNumber
|
Note: Paths within a JAR file are case-sensitive. Therefore, make sure the META-INF folder contained within the JAR file has a name with all uppercase or all lowercase characters. Otherwise, the custom autonumber source will not be deployed. |
Place the JAR file(s) in the agile_home/integration/sdk/extensions folder on the same computer where the Agile Application Server is installed.
|
Note: If you have several application servers in a clustered environment, you must deploy process extension files on each server in the cluster. |
In Agile Java Client, you can define autonumber sources in the Admin module. To configure Agile PLM system settings, you must have an administrator account.
To add a custom autonumber source:
Log in to Agile Java Client as an administrator.
Click the Admin tab.
Go to Settings > Data Settings > AutoNumbers.
Click the AutoNumbers node.
In the AutoNumbers window, click the New button. The Define the Autonumber dialog box appears.
Provide the following information:
Name - Type the name of the autonumber source.
API Name - This field is automatically filled in after completing the Name field. Refer to Accessing PLM Metadata with APIName Field in SDK Developer Guide - Using the APIs.
Description - Type a brief description of the autonumber source.
Enabled - Select Yes or No.
AutoNumber type - Select Custom. This activates the Custom AutoNumber field.
Where Used - Select the subclass(es) that can use this autonumber source.
Custom AutoNumber - Select a custom autonumber source from the list (this is where your class will appear).
Click OK to save the autonumber definition.
When you define an autonumber source, you can specify the subclasses where it is used in the Where Used field. You can also assign an autonumber source to a subclass in the Classes node.
To assign autonumber sources to a subclass:
Log in to Agile Java Client as an administrator.
Click the Admin tab.
Open the Data Settings folder.
Open the Classes node.
In the Classes window, double-click a subclass. The subclass window appears.
In the Autonumber Source field, click the Down Arrow button. A popup window appears.
Select autonumber sources in the Choices list, and then click the Right Angle Button to move them into the Selected list. When you are finished, click OK.
Click Save to save settings.
This section describes how to develop custom actions in Java classes. The Agile PLM clients can make direct method calls to these classes to perform the actions.
You can initiate a custom action from the following areas of Agile PLM clients:
Actions menu
Tools menu
External reports
Workflow Status
To define a custom action, create a Java class that implements the ICustomAction interface, a server-side API in the com.agile.px package. The code should define the action to perform. The Agile PLM server initiates the action by calling the doAction() method, which must be provided in your class.
The following example shows the code for a HelloWorld class. When the doAction() method is called, the method returns ”Hello World.” If you invoke the HelloWorld custom action from Actions menu, the string ”Hello World” will be logged to the object's History table. If you invoke the HelloWorld custom action from a workflow, the string ”HelloWorld” will be logged to the change order's History table when it enters the appropriate Workflow status.
import com.agile.px.*;
import com.agile.api.*;

public class HelloWorld implements ICustomAction
{
     public ActionResult doAction(IAgileSession session, INode actionNode,           IDataObject affectedObject)     {        return new ActionResult(ActionResult.STRING, "Hello World");     }}
The above HelloWorld class does not perform a useful action, it simply demonstrates how to implement the class for a custom action.
You can configure new lines in ActionResult outputs in Web and Java clients using the '\n' character.
|
Note: SDK only supports the character '\n' for new lines in both Web and Java clients. |
To format new Line Breaks in PLM:
Create a Process Extension that includes with the following ActionResult string.
return ActionResult(ActionResult.STRING, "Hello \n This example tests formatting new lines \n in the SDK");
Run the Process Extension in the Web and Java clients from Actions menu and Tools menu.
        The output should be as shown below:
Hello
This example tests formatting new line for the context in the SDK.
When an Agile PLM client invokes a process extension, it does so within the current user's session. Therefore, the process extension should not create any additional IAgileSession objects using the Agile API within the process extension code or any code directly invoked from the process extension. Stated simply, process extensions never directly create new Agile PLM sessions.
If you have written a Web service extension (WSX) and want to use that code from within a process extension, you can directly invoke Java methods contained in WSX classes without using the Web services infrastructure, provided those methods do not create a new IAgileSession object.
Do not mix Process extension (PX) invocations with Web service extension (WSX) invocations. The PX code must not invoke any WSX code directly, especially when the PX and WSX reside in the same application container. If a process extension uses Web services, WSX could create a new Agile PLM session that is distinct from the session that the process extension uses.
URL-based process extensions can call an external application that communicates with the Agile PLM server and performs some action upon the currently selected business object. To perform such an action, the external application can use the Agile API to create another Agile PLM session. For more information, see "Creating an Agile PLM Session from the Target System."
After you develop classes for a custom action, follow these instructions to properly package and deploy them.
To package and deploy a custom action:
Use your Java development environment or the Java Archive tool (or JAR tool) to create one or more JAR files for the custom action. Make sure the JAR file(s) includes a META-INF/services directory that contains a file named com.agile.px.ICustomAction, which is a text file that lists the fully qualified Java class names, one class per line, for the custom action.
You can include multiple custom actions in one package. For example, the com.agile.px.ICustomAction file can look like this:
actions.HelloWorldactions.RFQConsolidationactions.RefreshCustomerFromCRMactions.StartMfgactions.ObsoletePartReplaceractions.WorkflowConflictResolver
|
Note: Paths within a JAR file are case-sensitive. Therefore, make sure the META-INF folder contained within the JAR file has a name with all uppercase or all lowercase characters. Otherwise, the custom action will not be deployed. |
Place the JAR file(s) in the agile_home/integration/sdk/extensions folder on the same computer where the Agile Application Server is installed.
|
Note: If you have several application servers in a clustered environment, you must deploy process extension files on each server in the cluster. |
When you configure a custom action in Agile Java Client, you can specify the roles it uses. By default, a custom action uses the roles of the current user. However, you can configure a custom action to have expanded privileges. This is an important feature of process extensions. In effect, you can enforce the business logic of a custom action by granting it more privileges than those given to ordinary users. When a custom action is invoked in the Agile PLM client, its roles and privileges contained within the roles override the privileges of the current user. Once the custom action is completed, the client reverts to the user's privileges.
To configure a Process Extension, you must have necessary user privileges to get the user's language setting. If a PX fails, the error message should display in the user's current language. If the user's roles are not set to include the privilege to load current user object info, the server will display all messages in the default system language.
To determine whether a user has the necessary privileges to perform an action at run time, you must use the IUser.hasPrivilege() method.You can adjust your program's logic based on the user's privileges.
The following example shows how to check if the user has the necessary privileges to modify the object before calling the IDataObject.setValue() method.
Example 3-3 Checking a user's privileges before modifying the object
public void checkPriv(IUser user, IDataObject obj) throws APIException{    Boolean userHasPrivOriginalUser =
              user.hasPrivilege(UserConstants.PRIV_MODIFY, obj, true);    System.out.println("Check Original User has the modify priv : " +               userHasPrivOriginalUser + " #\n");    Boolean userHasPrivInPX =
              user.hasPrivilege(UserConstants.PRIV_MODIFY, obj, false);    System.out.println
      ("Check the modify priv in assigned PX roles: " + userHasPrivInPX + " #\n");    if(userHasPrivInPX){IAgileClass agileClass = obj.getAgileClass();            IAttribute attr =
                 agileClass.getAttribute(AttributeTypeConstants.TYPE_DESCRIPTION);            String desc =
                 "HERE IS A NUMBER: " + System.currentTimeMillis();            obj.setValue(attr, desc);                          System.out.println("Set description to '" + desc + " #\n");            }}
|
Note: When you call the hasPrivilege() method in multiple new threads which are created in Custom Actions, the method only checks the original user's privileges, which does not include the assigned PX roles. |
In Agile Java Client, you can define custom actions in the Admin module. To configure Agile PLM system settings, you must log in as a user with administrator privileges. If the Action Menu or the Tools Menu are selected, the User Role Required to See PX prompt displaying the list of users who can view the PX will appears. Users having any of the listed roles can view PX. All execution control retains same. This visibility check is added before execution.
The Process Extension Library is where you define the custom actions that can be used in Agile PLM clients. When you add a custom action to the Process Extension Library, you specify how to initiate that action from the client.
To add a custom action to the Process Extension Library:
Log in to Agile Java Client as an administrator.
Click the Admin tab.
Open the Data Settings folder.
Open the Process Extensions node.The Process Extension Library
In the Process Extension Library window, click the Add Process Extension button to open the Add Process Extension dialog box.
Type the following information:
Name - Type the name of the process extension.
API Name - This field is automatically filled in after completing the Name field. Refer to Accessing PLM Metadata with APIName Field in SDK Developer Guide - Using the APIs.
Description - Type a brief description of the process extension.
Type - Select Internal Custom Action. This activates the Internal Custom Actions field.
Internal Custom Action - Select a custom action from the list (your classes should appear here).
Initiate From - Select one or more locations from which the process extension can be initiated. Choose from the following options:
Actions menu - Enables you to select the custom action from the Actions menu of a properly configured class.
External report - Enables you to generate a report by accessing an external resource or URL. If the process extension is an internal custom action, the External Report option is unavailable.
Tools menu - Enables you to select the custom action from the Tools menu.
Workflow status - Invokes the custom action whenever a properly configured workflow enters a particular status.
If you specify that a process extension is initiated from the Actions menu or a workflow status, you can configure subclasses or workflows to use it. If you specify a process extension to generate an external report, you can use Agile Web Client to create the report. If you specify that a process extension is initiated from the Tools menu, it is always available in the Agile PLM client.
Roles - Select one or more roles to use for the custom action. To use the roles of the current user, leave this field blank. To temporarily override roles of the current user, select one or more roles. Once the custom action is completed, the client reverts to the current user's roles.
Enabled - Select Yes or No.
Click OK to save the new process extension.
To add custom actions to the Actions menu of an Agile PLM object (such as a Part or an ECO), you configure the object's class. Each base class, class, and subclass has a Process Extensions tab. The custom actions that you assign to a class must be previously defined in the Process Extension Library.
Process Extensions are inherited from classes and base classes. Consequently, if you assign a process extension to a base class, it is also assigned to classes and subclasses beneath the base class.
|
Note: Process extensions can be assigned to only one level in a class hierarchy. For example, if a process extension is assigned to the Part subclass, you cannot assign it to the Item base class. |
To assign process extensions to a class:
Log in to Agile Java Client as an administrator.
Click the Admin tab.
Open the Data Settings folder.
Open the Classes node.
In the Classes window, double-click a base class, class, or subclass.
Click the Process Extensions tab.
In the toolbar, click the Assign button. The Assign Process Extension dialog box appears.
Select custom actions in the Choices list, and then click to move them into the Selected list. When you are finished, click OK.
Click OK to save settings.
For each workflow status except the Pending status, you can assign one or more custom actions that are initiated when the workflow enters that status. The custom actions you assign to a workflow status must be previously defined in the Process Extension Library.
|
Note: Automated Transfer Orders (ATOs) do not support workflow-triggered process extensions. |
To assign process extensions to a workflow status:
Log in to Agile Java Client as an administrator.
Click the Admin tab.
Open the Workflow Settings folder.
Open the Workflows node.
In the Workflows window, double-click a workflow, for example, a Default Workflow.
Click the Status tab.
Select a status other than Pending. The selected status updates the Workflow Criteria properties table that appears below the status table.
Double-click the selected status criterion in the Workflow Criteria properties table.
In the Process Extensions list, click the Down Arrow button. A popup window appears.
Select custom actions in the Choices list, and then click to move them into the Selected list. When you are finished, click OK.
Click Save to save settings.
This section describes AutoVue, AutoVue's Augmented Business Visualization (ABV), and shows using AutoVue's ABV to view PLM Change objects in AutoVue.
AutoVue is a solution that enables viewing and marking up documents, drawings, and CAD files using a Web browser. AutoVue's ABV is an integration of Autovue and Agile PLM that supports executing context-based operations in Agile by selecting a part in AutoVue Viewer applet and choosing a related operation. For a list of functions that are supported by AutoVue Viewer, refer to https://blogs.oracle.com/enterprisevisualization/entry/context_is_everything.
The overall solution that enables this interaction, involves Javascript and PX code to interact with Agile APIs.
The Javascript and PX code are authored, tested, and maintained by the AutoVue team. The Javascript component is bundled as part of the standard Agile install, and connected to the standard initialization process for the AutoVue Client in Agile.
The APIs required for this solution are authored, tested, and maintained by the Agile team.
|
Note: The focus of this SDK Guide isIAutoVueExtension and the other PLM Java interfaces that supports this interaction. |
The IAutoVueExtension interface in the PX framework supports PLM interactions with AutoVue Viewer.
public interface IAutoVueExtension {public String getDefinition(IAgileSession session);public AutoVueActionResult doAction(IAgileSession session, Map param);}
The getDefinition method returns the hotspot definitions used by the AutoVue Viewer applet. A hotspot definition is a string of semicolons that are separated by key-value pairs and contain attributes such as ”Create ECO” or ”Create ECR”.
"DEFINITION_REGEX=server;" + "DEFINITION_MATCHCASE=false;" + "DEFINITION_TOOLTIP=AutoVue 2D Professional;" + "DEFINITION_COLOR=(0,0,255,128);" + "DEFINITION_ACTIONS=Menu1, Menu2;" + "DEFINITION_TYPE=DEFINITION_TYPE_TEXT;DEFINITION_KEY=agileDef";
With the exception of the DEFINITION_TYPE and DEFINITION_TYPE keys, all other keys are defined in the Augmented Business Visualization Developer's Guide. The DEFINITION_TYPE and DEFINITION_KEYS are added by this design to pass definition type and definition key information from the PX to setHotSpotHandler method in the AutoVue viewer applet.
The doAction method performs the action invoked in AutoVue viewer applet's popup menu item. The param argument contains the following information about the selected hotspot and action:
definitionKey - definition key returned in the definition string, for example, agileDef
hotspotKey - hotspot key
action - the selected caption in the menu item
properties - properties of the selected hotspot
|
Note: It is not necessary to configure the AutoVue extension PX in Java Client, because the PX runs with the user's roles/privilege and is not granted additional roles/privileges. |
The Agile Web Client acts as a middleman between AutoVue Viewer Applet and the PX.
When the Viewer applet is initialized, Web Client gets the metadata used by viewer from the PX.
When an action is triggered, Web Client collects the data from the Viewer and passes it to the PX. Upon completion of PX functions, Web Client gets the result of PX operations and performs the required task in Web Client. For example, displays a newly created object in Web Client.
When an exception occurs in the PX, Web Client will take the applicable action and displays the result.
|
Note: There should be only one AutoVue PX in the system. If there are more than one AutoVue PXs, the system will the first one defined in file META-INF\services\com.agile.px.IAutoVueExtension. |
An ActionResult() method directs the behavior of the Client upon completion of AutoVue PX processes and the corresponding UI behavior.
Three Client actions upon completion of PX processes are:
Display message - A message is displayed in the browser's window.
Display exception - When exceptions occur upon completion PX processes, they are displayed in the browser window
Display object - An object is displayed in Web Client's browser window
{
   public String getDefinition(IAgileSession session) {     String def =      "DEFINITION_REGEX=server;" +      "DEFINITION_MATCHCASE=false;" +      "DEFINITION_TOOLTIP=AutoVue 2D Professional;" +      "DEFINITION_COLOR=(0,0,255,128);" +      "DEFINITION_ACTIONS=Display Message,Display Object,Display Exception;" +      "DEFINITION_TYPE=DEFINITION_TYPE_TEXT;DEFINITION_KEY=agileDef";   return def;
}

public AutoVueActionResult doAction(IAgileSession session, Map params) {
   String action = (String) params.get("action");   if ("Display Message".equalsIgnoreCase(action)) {      return new AutoVueActionResult(AutoVueActionResult.DISPLAY_MESSAGE,         "Message from PX - Display Message is clicked.");   } else if ("Display Object".equalsIgnoreCase(action)) {    try {      IItem item = (IItem) session.getObject(IItem.OBJECT_TYPE, "1000-02");      return new AutoVueActionResult(AutoVueActionResult.DISPLAY_OBJECT,          item.getId());   } catch (APIException e) {      e.printStackTrace();   }      } else if ("Display Exception".equalsIgnoreCase(action)) {         return new
           AutoVueActionResult(AutoVueActionResult.SHOW_EXCEPTION,               "Message from PX - Display Exception is clicked.");      }             return new
      AutoVueActionResult(AutoVueActionResult.DISPLAY_MESSAGE,         "Message from PX - " + action + " is performed.");      }
}
The Agile Web Client uses the URL-Based Process Extensions to provide access from the Web Client to external applications.When the Agile PLM Web Client invokes a process extension that references a URL, the client displays the Web page in a new browser window.
What types of Web-based applications could be used for URL-based process extensions? Again, there are few limitations. One example might be a Web-based application that performs business rules validation for an Agile PLM object and updates the object accordingly. The following figure shows the program flow of such a process extension.
You can also use URL-based process extensions to reference a Web-based report engine. To create an external report that uses a URL-based process extension, choose Create >Report > External in Agile Web Client. For more information, see "Creating an External Report."
|
Note: Agile Java Client does not support URL PXs. |
Please note the following requirements and constraints when building a URL-based process extension:
URL-based process extensions cannot be initiated by a change in a workflow, because an Agile PLM client may not be active to trigger the change in status
URL-based process extensions are not supported for Sourcing projects (IProject)
Following procedure defines a URL-based Process Extension.
To define a URL-based process extension do as follows:
Log into the Agile Java Client as an administrator.
Click the Admin tab.
Open the Data Settings folder.
Open the Process Extensions node.
In the Process Extension Library window, click the New button. The Add Process Extension dialog box appears.
Type the following for different fields:
Name - Type the name of the process extension.
Description - Type a brief description of the process extension.
Type - Select the URL.
Address - Specify the address of a Web page. You must specify the complete URL, including the protocol. For example, to specify the Oracle Corporation website, you would type http://www.oracle.com, not www.oracle.com.
Initiate From - Select one or more locations from which the Web page can be initiated. Choose from the following options:
Actions menu - Enables you to select the Web page from the Actions menu of a properly configured class.
Dashboard - See Developing Dashboard Management Extensions.
External report - Use this to generate a report by accessing the Web page.
Tools menu - Use this to select the Web page from the Tools menu.
If you specify that a process extension is initiated from the Actions menu, you can configure subclasses to use it. If you specify that the process extension to generate an external report, you can use the Agile Web Client to create the report. If you specify that the process extension is initiated from the Tools menu, which is always available in the Agile PLM client.
Enabled - Select Yes or No.
Click OK to save the new process extension.
Navigating the URL PX generates a Cookie, and once created, the Cookie can be reused to intrude the PLM System. The Cookie Expiration feature is implemented to protect the PLM System from harmful intrusion by unauthorized user. This feature generates a unique token that is passed inside the j_password cookie which you can use only once. The following two attributes in the agile.properties file control the settings for these properties:
agile.sso.checkOneTimePXToken - This property enables/disables the feature.
agile.sso.expirationTime - This property controls the duration of the token and once the set duration expires, the token is invalidated and the Cookie is no longer reusable.
The default settings for these properties are (true) and 120 seconds respectively, and the PLM Administrator can reset both properties:
agile.sso.checkOneTimePXToken = 'true'
agile.sso.expirationTime = 120
|
Note: Agile SDK does not support single sign-on through password protected external application servers. However, Agile Web Client can propagate encoded user credentials, and the SDK can reuse these credentials when your PX application uses the Agile SDK. To provide password protected access to an external Application Server, you must hard code the username and password to access the external servlet into your code. |
If a URL-based process extension is initiated from an object's Actions menu, the object's composite key and class ID, as well as the current username, are encoded in the URL using the GET method. The client encodes the data as ID=value pairs and appends it to the end of the URL. Each ID is prefixed with ”agile,” as shown in the following example.
http://www.acoolwebsite.com/?agile.username=wangsh&agile.classId=10141&agile.100=1000-02&agile.1014=A&agile.siteName=Taipe
|
Note: Unlike the Actions menu, there isn't an Agile PLM object associated with commands on the Tools menu. Consequently, if a URL-based process extension is initiated from the Tools menu, the URL is not augmented with encoded object data. |
In addition to information encoded in the URL of a URL-based process extension, the encrypted username and its associated password are available from the j_username and j_password cookies, respectively, which are automatically passed to the target system if the following conditions are met:
The user initiates a URL-based process extension from Agile Web Client.
|
Note: Your Web application must reside in the domain specified in the cookie.domain property ofagile.properties. Otherwise, security cookies will not propagate. |
The target system is permitted to receive cookies.
The target system is in the same domain as the Agile PLM system.
|
Note: If the target system is located outside the company firewall, it should be a secure Web server using SSL. |
Using authentication information contained in the HTTP request received from a URL-based process extension initiated from Agile Web Client, the target application can use the Agile API to create an IAgileSession. The Agile API client can then retrieve and configure the Agile PLM object referenced by the HTTP request.
When a user logs into Agile Web Client, the authentication process creates a pair of cookies (j_username and j_password) on the server computer that store the user's encrypted user name and password.
|
Note: These cookies will expire after the duration set by the Agile PLM Administrator. |
When you initiate a URL-based process extension from Agile Web client, the target system can use cookies to create an Agile PLM session. In effect, Agile Web client and the Agile API client on the target system can share a single sign-on.
|
Note: The Agile Java Client, unlike the Web client, does not create client-side cookies. Therefore, it does not support the single sign-on feature for process extensions. |
Cookies are designed to be shared among computers within the same domain. For example, if during installation of Agile PLM, you configure the domain to be ”.agile.agilesoft.com”, then all computers ending with ”.agile.agilesoft.com” can use the j_username and j_password cookies.
For more information, see http://cookiescache.tripod.com/.
The following example shows how to use the Agile API to extract cookie information from the HTTP servlet request and use that information to generate an IAgileSession. The value of the AgileSessionFactory.PX_REQUEST field, which is the key used to create the session, is set to be equal to the servlet request.
Example 3-6 Creating IAgileSessions from servlet requests with PX_REQUEST
private IAgileSession connect(HttpServletRequest request) throws ServletException
{
  HashMap params = new HashMap();
  params.put(AgileSessionFactory.PX_REQUEST, request);
  session = factory.createSession(params);
  return session;
}
If the target application is not servlet-based, there is another way to use the cookie information to create a session. Rather than using AgileSessionFactory.PX_REQUEST, you can use AgileSessionFactory.PX_USERNAME and AgileSessionFactory.PX_PASSWORD fields as keys for the HashMap. The values of these fields are the values of the j_username and j_password cookies, respectively.
private IAgileSession connect(Cookie[] cookies) throws Exception {
factory = AgileSessionFactory.getInstance("http://agileserver/Agile");
  HashMap params = new HashMap();
  String username = null;
  String pwd = null;
  for (int i = 0; i < cookies.length; i++) {
    if (cookies[i].getName().equals("j_username"))
      username = cookies[i].getValue();
    else if (cookies[i].getName().equals("j_password"))
      pwd = cookies[i].getValue();
  }
  params.put(AgileSessionFactory.PX_USERNAME, username);
  params.put(AgileSessionFactory.PX_PASSWORD, pwd);
  session = factory.createSession(params);
  return session;
}
If you invoke a URL-based process extension from an object's Actions menu, you may want the target application to retrieve the Agile PLM object and modify it. The object's composite key and class ID are encoded in the URL using the GET method. To help the target application to retrieve the referenced IAgileObject, the Agile API provides an overloaded use of the IAgileSession.IAgileObject() method, as shown in the following example. The SDK extracts the object ID information from the request and uses it to retrieve the specified object.
Example 3-8 Retrieving an Agile PLM object from an HTTP request
private IAgileObject getAgileObject(HttpServletRequest request)
throws ServletException {
   IAgileObject obj = session.getObject(null, request);   return obj;}
If the target application is not servlet-based, you can use the normal IAgileSession.getObject() methods to retrieve the referenced object. For the params parameter of getObject(), specify a HashMap containing all required attributes for the object's class; the necessary attribute/value pairs are contained in the encoded URL. For a list of identifying attributes for each Agile PLM class, see the following section.
Each Agile PLM class has a different set of identifying attributes that could be passed as parameters in an encoded URL. For example, a Change object would pass its class ID and Cover Page.Number attribute. The following table lists the identifying attributes for each Agile PLM class.
| Class | Parameter | Description |
|---|---|---|
| Change | agile.classID | Class ID of selected object |
| Change | agile.1047 | Cover Page.Number |
| Customer | agile.classID | Class ID of selected object |
| Customer | agile.5110 | General Info.Customer Number |
| Commodity | agile.classID | Class ID of selected object |
| Commodity | agile.agile.2000004284 | Title Block.Name |
| Declaration | agile.classID | Class ID of selected object |
| Declaration | agile.agile.2000002615 | Title Block.Name |
| Discussion | agile.classID | Class ID of selected object |
| Discussion | agile.18417 | Cover Page.Number |
| File Folder | agile.classID | Class ID of selected object |
| File Folder | agile.6173 | Title Block.Number |
| File Folder | agile.7951 | Title Block.Version |
| Item | agile.classID | Class ID of selected object |
| Item | agile.1001 | Title Block.Number |
| Item | agile.1014 | Title Block.Rev |
| Item | agile.siteName | Site name - If All is selected, this parameter is omitted |
| Manufacturer Part | agile.classID | Class ID of selected object |
| Manufacturer Part | agile.1647 | General Info.Manufacturer Name |
| Manufacturer Part | agile.1648 | General Info.Manufacturer Part Number |
| Manufacturer | agile.classID | Class ID of selected object |
| Manufacturer | agile.1754 | General Info.Manufacturer Name |
| Package | agile.classID | Class ID of selected object |
| Package | agile.3110 | Cover Page.Package Number |
| Price | agile.classID | Class ID of selected object |
| Price | agile.10355 | General Information.Number |
| Price | agile.10357 | General Information.Rev |
| Program | agile.classID | Class ID of selected object |
| Program | agile.18041 | General Info.Number |
| Sourcing Project | agile.classID | Class ID of selected object |
| Sourcing Project | agile.14824 | General Info.Number |
| PSR | agile.classID | Class ID of selected object |
| PSR | agile.4856 | Cover Page.Number |
| QCR | agile.classID | Class ID of selected object |
| QCR | agile.4029 | Cover Page.QCR Number |
| Report1 | agile.classID | Class ID of selected object |
| Report1 | agile.8071 | General Info.Name |
| RFQ | agile.classID | Class ID of selected object |
| RFQ | agile.13925 | CoverPage.RFQ Number |
| RFQ Response | agile.classID | Class ID of selected object |
| RFQ Response | agile.14472 | CoverPage.RFQ Number |
| RFQ Response | agile.14452 | CoverPage.SupplierName |
| Site | agile.classID | Class ID of selected object |
| Site | agile.11882 | General Info.Name |
| Specification | agile.classID | Class ID of selected object |
| Specification | agile.2000001969 | Title Block.Name |
| Substances | agile.classID | Class ID of selected object |
| Substances | agile.2000001124 | Title Block.Name |
| Supplier | agile.classID | Class ID of selected object |
| Supplier | agile.17761 | General Info.Number |
| Transfer Order | agile.classID | Class ID of selected object |
| Transfer Order | agile.12673 | Cover Page.Transfer Order Number |
| User | agile.classID | Class ID of selected object |
| User | agile.11617 | General Info.Username |
| User Groups | agile.classID | Class ID of selected object |
| User Groups | agile.12077 | General Info.Name |
|
Note: Although the process extensions framework can encode Report information in a URL, Report objects are not supported by the Agile API. Therefore, you cannot use the Agile API to retrieve Report objects referenced in a URL. |
In Agile Web Client, you can connect to an external resource or URL to generate an external report. Before you create an external report, you must add the URL associated with the report to the Process Extension Library. For more information, see "Defining a URL-Based Process Extension."
To create reports in Agile Web Client, you must have the Create Reports privilege.
To create an external report:
Log in to Agile Web Client.
|
Note: You cannot create external reports in Agile Java Client. |
Choose Create > Report > External. The Report Creation Wizard appears.
Type the name of the report. Click Next.
Type the following General Information:
Description - Type a brief description of the report.
Process Extension - Select a process extension. The process extension you select is associated with a URL, such as the location of Web-based report engine.
Folder - Select the report's parent folder.
Click Finish.
If the Agile PLM installer was not run on a server in the application server cluster, the /agile_home/integration/sdk/extensions folder will not exist on that server. In this case, you must create the folder manually and copy any process extension JAR files into that folder as shown below.
To manually create deployment folders for process extensions:
Create the following folder on all application servers in the cluster (if it does not exist): /agile_home/integration/sdk/extensions
Load all process extension JAR files in the /agile_home/integration/sdk/extensions folder on each server in the cluster.
If your PX code uses 3rd party JAR files such as axis.jar, you can copy them in the shared library and add them to classpath using the following procedures.
Use the following procedure to configure your shared libraries
To configure shared libraries in Oracle Application Server:
Place all third party JAR files in a folder, for example, D:\commonLib.
Stop the Agile server.
Navigate to OAS_HOME\j2ee\home\application-deployments\Agile.
Open orion-application.xml in a text editor.
Append a line to specify your library path:
library path="ABSOLUTE_PATH_TO_YOUR_LIBRARY" /
Specify the absolute path to the folder having those required JAR files.
For example, library path="D:\commonLib”after these two lines:
library path="../APP-INF/lib" /
library path="../APP-INF/classes"/
Start the Agile Server.
Procedures in this section show how to deploy the following dependent JAR files:
The dependent JAR file from 3rd party JAR files that do not dependent on Agile JAR files
Any dependent JAR file from 3rd party JAR files that are dependent or not dependent on Agile JAR files
To deploy the 3rd party JAR files on WebLogic:
Stop all servers in the domain.
Copy the shared JAR file(s) to the lib subdirectory of the domain directory.
For example, cp c:\3rdpartyjars\utility.jar AGILE_HOME\agileDomain\lib
|
Note: The WebLogic Server must have read access to the lib directory during startup. |
|
Note: The Administration Server does not automatically copy files in the lib directory to Managed Servers on remote machines. If you have Managed Servers that do not share the same physical domain directory with the Administration Server, you must manually copy the JAR file(s) to thedomain_name/lib directory on the Managed Servers. |
Start the Administration Server and all Managed Servers in the domain. WebLogic Server appends JAR files found in the lib directory to the system classpath. Multiple files are added in alphabetical order.
To deploy the dependent JAR files from a WebLogic Admin console:
In WLS Administration console, select Deployments > Control > Install. 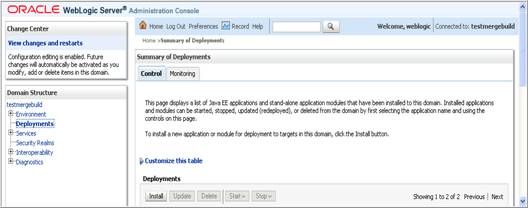
Select the JAR file and then click 
In Install Application Assistant accept the default settings and click Finish.

Make sure the library pointed to the Agile Server/cluster.
Create a file called weblogic-application.xml with the following content:
<?xml version="1.0" encoding="UTF-8"?><wls:weblogic-application xmlns:xsi="http://www.w3.org/2001/XMLSchema-instance" xmlns:wls=http://www.bea.com/ns/weblogic/weblogic-application xsi:schemaLocation="http://www.bea.com/ns/weblogic/weblogic-application http://www.bea.com/ns/weblogic/weblogic-application.xsd http://java.sun.com/xml/ns/j2ee http://java.sun.com/xml/ns/j2ee/j2ee_1_4.xsd"><wls:library-ref><wls:library-name><Shared Library Jar file name></wls:library-name></wls:library-ref></wls:weblogic-application>
Place the weblogic-application.xml file in Agile_Home\agiledomain\applications\application.ear\META-INF folder in the Administration server.
Restart the Administration and all the Managed servers.
To deploy the properties files on WebLogic
Stop all servers in the domain.
Copy the properties file(s) to a directory as in AGILE_HOME/pxConfig in each server.
|
Note: WebLogic Server must have read access to the directory during startup. The Administration Server does not automatically copy files in the directory to Managed Servers that are on remote machines. If you have Managed Servers that do not share the same physical domain directory that the Administration Server uses, you must manually copy the properties files to the AGILE_HOME//pxConfig directory on the Managed Servers. |
Add the directory containing the properties file(s), for example, AGILE_HOME /pxConfig to the WebLogic CLASSPATH as shown below:
a. Edit AGILE_HOME/agileDomain/bin/setEnv.bat in all Managed Servers
b. Add AGILE_HOME/pxConfig folder to the CLASSPATH
    set CLASSPATH=%JAVA_HOME%/lib/tools.jar     set CLASSPATH=%CLASSPATH%;%LIB_HOME%/ojdbc14.jar     setCLASSPATH=%CLASSPATH%;%WLS_HOME%/server/lib/     weblogic_sp.jar;%WLS_HOME%/server/lib/weblogic.jar
    set ClASSPATH=%CLASSPATH%;%LIB_HOME%/agbase.jar     set CLASSPATH=%CLASSPATH%;%LIB_HOME%/wlsauth.jar     set CLASSPATH=%CLASSPATH%;%LIB_HOME%/crypto.jar +    set CLASSPATH=%CLASSPATH%;%LIB_HOME%/xercesImpl.jar     set CLASSPATH=%CLASSPATH%;%LIB_HOME%/jdom.jar;     set CLASSPATH=%CLASSPATH%;%LIB_HOME%/log4j.jar;     set CLASSPATH=%CLASSPATH%;%LIB_HOME%/jobaccess.jar;     set ClASSPATH=%CLASSPATH%;%LIB_HOME%/colt.jar     set ClASSPATH=%CLASSPATH%;%LIB_HOME%/jms.jar     set ClASSPATH=%CLASSPATH%;%LIB_HOME%/jndi.jar     set ClASSPATH=%CLASSPATH%;%LIB_HOME%/tibjms.jar     set ClASSPATH=%CLASSPATH%;%LIB_HOME%/oc4jclient.jar     set ClASSPATH=%CLASSPATH%;%LIB_HOME%/oc4j.jar     set CLASSPATH=%CLASSPATH%;../ldaplib/ldaputil.jar     set CLASSPATH=%CLASSPATH%;D:\Agile931b28/agileDomain/config
    set CLASSPATH=%CLASSPATH%;AGILE_HOME/pxConfig
Start the Administration Server and all Managed Servers in the domain
This section answers common questions about process extensions.
What are process extensions?
Process extensions extend the functionality of Agile PLM clients through custom actions, external reports, and custom autonumbering, thus tailoring the system to fit a customer's business. You can use Process extensions to connect the Agile PLM server and Agile PLM users to external systems.
What types of actions can you define with process extensions?
Process extensions support two types of process extensions actions. They are custom autonumber sources and custom actions. Custom autonumber sources define the numbering sequences used by classes of objects. Custom actions are programs that can be run from Agile PLM clients.
A process extension can also be a reference to a URL. The URL can be a simple website or the location of a Web-based application.
Can Process Extensions support asynchronous operations?
Agile Process Extensions only support synchronous operations. If your Process Extension requires asynchronous behavior, you must modify your PX code to implement asynchronous solutions of your choice. For example, you can spawn a thread.
Can I use Agile's Java API within a process extension program?
Yes. You can use Agile's Java API and other external Java APIs. The only requirement is that you implement either the ICustomAutoNumber or the ICustomAction interface, depending on the type of extension.
How do you initiate a process extension in an Agile PLM client?
Custom actions can be triggered in the following ways:
A change to a Workflow status.
Selecting a custom action from the Tools menu.
Selecting a custom action from the object's Actions menu.
Selecting an external report that uses a custom action.
Creating an object of a class that uses a custom autonumber source.
Do process extensions have special security requirements?
No. The process extensions stack sits on the Agile Application Server, so custom actions and custom autonumber sources operate within an environment where the user has already been authenticated and authorized.
How are roles defined for custom actions?
By default, a custom action uses the roles of the current user. However, to configure a custom action to have expanded privileges, you can specify the roles required for a custom action in the Process Extension Library of Agile Java Client. When you use a custom action in the Agile PLM client, roles that are specified for the custom action, override the privileges of the current user. Once the custom action is completed, the client reverts to the user's original privileges.
How do I configure and deploy a process extension?
Place the JAR file(s) for a process extension in the agile_home/integration/sdk/extensions folder on the application server. Included with the JAR file(s) should be a file named com.agile.px.ICustomAutoNumber or com.agile.px.ICustomAction in the META-INF/services directory. The contents of these files are the fully qualified Java class names, one class per line, for a custom autonumber source or a custom action, respectively.
After I deploy a process extension program on the application server, how do I enable it?
Once process extensions have been deployed, you can configure them for use within Agile PLM clients. In Agile Java Client, you can add custom actions to the Process Extension Library and custom autonumbers to the Autonumbers node table.
After I've deployed JAR file(s) for a custom action or custom autonumber source, do I need to update the application server classpath?
No. The classpath is updated automatically by a special-purpose classloader. The classloader extends the application server classpath with any classes located in agile_home/integration/sdk/extensions (or the location specified for the sdk.extensions property in the agile.properties file).
How do you create a custom autonumber source?
Create a Java class that implements the ICustomAutoNumber interface, a server-side API in the com.agile.px package. The code defines the autonumbering logic, for example, prefix, suffix, number of digits, and so on, and the persistence mechanism. The Agile PLM system gets the next number from the custom autonumber source by calling the getAutoNumber() method.
How do you assign custom autonumber sources in Agile Java Client?
In the Classes node, you assign autonumber sources to specific subclasses. In the AutoNumbers node, you can also assign subclasses to an autonumber source.
How do you create a custom action?
Create a Java class that implements the ICustomAction interface, a server-side API in the com.agile.px package. The code defines the custom action, whether to modify the current object, create an external report, integrate the Agile PLM client with an external system, or perform some other business logic. When an Agile PLM client initiates a custom action, the Agile PLM system calls the doAction() method.
How do you associate custom actions with the Tools menu, the Actions menu, Status of a Workflow, and external reports?
In Agile Java Client, open the Process Extensions node to add and configure custom actions. You can associate custom actions with a given Workflow status, the Tools menu and Actions menu for classes. A custom action associated with a Workflow status is initiated automatically when the Workflow assumes that status. A custom action appears on the Tools menu when it is invoked From property and is set to the Tools menu. A custom action appears on the Actions menu for an object when you add it to the Process Extensions tab of the subclass. As indicated earlier in this Guide, external reports can only use URL PXs. As such, a custom action associated with an external report is triggered automatically when that report is executed.
In what order do process extensions appear on the Tools menu or Actions menu of Agile PLM clients?
If you add process extensions to either the Tools menu or an object's Actions menu, they are listed after standard menu commands in the order they were created. You cannot reorder or otherwise manage commands on the Tools menu or Actions menu.
What is the inheritance model of custom actions that are assigned to classes?
Custom actions can be defined at the base class level, the class level, or the subclass level. A custom action defined at the base class level is available to all classes and subclasses beneath the base class. A custom action defined at the subclass level is available only to that subclass.
Where do I put PX and WSX configuration property files?
After deployment changes in Agile PLM Release 9.2.2.2, the agileDomain\config directory is no longer in the classpath. You can put PX and WSX property files in this directory: \oas\j2ee\home\applications\Agile\APP-INF\classes\.